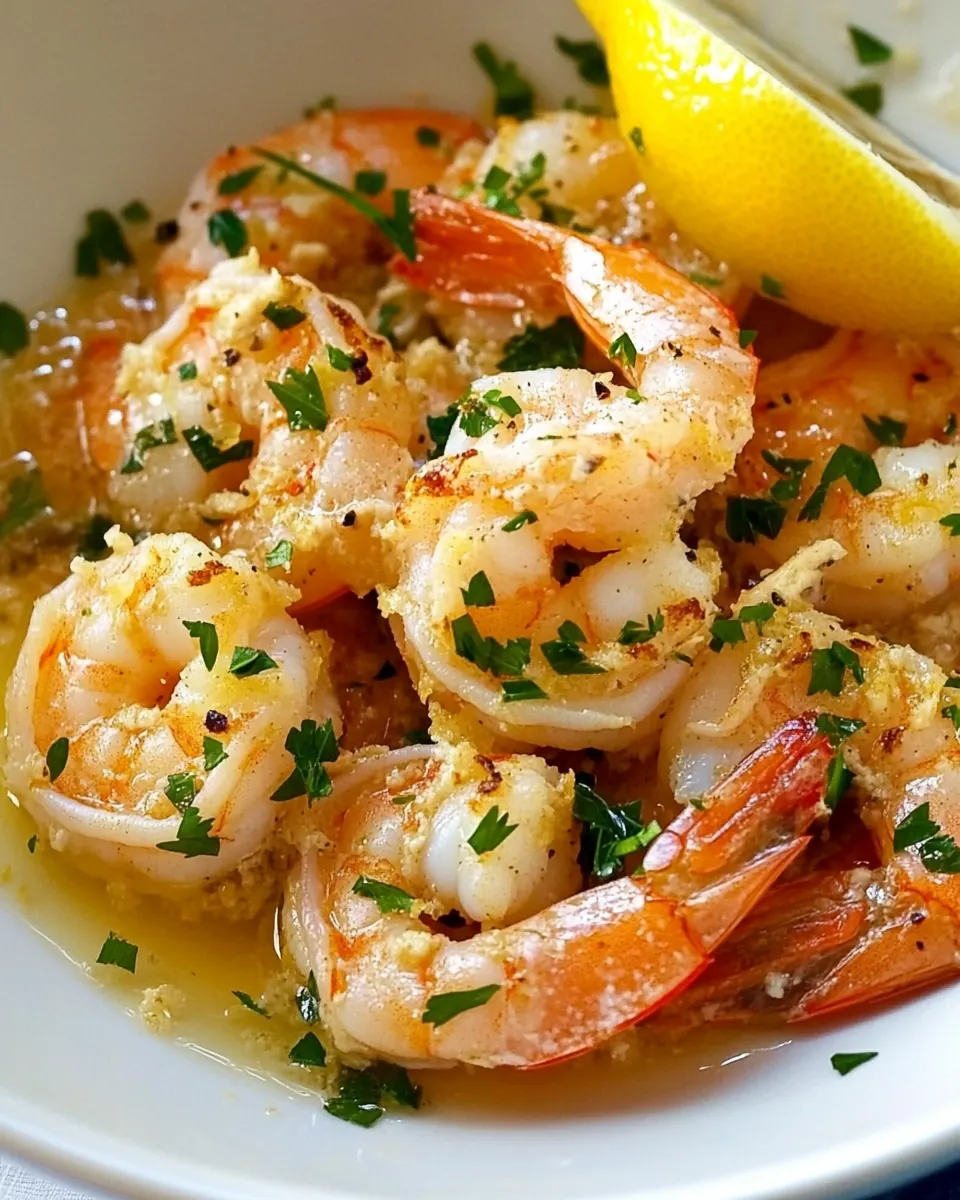
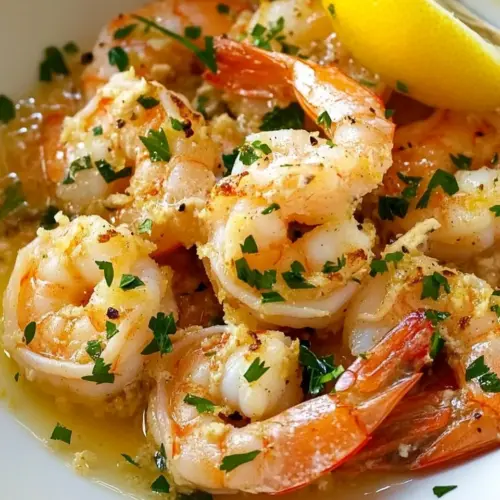
Easy Garlic and Lemon Shrimp
Easy Garlic and Lemon Shrimp is one of those recipes I reach for when I want dinner to feel effortless yet special. The first time I made it I was running late after a long day, but the bright hit of lemon and the warm aroma of garlic sizzling in olive oil made the whole apartment stop and take notice. I remember standing by the stove, fork in hand, sneaking a taste and realizing how a few simple ingredients could sing together so clearly.
Over the years I have tweaked tiny details, like using a heavy pan so the shrimp get a quick sear, and finishing with cold-pressed olive oil when I have it. That balance between tangy and savory, with the silky finish from a little butter, makes this dish feel both homey and restaurant worthy. When friends come over unexpectedly, this is the recipe that saves the evening without making me miss out on the conversation. It also fits right into summer evenings when citrus is at its peak and dinners are meant to be light and lively.
Recipe Snapshot
16 mins
10 mins
6 mins
Medium
300 kcal
American
Keto, Gluten-Free
Dinner
Large heavy pan, Zester or grater, Knife, Tongs
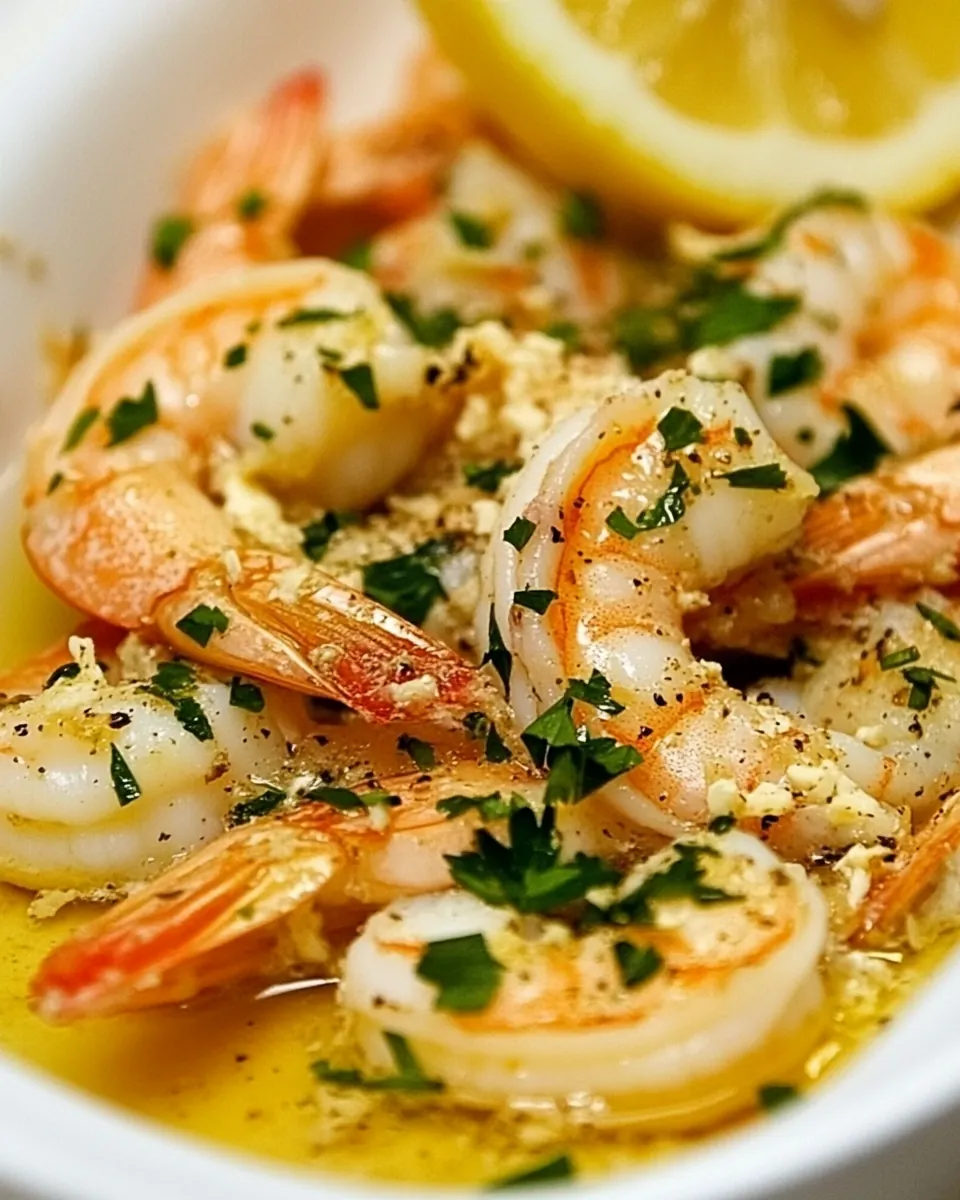
The Appeal of This Easy Garlic and Lemon Shrimp
Bright citrus flavor that wakes everything up
I love how the combination of lemon juice and lemon zest lifts the whole dish, cutting through the richness of butter and highlighting the natural sweetness of the shrimp. That citrus punch makes each bite feel bright and clean, which is why I reach for this recipe when I want something refreshing yet satisfying.
Fast to make, perfect for busy nights
We value speed without sacrificing quality, and this recipe delivers. From prep to plate is just a few minutes, so you can get dinner on the table and still have time to relax. The quick cook time preserves the shrimp texture so you get tender, not rubbery, results every time.
Few ingredients, big impact
There are only a handful of players here: shrimp, olive oil, butter, garlic, and lemon. That simplicity means each component has to be good, and when they are, the result is greater than the sum of its parts. I like recipes that let quality shine through without fuss, and this is one of them.
Versatile serving options
You can serve this as a quick dinner, a shareable appetizer, or as part of a light summer spread. I often toss it with a little pasta or serve it atop a simple salad. The flavor profile pairs well with many sides, which is why it’s become a go-to for easy entertaining in my kitchen.
Room for personal touches
I enjoy how forgiving the method is. You can dial the lemon up or down, adjust the amount of garlic, or swap the fat ratio between olive oil and butter to suit your taste. That flexibility makes it perfect for cooks who like to experiment without risking the whole dish.
Main Ingredients for Easy Garlic and Lemon Shrimp
These ingredients are the backbone of the recipe, each playing a specific role. The shrimp provide sweet, briny substance, while the olive oil and butter build a glossy cooking medium and mouthfeel. Garlic brings savory depth and lemon brightens and balances. Together they create a lively, simple dish that feels greater than the parts.
- 1 lb . jumbo shrimp, thawed if frozen (see notes): Provide succulent protein and the main body of the dish; shrimp cook quickly and absorb garlic and lemon flavors, so monitor closely to avoid overcooking. Thawed if frozen ensures even cooking and consistent texture throughout the recipe.
- 2 T olive oil (see notes): Add a fragrant, heart-healthy fat that helps transfer heat and flavor; olive oil creates a flavorful cooking medium for browning the shrimp and mellowing the garlic. Use quality extra-virgin oil for brighter flavor, but moderate the amount to avoid greasiness.
- 1 T butter: Contribute a rich, silky mouthfeel and help develop a light browning on the shrimp; butter also carries and rounds out the acidity of lemon. Add toward the end of cooking to prevent burning and to create a glossy finish.
- 2 T finely minced garlic: Deliver intense aromatics and foundational savory flavor; finely minced garlic disperses evenly and quickly infuses the oil and butter. Add early enough to release its aroma but watch carefully to prevent bitterness from overcooking.
- 2 T fresh-squeezed lemon juice: Provide bright acidity and a clean citrus lift that balances richness; fresh–squeezed lemon juice brightens the overall flavor and helps deglaze the pan. Add toward the end of cooking to preserve freshness and avoid cooking off delicate juices.
- 1 T lemon zest (or a little less if you’re not that fond of lemon zest): Offer concentrated citrus oil and a zesty aroma that intensifies lemon flavor; lemon zest adds complexity without extra acidity. Use slightly less if a subtler lemon note is desired to maintain balance with garlic and butter.
- sea salt to taste (I did not use much salt): Season to taste and enhance the natural flavors of shrimp and aromatics; sea salt elevates sweetness and balances acidity in the dish. Add sparingly at first and adjust after cooking to avoid over-salting delicate seafood.
The Method for Easy Garlic and Lemon Shrimp
This is a hands on, quick method that rewards attention and timing. You will be working at medium high heat to get a fast sear and then finishing gently with citrus, so reading the pan cues is important. Keep your mise en place ready because the shrimp cook in a flash.
- If using frozen shrimp thaw them over night in the refrigerator. Drain shrimp and pat dry.: The moment you scent the shrimp after thawing you will notice they smell fresher when they have been gently thawed. The texture will be firmer and less watery than if you try to speed thaw with hot water, which can partially cook them. A common mistake is leaving them in water to thaw too long, which dilutes flavor and makes them mushy, so plan ahead.
- Zest one large lemon and then squeeze the juice, to yield at least 2 T juice and close to 1 T lemon zest.: Touching the surface, you want the shrimp to feel matte, not wet. Dry surfaces promote immediate searing and that little popping sound as they meet the hot pan. If they steam instead, you will miss the caramelized edges that give complexity. Overcrowding the pan is a trap here, it lowers the pan temperature and leads to steaming.
- Finely mince garlic cloves to make 2 T minced garlic.: When you grate the zest, a burst of fragrant citrus oil will fill the air, and freshly squeezed juice will be bright and tangy, not flat. Zest before juicing so you don’t remove the fragrant oils with the pith. Avoid grating into the bitter white pith to keep flavors clean.
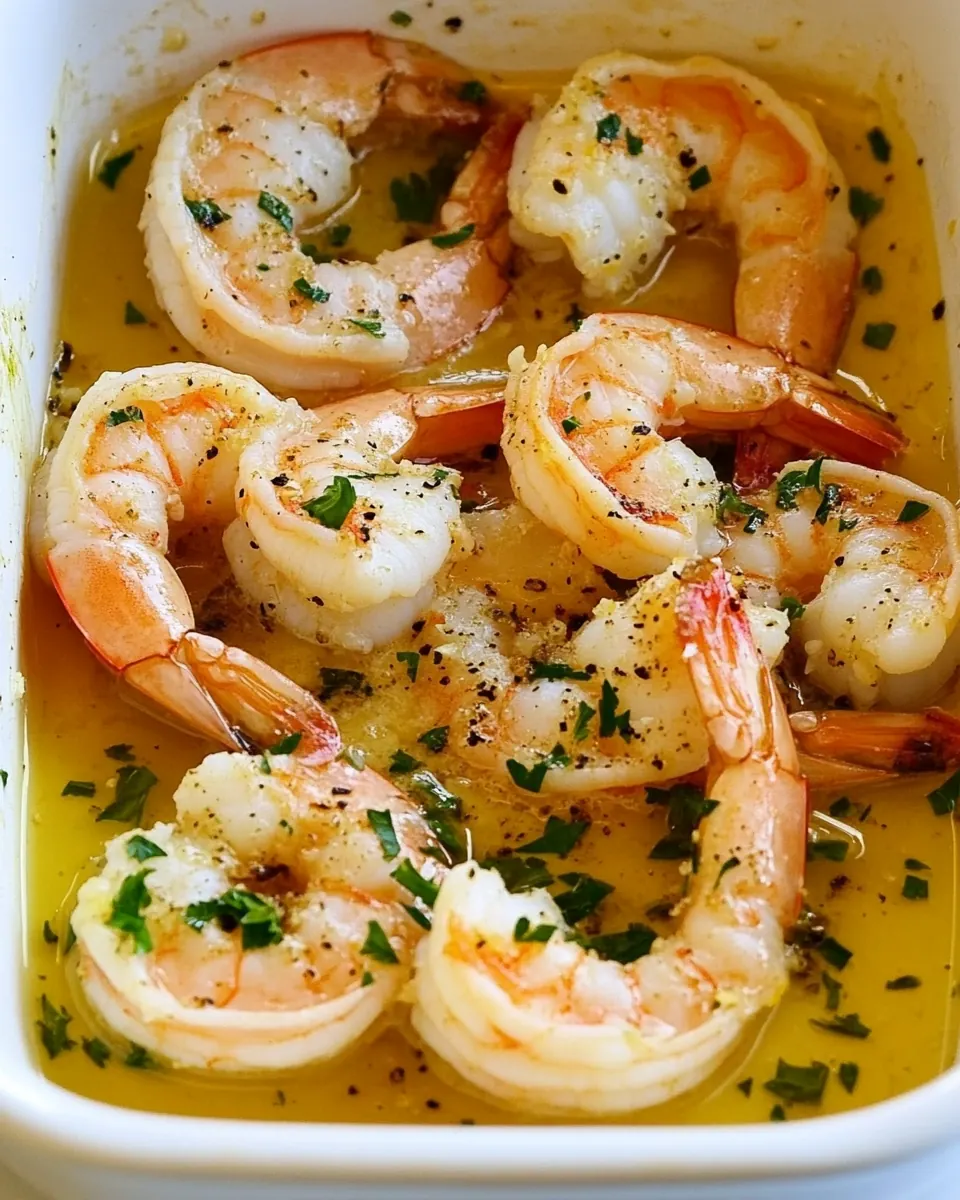
- Heat the oil over medium high heat and then melt the butter, using a large heavy pan. (I used a pan that was nice enough to serve the shrimp from, which helps keep them hot.): As you chop, the aroma of garlic should grow sharp and immediate, promising savory depth. Fine mincing releases more flavor quickly when it hits the pan. If pieces are too large they will not bloom evenly and could leave raw pockets of flavor.
- Add the shrimp in a single layer and cook just until they start to turn pink at the edges, not more than 1-2 minutes.: You will know the pan is ready when the oil shimmers and the butter melts into a satin pool, giving off a faint nutty scent. A heavy pan retains heat and helps the shrimp sear uniformly. If the pan is not hot enough the shrimp will not brown, but if it is smoking you risk burning the fats.
- Turn shrimp over quickly and add the minced garlic. Continue to cook until shrimp are barely firm and slightly pink, probably not more than 3-4 minutes more. (Don’t overcook; the shrimp will continue to cook a little in the hot pan.): Listen for a gentle sizzle and watch for that first blush of pink along the edges, which signals the Maillard reaction starting. This brief contact gives you a slightly firm exterior and tender interior. Cook longer and the texture becomes rubbery, so resist the urge to move them constantly.
- Turn off heat and add the lemon juice, lemon zest, and salt as desired and stir to coat shrimp. Serve immediately.: The moment you flip the shrimp , add the garlic so it can bloom in the warm fat without burning. You should smell a fragrant, toasty garlic aroma almost immediately. Stirring gently ensures even coating, but do not let the pan sit too long or the garlic can brown and taste bitter.
- Continue to cook until shrimp are barely firm and slightly pink, probably not more than 3 to 4 minutes more: At this stage you will notice the shrimp turn opaque and firm to the touch, with a slight spring when pressed. The pan will be lively with the sound of gentle sizzling. Overcooking is the main pitfall, it tightens proteins and steals tenderness, so keep a close eye on texture.
- Don’t overcook; the shrimp will continue to cook a little in the hot pan: After you remove the pan from heat, carryover cooking will finish the shrimp gently; they will blush slightly more as residual heat works. This prevents dryness when you sit down to eat. A typical error is leaving them on the hot burner, which can overcook in the lingering heat.
- Turn off heat and add the lemon juice, lemon zest, and salt as desired and stir to coat shrimp: As soon as the acidic lemon juice hits the warm pan you will hear a faint hiss and smell a bright citrus burst. The zest provides aromatic oils that float on the surface, giving each bite a lively top note. Taste before heavy salting because the shrimp may already be flavorful, and over-salting is hard to fix. Serve immediately.
Customization Ideas
This recipe is flexible and welcomes small changes to suit your mood or pantry. Below are thoughtful, practical ideas to modify flavor, texture, and presentation while keeping the core technique intact.
- Boost citrus: Increase the lemon juice or zest if you prefer a brighter, tangier profile, keeping the balance by reducing added salt.
- Garlic forward: Add an extra tablespoon of minced garlic for a more pronounced savory punch, but watch the heat to avoid bitterness.
- Butter finish: Stir in a little more butter at the end for a richer, silkier sauce that clings to the shrimp.
- Mild oil swap: Use a neutral oil if you want less fruity olive oil flavor, while keeping the butter for mouthfeel.
- Batch cooking: Cook shrimp in two small batches to avoid lowering pan temperature and ensure a clean sear on each piece.
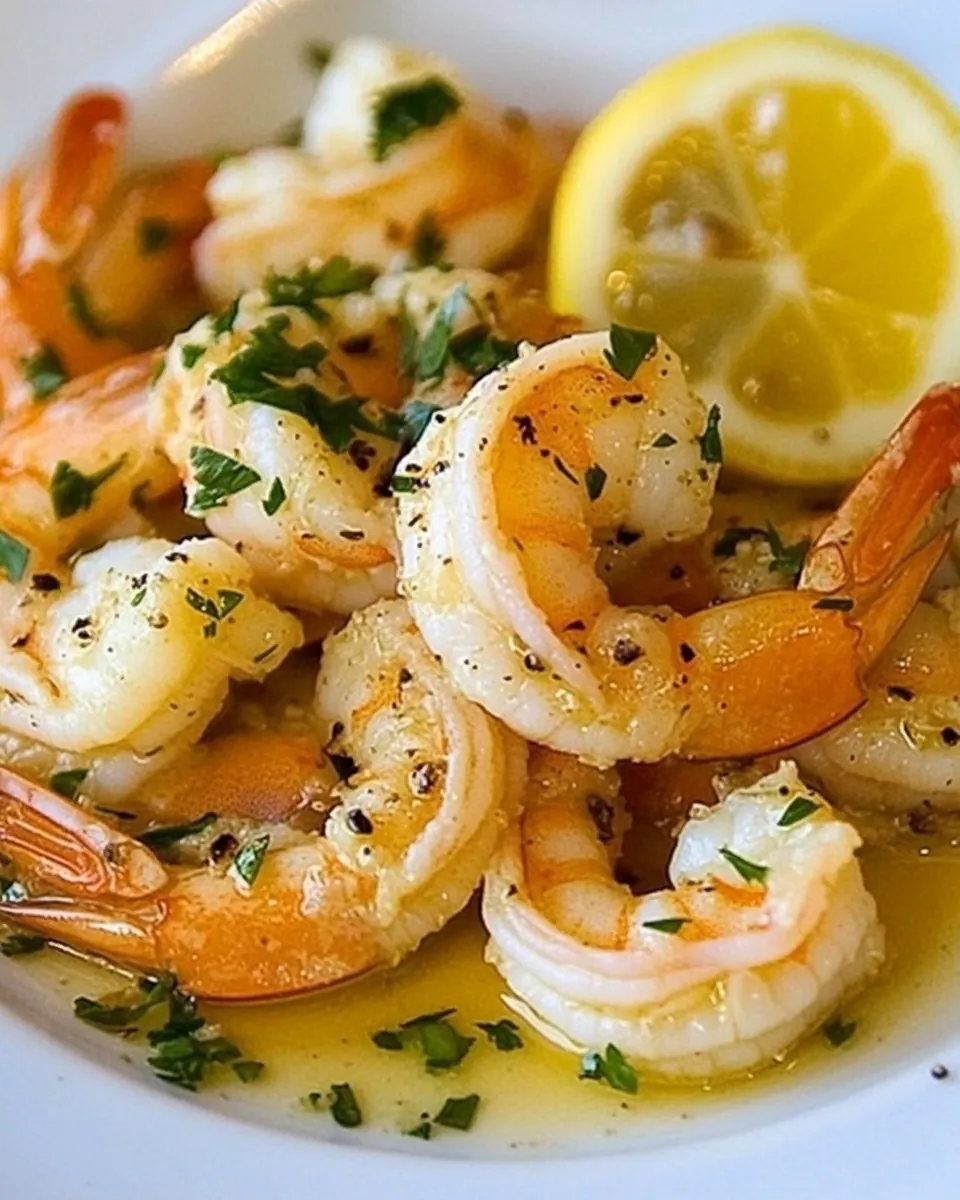
Great Combinations for Easy Garlic and Lemon Shrimp
This dish pairs beautifully with many sides and occasions, from quick weeknight dinners to relaxed summer gatherings. Below are serving ideas, storage suggestions, and seasonal pairings to help you plan the meal.
- Simple pasta toss: Toss the cooked shrimp with cooked pasta, a splash of reserved pasta water, and a drizzle of olive oil for an effortless weeknight dinner. The pasta absorbs the citrus garlic sauce, making it feel complete and comforting.
- Light salad topper: Serve over a bed of crisp greens for a lighter lunch or dinner. The bright lemon and savory garlic complement crunchy vegetables and make the salad more substantial.
- Communal appetizer: Arrange on a warmed platter for guests, with wedges of lemon for extra brightness. This presentation keeps the shrimp hot and inviting for sharing.
- Storage: Cool leftovers quickly and store in an airtight container for up to 2 days in the refrigerator. Reheat gently in a skillet over low heat to avoid toughening the shrimp.
- Occasions: Ideal for summer dinners, casual entertaining, or a quick midweek special. The fresh citrus makes it particularly suitable for warm weather meals and outdoor dining.
- Seasonal pairing: Highlight the dish when citrus is in season for the brightest flavor, and pair it with light sides like steamed vegetables or simple grains for a balanced plate.
FAQ
Conclusion
Easy Garlic and Lemon Shrimp stands out for its bright citrus notes, fragrant garlic, and speedy execution. It’s a recipe that feels elegant while being genuinely simple to prepare, perfect for weeknights or impromptu guests. Try it when you want dinner that comes together fast but still tastes like you spent time crafting it, and enjoy how a few quality ingredients can transform a meal.
Easy Garlic and Lemon Shrimp
Equipment
- Large heavy pan
- Zester or grater
- Knife
- Tongs
Ingredients
- 1 lb . jumbo shrimp, thawed if frozen (see notes) Provide succulent protein and the main body of the dish; shrimp cook quickly and absorb garlic and lemon flavors, so monitor closely to avoid overcooking. Thawed if frozen ensures even cooking and consistent texture throughout the recipe.
- 2 T olive oil (see notes) Add a fragrant, heart-healthy fat that helps transfer heat and flavor; olive oil creates a flavorful cooking medium for browning the shrimp and mellowing the garlic. Use quality extra-virgin oil for brighter flavor, but moderate the amount to avoid greasiness.
- 1 T butter Contribute a rich, silky mouthfeel and help develop a light browning on the shrimp; butter also carries and rounds out the acidity of lemon. Add toward the end of cooking to prevent burning and to create a glossy finish.
- 2 T finely minced garlic Deliver intense aromatics and foundational savory flavor; finely minced garlic disperses evenly and quickly infuses the oil and butter. Add early enough to release its aroma but watch carefully to prevent bitterness from overcooking.
- 2 T fresh-squeezed lemon juice Provide bright acidity and a clean citrus lift that balances richness; fresh-squeezed lemon juice brightens the overall flavor and helps deglaze the pan. Add toward the end of cooking to preserve freshness and avoid cooking off delicate juices.
- 1 T lemon zest (or a little less if you’re not that fond of lemon zest) Offer concentrated citrus oil and a zesty aroma that intensifies lemon flavor; lemon zest adds complexity without extra acidity. Use slightly less if a subtler lemon note is desired to maintain balance with garlic and butter.
- sea salt to taste (I did not use much salt) Season to taste and enhance the natural flavors of shrimp and aromatics; sea salt elevates sweetness and balances acidity in the dish. Add sparingly at first and adjust after cooking to avoid over-salting delicate seafood.
Instructions
- If using frozen shrimp thaw them over night in the refrigerator. Drain shrimp and pat dry.: The moment you scent the shrimp after thawing you will notice they smell fresher when they have been gently thawed. The texture will be firmer and less watery than if you try to speed thaw with hot water, which can partially cook them. A common mistake is leaving them in water to thaw too long, which dilutes flavor and makes them mushy, so plan ahead.
- Zest one large lemon and then squeeze the juice, to yield at least 2 T juice and close to 1 T lemon zest.: Touching the surface, you want the shrimp to feel matte, not wet. Dry surfaces promote immediate searing and that little popping sound as they meet the hot pan. If they steam instead, you will miss the caramelized edges that give complexity. Overcrowding the pan is a trap here, it lowers the pan temperature and leads to steaming.
- Finely mince garlic cloves to make 2 T minced garlic.: When you grate the zest, a burst of fragrant citrus oil will fill the air, and freshly squeezed juice will be bright and tangy, not flat. Zest before juicing so you don’t remove the fragrant oils with the pith. Avoid grating into the bitter white pith to keep flavors clean.
- Heat the oil over medium high heat and then melt the butter, using a large heavy pan. (I used a pan that was nice enough to serve the shrimp from, which helps keep them hot.): As you chop, the aroma of garlic should grow sharp and immediate, promising savory depth. Fine mincing releases more flavor quickly when it hits the pan. If pieces are too large they will not bloom evenly and could leave raw pockets of flavor.
- Add the shrimp in a single layer and cook just until they start to turn pink at the edges, not more than 1-2 minutes.: You will know the pan is ready when the oil shimmers and the butter melts into a satin pool, giving off a faint nutty scent. A heavy pan retains heat and helps the shrimp sear uniformly. If the pan is not hot enough the shrimp will not brown, but if it is smoking you risk burning the fats.
- Turn shrimp over quickly and add the minced garlic. Continue to cook until shrimp are barely firm and slightly pink, probably not more than 3-4 minutes more. (Don’t overcook; the shrimp will continue to cook a little in the hot pan.): Listen for a gentle sizzle and watch for that first blush of pink along the edges, which signals the Maillard reaction starting. This brief contact gives you a slightly firm exterior and tender interior. Cook longer and the texture becomes rubbery, so resist the urge to move them constantly.
- Turn off heat and add the lemon juice, lemon zest, and salt as desired and stir to coat shrimp. Serve immediately.: The moment you flip the shrimp , add the garlic so it can bloom in the warm fat without burning. You should smell a fragrant, toasty garlic aroma almost immediately. Stirring gently ensures even coating, but do not let the pan sit too long or the garlic can brown and taste bitter.
- Continue to cook until shrimp are barely firm and slightly pink, probably not more than 3 to 4 minutes more: At this stage you will notice the shrimp turn opaque and firm to the touch, with a slight spring when pressed. The pan will be lively with the sound of gentle sizzling. Overcooking is the main pitfall, it tightens proteins and steals tenderness, so keep a close eye on texture.
- Don’t overcook; the shrimp will continue to cook a little in the hot pan: After you remove the pan from heat, carryover cooking will finish the shrimp gently; they will blush slightly more as residual heat works. This prevents dryness when you sit down to eat. A typical error is leaving them on the hot burner, which can overcook in the lingering heat.
- Turn off heat and add the lemon juice, lemon zest, and salt as desired and stir to coat shrimp: As soon as the acidic lemon juice hits the warm pan you will hear a faint hiss and smell a bright citrus burst. The zest provides aromatic oils that float on the surface, giving each bite a lively top note. Taste before heavy salting because the shrimp may already be flavorful, and over-salting is hard to fix. Serve immediately.
Notes
- Boost citrus: Increase the lemon juice or zest if you prefer a brighter, tangier profile, keeping the balance by reducing added salt.
- Garlic forward: Add an extra tablespoon of minced garlic for a more pronounced savory punch, but watch the heat to avoid bitterness.
- Butter finish: Stir in a little more butter at the end for a richer, silkier sauce that clings to the shrimp.
- Mild oil swap: Use a neutral oil if you want less fruity olive oil flavor, while keeping the butter for mouthfeel.
- Batch cooking: Cook shrimp in two small batches to avoid lowering pan temperature and ensure a clean sear on each piece.