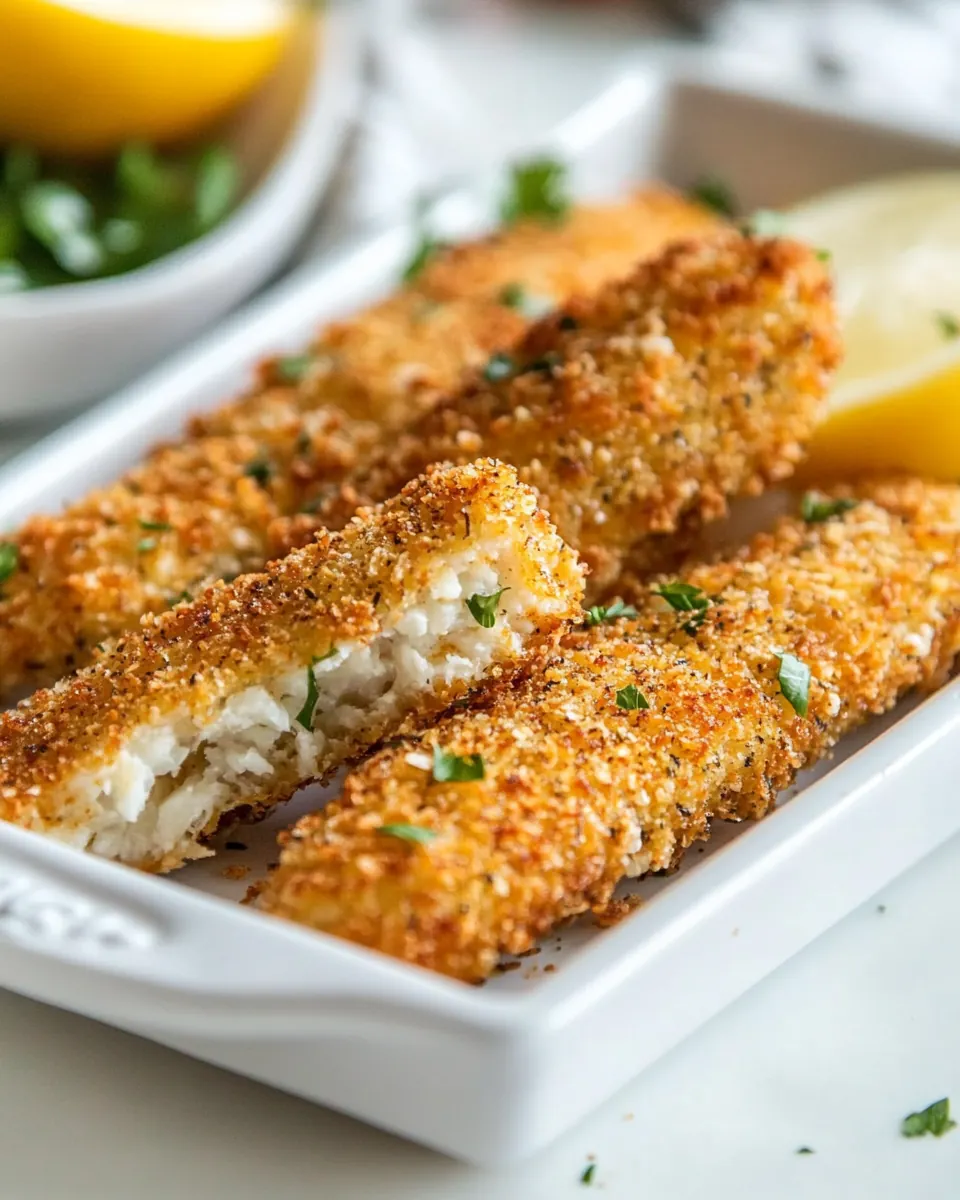
Fish Sticks
Fish Sticks are one of those recipes that took me back to my childhood yet feel grown up enough for a weeknight dinner. I remember the first time I tried to recreate them at home, determined to make a version that was flaky on the inside and perfectly crisp on the outside without deep frying. That trial led to this baked approach, which became my reliable go to when I wanted something simple, comforting, and fast.
Over the years I’ve adapted the coating, swapped breadcrumbs, and played with seasonings until the texture and flavor hit the sweet spot. What I love most about these Fish Sticks is how approachable they are, whether you are feeding picky eaters or serving friends. The method keeps the fish moist while giving you that satisfying crunch that makes dipping into a tangy sauce extra rewarding. Little rituals matter in cooking, and for me pressing the crumbs on with my fingers and hearing the light crackle as they bake is pure kitchen joy.
Recipe Snapshot
30 mins
10 mins
20 mins
Medium
300 kcal
American
Paleo, Low FODMAP
Dinner
Baking Sheet
Why This Fish Sticks Hits Different
They are reliably crispy without frying
I love that these Fish Sticks get golden and crunchy straight from the oven. Using a two breadcrumb mix and a quick spray of oil gives you the texture you expect from fried fish, but with less hassle and less fat. The contrast between the crisp exterior and the delicate cod inside is what keeps me making them again and again.
Simple pantry friendly ingredients
One of the reasons I return to this recipe is the ingredient list. All purpose flour, eggs, and a pair of breadcrumbs are things I usually have on hand. That makes this dish perfect for nights when you need dinner to come together fast, and you do not want to run to the store for a single missing item.
Kid friendly and customizable
When my niece visits she asks for these every time. The mild flavor of the cod and the crunchy coating appeal to kids, while adults can add a squeeze of lemon or a spoonful of tartar sauce for extra brightness. I often tweak the seasoning for different crowds, but the base method stays the same.
Great for batch cooking
I appreciate that you can prep a large batch quickly, then bake in one go. They reheat well and remain crisp if you flash them in the oven for a few minutes before serving. For gatherings, these Fish Sticks are easy to double and still deliver consistent results, which is why they show up at casual get togethers at my place.
Textural balance and timing
This recipe balances moisture and heat so the fish does not dry out. The combination of a light flour dusting, an egg wash with a touch of Dijon mustard, and a sturdy breadcrumb coat protects the fillets during baking, giving you flaky fish under a crunchy shell. That technique is the main reason I prefer this baked version to other quick methods.
Recipe Ingredients for Fish Sticks
These ingredients are chosen to create a protective, flavorful crust and to keep the cod tender. The process relies on three stages of coating to build texture, with the eggs and Dijon mustard helping the crumbs adhere while the flour gives an anchor for the batter. Each component plays a clear role in getting a reliably crispy outside and flaky inside.
- 1 pound cod fillets cut into 1-inch strips: Season evenly to enhance the natural flavor of the cod and help draw out moisture for better texture when breading and frying; dissolve in any wet components if needed and distribute thoroughly prior to cooking.
- 1 teaspoon kosher salt: Season lightly to provide balanced heat and a subtle bite that complements the fish; incorporate during seasoning to ensure even distribution and avoid overpowering the delicate cod.
- 1/2 teaspoon freshly ground black pepper: Coat the fish with a light layer of flour to create a dry surface that helps the egg wash adhere, leading to a crisper coating; adjust quantity to lightly dust each strip without clumping.
- 1 cup all-purpose flour: Add a warm, smoky note to the coating mix to deepen the flavor profile and complement the mild fish; sprinkle into the flour or breadcrumbs for even flavor distribution.
- 1/2 teaspoon sweet or smoked paprika: Whisk together with the mustard to form an adhesive egg wash that binds breadcrumbs to the fish; beat until smooth and slightly frothy to ensure consistent coating coverage.
- 2 large eggs beaten: Emulsify with the beaten eggs to add a tangy, savory lift and improve adhesion of the breadcrumb layers; blend thoroughly to avoid streaks and promote even browning.
- 1 tablespoon Dijon mustard: Provide a crunchy, airy texture to the outer crust that yields a light, crisp bite; press panko firmly onto the egg-coated fish strips to create a sturdy, flaky coating.
- 1 cup panko breadcrumbs: Supply a seasoned, traditional breadcrumb layer that delivers flavor and helps fill gaps in the panko for a uniform crust; use in combination with panko for balanced texture and taste.
- 1 cup seasoned breadcrumbs: Lightly coat the cooking surface and fish tops to promote even browning and crispness without deep-frying; apply a fine mist just before baking or air-frying to prevent sogginess.
- olive oil cooking spray: Serve alongside the finished fish sticks to add a creamy, tangy contrast that complements the savory coating and flaky fish; offer store–bought or homemade versions for convenience or freshness.
- tartar sauce for serving (store bought or click for recipe): Garnish or dip to provide a cool, acidic balance that cuts through the richness of the fried crust and enhances overall flavor harmony; pair in small bowls for individual serving.
Making This Fish Sticks
These instructions are conversational and approachable, designed to guide you through each step with sensory cues and troubleshooting. Follow the sequence so your coating develops properly and the cod stays flaky and moist. Take your time at the dredging station, and pay attention to visual cues like color and texture during baking.
- Preheat oven to 400°F, cover a baking sheet with aluminum foil, and spray the foil with nonstick spray. Set aside.: You will notice the oven warming and a steady ambient heat that will crisp the coating; preheating ensures the fish begins to cook immediately and prevents soggy crumbs. The foil makes cleanup easier and the nonstick spray helps keep the crumbs from gluing to the sheet while the surface starts to sizzle slightly as the oil heats. A common mistake is placing the fish in a cold oven which can result in greasy, under crisped breading, so always allow the oven to reach temperature before baking.
- Lightly coat the fish with salt, pepper, and smoked paprika.: You'll feel the texture of the raw cod change as the seasoning adheres, and the paprika brings a warm color that previews the final golden crust. The aroma of pepper and paprika will be subtle at this stage but becomes pronounced as the fish bakes. Avoid over seasoning, which can mask the delicate fish flavor; a light, even dusting is all you need.
- Set out 3 shallow bowls to create a dredging station.: Organizing your station means faster, cleaner work, and you will appreciate having everything within reach as you move from bowl to bowl. The rhythm of dipping in flour, egg, and crumbs becomes almost meditative and helps keep your hands uncluttered. Do not crowd the bowls or they can get contaminated with stray crumbs, which makes coatings inconsistent.
- In the first shallow bowl, place the flour.: The flour should be loose and dry, ready to form a thin shell on the fish; it acts as a base for the egg to grip. When you press a piece of cod into the flour, you should see a pale dusting that sticks but does not clump. If the flour appears wet or pasty, you may have introduced moisture and should replace it to avoid gummy coatings.
- In the second bowl, whisk the eggs and Dijon mustard together.: You will see the eggs lighten and become slightly frothy, and the mustard will give the mixture a pale yellow tint and a faint tangy scent. This mixture should coat the fish evenly without pooling, which ensures the crumbs stick uniformly. If the egg mixture sits too long it may dry, so whisk again quickly before dipping if needed.
- In the third bowl, combine Panko breadcrumbs and the seasoned breadcrumbs.: Mixing these two gives you both light crunch and seasoned depth. Run your fingers through the crumbs to break up any clumps, and notice the contrast between the large flakes of panko and the finer seasoned crumbs. If the breadcrumbs feel damp or compacted, they will not crisp properly; toss them to aerate before using.
- For the dredging process, press a fish stick in the flour, making sure to cover all sides and shake off the excess.: As you press the cod into the flour you will hear a soft pat and see a dry, powdery coat form; shaking off the excess prevents a thick, doughy layer that can become gummy. This stage is crucial since too much flour makes the egg layer uneven. A frequent error is overflouring, which leads to a pasty interior, so be gentle and thorough with the shake off.
- Then, dredge the fish stick in the egg mixture and let the excess drip off. Now, press the fish in the breadcrumb mixture, patting to help the coating adhere.: The egg should cling in a thin film, and when you press into the crumbs you should feel them stick and form a textured surface. Pressing helps the crumbs compact slightly so they do not fall away during baking. If you skip the patting, coatings can slough off in the oven, leaving bare spots on the fish.
- Place the coated fish stick on the prepared rack/baking sheet and repeat the process with the remaining fish sticks.: Arrange the pieces so they have space around them and you will notice the individual crumbs remain intact rather than steaming each other. A crowded pan causes moisture to accumulate and prevents crisping. To avoid uneven baking, keep pieces uniform in size and spacing to ensure simultaneous doneness.
- Spritz the fish with olive oil or butter-flavored cooking spray.: A light mist promotes browning and imparts a faint richness that complements the crumbs, and you may hear a faint hiss as the oil hits the warm pan. This step mimics shallow frying without the mess. Too much oil can create sogginess, so apply an even, light spray rather than drenching the pieces.
- Place the fish in the oven and bake 6 minutes. Turn the fish sticks over and spray with oil or cooking spray.: During the first bake you will see the edges begin to color and the aroma of baked crumbs rise, signaling the crust is setting. Turning them ensures even browning on both sides, and the second spray helps the top crisp similarly to the bottom. A common mistake is not flipping, which can leave one side pale and less crunchy.
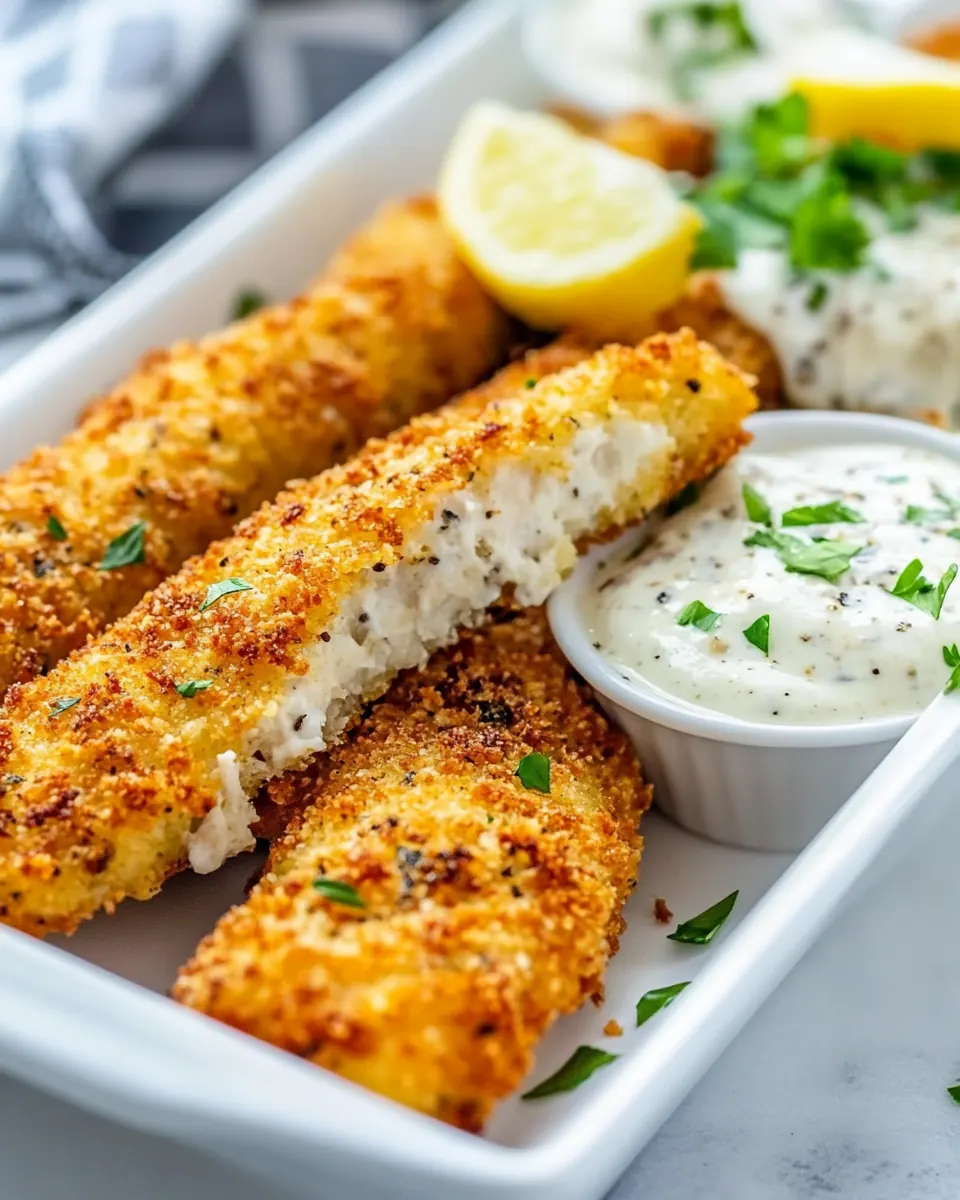
- Bake another 6-10 minutes or until the fish begins to flake easily with a fork.: As they finish, the coating will be deep golden and you will notice the cod flake when tested with a fork, releasing a delicate, slightly sweet aroma. The internal texture should be moist but not translucent in the center. Overbaking will dry out the fish, so check early and often toward the end of the time window.
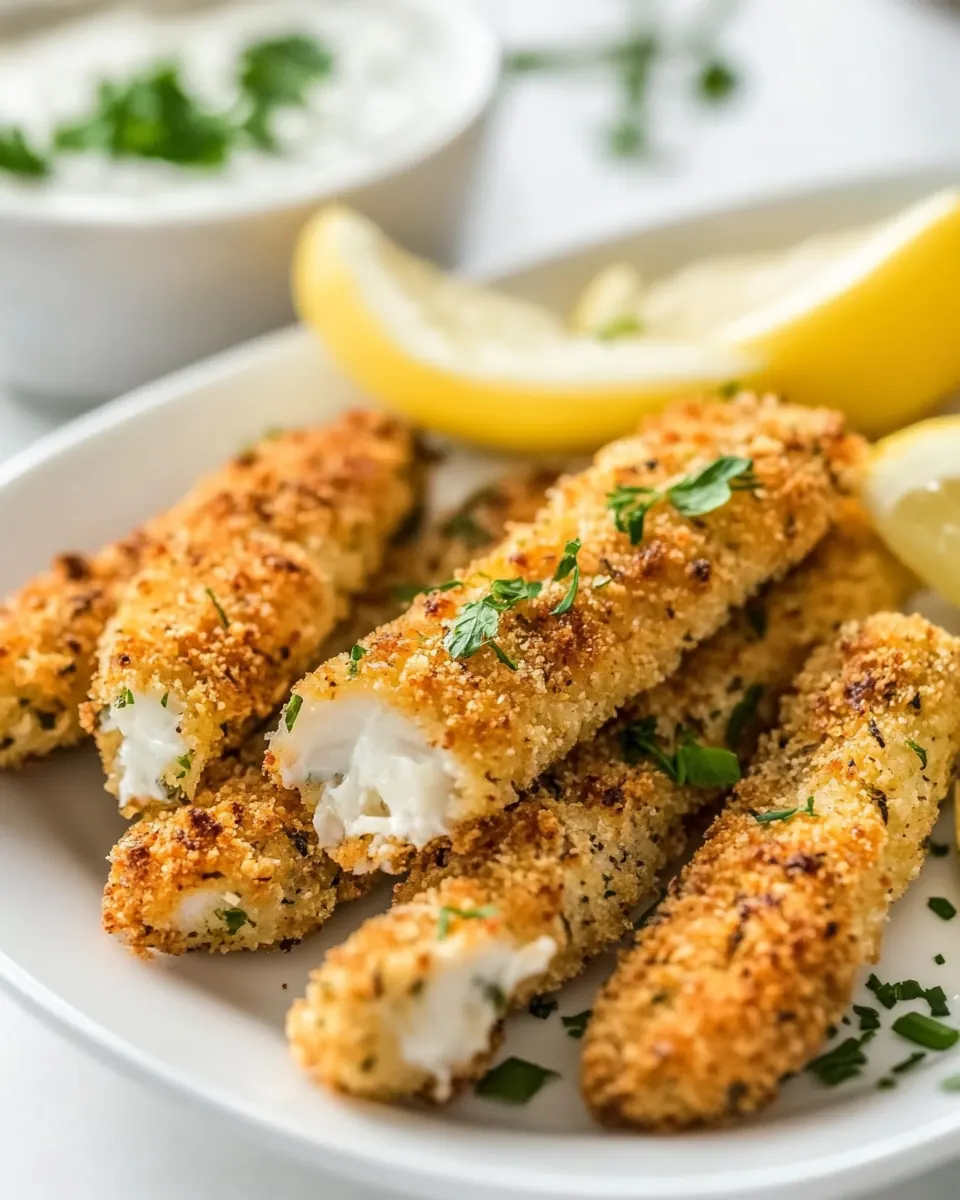
- Transfer cooked fish to a serving tray and serve immediately with Homemade Tartar Sauce or other favorite sauce.: Fresh from the oven the crust will be at its crispiest and the contrast with the cool tartar sauce will be delightful; allow a minute to rest so juices settle. Serving straightaway preserves texture and flavor. Letting them sit too long uncovered can cause them to lose heat and crispness, so plan plating close to finishing time.
Ways to Adapt This Recipe
These adaptation tips help you personalize the Fish Sticks while keeping the core technique intact. Each suggestion starts with a practical highlight so you can scan quickly, then gives detail on execution and impact.
- Swap breadcrumbs for gluten free: Use a gluten free breadcrumb blend combined with gluten free panko to maintain texture. Make sure the mix is light and not too fine or it can compress and lose crispness. Check labels for added salt to adjust seasoning.
- Make it extra crunchy: Pulse some panko with a few crackers or crisped cereal for additional texture, then press gently onto the fish. This creates irregular shards that brown beautifully and add dramatic crispness.
- Smoke flavor without a smoker: Use smoked paprika in the seasoning to introduce a gentle smoke note. Combine with a touch of olive oil spray to amplify roasted aroma during baking without overpowering the mild cod.
- Oven crisping trick: Place the baking sheet on the lowest oven rack for the first half of baking to encourage bottom browning, then move to middle rack after turning. This sequence helps develop even color on both sides.
- Prep ahead: Fully coat the fish and arrange on a tray, then refrigerate until ready to bake. Chilled coated pieces firm up and hold their shape better, making this a great make ahead step for busy nights.
Perfect Matches for Fish Sticks
These serving ideas and pairings will help you present the Fish Sticks in ways that suit casual family meals or relaxed entertaining. I include storage notes and occasions so you can adapt the dish to your schedule and season.
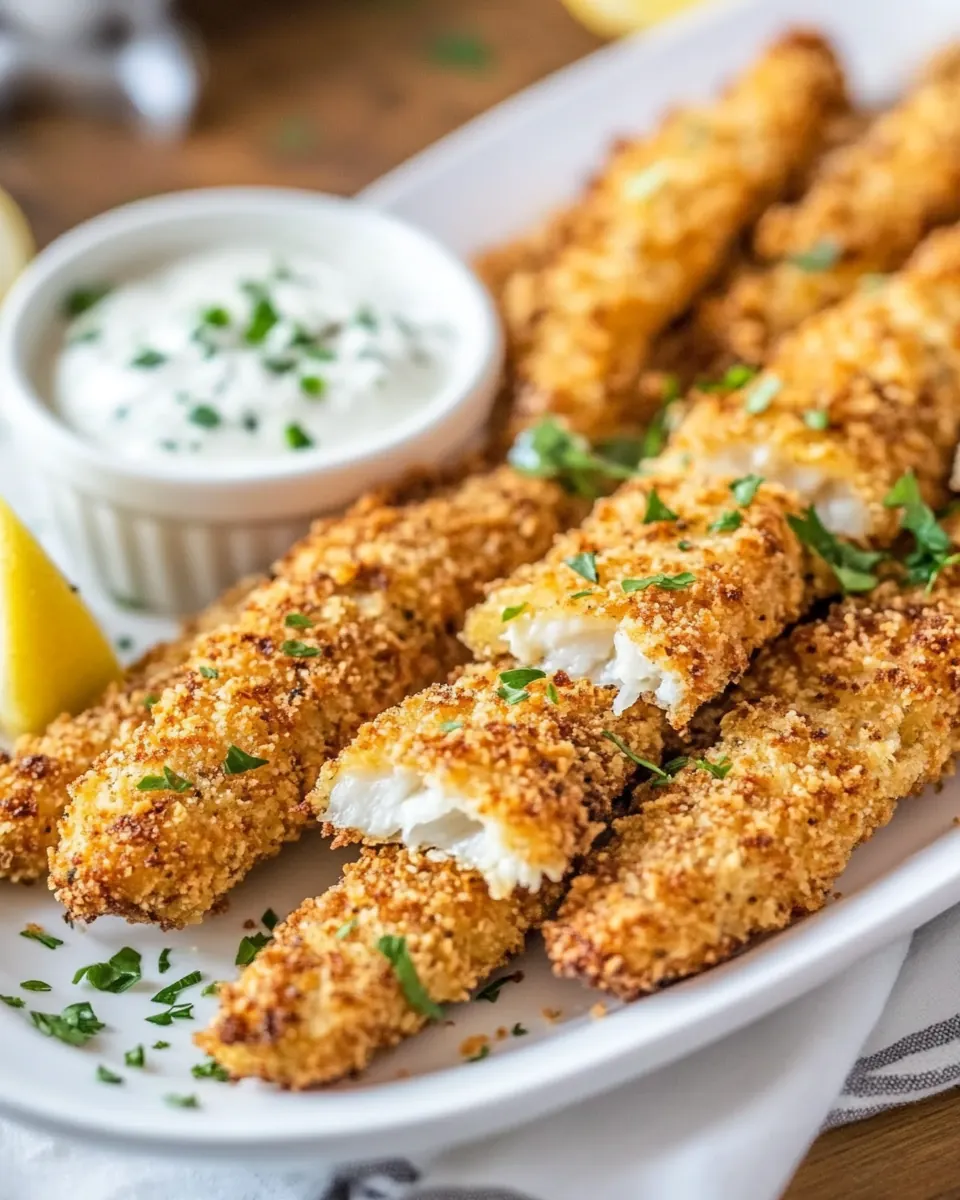
- Classic dipping combo: Serve with chilled tartar sauce and lemon wedges for a traditional pairing that balances crunch and acidity. This is an easy crowd pleaser for family dinners or casual get togethers.
- Weeknight meal: Pair with oven roasted fries and a crisp green salad for a simple, satisfying dinner that comes together quickly. The contrast between crunchy fish and a crunchy salad elevates the meal without extra effort.
- Kids friendly plate: Offer carrot sticks and apple slices alongside the Fish Sticks to round out a kid approved platter with variety in texture, color, and nutrition. Small containers of sauce help picky eaters enjoy the meal.
- Make ahead and reheat: Store cooled cooked sticks in an airtight container for up to two days in the refrigerator, then reheat on a baking sheet at 350°F until warmed through to revive the crisp exterior. Avoid microwaving which makes them limp.
- Occasion ideas: These work for casual lunches, weeknight dinners, and relaxed gatherings where handheld food is welcome, like game day or casual potlucks. They are easy to scale and still perform well when doubled.
- Seasonal notes: Serve them year round, but consider lighter sides like a citrus slaw in warm months and roasted root vegetables in cooler months to match seasonal produce.
FAQ
Conclusion
These Fish Sticks stand out because they combine a flaky, mild fish center with a reliably crunchy, golden crust baked in the oven. You get the comfort of classic fried fish but with less oil and less fuss, which is why I turn to this recipe for quick dinners and casual gatherings. Give them a try the next time you need an easy, satisfying meal that comes together from pantry staples, and enjoy the contrast of warm, crisp bites with a cool tangy sauce. They are approachable, forgiving, and consistently pleasing to both kids and adults, making them a dependable addition to your weeknight repertoire.
Fish Sticks
Equipment
- Baking Sheet
Ingredients
- 1 pound cod fillets cut into 1-inch strips Season evenly to enhance the natural flavor of the cod and help draw out moisture for better texture when breading and frying; dissolve in any wet components if needed and distribute thoroughly prior to cooking.
- 1 teaspoon kosher salt Season lightly to provide balanced heat and a subtle bite that complements the fish; incorporate during seasoning to ensure even distribution and avoid overpowering the delicate cod.
- 1/2 teaspoon freshly ground black pepper Coat the fish with a light layer of flour to create a dry surface that helps the egg wash adhere, leading to a crisper coating; adjust quantity to lightly dust each strip without clumping.
- 1 cup all-purpose flour Add a warm, smoky note to the coating mix to deepen the flavor profile and complement the mild fish; sprinkle into the flour or breadcrumbs for even flavor distribution.
- 1/2 teaspoon sweet or smoked paprika Whisk together with the mustard to form an adhesive egg wash that binds breadcrumbs to the fish; beat until smooth and slightly frothy to ensure consistent coating coverage.
- 2 large eggs beaten Emulsify with the beaten eggs to add a tangy, savory lift and improve adhesion of the breadcrumb layers; blend thoroughly to avoid streaks and promote even browning.
- 1 tablespoon Dijon mustard Provide a crunchy, airy texture to the outer crust that yields a light, crisp bite; press panko firmly onto the egg-coated fish strips to create a sturdy, flaky coating.
- 1 cup panko breadcrumbs Supply a seasoned, traditional breadcrumb layer that delivers flavor and helps fill gaps in the panko for a uniform crust; use in combination with panko for balanced texture and taste.
- 1 cup seasoned breadcrumbs Lightly coat the cooking surface and fish tops to promote even browning and crispness without deep-frying; apply a fine mist just before baking or air-frying to prevent sogginess.
- olive oil cooking spray Serve alongside the finished fish sticks to add a creamy, tangy contrast that complements the savory coating and flaky fish; offer store-bought or homemade versions for convenience or freshness.
- tartar sauce for serving (store bought or click for recipe) Garnish or dip to provide a cool, acidic balance that cuts through the richness of the fried crust and enhances overall flavor harmony; pair in small bowls for individual serving.
Instructions
- Preheat oven to 400°F, cover a baking sheet with aluminum foil, and spray the foil with nonstick spray. Set aside.: You will notice the oven warming and a steady ambient heat that will crisp the coating; preheating ensures the fish begins to cook immediately and prevents soggy crumbs. The foil makes cleanup easier and the nonstick spray helps keep the crumbs from gluing to the sheet while the surface starts to sizzle slightly as the oil heats. A common mistake is placing the fish in a cold oven which can result in greasy, under crisped breading, so always allow the oven to reach temperature before baking.
- Lightly coat the fish with salt, pepper, and smoked paprika.: You'll feel the texture of the raw cod change as the seasoning adheres, and the paprika brings a warm color that previews the final golden crust. The aroma of pepper and paprika will be subtle at this stage but becomes pronounced as the fish bakes. Avoid over seasoning, which can mask the delicate fish flavor; a light, even dusting is all you need.
- Set out 3 shallow bowls to create a dredging station.: Organizing your station means faster, cleaner work, and you will appreciate having everything within reach as you move from bowl to bowl. The rhythm of dipping in flour, egg, and crumbs becomes almost meditative and helps keep your hands uncluttered. Do not crowd the bowls or they can get contaminated with stray crumbs, which makes coatings inconsistent.
- In the first shallow bowl, place the flour.: The flour should be loose and dry, ready to form a thin shell on the fish; it acts as a base for the egg to grip. When you press a piece of cod into the flour, you should see a pale dusting that sticks but does not clump. If the flour appears wet or pasty, you may have introduced moisture and should replace it to avoid gummy coatings.
- In the second bowl, whisk the eggs and Dijon mustard together.: You will see the eggs lighten and become slightly frothy, and the mustard will give the mixture a pale yellow tint and a faint tangy scent. This mixture should coat the fish evenly without pooling, which ensures the crumbs stick uniformly. If the egg mixture sits too long it may dry, so whisk again quickly before dipping if needed.
- In the third bowl, combine Panko breadcrumbs and the seasoned breadcrumbs.: Mixing these two gives you both light crunch and seasoned depth. Run your fingers through the crumbs to break up any clumps, and notice the contrast between the large flakes of panko and the finer seasoned crumbs. If the breadcrumbs feel damp or compacted, they will not crisp properly; toss them to aerate before using.
- For the dredging process, press a fish stick in the flour, making sure to cover all sides and shake off the excess.: As you press the cod into the flour you will hear a soft pat and see a dry, powdery coat form; shaking off the excess prevents a thick, doughy layer that can become gummy. This stage is crucial since too much flour makes the egg layer uneven. A frequent error is overflouring, which leads to a pasty interior, so be gentle and thorough with the shake off.
- Then, dredge the fish stick in the egg mixture and let the excess drip off. Now, press the fish in the breadcrumb mixture, patting to help the coating adhere.: The egg should cling in a thin film, and when you press into the crumbs you should feel them stick and form a textured surface. Pressing helps the crumbs compact slightly so they do not fall away during baking. If you skip the patting, coatings can slough off in the oven, leaving bare spots on the fish.
- Place the coated fish stick on the prepared rack/baking sheet and repeat the process with the remaining fish sticks.: Arrange the pieces so they have space around them and you will notice the individual crumbs remain intact rather than steaming each other. A crowded pan causes moisture to accumulate and prevents crisping. To avoid uneven baking, keep pieces uniform in size and spacing to ensure simultaneous doneness.
- Spritz the fish with olive oil or butter-flavored cooking spray.: A light mist promotes browning and imparts a faint richness that complements the crumbs, and you may hear a faint hiss as the oil hits the warm pan. This step mimics shallow frying without the mess. Too much oil can create sogginess, so apply an even, light spray rather than drenching the pieces.
- Place the fish in the oven and bake 6 minutes. Turn the fish sticks over and spray with oil or cooking spray.: During the first bake you will see the edges begin to color and the aroma of baked crumbs rise, signaling the crust is setting. Turning them ensures even browning on both sides, and the second spray helps the top crisp similarly to the bottom. A common mistake is not flipping, which can leave one side pale and less crunchy.
- Bake another 6-10 minutes or until the fish begins to flake easily with a fork.: As they finish, the coating will be deep golden and you will notice the cod flake when tested with a fork, releasing a delicate, slightly sweet aroma. The internal texture should be moist but not translucent in the center. Overbaking will dry out the fish, so check early and often toward the end of the time window.
- Transfer cooked fish to a serving tray and serve immediately with Homemade Tartar Sauce or other favorite sauce.: Fresh from the oven the crust will be at its crispiest and the contrast with the cool tartar sauce will be delightful; allow a minute to rest so juices settle. Serving straightaway preserves texture and flavor. Letting them sit too long uncovered can cause them to lose heat and crispness, so plan plating close to finishing time.
Notes
- Swap breadcrumbs for gluten free: Use a gluten free breadcrumb blend combined with gluten free panko to maintain texture. Make sure the mix is light and not too fine or it can compress and lose crispness. Check labels for added salt to adjust seasoning.
- Make it extra crunchy: Pulse some panko with a few crackers or crisped cereal for additional texture, then press gently onto the fish. This creates irregular shards that brown beautifully and add dramatic crispness.
- Smoke flavor without a smoker: Use smoked paprika in the seasoning to introduce a gentle smoke note. Combine with a touch of olive oil spray to amplify roasted aroma during baking without overpowering the mild cod.
- Oven crisping trick: Place the baking sheet on the lowest oven rack for the first half of baking to encourage bottom browning, then move to middle rack after turning. This sequence helps develop even color on both sides.
- Prep ahead: Fully coat the fish and arrange on a tray, then refrigerate until ready to bake. Chilled coated pieces firm up and hold their shape better, making this a great make ahead step for busy nights.