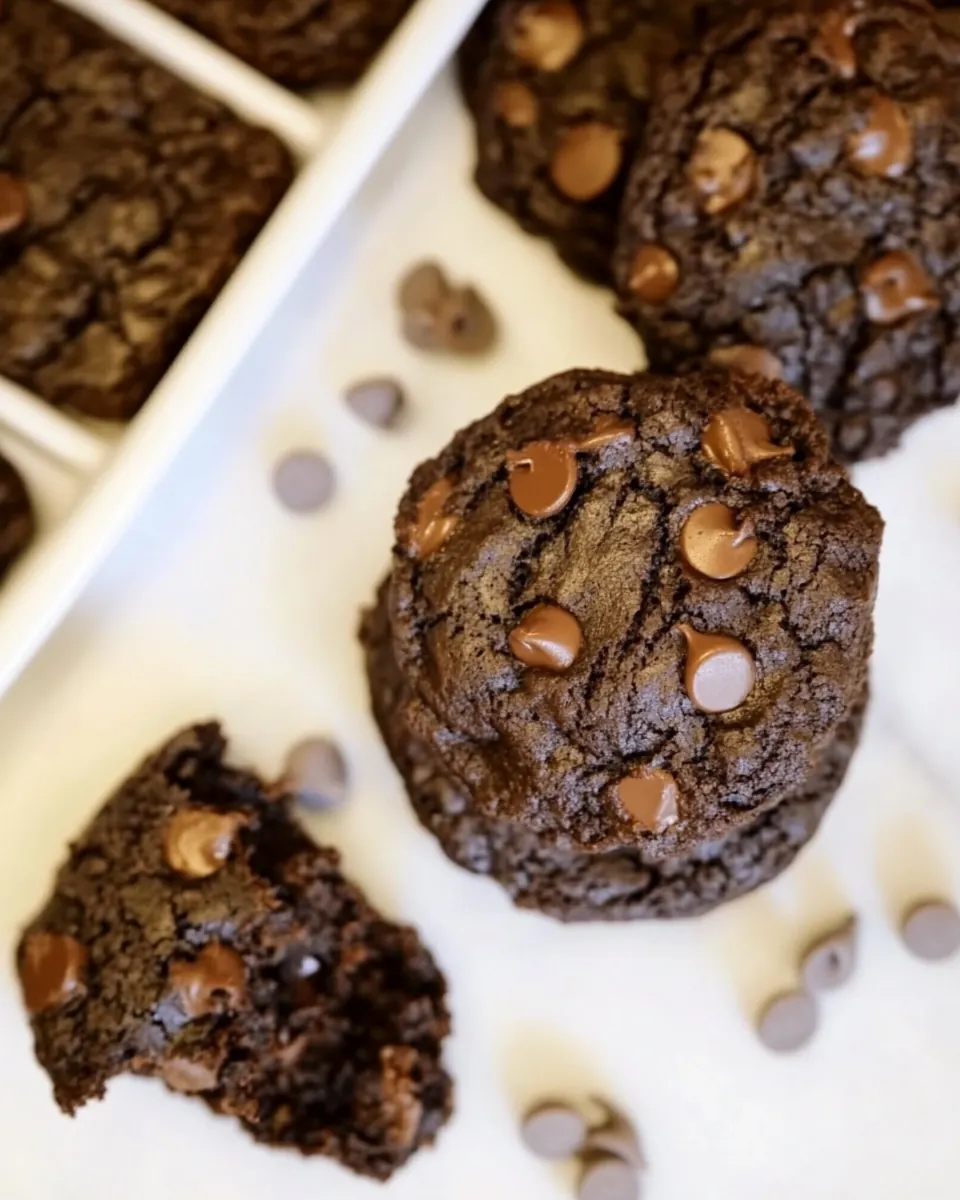
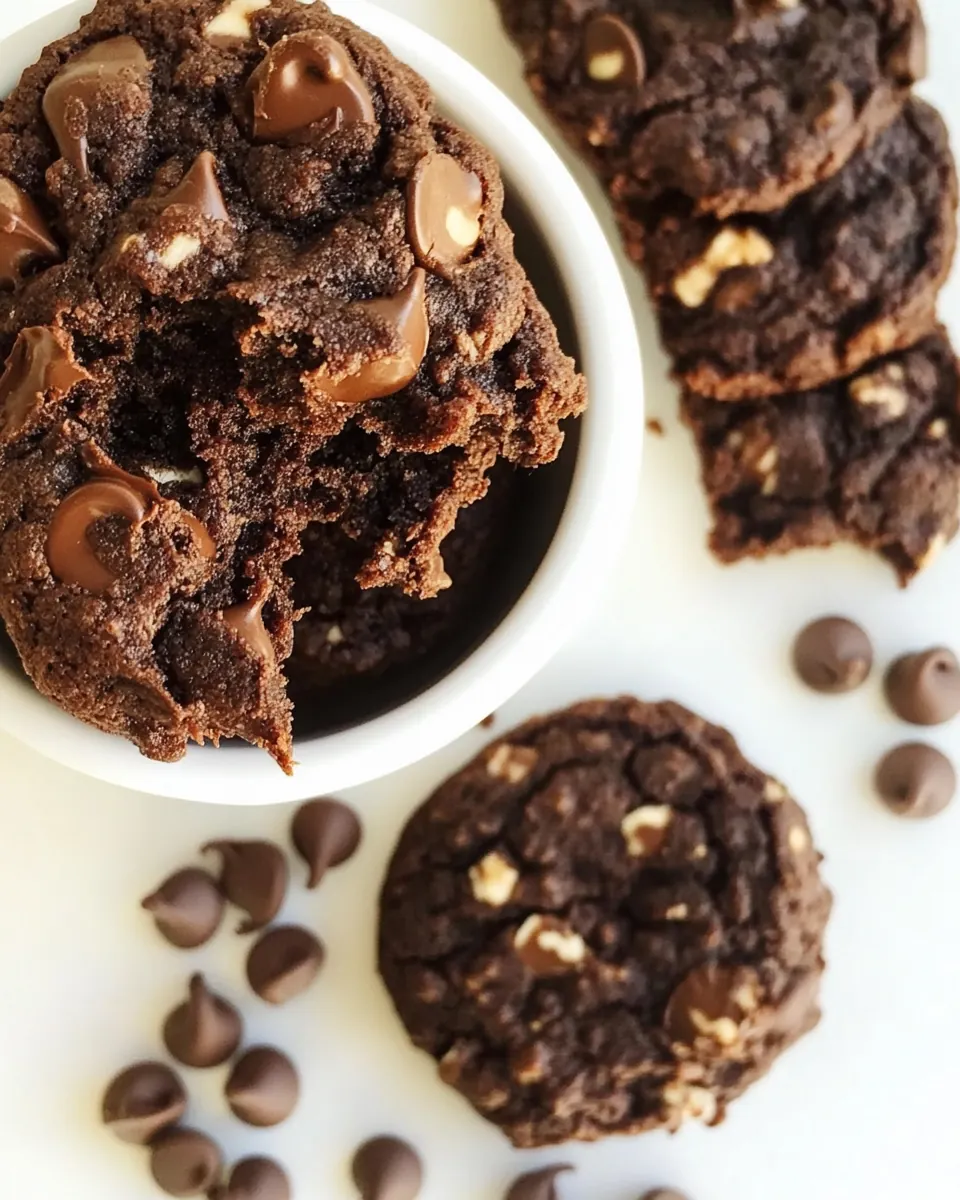
Chocolate Protein Cookies
Chocolate Protein Cookies have been my secret weapon on frantic mornings when I need a compact hit of energy and something that tastes like a treat. The first time I made these, I was juggling a work call and a grocery run, and I wanted a snack that felt indulgent, yet would actually keep me fueled. I remember scooping the batter with one hand and sipping coffee with the other, grinning when the kitchen filled with warm cocoa notes.
Over the years these Chocolate Protein Cookies have become the thing I bring to morning meetups, the cookie I stash in my gym bag, and the quick dessert I make when friends drop by. I love that they are flexible, forgiving, and come together with pantry basics. They are one of those recipes I tinker with depending on what I have, yet the base formula always delivers the same dense, slightly fudgy bite.
I also like the ritual of shaping them, pressing them gently with a spoon so each cookie gets that rustic, homemade look. Each batch seems to tell a small story about the week I made them, whether I used melty peanut butter because I forgot to stir the jar, or added a handful of chocolate chips to make the edges extra gooey. These memories make the cookies feel like more than fuel, they feel like comfort.
Recipe Snapshot
21 mins
10 mins
11 mins
Easy
120 kcal
American
Gluten-Free, Vegan
Desserts
Oven, Mixing bowl, Cookie sheet, Spoon
Why This Chocolate Protein Cookies Is a Winner
They are fast and reliable
I love these Chocolate Protein Cookies because they come together in minutes. When life is busy, I want something that is not precious, and this recipe delivers. Mix the dry ingredients, stir in the wet, shape, and bake, and you have snacks that hold up all week. That speed means I actually make them instead of bookmarking the idea.
Balanced energy without fuss
Between the protein powder and the peanut butter, these cookies offer sustained energy. I personally appreciate how the combination of protein and healthy fats keeps me satisfied after a morning workout. They hit the sweet spot between a snack and a mini meal, which is why I often reach for them instead of a pastry.
Texture that surprises
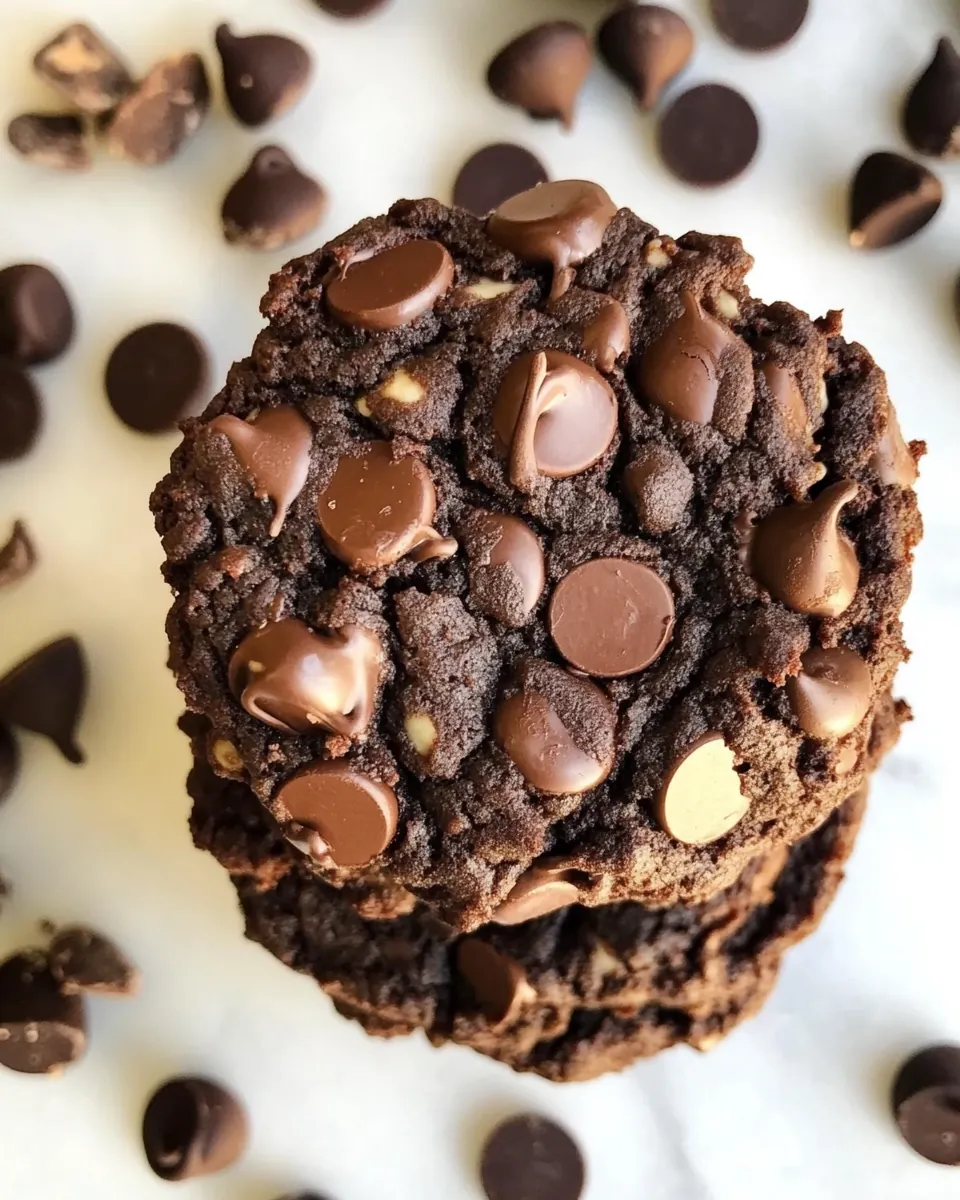
These cookies are chewy in the center with slightly crisp edges when baked a bit longer. I adore that texture contrast because it feels like an intentional treat rather than a dry protein bar. The cocoa and chocolate chips add an almost fudgy quality that makes them feel indulgent without being heavy.
Customizable and forgiving
I frequently swap ingredients to suit allergies or preferences, and the recipe still behaves. You can change sweeteners, try an allergy friendly nut butter, or leave the chips out altogether. That flexibility makes this one of my go to recipes when I have guests with different diets.
Perfect for on the go
Finally, these cookies travel well. I pack them for hikes, lunches, and post gym snacks. They do not crumble into a mess, and they keep their flavor even after a few days. Having a stash of these means I rarely skip a meal when the day runs long.
Ingredients to Make Chocolate Protein Cookies

These ingredients form a simple, purposeful team. The dry elements create structure and chocolate intensity, while the wet players bind and bring richness. Each component serves a role so the cookies are tender yet hold together, with the peanut butter contributing fat and depth and the protein powder adding body.
- 1/2 cup chocolate protein powder (64 g): Provides concentrated protein and chocolate flavor while helping to bind the dough; choose a whey or plant-based variety depending on dietary needs and mix thoroughly to avoid lumps. Enhances nutritional profile by increasing protein per serving and contributes structure when combined with liquid ingredients. Can affect texture so consider the powder's fineness and adjust moisture slightly if mixture seems dry.
- 1/2 cup cocoa powder (40 g): Adds deep chocolate flavor and a dry structure that helps absorb moisture from wet ingredients; sift or whisk into dry mix to prevent clumps. Contributes a rich color and intensifies cocoa notes without adding fat, balancing sweetness in the cookie. Can be natural or Dutch-processed, which will slightly alter acidity and flavor intensity.
- 1/3 cup sugar or xylitol (70 g): Sweetens the cookies and balances bitter cocoa while also contributing to tenderness and browning; substitute xylitol for a lower-calorie option and ensure it dissolves into the wet ingredients. Impacts overall sweetness level so taste the batter if possible and adjust accordingly. Granulated forms provide texture control, while finer varieties dissolve more readily.
- 1/4 tsp salt: Enhances overall flavor by balancing sweetness and intensifying other tastes; a small amount is sufficient due to its concentrated taste. Also helps regulate the chemical reactions of leavening agents and supports proper flavor perception in the finished cookie. Measure carefully to avoid oversalting.
- 1/4 tsp baking soda: Provides gentle leavening and helps create a lighter texture by reacting with acidic components in the batter; ensure even distribution by whisking into dry ingredients. Works subtly in cookies to give slight lift and prevent excessive density. Use the stated small quantity to avoid leaving an alkaline aftertaste.
- 1/2 cup peanut butter or allergy friendly alternative (120 g): Acts as the primary fat and binder, supplying richness, moisture, and chewiness while helping hold the cookie together; choose peanut butter or an allergy–friendly alternative depending on dietary needs. Contributes flavor and mouthfeel and pairs well with chocolate for classic taste. Smooth varieties blend more uniformly, while chunky types add texture.
- 1/2 cup water (120 g): Supplies necessary hydration to hydrate dry ingredients and create a cohesive dough; add gradually to reach the desired cookie consistency without making it too runny. Water keeps calories lower compared with milk or oil and helps activate protein powder for better structure. Adjust slightly if using a different protein powder that varies in absorption.
- 1 handful chocolate chips () (optional): Provides optional bursts of concentrated chocolate flavor and textural contrast when folded into dough; add to taste for extra sweetness and chew. Enhances appearance and indulgence factor while offering small pockets of melted chocolate after baking. Use allergy–friendly or dairy-free chips as needed for dietary restrictions.
Chocolate Protein Cookies Instructions
These instructions are straightforward, and I like to chat through a few kitchen rhythms as you go. Pay attention to texture cues rather than only clocks, and trust your senses. Small adjustments while mixing and shaping make a big difference in the final cookie.
- To make the chocolate protein cookies, first read through the baking tips above. Preheat your oven to 325 F. If not already runny, gently heat the nut butter until easily stirrable. Mix dry ingredients in a medium bowl, then stir in wet to form a batter. Stir vigorously, breaking up any clumps of nut butter, until it forms a cookie dough texture. Roll into balls or shape into cookies. Flatten with a spoon if desired, then place on a cookie sheet. Bake 8 minutes for soft cookies or 11 minutes for chewy protein cookies. Let cool, then serve and enjoy!: The kitchen should smell faintly of cocoa and warm peanut butter as you prepare, a comforting, slightly roasted aroma that signals the right balance. Use a medium bowl so you can mix vigorously without spilling, and listen for the slight swirl sound as powders combine. A common mistake is skimping on breaking up clumps, so press and rub any stubborn lumps against the bowl with a spoon to avoid gritty pockets.
- first read through the baking tips above: Reading the notes primes you to avoid issues like over baking and helps you decide whether to use sugar or xylitol. Mentally mapping the steps also helps your timing, so you do not find the oven preheated with nothing ready. A frequent error is skipping this pause, which can lead to rushed mixing and uneven cookies.
- Preheat your oven to 325 F: When the oven reaches temperature a steady heat fills the kitchen with warmth and you may notice a slight metallic hum from the element. Preheating ensures consistent rise and even edges, because the batter meets the same heat every time. Putting cookies into a cold oven will change bake times and may leave them underdone or excessively flat.
- If not already runny, gently heat the nut butter until easily stirrable: Warming the peanut butter softens its texture and releases nut oils, yielding a silkier mouthfeel. Do this slowly in a microwave in short bursts or over a warm water bath to avoid scorching, and stir until smooth. A common pitfall is overheating, which can separate oils and alter texture, so stop as soon as it becomes easily pourable.
- Mix dry ingredients in a medium bowl: Combining the chocolate protein powder , cocoa powder , sugar , salt , and baking soda produces a uniformly colored, fine mixture that smells faintly bitter and toasty. Whisking breaks up pockets and aerates slightly, which helps even hydration. If you skip thorough mixing you risk pockets of unblended leavening or cocoa, which will create inconsistent flavor and texture.
- then stir in wet to form a batter: As you add the warmed peanut butter and water , the mixture will transform from dusty powder to glossy, thick batter. At this stage you will notice the batter becoming more cohesive, and small streaks of glossy nut butter will disappear as you fold. If the batter seems too dry, add water in teaspoon increments so you do not over thin the dough.
- Stir vigorously, breaking up any clumps of nut butter, until it forms a cookie dough texture: The vigorous stirring creates a uniform, slightly tacky dough; you will see a sheen and feel resistance when you scoop. The sound is a soft scrape as the spoon moves through slightly sticky batter. Not breaking clumps will leave oily chunks and uneven bake, so press them against the bowl until integrated.
- Roll into balls or shape into cookies: Shaping the dough gives each cookie a uniform volume, which helps them bake evenly. Rolling creates a smooth exterior that browns predictably, while rustic shapes yield more variation in texture at the edges. A mistake here is making sizes wildly inconsistent, so I use a tablespoon measure or a small ice cream scoop for consistency.
- Flatten with a spoon if desired, then place on a cookie sheet: Pressing each ball slightly flattens the center and encourages even spreading, and you will see the dough relax and spread a bit on the sheet. The surface may show small cracks that hint at the chewy interior. Placing too close together will make them merge while baking, so space them with room to spread.
- Bake 8 minutes for soft cookies or 11 minutes for chewy protein cookies: The oven will turn those doughy mounds into cookies that smell richly of cocoa, with edges that may darken slightly and centers that remain tender. For a soft result, remove at the shorter time and allow residual heat to finish them on the sheet; for chewier results, bake a bit longer until edges are set and centers spring back lightly. Over baking dries them out, so check early and use visual cues more than strict timing.
- Let cool, then serve and enjoy: Cooling lets the cookies set and develop final texture, and you will notice the aroma settle into a deeper, roasted chocolate note. Transfer to a rack after a few minutes to avoid the bottoms steaming and becoming soggy. A common misstep is eating them right out of the oven, which can be too soft and fall apart, so give them time to firm up slightly.
Ways to Adapt This Recipe
These adaptation tips help you personalize the Chocolate Protein Cookies for taste, allergies, or texture preferences. Small swaps and technique notes make a big difference when you want to change sweetness, fat, or add mix ins.
- Use an allergy friendly nut butter if you need to avoid peanuts, such as a seed butter, which will provide similar binding and fat content but may alter flavor slightly.
- Adjust sweetness carefully by reducing sugar if your protein powder is already sweetened, maintaining balance so the cookies do not become cloying.
- Add more moisture sparingly by a teaspoon of water at a time if the batter seems too dry, to prevent running cookies that spread too thin.
- Skip chocolate chips for a cleaner, more intensely cocoa flavor, or add them for pockets of melty chocolate that increase perceived richness.
- Chill the dough briefly if you want thicker cookies and less spread, about 10 to 20 minutes so they hold shape during the initial oven heat.
- Use a cookie scoop for uniform sizes which helps ensure consistent bake time across the batch, especially if you make many cookies at once.
Great Combinations for Chocolate Protein Cookies
I like pairing Chocolate Protein Cookies with simple, complementary items for different occasions. Whether it is a quick breakfast, a gym snack, or a small dessert, the right pairing elevates the experience. Below are serving ideas and storage notes to help you make the most of each batch.
- Morning snack pairing: Serve with a small cup of coffee or a smoothie for a balanced start to the day, the cookie provides chew and substance while the beverage offsets density.
- Post workout: Pack a cookie with a banana or yogurt for a convenient recovery combo that delivers protein and carbs to help replenish energy stores.
- Casual gathering: Arrange a platter of cookies with a bowl of fresh fruit for guests, the chocolate notes pair especially well with tart berries to balance sweetness.
- Storage tip: Keep cookies in an airtight container at room temperature for up to three days, or freeze for longer storage; thaw at room temperature to restore chewiness.
- Seasonal serving: In colder months serve slightly warmed so the chocolate aroma is amplified, in warm weather pack chilled for a firmer, chewier bite.
FAQ
Conclusion
These Chocolate Protein Cookies stand out for their satisfying texture, deep chocolate flavor, and quick assembly. They are an ideal option when you want something that feels indulgent but also supports your day with protein and healthy fats. Give them a try the next time you need a portable snack or a small post workout treat, and notice how that fudgy center and cocoa aroma lift a simple moment into a small comfort. I hope this recipe becomes one of your go to solutions for busy mornings and quick gatherings.
Chocolate Protein Cookies
Equipment
- Oven
- Mixing Bowl
- Cookie Sheet
- Spoon
Ingredients
- 1/2 cup chocolate protein powder (64 g) Provides concentrated protein and chocolate flavor while helping to bind the dough; choose a whey or plant-based variety depending on dietary needs and mix thoroughly to avoid lumps. Enhances nutritional profile by increasing protein per serving and contributes structure when combined with liquid ingredients. Can affect texture so consider the powder's fineness and adjust moisture slightly if mixture seems dry.
- 1/2 cup cocoa powder (40 g) Adds deep chocolate flavor and a dry structure that helps absorb moisture from wet ingredients; sift or whisk into dry mix to prevent clumps. Contributes a rich color and intensifies cocoa notes without adding fat, balancing sweetness in the cookie. Can be natural or Dutch-processed, which will slightly alter acidity and flavor intensity.
- 1/3 cup sugar or xylitol (70 g) Sweetens the cookies and balances bitter cocoa while also contributing to tenderness and browning; substitute xylitol for a lower-calorie option and ensure it dissolves into the wet ingredients. Impacts overall sweetness level so taste the batter if possible and adjust accordingly. Granulated forms provide texture control, while finer varieties dissolve more readily.
- 1/4 tsp salt Enhances overall flavor by balancing sweetness and intensifying other tastes; a small amount is sufficient due to its concentrated taste. Also helps regulate the chemical reactions of leavening agents and supports proper flavor perception in the finished cookie. Measure carefully to avoid oversalting.
- 1/4 tsp baking soda Provides gentle leavening and helps create a lighter texture by reacting with acidic components in the batter; ensure even distribution by whisking into dry ingredients. Works subtly in cookies to give slight lift and prevent excessive density. Use the stated small quantity to avoid leaving an alkaline aftertaste.
- 1/2 cup peanut butter or allergy friendly alternative (120 g) Acts as the primary fat and binder, supplying richness, moisture, and chewiness while helping hold the cookie together; choose peanut butter or an allergy-friendly alternative depending on dietary needs. Contributes flavor and mouthfeel and pairs well with chocolate for classic taste. Smooth varieties blend more uniformly, while chunky types add texture.
- 1/2 cup water (120 g) Supplies necessary hydration to hydrate dry ingredients and create a cohesive dough; add gradually to reach the desired cookie consistency without making it too runny. Water keeps calories lower compared with milk or oil and helps activate protein powder for better structure. Adjust slightly if using a different protein powder that varies in absorption.
- 1 handful chocolate chips (optional) Provides optional bursts of concentrated chocolate flavor and textural contrast when folded into dough; add to taste for extra sweetness and chew. Enhances appearance and indulgence factor while offering small pockets of melted chocolate after baking. Use allergy-friendly or dairy-free chips as needed for dietary restrictions.
Instructions
- To make the chocolate protein cookies, first read through the baking tips above. Preheat your oven to 325 F. If not already runny, gently heat the nut butter until easily stirrable. Mix dry ingredients in a medium bowl, then stir in wet to form a batter. Stir vigorously, breaking up any clumps of nut butter, until it forms a cookie dough texture. Roll into balls or shape into cookies. Flatten with a spoon if desired, then place on a cookie sheet. Bake 8 minutes for soft cookies or 11 minutes for chewy protein cookies. Let cool, then serve and enjoy!: The kitchen should smell faintly of cocoa and warm peanut butter as you prepare, a comforting, slightly roasted aroma that signals the right balance. Use a medium bowl so you can mix vigorously without spilling, and listen for the slight swirl sound as powders combine. A common mistake is skimping on breaking up clumps, so press and rub any stubborn lumps against the bowl with a spoon to avoid gritty pockets.
- first read through the baking tips above: Reading the notes primes you to avoid issues like over baking and helps you decide whether to use sugar or xylitol. Mentally mapping the steps also helps your timing, so you do not find the oven preheated with nothing ready. A frequent error is skipping this pause, which can lead to rushed mixing and uneven cookies.
- Preheat your oven to 325 F: When the oven reaches temperature a steady heat fills the kitchen with warmth and you may notice a slight metallic hum from the element. Preheating ensures consistent rise and even edges, because the batter meets the same heat every time. Putting cookies into a cold oven will change bake times and may leave them underdone or excessively flat.
- If not already runny, gently heat the nut butter until easily stirrable: Warming the peanut butter softens its texture and releases nut oils, yielding a silkier mouthfeel. Do this slowly in a microwave in short bursts or over a warm water bath to avoid scorching, and stir until smooth. A common pitfall is overheating, which can separate oils and alter texture, so stop as soon as it becomes easily pourable.
- Mix dry ingredients in a medium bowl: Combining the chocolate protein powder , cocoa powder , sugar , salt , and baking soda produces a uniformly colored, fine mixture that smells faintly bitter and toasty. Whisking breaks up pockets and aerates slightly, which helps even hydration. If you skip thorough mixing you risk pockets of unblended leavening or cocoa, which will create inconsistent flavor and texture.
- then stir in wet to form a batter: As you add the warmed peanut butter and water , the mixture will transform from dusty powder to glossy, thick batter. At this stage you will notice the batter becoming more cohesive, and small streaks of glossy nut butter will disappear as you fold. If the batter seems too dry, add water in teaspoon increments so you do not over thin the dough.
- Stir vigorously, breaking up any clumps of nut butter, until it forms a cookie dough texture: The vigorous stirring creates a uniform, slightly tacky dough; you will see a sheen and feel resistance when you scoop. The sound is a soft scrape as the spoon moves through slightly sticky batter. Not breaking clumps will leave oily chunks and uneven bake, so press them against the bowl until integrated.
- Roll into balls or shape into cookies: Shaping the dough gives each cookie a uniform volume, which helps them bake evenly. Rolling creates a smooth exterior that browns predictably, while rustic shapes yield more variation in texture at the edges. A mistake here is making sizes wildly inconsistent, so I use a tablespoon measure or a small ice cream scoop for consistency.
- Flatten with a spoon if desired, then place on a cookie sheet: Pressing each ball slightly flattens the center and encourages even spreading, and you will see the dough relax and spread a bit on the sheet. The surface may show small cracks that hint at the chewy interior. Placing too close together will make them merge while baking, so space them with room to spread.
- Bake 8 minutes for soft cookies or 11 minutes for chewy protein cookies: The oven will turn those doughy mounds into cookies that smell richly of cocoa, with edges that may darken slightly and centers that remain tender. For a soft result, remove at the shorter time and allow residual heat to finish them on the sheet; for chewier results, bake a bit longer until edges are set and centers spring back lightly. Over baking dries them out, so check early and use visual cues more than strict timing.
- Let cool, then serve and enjoy: Cooling lets the cookies set and develop final texture, and you will notice the aroma settle into a deeper, roasted chocolate note. Transfer to a rack after a few minutes to avoid the bottoms steaming and becoming soggy. A common misstep is eating them right out of the oven, which can be too soft and fall apart, so give them time to firm up slightly.
Notes
- Use an allergy friendly nut butter if you need to avoid peanuts, such as a seed butter, which will provide similar binding and fat content but may alter flavor slightly.
- Adjust sweetness carefully by reducing sugar if your protein powder is already sweetened, maintaining balance so the cookies do not become cloying.
- Add more moisture sparingly by a teaspoon of water at a time if the batter seems too dry, to prevent running cookies that spread too thin.
- Skip chocolate chips for a cleaner, more intensely cocoa flavor, or add them for pockets of melty chocolate that increase perceived richness.
- Chill the dough briefly if you want thicker cookies and less spread, about 10 to 20 minutes so they hold shape during the initial oven heat.
- Use a cookie scoop for uniform sizes which helps ensure consistent bake time across the batch, especially if you make many cookies at once.