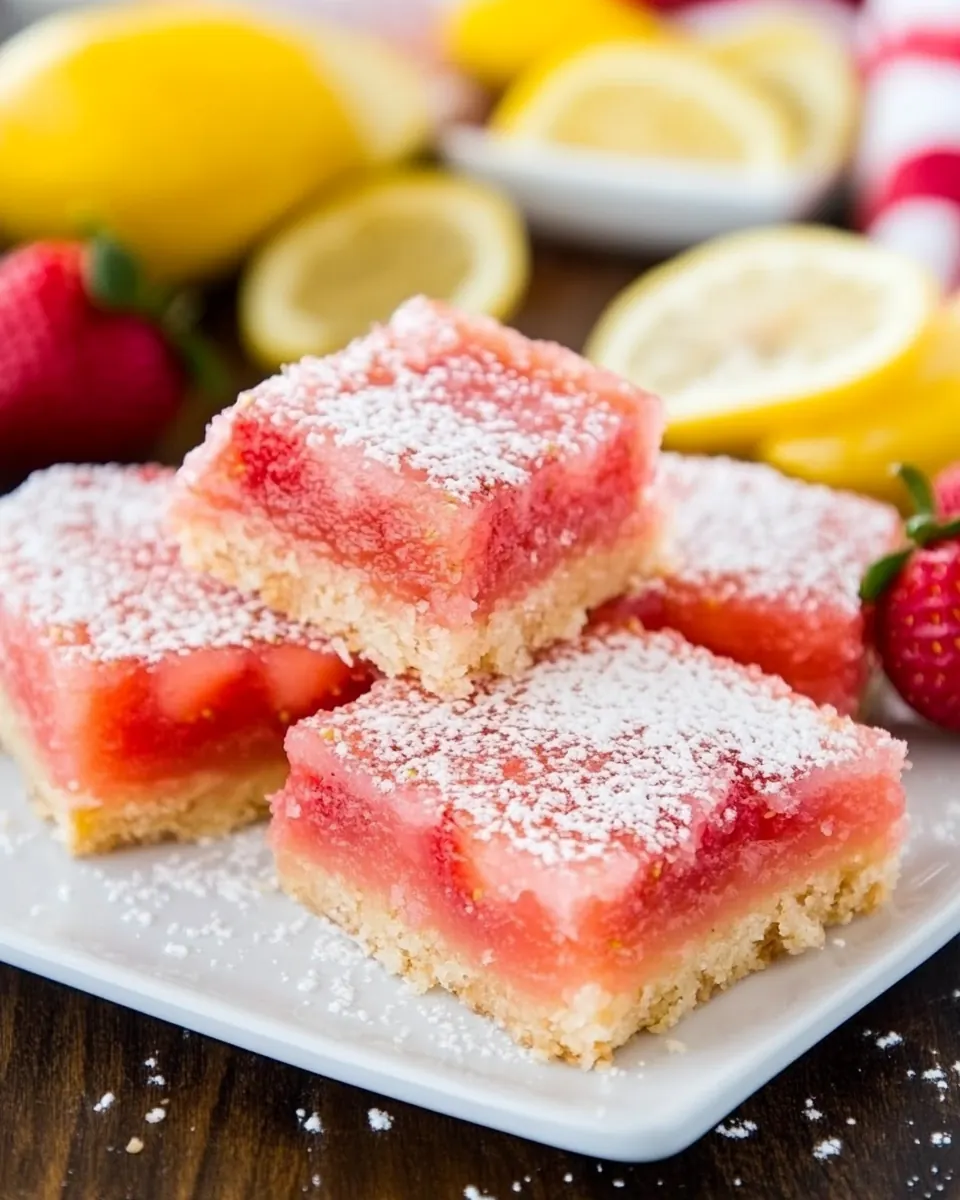
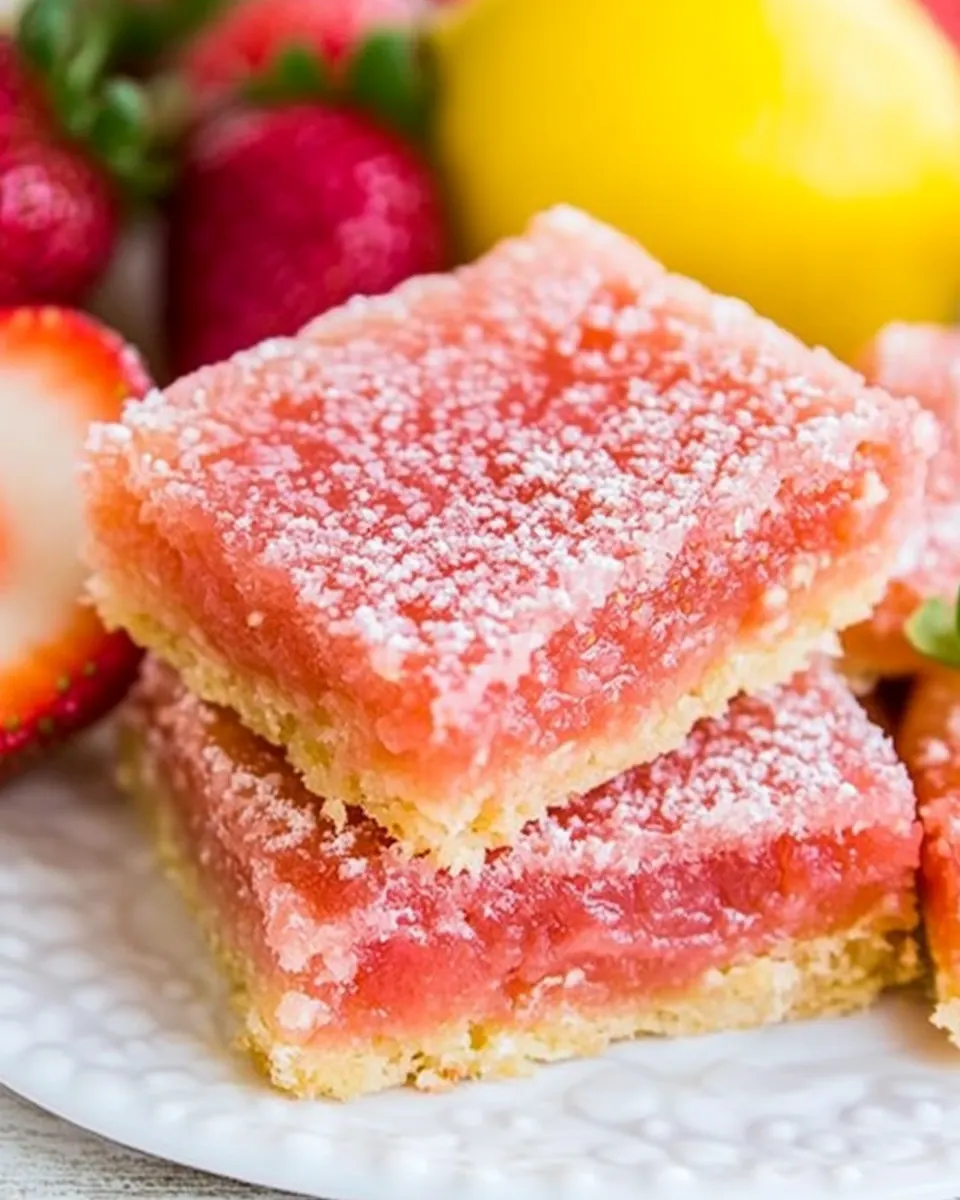
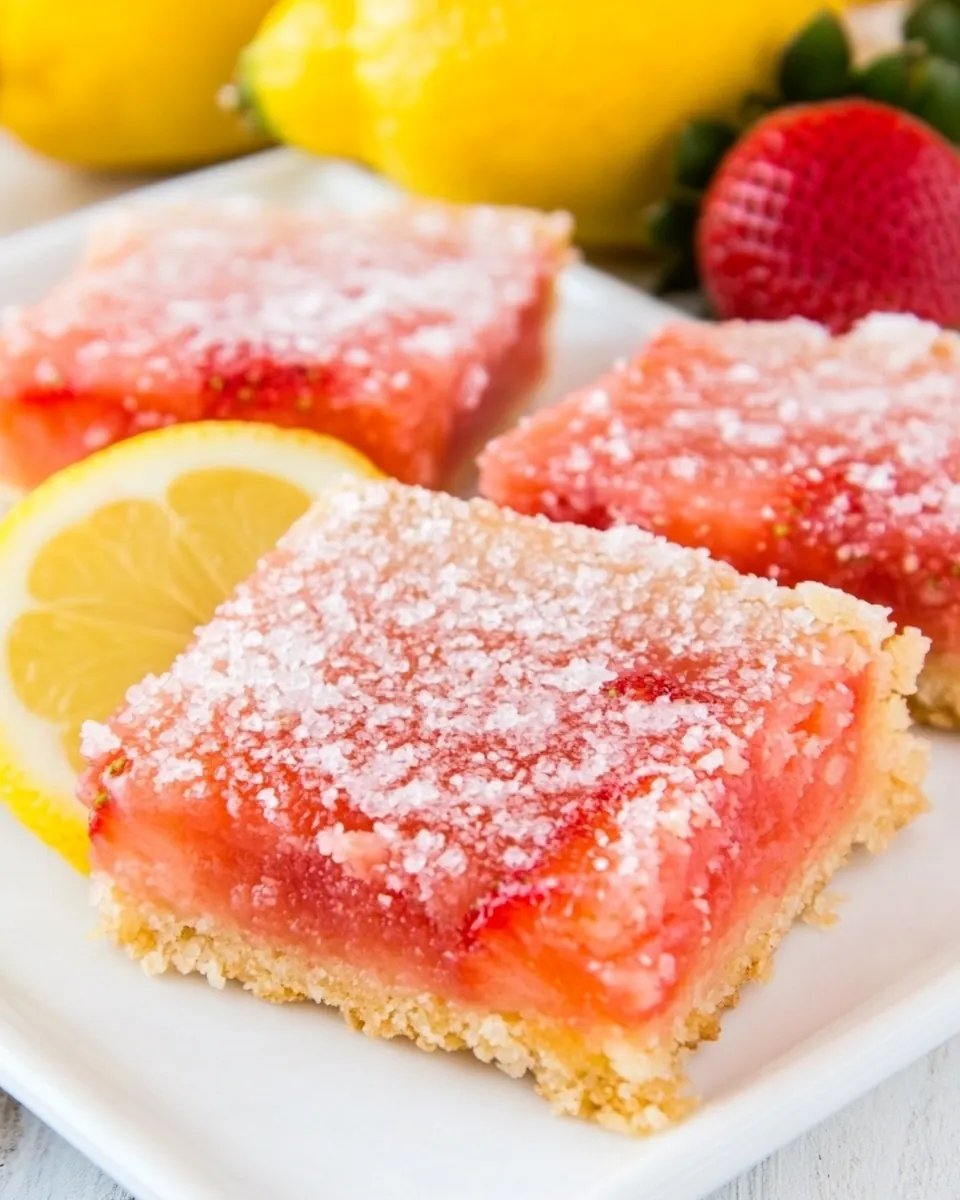
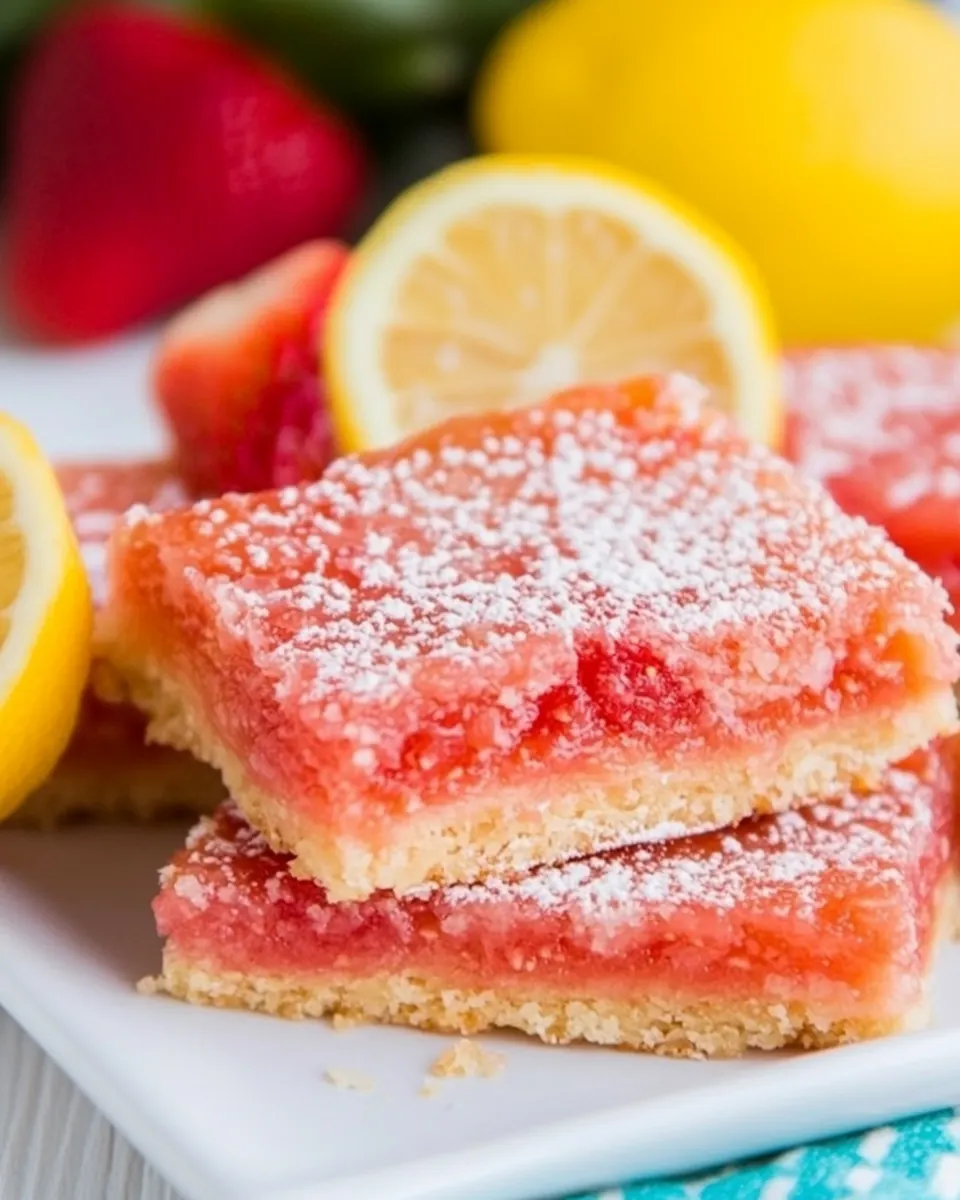
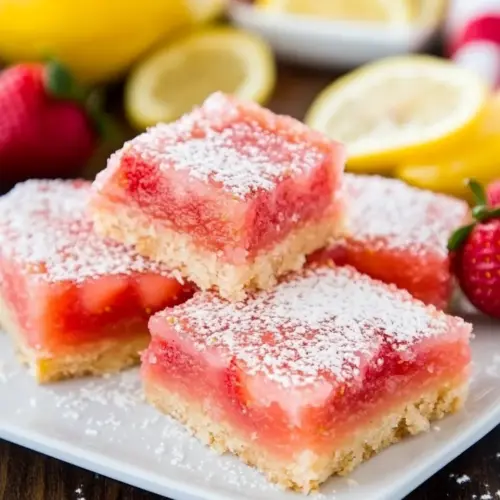
Strawberry Lemonade Bars
Strawberry Lemonade Bars have been my go to summer treat ever since I scribbled this recipe on a sun splattered index card at a neighborhood picnic years ago.
That first batch came from a late afternoon when the kids were sticky and the cooler was empty, and I wanted something bright, tart, and easy to hand around. I remember how the kitchen filled with a fresh citrus perfume as I zested and juiced lemons while slicing ripe strawberries. The crust set up into a tender, flaky base that contrasted with the glossy, pink filling, and we ate the first pan while still warm, laughing about how well three simple ingredients can sing together.
Over time I tweaked proportions, learned the little tricks that stop the filling from curdling, and found that chilling the bars overnight really sharpens that lemon punch. Now when friends ask for a dessert to bring to a barbecue, I reach for this recipe because it travels well, looks festive, and is unexpectedly elegant for how effortless it is. You can make the crust in a food processor or with a fork, and the filling comes together in a blender or processor for a perfectly smooth texture.
Recipe Snapshot
56 mins
20 mins
36 mins
Medium
200 kcal
American
Gluten-Free, Low FODMAP
Desserts
Food Processor or Blender, 9×13-inch Pan, Parchment Paper, Mixing Bowls, Whisk
What We Adore About This Strawberry Lemonade Bars
Bright, refreshing flavor that stands out
I love how Strawberry Lemonade Bars deliver a double hit of citrus and berry without being sickly sweet. The fresh lemon juice keeps the filling lively, while the strawberries add a mellow, fruity balance. For warm afternoons when heavier desserts feel wrong, this is the one I reach for, because it cleanses the palate and leaves people asking for another square.
Simple technique with impressive results
These bars feel special but they do not demand hours of attention. The method uses straightforward steps and common tools, and yet the end result looks polished. I tell friends that a humble food processor and a 9 by 13 pan will give you bakery worthy bars at home, and I mean it. That accessibility is a huge reason I keep making them.
Flexible and forgiving
Whether you prefer a slightly tangier bite or a sweeter finish, small adjustments to sugar or chilling time let you tailor the bars. I often tweak the lemon to suit the fruit I have on hand, and the recipe still behaves reliably. Because the crust is sturdy but tender, it supports the filling beautifully and holds up for transport, which is perfect for potlucks.
Visually appealing and seasonal
There is something about the pink hue of strawberries paired with powdered sugar that makes these bars feel celebratory. I bring them to summer gatherings and they vanish fast. They also photograph well if you like sharing your kitchen wins on social media, making them a go to for warm weather entertaining.
Great for make ahead serving
I adore that you can bake the bars a day ahead and chill them, then dust with powdered sugar just before serving for a crisp presentation. This recipe rewards planning, and it frees up time on the day you need to entertain. Personally, that stress relief is priceless.
Ingredient List for Strawberry Lemonade Bars
These ingredients are chosen to create a balance of tender, buttery crust and a vibrant, silky filling. The crust relies on a simple flour, sugar, and salted butter combination for texture and flavor, while the filling uses fresh lemon juice and strawberries for brightness. Eggs provide structure and silkiness, while a bit of extra flour and powdered sugar help set the bars and give a lovely finish.
- 1 1/4 cups all-purpose flour: Provide structure and bulk to the crust, creating a tender but sturdy base that holds the filling. Offer a neutral flavor that balances the tartness of the lemon and sweetness of the strawberries. Work best when measured accurately for proper texture.
- 1/4 cup powdered sugar: Add a delicate sweetness to the crust while helping to tenderize the dough for a light, crumbly texture. Dissolve slightly into the butter and flour, producing a finer mouthfeel in the baked base. Sprinkle evenly to avoid concentrated pockets of sweetness.
- 1/4 teaspoons salt: Enhance overall flavor by balancing sweetness with a subtle savory note, which rounds out the bright lemon and sweet strawberry components. Strengthen gluten slightly when mixed, contributing to a stable crust. Use the specified small amount to avoid an overly salty taste.
- 1/2 cups salted butter, cut into tablespoon pieces: Provide rich fat that binds the crust ingredients together and creates a tender, flaky texture when cut into the flour. Contribute a buttery flavor that complements the lemon filling and strawberries. Chill briefly if needed to prevent greasiness and help the crust set while baking.
- 1/2 cup fresh lemon juice: Deliver concentrated acidity and bright citrus flavor to the filling, producing the signature tartness of lemonade bars. React with eggs and sugar to set into a custard-like texture when baked. Freshly squeezed juice is recommended for the most vibrant taste.
- 1 teaspoon lemon zest: Offer intense citrus aroma and concentrated lemon flavor that enhances the juice without adding extra liquid. Lift the overall brightness of the bars and provide subtle herbal notes from the peel. Zest sparingly to avoid bitter white pith inclusion.
- 1 heaping cup sliced strawberries: Contribute fresh fruity sweetness and natural moisture that complements lemon while adding texture and color to the filling. Provide light strawberry flavor that pairs well with powdered sugar for visual appeal. Slice evenly to distribute fruit throughout the filling.
- 1 cup granulated sugar: Supply bulk sweetness and help set the lemon custard by dissolving and combining with eggs during baking. Caramelize slightly at the edges for added depth of flavor when baked. Use measured amount to achieve the intended balance of sweet and tart.
- 1/4 cup powdered sugar: Dust over the finished bars to add a soft, snowy garnish and a hint of extra sweetness that contrasts the tart filling. Melt slightly into the surface for an attractive finish and light sweetness in every bite. Apply just before serving to maintain appearance.
- 1/3 cup all-purpose flour: Thicken the lemon filling slightly, contributing to a smoother, more stable custard that holds when sliced. Work with the eggs and sugar to achieve the proper set without becoming rubbery. Sift if necessary to prevent lumps in the filling.
- 1/4 teaspoons salt: Balance flavor in the filling with a tiny savory element that accents the lemon and strawberry sweetness. Help round out the profile without making the mixture noticeably salty. Use the small specified amount to preserve the dessert's sweet-tart character.
- 4 large eggs: Provide rich, silky structure to the lemon custard and help it set when baked, contributing to a firm but tender filling. Add richness and depth that supports the tartness of lemon juice and the sweetness of sugar. Beat thoroughly to incorporate air for a slightly lighter texture.
- 1 large egg yolk: Increase creaminess and body in the filling while adding an extra depth of richness that enhances mouthfeel. Help stabilize the custard and contribute to a luxuriously smooth interior. Incorporate gently to maintain the desired consistency.
- 1 teaspoon vanilla extract: Introduce warm aromatic notes that complement the citrus and strawberry flavors, adding complexity to the filling. Enhance perceived sweetness without adding sugar and tie together the dessert's flavor profile. Add with other wet ingredients for even distribution.
- powdered sugar for serving: Provide a final decorative touch and gentle sweetness when dusted over the finished bars, creating an attractive presentation. Soften slightly on the surface for a delicate finish that contrasts the tangy filling. Apply just before serving to avoid melting into the bars.
Cooking Instructions for Strawberry Lemonade Bars
These directions are straightforward and forgiving, but the little details matter. I like to prepare my pan and ingredients before turning on the oven so everything moves smoothly. Take note of color and texture cues while baking and chilling, because they tell you when the bars are ready.
- Preheat oven to 350 degrees and line a 9×13-inch pan with parchment paper.: You will notice the warm air circulating as the oven approaches temperature, which helps the crust bake evenly. Properly lining the pan prevents sticking and makes lifting the whole slab out simple. If the parchment slips, use a dab of butter at the corners to secure it. Common mistake to avoid, do not skip lining or the crust can adhere to the pan and tear when removed.
- To make crust, combine the flour, powdered sugar and salt in a food processor. Add butter pieces. Pulse until mixture resembles fine crumbs. Press into bottom of parchment lined baking dish.: After pulsing you should see pea sized pieces of butter distributed through the pale flour mixture, and the aroma will turn slightly rich and nutty as the butter breaks down. Press firmly and evenly into the pan so the crust bakes to a uniform thickness. If you press unevenly, some areas will brown faster than others. A failing to chill the dough briefly can cause shrinking while baking.
- Bake for 18 to 20 minutes.: As the crust bakes you will see the edges begin to take on a light golden hue and a faint, toasty butter scent will fill the kitchen. This visual cue means the base is set and will support the filling. Underbaked crust will be soggy once the filling is added, while overbaked crust can become too hard. Keep an eye in the last few minutes to avoid darkening.
- Make the filling while the crust is baking. Using a food processor or blender, process the lemon juice, lemon zest, and strawberries until smooth.: The blender will create a vivid pink mixture that smells simultaneously citrusy and floral. Processing thoroughly gives a uniform texture that bakes into a glossy custard. If the mixture seems watery, pulse briefly and let it settle so you can check the consistency. One trap is blending too long and heating the fruit, which can alter the fresh flavor.
- In a medium bowl, whisk together granulated sugar, powdered sugar, flour and salt. Add eggs and egg yolk and whisk well.: Whisking these dry ingredients with the eggs creates a cohesive base that helps the filling thicken as it bakes. You should feel the mixture smooth out and take on a slightly thicker body. Take care not to over whisk to the point of frothing, because excess air can cause the filling to puff and crack. A common error is adding cold eggs which can cause uneven mixing, so use room temperature eggs if possible.
- Add the strawberry mixture and whisk to blend.: Once combined, the batter will be uniformly pink and will glisten when moved. The scent will be a bright blend of tangy lemon and sweet strawberry . Incorporating the fruit puree ensures a consistent flavor in every bite and prevents pockets of unmixed liquid. Avoid vigorous whisking that traps air, as that can change the custard texture.
- As soon as you take the crust out of the oven, pour the filling on top and return to the oven for another 18 to 20 minutes or until set in the middle.: Pouring while the crust is hot helps the filling adhere and bake evenly. During the second bake watch for the center to appear just set with a slight jiggle when nudged, and the edges should look firmer than the middle. The aroma will amplify with a warm fruity perfume. Overbaking will dry the filling and create cracks, underbaking will leave it runny after chilling, so aim for a slight wobble in the center.
- Cool bars to room temperature and then refrigerate for at least 2 to 3 hours before serving.: Cooling lets the filling finish setting and chilling firms the bars for clean slicing. You will notice the filling lose its glossy sheen as it cools and turn into a custardy texture. Rushing this step is a frequent mistake that results in sloppy slices, so allow the chill time for best results.
- Cut into squares and dust with powdered sugar.: The final step brings visual charm and a soft sweetness on the surface. Use a sharp knife warmed briefly under hot water and wiped dry to get neat edges. Press the powdered sugar through a fine sieve for an even dusting. Cutting too soon can cause crumbling; wait until fully chilled for tidy squares.
Helpful Notes about Strawberry Lemonade Bars
I like to share notes that turn a good batch into a great batch. Below are practical tips I return to every time I make Strawberry Lemonade Bars, covering texture, timing, and presentation so your results are consistent and impressive.
- Secure your parchment: Fold parchment to fit snugly in the pan and use a dab of butter to keep corners from moving, which ensures clean removal of the slab after chilling.
- Use fresh lemon juice: Fresh squeezed lemon juice provides brighter acidity and essential oils from zest that bottled juice lacks, improving both aroma and flavor balance.
- Pulse don’t overwork the crust: Stop pulsing when pea sized butter pieces remain, this creates the tender, flaky texture you want once baked.
- Check for a slight wobble: When the filling is done, the center should jiggle minimally; this prevents a dry, overcooked texture after chilling.
- Warm knife for clean cuts: Dip a sharp knife in hot water, dry it, then slice to produce smooth, attractive squares without cracking the filling.
Perfect Matches for Strawberry Lemonade Bars
These bars pair beautifully with light accompaniments and work well for casual or festive occasions. Below I outline serving ideas, storage tips, and occasions where these bars really shine. Use the list to mix and match ways to present them at gatherings.
- Serve chilled with fresh berries: A few whole strawberries on the side accentuate the filling and add color for summer brunch or afternoon tea.
- Pair with iced tea or lemonade: Complement the citrus notes by offering a simple beverage station for backyard gatherings.
- Great for potlucks and picnics: Because they travel well when chilled, these bars are ideal for laid back events where you want something that slices neatly and shares easily.
- Make ahead for parties: Bake a day early and dust with powdered sugar just before serving to save time on the event day.
- Seasonal appeal: Highlight them during summer when strawberries are peak ripe, they also bring a bright touch to spring gatherings.
- Storage tips: Keep covered in the refrigerator for up to three days, or freeze cut squares between layers of parchment for longer storage.
FAQ
Conclusion
What makes these bars special is their perfect balance of tart lemon and sweet strawberry wrapped in a tender, buttery crust, giving you a dessert that feels light and celebratory. I encourage you to try this recipe for your next warm weather gathering because it is simple to make, travels well, and always receives compliments. Enjoy the bright flavors, and don’t be surprised if they become your new summer go to.
Strawberry Lemonade Bars
Equipment
- Food processor or blender
- 9×13-inch pan
- Parchment Paper
- Mixing Bowls
- Whisk
Ingredients
- 1 1/4 cups all-purpose flour Provide structure and bulk to the crust, creating a tender but sturdy base that holds the filling. Offer a neutral flavor that balances the tartness of the lemon and sweetness of the strawberries. Work best when measured accurately for proper texture.
- 1/4 cup powdered sugar Add a delicate sweetness to the crust while helping to tenderize the dough for a light, crumbly texture. Dissolve slightly into the butter and flour, producing a finer mouthfeel in the baked base. Sprinkle evenly to avoid concentrated pockets of sweetness.
- 1/4 teaspoons salt Enhance overall flavor by balancing sweetness with a subtle savory note, which rounds out the bright lemon and sweet strawberry components. Strengthen gluten slightly when mixed, contributing to a stable crust. Use the specified small amount to avoid an overly salty taste.
- 1/2 cups salted butter, cut into tablespoon pieces Provide rich fat that binds the crust ingredients together and creates a tender, flaky texture when cut into the flour. Contribute a buttery flavor that complements the lemon filling and strawberries. Chill briefly if needed to prevent greasiness and help the crust set while baking.
- 1/2 cup fresh lemon juice Deliver concentrated acidity and bright citrus flavor to the filling, producing the signature tartness of lemonade bars. React with eggs and sugar to set into a custard-like texture when baked. Freshly squeezed juice is recommended for the most vibrant taste.
- 1 teaspoon lemon zest Offer intense citrus aroma and concentrated lemon flavor that enhances the juice without adding extra liquid. Lift the overall brightness of the bars and provide subtle herbal notes from the peel. Zest sparingly to avoid bitter white pith inclusion.
- 1 heaping cup sliced strawberries Contribute fresh fruity sweetness and natural moisture that complements lemon while adding texture and color to the filling. Provide light strawberry flavor that pairs well with powdered sugar for visual appeal. Slice evenly to distribute fruit throughout the filling.
- 1 cup granulated sugar Supply bulk sweetness and help set the lemon custard by dissolving and combining with eggs during baking. Caramelize slightly at the edges for added depth of flavor when baked. Use measured amount to achieve the intended balance of sweet and tart.
- 1/4 cup powdered sugar Dust over the finished bars to add a soft, snowy garnish and a hint of extra sweetness that contrasts the tart filling. Melt slightly into the surface for an attractive finish and light sweetness in every bite. Apply just before serving to maintain appearance.
- 1/3 cup all-purpose flour Thicken the lemon filling slightly, contributing to a smoother, more stable custard that holds when sliced. Work with the eggs and sugar to achieve the proper set without becoming rubbery. Sift if necessary to prevent lumps in the filling.
- 1/4 teaspoons salt Balance flavor in the filling with a tiny savory element that accents the lemon and strawberry sweetness. Help round out the profile without making the mixture noticeably salty. Use the small specified amount to preserve the dessert's sweet-tart character.
- 4 large eggs Provide rich, silky structure to the lemon custard and help it set when baked, contributing to a firm but tender filling. Add richness and depth that supports the tartness of lemon juice and the sweetness of sugar. Beat thoroughly to incorporate air for a slightly lighter texture.
- 1 large egg yolk Increase creaminess and body in the filling while adding an extra depth of richness that enhances mouthfeel. Help stabilize the custard and contribute to a luxuriously smooth interior. Incorporate gently to maintain the desired consistency.
- 1 teaspoon vanilla extract Introduce warm aromatic notes that complement the citrus and strawberry flavors, adding complexity to the filling. Enhance perceived sweetness without adding sugar and tie together the dessert's flavor profile. Add with other wet ingredients for even distribution.
- powdered sugar for serving Provide a final decorative touch and gentle sweetness when dusted over the finished bars, creating an attractive presentation. Soften slightly on the surface for a delicate finish that contrasts the tangy filling. Apply just before serving to avoid melting into the bars.
Instructions
- Preheat oven to 350 degrees and line a 9×13-inch pan with parchment paper.: You will notice the warm air circulating as the oven approaches temperature, which helps the crust bake evenly. Properly lining the pan prevents sticking and makes lifting the whole slab out simple. If the parchment slips, use a dab of butter at the corners to secure it. Common mistake to avoid, do not skip lining or the crust can adhere to the pan and tear when removed.
- To make crust, combine the flour, powdered sugar and salt in a food processor. Add butter pieces. Pulse until mixture resembles fine crumbs. Press into bottom of parchment lined baking dish.: After pulsing you should see pea sized pieces of butter distributed through the pale flour mixture, and the aroma will turn slightly rich and nutty as the butter breaks down. Press firmly and evenly into the pan so the crust bakes to a uniform thickness. If you press unevenly, some areas will brown faster than others. A failing to chill the dough briefly can cause shrinking while baking.
- Bake for 18 to 20 minutes.: As the crust bakes you will see the edges begin to take on a light golden hue and a faint, toasty butter scent will fill the kitchen. This visual cue means the base is set and will support the filling. Underbaked crust will be soggy once the filling is added, while overbaked crust can become too hard. Keep an eye in the last few minutes to avoid darkening.
- Make the filling while the crust is baking. Using a food processor or blender, process the lemon juice, lemon zest, and strawberries until smooth.: The blender will create a vivid pink mixture that smells simultaneously citrusy and floral. Processing thoroughly gives a uniform texture that bakes into a glossy custard. If the mixture seems watery, pulse briefly and let it settle so you can check the consistency. One trap is blending too long and heating the fruit, which can alter the fresh flavor.
- In a medium bowl, whisk together granulated sugar, powdered sugar, flour and salt. Add eggs and egg yolk and whisk well.: Whisking these dry ingredients with the eggs creates a cohesive base that helps the filling thicken as it bakes. You should feel the mixture smooth out and take on a slightly thicker body. Take care not to over whisk to the point of frothing, because excess air can cause the filling to puff and crack. A common error is adding cold eggs which can cause uneven mixing, so use room temperature eggs if possible.
- Add the strawberry mixture and whisk to blend.: Once combined, the batter will be uniformly pink and will glisten when moved. The scent will be a bright blend of tangy lemon and sweet strawberry . Incorporating the fruit puree ensures a consistent flavor in every bite and prevents pockets of unmixed liquid. Avoid vigorous whisking that traps air, as that can change the custard texture.
- As soon as you take the crust out of the oven, pour the filling on top and return to the oven for another 18 to 20 minutes or until set in the middle.: Pouring while the crust is hot helps the filling adhere and bake evenly. During the second bake watch for the center to appear just set with a slight jiggle when nudged, and the edges should look firmer than the middle. The aroma will amplify with a warm fruity perfume. Overbaking will dry the filling and create cracks, underbaking will leave it runny after chilling, so aim for a slight wobble in the center.
- Cool bars to room temperature and then refrigerate for at least 2 to 3 hours before serving.: Cooling lets the filling finish setting and chilling firms the bars for clean slicing. You will notice the filling lose its glossy sheen as it cools and turn into a custardy texture. Rushing this step is a frequent mistake that results in sloppy slices, so allow the chill time for best results.
- Cut into squares and dust with powdered sugar.: The final step brings visual charm and a soft sweetness on the surface. Use a sharp knife warmed briefly under hot water and wiped dry to get neat edges. Press the powdered sugar through a fine sieve for an even dusting. Cutting too soon can cause crumbling; wait until fully chilled for tidy squares.
Notes
- Secure your parchment: Fold parchment to fit snugly in the pan and use a dab of butter to keep corners from moving, which ensures clean removal of the slab after chilling.
- Use fresh lemon juice: Fresh squeezed lemon juice provides brighter acidity and essential oils from zest that bottled juice lacks, improving both aroma and flavor balance.
- Pulse don’t overwork the crust: Stop pulsing when pea sized butter pieces remain, this creates the tender, flaky texture you want once baked.
- Check for a slight wobble: When the filling is done, the center should jiggle minimally; this prevents a dry, overcooked texture after chilling.
- Warm knife for clean cuts: Dip a sharp knife in hot water, dry it, then slice to produce smooth, attractive squares without cracking the filling.