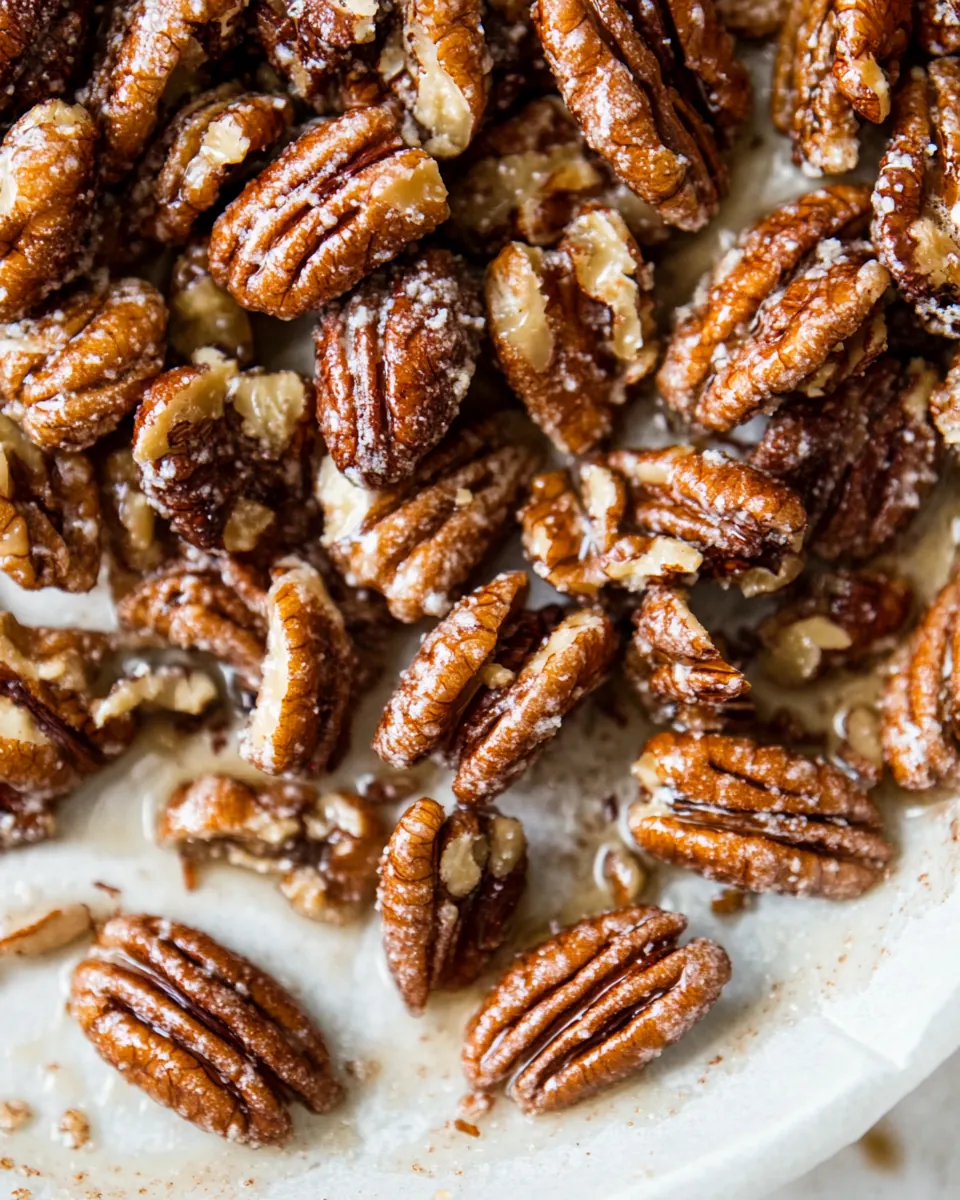
Maple Pecans
Maple Pecans have been a tiny ritual for me whenever the weather turns crisp and the kitchen smells like warm sugar and toasted nuts.
I remember the first time I made these Maple Pecans for a small gathering, balancing a bowl on my knee while chatting with friends, the syrup glazing each pecan and sending a buttery steam into the air. The recipe felt like an easy little magic trick, transforming plain pecan halves into something irresistible with just a few pantry players. Over the years I refined the timing and the way the pecans rest, learning when to pull them from heat so they keep a glossy coat without getting too sticky.
Now I make Maple Pecans for holidays, a midweek treat, and when I need a thoughtful edible gift. There is comfort in the simple process, and I like to tell guests the story behind each batch: butter melting, brown sugar softening, and that warm umbrella of maple aroma that announces they are nearly done. I find the combination feels nostalgic, like the kitchen is wrapping itself in a cozy blanket. Each time I taste one, I tune into the crisp snap of the toasted nut and the lingering maple notes, and I think about the people I’ll share them with next.
Recipe Snapshot
22 mins
10 mins
12 mins
Easy
200 kcal
American
Gluten-Free, Low FODMAP
Desserts
Baking sheet, Parchment paper or Silpat, Microwave safe bowl
Why This Maple Pecans Shines
Buttery maple flavor that feels upscale
I love how a tiny amount of butter and pure maple syrup turn ordinary pecan halves into something that tastes richer than the sum of its parts. The brown sugar gives depth, while the maple brightens the finish, so every bite feels both cozy and sophisticated.
Fast and approachable process
One of the nicest things about this recipe is how quickly it comes together. I can go from bowl to oven in minutes, and the hands on work is minimal. That makes Maple Pecans perfect for last minute hostess gifts or when I need a quick snack with personality.
Versatile for gifting and snacking
I often portion these into small jars for neighbors, and they always look and taste like something special. The texture holds well in a sealed container, so the crunch stays present for a few days, which makes them ideal for prepping ahead.
Textural contrast and aroma
The toasted exterior of the pecan becomes delightfully crisp, while the sticky-sweet coating gives a slight chew before the snap. The aroma of warm maple and butter while they roast is one of my favorite kitchen signals that something comforting is on the way.
Reliable technique for consistent results
I appreciate that the method is forgiving. Even if the maple syrup does not completely dissolve into the sugar, the oven finishes the job, and the end result remains delicious. That consistent success rate is why I keep this recipe in heavy rotation.
Ingredients to Make Maple Pecans
These ingredients are simple and purposeful. Each plays a distinct role: the pecan halves provide crunch and richness, the butter supplies fat and toasty aroma, the brown sugar adds caramel depth, pure vanilla extract lifts the flavor, pure maple syrup brings the signature sweetness, and a pinch of salt balances everything. Together they create a glossy, crunchy snack that tastes more complex than the short list implies.
- 2 cups pecan halves: Toast gently to deepen flavor and bring out natural oils before coating with maple glaze; provides crunch and visual appeal in the finished snack. Helps carry and balance sweet and buttery coatings while adding textural contrast to each bite.
- 2 tablespoons butter: Melt slowly to create a smooth, rich base that binds sugar and maple syrup into a glossy coating for the pecans. Contributes creamy mouthfeel and enhances overall richness without overpowering the nutty profile.
- 2 tablespoons (packed) brown sugar: Dissolve into the butter and maple syrup mixture to supply caramel-like sweetness and a hint of molasses depth; helps the glaze adhere to the nut surfaces. Packed brown sugar also adds moisture which prevents the coating from becoming too dry or brittle.
- 1 teaspoon pure vanilla extract: Add sparingly to brighten and round out the sweet components with warm, aromatic notes; enhances overall flavor complexity. Pure vanilla helps amplify the perception of sweetness and complements the maple and brown sugar layers.
- 3 tablespoons pure maple syrup: Stir in as the primary sweetener and flavor star, providing distinct maple aroma and syrupy viscosity that helps create a shiny glaze. Pure maple syrup contributes nuanced sweetness and characteristic woody, caramelized notes that define the recipe.
- Pinch of salt: Sprinkle minimally to balance sweetness and enhance other flavors through subtle contrast; helps prevent the final product from tasting cloying. A pinch of salt also intensifies the nutty and maple notes while smoothing overall flavor.
Instructions for Maple Pecans
This method is straightforward and very forgiving, and I like to talk you through what to watch for. Small cues like smell and texture tell you when to move on. Below I expand each step with sensory notes, troubleshooting, and the reasons behind the technique so you can feel confident as you go.
- Preheat oven to 400 F and move the rack to the middle position. Line a baking sheet with parchment paper or aSilpat non-stick mat.: Heat will create an immediate toasting reaction and a deep, nutty aroma as the sugars caramelize, so you should notice warm, toasty notes soon after the tray goes in. The visual cue is a slowly deepening color on the nut edges, not a rapid darkening. If your oven runs hot, rotate the tray earlier because quick browning can mean burnt edges. Avoid skipping the liner because the glaze will stick and make cleanup and even cooking harder.
- Add the butter and brown sugar to a microwave-safe bowl and melt the butter. You can do this step on the stove too if you prefer. Give it a good stir.: The bowl will smell rich and caramel like as the butter and brown sugar combine, and the mixture should look glossy and free of large sugar clumps. The melt helps the sugar begin dissolving so the glaze will be smooth, and the butter prevents the sugars from drying into a grainy mess. One mistake is overheating, which can separate the fat; if that happens, let it cool slightly and whisk until cohesive.
- Add the vanilla extract, maple syrup, and salt to the bowl. Continue to stir it until the sugar has pretty much dissolved (ok if it's not perfect).: The aroma will lift instantly when you add the vanilla extract and pure maple syrup , producing a warm floral-maple scent. The mixture should thin out as the syrup blends in, creating a pourable glaze. It does not need to be perfectly smooth, because oven heat will finish dissolving the remaining granules. A common misstep is stirring too aggressively and creating froth, which can burn faster in the oven.
- Add the pecans to the bowl and mix until they're coated.: When the pecan halves meet the glaze you will see each nut become slick and glossy, and the kitchen will fill with toasted maple notes. Coating them thoroughly ensures every piece gains a crunchy shell when roasted, and it prevents clumping on the baking sheet. If you pile them too closely, they may steam instead of toast, so spread them out promptly after coating.
- Spread the pecans out in an even layer on the lined baking sheet and bake for 8 minutes. If you're concerned about them cooking evenly on both sides, stir them halfway. I don't think it's necessary and skip this step, however.: As they roast the sugars will bubble slightly and the pecans will shift from pale to a warm golden brown, releasing a toasty fragrance and a low sizzling sound as the glaze caramelizes. The 8 minute timing gives caramelization without burning, but ovens vary, so check for even color. Avoid leaving them unattended because sugars can go from golden to bitter quickly.
- Once they're done roasting, let them cool for a few minutes, then add them to a ZipLoc or sealed container to stay fresh for a few days.: Cooling lets the glaze set into a crisp shell, and during this brief rest you will hear the snap of the coating firming. Transfer to an airtight container only after they are cool, otherwise trapped steam will soften the glaze and ruin the crunch. A frequent mistake is sealing them too soon, which produces sticky, rather than crisp, nuts.
Recipe Notes about Maple Pecans
These notes reflect the small details that make a difference when you prepare Maple Pecans. A handful of adjustments can change texture, shelf life, and presentation, so I like to keep them handy when I cook. Read through and pick the tips that match how you plan to use the nuts, whether for gifting or snacking.
- Storage tip Store fully cooled Maple Pecans in an airtight container at room temperature for up to four days to keep them crisp.
- Sweetness control If you prefer a more subtle maple note, reduce the pure maple syrup by half a tablespoon and increase the brown sugar slightly to maintain texture.
- Even coating Toss the pecans thoroughly in the glaze so each piece has a thin, even layer which promotes consistent caramelization.
- Sheet choice Use a rimmed baking sheet so the sugary glaze cannot drip onto the oven floor and smoke, and line it for easier cleanup.
- Batch scaling This recipe scales well; when increasing amounts, spread the nuts across multiple trays so they roast evenly instead of steaming.
Side Dish Ideas for Maple Pecans
These Maple Pecans can complement many dishes and occasions. They work as a snack, a salad topper, or a thoughtful gift during fall gatherings. Below I outline pairing ideas, serving styles, and storage notes to help you present them beautifully.
- Salad topper Scatter cooled Maple Pecans over a spinach or mixed green salad for crunch and sweet contrast, especially with a tangy vinaigrette.
- Cheese board accent Use them alongside soft cheeses and fruit on a board to add texture and maple notes, great for casual entertaining.
- Gift jars Portion into small sealed jars with a ribbon for a seasonal edible gift that keeps a few days at room temperature.
- Snack bowl Serve in a small bowl during movie night or as a pre dinner nibble, they pair well with sparkling water or non alcoholic cider.
- Occasions These are ideal for fall gatherings, holiday prep, or anytime you want an easy, refined snack to share with guests.
- Storage and reheating Keep sealed at room temperature, and refresh briefly at low oven heat for a minute if they lose some crispness, watching closely to avoid burning.
FAQ
Conclusion
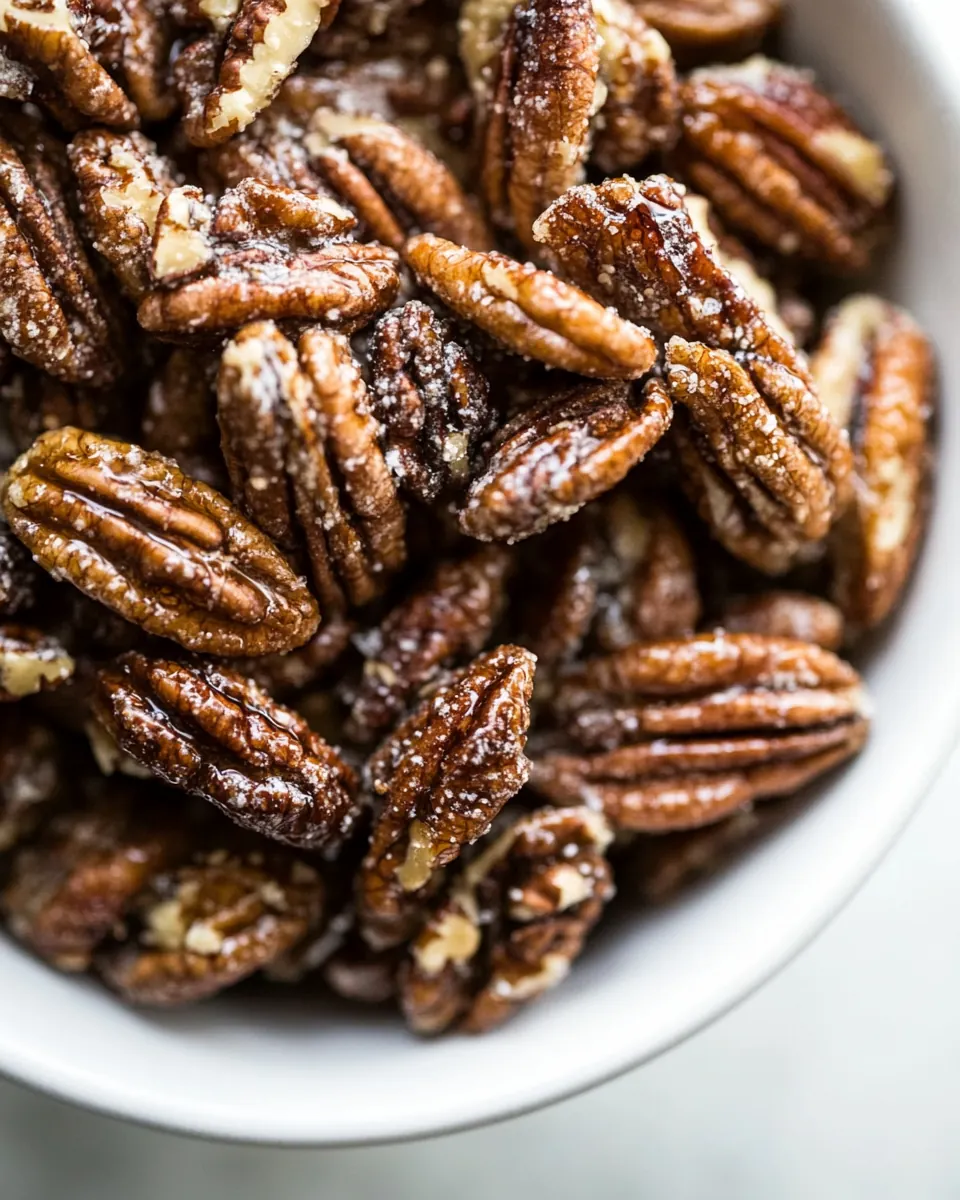
These Maple Pecans stand out because they combine simple ingredients into a snack that feels indulgent and thoughtful. The balance of buttery richness, brown sugar depth, and clear maple brightness produces a nut with crisp texture and warm aroma that works for gifting or quiet snacking. Give them a try the next time you want something quick to prepare that still makes an impression, and enjoy the small ritual of stirring, roasting, and sharing.
Maple Pecans
Equipment
- Baking Sheet
- Parchment paper or Silpat
- Microwave-safe Bowl
Ingredients
- 2 cups pecan halves Toast gently to deepen flavor and bring out natural oils before coating with maple glaze; provides crunch and visual appeal in the finished snack. Helps carry and balance sweet and buttery coatings while adding textural contrast to each bite.
- 2 tablespoons butter Melt slowly to create a smooth, rich base that binds sugar and maple syrup into a glossy coating for the pecans. Contributes creamy mouthfeel and enhances overall richness without overpowering the nutty profile.
- 2 tablespoons (packed) brown sugar Dissolve into the butter and maple syrup mixture to supply caramel-like sweetness and a hint of molasses depth; helps the glaze adhere to the nut surfaces. Packed brown sugar also adds moisture which prevents the coating from becoming too dry or brittle.
- 1 teaspoon pure vanilla extract Add sparingly to brighten and round out the sweet components with warm, aromatic notes; enhances overall flavor complexity. Pure vanilla helps amplify the perception of sweetness and complements the maple and brown sugar layers.
- 3 tablespoons pure maple syrup Stir in as the primary sweetener and flavor star, providing distinct maple aroma and syrupy viscosity that helps create a shiny glaze. Pure maple syrup contributes nuanced sweetness and characteristic woody, caramelized notes that define the recipe.
- Pinch of salt Sprinkle minimally to balance sweetness and enhance other flavors through subtle contrast; helps prevent the final product from tasting cloying. A pinch of salt also intensifies the nutty and maple notes while smoothing overall flavor.
Instructions
- Preheat oven to 400 F and move the rack to the middle position. Line a baking sheet with parchment paper or aSilpat non-stick mat.: Heat will create an immediate toasting reaction and a deep, nutty aroma as the sugars caramelize, so you should notice warm, toasty notes soon after the tray goes in. The visual cue is a slowly deepening color on the nut edges, not a rapid darkening. If your oven runs hot, rotate the tray earlier because quick browning can mean burnt edges. Avoid skipping the liner because the glaze will stick and make cleanup and even cooking harder.
- Add the butter and brown sugar to a microwave-safe bowl and melt the butter. You can do this step on the stove too if you prefer. Give it a good stir.: The bowl will smell rich and caramel like as the butter and brown sugar combine, and the mixture should look glossy and free of large sugar clumps. The melt helps the sugar begin dissolving so the glaze will be smooth, and the butter prevents the sugars from drying into a grainy mess. One mistake is overheating, which can separate the fat; if that happens, let it cool slightly and whisk until cohesive.
- Add the vanilla extract, maple syrup, and salt to the bowl. Continue to stir it until the sugar has pretty much dissolved (ok if it's not perfect).: The aroma will lift instantly when you add the vanilla extract and pure maple syrup , producing a warm floral-maple scent. The mixture should thin out as the syrup blends in, creating a pourable glaze. It does not need to be perfectly smooth, because oven heat will finish dissolving the remaining granules. A common misstep is stirring too aggressively and creating froth, which can burn faster in the oven.
- Add the pecans to the bowl and mix until they're coated.: When the pecan halves meet the glaze you will see each nut become slick and glossy, and the kitchen will fill with toasted maple notes. Coating them thoroughly ensures every piece gains a crunchy shell when roasted, and it prevents clumping on the baking sheet. If you pile them too closely, they may steam instead of toast, so spread them out promptly after coating.
- Spread the pecans out in an even layer on the lined baking sheet and bake for 8 minutes. If you're concerned about them cooking evenly on both sides, stir them halfway. I don't think it's necessary and skip this step, however.: As they roast the sugars will bubble slightly and the pecans will shift from pale to a warm golden brown, releasing a toasty fragrance and a low sizzling sound as the glaze caramelizes. The 8 minute timing gives caramelization without burning, but ovens vary, so check for even color. Avoid leaving them unattended because sugars can go from golden to bitter quickly.
- Once they're done roasting, let them cool for a few minutes, then add them to a ZipLoc or sealed container to stay fresh for a few days.: Cooling lets the glaze set into a crisp shell, and during this brief rest you will hear the snap of the coating firming. Transfer to an airtight container only after they are cool, otherwise trapped steam will soften the glaze and ruin the crunch. A frequent mistake is sealing them too soon, which produces sticky, rather than crisp, nuts.
Notes
- Storage tip Store fully cooled Maple Pecans in an airtight container at room temperature for up to four days to keep them crisp.
- Sweetness control If you prefer a more subtle maple note, reduce the pure maple syrup by half a tablespoon and increase the brown sugar slightly to maintain texture.
- Even coating Toss the pecans thoroughly in the glaze so each piece has a thin, even layer which promotes consistent caramelization.
- Sheet choice Use a rimmed baking sheet so the sugary glaze cannot drip onto the oven floor and smoke, and line it for easier cleanup.
- Batch scaling This recipe scales well; when increasing amounts, spread the nuts across multiple trays so they roast evenly instead of steaming.