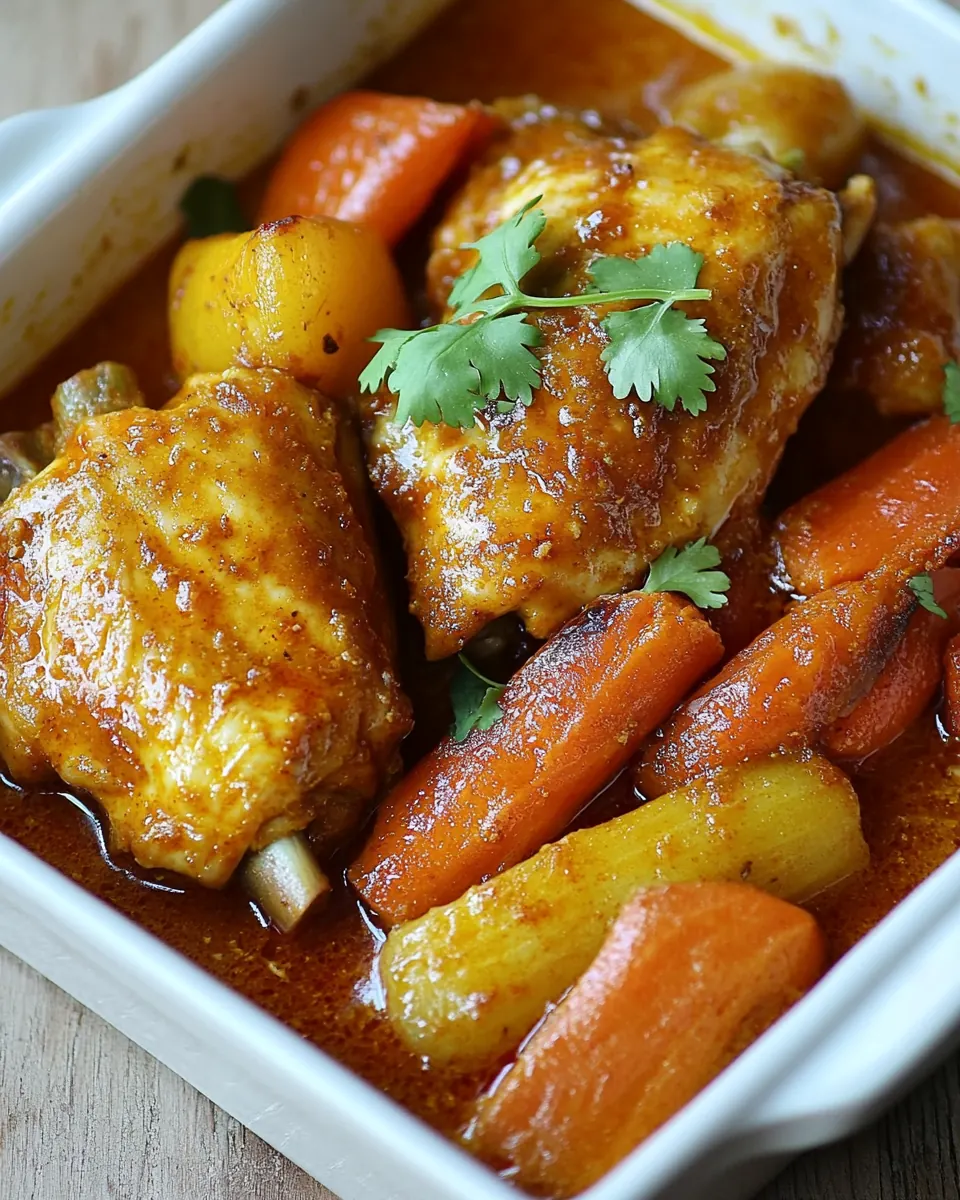
Coconut Harissa Curry Braised Chicken with Root Vegetables
Coconut Harissa Curry Braised Chicken with Root Vegetables started as a weeknight rescue for me the first time I made it, when a sudden cold snap had me searching my pantry for bold flavors and easy comfort. I grabbed a can of coconut milk, a jar of harissa, and the chicken in my fridge, and what followed felt like a tiny feast unfolding in one skillet. The aroma filled the kitchen, and I knew this recipe would become one I reach for when I want something soulful but not fussy.
I remember standing at the stove, watching the chicken sizzle as the skin crisped, while the root vegetables softened and soaked up the spiced, creamy sauce. That moment when I lifted the lid and the steam hit my face was pure satisfaction. Over time I tweaked small things, but the core of this dish stayed the same, a simple technique that delivers big flavor and cozy texture.
Recipe Snapshot
55 mins
15 mins
40 mins
Medium
450 kcal
American
Gluten-Free, Low FODMAP
Dinner
Cast iron skillet, Blender
Why We Love This Coconut Harissa Curry Braised Chicken with Root Vegetables
Bold, layered flavor in one pan
I love how the blend of coconut milk, harissa, and curry powder creates heat, warmth, and creaminess that are balanced rather than one dimensional. I’m drawn to recipes that build flavor quickly, and this one does that on the stovetop with a few smart moves.
Comforting textures that everyone enjoys
The combination of crispy chicken skin and tender root vegetables gives you contrast in every bite. I find friends and family keep coming back for second helpings because it feels hearty and homey, yet a bit elevated by the sauce.
Weeknight friendly, yet special enough for guests
I often make this when I want something that reads like a dinner party dish but comes together with minimal fuss. The technique is straightforward, and you can chat with guests while the dish simmers, which I appreciate when I’m hosting.
Hands off once it simmers
After a quick sear and a short saute, the recipe mostly requires patience, not babysitting. That gentle simmer lets the flavors marry while you get other things done, and I love food that rewards a little patience.
Flexible and forgiving
I like that the vegetables soak up the sauce and adapt to what you have on hand. The method is forgiving, so if your skillet is a touch crowded or you simmer a bit longer, the dish still turns out comforting and delicious.
Recipe Ingredients for Coconut Harissa Curry Braised Chicken with Root Vegetables
These ingredients work together to create a balance of spice, creaminess, and earthy sweetness. The coconut milk brings richness and body, the harissa provides warm heat and aromatic depth, and the curry powder ties it with familiar spice notes. The chicken gives the dish substance, while the root vegetables add texture and a mellow sweetness that soaks up the sauce.
- 1 (14-ounce) can full-fat coconut milk: Adds rich, creamy texture and a mildly sweet coconut flavor that balances spicy harissa; provides a silky sauce body and contributes fat for braising that keeps chicken moist.
- 2/3 cup mild harissa paste: Lends warm, aromatic heat and North African flavor complexity; disperses into the coconut milk to create the curry’s spicy backbone and seasons both chicken and vegetables evenly.
- 1 tablespoon curry powder: Introduces earthy, warm spice notes and a hint of bitterness that deepen the curry profile; blends with harissa and coconut milk to round out the dish’s savory character.
- 1/4 teaspoons ea salt: Seasoning as a base saline component to enhance overall flavors; ensures proper balance so the spices and coconut milk don’t taste flat or overly sweet.
- 2 tablespoons grapeseed or olive oil: Provides a neutral, high-heat cooking fat for browning and searing chicken; helps develop fond on the pan that boosts depth in the braising liquid.
- 3 pounds bone-in skin-on chicken pieces: Supplies rich flavor from bone and skin, with collagen that enriches the braising liquid; sears to create color and then cooks slowly to absorb the curry sauce.
- 1 large parsnip peeled and chopped into 2-inch pieces: Adds natural sweetness and an earthy, slightly nutty flavor while holding shape during braising; soaks up curry flavors and contributes firm texture contrast to the chicken.
- 1 large carrot peeled and chopped into 2-inch pieces: Contributes bright sweetness and tender texture when braised; enhances visual color contrast and adds a classical root vegetable flavor to complement spices.
- 1 small sweet potato peeled and chopped into 2-inch pieces: Provides soft, sweet, starchy richness that breaks down slightly in the braise; helps thicken the sauce and adds comforting body to the finished curry.
Preparation Steps for Coconut Harissa Curry Braised Chicken with Root Vegetables
These steps guide you through building layers of flavor from blending the sauce to searing the chicken and finishing the braise. Move confidently, keep an eye on visual cues, and enjoy the smells as the dish comes together.
- Add the coconut milk, harissa paste, curry powder and salt to a blender and blend until smooth. Set aside until ready to use.: The first thing you will notice is the heady aroma as the harissa and curry powder break down into the coconut milk , releasing fragrant oils that lift immediately. The texture should be velvety, which helps the sauce cling to the chicken and vegetables later. Listen for a steady hum of the blender as the mixture homogenizes, and watch for a uniform color, no streaks of paste. This matters because an even sauce ensures consistent flavor in every bite. A common mistake is underblending, leaving pockets of paste that can burn or create uneven spice; blend until fully smooth and scrape the sides once if needed.
- Heat the oil over medium-high in a large (10 to 12-inch) cast iron skillet.: As the oil warms you should see a thin ripple across the surface and feel a slight shimmer when you hold your hand a safe distance above the pan. The pan should be hot enough that a drop of water sizzles and evaporates quickly. Preheating properly sets the stage for a good sear on the chicken , which locks in juices and forms flavorful browned bits. If the oil smokes heavily you have it too hot, so reduce the heat a touch. A common mistake is adding chicken to a cold pan, which prevents browning and leaves the skin soggy instead of crisp.
- Place chicken pieces on the hot skillet skin-side down. Sear 2 to 3 minutes, until skin is golden brown and crispy. Carefully flip and cook an additional 2 to 3 minutes – do not cook the chicken through. Place seared chicken on a plate and set aside.: You will hear a vigorous sizzle the instant the chicken hits the pan, and the sound will morph into a steady crackle as the skin renders and crisps. Watch for the edges of the skin turning golden brown, and resist moving the pieces too soon, or they will not develop a proper crust. This step adds texture and flavor through the Maillard reaction, which deepens the overall taste of the braise. A typical error is overcrowding the pan causing steaming instead of searing; if your skillet is too full, cook in batches so each piece has space.
- Reduce the heat to medium and add the root vegetables to the hot skillet. Saute, stirring frequently for 3 minutes.: The visual cue here is clear golden to deep golden color on the skin, and the sound will quiet slightly as moisture is driven away. After flipping, the underside will gain color but should not be cooked to doneness because the simmer will finish the job. This partial cooking prevents dry meat and ensures the thighs end juicy. Avoid the mistake of cooking through at this stage, which yields tough chicken after braising.
- Place the seared chicken pieces back into the skillet with the vegetables. Pour the coconut-harissa sauce over everything and maneuver the chicken and vegetables around so that everything is covered and in a single layer. Bring to a gentle boil, reduce heat to a simmer and cover. Cook for 30 to 35 minutes or until thighs reach 165 degrees F internal temperature and veggies are cooked through.: As you move the pieces off the heat you will still feel residual warmth and see the browned fond in the skillet. Resting them briefly prevents overcooking while you prepare the vegetables and helps you manage space. The fond left in the pan is valuable for flavoring the sauce later, so do not scrape it away. A common oversight is wiping the pan clean, which removes those tasty browned bits that enrich the final sauce.
- Serve with your favorite side dish and enjoy!: When the root vegetables hit the pan they should sizzle gently and begin to smell slightly sweet as their surfaces caramelize. Stir frequently for those initial minutes so they begin to brown in places, which adds complexity to the dish. Doing this builds another layer of flavor before the braise, and helps the vegetables hold their shape through the simmer. Avoid crowding them, which causes steaming, and if needed, do this in batches.
- Saute stirring frequently for 3 minutes: You want the vegetables to develop small golden spots and a faint sweetness on their edges; that scent is a good marker that they are ready. The sound will be a gentle sizzle and the texture should still be firm because they will finish cooking in the sauce. This step matters because these beginnings of caramelization add a deeper profile to the final braise. A typical mistake is skipping this step and adding the sauce to raw vegetables, which can result in a flatter tasting dish.
- Place the seared chicken pieces back into the skillet with the vegetables: When you nestle the chicken among the vegetables you set up even cooking and let flavors mingle before the liquid goes in. The arrangement helps the sauce surround everything and ensures that bones transfer flavor into the braising liquid. If you pile pieces on top of each other the heat will be uneven, so arrange them in a single layer where possible. Do not worry if things are snug, but give each piece some surface contact with the pan for even cooking.
- Pour the coconut harissa sauce over everything and maneuver the chicken and vegetables around so that everything is covered and in a single layer: As the sauce pours, steam will rise with a fragrant mix of spices and coconut. Use a spoon to move pieces gently so the sauce coats skin and vegetables evenly, which helps them braise uniformly. This coating is crucial because the sauce both seasons and tenderizes as it simmers. A frequent slip is pouring and then leaving lumps of sauce; stir lightly to ensure every piece gets sauced.
- Bring to a gentle boil reduce heat to a simmer and cover: Watch for tiny bubbles around the edges indicating a gentle boil, then immediately lower the flame until you see just an occasional soft bubble, that is the true simmer. Covering traps steam which cooks the vegetables and chicken through without drying the meat. This gentle approach yields tenderness and melded flavors. Overly vigorous boiling will toughen proteins and break down the vegetables too much, so regulate the heat carefully.
- Cook for 30 to 35 minutes or until thighs reach 165 degrees F internal temperature and veggies are cooked through: During this time you will smell the sweet and spicy notes deepen, and the sauce will thicken slightly and cling to the ingredients. Check for an internal temperature of 165 degrees F in the thickest part of a thigh, and pierce a vegetable to ensure it yields easily. This timing ensures safety and the right texture, giving you succulent meat and tender roots. A mistake to watch for is assuming visual cues are enough; always check temperature for doneness to avoid over or undercooking.
- Serve with your favorite side dish and enjoy: When you lift the lid the steam will be aromatic and inviting, and the sauce will be glossy. Let the dish rest a few minutes for juices to settle, then plate so each portion gets a balance of chicken , vegetables , and sauce. This final pause lets flavors meld on the plate. Avoid serving it piping hot straight from the pan; a minute of rest will improve texture and make the dish more enjoyable.
Recipe Tips about Coconut Harissa Curry Braised Chicken with Root Vegetables

This dish benefits from small technique-driven touches that amplify flavor and texture. Below you will find practical tips to ensure the best sear, balanced sauce, and perfectly tender vegetables so the final plate feels both comforting and refined.
- Choose full fat coconut milk for the creamiest, most luxurious sauce; light versions can separate and yield a thinner mouthfeel.
- Pat the chicken dry before searing to encourage crisp skin and reduce steaming in the pan.
- Control heat carefully when reducing to a simmer, because a too vigorous boil can toughen the chicken and break down the vegetables into mush.
- Use a heavy skillet like cast iron if you can, as it holds heat and gives consistent searing across the pan surface.
- Taste and adjust salt after blending the sauce and again near the end, since the braise concentrates flavors and may need a final lift.
How to Serve Coconut Harissa Curry Braised Chicken with Root Vegetables
This dish is cozy and adaptable, perfect for family dinners or a relaxed gathering where you want impressive flavor with minimal fuss. Serve it warm so the sauce is silky and the textures contrast pleasingly on the plate.
- Serve over grains like rice or couscous to soak up the sauce and make the meal heartier for dinner.
- Plate family style in the skillet at the center of the table so guests can help themselves and enjoy the aroma and warmth.
- Pair with simple sides such as steamed greens or a crisp salad to add a fresh counterpoint to the rich sauce.
- Occasion friendly for weeknight dinners, small dinner parties, and winter comfort meals where you want something filling and fragrant.
- Storage tips cool completely, refrigerate in an airtight container for up to 3 days, and gently reheat on the stove to keep the chicken juicy.
- Seasonal pairings lean into winter produce since the root vegetables shine this time of year, making it a great cozy winter main.
FAQ
Conclusion
This recipe shines because it balances creamy coconut, warm harissa heat, and tender braised chicken with sweet root vegetables into a single, comforting skillet meal. I encourage you to try it on a chilly evening when you want bold flavor with minimal fuss. It’s approachable, full of texture, and forgiving, making it an excellent addition to your weeknight rotation or a cozy weekend dinner when you want something that feels a bit special.
Coconut Harissa Curry Braised Chicken with Root Vegetables
Equipment
- Cast-Iron Skillet
- Blender
Ingredients
- 1 (14-ounce) can full-fat coconut milk Adds rich, creamy texture and a mildly sweet coconut flavor that balances spicy harissa; provides a silky sauce body and contributes fat for braising that keeps chicken moist.
- 2/3 cup mild harissa paste Lends warm, aromatic heat and North African flavor complexity; disperses into the coconut milk to create the curry’s spicy backbone and seasons both chicken and vegetables evenly.
- 1 tablespoon curry powder Introduces earthy, warm spice notes and a hint of bitterness that deepen the curry profile; blends with harissa and coconut milk to round out the dish’s savory character.
- 1/4 teaspoons ea salt Seasoning as a base saline component to enhance overall flavors; ensures proper balance so the spices and coconut milk don’t taste flat or overly sweet.
- 2 tablespoons grapeseed or olive oil Provides a neutral, high-heat cooking fat for browning and searing chicken; helps develop fond on the pan that boosts depth in the braising liquid.
- 3 pounds bone-in skin-on chicken pieces Supplies rich flavor from bone and skin, with collagen that enriches the braising liquid; sears to create color and then cooks slowly to absorb the curry sauce.
- 1 large parsnip peeled and chopped into 2-inch pieces Adds natural sweetness and an earthy, slightly nutty flavor while holding shape during braising; soaks up curry flavors and contributes firm texture contrast to the chicken.
- 1 large carrot peeled and chopped into 2-inch pieces Contributes bright sweetness and tender texture when braised; enhances visual color contrast and adds a classical root vegetable flavor to complement spices.
- 1 small sweet potato peeled and chopped into 2-inch pieces Provides soft, sweet, starchy richness that breaks down slightly in the braise; helps thicken the sauce and adds comforting body to the finished curry.
Instructions
- Add the coconut milk, harissa paste, curry powder and salt to a blender and blend until smooth. Set aside until ready to use.: The first thing you will notice is the heady aroma as the harissa and curry powder break down into the coconut milk , releasing fragrant oils that lift immediately. The texture should be velvety, which helps the sauce cling to the chicken and vegetables later. Listen for a steady hum of the blender as the mixture homogenizes, and watch for a uniform color, no streaks of paste. This matters because an even sauce ensures consistent flavor in every bite. A common mistake is underblending, leaving pockets of paste that can burn or create uneven spice; blend until fully smooth and scrape the sides once if needed.
- Heat the oil over medium-high in a large (10 to 12-inch) cast iron skillet.: As the oil warms you should see a thin ripple across the surface and feel a slight shimmer when you hold your hand a safe distance above the pan. The pan should be hot enough that a drop of water sizzles and evaporates quickly. Preheating properly sets the stage for a good sear on the chicken , which locks in juices and forms flavorful browned bits. If the oil smokes heavily you have it too hot, so reduce the heat a touch. A common mistake is adding chicken to a cold pan, which prevents browning and leaves the skin soggy instead of crisp.
- Place chicken pieces on the hot skillet skin-side down. Sear 2 to 3 minutes, until skin is golden brown and crispy. Carefully flip and cook an additional 2 to 3 minutes - do not cook the chicken through. Place seared chicken on a plate and set aside.: You will hear a vigorous sizzle the instant the chicken hits the pan, and the sound will morph into a steady crackle as the skin renders and crisps. Watch for the edges of the skin turning golden brown, and resist moving the pieces too soon, or they will not develop a proper crust. This step adds texture and flavor through the Maillard reaction, which deepens the overall taste of the braise. A typical error is overcrowding the pan causing steaming instead of searing; if your skillet is too full, cook in batches so each piece has space.
- Reduce the heat to medium and add the root vegetables to the hot skillet. Saute, stirring frequently for 3 minutes.: The visual cue here is clear golden to deep golden color on the skin, and the sound will quiet slightly as moisture is driven away. After flipping, the underside will gain color but should not be cooked to doneness because the simmer will finish the job. This partial cooking prevents dry meat and ensures the thighs end juicy. Avoid the mistake of cooking through at this stage, which yields tough chicken after braising.
- Place the seared chicken pieces back into the skillet with the vegetables. Pour the coconut-harissa sauce over everything and maneuver the chicken and vegetables around so that everything is covered and in a single layer. Bring to a gentle boil, reduce heat to a simmer and cover. Cook for 30 to 35 minutes or until thighs reach 165 degrees F internal temperature and veggies are cooked through.: As you move the pieces off the heat you will still feel residual warmth and see the browned fond in the skillet. Resting them briefly prevents overcooking while you prepare the vegetables and helps you manage space. The fond left in the pan is valuable for flavoring the sauce later, so do not scrape it away. A common oversight is wiping the pan clean, which removes those tasty browned bits that enrich the final sauce.
- Serve with your favorite side dish and enjoy!: When the root vegetables hit the pan they should sizzle gently and begin to smell slightly sweet as their surfaces caramelize. Stir frequently for those initial minutes so they begin to brown in places, which adds complexity to the dish. Doing this builds another layer of flavor before the braise, and helps the vegetables hold their shape through the simmer. Avoid crowding them, which causes steaming, and if needed, do this in batches.
- Saute stirring frequently for 3 minutes: You want the vegetables to develop small golden spots and a faint sweetness on their edges; that scent is a good marker that they are ready. The sound will be a gentle sizzle and the texture should still be firm because they will finish cooking in the sauce. This step matters because these beginnings of caramelization add a deeper profile to the final braise. A typical mistake is skipping this step and adding the sauce to raw vegetables, which can result in a flatter tasting dish.
- Place the seared chicken pieces back into the skillet with the vegetables: When you nestle the chicken among the vegetables you set up even cooking and let flavors mingle before the liquid goes in. The arrangement helps the sauce surround everything and ensures that bones transfer flavor into the braising liquid. If you pile pieces on top of each other the heat will be uneven, so arrange them in a single layer where possible. Do not worry if things are snug, but give each piece some surface contact with the pan for even cooking.
- Pour the coconut harissa sauce over everything and maneuver the chicken and vegetables around so that everything is covered and in a single layer: As the sauce pours, steam will rise with a fragrant mix of spices and coconut. Use a spoon to move pieces gently so the sauce coats skin and vegetables evenly, which helps them braise uniformly. This coating is crucial because the sauce both seasons and tenderizes as it simmers. A frequent slip is pouring and then leaving lumps of sauce; stir lightly to ensure every piece gets sauced.
- Bring to a gentle boil reduce heat to a simmer and cover: Watch for tiny bubbles around the edges indicating a gentle boil, then immediately lower the flame until you see just an occasional soft bubble, that is the true simmer. Covering traps steam which cooks the vegetables and chicken through without drying the meat. This gentle approach yields tenderness and melded flavors. Overly vigorous boiling will toughen proteins and break down the vegetables too much, so regulate the heat carefully.
- Cook for 30 to 35 minutes or until thighs reach 165 degrees F internal temperature and veggies are cooked through: During this time you will smell the sweet and spicy notes deepen, and the sauce will thicken slightly and cling to the ingredients. Check for an internal temperature of 165 degrees F in the thickest part of a thigh, and pierce a vegetable to ensure it yields easily. This timing ensures safety and the right texture, giving you succulent meat and tender roots. A mistake to watch for is assuming visual cues are enough; always check temperature for doneness to avoid over or undercooking.
- Serve with your favorite side dish and enjoy: When you lift the lid the steam will be aromatic and inviting, and the sauce will be glossy. Let the dish rest a few minutes for juices to settle, then plate so each portion gets a balance of chicken , vegetables , and sauce. This final pause lets flavors meld on the plate. Avoid serving it piping hot straight from the pan; a minute of rest will improve texture and make the dish more enjoyable.
Notes
- Choose full fat coconut milk for the creamiest, most luxurious sauce; light versions can separate and yield a thinner mouthfeel.
- Pat the chicken dry before searing to encourage crisp skin and reduce steaming in the pan.
- Control heat carefully when reducing to a simmer, because a too vigorous boil can toughen the chicken and break down the vegetables into mush.
- Use a heavy skillet like cast iron if you can, as it holds heat and gives consistent searing across the pan surface.
- Taste and adjust salt after blending the sauce and again near the end, since the braise concentrates flavors and may need a final lift.