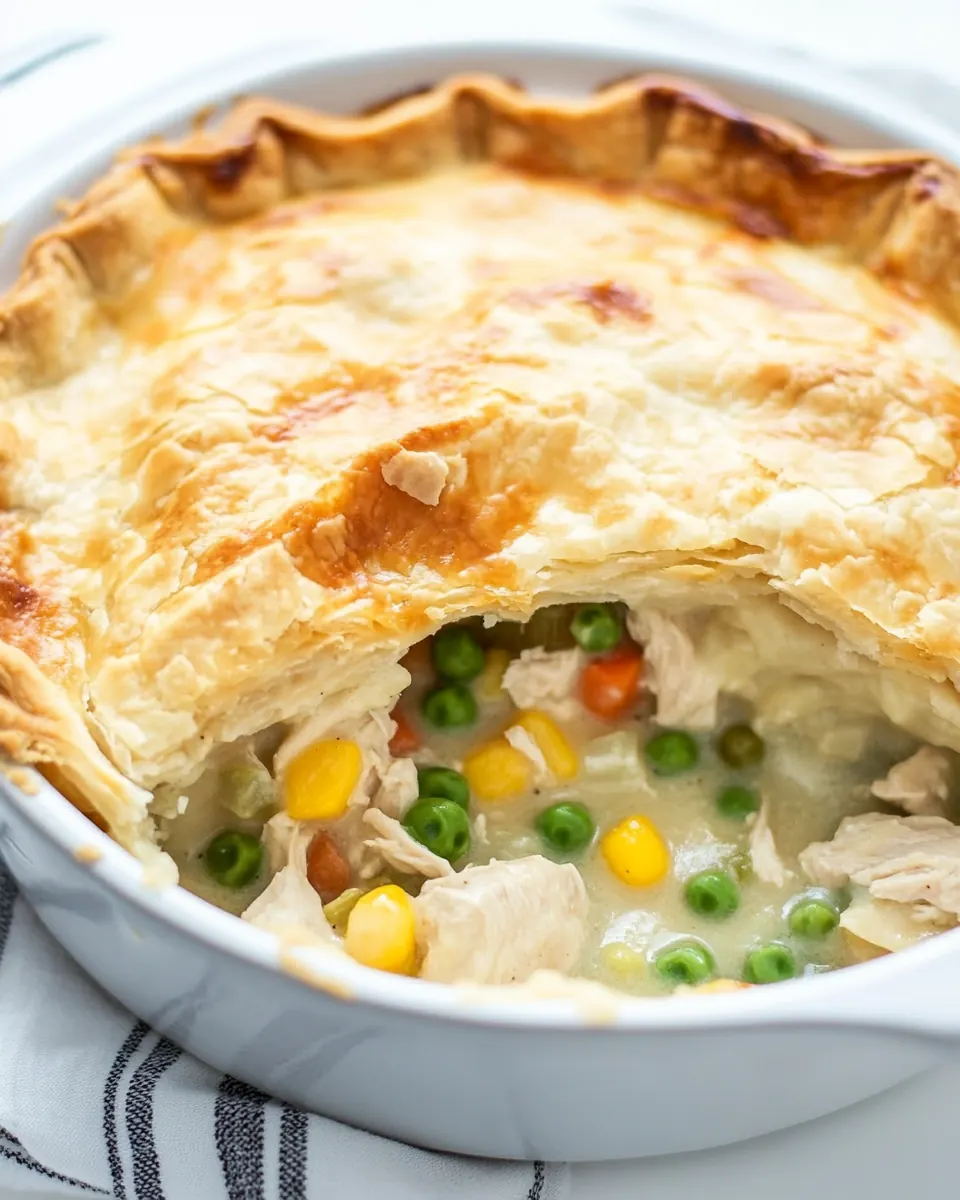
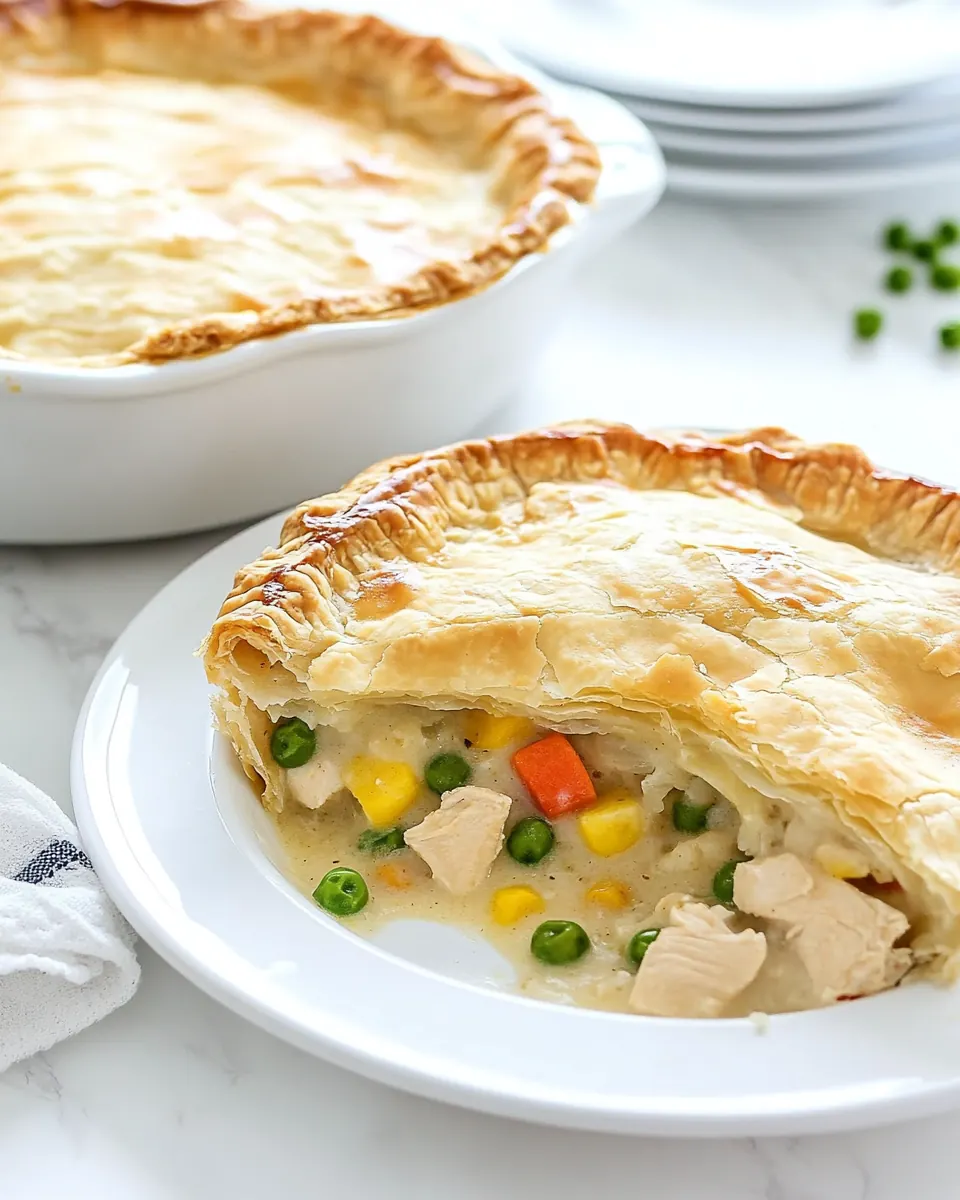
Chicken Pot Pie
Chicken Pot Pie has been my ultimate comfort-food staple on cold evenings, the kind of dish that hugs you from the inside out. I remember the first time I made it for a weeknight dinner when I had just moved into my own apartment, juggling a tiny oven and an even tinier budget. The aroma of bubbling filling and warm pastry filled the hallway, and neighbors knocked asking for a slice, which felt like an odd but welcome affirmation that I could actually cook.
Years later, I still turn to Chicken Pot Pie whenever I want something hearty, familiar, and reliably satisfying. There is a ritual to it that I love, from peeling potatoes to crisping the top crust until it sings with golden color. I find that the combination of creamy broth, tender chicken, and flaky crust creates a balance that always wins over picky eaters and hungry friends.
When winter settles in, this recipe becomes my default weekend project because it rewards patience. I like to make the filling slowly, tasting as I go, and then let the assembled pie rest so it slices cleanly. Serving it straight from the oven, steam rising through the vents in the crust, feels like a small moment of triumph after a busy day.
Recipe Snapshot
1 hr 40 mins
30 mins
70 mins
Medium
350 kcal
American
Gluten-Free, Low FODMAP
Dinner
Large pot, Saucepan, 9-inch pie plate, Oven, Whisk, Baking sheet
What You’ll Enjoy About This Chicken Pot Pie
Hearty, homey satisfaction
I love that Chicken Pot Pie delivers on comfort without feeling heavy in a guilty way. Each forkful has a creamy mouthfeel from the sauce and the bright textures of carrots and peas. It feeds a crowd and still tastes like something you made with extra care.
Simple pantry friendly
One of the biggest wins is how many of the ingredients are pantry and freezer staples. With basics like all purpose flour, milk, and pie crusts on hand, you can pull this together quickly, making it an ideal easy weeknight dinner when time is tight.
Flexible and forgiving
I appreciate that this recipe forgives little mistakes. If the sauce is a touch thin, a few more minutes of simmering thickens it. If the top crust browns too fast, a tent of foil fixes it. That makes cooking less stressful and more enjoyable.
Great for batch cooking and freezing
Because this pie freezes well, I often double the filling and stash one in the freezer for a future night when I need a comforting meal without the prep. It reheats beautifully and retains both texture and flavor after baking from frozen.
Kid approved, guest ready
Finally, Chicken Pot Pie is a universal crowd pleaser. The gentle, savory flavors are approachable for kids while still satisfying for adults. I’ve served it for casual dinners and potlucks, and it always disappears fast.
What’s In This Chicken Pot Pie
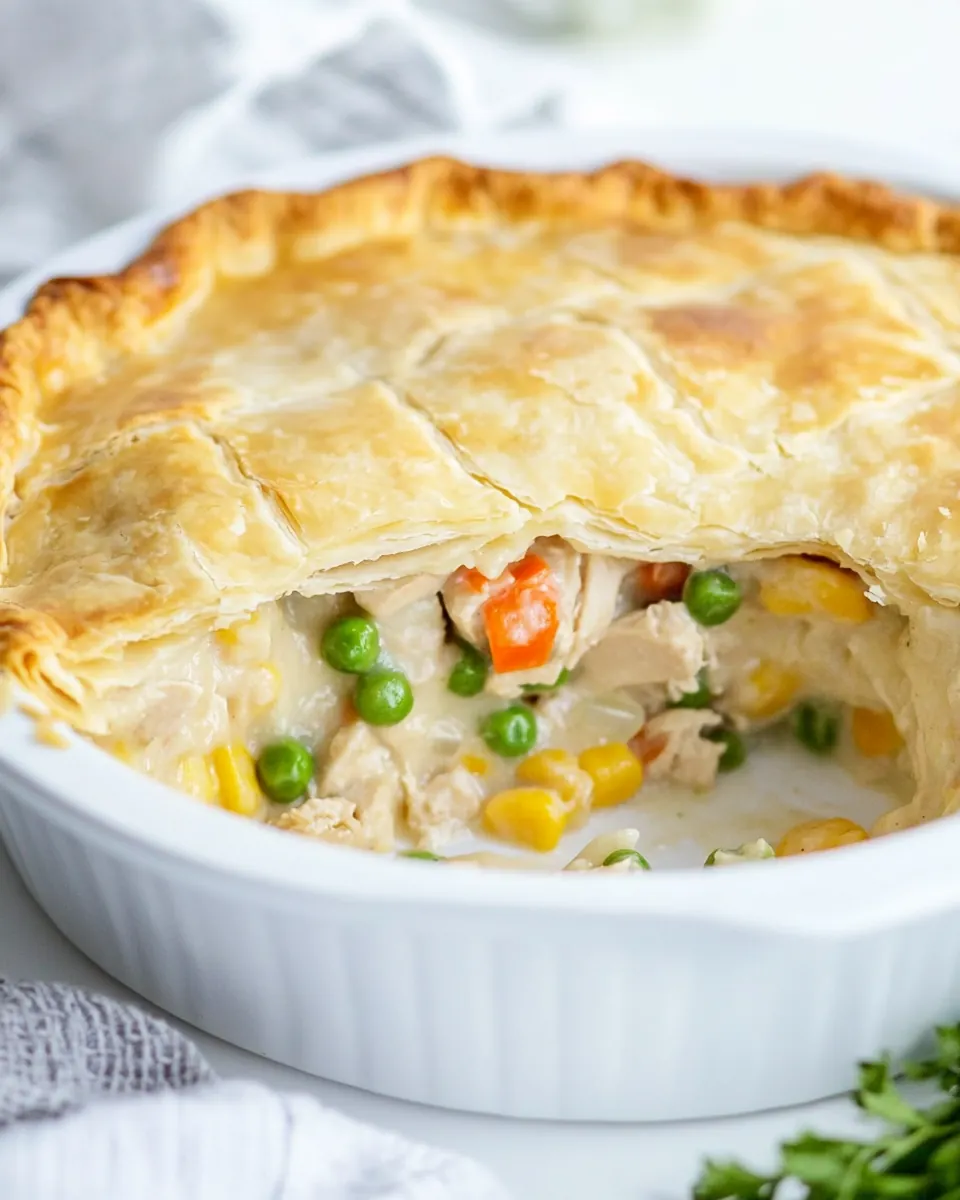
This ingredient list is built around a simple philosophy: reliable building blocks that create a creamy, savory filling wrapped in a flaky crust. The key players are the chicken for substance, starchy potatoes for body, and a roux made from butter and all purpose flour to bind everything into a silky sauce. Vegetables like carrots, peas, and corn add sweetness and color, while the pie crusts provide textural contrast.
- 1 medium russet potato, peeled and cubed: Provide starchy body and absorb flavors when boiled; peeled and cubed to cook evenly and give a creamy texture that complements the filling once fork-tender.
- 2 chicken breasts, cubed (about 2 cups): Add lean protein and hearty texture when cubed; cooks through quickly and contributes savory flavor and substance to the pie filling.
- 1 cup sliced carrots: Contribute natural sweetness and slight firmness when sliced; add color and a tender bite after simmering with the filling.
- 1 cup frozen peas: Offer pops of color and a burst of sweetness; frozen peas thaw and heat rapidly, adding freshness and contrast to the creamy sauce.
- 1/2 cup corn: Supply additional sweet kernels and subtle texture contrast; provide small pockets of sweetness that balance the savory components.
- 2 (9-inch) pie crusts, unbaked: Form the flaky top and bottom shells when unbaked; encase the filling and bake to a golden crust that provides structure and a tender crumb.
- 2 tablespoons unsalted butter: Lend rich flavor and help sauté vegetables when melted; used to start the roux and enrich the sauce for a smooth, silky filling.
- 1/2 cup all-purpose flour: Thicken the filling by forming a roux when combined with melted butter; helps create a creamy, cohesive sauce that coats the ingredients.
- 1 teaspoon garlic salt: Season with a garlicky, savory note; used to enhance overall flavor and complement the chicken and vegetables in the filling.
- 1/4 teaspoon pepper: Season with a mild heat and balance flavors; ground pepper adds subtle warmth and depth without overpowering the dish.
- 2 cups chicken broth: Provide savory liquid and concentrated chicken flavor; used to simmer the vegetables and form the base of the creamy sauce.
- 2/3 cup milk: Add creaminess and mellow dairy richness; combined with broth and roux to create a smooth, velvety sauce for the filling.
- 1 egg: Brush crust edges and top to promote browning and a glossy finish; beaten and applied before baking for color and sealing.
Chicken Pot Pie Instructions
These instructions walk you through making a classic, reliable filling and a perfectly baked crust. I like to move steadily, tasting the sauce and watching textures change, because those cues tell you when things are right. Have your tools and ingredients organized so each step flows naturally.
- Preheat the oven to 375 degrees F.: The air should feel warm and steady in the preheating oven, and you want that consistent heat so the bottom crust begins to set when parbaked. Preheating ensures even baking for a flaky crust and prevents the filling from cooling the oven too much when you place the pie inside. One common mistake is not allowing the oven to fully come to temperature, which can result in a soggy bottom crust and uneven browning. If your oven has hot spots, rotate the pie halfway through baking for even color.
- Place potatoes in a large pot and cover with water. Bring to a boil for 10 minutes, then add chicken, carrots, peas, and corn and boil for 15 minutes more. Remove from the heat, drain the water, and set aside.: You will notice the water move from fast rolling to a gentler boil as it starts to foam, and the potatoes should become tender enough that a fork slides through them without resistance, while the chicken will turn opaque and the vegetables soften but retain some snap. This technique cooks everything evenly together so flavors mingle, and the brief combined simmer helps the chicken release savory juices into the broth. A frequent mistake is overcooking, which makes the vegetables mushy; monitor the texture so they stay slightly firm.
- Place bottom crust in a 9-inch pie plate and bake for 5 minutes.: As the crust warms, its surface will firm slightly, and you may see the edges begin to dry. This parbake step prevents a soggy bottom by giving the lower crust a head start on crisping before the wet filling goes in. If you skip this, steam from the filling can soak through, leaving you with a limp base. Watch carefully so the crust does not start to brown too deeply during this short bake.
- While the crust is baking, cook butter in a saucepan over medium heat. Once butter is melted, stir in flour, garlic salt, and pepper. Slowly whisk in chicken broth and milk and heat until thickened, 5-6 minutes.: The sound shifts from a gentle sizzle to a quiet simmer as you melt the butter , and stirring the flour creates a pale paste that should smell slightly nutty once cooked. Whisking in the chicken broth and milk introduces steam and transforms the roux into a glossy sauce that coats the back of a spoon, indicating the right thickness. This step is crucial because the roux cooks out raw flour flavor and ensures the gravy binds the filling. A common slip is adding the liquid too quickly, which causes lumps; go slow and whisk continuously for a smooth finish.
- Remove bottom crust from the oven and add chicken and veggies to the crust. Pour the broth mixture over the chicken and veggies.: At this point the smell should be deeply savory, with a light creaminess lifting the aroma. The filling will glisten as you mound it into the parbaked shell, and the broth mixture pours in to coat the pieces without pooling excessively, showing the thickness is correct. The reason this layering matters is it helps suspend the ingredients so slices hold together after baking. Avoid packing the filling too tightly, which can cause uneven cooking and make the pie hard to slice.
- Cover with the top pie crust, making sure to seal the edges. Cut slits on the top to allow steam to escape.: Pressing the edges together creates a barrier that traps steam until slits let it escape in a controlled way, preventing the crust from splitting randomly. The slits should reveal little puffs of steam during baking and help the top bake evenly. A common error is sealing imperfectly, which can cause filling to leak and scorch; pinch or flute the edges firmly for a neat finish.
- Create an egg wash by whisking egg with a little water. Brushing egg wash on top the pie crust.: Applying the wash gives the crust a reflective, golden sheen as it bakes, and brushing should be gentle so you do not press liquid into the slits. The egg wash promotes an even, appetizing color and a slight crispness to the surface. If you brush too heavily, egg can pool and brown unevenly, so use a light, even coat for the best result.
- Bake for 40–45 minutes, or until the top is golden brown.: During baking, listen for a steady gentle bubbling sound through the vents, and watch the crust transform from pale to deeply golden, with edges slightly darker. The internal aroma will become rich and savory, signaling the filling has thickened fully. Baking time is key to set the filling and develop that signature flaky top; underbaking yields a runny interior, while overbaking risks a dry filling or burnt crust. Tent with foil if the crust reaches the desired color before the center is set.
- Let rest for 10–15 minutes before cutting and serving.: Resting allows the filling to settle and firm up, so slices hold together rather than ooze. You will see the steam subside and the surface cool slightly, making slicing easier and safer. Cutting too soon is a common mistake that results in a messy presentation, so patience here rewards you with clean wedges and optimal texture.
Expert Tips about Chicken Pot Pie
I like to think of these tips as little chef secrets that help you get predictable, excellent results every time. Each suggestion targets texture, timing, or flavor so you spend fewer minutes guessing and more time enjoying the pie.
- Parbake the base: Parbaking the bottom crust for a few minutes before filling helps it stay crisp instead of turning soggy from the wet filling.
- Whisk liquids slowly: When adding chicken broth and milk to the roux, pour gradually while whisking to prevent lumps and ensure a smooth gravy.
- Check vegetable texture: Boil the potatoes and carrots until just tender so they keep structure after baking and do not become mushy.
- Use a light egg wash: A thin coat made with egg and water yields an even, shiny top without pooling or burning in the vents.
- Cool slightly before slicing: Let the pie rest so the filling sets, which helps you get neat slices and prevents steam burns.
- Freeze for later: Wrap tightly and freeze the assembled pie, then bake from frozen adding extra time for a convenient make ahead meal.
What to Serve Alongside Chicken Pot Pie
Pairing this pie is about balance, offering fresh contrasts to the creamy interior. I usually serve light, crisp sides and simple warm breads to round out the meal for family or guests.
- Light green salad: A salad with a bright vinaigrette cuts through the richness and adds a refreshing texture contrast.
- Steamed greens: Quick steamed vegetables like spinach provide color and a slightly bitter foil to the savory filling.
- Crusty bread: A warm loaf can soak up any extra gravy and is a comforting addition for casual dinners.
- Seasonal fruit: Sliced apples or pears bring a touch of sweetness that complements the savory pie on a winter table.
- Occasions: This dish works for family dinners, potlucks, and cold season gatherings, especially when you want a filling centerpiece that feeds many.
- Storage tips: Store leftovers covered in the fridge for up to three days, or freeze whole or in portions for up to four months; reheat until piping hot.
- Serving style: Serve warm in wedges with a spoon for any loose filling on the side, making it easy for guests to build balanced plates.
FAQ
Conclusion
This Chicken Pot Pie shines because it balances creamy, savory filling with a flaky golden crust, offering a nostalgic, satisfying meal that feeds a crowd. Give it a try on a chilly evening or when you want a comforting centerpiece that doubles as a make ahead freezer meal. You will likely find it becomes a trusted favorite for family dinners, potlucks, and any time you crave warm, homey flavors.
Chicken Pot Pie
Equipment
- Large Pot
- Saucepan
- 9-inch pie plate
- Oven
- Whisk
- Baking Sheet
Ingredients
- 1 medium russet potato, peeled and cubed Provide starchy body and absorb flavors when boiled; peeled and cubed to cook evenly and give a creamy texture that complements the filling once fork-tender.
- 2 chicken breasts, cubed (about 2 cups) Add lean protein and hearty texture when cubed; cooks through quickly and contributes savory flavor and substance to the pie filling.
- 1 cup sliced carrots Contribute natural sweetness and slight firmness when sliced; add color and a tender bite after simmering with the filling.
- 1 cup frozen peas Offer pops of color and a burst of sweetness; frozen peas thaw and heat rapidly, adding freshness and contrast to the creamy sauce.
- 1/2 cup corn Supply additional sweet kernels and subtle texture contrast; provide small pockets of sweetness that balance the savory components.
- 2 (9-inch) pie crusts, unbaked Form the flaky top and bottom shells when unbaked; encase the filling and bake to a golden crust that provides structure and a tender crumb.
- 2 tablespoons unsalted butter Lend rich flavor and help sauté vegetables when melted; used to start the roux and enrich the sauce for a smooth, silky filling.
- 1/2 cup all-purpose flour Thicken the filling by forming a roux when combined with melted butter; helps create a creamy, cohesive sauce that coats the ingredients.
- 1 teaspoon garlic salt Season with a garlicky, savory note; used to enhance overall flavor and complement the chicken and vegetables in the filling.
- 1/4 teaspoon pepper Season with a mild heat and balance flavors; ground pepper adds subtle warmth and depth without overpowering the dish.
- 2 cups chicken broth Provide savory liquid and concentrated chicken flavor; used to simmer the vegetables and form the base of the creamy sauce.
- 2/3 cup milk Add creaminess and mellow dairy richness; combined with broth and roux to create a smooth, velvety sauce for the filling.
- 1 egg Brush crust edges and top to promote browning and a glossy finish; beaten and applied before baking for color and sealing.
Instructions
- Preheat the oven to 375 degrees F.: The air should feel warm and steady in the preheating oven, and you want that consistent heat so the bottom crust begins to set when parbaked. Preheating ensures even baking for a flaky crust and prevents the filling from cooling the oven too much when you place the pie inside. One common mistake is not allowing the oven to fully come to temperature, which can result in a soggy bottom crust and uneven browning. If your oven has hot spots, rotate the pie halfway through baking for even color.
- Place potatoes in a large pot and cover with water. Bring to a boil for 10 minutes, then add chicken, carrots, peas, and corn and boil for 15 minutes more. Remove from the heat, drain the water, and set aside.: You will notice the water move from fast rolling to a gentler boil as it starts to foam, and the potatoes should become tender enough that a fork slides through them without resistance, while the chicken will turn opaque and the vegetables soften but retain some snap. This technique cooks everything evenly together so flavors mingle, and the brief combined simmer helps the chicken release savory juices into the broth. A frequent mistake is overcooking, which makes the vegetables mushy; monitor the texture so they stay slightly firm.
- Place bottom crust in a 9-inch pie plate and bake for 5 minutes.: As the crust warms, its surface will firm slightly, and you may see the edges begin to dry. This parbake step prevents a soggy bottom by giving the lower crust a head start on crisping before the wet filling goes in. If you skip this, steam from the filling can soak through, leaving you with a limp base. Watch carefully so the crust does not start to brown too deeply during this short bake.
- While the crust is baking, cook butter in a saucepan over medium heat. Once butter is melted, stir in flour, garlic salt, and pepper. Slowly whisk in chicken broth and milk and heat until thickened, 5-6 minutes.: The sound shifts from a gentle sizzle to a quiet simmer as you melt the butter , and stirring the flour creates a pale paste that should smell slightly nutty once cooked. Whisking in the chicken broth and milk introduces steam and transforms the roux into a glossy sauce that coats the back of a spoon, indicating the right thickness. This step is crucial because the roux cooks out raw flour flavor and ensures the gravy binds the filling. A common slip is adding the liquid too quickly, which causes lumps; go slow and whisk continuously for a smooth finish.
- Remove bottom crust from the oven and add chicken and veggies to the crust. Pour the broth mixture over the chicken and veggies.: At this point the smell should be deeply savory, with a light creaminess lifting the aroma. The filling will glisten as you mound it into the parbaked shell, and the broth mixture pours in to coat the pieces without pooling excessively, showing the thickness is correct. The reason this layering matters is it helps suspend the ingredients so slices hold together after baking. Avoid packing the filling too tightly, which can cause uneven cooking and make the pie hard to slice.
- Cover with the top pie crust, making sure to seal the edges. Cut slits on the top to allow steam to escape.: Pressing the edges together creates a barrier that traps steam until slits let it escape in a controlled way, preventing the crust from splitting randomly. The slits should reveal little puffs of steam during baking and help the top bake evenly. A common error is sealing imperfectly, which can cause filling to leak and scorch; pinch or flute the edges firmly for a neat finish.
- Create an egg wash by whisking egg with a little water. Brushing egg wash on top the pie crust.: Applying the wash gives the crust a reflective, golden sheen as it bakes, and brushing should be gentle so you do not press liquid into the slits. The egg wash promotes an even, appetizing color and a slight crispness to the surface. If you brush too heavily, egg can pool and brown unevenly, so use a light, even coat for the best result.
- Bake for 40–45 minutes, or until the top is golden brown.: During baking, listen for a steady gentle bubbling sound through the vents, and watch the crust transform from pale to deeply golden, with edges slightly darker. The internal aroma will become rich and savory, signaling the filling has thickened fully. Baking time is key to set the filling and develop that signature flaky top; underbaking yields a runny interior, while overbaking risks a dry filling or burnt crust. Tent with foil if the crust reaches the desired color before the center is set.
- Let rest for 10–15 minutes before cutting and serving.: Resting allows the filling to settle and firm up, so slices hold together rather than ooze. You will see the steam subside and the surface cool slightly, making slicing easier and safer. Cutting too soon is a common mistake that results in a messy presentation, so patience here rewards you with clean wedges and optimal texture.
Notes
- Parbake the base: Parbaking the bottom crust for a few minutes before filling helps it stay crisp instead of turning soggy from the wet filling.
- Whisk liquids slowly: When adding chicken broth and milk to the roux, pour gradually while whisking to prevent lumps and ensure a smooth gravy.
- Check vegetable texture: Boil the potatoes and carrots until just tender so they keep structure after baking and do not become mushy.
- Use a light egg wash: A thin coat made with egg and water yields an even, shiny top without pooling or burning in the vents.
- Cool slightly before slicing: Let the pie rest so the filling sets, which helps you get neat slices and prevents steam burns.
- Freeze for later: Wrap tightly and freeze the assembled pie, then bake from frozen adding extra time for a convenient make ahead meal.