
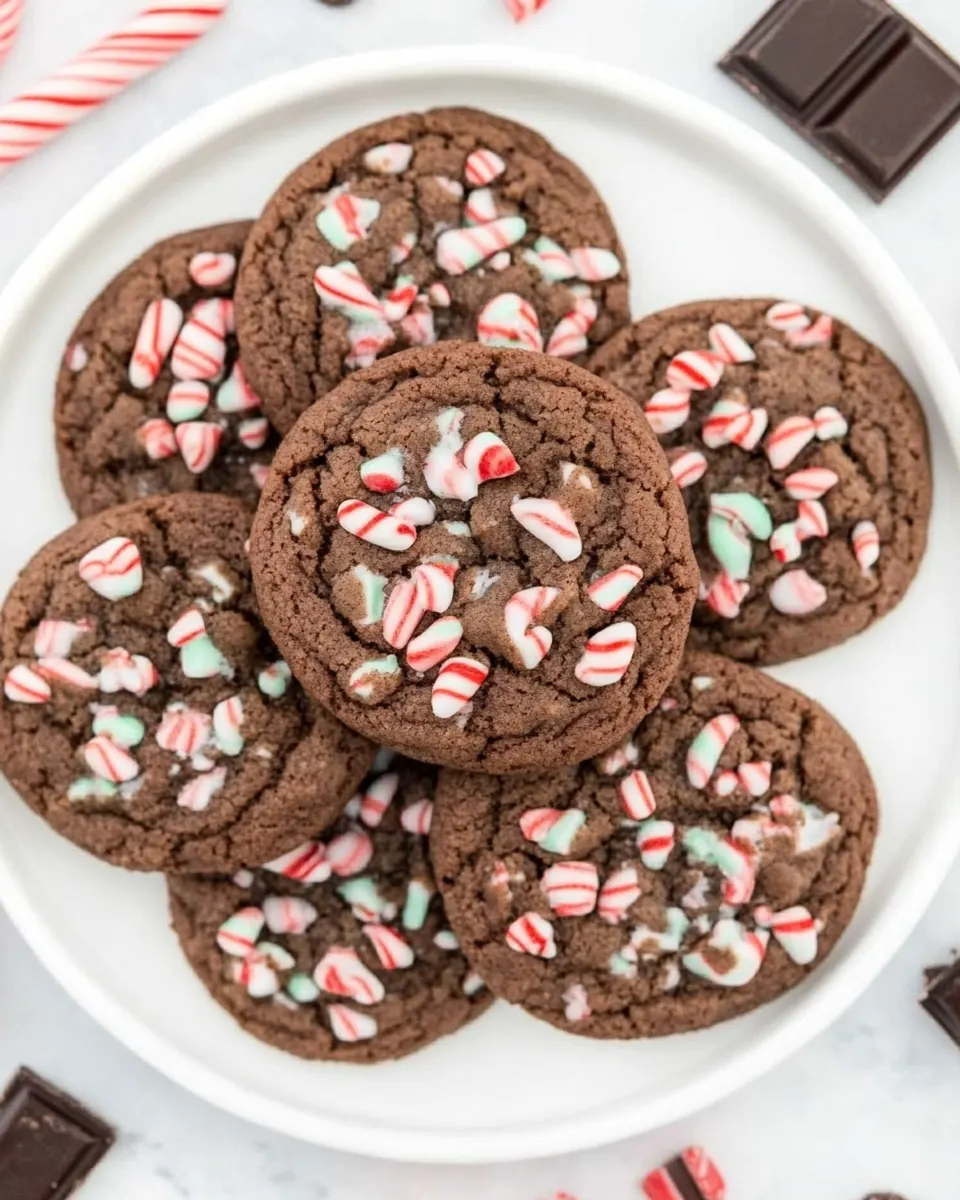
Chewy Double Chocolate Peppermint Cookies
Chewy Double Chocolate Peppermint Cookies came into my life on a blustery December afternoon when I needed something that tasted like a warm hug and a festive wink all at once. I was cleaning out my baking drawer, humming along to holiday music, when I found an old jar of crushed peppermint and a bag of bittersweet chocolate chips. I knew I wanted something that would be chewy, chocolaty, and bright with mint, something to hand to friends as they arrived at my door with mittens and wool scarves.
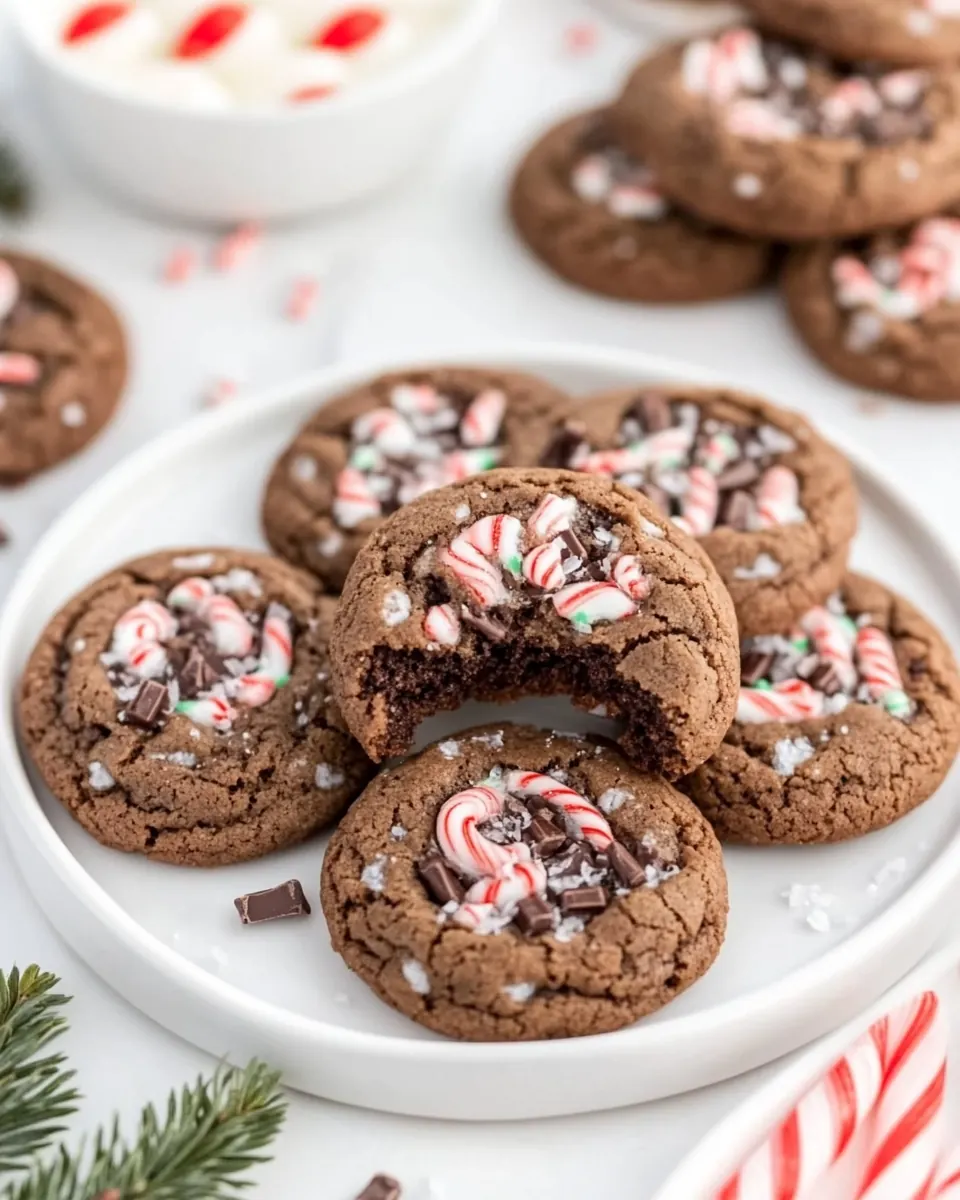
That batch of Chewy Double Chocolate Peppermint Cookies became an instant favorite at every winter gathering I hosted after that. I loved how the centers held a glossy pool of chocolate ganache, like little edible ornaments, and how the crushed peppermint sprinkled on top gave each bite a candy cane snap. The dough chills up nicely, so I could make it ahead and bake right before guests arrived, which saved me from frantic last minute baking chaos.
I remember one snowy evening when a neighbor popped by with her toddler, and the tiny face that peered at the cookie was the sweetest approval I have ever received. Baking these taught me to trust simple techniques, like chilling the dough and gently pressing a teaspoon into the baked cookie to cradle the ganache. Those small steps create a cookie that keeps its chew, but still looks elegant on a holiday platter.
Recipe Snapshot
37 mins
25 mins
12 mins
Medium
150 kcal
American
Gluten-Free, Low FODMAP
Desserts
Electric mixer, Mixing bowls, Baking sheets, Parchment paper, Microwave, Whisk, Wire rack, Rolling pin, Ziploc bag, Measuring cup, Cookie scoop
Why We Love This Chewy Double Chocolate Peppermint Cookies
Intense Chocolate, Not Overpowering
I love how Chewy Double Chocolate Peppermint Cookies deliver rich chocolate without losing balance. The blend of cocoa and chocolate chips gives depth, while the whipped cream based ganache smooths everything into a velvety center. I always savor that first bite where the outer cookie is chewy and the center is silky.
Festive Peppermint Pop
Peppermint pieces lift these cookies from ordinary to seasonal showstoppers. I rely on the crushed candy canes to add both texture and a cool mint burst. This treat is perfect when you want something that tastes like the holidays without being too sweet.
Make Ahead Friendly
One thing I appreciate, is how forgiving the dough is. Chilling the dough for 30 minutes firms it up for neat scooping, and the cookies keep well if you bake ahead and add ganache just before serving. I often prepare the dough the night before so I can bake fresh cookies in the morning, giving me a low stress hosting routine.
Simple Techniques, Big Rewards
The method is straightforward, but each step matters. Creaming the butter and sugars aerates the dough, chilling concentrates flavors, and heating the heavy whipping cream just enough melts the chips into a glossy ganache. I enjoy teaching these little technique tips to friends because they transform a good cookie into a memorable one.
Textural Contrast
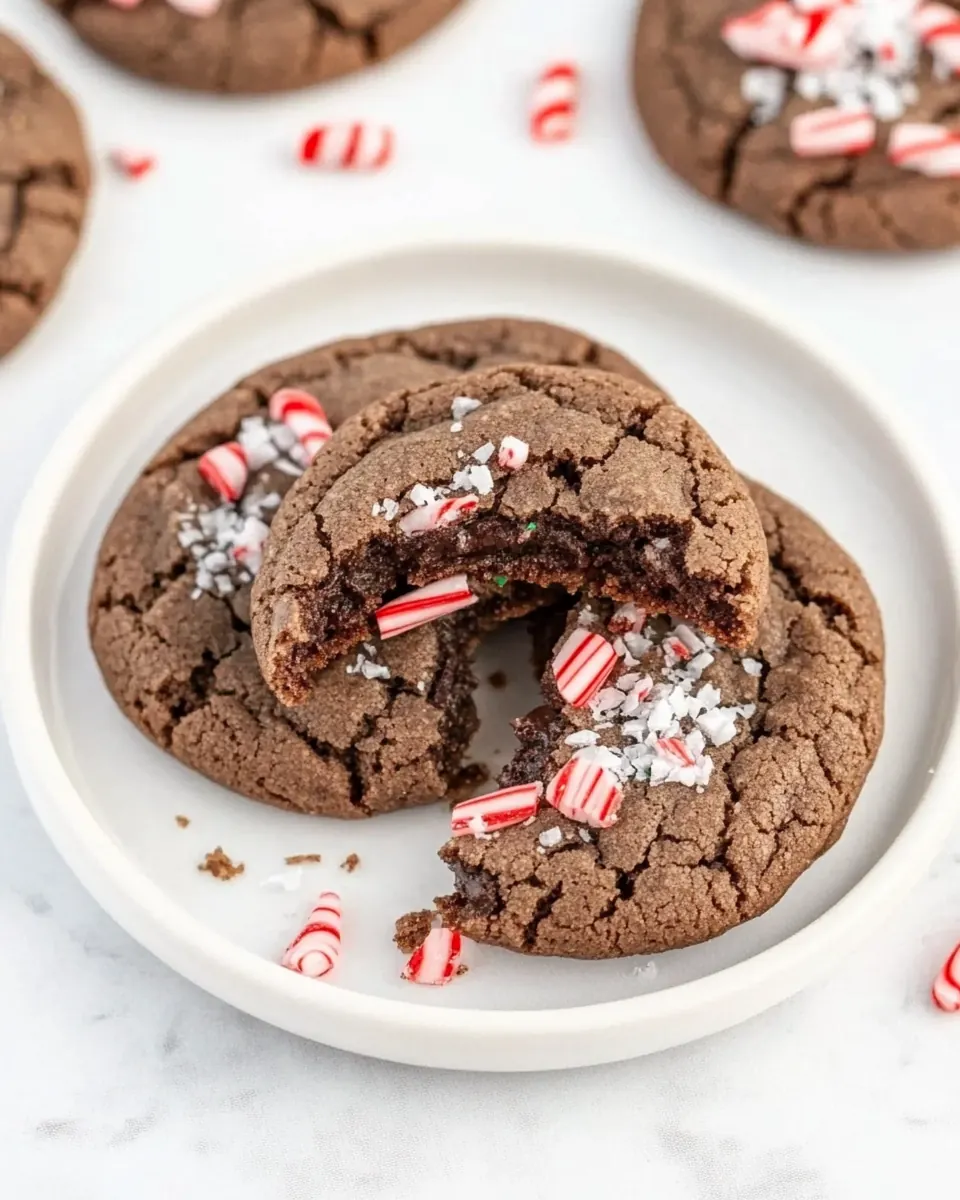
What makes me come back to this recipe is the interplay of textures. You get a soft, chewy base, a satin ganache center, and crunchy peppermint on top. That contrast keeps each bite interesting, and it is a reliable crowd pleaser whenever I bring a tin over to neighbors.
Chewy Double Chocolate Peppermint Cookies Ingredients
These ingredients combine to create a cookie that is rich, chewy, and bright with peppermint. The core players are the butter and sugars which set the texture and chew, the cocoa powder and chocolate chips which deliver deep chocolate flavor, and the peppermint pieces for festive lift. Each item has a specific role so the final cookie stays tender while holding a glossy ganache center.
- 6 tablespoons butter unsalted, softened: Soften to room temperature to ensure even creaming with sugars and to create a tender, chewy cookie texture when baked.
- 3/4 cup white sugar divided: Divided to allow initial creaming with butter for structure and a finishing sprinkle or sweetness adjustment before baking for flavor balance.
- 1/2 cup brown sugar: Provide deep, caramel-like sweetness and moisture that helps retain chewiness in the cookie crumb.
- 2 large eggs: Whisked in to bind ingredients, add moisture, and contribute to the rich, tender structure and leavening when combined with other components.
- 1/2 teaspoon vanilla: Add a warm, familiar vanilla note to enhance overall flavor complexity and round out the chocolate and peppermint accents.
- 1/2 teaspoon peppermint extract: Introduce a clear, cooling peppermint flavor to give the cookies a distinctive holiday mint character that complements chocolate.
- 1 1/2 cups flour: Supply the bulk structure and gluten framework that holds the cookie together while determining chewiness and spread.
- 1/2 cup cocoa powder: Intensify chocolate flavor and deepen color while slightly reducing moisture, producing a rich, fudgy taste in the cookie base.
- 1/2 teaspoon baking powder: Leaven slightly to provide gentle lift and prevent excessive density, contributing to a balanced cookie texture.
- 1/4 teaspoon salt: Enhance overall flavor by balancing sweetness and bringing out other ingredients, while also supporting proper dough chemistry.
- 1/2 cup heavy whipping cream: Enrich the dough with fat for a silkier mouthfeel and added tenderness, helping produce a moist, chewy interior.
- 1/3 cup chocolate chips semi-sweet: Add concentrated pockets of melted chocolate for bursts of richness and texture variation throughout the cookies.
- 1/2 teaspoon vanilla: Provide a secondary layer of vanilla aroma to reinforce flavor continuity and complement both chocolate and peppermint notes.
- 1/4 cup peppermint pieces about 3 candy canes crushed, can also use round peppermints crushed: Offer crunchy, bright peppermint shards that add textural contrast and a refreshing mint finish atop or within the cookies.
Cooking Method for Chewy Double Chocolate Peppermint Cookies
Below you will find the full process from creaming to ganache filling. I like to walk through each moment, because small details shape big results. Keep sensory cues in mind and give yourself permission to enjoy the smells as the kitchen fills with chocolate and mint.
- Place the butter, 1/2 cup white sugar, and brown sugar with an electric mixer. Mix well until smooth. Add two eggs, vanilla, and peppermint extract to the butter mixture and mix well until combined.: The room will start smelling buttery and sweet the moment you beat the butter and sugars together, giving off a light, caramel like aroma that promises chewiness. I notice the texture change from grainy to glossy, which signals that enough air has been incorporated to support a tender crumb. Proper creaming produces a slightly paler, ribbon like stream when you lift the mixer, and that visual cue helps you avoid undermixing which yields dense cookies. One common mistake is not softening the butter enough, causing lumps, so bring it to a spreadable consistency but do not melt it. Also, if you add the eggs cold, the batter can seize, so I prefer room temperature eggs for a smooth, cohesive mix.
- In a second mixing bowl combine flour, cocoa powder, baking powder and salt and mix until well blended.: As you whisk these dry ingredients, the cocoa releases a dusty chocolate scent and the mixture becomes visually even, a deep brown uniform color. This step ensures the cocoa powder is evenly distributed so you do not get streaks of dry cocoa in the dough which would create dry pockets. I always sift or whisk well to break up any lumps in the cocoa. A frequent slip is dumping dry ingredients directly into wet without preblending, which can create uneven texture and overmixing later, so take the extra minute to combine them well.
- Add the dry to the wet ingredients and mix until a thick sticky chocolate dough forms. Place the dough in the refrigerator and chill for 30 minutes.: As the dry melds into the creamed mix, the batter darkens and thickens into a sticky, fudgy dough that clings to your spoon. Chilling firms the fats and hydrates the flour, making it easier to scoop clean balls and preventing excessive spread during baking. When chilled, the dough is easier to handle and retains shape in the oven, yielding that desirable chewy center. Avoid skipping the chill because very warm dough will flatten into thin, hard cookies. Also, if the dough is too cold, let it sit five minutes to soften slightly so it scoops cleanly.
- Preheat the oven to 350 degrees. Line baking sheets with parchment paper.: The kitchen will begin to smell faintly of warmth as the oven approaches 350 degrees , which is key for creating that slightly crisp exterior while keeping the middle chewy. Lining sheets with parchment prevents sticking and encourages even browning. I always rotate racks if I am baking multiple sheets to ensure uniform heat exposure. A common error is not preheating fully, which leads to inconsistent rise and texture, so allow the oven to reach temperature before the cookies go in.
- Place the heavy whipping cream in a heatproof bowl. Place the chocolate chips and vanilla in a large bowl. Put the heavy whipping cream in the microwave and heat for 1 minute.: Heating the heavy whipping cream releases a warm, sweet dairy aroma that prepares it to melt the chocolate chips . The minute in the microwave should leave the cream steamy but not boiling, which ensures gentle melting when poured over the chips. I prefer this method for a glossy ganache; it yields a silky texture that contrasts with the chewy cookie. Overheating the cream can scorch it, producing an unpleasant cooked flavor, so watch closely and stop just as it steams.
- Pour the whipping cream over the chocolate chips. With a whisk, blend the chocolate chips with the whipping cream until smooth. Set the chocolate to the side.: As you whisk, the chips surrender and the mixture becomes glossy and fluid, releasing a rich chocolate perfume. A smooth ganache should be shiny and free of lumps, with a pourable, satin consistency. If the ganache looks grainy, let it sit a minute and whisk gently, or warm briefly in short bursts to encourage melting. Avoid stirring too vigorously which can incorporate air and create a duller finish.
- Unwrap the candy canes or peppermint candies and place them in a thick ziploc bag. With a rolling pin, crush the candy canes in the bag until they are the size of large sprinkles.: Crushing the peppermint pieces releases a bright, cool scent that makes the kitchen feel festive. I like leaving a few slightly larger shards for crunch and fine bits for a dusting effect. Be careful not to pulverize them into powder, or the texture on top of the cookie will be lost. A tip I use is to fold the bag once over to contain the shards, then tap gently with the rolling pin until I reach the sizes I want.
- Place the remaining 1/4 cup sugar into a small bowl. With a medium cookie scoop, scoop and roll the cookie dough into balls. Roll each cookie dough ball in the sugar then place on a cookie sheet leaving two to three inches in between dough balls. With a teaspoon press the round part into each cookie dough ball.: Rolling the dough in the extra sugar gives the exterior a subtle sparkle and slight crunch. As you press with a teaspoon, you create a shallow well that will later hold ganache, and you will hear a soft give as the center compresses without breaking. Keep spacing of two to three inches so cookies have room to spread and bake into domed, chewy rounds. One common slip is pressing too hard which can flatten the cookie; press gently to form a shallow cup.
- Bake cookies for 10-12 minutes. When the cookies have just come out of the oven, push the teaspoon again into the center of each cookie to make the space to hold the ganache a little larger. Let the cookies cool completely on a wire rack.: While baking, the kitchen will fill with deep chocolate aroma and the edges will set to a matte finish while centers remain soft. The 10 to 12 minute window produces a set edge and a tender middle; look for slightly cracked tops and a gentle spring when touched. Re pressing with the teaspoon while warm enlarges the cavity cleanly, but be gentle so you do not tear the cookie. Cool fully on a wire rack to avoid warm ganache leaking; patience here prevents a messy finish.
- Slide a large piece of parchment paper under the wire rack. With a small measuring cup carefully pour the chocolate ganache to fill the center of each cookie.: Pouring the glossy ganache into the cooled wells is the point where the cookie transforms visually and texturally, the ganache settling into a mirror like pool. Use a small measuring cup or spoon for control, and pour slowly to avoid overflow. The ganache will look glossy and slightly fluid at first, and aroma of warm chocolate will mingle with the mint shards on top. A typical mistake is adding ganache while cookies are still warm, which causes run off, so ensure they are completely cool.
- Sprinkle the tops of the cookies with crushed candy canes. Allow the ganache to fully set, then enjoy!: As you dust each cookie with crushed peppermint , you will notice a bright contrast of color and a crisp sound as shards settle. Let the cookies rest until the ganache firms to the touch, about one to two hours at room temperature, or chill briefly to speed the process. Once set, the cookies present beautifully and each bite offers chewy cookie, silky ganache, and crunchy peppermint. Avoid stacking them until the centers are fully firm, or the ganache can smear.
Substitutions and Tips
I like to keep substitutions simple and practical so you can still get excellent results if you are missing one item. Below are detailed tips and options to help you navigate small swaps and technique choices while keeping the cookie chewy and flavorful.
- If you do not have peppermint extract, use the notes guidance; all vanilla for a more cocoa forward profile, because the candy canes still add peppermint notes.
- Sticky dough expectation, accept that the dough will be tacky; chilling is the correct fix, do not add excessive flour which will dry out the cookies.
- Cooling before ganache, never add warm ganache to hot cookies; wait until they are completely cool to prevent leakage and preserve the ganache shape.
- Speeding ganache set, move cookies to the refrigerator after about one hour to set centers faster, but do not move them earlier or the centers can spill.
- Crushing candy canes, use a thick ziploc and a rolling pin for controlled shards, and aim for varied sizes to keep texture interesting.
- Measuring sugars, spoon and level white and brown sugars to avoid overly sweet or overly flat cookies, which can occur with packed mistakes.
Serving Options for Chewy Double Chocolate Peppermint Cookies
These cookies shine during winter gatherings, holiday cookie exchanges, and cozy evenings by the fire. Below are many serving ideas, storage tips, and occasion suggestions to help you present these cookies beautifully.
- Holiday cookie platters, arrange the cookies with a mix of other simple shapes for a festive assortment that highlights the peppermint contrast.
- Party favors, wrap individual cookies in clear cello and tie with ribbon for neighbor gifts or party takeaways.
- Hot beverage pairing, serve with a cup of hot chocolate or coffee for a warm pairing that balances the mint and chocolate flavors.
- Make ahead serving, bake the cookies and fill with ganache the same day of serving for the freshest centers, or fill then refrigerate to transport.
- Storage tips, store in a single layer in an airtight container at room temperature for up to three days, or refrigerate for firmer ganache and up to one week.
- Occasions, perfect for winter holidays, cookie swaps, school parties, or cozy nights during the seasonal months labeled winter.
- Presentation, place on a wire rack over parchment to catch stray peppermint shards, then transfer to a decorative tin for gifting.
FAQ
Conclusion
What makes these cookies special is the combination of a chewy, fudgy base with a silky ganache center and crunchy peppermint topping, giving each bite a layered, festive experience. I encourage you to give them a try, especially during the winter months when a mint chocolate cookie feels like a seasonal treat. They are forgiving enough for bakers of many levels, and once you master the simple steps of chilling, pressing the wells, and filling with ganache, you will have a reliable showstopper to share with friends and family.

Chewy Double Chocolate Peppermint Cookies
Equipment
- Electric Mixer
- Mixing Bowls
- Baking Sheets
- Parchment Paper
- Microwave
- Whisk
- Wire Rack
- Rolling Pin
- Ziploc bag
- Measuring Cup
- Cookie Scoop
Ingredients
- 6 tablespoons butter unsalted, softened Soften to room temperature to ensure even creaming with sugars and to create a tender, chewy cookie texture when baked.
- 3/4 cup white sugar divided Divided to allow initial creaming with butter for structure and a finishing sprinkle or sweetness adjustment before baking for flavor balance.
- 1/2 cup brown sugar Provide deep, caramel-like sweetness and moisture that helps retain chewiness in the cookie crumb.
- 2 large eggs Whisked in to bind ingredients, add moisture, and contribute to the rich, tender structure and leavening when combined with other components.
- 1/2 teaspoon vanilla Add a warm, familiar vanilla note to enhance overall flavor complexity and round out the chocolate and peppermint accents.
- 1/2 teaspoon peppermint extract Introduce a clear, cooling peppermint flavor to give the cookies a distinctive holiday mint character that complements chocolate.
- 1 1/2 cups flour Supply the bulk structure and gluten framework that holds the cookie together while determining chewiness and spread.
- 1/2 cup cocoa powder Intensify chocolate flavor and deepen color while slightly reducing moisture, producing a rich, fudgy taste in the cookie base.
- 1/2 teaspoon baking powder Leaven slightly to provide gentle lift and prevent excessive density, contributing to a balanced cookie texture.
- 1/4 teaspoon salt Enhance overall flavor by balancing sweetness and bringing out other ingredients, while also supporting proper dough chemistry.
- 1/2 cup heavy whipping cream Enrich the dough with fat for a silkier mouthfeel and added tenderness, helping produce a moist, chewy interior.
- 1/3 cup chocolate chips semi-sweet Add concentrated pockets of melted chocolate for bursts of richness and texture variation throughout the cookies.
- 1/2 teaspoon vanilla Provide a secondary layer of vanilla aroma to reinforce flavor continuity and complement both chocolate and peppermint notes.
- 1/4 cup peppermint pieces about 3 candy canes crushed, can also use round peppermints crushed Offer crunchy, bright peppermint shards that add textural contrast and a refreshing mint finish atop or within the cookies.
Instructions
- Place the butter, 1/2 cup white sugar, and brown sugar with an electric mixer. Mix well until smooth. Add two eggs, vanilla, and peppermint extract to the butter mixture and mix well until combined.: The room will start smelling buttery and sweet the moment you beat the butter and sugars together, giving off a light, caramel like aroma that promises chewiness. I notice the texture change from grainy to glossy, which signals that enough air has been incorporated to support a tender crumb. Proper creaming produces a slightly paler, ribbon like stream when you lift the mixer, and that visual cue helps you avoid undermixing which yields dense cookies. One common mistake is not softening the butter enough, causing lumps, so bring it to a spreadable consistency but do not melt it. Also, if you add the eggs cold, the batter can seize, so I prefer room temperature eggs for a smooth, cohesive mix.
- In a second mixing bowl combine flour, cocoa powder, baking powder and salt and mix until well blended.: As you whisk these dry ingredients, the cocoa releases a dusty chocolate scent and the mixture becomes visually even, a deep brown uniform color. This step ensures the cocoa powder is evenly distributed so you do not get streaks of dry cocoa in the dough which would create dry pockets. I always sift or whisk well to break up any lumps in the cocoa. A frequent slip is dumping dry ingredients directly into wet without preblending, which can create uneven texture and overmixing later, so take the extra minute to combine them well.
- Add the dry to the wet ingredients and mix until a thick sticky chocolate dough forms. Place the dough in the refrigerator and chill for 30 minutes.: As the dry melds into the creamed mix, the batter darkens and thickens into a sticky, fudgy dough that clings to your spoon. Chilling firms the fats and hydrates the flour, making it easier to scoop clean balls and preventing excessive spread during baking. When chilled, the dough is easier to handle and retains shape in the oven, yielding that desirable chewy center. Avoid skipping the chill because very warm dough will flatten into thin, hard cookies. Also, if the dough is too cold, let it sit five minutes to soften slightly so it scoops cleanly.
- Preheat the oven to 350 degrees. Line baking sheets with parchment paper.: The kitchen will begin to smell faintly of warmth as the oven approaches 350 degrees , which is key for creating that slightly crisp exterior while keeping the middle chewy. Lining sheets with parchment prevents sticking and encourages even browning. I always rotate racks if I am baking multiple sheets to ensure uniform heat exposure. A common error is not preheating fully, which leads to inconsistent rise and texture, so allow the oven to reach temperature before the cookies go in.
- Place the heavy whipping cream in a heatproof bowl. Place the chocolate chips and vanilla in a large bowl. Put the heavy whipping cream in the microwave and heat for 1 minute.: Heating the heavy whipping cream releases a warm, sweet dairy aroma that prepares it to melt the chocolate chips . The minute in the microwave should leave the cream steamy but not boiling, which ensures gentle melting when poured over the chips. I prefer this method for a glossy ganache; it yields a silky texture that contrasts with the chewy cookie. Overheating the cream can scorch it, producing an unpleasant cooked flavor, so watch closely and stop just as it steams.
- Pour the whipping cream over the chocolate chips. With a whisk, blend the chocolate chips with the whipping cream until smooth. Set the chocolate to the side.: As you whisk, the chips surrender and the mixture becomes glossy and fluid, releasing a rich chocolate perfume. A smooth ganache should be shiny and free of lumps, with a pourable, satin consistency. If the ganache looks grainy, let it sit a minute and whisk gently, or warm briefly in short bursts to encourage melting. Avoid stirring too vigorously which can incorporate air and create a duller finish.
- Unwrap the candy canes or peppermint candies and place them in a thick ziploc bag. With a rolling pin, crush the candy canes in the bag until they are the size of large sprinkles.: Crushing the peppermint pieces releases a bright, cool scent that makes the kitchen feel festive. I like leaving a few slightly larger shards for crunch and fine bits for a dusting effect. Be careful not to pulverize them into powder, or the texture on top of the cookie will be lost. A tip I use is to fold the bag once over to contain the shards, then tap gently with the rolling pin until I reach the sizes I want.
- Place the remaining 1/4 cup sugar into a small bowl. With a medium cookie scoop, scoop and roll the cookie dough into balls. Roll each cookie dough ball in the sugar then place on a cookie sheet leaving two to three inches in between dough balls. With a teaspoon press the round part into each cookie dough ball.: Rolling the dough in the extra sugar gives the exterior a subtle sparkle and slight crunch. As you press with a teaspoon, you create a shallow well that will later hold ganache, and you will hear a soft give as the center compresses without breaking. Keep spacing of two to three inches so cookies have room to spread and bake into domed, chewy rounds. One common slip is pressing too hard which can flatten the cookie; press gently to form a shallow cup.
- Bake cookies for 10-12 minutes. When the cookies have just come out of the oven, push the teaspoon again into the center of each cookie to make the space to hold the ganache a little larger. Let the cookies cool completely on a wire rack.: While baking, the kitchen will fill with deep chocolate aroma and the edges will set to a matte finish while centers remain soft. The 10 to 12 minute window produces a set edge and a tender middle; look for slightly cracked tops and a gentle spring when touched. Re pressing with the teaspoon while warm enlarges the cavity cleanly, but be gentle so you do not tear the cookie. Cool fully on a wire rack to avoid warm ganache leaking; patience here prevents a messy finish.
- Slide a large piece of parchment paper under the wire rack. With a small measuring cup carefully pour the chocolate ganache to fill the center of each cookie.: Pouring the glossy ganache into the cooled wells is the point where the cookie transforms visually and texturally, the ganache settling into a mirror like pool. Use a small measuring cup or spoon for control, and pour slowly to avoid overflow. The ganache will look glossy and slightly fluid at first, and aroma of warm chocolate will mingle with the mint shards on top. A typical mistake is adding ganache while cookies are still warm, which causes run off, so ensure they are completely cool.
- Sprinkle the tops of the cookies with crushed candy canes. Allow the ganache to fully set, then enjoy!: As you dust each cookie with crushed peppermint , you will notice a bright contrast of color and a crisp sound as shards settle. Let the cookies rest until the ganache firms to the touch, about one to two hours at room temperature, or chill briefly to speed the process. Once set, the cookies present beautifully and each bite offers chewy cookie, silky ganache, and crunchy peppermint. Avoid stacking them until the centers are fully firm, or the ganache can smear.
Notes
- If you do not have peppermint extract, use the notes guidance; all vanilla for a more cocoa forward profile, because the candy canes still add peppermint notes.
- Sticky dough expectation, accept that the dough will be tacky; chilling is the correct fix, do not add excessive flour which will dry out the cookies.
- Cooling before ganache, never add warm ganache to hot cookies; wait until they are completely cool to prevent leakage and preserve the ganache shape.
- Speeding ganache set, move cookies to the refrigerator after about one hour to set centers faster, but do not move them earlier or the centers can spill.
- Crushing candy canes, use a thick ziploc and a rolling pin for controlled shards, and aim for varied sizes to keep texture interesting.
- Measuring sugars, spoon and level white and brown sugars to avoid overly sweet or overly flat cookies, which can occur with packed mistakes.