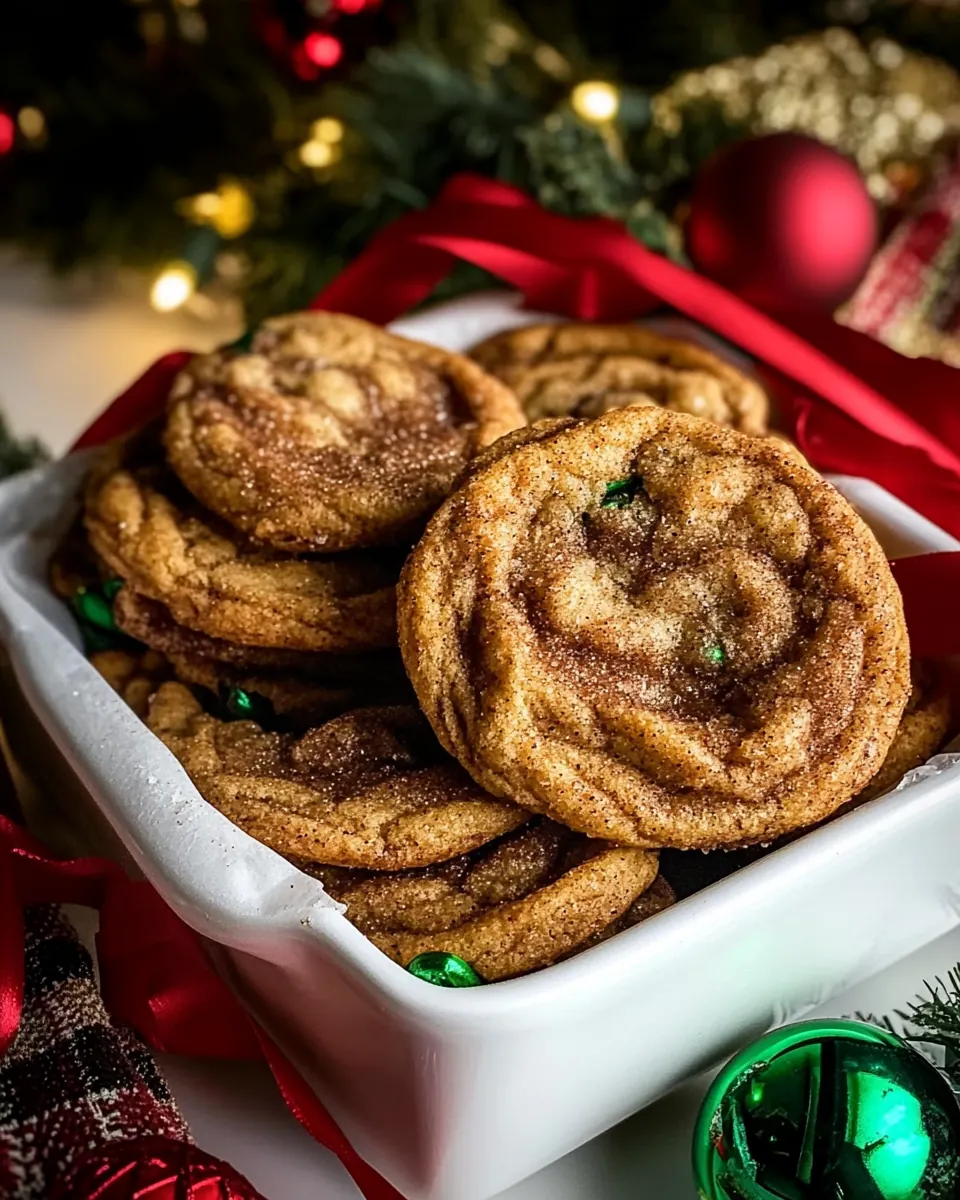
Chewy Christmas Snickerdoodles
Chewy Christmas Snickerdoodles are the cookies I reach for when the kitchen needs that cozy, sugared-up feeling that somehow makes every corner of the house feel like a warm hug. I remember the year I first combined browned butter with a scatter of colorful candies and crunchy pretzels, and how the first bite surprised me by being soft in the center with that classic cinnamon sugar kiss on the outside. It felt like holiday nostalgia met a little grown up curiosity, and I kept coming back to the bowl to steal another.
There are seasons when I want tidy, perfect cookies, and there are seasons when I want something forgiving and cheerful. These Chewy Christmas Snickerdoodles live in that second camp. They are forgiving because the dough is thick and friendly, and cheerful because the little pops of M&M’s and the crunch of crushed pretzel create delightful contrasts. I like to make them when guests are coming over, because they travel well and they seem to spark conversation, everyone asking what the secret is.
Recipe Snapshot
35 mins
20 mins
15 mins
Easy
150 kcal
American
Gluten-Free, Low FODMAP
Desserts
Skillet, Heatproof bowl, Oven, Baking sheet, Parchment paper, Mixing bowl, Spatula
What Sets This Chewy Christmas Snickerdoodles Apart
Classic comfort with a twist
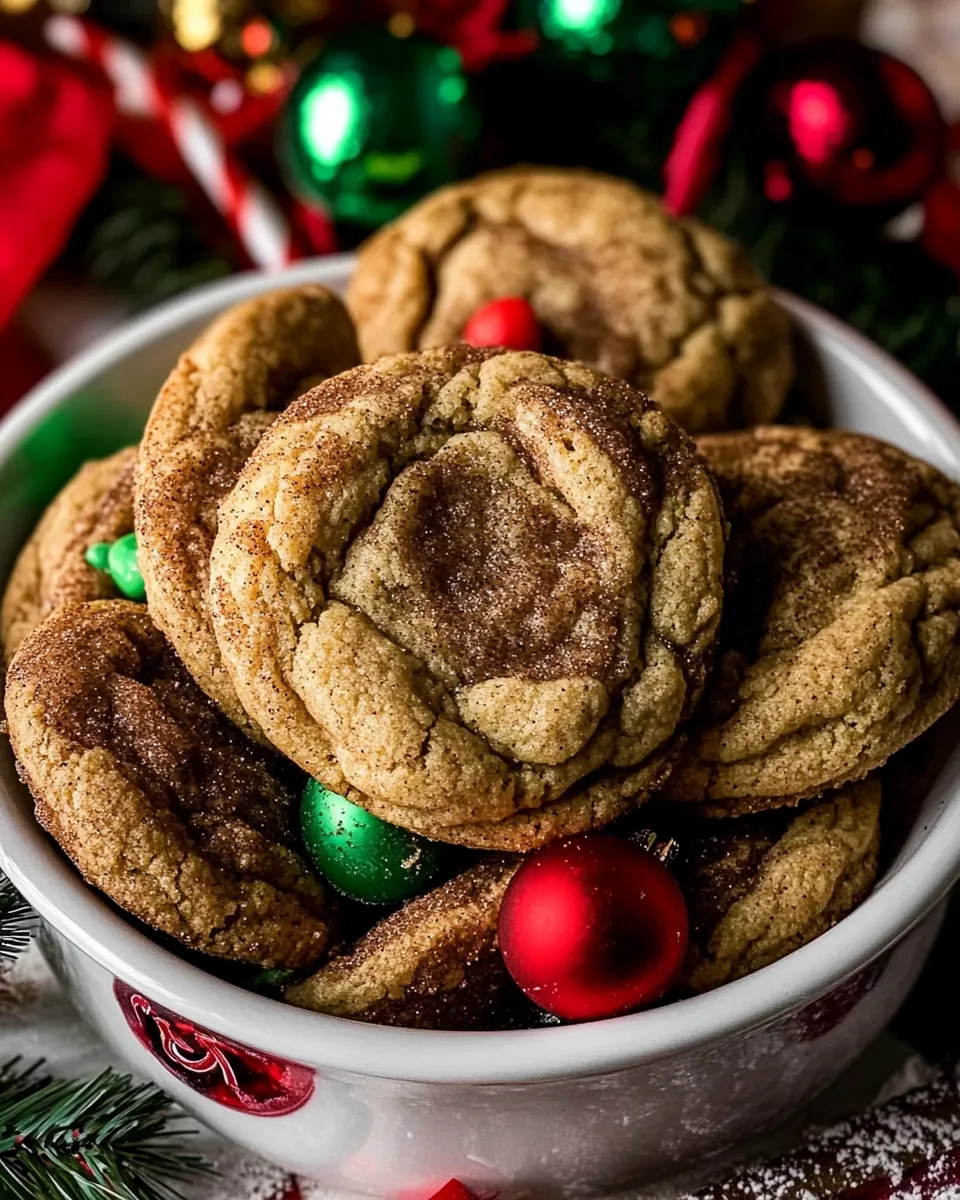
I love these cookies because they balance nostalgia with playful additions. The base is familiar, soft, and chewy thanks to a higher proportion of egg yolk and browned butter, and then the M&M’s and chocolate chips give each bite a small surprise. I find myself smiling when a colorful candy melts into a gooey ribbon, while a pretzel shard offers a salty lift.
Textural drama in every bite
One of the biggest reasons I make Chewy Christmas Snickerdoodles is the texture. The center stays tender, while the exterior gets that crisp, cinnamon sugar shell. The crushed pretzel adds crunch, and the combination of small and chunky chocolates creates pockets of molten chocolate that contrast beautifully with the doughs mild chew.
Flavor depth from simple technique
Browned butter is the trick that elevates these cookies. That two to three minute toasting changes the whole flavor profile, bringing nutty, caramel notes that play nicely against the cinnamon sugar. I often tell friends that this small step makes the cookie taste like it takes twice as long to bake, but it really does not add hassle.
Flexible and festive
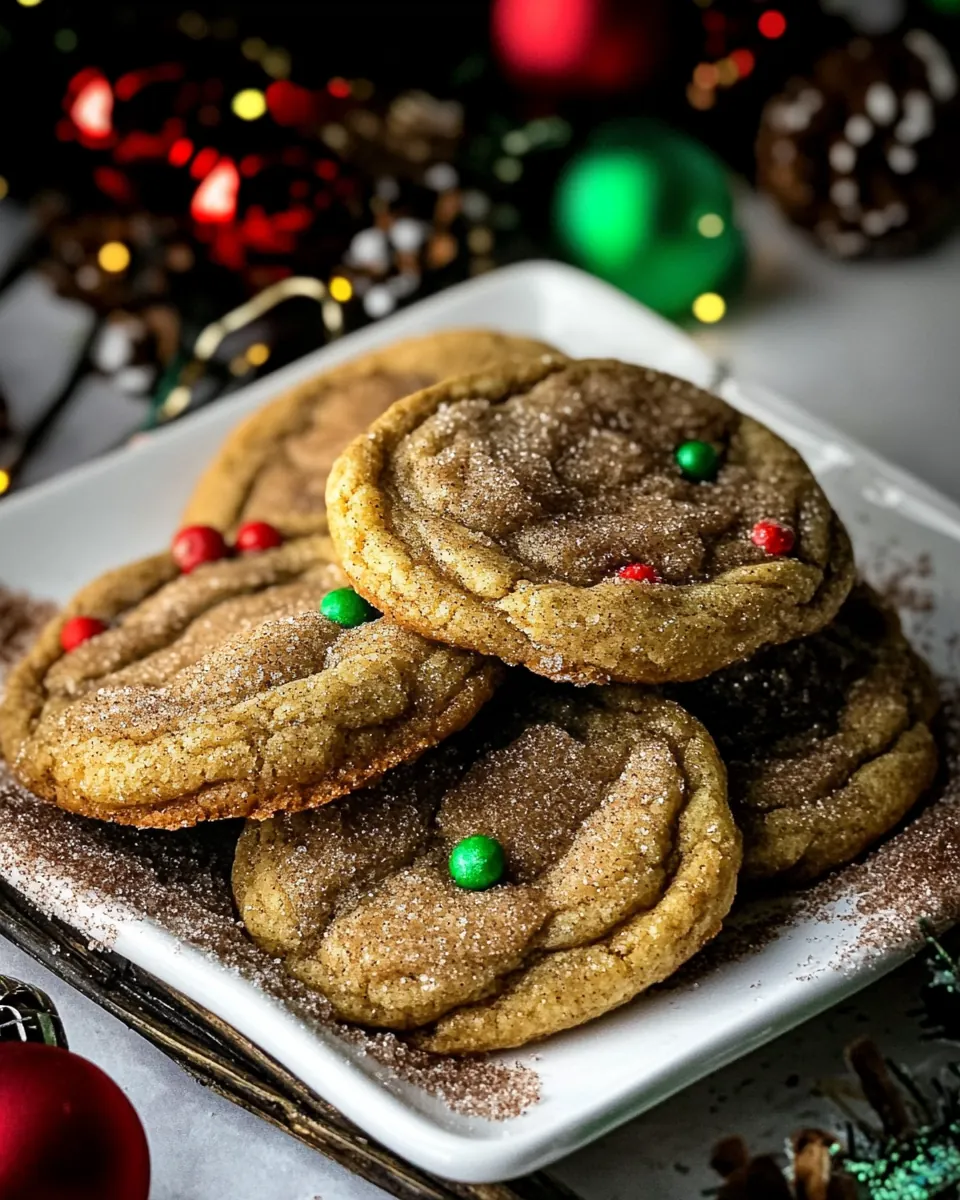
I appreciate how adaptable the recipe is. You can portion sizes a little larger for a bakery style treat, or keep them smaller for cookie exchanges. The M&M’s make these instantly seasonal, but the technique stands on its own, so you can swap colors or leave them out while keeping the cookie’s soul intact.
Great for gifting and gatherings
Finally, these cookies are crowd friendly. They hold up well during transport, and they keep fresh for several days in an airtight container. I often pack them in small boxes as little hostess gifts, and the reactions never fail to make me feel like I passed along a bit of holiday magic.
Shopping List for Chewy Christmas Snickerdoodles
These ingredients are chosen for harmony and contrast, each one playing a clear role in the final cookie. The core players are the butter for richness, the flour for structure, and the sugar for sweetness and that crisp exterior. Mix ins like M&M’s, chocolate chips, and pretzel bring texture and festive color.
- 2 sticks (1 cup) salted butter, at room temperature: Creamy and softened to incorporate air and create a tender, chewy cookie base; at room temperature it blends smoothly with sugars and eggs for even texture.
- 3/4 cup light or dark brown sugar: Sweet and moist, brown sugar contributes deep caramel notes and helps retain chewiness by adding moisture; choose light for milder flavor or dark for richer molasses intensity.
- 2 large eggs, plus 1 egg yolk: Beaten to add structure, moisture, and lift; the two whole eggs provide binding and leavening while the extra yolk adds richness and chewiness to the dough.
- 2 teaspoons vanilla extract: Aromatic flavoring that enhances sweetness and rounds out the cookie profile; vanilla extract deepens overall taste and complements cinnamon and chocolate.
- 2 1/4 cups all-purpose flour: Provides the bulk and structure of the cookies; all-purpose flour develops enough gluten for chew without becoming tough when properly mixed and measured.
- 1 teaspoon baking soda: Leavening agent used to give cookies a gentle lift and slight spread; baking soda reacts with acidic components to create tenderness and lightness.
- 1 teaspoon kosher salt: Seasoning that balances sweetness and enhances flavor contrast; kosher salt strengthens dough structure and heightens the overall taste of the cookie.
- 1 1/4 cups holiday M&M’s: Colorful candy pieces that add festive crunch and bursts of chocolate; folded into the dough, holiday M&M’s create visual appeal and small pockets of sweetness.
- 1 cup mini pretzel sticks crushed: Crunchy, salty element crushed to add texture and a savory counterpoint; mini pretzel sticks contribute broken salty shards that complement the sweet dough.
- 1 cup semi-sweet chocolate chips: Small chocolate morsels that melt into pockets of sweetness; semi–sweet chips provide chocolate flavor without overwhelming the other mix-ins.
- 1/3 cup dark chocolate chunks: Larger chunks of dark chocolate that create melty, intense chocolate pockets; dark chocolate adds richness and a slightly bitter contrast to the sweet dough.
- 1/3 cup granulated sugar: Coarse sugar used for rolling the dough before baking to create a sweet, slightly crunchy exterior and enhance the cookie’s surface texture.
- 2 teaspoons cinnamon: Warm spice that defines the snickerdoodle character; cinnamon is mixed with sugar for coating, adding aromatic warmth and a familiar holiday flavor.
How to Prepare Chewy Christmas Snickerdoodles
These instructions guide you from browning the butter to the warm, cinnamon sugar coated finish. Read each step before starting, because a few quick actions like chilling times and spacing on the sheet matter to the final texture.
- Add 1 stick of butter to a skillet set over medium heat. Cook until the butter begins to brown, about 3-4 minutes. Remove from the heat and transfer to a heatproof bowl. Freeze for 10-15 minutes, but no longer. Preheat the oven to 350° F. Line a baking sheet with parchment paper. In a bowl, beat together the remaining stick of butter, the cooled browned butter, and the brown sugar until combined. Beat in the eggs and 1 egg yolk, one at a time, until combined. Add the vanilla, beating until creamy. Add the flour, baking soda, and salt. Fold in 3/4 cup of the M&M's, pretzels, chocolate chips, and chocolate chunks. Mix the sugar and cinnamon in a bowl. Roll the dough into rounded 2-3 tablespoon-size balls and then roll through the cinnamon sugar. Place 3 inches apart on the prepared baking sheet. Bake for 8 minutes, then rotate the pan and push the remaining M&M's into the cookies. Bake for 2-3 minutes more. Remove from the oven and let the cookies cool on the baking sheet. They will continue to cook slightly as they sit on the baking sheet. Eat warm or let cool and store in an airtight container for up to 4 days.: The aroma of butter changing color is immediate, a nutty, toasty scent that signals those deep caramel notes forming, and you will hear a gentle sputter as moisture cooks off. This step introduces complexity, and it is why the final cookie tastes richer without extra ingredients. Watch the butter closely so it browns evenly, swirling the pan to distribute the heat. A common mistake is walking away and letting it burn, which leaves bitter undertones. Remove from heat the moment brown flecks appear.
- Cook until the butter begins to brown, about 3 to 4 minutes: When the butter browns, you will see tiny browned solids at the bottom and smell a warm, toasted aroma, almost like toasted nuts. This moment is crucial because the browned particles carry much of the flavor, so scrape them into your bowl. If you overcook it, the smell will turn overly toasty and start to smell acrid, which signals burning. Cooling briefly prevents the next ingredients from cooking the eggs prematurely.
- Remove from the heat and transfer to a heatproof bowl: Transferring the hot butter into a safe bowl preserves the browned bits and allows even cooling. You will notice the oil separating slightly from the solids, a sign the browning succeeded. Scrape everything into the bowl to keep the flavor. A mistake people make is leaving the butter in the hot pan, which can continue cooking and darken the flavor.
- Freeze for 10 to 15 minutes, but no longer: Chilling the bowl firms up the fat enough to handle the mixing stage without melting the other butter you will cream later, and you will still retain those warm notes. If you freeze too long, the butter becomes rock hard and difficult to beat into a smooth mixture. The texture you want is cool and slightly set, not fully solid.
- Preheat the oven to 350° F: A steady oven temperature ensures predictable spread and browning, and as it preheats you can prepare pans and coatings. You'll want a consistently hot environment so the exterior sets while the center stays chewy. If the oven temperature is too low the cookies will spread excessively and lose chewiness, while too hot will brown the edges too quickly.
- Line a baking sheet with parchment paper: Lining the sheet prevents sticking and encourages even heating across the cookie bottoms, producing consistent texture and easy cleanup. The parchment gives a light buffer, so the bottoms do not overbrown. Using unlined metal or greasing the pan can change how the cookies spread and crisp, so choose parchment for reliability.
- Beat together the remaining stick of butter, the cooled browned butter, and the brown sugar until combined: The creaming process creates air pockets that influence the cookie lift, and when you beat the cooled browned butter with the remaining softened butter and brown sugar , you will notice a glossy, fluffy texture form that smells like caramel. This hybrid of melted and creamed fats helps retain chew. Overbeating can incorporate too much air, causing the cookies to collapse, so stop when the mixture is light and homogeneous.
- Beat in the eggs and 1 egg yolk, one at a time, until combined: Adding eggs slowly creates a smooth, cohesive batter and prevents curdling. The mixture will look slightly glossy and heavier as each egg blends in, and that extra yolk adds richness that keeps the interior soft. A common error is adding cold eggs to a warm fat mix, which can cook the egg and create lumps; ensure ingredients are near room temperature for a silky result.
- Add the vanilla, beating until creamy: The scent of vanilla will bloom immediately, joining the browned butter aroma to create a warm, inviting profile. Creaming briefly ensures the flavor distributes evenly. Mixing too long here is unnecessary, since you only need the mixture to be smooth before adding dry ingredients.
- Add the flour, baking soda, and salt: Once the dry components are incorporated, you will see the dough thicken and pull away from the bowl edges, a visual cue that you have proper structure. The baking soda promotes gentle spread, and the salt lifts the sweetness. Fold until just blended to avoid developing tough gluten; overmixing at this stage is the most common mistake and will yield denser cookies.
- Fold in 3/4 cup of the M&M's, pretzels, chocolate chips, and chocolate chunks: As you fold, listen for the soft scrape of the spatula and notice how the dough takes on little flecks of color and the occasional glossy chocolate sheen. Distribute the mix ins so each scoop of dough has variety. If you overmix, the candies and chocolate can smear and change the dough consistency, so fold gently until evenly scattered.
- Mix the sugar and cinnamon in a bowl: The cinnamon sugar should smell aromatic and sweet, with a warm spice note that will become the cookie’s signature crust. Combine until uniform so every dough ball gets an even coating. Clumps of cinnamon will make some cookies overly spiced, so sift or stir thoroughly.
- Roll the dough into rounded 2 to 3 tablespoon size balls and then roll through the cinnamon sugar: The dough balls should feel dense and slightly sticky, and rolling them will coat each cookie in a glittering cinnamon sugar shell. The sugar gives a faint crunch and aromatic top. If balls are too large or too small, the bake time will change, so try to keep them consistent for even results.
- Place 3 inches apart on the prepared baking sheet: Spacing is critical so the cookies can spread and develop that thin, crisp edge without crowding. You will see them flatten and puff slightly as they bake, so the distance avoids them colliding. Too close and they will merge into one large sheet cookie; too far and you waste oven space but get well formed cookies.
- Bake for 8 minutes, then rotate the pan and push the remaining M&M's into the cookies: At the eight minute mark the edges will be set and lightly colored while the centers remain soft, and rotating the pan ensures even browning. Pressing the reserved M&M’s into the tops adds a festive look and a fresh candy burst. Avoid leaving them out too long before pressing, as they will not adhere well once the cookie surface cools significantly.
- Bake for 2 to 3 minutes more: This short second bake firms the tops just enough to set the candies and finalize the texture, creating a thin crisp exterior while preserving a chewy center. Watch closely because that extra time is the difference between perfectly chewy and overdone. A common mistake is overshooting this stage and creating a dry interior.
- Remove from the oven and let the cookies cool on the baking sheet: The residual heat on the sheet continues to finish the cookies as they rest, a carryover cooking that gently firms the center but keeps it tender. Cooling on the sheet also prevents breakage from moving them too early. If you transfer them while too warm, they may fall apart or lose that slightly glossy center.
- They will continue to cook slightly as they sit on the baking sheet: This is the moment where texture balances out, so resist the urge to move them immediately; you will notice the aroma deepen and a subtle firming at the edges. Let resting complete the internal set without drying the cookie. A mistake is stacking warm cookies, which traps steam and makes the shells soggy.
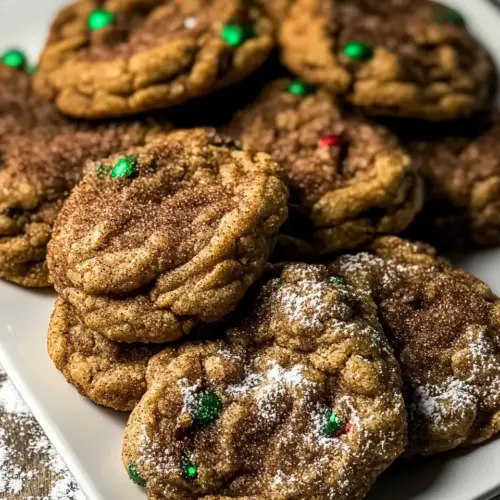
- Eat warm or let cool and store in an airtight container for up to 4 days: Warm cookies deliver the best contrast of gooey chocolate and crunchy pretzel , while cooled cookies are easier to box for gifting. Store in an airtight container at room temperature and separate layers with parchment if stacking. Leaving them uncovered causes the edges to harden and the centers to stale faster.
Pro Tips and Tweaks
I like to think of these tips as the little chef secrets that make the difference between good cookies and ones guests ask for the recipe. Small adjustments in technique or timing yield consistent, bakery quality results.
- Browned butter strategy Keep an eye and nose on the butter as it browns, scraping the nutty bits into the bowl; they add depth without any extra ingredients.
- Room temperature ingredients Bring eggs and softened butter to room temperature so the batter emulsifies smoothly and you avoid lumps or curdling.
- Measuring flour Spoon and level the flour rather than scooping to prevent dense cookies caused by packing too much flour into the cup.
- Controlled mixing Fold in mix ins gently to preserve their shapes and prevent chocolate from smearing into the dough.
- Consistent scoops Use a cookie scoop or scaled spoonfuls to keep cookie sizes uniform for even baking and presentation.
- Final candy press Press reserved M&M’s into tops mid bake for a glossy, festive look that keeps the candy intact.
Best Served With
These cookies pair beautifully with hot beverages and simple dairy free or dairy options, and they adapt to a variety of occasions from casual gatherings to holiday cookie exchanges. Presentation matters, and small choices influence the eating experience. Below are thoughtful serving ideas and storage suggestions.
- Warm and cozy Serve Chewy Christmas Snickerdoodles warm alongside a mug of hot cocoa or a spiced tea for an easy holiday dessert pairing.
- Party platter Arrange the cookies on a decorative platter with napkins for holiday parties, placing small piles of extra M&M’s and pretzel shards nearby for people to customize their bites.
- Gift boxes Layer with parchment in small boxes for gifting to neighbors or hosts, and include a small note about the browned butter to highlight the special touch.
- Occasion fit These cookies are perfect for cookie exchanges, family gatherings during winter, and celebratory brunches where a sweet, chewy treat is welcome.
- Storage tips Keep in an airtight container at room temperature for up to four days, or freeze baked cookies in a single layer then transfer to a freezer bag for longer storage; thaw at room temperature before serving.
- Seasonal pairings Pair with other holiday cookies for a mixed platter, balancing different textures so the chewy snickerdoodles contrast with crisp butter cookies or soft spice cookies.
FAQ
Conclusion
These Chewy Christmas Snickerdoodles are special because they blend browned butter depth with cinnamon sugar nostalgia and festive mix ins for an elevated holiday cookie. Try them and you will find the contrast of tender centers and crisp edges, punctuated by pockets of chocolate and pretzel crunch, hard to resist. Baking them is a warm, approachable ritual that rewards small attentions like browning the butter or pressing in candies mid bake, and they make thoughtful gifts or a comforting addition to family gatherings. I hope you bake a batch soon and enjoy sharing them with loved ones.
Chewy Christmas Snickerdoodles
Equipment
- Skillet
- Heatproof Bowl
- Oven
- Baking Sheet
- Parchment Paper
- Mixing Bowl
- Spatula
Ingredients
- 2 sticks (1 cup) salted butter, at room temperature Creamy and softened to incorporate air and create a tender, chewy cookie base; at room temperature it blends smoothly with sugars and eggs for even texture.
- 3/4 cup light or dark brown sugar Sweet and moist, brown sugar contributes deep caramel notes and helps retain chewiness by adding moisture; choose light for milder flavor or dark for richer molasses intensity.
- 2 large eggs, plus 1 egg yolk Beaten to add structure, moisture, and lift; the two whole eggs provide binding and leavening while the extra yolk adds richness and chewiness to the dough.
- 2 teaspoons vanilla extract Aromatic flavoring that enhances sweetness and rounds out the cookie profile; vanilla extract deepens overall taste and complements cinnamon and chocolate.
- 2 1/4 cups all-purpose flour Provides the bulk and structure of the cookies; all-purpose flour develops enough gluten for chew without becoming tough when properly mixed and measured.
- 1 teaspoon baking soda Leavening agent used to give cookies a gentle lift and slight spread; baking soda reacts with acidic components to create tenderness and lightness.
- 1 teaspoon kosher salt Seasoning that balances sweetness and enhances flavor contrast; kosher salt strengthens dough structure and heightens the overall taste of the cookie.
- 1 1/4 cups holiday M&M’s Colorful candy pieces that add festive crunch and bursts of chocolate; folded into the dough, holiday M&M’s create visual appeal and small pockets of sweetness.
- 1 cup mini pretzel sticks crushed Crunchy, salty element crushed to add texture and a savory counterpoint; mini pretzel sticks contribute broken salty shards that complement the sweet dough.
- 1 cup semi-sweet chocolate chips Small chocolate morsels that melt into pockets of sweetness; semi-sweet chips provide chocolate flavor without overwhelming the other mix-ins.
- 1/3 cup dark chocolate chunks Larger chunks of dark chocolate that create melty, intense chocolate pockets; dark chocolate adds richness and a slightly bitter contrast to the sweet dough.
- 1/3 cup granulated sugar Coarse sugar used for rolling the dough before baking to create a sweet, slightly crunchy exterior and enhance the cookie’s surface texture.
- 2 teaspoons cinnamon Warm spice that defines the snickerdoodle character; cinnamon is mixed with sugar for coating, adding aromatic warmth and a familiar holiday flavor.
Instructions
- Add 1 stick of butter to a skillet set over medium heat. Cook until the butter begins to brown, about 3-4 minutes. Remove from the heat and transfer to a heatproof bowl. Freeze for 10-15 minutes, but no longer. Preheat the oven to 350° F. Line a baking sheet with parchment paper. In a bowl, beat together the remaining stick of butter, the cooled browned butter, and the brown sugar until combined. Beat in the eggs and 1 egg yolk, one at a time, until combined. Add the vanilla, beating until creamy. Add the flour, baking soda, and salt. Fold in 3/4 cup of the M&M's, pretzels, chocolate chips, and chocolate chunks. Mix the sugar and cinnamon in a bowl. Roll the dough into rounded 2-3 tablespoon-size balls and then roll through the cinnamon sugar. Place 3 inches apart on the prepared baking sheet. Bake for 8 minutes, then rotate the pan and push the remaining M&M's into the cookies. Bake for 2-3 minutes more. Remove from the oven and let the cookies cool on the baking sheet. They will continue to cook slightly as they sit on the baking sheet. Eat warm or let cool and store in an airtight container for up to 4 days.: The aroma of butter changing color is immediate, a nutty, toasty scent that signals those deep caramel notes forming, and you will hear a gentle sputter as moisture cooks off. This step introduces complexity, and it is why the final cookie tastes richer without extra ingredients. Watch the butter closely so it browns evenly, swirling the pan to distribute the heat. A common mistake is walking away and letting it burn, which leaves bitter undertones. Remove from heat the moment brown flecks appear.
- Cook until the butter begins to brown, about 3 to 4 minutes: When the butter browns, you will see tiny browned solids at the bottom and smell a warm, toasted aroma, almost like toasted nuts. This moment is crucial because the browned particles carry much of the flavor, so scrape them into your bowl. If you overcook it, the smell will turn overly toasty and start to smell acrid, which signals burning. Cooling briefly prevents the next ingredients from cooking the eggs prematurely.
- Remove from the heat and transfer to a heatproof bowl: Transferring the hot butter into a safe bowl preserves the browned bits and allows even cooling. You will notice the oil separating slightly from the solids, a sign the browning succeeded. Scrape everything into the bowl to keep the flavor. A mistake people make is leaving the butter in the hot pan, which can continue cooking and darken the flavor.
- Freeze for 10 to 15 minutes, but no longer: Chilling the bowl firms up the fat enough to handle the mixing stage without melting the other butter you will cream later, and you will still retain those warm notes. If you freeze too long, the butter becomes rock hard and difficult to beat into a smooth mixture. The texture you want is cool and slightly set, not fully solid.
- Preheat the oven to 350° F: A steady oven temperature ensures predictable spread and browning, and as it preheats you can prepare pans and coatings. You'll want a consistently hot environment so the exterior sets while the center stays chewy. If the oven temperature is too low the cookies will spread excessively and lose chewiness, while too hot will brown the edges too quickly.
- Line a baking sheet with parchment paper: Lining the sheet prevents sticking and encourages even heating across the cookie bottoms, producing consistent texture and easy cleanup. The parchment gives a light buffer, so the bottoms do not overbrown. Using unlined metal or greasing the pan can change how the cookies spread and crisp, so choose parchment for reliability.
- Beat together the remaining stick of butter, the cooled browned butter, and the brown sugar until combined: The creaming process creates air pockets that influence the cookie lift, and when you beat the cooled browned butter with the remaining softened butter and brown sugar , you will notice a glossy, fluffy texture form that smells like caramel. This hybrid of melted and creamed fats helps retain chew. Overbeating can incorporate too much air, causing the cookies to collapse, so stop when the mixture is light and homogeneous.
- Beat in the eggs and 1 egg yolk, one at a time, until combined: Adding eggs slowly creates a smooth, cohesive batter and prevents curdling. The mixture will look slightly glossy and heavier as each egg blends in, and that extra yolk adds richness that keeps the interior soft. A common error is adding cold eggs to a warm fat mix, which can cook the egg and create lumps; ensure ingredients are near room temperature for a silky result.
- Add the vanilla, beating until creamy: The scent of vanilla will bloom immediately, joining the browned butter aroma to create a warm, inviting profile. Creaming briefly ensures the flavor distributes evenly. Mixing too long here is unnecessary, since you only need the mixture to be smooth before adding dry ingredients.
- Add the flour, baking soda, and salt: Once the dry components are incorporated, you will see the dough thicken and pull away from the bowl edges, a visual cue that you have proper structure. The baking soda promotes gentle spread, and the salt lifts the sweetness. Fold until just blended to avoid developing tough gluten; overmixing at this stage is the most common mistake and will yield denser cookies.
- Fold in 3/4 cup of the M&M's, pretzels, chocolate chips, and chocolate chunks: As you fold, listen for the soft scrape of the spatula and notice how the dough takes on little flecks of color and the occasional glossy chocolate sheen. Distribute the mix ins so each scoop of dough has variety. If you overmix, the candies and chocolate can smear and change the dough consistency, so fold gently until evenly scattered.
- Mix the sugar and cinnamon in a bowl: The cinnamon sugar should smell aromatic and sweet, with a warm spice note that will become the cookie’s signature crust. Combine until uniform so every dough ball gets an even coating. Clumps of cinnamon will make some cookies overly spiced, so sift or stir thoroughly.
- Roll the dough into rounded 2 to 3 tablespoon size balls and then roll through the cinnamon sugar: The dough balls should feel dense and slightly sticky, and rolling them will coat each cookie in a glittering cinnamon sugar shell. The sugar gives a faint crunch and aromatic top. If balls are too large or too small, the bake time will change, so try to keep them consistent for even results.
- Place 3 inches apart on the prepared baking sheet: Spacing is critical so the cookies can spread and develop that thin, crisp edge without crowding. You will see them flatten and puff slightly as they bake, so the distance avoids them colliding. Too close and they will merge into one large sheet cookie; too far and you waste oven space but get well formed cookies.
- Bake for 8 minutes, then rotate the pan and push the remaining M&M's into the cookies: At the eight minute mark the edges will be set and lightly colored while the centers remain soft, and rotating the pan ensures even browning. Pressing the reserved M&M’s into the tops adds a festive look and a fresh candy burst. Avoid leaving them out too long before pressing, as they will not adhere well once the cookie surface cools significantly.
- Bake for 2 to 3 minutes more: This short second bake firms the tops just enough to set the candies and finalize the texture, creating a thin crisp exterior while preserving a chewy center. Watch closely because that extra time is the difference between perfectly chewy and overdone. A common mistake is overshooting this stage and creating a dry interior.
- Remove from the oven and let the cookies cool on the baking sheet: The residual heat on the sheet continues to finish the cookies as they rest, a carryover cooking that gently firms the center but keeps it tender. Cooling on the sheet also prevents breakage from moving them too early. If you transfer them while too warm, they may fall apart or lose that slightly glossy center.
- They will continue to cook slightly as they sit on the baking sheet: This is the moment where texture balances out, so resist the urge to move them immediately; you will notice the aroma deepen and a subtle firming at the edges. Let resting complete the internal set without drying the cookie. A mistake is stacking warm cookies, which traps steam and makes the shells soggy.
- Eat warm or let cool and store in an airtight container for up to 4 days: Warm cookies deliver the best contrast of gooey chocolate and crunchy pretzel , while cooled cookies are easier to box for gifting. Store in an airtight container at room temperature and separate layers with parchment if stacking. Leaving them uncovered causes the edges to harden and the centers to stale faster.
Notes
- Browned butter strategy Keep an eye and nose on the butter as it browns, scraping the nutty bits into the bowl; they add depth without any extra ingredients.
- Room temperature ingredients Bring eggs and softened butter to room temperature so the batter emulsifies smoothly and you avoid lumps or curdling.
- Measuring flour Spoon and level the flour rather than scooping to prevent dense cookies caused by packing too much flour into the cup.
- Controlled mixing Fold in mix ins gently to preserve their shapes and prevent chocolate from smearing into the dough.
- Consistent scoops Use a cookie scoop or scaled spoonfuls to keep cookie sizes uniform for even baking and presentation.
- Final candy press Press reserved M&M’s into tops mid bake for a glossy, festive look that keeps the candy intact.