
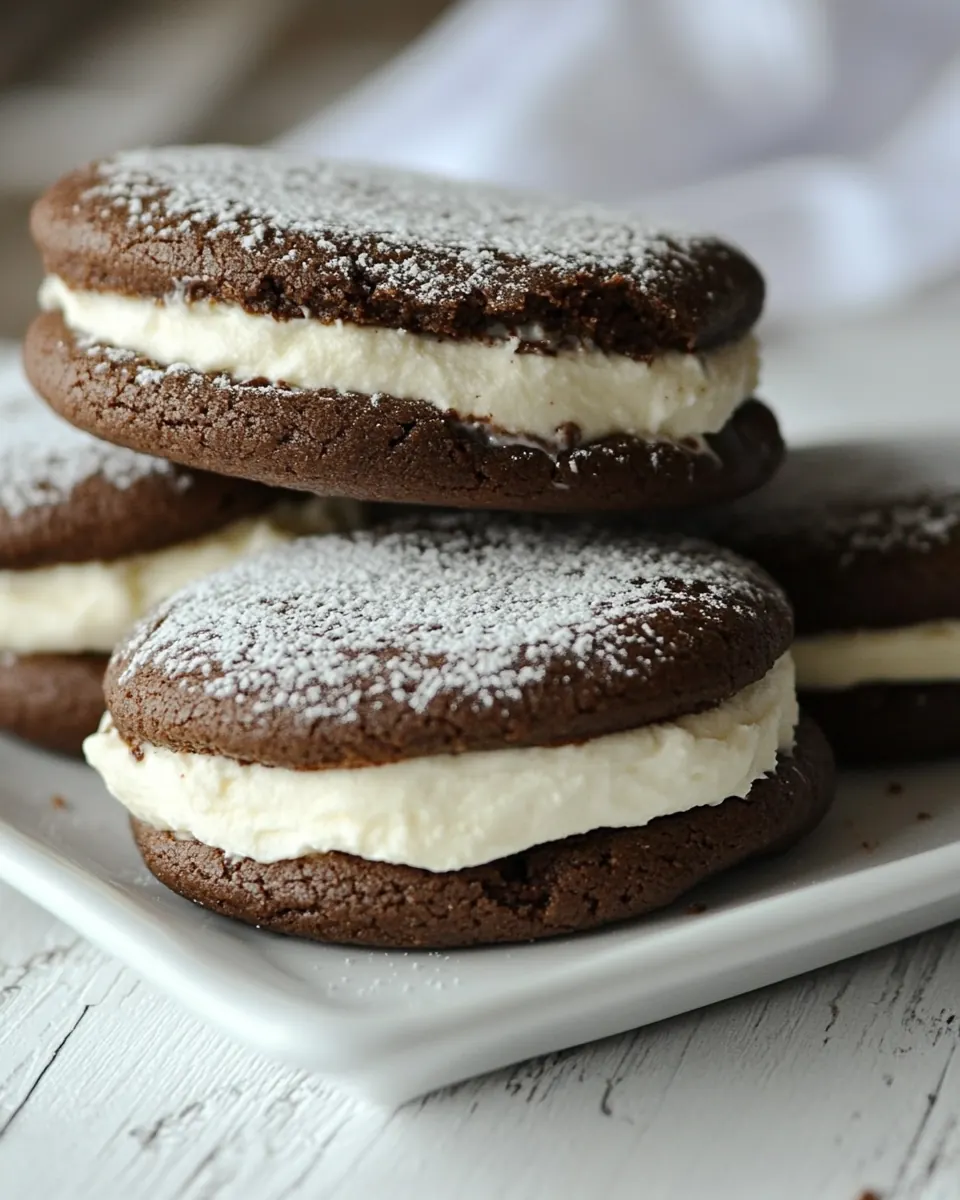
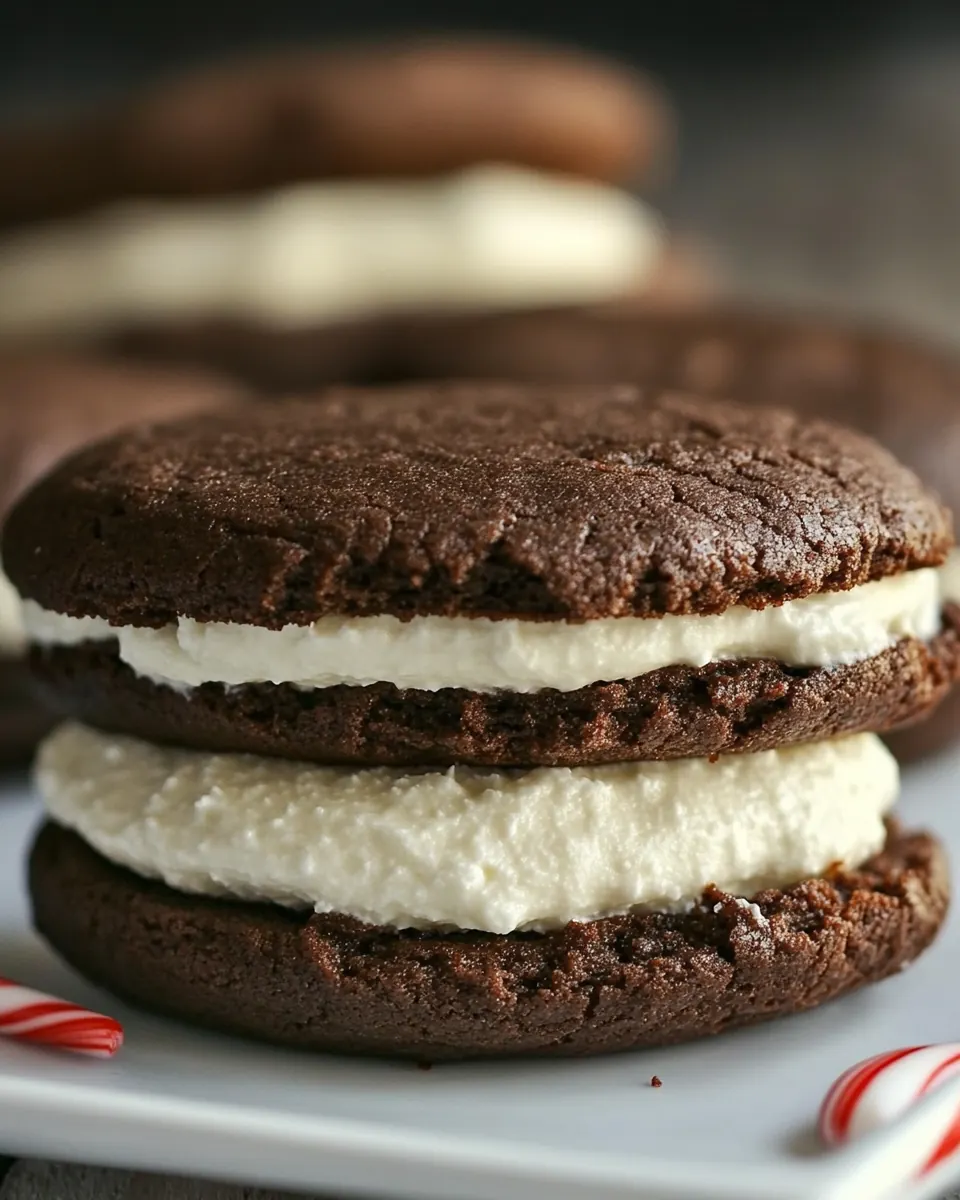
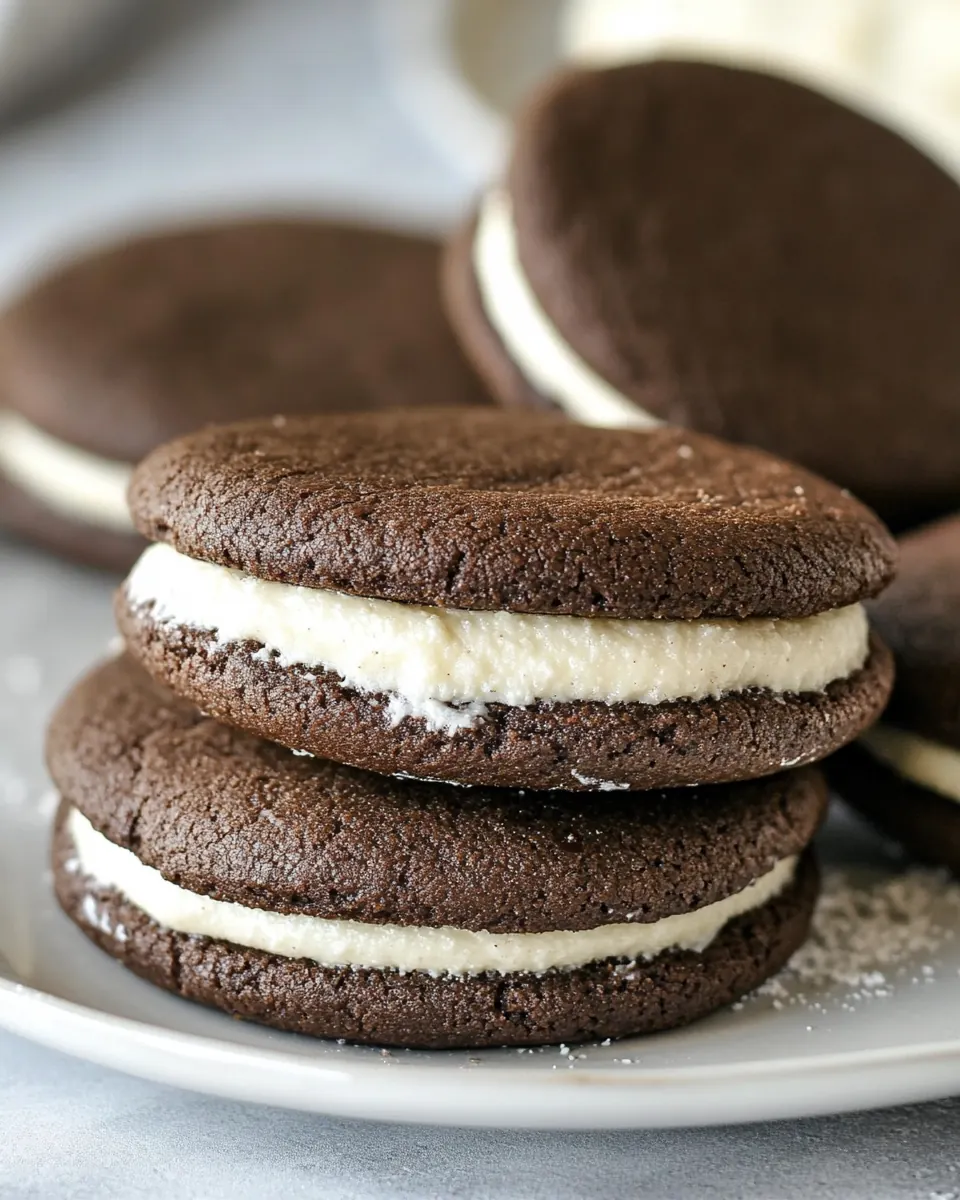
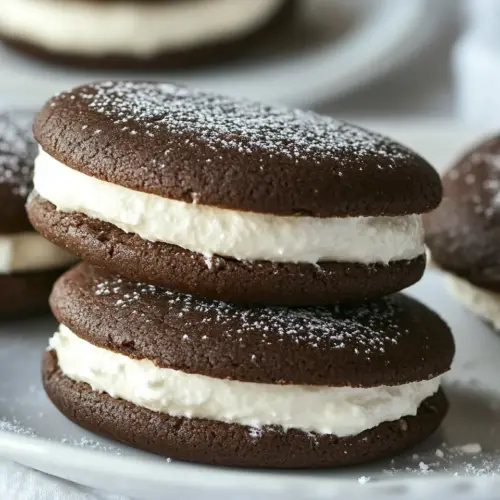
Peppermint Cream Chocolate Cookie Sandwiches
Peppermint Cream Chocolate Cookie Sandwiches are the kind of festive treat I reach for when I want to make an impression without spending all day in the kitchen.
My earliest memory of these cookies comes from a cramped holiday kitchen where my cousin and I attempted to frost every cookie in sight while holiday music played too loud. We laughed, traded spoonfuls of filling, and ended up with a tray so full of personality nobody wanted to share. That joyful chaos taught me that flavor and fun matter more than perfection, and that lesson lives in this recipe.
Recipe Snapshot
25 mins
15 mins
10 mins
Medium
200 kcal
American
Gluten-Free, Low FODMAP
Desserts
Oven, Sheet pan, Parchment paper, Mixing bowl, Mixer, Measuring cups, Spoon
Why You’ll Love This Peppermint Cream Chocolate Cookie Sandwiches
One bite delivers seasonal cheer
I love how Peppermint Cream Chocolate Cookie Sandwiches balance a rich chocolate profile with a bright peppermint note. The contrast makes each bite feel lively, and I often find guests closing their eyes as the flavors land. That minty finish keeps these from feeling too heavy, which is why I reach for them during winter gatherings.
Textural play is a winner
The cookies themselves are slightly crisp at the edges and tender inside, while the marshmallow cream filling and confectioners‘ sugar create a pillowy center. I adore that combination because it gives you a contrast between exterior crunch and soft, sweet filling. When I taste it, the mouthfeel is every bit as satisfying as the flavor.
Simple pantry ingredients, big payoff
You do not need exotic supplies to make these shine. With staples like all-purpose flour, sugar, and chocolate chips, the recipe is approachable. I appreciate recipes that let me improvise, and these cookies invite creativity while staying reliably delicious.
Great for gifting and parties
Because these hold together well at room temperature, they travel easily. I often package them in boxes for neighbors, and people always ask for the recipe. The peppermint note reads as holiday without being gimmicky, so they fit many occasions beyond Christmas too.
Flexible and forgiving process
I enjoy that the dough is easy to scoop and the filling is forgiving to assemble. You can make the cookies a day ahead and finish assembly later, which is a lifesaver when hosting. In short, these are festive, fun, and user friendly, and that is why I keep them in my repertoire.
What Goes Into Peppermint Cream Chocolate Cookie Sandwiches
These ingredients work together to create a cookie that is chocolate forward, balanced, and textured. The key players are the all-purpose flour for structure, the butter and shortening for tenderness and spread control, and the chocolate chips for pockets of melted chocolate. The peppermint filling brings a cool, aromatic contrast that lifts the whole bite.
- 1/2 cup (113 g) butter, softened: Softened to room temperature so it creams smoothly with sugar and provides richness and structure to the cookie dough when beaten.
- 1/4 cup (21 g) unsweetened cocoa powder: Unsweetened and sifted to contribute deep chocolate flavor without added sugar, balancing sweetness and intensifying the overall cocoa profile.
- 2 tablespoons (25 g) vegetable oil: Used to add moisture and tenderize the crumb while helping distribute fat evenly for a softer, chewier cookie texture.
- 1 cup (170 g) chocolate chips: Melted or stirred into batter to boost chocolate intensity, add pockets of melted chocolate, and create a rich, fudgy bite in each sandwich.
- 2 cups (240 g) all-purpose flour: Measured and sifted to build the dough’s structure, provide bulk, and interact with leaveners to determine the final texture and chewiness.
- 1/2 teaspoon (2 g) baking powder: Leavening agent combined with flour to provide slight lift, lighten the cookie crumb, and ensure an even rise during baking.
- 1/2 teaspoon (1 g) kosher salt: Added sparingly to enhance overall flavor and control fermentation, balancing sweetness while accentuating other flavors in the cookies.
- 4 large (200 g) eggs: Beaten into the batter to bind ingredients, provide moisture and richness, and contribute to the cookie’s tender, cohesive structure.
- 1 1/2 cups (297 g) sugar: Creamed with butter to aerate the dough, sweeten the cookies, and help create a soft, tender texture while balancing other flavors.
- 2 teaspoons (9 g) vanilla extract: Added for aroma and flavor complexity, enhancing the overall profile with warm vanilla notes that round out chocolate and peppermint.
- 1/2 cup (92 g) shortening: Incorporated into the filling to add solid fat for stability, contribute a silky mouthfeel, and help achieve the marshmallow cream’s spreadable consistency.
- 1 1/2 cups (144 g) marshmallow cream: Folded into the filling to provide sweet, gooey flavor and light, fluffy texture, acting as the primary binder for the peppermint cream center.
- 2 cups (227 g) confectioners' sugar: Sifted into the filling to thicken and sweeten, creating a smooth, pipeable cream that holds shape between cookies.
- 1 teaspoon (4 g) peppermint extract: Added at a small percentage to the filling to deliver bright, cooling peppermint flavor and balance the sweetness of the cream.
- 1 1/2 tablespoons (21 g) milk: Stirred into the filling to adjust consistency and loosen the cream slightly, ensuring a spreadable texture and smooth mouthfeel.
How to Prepare Peppermint Cream Chocolate Cookie Sandwiches
These steps walk you through making the cookies and the peppermint cream filling, and they show how to assemble the sandwiches. Read each step fully so you can notice the visual and sensory cues I describe, which help you hit the right texture and flavor every time.
- Preheat oven to 350º F. Line sheet pan with parchment paper or silicon baking mat. Set aside.: The kitchen should smell faintly warm as the oven comes to temperature and the air in the room shifts; this preheating ensures even bake and accurate timing. You will know the oven is ready when the temperature stabilizes at 350º F , and using parchment paper prevents sticking and promotes even browning. A common error is skipping lining the pan, which can cause cookies to adhere and break when removed, so take the minute to prepare the pan ahead of time.
- Cream together butter, cocoa and vegetable oil until well-combined. Stir in chocolate chips.: You will notice a glossy, darker paste form as the butter and cocoa marry, and the aroma of chocolate becomes more pronounced. The vegetable oil adds a silkiness that helps pockets of chocolate chips suspend in the dough. Avoid overbeating at this stage because excessive aeration can change the texture and lead to flatter cookies. If you see uneven lumps, stop and scrape the bowl, then mix briefly to even the texture.
- Mix in flour, baking powder, and salt until well-combined. Add eggs, sugar and vanilla and mix until all well-combined and creamy.: The dry all-purpose flour will turn the glossy batter into a cohesive dough, and the faint scent of baking powder and salt will balance the sweetness. When you add the eggs , the mixture smooths into a creamy consistency and the sugar begins to dissolve, creating slight sheen. One mistake is to overmix after the flour goes in; that can develop gluten and make the cookies tough, so stop mixing as soon as the dough comes together.
- Scoop tablespoon of cookie dough and drop onto prepared sheet pan, leaving about 1 1/2 inches between each for the cookies to spread as they bake.: As you scoop, the dough should feel slightly tacky but hold its shape, and the mounding will create domed cookies that flatten to the intended size. Proper spacing matters because the butter and shortening cause spreading; give each cookie about 1 1/2 inches of clearance so edges can crisp while centers stay tender. A frequent slip up is overcrowding the pan, which yields merged cookies instead of neat rounds.
- Bake for 10 minutes. Remove from oven and allow to cool completely.: During baking you will see the edges set and darken slightly, and the tops may develop a subtle sheen. At the 10 minute mark the cookies should be browned at the edges but still tender in the center; they continue to set as they cool on the sheet, which is why removing at the right time is crucial. Leaving them in longer will create overly crisp interiors, while removing too early can leave them underdone and prone to collapsing.
- While the chocolate cookie dough is baking, prepare the peppermint cream filling. Cream together all of the ingredients for the cream filling recipe. Set aside until the chocolate cookies portion has completely cooled.: As you beat the marshmallow cream , confectioners' sugar , peppermint extract , milk , and shortening , the mixture will lighten and become glossy, with the peppermint scent lifting through the bowl. The texture should be spreadable yet stable; chilling for a short time can firm it if it feels too soft. Beware of adding too much milk at once, which can make the filling runny and difficult to assemble.
- Scoop 1 teaspoon of cream filling and place on top of the flattened side of one chocolate cookies. Place another chocolate cookie on top of the cream filling.: The filling should feel slightly cool and marshmallow soft, and when sandwiched it should create a modest mound without oozing. Press gently so the filling spreads to the edges but does not spill over. A common mistake is overfilling, which causes the sandwiches to slip apart and look messy, so keep to approximately 1 teaspoon per sandwich for neat presentation.
- Serve at room temperature.: Allowing the sandwiches to rest brings the flavors into balance and softens any chill from refrigeration, yielding the best texture. At room temperature the mint aroma is more pronounced and the filling is perfectly pillowy. Serving too warm will make the filling too soft, while serving too cold can mute the peppermint and make biting more difficult.
Helpful Hints
These notes will help you bake with confidence and adapt the process to your kitchen. Each tip highlights a practical step or adjustment I use when making Peppermint Cream Chocolate Cookie Sandwiches.
- Check your oven accuracy by using an oven thermometer so you bake at a true 350º F, which prevents under or overbaking.
- Softened butter matters, not melted, to get the right creaminess when combining with the cocoa and vegetable oil, preserving texture in the final cookie.
- Measure confectioners’ sugar carefully and sift if needed to ensure the filling is smooth and free of lumps that can affect mouthfeel.
- Keep spacing consistent when scooping cookies to ensure even baking and uniform size for neat sandwiches.
- Chill the filling slightly if your kitchen is warm, this helps the cream hold shape during assembly and transport.
What Complements This Peppermint Cream Chocolate Cookie Sandwiches
These cookie sandwiches pair well with simple accompaniments and make excellent gifts. Below I describe serving contexts and practical storage ideas to keep them tasting their best.
- Party platter, arrange on a platter with small signs noting the peppermint element, so guests know the flavor profile and can sample with other holiday cookies.
- Gifting, stack in small boxes layered with parchment so they travel without sticking, and include a note about keeping them at room temperature for best texture.
- Seasonal pairing, serve during winter gatherings or holiday dessert tables alongside nut free offerings so these remain accessible to many guests.
- Storage, keep in an airtight container at room temperature for up to three days, or freeze assembled sandwiches separated by parchment for up to one month.
- Serving temperature, allow refrigerated sandwiches to sit at room temperature for 20 to 30 minutes before serving so the filling regains its pillowy consistency.
FAQ
Conclusion
These Peppermint Cream Chocolate Cookie Sandwiches stand out because they pair deep chocolate notes with a cool peppermint cream, delivering contrast in both flavor and texture. Give them a try the next time you want an easy yet festive dessert that travels and gifts well. They are forgiving to make, satisfying to share, and a reliable crowd pleaser that will likely become a seasonal favorite.
Peppermint Cream Chocolate Cookie Sandwiches
Equipment
- Oven
- Sheet Pan
- Parchment Paper
- Mixing Bowl
- Mixer
- Measuring Cups
- Spoon
Ingredients
- 1/2 cup (113 g) butter, softened Softened to room temperature so it creams smoothly with sugar and provides richness and structure to the cookie dough when beaten.
- 1/4 cup (21 g) unsweetened cocoa powder Unsweetened and sifted to contribute deep chocolate flavor without added sugar, balancing sweetness and intensifying the overall cocoa profile.
- 2 tablespoons (25 g) vegetable oil Used to add moisture and tenderize the crumb while helping distribute fat evenly for a softer, chewier cookie texture.
- 1 cup (170 g) chocolate chips Melted or stirred into batter to boost chocolate intensity, add pockets of melted chocolate, and create a rich, fudgy bite in each sandwich.
- 2 cups (240 g) all-purpose flour Measured and sifted to build the dough’s structure, provide bulk, and interact with leaveners to determine the final texture and chewiness.
- 1/2 teaspoon (2 g) baking powder Leavening agent combined with flour to provide slight lift, lighten the cookie crumb, and ensure an even rise during baking.
- 1/2 teaspoon (1 g) kosher salt Added sparingly to enhance overall flavor and control fermentation, balancing sweetness while accentuating other flavors in the cookies.
- 4 large (200 g) eggs Beaten into the batter to bind ingredients, provide moisture and richness, and contribute to the cookie’s tender, cohesive structure.
- 1 1/2 cups (297 g) sugar Creamed with butter to aerate the dough, sweeten the cookies, and help create a soft, tender texture while balancing other flavors.
- 2 teaspoons (9 g) vanilla extract Added for aroma and flavor complexity, enhancing the overall profile with warm vanilla notes that round out chocolate and peppermint.
- 1/2 cup (92 g) shortening Incorporated into the filling to add solid fat for stability, contribute a silky mouthfeel, and help achieve the marshmallow cream’s spreadable consistency.
- 1 1/2 cups (144 g) marshmallow cream Folded into the filling to provide sweet, gooey flavor and light, fluffy texture, acting as the primary binder for the peppermint cream center.
- 2 cups (227 g) confectioners' sugar Sifted into the filling to thicken and sweeten, creating a smooth, pipeable cream that holds shape between cookies.
- 1 teaspoon (4 g) peppermint extract Added at a small percentage to the filling to deliver bright, cooling peppermint flavor and balance the sweetness of the cream.
- 1 1/2 tablespoons (21 g) milk Stirred into the filling to adjust consistency and loosen the cream slightly, ensuring a spreadable texture and smooth mouthfeel.
Instructions
- Preheat oven to 350º F. Line sheet pan with parchment paper or silicon baking mat. Set aside.: The kitchen should smell faintly warm as the oven comes to temperature and the air in the room shifts; this preheating ensures even bake and accurate timing. You will know the oven is ready when the temperature stabilizes at 350º F , and using parchment paper prevents sticking and promotes even browning. A common error is skipping lining the pan, which can cause cookies to adhere and break when removed, so take the minute to prepare the pan ahead of time.
- Cream together butter, cocoa and vegetable oil until well-combined. Stir in chocolate chips.: You will notice a glossy, darker paste form as the butter and cocoa marry, and the aroma of chocolate becomes more pronounced. The vegetable oil adds a silkiness that helps pockets of chocolate chips suspend in the dough. Avoid overbeating at this stage because excessive aeration can change the texture and lead to flatter cookies. If you see uneven lumps, stop and scrape the bowl, then mix briefly to even the texture.
- Mix in flour, baking powder, and salt until well-combined. Add eggs, sugar and vanilla and mix until all well-combined and creamy.: The dry all-purpose flour will turn the glossy batter into a cohesive dough, and the faint scent of baking powder and salt will balance the sweetness. When you add the eggs , the mixture smooths into a creamy consistency and the sugar begins to dissolve, creating slight sheen. One mistake is to overmix after the flour goes in; that can develop gluten and make the cookies tough, so stop mixing as soon as the dough comes together.
- Scoop tablespoon of cookie dough and drop onto prepared sheet pan, leaving about 1 1/2 inches between each for the cookies to spread as they bake.: As you scoop, the dough should feel slightly tacky but hold its shape, and the mounding will create domed cookies that flatten to the intended size. Proper spacing matters because the butter and shortening cause spreading; give each cookie about 1 1/2 inches of clearance so edges can crisp while centers stay tender. A frequent slip up is overcrowding the pan, which yields merged cookies instead of neat rounds.
- Bake for 10 minutes. Remove from oven and allow to cool completely.: During baking you will see the edges set and darken slightly, and the tops may develop a subtle sheen. At the 10 minute mark the cookies should be browned at the edges but still tender in the center; they continue to set as they cool on the sheet, which is why removing at the right time is crucial. Leaving them in longer will create overly crisp interiors, while removing too early can leave them underdone and prone to collapsing.
- While the chocolate cookie dough is baking, prepare the peppermint cream filling. Cream together all of the ingredients for the cream filling recipe. Set aside until the chocolate cookies portion has completely cooled.: As you beat the marshmallow cream , confectioners' sugar , peppermint extract , milk , and shortening , the mixture will lighten and become glossy, with the peppermint scent lifting through the bowl. The texture should be spreadable yet stable; chilling for a short time can firm it if it feels too soft. Beware of adding too much milk at once, which can make the filling runny and difficult to assemble.
- Scoop 1 teaspoon of cream filling and place on top of the flattened side of one chocolate cookies. Place another chocolate cookie on top of the cream filling.: The filling should feel slightly cool and marshmallow soft, and when sandwiched it should create a modest mound without oozing. Press gently so the filling spreads to the edges but does not spill over. A common mistake is overfilling, which causes the sandwiches to slip apart and look messy, so keep to approximately 1 teaspoon per sandwich for neat presentation.
- Serve at room temperature.: Allowing the sandwiches to rest brings the flavors into balance and softens any chill from refrigeration, yielding the best texture. At room temperature the mint aroma is more pronounced and the filling is perfectly pillowy. Serving too warm will make the filling too soft, while serving too cold can mute the peppermint and make biting more difficult.
Notes
- Check your oven accuracy by using an oven thermometer so you bake at a true 350º F, which prevents under or overbaking.
- Softened butter matters, not melted, to get the right creaminess when combining with the cocoa and vegetable oil, preserving texture in the final cookie.
- Measure confectioners' sugar carefully and sift if needed to ensure the filling is smooth and free of lumps that can affect mouthfeel.
- Keep spacing consistent when scooping cookies to ensure even baking and uniform size for neat sandwiches.
- Chill the filling slightly if your kitchen is warm, this helps the cream hold shape during assembly and transport.