
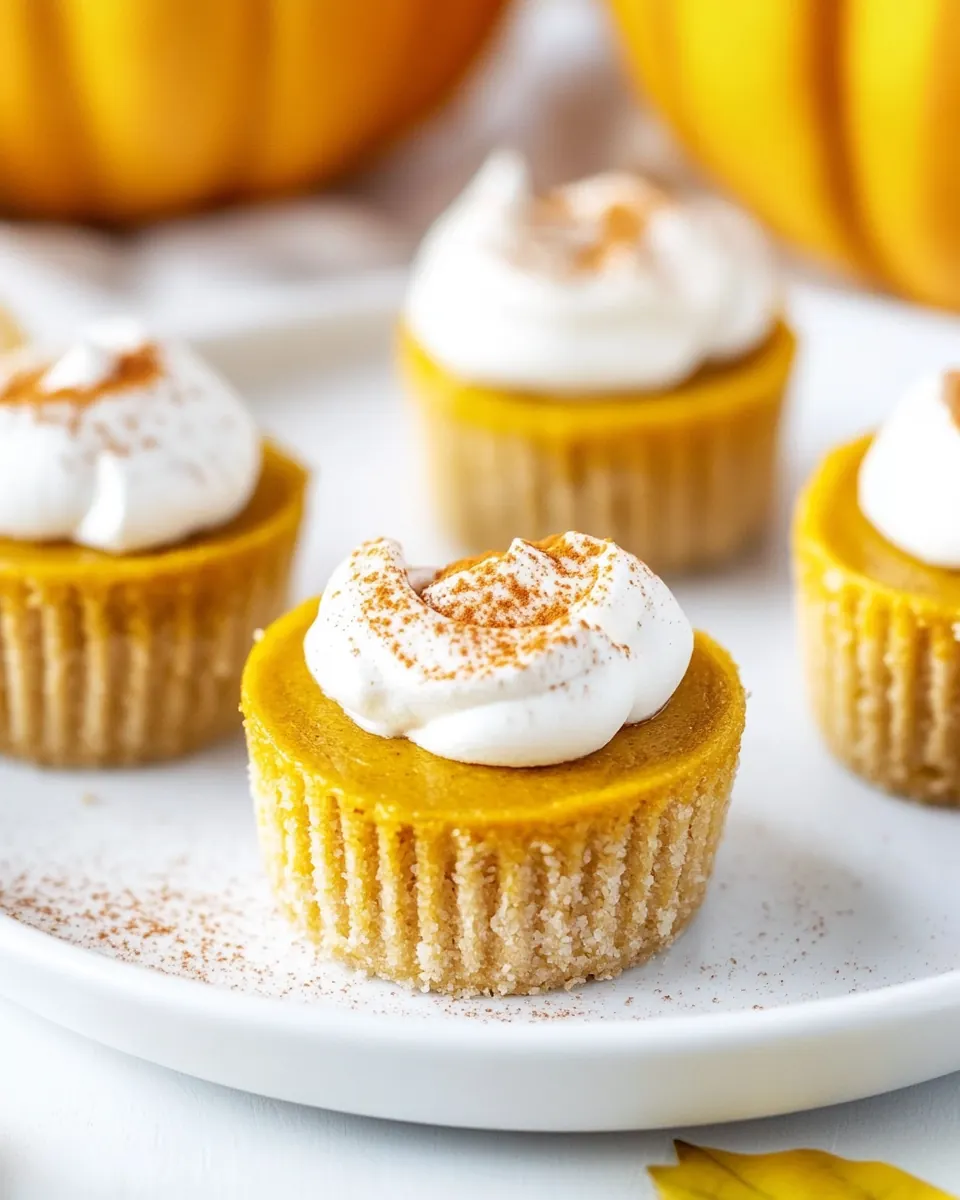
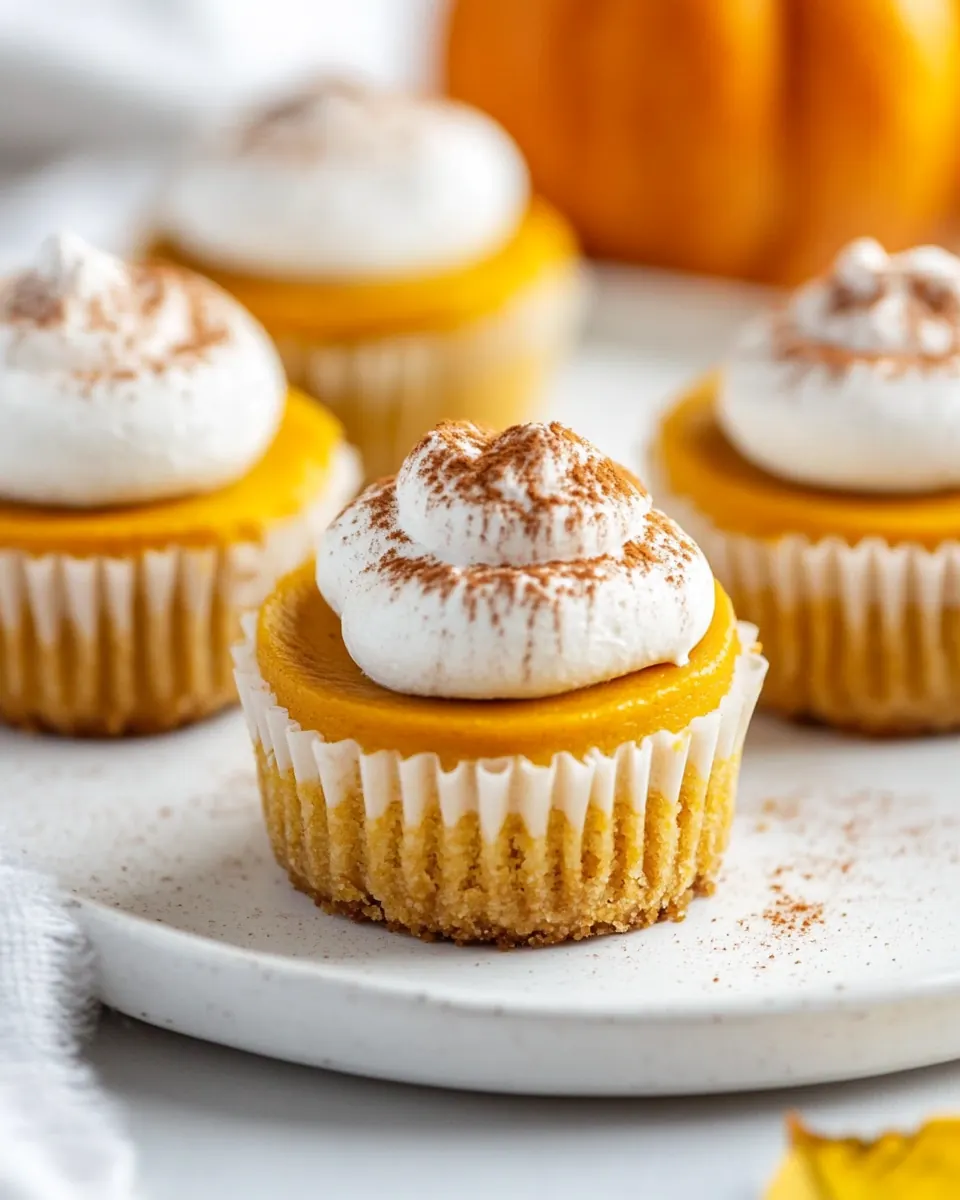
Mini Pumpkin Cheesecakes
Mini Pumpkin Cheesecakes came into my life one crisp October afternoon when I was craving something small, festive, and comfortingly rich.
I remember juggling a basket of groceries and a toddler underfoot while deciding whether to make a full sized dessert or bite sized treats that guests could pop into their mouths between conversations. I chose the latter, and those first tiny cheesecakes vanished faster than I could plate them. The texture was luxuriously creamy, the top held just the right hint of pumpkin spice, and the graham crust provided a buttery contrast that made me grin.
Over the years I’ve refined the method so the crust presses evenly and the centers set without cracking. Each holiday I bring a tin of these to share, and people always ask for the recipe. I love that they travel well, and chilling them lets the flavors sharpen into something quietly addictive. Making a batch feels like a small act of celebration that fits into a busy afternoon or a relaxed evening with friends.
Recipe Snapshot
35 mins
10 mins
25 mins
Easy
180 kcal
American
Gluten-Free, Low FODMAP
Desserts
Muffin tin, Cupcake liners, Mixing bowl, Large scoop
What We Adore About This Mini Pumpkin Cheesecakes
Perfect portion control
I adore how Mini Pumpkin Cheesecakes give you the satisfaction of dessert without overindulging. Each small cake is just the right size to enjoy the full creaminess of the filling while keeping the crust to filling ratio balanced. I often bring these to gatherings where people prefer bite sized treats, and they always disappear first.
Balanced texture and flavor
The combination of crunchy Graham Cracker Crumbs and silky Cream Cheese infused with Pumpkin Puree creates a contrast that feels intentional. I like how the pumpkin spice lifts the filling without overpowering it. The result is an elegantly spiced, creamy bite that still feels light enough for a second helping.
Easy to scale and transport
Because these are made in a muffin tin, they are simple to portion and extremely portable. I’ve packed them into picnic boxes and holiday platters, and chilling them overnight makes them firm and durable. If you want to double the batch, the process is the same and stays manageable even on a busy day.
Kid friendly, crowd pleasing
My family loves handing these out to little hands because they are tidy and less messy than a slice of cake. Guests appreciate the individual portions, and the familiar flavors of Pumpkin Pie Spice and vanilla make these universally appealing. I find they bridge generational tastes, making them a safe choice for mixed company.
Short ingredient list with big results
You don’t need a long grocery list to get impressive results. The recipe leans on a handful of quality ingredients like Cream Cheese and Pumpkin Puree, which carry the flavor. That simplicity makes it an ideal go to when you want something special but not complicated.
Ingredients for Mini Pumpkin Cheesecakes
These ingredients are chosen for harmony. The crust provides a buttery, crunchy base that supports a luxuriously smooth filling. The key players are the Graham Cracker Crumbs and Cream Cheese, which create the structure and texture, while Pumpkin Puree and Pumpkin Pie Spice deliver seasonal warmth. I like to keep the list focused so each component can shine.
- 1 cup Graham Cracker Crumbs: Provide a crunchy, buttery base when combined with melted butter; helps form a sturdy crust for mini cheesecakes that holds shape. Add texture contrast to the creamy filling and can be pressed into muffin tins for individual portions.
- 4 tablespoons Salted Butter Melted: Melted to bind graham cracker crumbs together and create a cohesive crust; contributes a rich, savory balance that enhances overall flavor. Helps the crust set firmly when chilled so individual cheesecakes release cleanly.
- 3 tablespoons Sugar: Sweeten and balance the tang of the cream cheese in the crust or filling; dissolves easily to integrate with wet ingredients. Adds subtle caramelization when the crust bakes briefly and enhances overall sweetness.
- 12 ounces Cream Cheese Softened: Provide the smooth, tangy base for the cheesecake filling; beating until fluffy creates a light, creamy texture. Contributes structure and richness, supporting the other flavors like pumpkin and spices while setting when chilled or baked.
- 3/4 cup Pumpkin Puree: Add moisture, color, and distinctive autumnal flavor while lightening the density of the cream cheese filling. Blend thoroughly to ensure a uniform texture and to maintain a smooth, custard-like consistency in each mini cheesecake.
- 1 teaspoon Vanilla Extract: Bring a warm, floral aroma and deepen the dessert's sweetness; enhances other flavors without overpowering. Stir in with wet ingredients to distribute flavor evenly throughout the filling.
- 1/2 cup Granulated Sugar: Increase overall sweetness in the filling and help with texture by dissolving into the mixture; balances the pumpkin and spice. Use measured amounts to control sweetness level and prevent a cloying finish.
- 1 teaspoon Pumpkin Pie Spice: Introduce warm, spiced notes characteristic of pumpkin desserts; adds complexity and seasonal flavor. Mix evenly into the filling to ensure each bite has a consistent spiced profile.
- 2 Large Eggs: Incorporate protein and structure to the filling, enabling it to set and hold shape when baked or chilled. Whisk gently to combine without overbeating to avoid excess air and potential cracking.
- Whipped Cream for Topping: Provide a light, airy finishing touch that complements the rich cheesecake filling; adds visual appeal and a creamy contrast. Dollop just before serving to maintain texture and freshness.
- Ground Cinnamon for topping: Offer a warm, aromatic finish when lightly dusted over the topping; complements the pumpkin and spice combination. Sprinkle sparingly to enhance presentation and add a subtle cinnamon note to each serving.
Step by Step Guide for Mini Pumpkin Cheesecakes

These directions transform a handful of pantry staples into neat, festive bites. I walk through each step as if I am standing beside you, describing cues and small adjustments that make the difference between good and exceptional. Pay attention to texture and timing to get the creamiest centers and the firmest crusts.
- Preheat the oven to 325°F. Line a muffin tin with cupcake liners and set aside.: You will notice a warm, steady smell in the kitchen as the oven begins to heat, and the act of lining the tin creates a tidy workspace. This temperature gives the cheesecakes a gentle bake that encourages even setting without browning excessively. One common mistake is rushing this step, so allow the oven to reach the full 325°F so the first few minutes of baking are predictable. If liners are loose, they can shift during pressing; I press them lightly into each cup to secure them.
- In a small bowl, combine the graham cracker crumbs, melted butter and sugar. Add about a tablespoon of the mixture to each cupcake liner and press down firmly, I placed a cupcake liner on top of the crumbs to get a nice, even layer. Discard the extra cupcake liner after all 12 crusts have been pressed down. Bake for 5 minutes.: As you mix the crumbs with melted butter and sugar , you should feel the texture change from loose to slightly cohesive, and you will smell the buttery aroma. Pressing firmly yields a compact base that will hold together when you bite the cheesecake, and using an extra liner to press helps create a flat, even surface without sticking to your fingers. When the crusts bake for 5 minutes you may detect a faint toasty scent, and a subtle darkening signals readiness. Avoid under pressing which causes crumbly bases, and do not overbake the crusts as they can become too hard for the delicate mini format.
- In a large bowl, beat together the cream cheese and pumpkin puree until smooth. Add the vanilla, sugar, and pumpkin pie spice and mix again until smooth. Add the eggs one at a time, mixing thoroughly after each addition.: When you beat the cream cheese with pumpkin puree , watch for a glossy, homogeneous mixture without streaks. The scent will shift to creamy pumpkin with a sweet spice undercurrent. Adding vanilla , the granulated sugar , and pumpkin pie spice blends the sweet and aromatic notes, and incorporating the Large Eggs one at a time ensures a stable emulsion so the batter sets properly without separating. A lumpy or curdled texture indicates the cream cheese was too cold, so let it soften if needed. Do not overbeat after adding eggs, or air bubbles can form and create puffy tops that crack.
- Use a large scoop to fill each cupcake liner until they are just about full.: As you portion the batter, notice its thickness and sheen; it should hold its shape but still settle slightly. Filling close to the top gives a generous, rounded final appearance once baked, but leave a whisper of space to prevent overflow. A common error is inconsistent scooping which yields uneven baking times, so use the same scoop for each cup to keep portions uniform. The batter should be relatively smooth when scooped, not runny, which helps the minis maintain a creamy center after baking.
- Bake for 16-20 minutes, just until the cheesecakes are set in the middle. Cool to room temperature. Cover the cheesecakes and refrigerate for at least 3 hours, or overnight.: During baking you will hear only the quiet hum of the oven while the centers firm. Look for a gentle jiggle in the core, not a liquid wobble, and the edges should be slightly set and pull away from the liner a hair. Cooling to room temperature prevents condensation when they chill. Refrigeration for several hours allows the flavors to meld and the texture to fully firm, producing clean slices. A typical mistake is under chilling, which results in overly soft centers; give them the time to rest so they slice and transport cleanly.
- Top the chilled cheesecakes with whipped cream and dust with ground cinnamon.: The finishing touch adds a creamy, airy contrast to the dense filling, and the aroma of Ground Cinnamon is the first thing people notice when served. Dolloping or piping Whipped Cream gives a pleasing visual and textural balance. Avoid topping them too far in advance, as the cream can weep into the surface; add it shortly before serving for the freshest presentation.
Expert Tips about Mini Pumpkin Cheesecakes
These tips distill small techniques that make a big difference. I include tested notes on texture, timing, and presentation so your batch comes out reliably excellent. Read them before you start to avoid common missteps and to speed up the process.
- Soften the cream cheese properly — Allow the Cream Cheese to sit at room temperature for at least 30 minutes. This prevents lumps and helps you beat a silkier filling with fewer air pockets, which in turn reduces cracking and uneven texture.
- Measure crumbs by weight if possible — While the recipe lists cup measurements, weighing your Graham Cracker Crumbs ensures consistent crust density. If you press too lightly the crust will crumble, and if too tightly it can become overly hard after baking.
- Use room temperature eggs — Warm eggs incorporate more smoothly into the batter, helping to achieve a uniform, creamy consistency. Cold eggs can cause the Cream Cheese to seize and create an uneven texture.
- Don’t overfill the liners — Filling to just about full avoids spills and creates a clean, rounded top. Leave a tiny gap to allow for gentle rising without overflowing the liners in the oven.
- Chill long enough — Refrigerate for at least three hours or overnight to fully set the centers and let the flavors meld. Rushing this step leads to loose centers that are difficult to serve neatly.
Serving Options for Mini Pumpkin Cheesecakes
These mini cheesecakes are versatile and suit many occasions. Whether served at a family Thanksgiving, a casual brunch, or wrapped as a gift, thoughtful plating and pairing elevate the experience. I include options for accompaniments and storage so you can plan ahead with confidence.
- Holiday platter presentation — Arrange on a large platter with small doilies, and place a tiny dollop of Whipped Cream and a light dusting of Ground Cinnamon on each for a festive look, perfect for Thanksgiving dessert tables.
- Individual dessert cups — Serve a mini cheesecake in a clear dessert cup layered with a teaspoon of extra graham crumbs and a swirl of Whipped Cream for a refined single serving at dinner parties.
- Brunch addition — Pair a couple of mini cheesecakes with seasonal fruit or warm spiced coffee. Their compact size makes them an elegant finish to a mid morning gathering without feeling heavy.
- Make ahead and store — After chilling, keep the cheesecakes covered in the refrigerator for up to four days. For longer storage, freeze on a tray until firm, then transfer to an airtight container for up to one month. Thaw in the refrigerator overnight before topping with Whipped Cream.
- Perfect for gifting — Pack in a sturdy box with parchment between layers to keep the minis protected. Chilled cheesecakes travel well for short distances and make a thoughtful homemade gift.
- Occasion pairings — These work for casual get togethers, holiday celebrations like Thanksgiving, or intimate dinners where a small, refined dessert is appreciated. Their flavor profile fits autumn menus particularly well.
FAQ
Conclusion
Mini Pumpkin Cheesecakes stand out because they combine velvety cream cheese filling with cozy pumpkin spice in a perfectly portioned bite. They are simple enough for a weekday treat and elegant enough for holidays, making them a versatile addition to your dessert repertoire. I hope you give them a go, whether you are feeding a crowd or craving a single, satisfying dessert. Enjoy the process, and don’t forget to chill them well so each mini is creamy and set.

Mini Pumpkin Cheesecakes
Equipment
- Muffin Tin
- cupcake liners
- Mixing Bowl
- Large scoop
Ingredients
- 1 cup Graham Cracker Crumbs Provide a crunchy, buttery base when combined with melted butter; helps form a sturdy crust for mini cheesecakes that holds shape. Add texture contrast to the creamy filling and can be pressed into muffin tins for individual portions.
- 4 tablespoons Salted Butter Melted Melted to bind graham cracker crumbs together and create a cohesive crust; contributes a rich, savory balance that enhances overall flavor. Helps the crust set firmly when chilled so individual cheesecakes release cleanly.
- 3 tablespoons Sugar Sweeten and balance the tang of the cream cheese in the crust or filling; dissolves easily to integrate with wet ingredients. Adds subtle caramelization when the crust bakes briefly and enhances overall sweetness.
- 12 ounces Cream Cheese Softened Provide the smooth, tangy base for the cheesecake filling; beating until fluffy creates a light, creamy texture. Contributes structure and richness, supporting the other flavors like pumpkin and spices while setting when chilled or baked.
- 3/4 cup Pumpkin Puree Add moisture, color, and distinctive autumnal flavor while lightening the density of the cream cheese filling. Blend thoroughly to ensure a uniform texture and to maintain a smooth, custard-like consistency in each mini cheesecake.
- 1 teaspoon Vanilla Extract Bring a warm, floral aroma and deepen the dessert's sweetness; enhances other flavors without overpowering. Stir in with wet ingredients to distribute flavor evenly throughout the filling.
- 1/2 cup Granulated Sugar Increase overall sweetness in the filling and help with texture by dissolving into the mixture; balances the pumpkin and spice. Use measured amounts to control sweetness level and prevent a cloying finish.
- 1 teaspoon Pumpkin Pie Spice Introduce warm, spiced notes characteristic of pumpkin desserts; adds complexity and seasonal flavor. Mix evenly into the filling to ensure each bite has a consistent spiced profile.
- 2 Large Eggs Incorporate protein and structure to the filling, enabling it to set and hold shape when baked or chilled. Whisk gently to combine without overbeating to avoid excess air and potential cracking.
- Whipped Cream for Topping Provide a light, airy finishing touch that complements the rich cheesecake filling; adds visual appeal and a creamy contrast. Dollop just before serving to maintain texture and freshness.
- Ground Cinnamon for topping Offer a warm, aromatic finish when lightly dusted over the topping; complements the pumpkin and spice combination. Sprinkle sparingly to enhance presentation and add a subtle cinnamon note to each serving.
Instructions
- Preheat the oven to 325°F. Line a muffin tin with cupcake liners and set aside.: You will notice a warm, steady smell in the kitchen as the oven begins to heat, and the act of lining the tin creates a tidy workspace. This temperature gives the cheesecakes a gentle bake that encourages even setting without browning excessively. One common mistake is rushing this step, so allow the oven to reach the full 325°F so the first few minutes of baking are predictable. If liners are loose, they can shift during pressing; I press them lightly into each cup to secure them.
- In a small bowl, combine the graham cracker crumbs, melted butter and sugar. Add about a tablespoon of the mixture to each cupcake liner and press down firmly, I placed a cupcake liner on top of the crumbs to get a nice, even layer. Discard the extra cupcake liner after all 12 crusts have been pressed down. Bake for 5 minutes.: As you mix the crumbs with melted butter and sugar , you should feel the texture change from loose to slightly cohesive, and you will smell the buttery aroma. Pressing firmly yields a compact base that will hold together when you bite the cheesecake, and using an extra liner to press helps create a flat, even surface without sticking to your fingers. When the crusts bake for 5 minutes you may detect a faint toasty scent, and a subtle darkening signals readiness. Avoid under pressing which causes crumbly bases, and do not overbake the crusts as they can become too hard for the delicate mini format.
- In a large bowl, beat together the cream cheese and pumpkin puree until smooth. Add the vanilla, sugar, and pumpkin pie spice and mix again until smooth. Add the eggs one at a time, mixing thoroughly after each addition.: When you beat the cream cheese with pumpkin puree , watch for a glossy, homogeneous mixture without streaks. The scent will shift to creamy pumpkin with a sweet spice undercurrent. Adding vanilla , the granulated sugar , and pumpkin pie spice blends the sweet and aromatic notes, and incorporating the Large Eggs one at a time ensures a stable emulsion so the batter sets properly without separating. A lumpy or curdled texture indicates the cream cheese was too cold, so let it soften if needed. Do not overbeat after adding eggs, or air bubbles can form and create puffy tops that crack.
- Use a large scoop to fill each cupcake liner until they are just about full.: As you portion the batter, notice its thickness and sheen; it should hold its shape but still settle slightly. Filling close to the top gives a generous, rounded final appearance once baked, but leave a whisper of space to prevent overflow. A common error is inconsistent scooping which yields uneven baking times, so use the same scoop for each cup to keep portions uniform. The batter should be relatively smooth when scooped, not runny, which helps the minis maintain a creamy center after baking.
- Bake for 16-20 minutes, just until the cheesecakes are set in the middle. Cool to room temperature. Cover the cheesecakes and refrigerate for at least 3 hours, or overnight.: During baking you will hear only the quiet hum of the oven while the centers firm. Look for a gentle jiggle in the core, not a liquid wobble, and the edges should be slightly set and pull away from the liner a hair. Cooling to room temperature prevents condensation when they chill. Refrigeration for several hours allows the flavors to meld and the texture to fully firm, producing clean slices. A typical mistake is under chilling, which results in overly soft centers; give them the time to rest so they slice and transport cleanly.
- Top the chilled cheesecakes with whipped cream and dust with ground cinnamon.: The finishing touch adds a creamy, airy contrast to the dense filling, and the aroma of Ground Cinnamon is the first thing people notice when served. Dolloping or piping Whipped Cream gives a pleasing visual and textural balance. Avoid topping them too far in advance, as the cream can weep into the surface; add it shortly before serving for the freshest presentation.
Notes
- Soften the cream cheese properly — Allow the Cream Cheese to sit at room temperature for at least 30 minutes. This prevents lumps and helps you beat a silkier filling with fewer air pockets, which in turn reduces cracking and uneven texture.
- Measure crumbs by weight if possible — While the recipe lists cup measurements, weighing your Graham Cracker Crumbs ensures consistent crust density. If you press too lightly the crust will crumble, and if too tightly it can become overly hard after baking.
- Use room temperature eggs — Warm eggs incorporate more smoothly into the batter, helping to achieve a uniform, creamy consistency. Cold eggs can cause the Cream Cheese to seize and create an uneven texture.
- Don’t overfill the liners — Filling to just about full avoids spills and creates a clean, rounded top. Leave a tiny gap to allow for gentle rising without overflowing the liners in the oven.
- Chill long enough — Refrigerate for at least three hours or overnight to fully set the centers and let the flavors meld. Rushing this step leads to loose centers that are difficult to serve neatly.