Cheesy Popovers
Cheesy Popovers have been my secret weekend treat ever since I first watched batter puff into airy golden cups at my grandmother’s kitchen table.
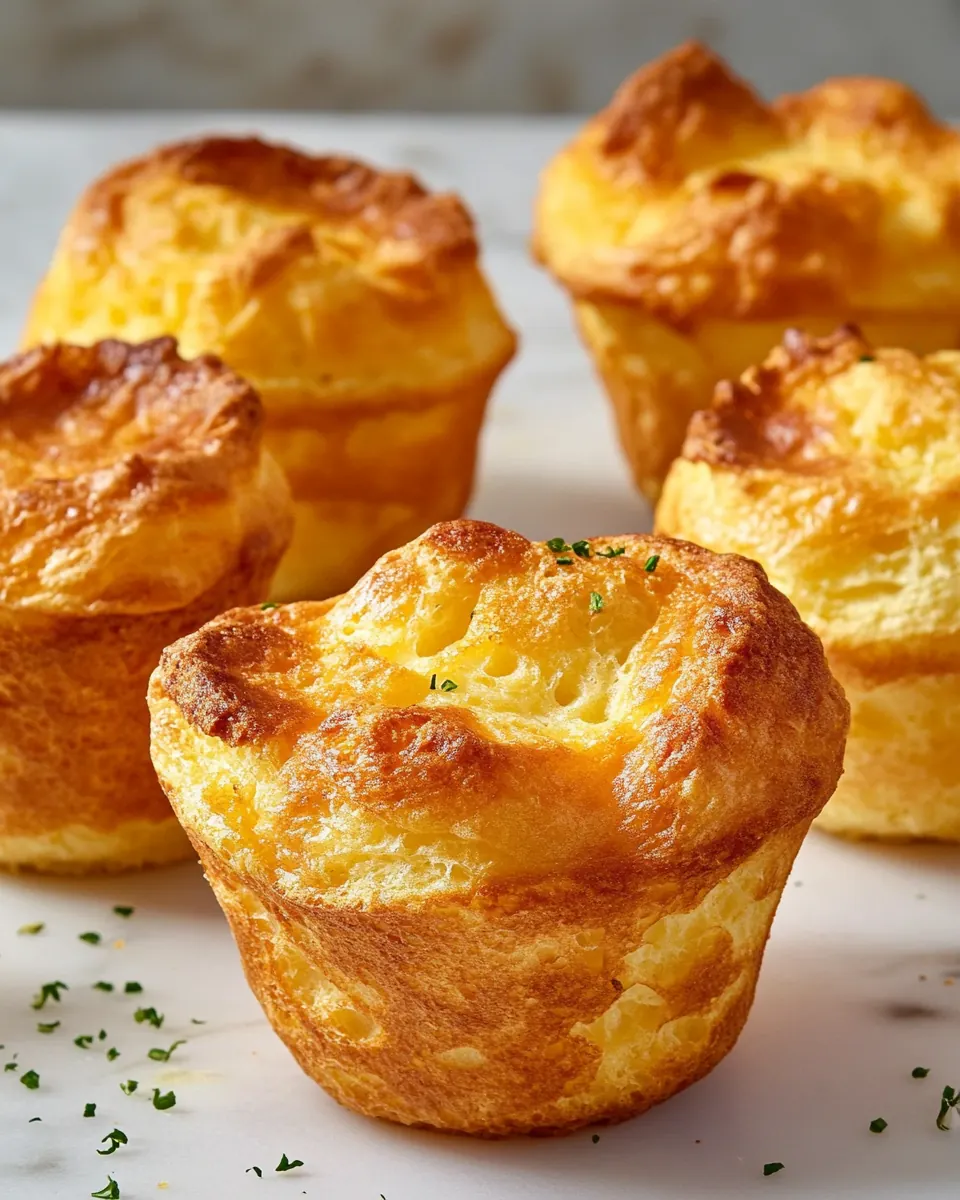
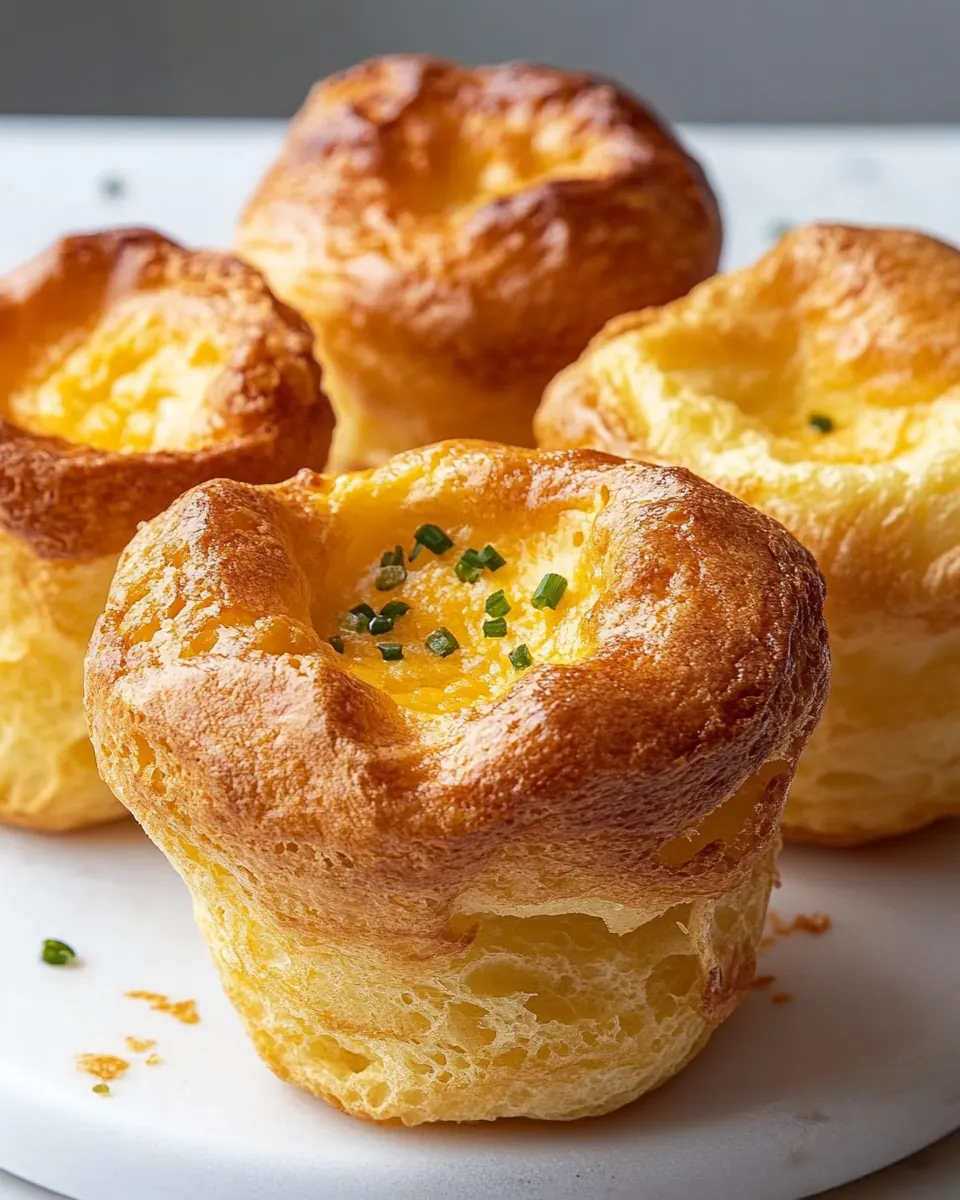
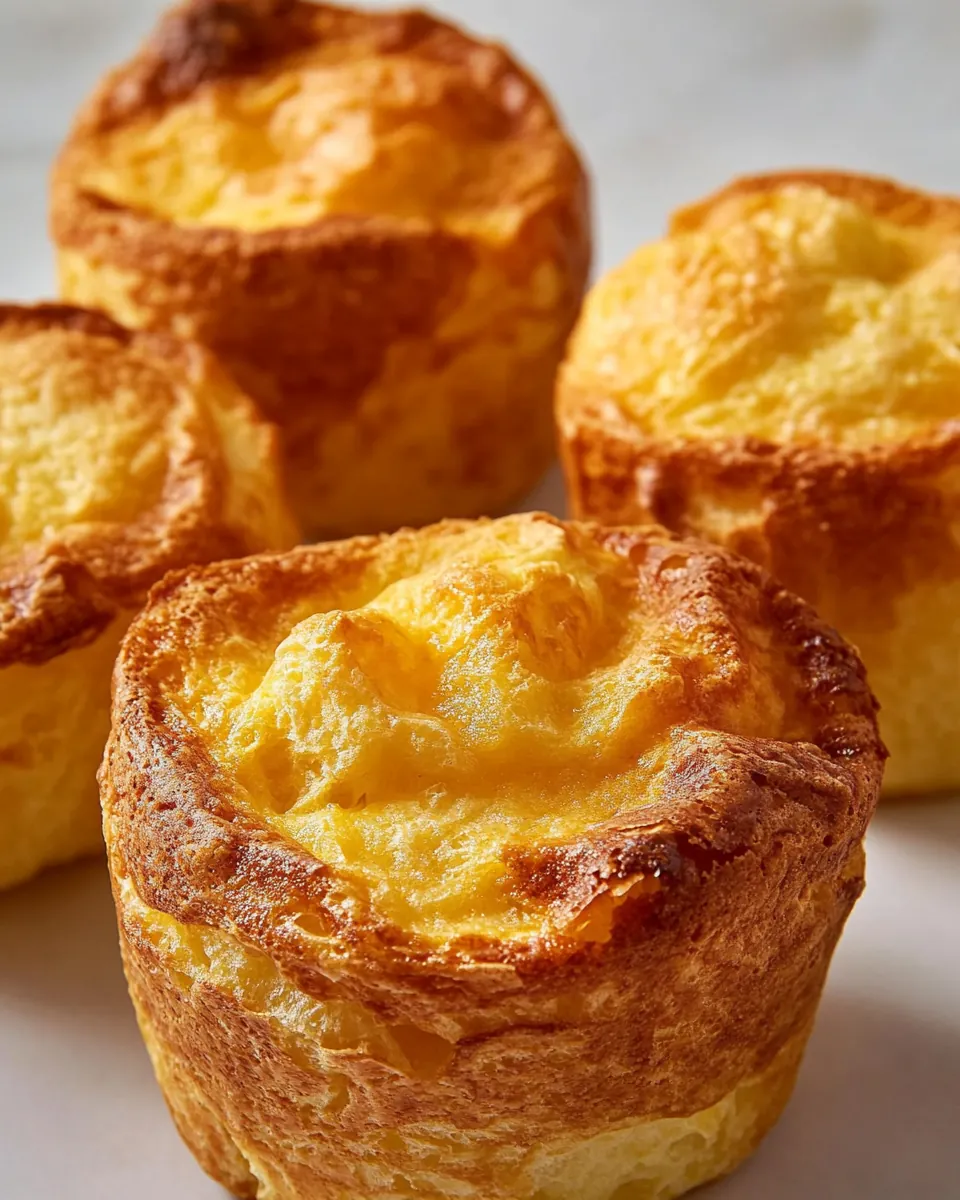
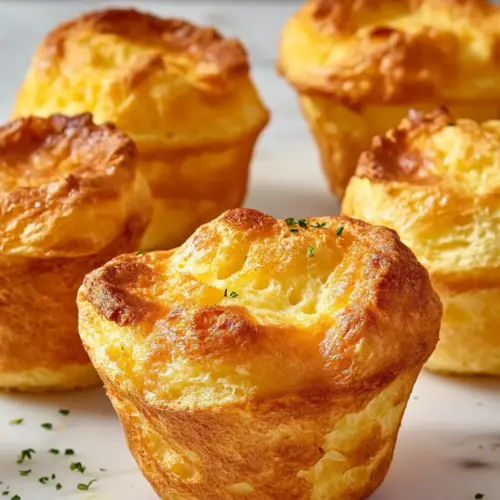
I remember the first time I baked Cheesy Popovers, my hands trembling slightly as I poured the glossy batter into the waiting pan. The kitchen filled with a warm, toasty aroma that hinted at butter and toasted cheese, and I felt small victories bubble up as each popover climbed tall and proud above the rim. Over the years, I learned to welcome the tiny inconsistencies that make these so human, like the one popover that leans to the side, or the perfect one that cracks open to reveal a steam cloud of soft, custardy interior.
There is something quietly festive about pulling a tray of Cheesy Popovers from the oven and setting it on the table, because they invite everyone to reach in, tear a corner, and discover that irresistible contrast between a crisp exterior and a tender, cheesy inside. I like to serve them straight away, while the edges are still crisp and the inside sighs with warmth. Each bite delivers a creamy hit of parmesan cheese blended into a batter that is simultaneously custardy and aerated. These moments remind me of slow mornings and good company, when food acts like a tiny celebration.
Recipe Snapshot
40 mins
5 mins
35 mins
Easy
200 kcal
American
Gluten-Free, Low FODMAP
Appetizers
Oven, Popover pan, Mixing bowl, Whisk
The Appeal of This Cheesy Popovers
1. Showstopping Texture
I love how Cheesy Popovers deliver an almost magical texture contrast. The exterior becomes impossibly crisp while the interior stays custardy and soft. That airy lift comes from a simple batter and hot oven, and I always marvel at how such a humble mix can puff into something spectacular.
2. Simple Ingredients, Big Flavor
One of the things that keeps me making Cheesy Popovers is how few ingredients create such a rich result. With staples like eggs, flour, milk, and parmesan cheese, you get deep savory notes without fuss. The melted unsalted butter adds a gentle richness that rounds the taste and helps the exterior crisp to a beautiful golden color.
3. Fast and Rewarding
When time is tight, Cheesy Popovers feel like a treat you can pull off quickly. The batter comes together in minutes and the oven does the heavy lifting. I particularly appreciate that the waiting period is exciting rather than tedious, because the rise and crackle of the popovers is positively theatrical.
4. Versatility at the Table
I often reach for Cheesy Popovers for brunch, as an elegant side, or even as an appetizer. They pair well with so many mains, yet they stand alone with confidence. Their neutral, savory base means you can highlight them with butter, herbs, or a light spread and they still shine.
5. Little Tips That Make a Big Difference
From room temperature eggs and milk to a well preheated oven, the technique matters. Over the years I learned that resting the batter and greasing the pan thoroughly prevent common pitfalls. These have become small rituals that consistently yield great results, and they make each batch feel reliably excellent.
Main Ingredients for Cheesy Popovers
Good popovers depend on a small cast of trustworthy ingredients working together. The batter is intentionally simple so each element can play its role: structure, moisture, lift, and flavor. When combined properly, these components create that coveted contrast between an airy interior and a crisp shell.
- 3 large eggs, at room temperature: Whisk vigorously to incorporate air and provide structure; eggs act as the primary leavening and binding agent, creating steam during baking that helps popovers rise. Use room temperature eggs to ensure a smooth, homogenous batter and better volume.
- 2 cups all purpose flour: Sift or whisk to ensure even texture and prevent lumps; all purpose flour supplies the gluten framework that traps steam and supports the airy interior. Measure accurately to maintain the right batter consistency for optimal rise.
- 2 cups milk, lukewarm: Warm gently to about lukewarm to promote emulsification and proper batter fluidity; milk hydrates the flour and contributes moisture, tenderness, and mild flavor. Using lukewarm milk helps the eggs blend smoothly and can aid in achieving a higher rise.
- 1/2 teaspoon kosher salt: Season judiciously to enhance overall flavor balance; kosher salt sharpens and brings out the savory notes of cheese and butter without overwhelming the batter. Dissolve thoroughly into the wet ingredients to distribute seasoning evenly throughout the popovers.
- 1/2 cup parmesan cheese, grated: Grate finely to melt uniformly and contribute savory depth; parmesan adds umami, nuttiness, and a crisp browned exterior when baked. Fold in toward the end to preserve some texture while ensuring even cheesy pockets throughout the popover.
- 2 tablespoons unsalted butter, melted and cooled slightly: Melt and cool slightly to incorporate as fat without cooking the eggs; unsalted butter provides richness, flavor, and a tender crumb while also helping achieve a golden crust. Use unsalted butter to control overall saltiness so seasoning can be adjusted precisely.
Cheesy Popovers Instructions
These directions will walk you through every nuance of making Cheesy Popovers with care. Follow the sequence and trust your senses, because the smell, color, and sound of the popovers will tell you when you are on track.
- Preheat oven to 425 F.: When the oven reaches 425 F , you should feel a steady surge of heat and smell the faint toasty scent that indicates the interior air is primed for dramatic lift. A well preheated oven is crucial because the initial blast of heat creates the steam that inflates the batter, producing tall, airy popovers. If the oven is not fully hot they may not rise properly and can turn out dense. One common mistake to avoid is placing the pan in before the oven has stabilized at 425 F , which leads to uneven puff and soggy edges. Check that your oven rack is positioned so the popovers have room to expand upward without hitting the rack above, and resist opening the door as it preheats, so the steady temperature is maintained.
- Place all of the ingredients in a bowl and whisk to combine. Allow mixture to come to room temperature while oven preheats. This helps with creating a light and fluffy popover.: As you whisk the mixture, notice the batter transition from a streaky mix to a glossy, slightly thin consistency that coats the back of a spoon, which signals it is well combined. The sound is soft and rhythmic, and the aroma becomes faintly eggy with a hint of dairy and butter, promising richness. Achieving a smooth batter eliminates lumps that can weigh down the interior and impede rising, and whisking thoroughly helps incorporate air that supports the structure. A typical pitfall at this stage is overmixing to the point of developing too much gluten, which can make popovers chewy; whisk just until smooth and homogenous. Letting the batter rest while the oven preheats allows any small bubbles to settle and the temperature to even out, which encourages a more uniform rise.
- Grease each popover tin with cooking spray or butter and fill 3/4 of the way up with batter.: When you grease the wells generously with unsalted butter or cooking spray, you will hear a quiet slicking sound and notice a shiny layer that helps the batter release as it climbs. Filling the wells about three quarters full gives the batter room to expand, and watching the batter settle into a smooth dome indicates it is ready to bake. This step matters because insufficient greasing or overfilling can lead to sticking or spillover, and a stuck popover will tear when you try to remove it. A frequent error is filling too high, which can cause the top to bake too fast and crack in odd ways; keep to the three quarter guideline for consistent results.
- Bake for 35 minutes and do not open the oven door while cooking.: During baking you will notice the popovers rise dramatically, their edges turning a deep golden brown with a satisfying crispness that contrasts with a tender interior. The oven fills with a warm, toasty cheese aroma, and you might hear a faint crackle as steam escapes. That uninterrupted baking time is the reason popovers puff so well; opening the door lets heat and steam escape and often causes them to collapse. Avoid the temptation to peek, because even a brief door opening can deflate them. If you see one popover browning unevenly, don't open the door to fix it mid bake; instead, allow the full 35 minutes and evaluate once they are out and resting briefly.
- Serve immediately.: As soon as the tray comes out, the popovers will sing with warmth and release a gentle steam when cracked open, revealing a soft, custardy center contrasted by a crisp shell. Serve them hot so guests can experience the full sensory spectrum, from the crackling edge to the creamy interior; delayed serving leads to moisture migration and softened exteriors. If you must hold them for a short time, keep them loosely tented in a warm but not humid spot, but know that the best texture is right out of the oven. A common mistake is letting them sit in a covered container, which traps steam and ruins the crispness, so resist covering them tightly.
Variations to Try

If you enjoy experimenting, these variations let you play with texture and flavor while keeping the essence of Cheesy Popovers. Each tip below highlights an approachable twist or helpful technique to expand how you serve them.
- Use a popover pan: While a muffin tin can work, a dedicated popover pan yields taller, more uniform rises and crisper edges, because the wells concentrate heat along the sides as they expand.
- Rest the batter briefly: Allowing the batter to come to room temperature while the oven preheats encourages better steam production and a lighter crumb, so take those extra minutes for a superior result.
- Grease generously: Coat every part of the well and the rim thoroughly with melted unsalted butter or nonstick spray to ensure the popovers release cleanly when risen above the pan.
- Give them space to rise: Make sure popover wells are not crowded by oven racks above; reposition racks so there is ample vertical room, preventing tops from hitting the rack as they expand.
- Do not open the oven door: Keep the oven sealed for the full 35 minute bake to avoid collapsing the airy structure; temperature stability is the key to a dramatic puff.
Perfect Matches for Cheesy Popovers
Cheesy Popovers pair beautifully with many meals and occasions. They can be a charming brunch centerpiece, a sophisticated side for dinner, or an easy snack to serve at gatherings. Here are thoughtful serving ideas and practical storage notes to help you plan.
- Brunch centerpiece: Serve warm Cheesy Popovers alongside a simple green salad and tea for a relaxed morning meal that feels special without being fussy.
- Dinner side dish: Present them with roasted vegetables and a main protein for a comforting dinner where the popovers add texture and savory lift to the plate.
- Casual appetizer: Offer mini-sized popovers or tear larger ones and arrange them with small bowls of compound butter for a shareable starter at gatherings.
- Seasonal pairing: These work year round, but in cooler months they shine with warm soups and roasted root vegetables, adding crisp contrast to softer components.
- Storage tips: For best results, eat immediately. If you need to store extras, cool completely and keep uncovered briefly to avoid sogginess, then reheat in a hot oven to refresh the crisp exterior.
FAQ
Conclusion
What makes this recipe special is its ability to transform simple pantry ingredients into airy, golden popovers that offer both crisp edges and a tender, cheesy interior. Try making these soon, because they are quick to prepare and deliver a big payoff for minimal effort. Whether you serve them for brunch, alongside dinner, or as a showy appetizer, they bring warmth and comfort to the table and encourage everyone to dig in together.
Cheesy Popovers
Equipment
- Oven
- Popover pan
- Mixing Bowl
- Whisk
Ingredients
- 3 large eggs, at room temperature Whisk vigorously to incorporate air and provide structure; eggs act as the primary leavening and binding agent, creating steam during baking that helps popovers rise. Use room temperature eggs to ensure a smooth, homogenous batter and better volume.
- 2 cups all purpose flour Sift or whisk to ensure even texture and prevent lumps; all purpose flour supplies the gluten framework that traps steam and supports the airy interior. Measure accurately to maintain the right batter consistency for optimal rise.
- 2 cups milk, lukewarm Warm gently to about lukewarm to promote emulsification and proper batter fluidity; milk hydrates the flour and contributes moisture, tenderness, and mild flavor. Using lukewarm milk helps the eggs blend smoothly and can aid in achieving a higher rise.
- 1/2 teaspoon kosher salt Season judiciously to enhance overall flavor balance; kosher salt sharpens and brings out the savory notes of cheese and butter without overwhelming the batter. Dissolve thoroughly into the wet ingredients to distribute seasoning evenly throughout the popovers.
- 1/2 cup parmesan cheese, grated Grate finely to melt uniformly and contribute savory depth; parmesan adds umami, nuttiness, and a crisp browned exterior when baked. Fold in toward the end to preserve some texture while ensuring even cheesy pockets throughout the popover.
- 2 tablespoons unsalted butter, melted and cooled slightly Melt and cool slightly to incorporate as fat without cooking the eggs; unsalted butter provides richness, flavor, and a tender crumb while also helping achieve a golden crust. Use unsalted butter to control overall saltiness so seasoning can be adjusted precisely.
Instructions
- Preheat oven to 425 F.: When the oven reaches 425 F , you should feel a steady surge of heat and smell the faint toasty scent that indicates the interior air is primed for dramatic lift. A well preheated oven is crucial because the initial blast of heat creates the steam that inflates the batter, producing tall, airy popovers. If the oven is not fully hot they may not rise properly and can turn out dense. One common mistake to avoid is placing the pan in before the oven has stabilized at 425 F , which leads to uneven puff and soggy edges. Check that your oven rack is positioned so the popovers have room to expand upward without hitting the rack above, and resist opening the door as it preheats, so the steady temperature is maintained.
- Place all of the ingredients in a bowl and whisk to combine. Allow mixture to come to room temperature while oven preheats. This helps with creating a light and fluffy popover.: As you whisk the mixture, notice the batter transition from a streaky mix to a glossy, slightly thin consistency that coats the back of a spoon, which signals it is well combined. The sound is soft and rhythmic, and the aroma becomes faintly eggy with a hint of dairy and butter, promising richness. Achieving a smooth batter eliminates lumps that can weigh down the interior and impede rising, and whisking thoroughly helps incorporate air that supports the structure. A typical pitfall at this stage is overmixing to the point of developing too much gluten, which can make popovers chewy; whisk just until smooth and homogenous. Letting the batter rest while the oven preheats allows any small bubbles to settle and the temperature to even out, which encourages a more uniform rise.
- Grease each popover tin with cooking spray or butter and fill 3/4 of the way up with batter.: When you grease the wells generously with unsalted butter or cooking spray, you will hear a quiet slicking sound and notice a shiny layer that helps the batter release as it climbs. Filling the wells about three quarters full gives the batter room to expand, and watching the batter settle into a smooth dome indicates it is ready to bake. This step matters because insufficient greasing or overfilling can lead to sticking or spillover, and a stuck popover will tear when you try to remove it. A frequent error is filling too high, which can cause the top to bake too fast and crack in odd ways; keep to the three quarter guideline for consistent results.
- Bake for 35 minutes and do not open the oven door while cooking.: During baking you will notice the popovers rise dramatically, their edges turning a deep golden brown with a satisfying crispness that contrasts with a tender interior. The oven fills with a warm, toasty cheese aroma, and you might hear a faint crackle as steam escapes. That uninterrupted baking time is the reason popovers puff so well; opening the door lets heat and steam escape and often causes them to collapse. Avoid the temptation to peek, because even a brief door opening can deflate them. If you see one popover browning unevenly, don't open the door to fix it mid bake; instead, allow the full 35 minutes and evaluate once they are out and resting briefly.
- Serve immediately.: As soon as the tray comes out, the popovers will sing with warmth and release a gentle steam when cracked open, revealing a soft, custardy center contrasted by a crisp shell. Serve them hot so guests can experience the full sensory spectrum, from the crackling edge to the creamy interior; delayed serving leads to moisture migration and softened exteriors. If you must hold them for a short time, keep them loosely tented in a warm but not humid spot, but know that the best texture is right out of the oven. A common mistake is letting them sit in a covered container, which traps steam and ruins the crispness, so resist covering them tightly.
Notes
- Use a popover pan: While a muffin tin can work, a dedicated popover pan yields taller, more uniform rises and crisper edges, because the wells concentrate heat along the sides as they expand.
- Rest the batter briefly: Allowing the batter to come to room temperature while the oven preheats encourages better steam production and a lighter crumb, so take those extra minutes for a superior result.
- Grease generously: Coat every part of the well and the rim thoroughly with melted unsalted butter or nonstick spray to ensure the popovers release cleanly when risen above the pan.
- Give them space to rise: Make sure popover wells are not crowded by oven racks above; reposition racks so there is ample vertical room, preventing tops from hitting the rack as they expand.
- Do not open the oven door: Keep the oven sealed for the full 35 minute bake to avoid collapsing the airy structure; temperature stability is the key to a dramatic puff.