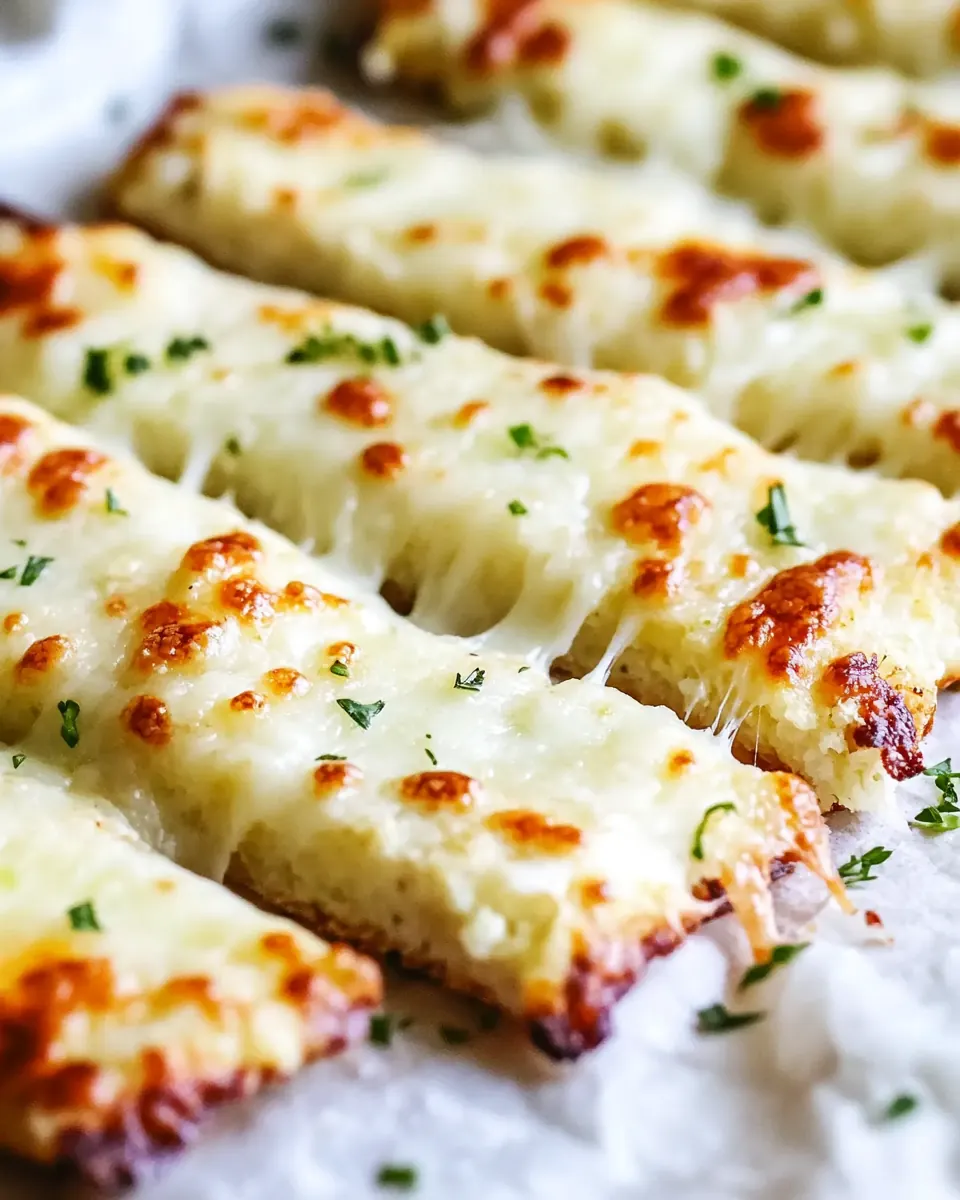
Cheesy Cauliflower Breadsticks
Cheesy Cauliflower Breadsticks came into my life on a rainy weeknight when I needed something warm, comforting, and a little clever. I had a head of cauliflower left from the farmers market and a stubborn craving for something cheesy and shareable, so I experimented until the kitchen smelled like a pizzeria and the whole family hovered around the counter. That first batch was a revelation, a crunchy yet tender bite that felt like indulgence without the heaviness, and it quickly turned into our go to when we wanted something easy that still impressed guests.
Over the years I learned a few small rituals that make these sticks reliably great, like squeezing every last drop of moisture from the riced cauliflower and baking the crust until it is golden and almost crisp before adding the extra cheese. I remember one evening when the kids asked for seconds and I realized I had accidentally doubled the herbs, which somehow made the flavor brighter and more grown up. That happy mistake taught me to trust my instincts more often in the kitchen.
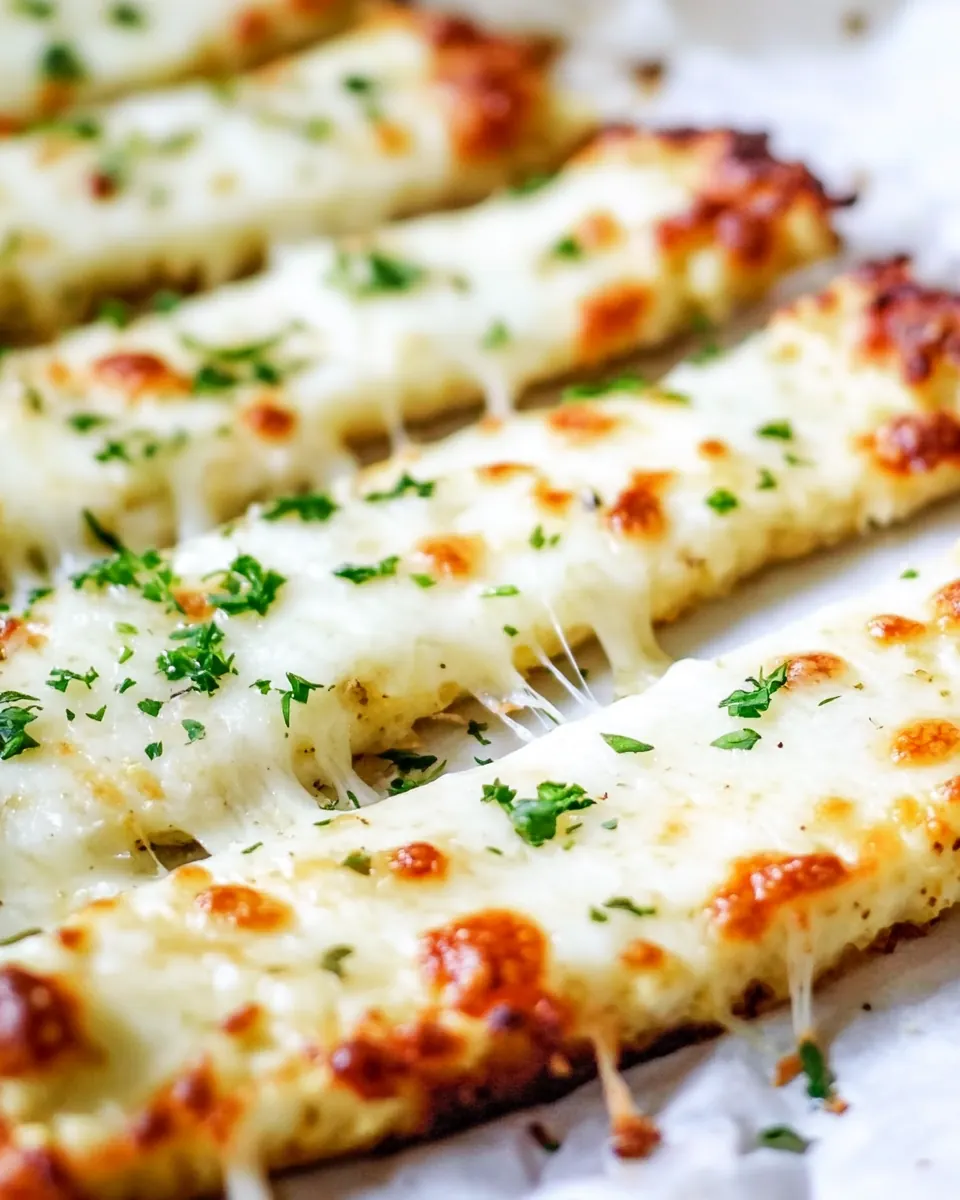
When I serve Cheesy Cauliflower Breadsticks I like to keep the plating casual, a parchment lined board with a small bowl of warm marinara for dipping, and a scattering of fresh herbs for color. They travel well to potlucks, and they are forgiving if you need to prep the cauliflower ahead. Once you get the rhythm of rinsing, squeezing, and shaping, you can turn this into a weekday ritual or a party starter that vanishes fast.
Recipe Snapshot
60 mins
30 mins
30 mins
Medium
150 kcal
Italian
Gluten-Free, Keto
Appetizers
Oven, Baking sheet, Parchment paper, Steamer basket, Food processor, Tea towel or cheesecloth
The Best Thing About This Cheesy Cauliflower Breadsticks
They satisfy cheesy cravings without being heavy
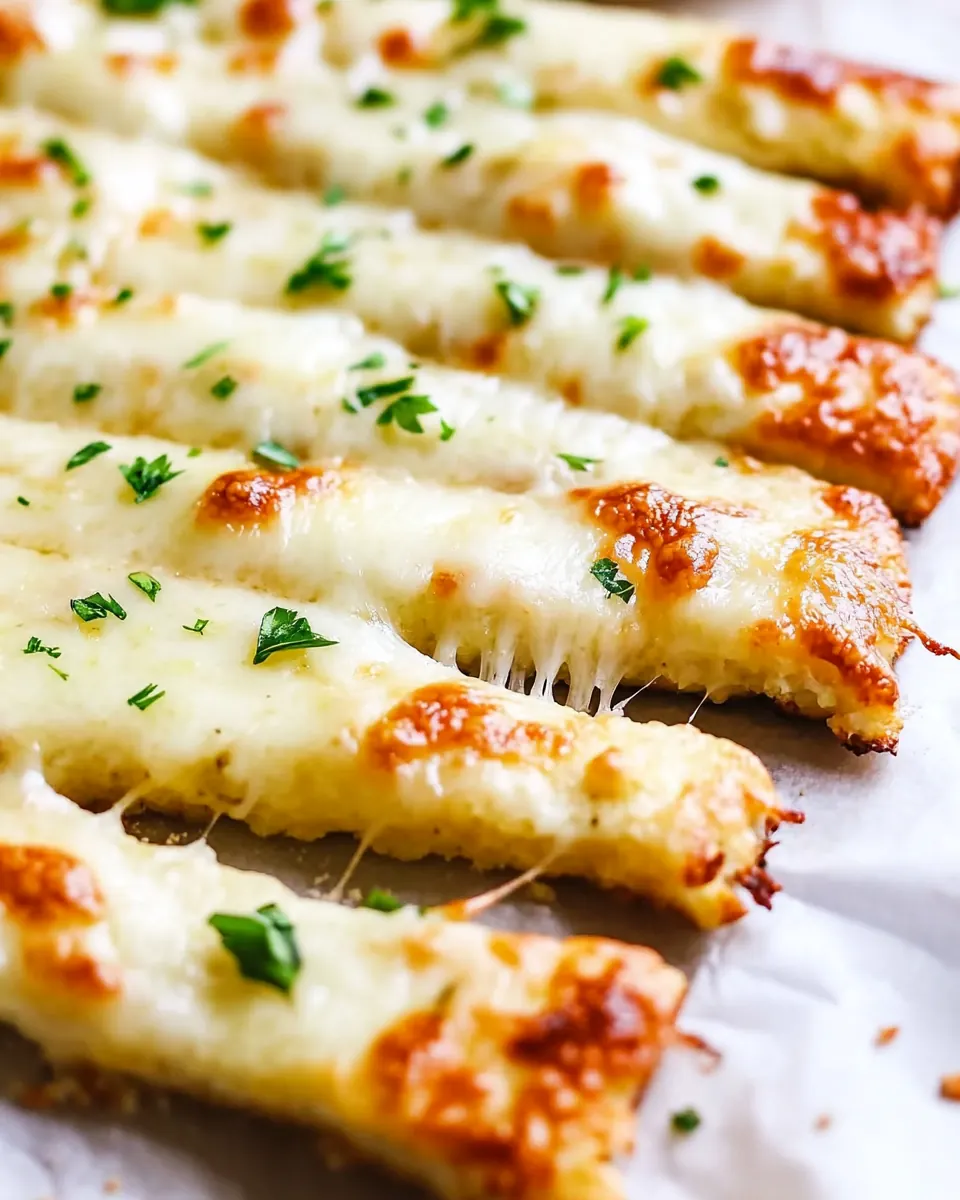
I love how Cheesy Cauliflower Breadsticks give you that melty, stringy cheese moment but with a much lighter base than traditional dough. The combination of mozzarella and parmesan yields a creamy, savory top layer that still permits the cauliflower‘s subtle sweetness to shine. For anyone watching carbs or just seeking a vegetable forward twist, this is a game changer.
Simple technique, big payoff
The methods here are straightforward, and I appreciate recipes that respect a busy schedule. Steaming and ricing the cauliflower, then squeezing it dry, is the small bit of effort that pays off in texture. When you follow that step, the crust firms up and holds together, which avoids a soggy disappointment. I always tell friends that a little patience at the start saves a lot of fuss at the end.
Highly customizable for gatherings
These sticks are perfect for sharing, and you can adapt the presentation easily. Add fresh herbs at the end for brightness or offer a variety of dips on the side. I once swapped the dipping sauce to a smoky tomato blend and it became the hit of the party. The base is forgiving, so you can make multiple pans at once without fear.
Kid friendly and approachable
My kids gobble these up, partly because the texture is familiar and cheesy, and partly because dipping is fun. I like that I can slip extra garlic or Italian seasoning into the mix and they still ask for more. It helps me sneak a serving of vegetables into a playful snack, which is a small victory in any week.
Great for meal prep
I often make a double batch and refrigerate extras, they reheat beautifully in a hot oven so the cheese gets lively again. This keeps weeknight meals easy, and I never mind grabbing a tray to warm while I toss together a salad. It feels like having a fresh baked treat with minimal nightly effort.
What’s In This Cheesy Cauliflower Breadsticks
These ingredients are straightforward and work together to create a crisp yet tender base that supports a rich cheesy top. The key players are the riced cauliflower which provides structure and moisture once drained, the egg whites which bind without weighing things down, and the cheeses that bring melt and flavor. Small additions like garlic and Italian seasoning pull everything toward a familiar, comforting profile.
- 4 cups riced cauliflower about 1 large head of cauliflower: Provide bulk and structure to the dough by adding moisture and fiber; riced cauliflower serves as the low-carb base that binds with cheeses and eggs when squeezed dry to avoid a soggy crust.
- 3 large egg whites: Stabilize and bind the mixture without adding yolk fat; using large egg whites helps the cauliflower and cheese hold together while keeping the finished breadsticks lighter in texture.
- 2 cups shredded mozzarella cheese divided: Melt and create gooey stretchiness in the crust; reserve half of the shredded mozzarella to mix into the dough for binding and flavor while holding back the remainder for a golden, bubbly topping.
- 1/4 cups shredded parmesan cheese: Add a sharp, nutty depth of flavor and help with browning; shredded Parmesan complements the mozzarella by contributing savory umami and a slightly granular texture.
- 1 teaspoon Italian Seasoning: Season evenly with herbal notes to enhance overall flavor; Italian seasoning brings a blend of dried oregano, basil, and thyme that pairs well with tomato dipping sauce.
- 3 cloves garlic minced: Infuse aromatic pungency and savory warmth when minced and mixed into the dough; garlic elevates the flavor profile and offers a robust contrast to the mild cheeses.
- 1/4 teaspoon ground pepper: Brighten flavor and temper richness with a subtle bite; ground pepper adds mild heat and helps balance the creamy, cheesy components of the breadsticks.
- 1/4 teaspoons salt: Enhance overall taste by providing essential seasoning; salt brings out the natural flavors of cauliflower and cheese and is used sparingly to avoid oversalting.
- Marinara sauce for dipping: Serve as a flavorful accompaniment for dipping and complementing the breadsticks; marinara sauce provides acidic tomato brightness and herby sweetness to balance the cheesy richness.
How to Cook Cheesy Cauliflower Breadsticks
These directions transform raw ingredients into something warm and shareable. I like to walk through each step slowly the first time, paying attention to moisture levels and visual cues so the crust bakes to a golden firmness. Follow the sensory notes below and you will get reliably crispy edges and melty cheese on top.
- Preheat the oven to 425° and line 2 baking sheets with parchment paper. Set aside.: The kitchen will warm with a faint scent of dry heat, and the parchment will prevent sticking, keeping the undersides clean and allowing the edges to brown evenly. Heating to 425° ensures quick oven spring and a crisp crust, which is crucial for texture. A common pitfall is placing cold trays into a not fully preheated oven, which leads to uneven baking. Make sure your oven reaches temperature, and listen for the faint click or beep indicating it is ready.
- If using frozen riced cauliflower, prepare it according to the package and let it cool until it is cool enough to handle. If using fresh cauliflower, prepare a pot of boiling water. Cut the cauliflower into florets and place it in a steamer basket over the boiling water. Cover and steam for 5 minutes until the florets are fork-tender. Alternatively, the cauliflower can be steamed in the microwave in a microwave-safe bowl with a little water in the bottom for 5 minutes. Once cooked, place the steamed florets in a food processor and pulse for 10-15 seconds until you get a nice riced consistency.: As the florets steam, they release a vegetal, slightly sweet aroma and the texture softens to become tender without falling apart. Pulsing in the processor produces a consistent riced cauliflower texture that will bind better. Overprocessing can turn it mushy, while underprocessing leaves large lumps. Aim for a grainy rice like texture, and use short pulses to control the outcome.
- Transfer the riced cauliflower to a tea towel or several layers of cheesecloth and squeeze to remove as much liquid as possible. There is more liquid than you’d think, I’m usually able to squeeze out nearly a cup of liquid. Measure out 4 cups of cauliflower and add to a large bowl.: When you squeeze the warm cauliflower, steam and a savory scent will rise, and you will notice the weight drop substantially. Removing moisture is the single most important step for structure because excess water prevents the mixture from setting and leads to a soggy result. A frequent mistake is skipping the squeeze because it is tedious, but it is worth the effort; aim to remove as much liquid as you can by pressing firmly and twisting the cloth.
- Add the egg whites, 1 cup of mozzarella cheese, parmesan, Italian seasoning, garlic, salt, and pepper to the cauliflower and mix until fully combined.: As you mix, the ingredients will become glossy and evenly distributed, and the aroma of garlic and herbs will become prominent. The egg whites will coat the cauliflower granules, helping them bind during baking. If the mixture seems dry, check your measurements and gently fold to combine rather than overworking, which can make the texture gummy. Avoid adding more cheese than directed at this stage, because too much can make shaping difficult.
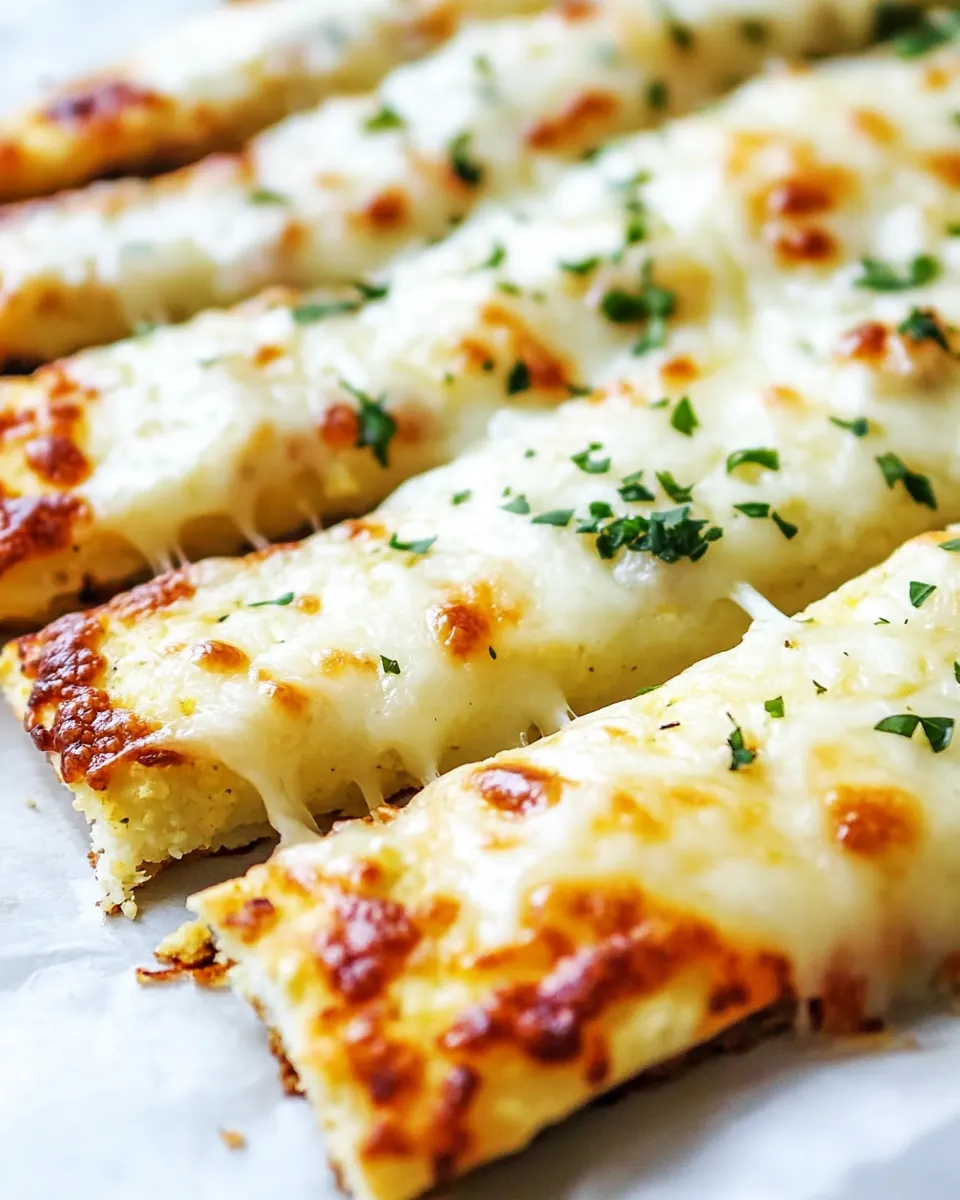
- Divide the mixture in half and add half to each prepared baking sheet in an even rectangle. Bake for 25 minutes, until the crust is nice and golden brown. Add the remaining mozzarella cheese and return to the oven to bake for another 5 minutes, until the cheese has melted.: As the rectangles bake, steam will escape and a golden crust will form, with the edges crisping and the center setting. The first bake is all about developing structure and color. When you return the pan to the oven after topping with the remaining mozzarella , you will hear a gentle bubbling and see the cheese turn glossy and begin to brown. A common error is slicing too soon; let the crust rest briefly so it firms up, otherwise the sticks may fall apart when you cut them.
- Top with fresh herbs or a crack of black pepper. Slice into breadsticks and serve with marinara sauce or your dipping sauce of choice.: The final flourish of herbs releases a fresh, bright perfume that contrasts the warm, cheesy base. Slicing reveals the tender crumb and melted cheese strings, and the dipping sauce adds acidic lift that balances the richness. If you cut while piping hot, steam may cause the cheese to stick to the knife, so let the pan rest for a few minutes. Avoid overcrowding your serving board so each stick retains its crisp edge.
Ways to Adapt This Recipe
There are small changes you can make to tailor the texture and flavor of Cheesy Cauliflower Breadsticks while keeping the core technique the same. Below are practical suggestions to adapt to preferences, equipment, and occasions.
- Make it extra crisp: Bake the formed rectangles on a preheated baking sheet or pizza stone so the bottom gets direct heat and crisps up quickly.
- Adjust the herb profile: Swap the Italian seasoning for a pinch more garlic and some dried basil for a greener, sweeter herb note without changing technique.
- Control salt carefully: Because parmesan and mozzarella contain salt, taste and reduce added salt if your cheeses are particularly salty.
- Prep ahead: Complete the ricing and squeezing steps a day ahead and store the dry cauliflower in the fridge to shorten assembly time the next day.
- Reheat well: Warm leftover sticks in a hot oven to restore crispness, avoiding the microwave which makes them limp.
What Complements This Cheesy Cauliflower Breadsticks
These breadsticks pair well with bright, acidic sauces and light sides that balance the creamy cheese. They work for casual weeknight dinners, game day spreads, or Ramadan iftar tables looking for a comforting vegetable forward dish. Below are ideas for pairings, occasions, and storage notes to make the most of every batch.
- Classic pairing: Serve with warm marinara sauce for dipping to add tomato brightness and acidity that complements the cheesy base.
- Light salads: A crisp green salad with lemon dressing provides a refreshing contrast to the warm, cheesy texture of the sticks.
- Party platter: Arrange on a board with small bowls of sauces so guests can mix and match dips for variety.
- Weeknight dinner: Pair with a bowl of quick soup for a cozy, minimal effort meal that feels complete.
- Storage tips: Refrigerate leftovers in an airtight container and reheat in a hot oven to restore crispness; they keep well for two to three days.
- Seasonal notes: These are great all year, but they particularly shine in cooler months when warm, cheesy dishes feel most comforting.
FAQ
Conclusion
What makes these Cheesy Cauliflower Breadsticks special is the way they deliver melty, satisfying cheese with a vegetable forward base that still feels indulgent. The technique is simple, but the payoff is big: a golden, slightly crisp exterior and a tender, flavorful interior that everyone will reach for. Try them when you want a shareable snack or a lighter alternative to traditional breadsticks, and give yourself a little kitchen time to press, bake, and enjoy the comforting results.
Cheesy Cauliflower Breadsticks
Equipment
- Oven
- Baking Sheet
- Parchment Paper
- Steamer basket
- Food Processor
- Tea towel or cheesecloth
Ingredients
- 4 cups riced cauliflower about 1 large head of cauliflower Provide bulk and structure to the dough by adding moisture and fiber; riced cauliflower serves as the low-carb base that binds with cheeses and eggs when squeezed dry to avoid a soggy crust.
- 3 large egg whites Stabilize and bind the mixture without adding yolk fat; using large egg whites helps the cauliflower and cheese hold together while keeping the finished breadsticks lighter in texture.
- 2 cups shredded mozzarella cheese divided Melt and create gooey stretchiness in the crust; reserve half of the shredded mozzarella to mix into the dough for binding and flavor while holding back the remainder for a golden, bubbly topping.
- 1/4 cups shredded parmesan cheese Add a sharp, nutty depth of flavor and help with browning; shredded Parmesan complements the mozzarella by contributing savory umami and a slightly granular texture.
- 1 teaspoon Italian Seasoning Season evenly with herbal notes to enhance overall flavor; Italian seasoning brings a blend of dried oregano, basil, and thyme that pairs well with tomato dipping sauce.
- 3 cloves garlic minced Infuse aromatic pungency and savory warmth when minced and mixed into the dough; garlic elevates the flavor profile and offers a robust contrast to the mild cheeses.
- 1/4 teaspoon ground pepper Brighten flavor and temper richness with a subtle bite; ground pepper adds mild heat and helps balance the creamy, cheesy components of the breadsticks.
- 1/4 teaspoons salt Enhance overall taste by providing essential seasoning; salt brings out the natural flavors of cauliflower and cheese and is used sparingly to avoid oversalting.
- Marinara sauce for dipping Serve as a flavorful accompaniment for dipping and complementing the breadsticks; marinara sauce provides acidic tomato brightness and herby sweetness to balance the cheesy richness.
Instructions
- Preheat the oven to 425° and line 2 baking sheets with parchment paper. Set aside.: The kitchen will warm with a faint scent of dry heat, and the parchment will prevent sticking, keeping the undersides clean and allowing the edges to brown evenly. Heating to 425° ensures quick oven spring and a crisp crust, which is crucial for texture. A common pitfall is placing cold trays into a not fully preheated oven, which leads to uneven baking. Make sure your oven reaches temperature, and listen for the faint click or beep indicating it is ready.
- If using frozen riced cauliflower, prepare it according to the package and let it cool until it is cool enough to handle. If using fresh cauliflower, prepare a pot of boiling water. Cut the cauliflower into florets and place it in a steamer basket over the boiling water. Cover and steam for 5 minutes until the florets are fork-tender. Alternatively, the cauliflower can be steamed in the microwave in a microwave-safe bowl with a little water in the bottom for 5 minutes. Once cooked, place the steamed florets in a food processor and pulse for 10-15 seconds until you get a nice riced consistency.: As the florets steam, they release a vegetal, slightly sweet aroma and the texture softens to become tender without falling apart. Pulsing in the processor produces a consistent riced cauliflower texture that will bind better. Overprocessing can turn it mushy, while underprocessing leaves large lumps. Aim for a grainy rice like texture, and use short pulses to control the outcome.
- Transfer the riced cauliflower to a tea towel or several layers of cheesecloth and squeeze to remove as much liquid as possible. There is more liquid than you’d think, I’m usually able to squeeze out nearly a cup of liquid. Measure out 4 cups of cauliflower and add to a large bowl.: When you squeeze the warm cauliflower, steam and a savory scent will rise, and you will notice the weight drop substantially. Removing moisture is the single most important step for structure because excess water prevents the mixture from setting and leads to a soggy result. A frequent mistake is skipping the squeeze because it is tedious, but it is worth the effort; aim to remove as much liquid as you can by pressing firmly and twisting the cloth.
- Add the egg whites, 1 cup of mozzarella cheese, parmesan, Italian seasoning, garlic, salt, and pepper to the cauliflower and mix until fully combined.: As you mix, the ingredients will become glossy and evenly distributed, and the aroma of garlic and herbs will become prominent. The egg whites will coat the cauliflower granules, helping them bind during baking. If the mixture seems dry, check your measurements and gently fold to combine rather than overworking, which can make the texture gummy. Avoid adding more cheese than directed at this stage, because too much can make shaping difficult.
- Divide the mixture in half and add half to each prepared baking sheet in an even rectangle. Bake for 25 minutes, until the crust is nice and golden brown. Add the remaining mozzarella cheese and return to the oven to bake for another 5 minutes, until the cheese has melted.: As the rectangles bake, steam will escape and a golden crust will form, with the edges crisping and the center setting. The first bake is all about developing structure and color. When you return the pan to the oven after topping with the remaining mozzarella , you will hear a gentle bubbling and see the cheese turn glossy and begin to brown. A common error is slicing too soon; let the crust rest briefly so it firms up, otherwise the sticks may fall apart when you cut them.
- Top with fresh herbs or a crack of black pepper. Slice into breadsticks and serve with marinara sauce or your dipping sauce of choice.: The final flourish of herbs releases a fresh, bright perfume that contrasts the warm, cheesy base. Slicing reveals the tender crumb and melted cheese strings, and the dipping sauce adds acidic lift that balances the richness. If you cut while piping hot, steam may cause the cheese to stick to the knife, so let the pan rest for a few minutes. Avoid overcrowding your serving board so each stick retains its crisp edge.
Notes
- Make it extra crisp: Bake the formed rectangles on a preheated baking sheet or pizza stone so the bottom gets direct heat and crisps up quickly.
- Adjust the herb profile: Swap the Italian seasoning for a pinch more garlic and some dried basil for a greener, sweeter herb note without changing technique.
- Control salt carefully: Because parmesan and mozzarella contain salt, taste and reduce added salt if your cheeses are particularly salty.
- Prep ahead: Complete the ricing and squeezing steps a day ahead and store the dry cauliflower in the fridge to shorten assembly time the next day.
- Reheat well: Warm leftover sticks in a hot oven to restore crispness, avoiding the microwave which makes them limp.