Bunny Cookies
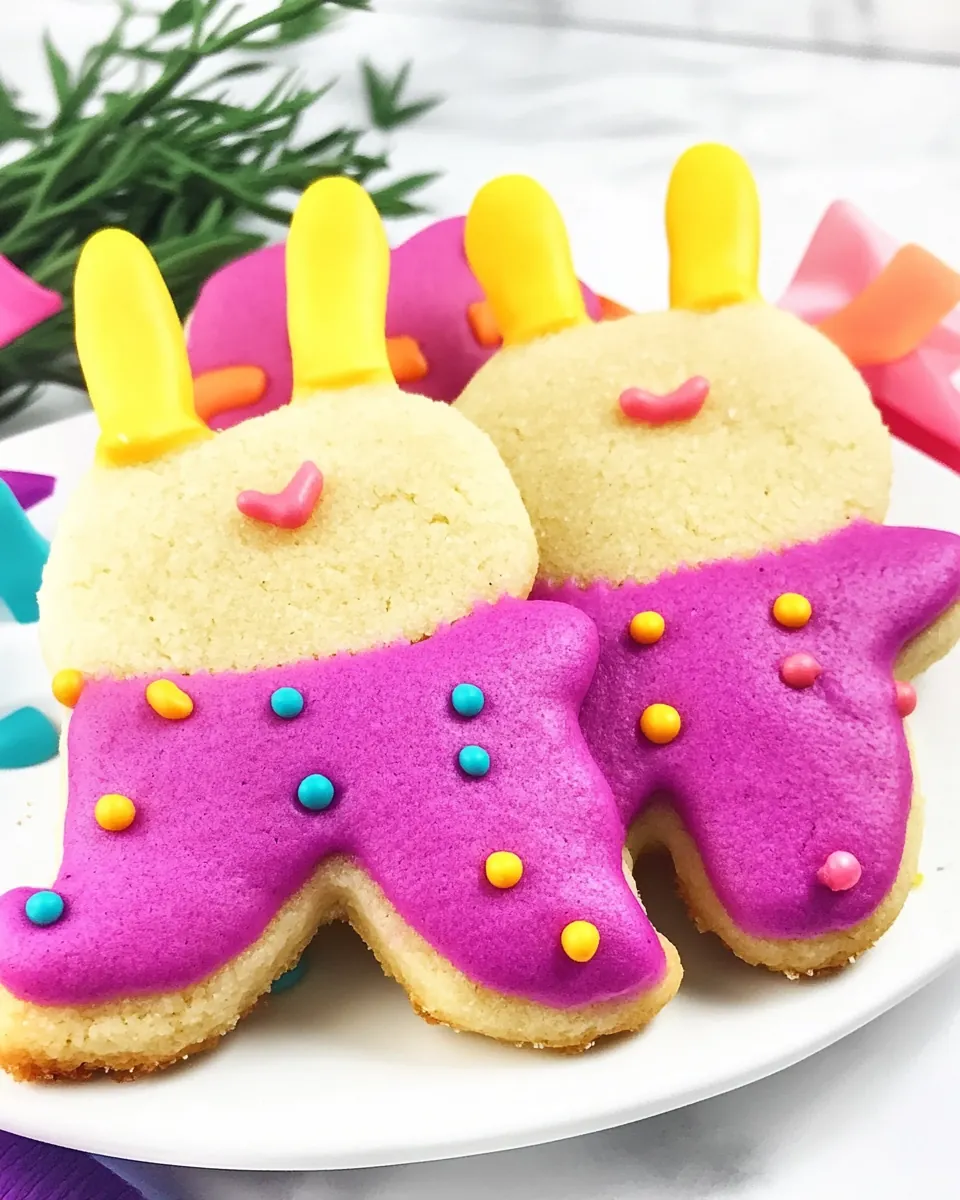
Bunny Cookies started as a sugar cookie template I made for a spring bake sale and quickly became my favorite way to celebrate small wins with kids and friends. The first time I rolled out the dough and used a tiny bunny cutter, I laughed at how instantly festive the kitchen felt. I remember sneaking a frosting-smeared fingertip before the cookies even cooled, and that little moment of sweetness told me these treats were destined to be comfort food and party showstoppers.
I have a habit of turning simple ideas into tiny rituals, and these Bunny Cookies are no exception. I like arranging colored sanding sugars in shallow bowls on the counter, laying out piping bags, and letting helpers choose eyes and noses from a jar of sprinkles. Every batch becomes a collaborative event, with chatter, a little flour on the counter, and the satisfying clink of cookie cutters. That tactile process is what keeps me coming back to this recipe, long after the holiday decorations are packed away.
Recipe Snapshot
40 mins
30 mins
10 mins
Medium
150 kcal
American
Vegan, Gluten-Free
Desserts
Baking sheet, Piping bag with small star tip, Shallow plates, Cookie cutter
Why We Love This Bunny Cookies
They are incredibly adaptable
I love that Bunny Cookies can be scaled up or down without losing their charm. You can make a few dozen for a classroom party or a trayful for a neighborhood gathering, and the technique stays the same. The simplicity lets your personality shine through with color choices and sprinkle placement, and I often find new variations by letting my kids pick the palettes.
Kid friendly and hands on
These cookies invite participation, and I find that baking together makes memories. The tactile steps, like dipping frosted cookies into Colored Sugar, are sensory and satisfying. I prefer recipes that encourage helpers to contribute, and these cookies make it easy to include little hands in the fun safely.
Visually festive with minimal effort
With a few small extras, Bunny Cookies look like they took hours to craft. A tinted frosting and a roll in Colored Sugar instantly elevate plain cookies to celebratory treats. I often lay them out on a pretty platter for brunch, and guests always compliment the cheerful look.
Quick finishing touches
The decoration steps are fast, which I appreciate when time is tight. Tinting a small batch of frosting and piping a tiny tail with a star tip takes minutes, yet it adds a delightful finishing touch. I like finishing cookies in batches, working in assembly line fashion to keep things efficient and tidy.
Great for seasonal and holiday occasions
These cookies are perfect for spring and Easter gatherings but remain versatile enough for baby showers or themed parties. I often swap colors to suit the occasion, and they always fit right in. Their approachable nature makes them a recipe I return to year after year.
Bunny Cookies Ingredients
I believe great cookies start with a handful of thoughtful choices. For Bunny Cookies, the ingredients play distinct roles: the sugar cookie base provides structure and crispness, the frosting brings sweetness and a smooth canvas, and the Colored Sugar and Sprinkles add texture and visual pop. These parts work together so each bite has crunch from the sugar exterior, tender cookie crumb, and a creamy frosting finish.
- 1 recipe Cutout sugar cookies with frosting: Provides the base cookie dough and decorative frosting to shape and decorate bunny-shaped cookies; use a favorite cutout sugar cookie recipe for tender, buttery cookies that hold their shape when baked. Chill the dough before cutting to maintain clean edges, and bake until just set to avoid overbrowning. Frost with a smooth, stable buttercream or royal frosting to allow toppings to adhere and create crisp decorative details.
- Colored Sugar: Adds a sparkling, colorful finish and subtle crunch when sprinkled over frosted cookies; use fine or coarse colored sugar depending on the desired texture and visual effect. Apply while the frosting is still tacky so the sugar adheres evenly and avoids clumping. Choose colors that complement the bunny design to enhance the festive appearance.
- Sprinkles (optional): Provides optional variety and extra texture for decorating cookies; use an assortment of shapes, sizes, and colors to create eyes, noses, or accents on bunny designs. Sprinkle selectively to avoid overpowering delicate frosting details and to maintain a balanced look. Store extras in an airtight container to preserve freshness and crunch for future batches.
Directions for Bunny Cookies
These steps take you from shaped dough to finished frosted bunnies in a relaxed, assembly line way. I like to work in stages for baking, tinting, dipping, piping, and finishing, keeping a rhythm that reduces mess and speeds up cleanup. Gather your decorated plates and piping tools before you begin so the process moves smoothly.
- When making your sugar cookies, cut out bunny shapes. Bake as directed.: Warm oven aromas will begin to fill the kitchen, a comforting mix of butter and sugar that signals progress and encourages patience. You should notice the edges firming and becoming pale gold, which indicates proper bake time, and the surface will look set rather than glossy. The reason this matters is that well shaped and cooled cookies provide a stable canvas for decoration, so take the time to chill dough and press cutters firmly for clean outlines. A common mistake is overworking the dough, which makes cookies tough; handle it gently and chill as needed to prevent spreading.
- Once cool, tint your frosting the color of your sanding sugars.: The tactile action of stirring food color into frosting should yield a smooth, evenly shaded paste that matches the brightness of your chosen Colored Sugar . A small spoonful of color can go a long way, and it is easier to deepen the shade than to lighten it, so add color sparingly. This step matters because matching colors ensures the sugar adheres and looks seamless, and a mismatched shade can make details read as sloppy. Avoid adding too much liquid to thin the frosting , which will make it runny and prevent proper adhesion.
- Place sugar on a shallow plate (use different plates for different colors).: The shallow plate lets you press a frosted cookie into the sugar with control, producing even coverage and minimizing waste. When you dip, the sugar will catch on the frosting's surface texture, creating that sparkling finish, and using separate plates prevents color transfer. This technique matters because mixing colors on one plate can create muddy hues, and keeping plates shallow helps you rotate cookies without losing your grip. One thing to watch for is static cling, which can scatter sugar; a gentle tap and tidy workspace keeps it contained.
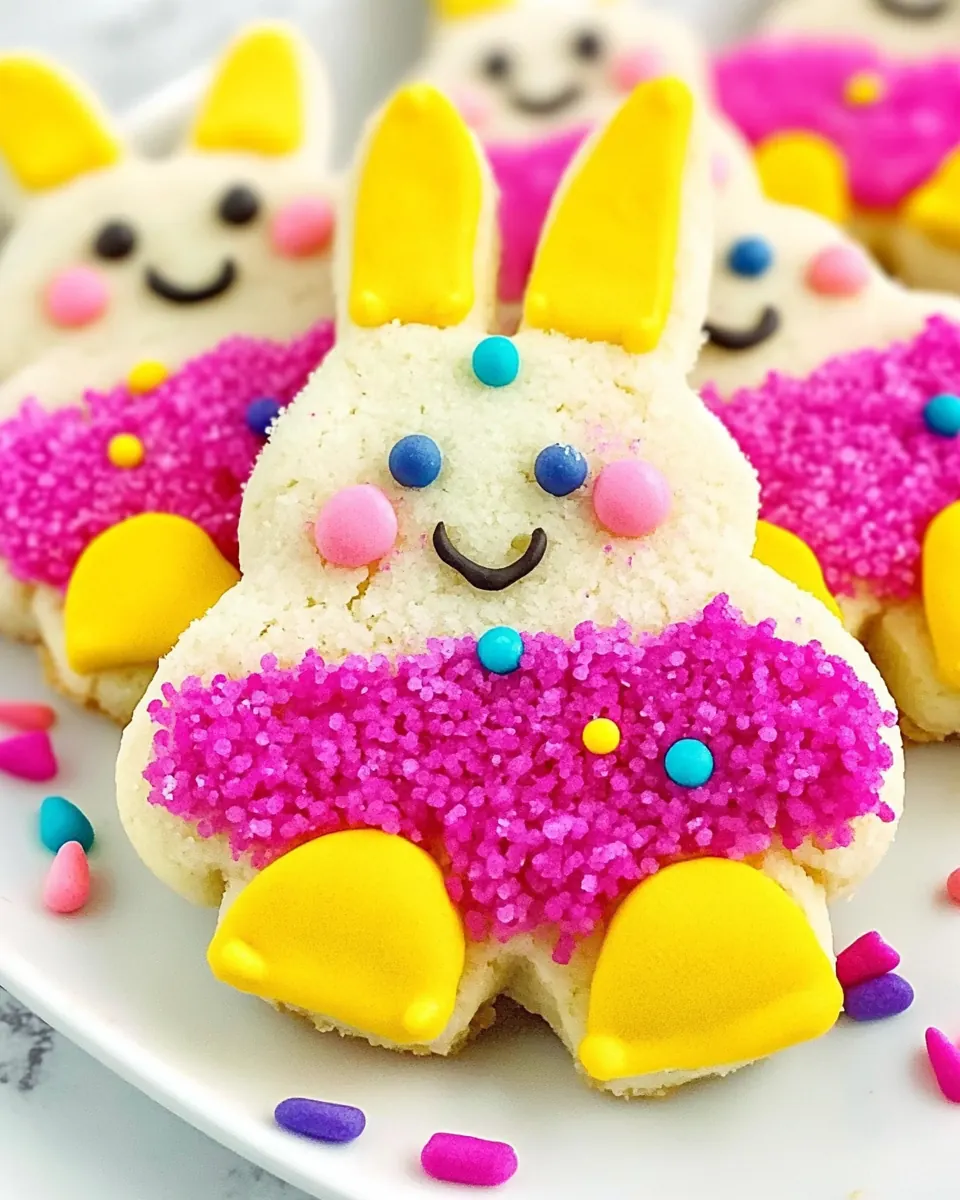
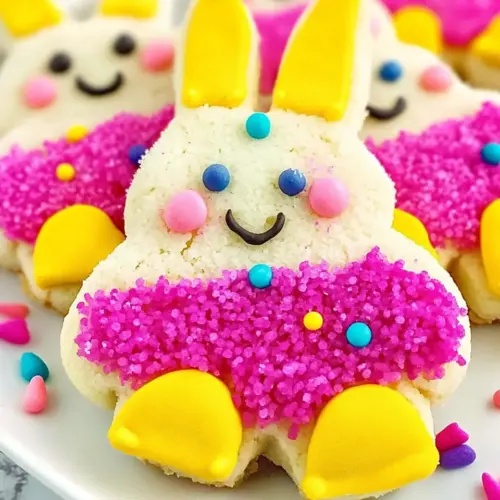
- Frost bunnies all over with frosting. Dip frosting side down in sugar and press to coat.: When you spread frosting , aim for a thin, even layer that still feels tacky so sugar will stick, and the press should be firm but gentle to avoid denting the cookie. You will feel a satisfying slight resistance as the sugar embeds into the icing, and visually the cookie will transform, gaining a glinting, textured coat. This approach matters because too much frosting will smudge the edges and too little will give sparse coverage. Avoid pressing so hard that the cookie cracks or the icing squeezes out the sides.
- Place white frosting in a piping bag fitted with a small star tip. Pipe a tail on the bottom of the cookie.: The tactile spring of the piping bag when you squeeze gives precise control, and the little star pattern makes an adorable textured tail that holds its shape. The contrast between the colored sugar body and the white piped tail adds dimension and a handcrafted look. This technique matters because a defined tail reads as detail rather than an afterthought, and a consistent pressure yields evenly sized stars. A slip to avoid is filling the bag too full, which makes control harder; fill it only halfway for better handling.
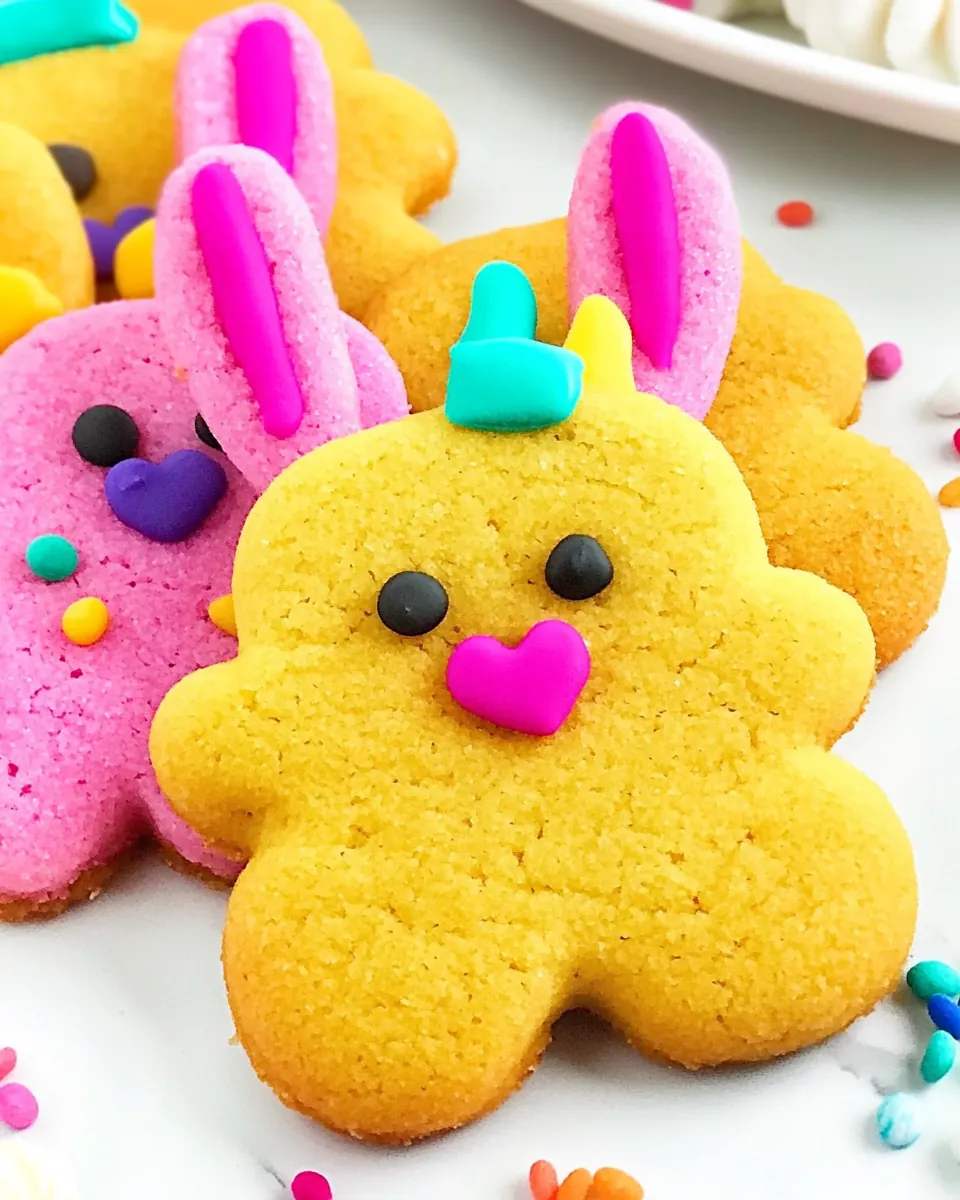
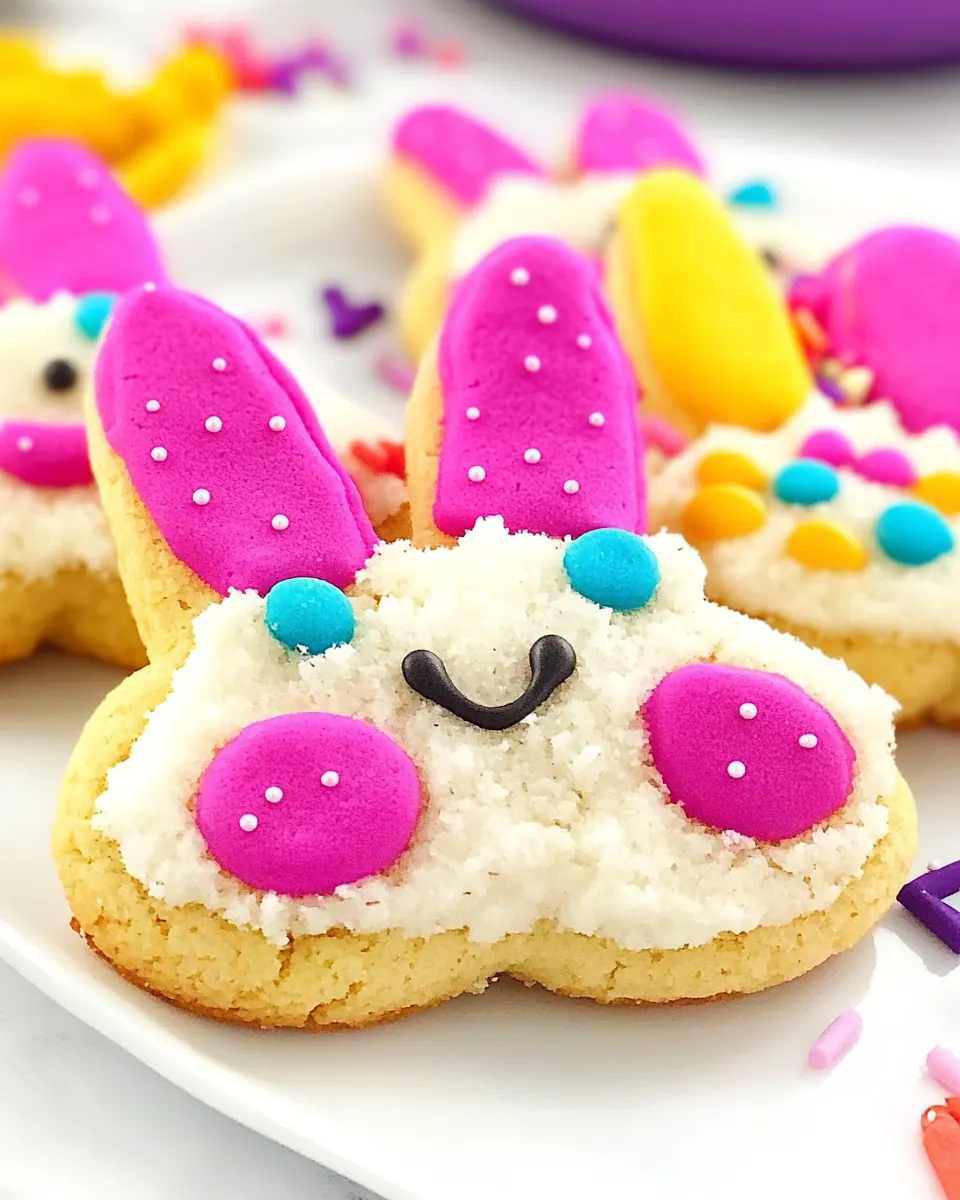
- Use sprinkles to make eyes and noses.: Adding tiny sprinkles for facial features brings personality and charm, and the small point of color really completes each bunny. Gently press each sprinkle into the still-tacky area of the frosting so it adheres without sliding, and arrange features symmetrically for a polished look. This detail matters because faces make cookies feel intentional and cute, and a crooked placement can look unintended. Beware of heavy fingers that may flatten the frosting and leave fingerprints.
- Store in an airtight container for up to 3 days.: The sensory shift from crisp initial bite to slightly softer interior is normal as moisture redistributes in the container, and keeping them airtight preserves that balance for a few days. Place sheets of parchment between layers to prevent sticking and protect delicate decorations like piped tails. This storage method matters because exposure to air will dry the cookies, and refrigeration can dull the frosting sheen, so room temperature in a sealed container is best. A frequent mistake is stacking while frosting is wet, which smudges designs; allow full drying time before storing.
Ways to Adapt This Recipe
These adaptations help you tailor Bunny Cookies to different occasions and skill levels. I recommend trying one change at a time so you see how it affects texture and appearance.
- Make mini cookies: Reduce the cutter size to create bite sized bunnies that are perfect for party platters, they bake faster so watch closely and remove when the edges just set.
- Vary the sugar finish: Use different sanding sugar textures for contrast, choosing a coarser grain for sparkle and a finer grain for a softer sheen, and test one cookie to confirm adhesion.
- Assemble a decorating station: Set out multiple colors of Colored Sugar and small bowls of Sprinkles so each guest can personalize their bunny without crowding the workspace.
- Time saving piping: If you are short on time, use a small round tip instead of a star tip for a quick dot tail that still reads as a tail but takes less precision.
- Prepare ahead: Bake the cookies a day early and store them uniced in an airtight container, then decorate the day of the event for fresher looking frosting and crisper sugar adherence.
How to Enjoy Bunny Cookies
These serving ideas help you present Bunny Cookies with style for any springtime gathering. I like pairing them with complementary items that highlight their sweetness without overpowering their delicate charm.
- Brunch display: Arrange cookies on a tiered platter alongside fruit and light pastries for a festive brunch table, placing colors so they alternate and create visual rhythm.
- Party favor: Pack two to three cookies in clear cellophane with a ribbon for a sweet takeaway, sealing the bag so the cookies remain protected and the decorations stay intact.
- Classroom treat: Place cookies on disposable trays separated by parchment squares, and label ingredients if serving to groups that may have allergies or preferences.
- Seasonal centerpiece: Integrate cookies into a spring centerpiece on a decorative board with edible flowers and small bowls of extra Colored Sugar for guests to customize their own.
- Storage tip: Keep finished cookies in a single layer or separated by parchment in an airtight container at room temperature for up to three days to maintain texture and appearance.
- Occasions: These are wonderful for Easter celebrations, spring showers, baby showers, school parties, or any simple afternoon tea where a themed sweet adds charm.
FAQ
Conclusion
Bunny Cookies shine because they combine a simple, reliable sugar cookie base with playful decoration that invites participation and creativity. They are easy to scale, fun to decorate with kids, and ideal for spring or Easter gatherings when a themed sweet makes the table feel special. I encourage you to try them as a small project the next time you want a hands on baking activity, because the process is as rewarding as the result and the smiles they inspire are worth every second.
Bunny Cookies
Equipment
- Baking Sheet
- Piping bag with small star tip
- Shallow plates
- Cookie Cutter
Ingredients
- 1 recipe Cutout sugar cookies with frosting Provides the base cookie dough and decorative frosting to shape and decorate bunny-shaped cookies; use a favorite cutout sugar cookie recipe for tender, buttery cookies that hold their shape when baked. Chill the dough before cutting to maintain clean edges, and bake until just set to avoid overbrowning. Frost with a smooth, stable buttercream or royal frosting to allow toppings to adhere and create crisp decorative details.
- Colored Sugar Adds a sparkling, colorful finish and subtle crunch when sprinkled over frosted cookies; use fine or coarse colored sugar depending on the desired texture and visual effect. Apply while the frosting is still tacky so the sugar adheres evenly and avoids clumping. Choose colors that complement the bunny design to enhance the festive appearance.
- Sprinkles optional Provides optional variety and extra texture for decorating cookies; use an assortment of shapes, sizes, and colors to create eyes, noses, or accents on bunny designs. Sprinkle selectively to avoid overpowering delicate frosting details and to maintain a balanced look. Store extras in an airtight container to preserve freshness and crunch for future batches.
Instructions
- When making your sugar cookies, cut out bunny shapes. Bake as directed.: Warm oven aromas will begin to fill the kitchen, a comforting mix of butter and sugar that signals progress and encourages patience. You should notice the edges firming and becoming pale gold, which indicates proper bake time, and the surface will look set rather than glossy. The reason this matters is that well shaped and cooled cookies provide a stable canvas for decoration, so take the time to chill dough and press cutters firmly for clean outlines. A common mistake is overworking the dough, which makes cookies tough; handle it gently and chill as needed to prevent spreading.
- Once cool, tint your frosting the color of your sanding sugars.: The tactile action of stirring food color into frosting should yield a smooth, evenly shaded paste that matches the brightness of your chosen Colored Sugar . A small spoonful of color can go a long way, and it is easier to deepen the shade than to lighten it, so add color sparingly. This step matters because matching colors ensures the sugar adheres and looks seamless, and a mismatched shade can make details read as sloppy. Avoid adding too much liquid to thin the frosting , which will make it runny and prevent proper adhesion.
- Place sugar on a shallow plate (use different plates for different colors).: The shallow plate lets you press a frosted cookie into the sugar with control, producing even coverage and minimizing waste. When you dip, the sugar will catch on the frosting's surface texture, creating that sparkling finish, and using separate plates prevents color transfer. This technique matters because mixing colors on one plate can create muddy hues, and keeping plates shallow helps you rotate cookies without losing your grip. One thing to watch for is static cling, which can scatter sugar; a gentle tap and tidy workspace keeps it contained.
- Frost bunnies all over with frosting. Dip frosting side down in sugar and press to coat.: When you spread frosting , aim for a thin, even layer that still feels tacky so sugar will stick, and the press should be firm but gentle to avoid denting the cookie. You will feel a satisfying slight resistance as the sugar embeds into the icing, and visually the cookie will transform, gaining a glinting, textured coat. This approach matters because too much frosting will smudge the edges and too little will give sparse coverage. Avoid pressing so hard that the cookie cracks or the icing squeezes out the sides.
- Place white frosting in a piping bag fitted with a small star tip. Pipe a tail on the bottom of the cookie.: The tactile spring of the piping bag when you squeeze gives precise control, and the little star pattern makes an adorable textured tail that holds its shape. The contrast between the colored sugar body and the white piped tail adds dimension and a handcrafted look. This technique matters because a defined tail reads as detail rather than an afterthought, and a consistent pressure yields evenly sized stars. A slip to avoid is filling the bag too full, which makes control harder; fill it only halfway for better handling.
- Use sprinkles to make eyes and noses.: Adding tiny sprinkles for facial features brings personality and charm, and the small point of color really completes each bunny. Gently press each sprinkle into the still-tacky area of the frosting so it adheres without sliding, and arrange features symmetrically for a polished look. This detail matters because faces make cookies feel intentional and cute, and a crooked placement can look unintended. Beware of heavy fingers that may flatten the frosting and leave fingerprints.
- Store in an airtight container for up to 3 days.: The sensory shift from crisp initial bite to slightly softer interior is normal as moisture redistributes in the container, and keeping them airtight preserves that balance for a few days. Place sheets of parchment between layers to prevent sticking and protect delicate decorations like piped tails. This storage method matters because exposure to air will dry the cookies, and refrigeration can dull the frosting sheen, so room temperature in a sealed container is best. A frequent mistake is stacking while frosting is wet, which smudges designs; allow full drying time before storing.
Notes
- Make mini cookies: Reduce the cutter size to create bite sized bunnies that are perfect for party platters, they bake faster so watch closely and remove when the edges just set.
- Vary the sugar finish: Use different sanding sugar textures for contrast, choosing a coarser grain for sparkle and a finer grain for a softer sheen, and test one cookie to confirm adhesion.
- Assemble a decorating station: Set out multiple colors of Colored Sugar and small bowls of Sprinkles so each guest can personalize their bunny without crowding the workspace.
- Time saving piping: If you are short on time, use a small round tip instead of a star tip for a quick dot tail that still reads as a tail but takes less precision.
- Prepare ahead: Bake the cookies a day early and store them uniced in an airtight container, then decorate the day of the event for fresher looking frosting and crisper sugar adherence.