Easy French Toast Recipe
Easy French Toast Recipe is one of those breakfasts I come back to again and again when I want something comforting but not fussy. The first time I learned to make it well, I was up before everyone else, testing how long to soak a slice so the interior would be custardy while the exterior stayed crisp. That morning taught me patience, and it taught me how a few humble ingredients can feel celebratory.
Over the years I have tweaked the method until it fits both weekday urgency and slow weekend breakfasts. I love the ritual of whisking the eggs and milk together, the little flecks of cinnamon that float in the custard, and the scent that fills the kitchen as the butter sizzles in the skillet. Sometimes I let the slices rest on a rack to dry a bit, other times I skip that step, and each approach brings its own charm.
Recipe Snapshot
25 mins
10 mins
15 mins
Easy
300 kcal
American
Gluten-Free, Paleo
Breakfast
Skillet, Wire rack, Baking sheet, Medium bowl, Casserole dish
Why Try This Easy French Toast Recipe
Reliable Crisp Exterior and Custardy Interior
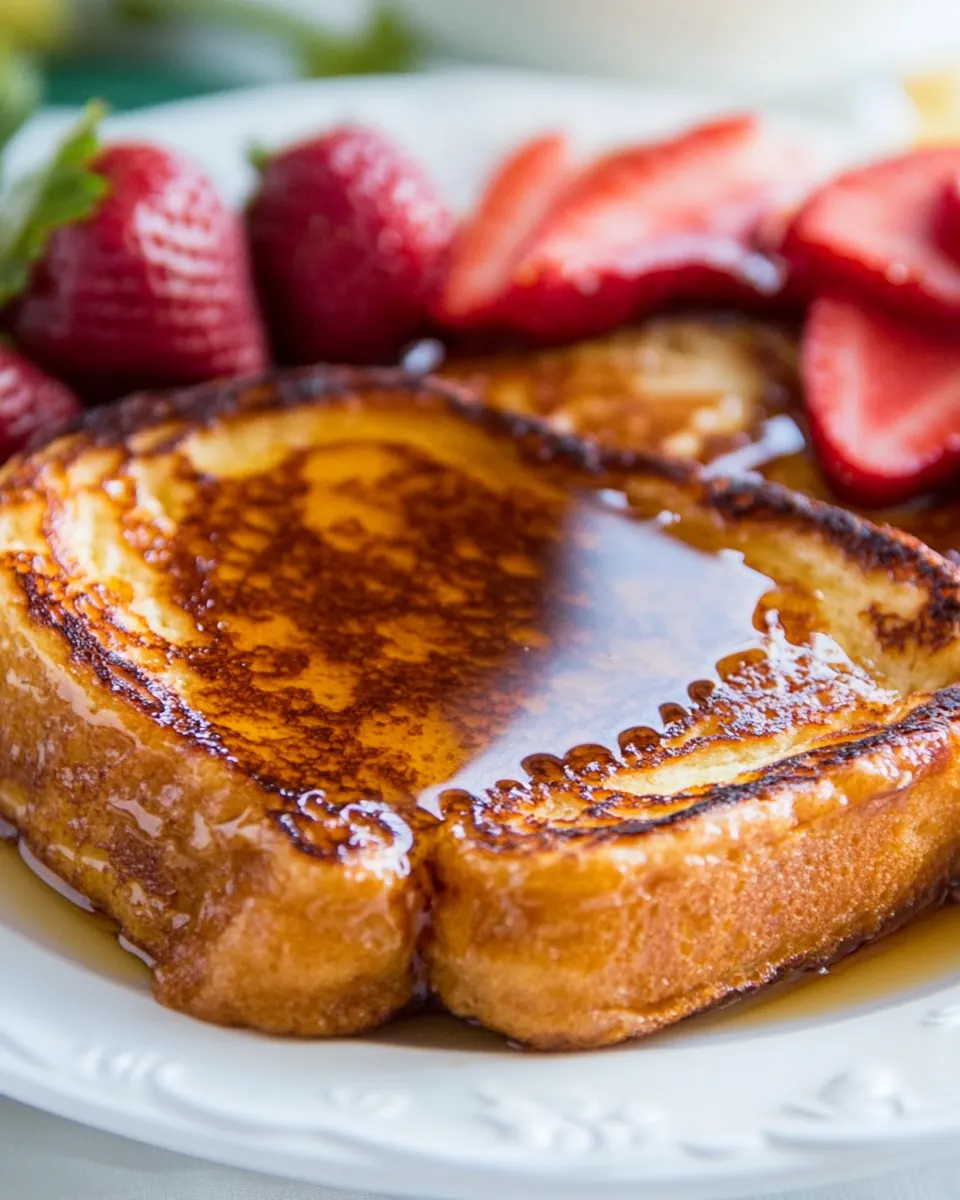
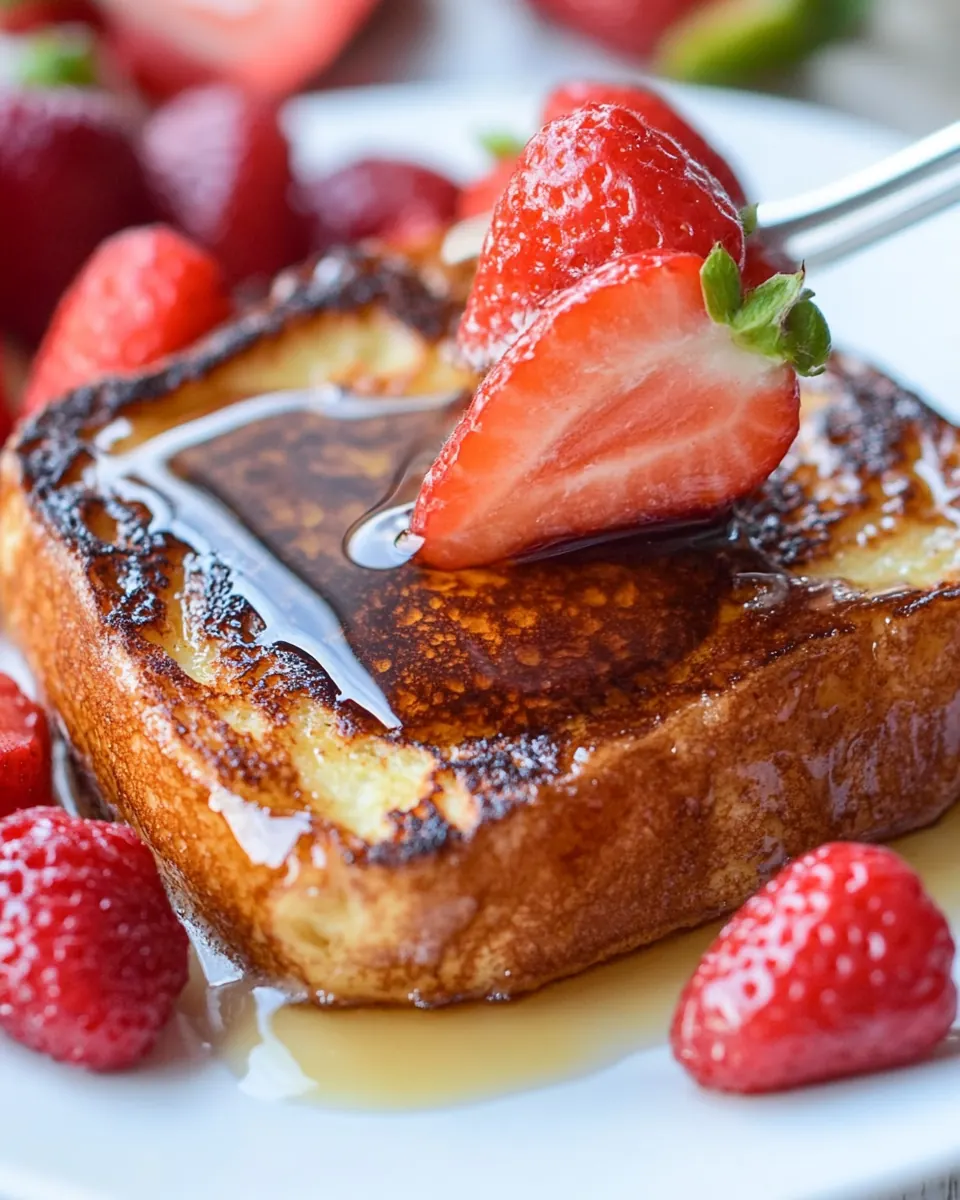
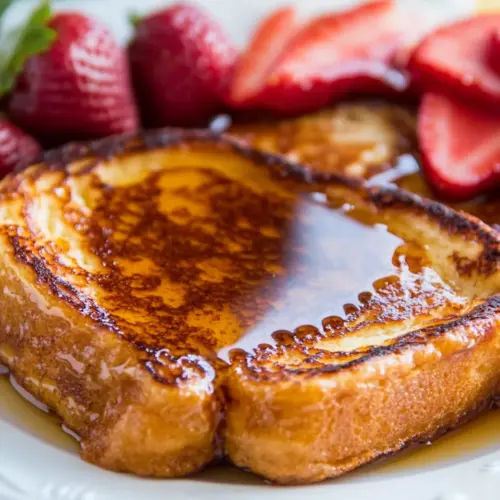
I often praise this recipe because it consistently produces a crunchy outside with a tender inside. When I cook it the right way the heat seals the surface quickly, forming a golden crust while the center stays soft, thanks to the balance of eggs and milk. I find that paying attention to soaking times and skillet temperature makes all the difference.
Simple Pantry Ingredients with Big Flavor
What I love is that you probably already have everything on hand. The recipe relies on straightforward items like eggs, milk, and cinnamon, yet the small addition of vanilla and a touch of honey elevates the flavor. I use these tiny touches to create depth without complexity, and it always feels like a treat.
Flexible for Different Breads and Occasions
I’ve used everything from bread like challah to thicker Texas toast, and each one brings a slightly different texture. I recommend brioche or challah when I want richness, and Texas toast when I need heft. We can adapt this recipe to feed a crowd or to make a quick single serving, and that adaptability is why it stays in my regular rotation.
Hands On, Comforting Technique
There is a comforting rhythm to dipping, sizzling, and piling warm slices on a baking sheet. I enjoy that hands on connection, and it helps me slow down in the morning. The method is forgiving, so even cooks who are still finding their footing can get a wonderful result.
Great Make Ahead and Keep Warm Strategy
I like that you can keep finished slices warm in a low oven while you finish the batch. That little step makes serving easier, and it keeps the texture right until the last plate is passed around. When entertaining, that trick keeps me relaxed and present with guests.
Ingredients You’ll Need for Easy French Toast Recipe
These ingredients form a simple custard that soaks into your chosen bread and transforms it into something rich and tender on the inside, and golden and crisp on the outside. The key players are the eggs and milk, which make the custard, along with a pinch of salt to boost flavor and a little vanilla and cinnamon to add warmth. The butter is important for browning and aroma, and the honey dissolves into the mix to add subtle sweetness.
- 6 large eggs: Whisk thoroughly to create the egg base that provides structure, richness, and a custardy interior for the soaked bread; contribute moisture and help bind the coating to each slice.
- 2 large egg yolks: Fold gently into the egg mixture to increase richness and creaminess, contributing extra yolk fat that deepens flavor and produces a silkier custard texture in the soak.
- 1 cup whole milk: Incorporate evenly to thin the egg mixture for better soaking, adding creaminess and a tender mouthfeel while balancing richness for a softer, custardy result.
- 1/4 tsp salt: Season lightly to enhance overall flavor and balance sweetness, helping to bring out the vanilla and cinnamon while preventing the custard from tasting flat.
- 2 tsp vanilla extract: Flavor intensely to add aromatic sweetness and depth; combine with cinnamon to elevate the classic French toast profile and complement the eggs and milk.
- 1 tsp ground cinnamon: Spice subtly to impart warm, fragrant notes that pair with vanilla and honey, enhancing aroma and delivering the characteristic flavor associated with traditional French toast.
- 1 tbsp warm honey: Sweeten gently to provide a natural floral honey note and a touch of sweetness that melds with cinnamon and vanilla while helping to caramelize during cooking.
- 1 lb bread such as Challah, Brioche, or Texas Toast, (about 8-10, 3/4”-thick slices): Provide the main body and texture as thick-sliced bread soaks up the custard; choose a rich, sturdy loaf like Challah, Brioche, or Texas Toast for optimal absorption and a tender interior with a crisp exterior.
- 3 tbsp unsalted butter, to saute toasts: Melt slowly to brown the soaked slices and create a golden, slightly crisp exterior; use unsalted butter to control seasoning and contribute a rich, buttery finish while sautéing the toasts.
Directions for Easy French Toast Recipe
I like to think of cooking these as a small ceremony, with steady, confident motions. Below you will find step by step actions expanded into sensory cues and troubleshooting notes so you know what to look and listen for as you go.
- Slice your bread about 3/4" thick, and arrange on a wire rack for 1-2 hours if time permits to dry out the bread slightly. Preheat the oven to 275˚F.: The air drying firms the crumb so the bread soaks up custard without collapsing, giving a tender interior and avoiding sogginess. You will notice the surface becoming less glossy and slightly stiff, which helps it hold shape when dipped. If you are short on time the step is optional, but faster soaking may lead to a softer center, so keep soaking times a bit shorter. A common mistake is slicing too thin which can lead to overcooked, rubbery pieces; aim for that three quarter inch thickness. When you set the oven to 275˚F the low heat keeps finished slices warm without continuing to brown them significantly, which is perfect for staging plates.
- In a medium bowl, whisk together eggs, yolks, milk, salt, vanilla, cinnamon, and warm honey until well blended and honey has dissolved. Pour into a casserole dish that fits 4 pieces of toast at a time, or as many as will fit your skillet at a time.: As you whisk you'll see the custard become glossy and slightly frothy, and the cinnamon will float in fine specks. The dissolved honey should leave no sticky strings, ensuring even sweetness. This smooth texture is essential because it helps the mixture coat the bread uniformly, preventing pockets of egg that can cook too quickly. A typical error is under whisking, which leaves uneven color and spots of undissolved honey; whisk until you have a uniform pale mixture. Use a shallow dish so the bread soaks evenly; deep bowls can trap pockets and cause over soaking at the edges.
- Preheat your skillet over medium-low heat and melt in 2 Tbsp butter.: The skillet should feel warm but not smoking when you add the butter . You want the butter to foam and give off a gentle nutty scent, not brown immediately. This moderate heat allows the surface of the bread to caramelize without burning, creating the desirable golden color. If your pan is too hot, the crust will darken before the interior cooks, resulting in a cold or under set center. A common trap is rushing the heat up to finish faster; take a moment to test with a small scrap of bread first to gauge sizzling intensity.
- Dip 4 pieces of bread into the egg mixture at a time and soak for 30-40 seconds per side depending on the thickness of the bread. Remove bread slices from egg wash letting excess drip back into the dish then place the bread slices into the hot skillet and saute for 3-4 minutes per side until golden brown.: When you dip the bread you should see the custard absorb and darken slightly, and a quick lift should show even coating. As the slices hit the skillet you will hear a steady gentle sizzle, and soon the edges will firm and a golden crust will appear. Flip when the underside releases easily and displays a deep amber color. This step controls the balance between a set interior and crispy exterior. A frequent mistake is soaking too long which yields a heavy, soggy interior; if your slices feel limp, press gently to release excess before cooking. While sauteing, watch for too aggressive browning which means the heat is high, so lower it to avoid burnt spots.
- Transfer to a baking sheet and place in the oven to keep warm at 275˚F. Repeat step 4 with the remaining toast, adding more butter as needed. Once all are sauteed, keep them in the oven for another 10-15 minutes for the custard center to fully set then serve warm with your favorite toppings.: The oven keeps temperature even and allows the custard to finish cooking gently, giving a uniformly set center without extra browning. You will notice the aroma deepen as they rest, and the texture firms up so slices slice cleanly. Add fresh butter in small amounts between batches so the pan maintains that gentle sizzle and avoids sticking, but avoid excess which can make the crust greasy. Avoid stacking slices while hot on the sheet as trapped steam can soften the crust; arrange them in a single layer. The final resting period is crucial for a perfect mouthfeel, because residual heat completes coagulation and produces that classic custardy interior.
Helpful Notes about Easy French Toast Recipe
I like to share compact, practical notes that you can refer to while cooking. These tips expand on small choices that have a big impact, from bread selection to finishing touches, and they are written so you can scan them quickly while you work.
- Choose enriched breads: When I want a rich, tender interior I reach for challah or brioche, because their higher fat content yields a silkier custard and more luxurious mouthfeel.
- Adjust soak time: Thicker slices need longer soaking, but if the bread is fresh reduce soak time to avoid a soggy center; test with one slice first.
- Keep batches warm: Use a 275˚F oven to hold finished slices while you finish the rest, this keeps texture consistent and frees you to cook without rushing.
- Butter management: Wipe the pan between batches if browned bits build up, then add a bit more butter to maintain even browning and prevent sticking.
- Flavor tweaks: Small additions like a touch more cinnamon or a pinch of salt can sharpen flavors, but tweak sparingly so the custard remains balanced.
Serve This Easy French Toast Recipe With
Serving is where this dish becomes an experience. Below I outline several pairing ideas, occasions, and storage suggestions so you can present the breakfast in ways that match your mood and company. The list format helps you pick a serving style quickly.
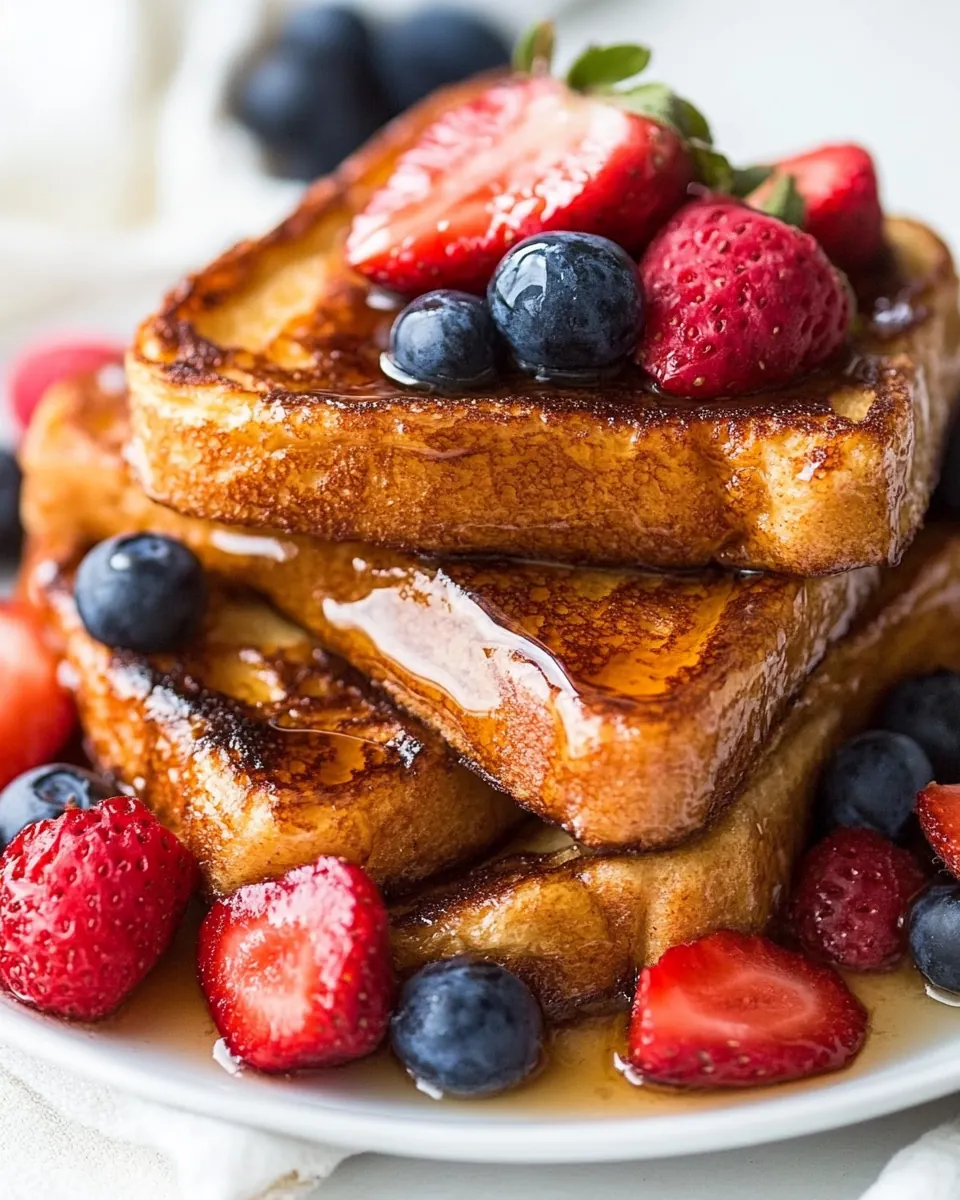
- Classic sweet service: Stack warm slices and serve with maple syrup and a dusting of powdered sugar for a timeless breakfast that everyone recognizes and loves.
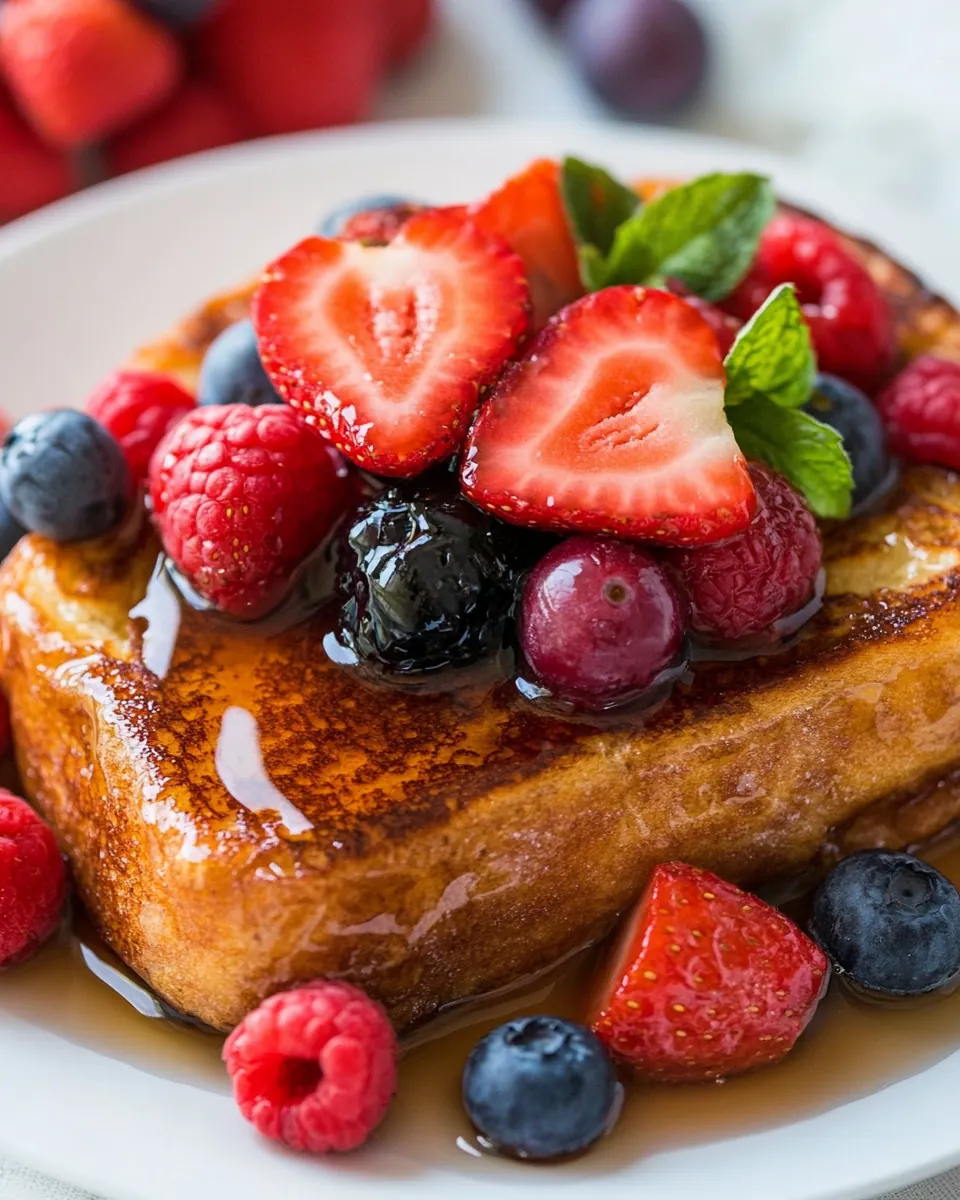
- Brunch spread: Pair with fresh fruit, yogurt, and a simple salad to balance the richness, making the meal suitable for a casual weekend gathering.
- Holiday mornings: This dish works well for special occasions, kept warm in a low oven so guests can serve themselves while you tend other dishes.
- On the go: Cool leftovers quickly, then refrigerate. Reheat briefly in a skillet or oven to restore crispness rather than microwaving, which can make slices limp.
- Seasonal pairings: In cooler months serve with spiced fruit compote, while in spring I prefer a bright berry salad to lighten the plate.
- Storage tips: Store in an airtight container for up to two days, and reheat in a skillet over low heat to revive the exterior crispness.
FAQ
Conclusion
This recipe stands out because it turns basic pantry ingredients into a reliably tender, custardy breakfast with a golden, crisp exterior. Give the method a try and notice how small choices like bread selection and skillet temperature change the result, making a familiar dish feel special. I hope you enjoy the ritual of whisking, dipping, and cooking these slices as much as I do, and that they become a warm staple in your breakfast rotation.
Easy French Toast Recipe
Equipment
- Skillet
- Wire Rack
- Baking Sheet
- Medium Bowl
- Casserole Dish
Ingredients
- 6 large eggs Whisk thoroughly to create the egg base that provides structure, richness, and a custardy interior for the soaked bread; contribute moisture and help bind the coating to each slice.
- 2 large egg yolks Fold gently into the egg mixture to increase richness and creaminess, contributing extra yolk fat that deepens flavor and produces a silkier custard texture in the soak.
- 1 cup whole milk Incorporate evenly to thin the egg mixture for better soaking, adding creaminess and a tender mouthfeel while balancing richness for a softer, custardy result.
- 1/4 tsp salt Season lightly to enhance overall flavor and balance sweetness, helping to bring out the vanilla and cinnamon while preventing the custard from tasting flat.
- 2 tsp vanilla extract Flavor intensely to add aromatic sweetness and depth; combine with cinnamon to elevate the classic French toast profile and complement the eggs and milk.
- 1 tsp ground cinnamon Spice subtly to impart warm, fragrant notes that pair with vanilla and honey, enhancing aroma and delivering the characteristic flavor associated with traditional French toast.
- 1 tbsp warm honey Sweeten gently to provide a natural floral honey note and a touch of sweetness that melds with cinnamon and vanilla while helping to caramelize during cooking.
- 1 lb bread such as Challah, Brioche, or Texas Toast, (about 8-10, 3/4”-thick slices) Provide the main body and texture as thick-sliced bread soaks up the custard; choose a rich, sturdy loaf like Challah, Brioche, or Texas Toast for optimal absorption and a tender interior with a crisp exterior.
- 3 tbsp unsalted butter, to saute toasts Melt slowly to brown the soaked slices and create a golden, slightly crisp exterior; use unsalted butter to control seasoning and contribute a rich, buttery finish while sautéing the toasts.
Instructions
- Slice your bread about 3/4" thick, and arrange on a wire rack for 1-2 hours if time permits to dry out the bread slightly. Preheat the oven to 275˚F.: The air drying firms the crumb so the bread soaks up custard without collapsing, giving a tender interior and avoiding sogginess. You will notice the surface becoming less glossy and slightly stiff, which helps it hold shape when dipped. If you are short on time the step is optional, but faster soaking may lead to a softer center, so keep soaking times a bit shorter. A common mistake is slicing too thin which can lead to overcooked, rubbery pieces; aim for that three quarter inch thickness. When you set the oven to 275˚F the low heat keeps finished slices warm without continuing to brown them significantly, which is perfect for staging plates.
- In a medium bowl, whisk together eggs, yolks, milk, salt, vanilla, cinnamon, and warm honey until well blended and honey has dissolved. Pour into a casserole dish that fits 4 pieces of toast at a time, or as many as will fit your skillet at a time.: As you whisk you'll see the custard become glossy and slightly frothy, and the cinnamon will float in fine specks. The dissolved honey should leave no sticky strings, ensuring even sweetness. This smooth texture is essential because it helps the mixture coat the bread uniformly, preventing pockets of egg that can cook too quickly. A typical error is under whisking, which leaves uneven color and spots of undissolved honey; whisk until you have a uniform pale mixture. Use a shallow dish so the bread soaks evenly; deep bowls can trap pockets and cause over soaking at the edges.
- Preheat your skillet over medium-low heat and melt in 2 Tbsp butter.: The skillet should feel warm but not smoking when you add the butter . You want the butter to foam and give off a gentle nutty scent, not brown immediately. This moderate heat allows the surface of the bread to caramelize without burning, creating the desirable golden color. If your pan is too hot, the crust will darken before the interior cooks, resulting in a cold or under set center. A common trap is rushing the heat up to finish faster; take a moment to test with a small scrap of bread first to gauge sizzling intensity.
- Dip 4 pieces of bread into the egg mixture at a time and soak for 30-40 seconds per side depending on the thickness of the bread. Remove bread slices from egg wash letting excess drip back into the dish then place the bread slices into the hot skillet and saute for 3-4 minutes per side until golden brown.: When you dip the bread you should see the custard absorb and darken slightly, and a quick lift should show even coating. As the slices hit the skillet you will hear a steady gentle sizzle, and soon the edges will firm and a golden crust will appear. Flip when the underside releases easily and displays a deep amber color. This step controls the balance between a set interior and crispy exterior. A frequent mistake is soaking too long which yields a heavy, soggy interior; if your slices feel limp, press gently to release excess before cooking. While sauteing, watch for too aggressive browning which means the heat is high, so lower it to avoid burnt spots.
- Transfer to a baking sheet and place in the oven to keep warm at 275˚F. Repeat step 4 with the remaining toast, adding more butter as needed. Once all are sauteed, keep them in the oven for another 10-15 minutes for the custard center to fully set then serve warm with your favorite toppings.: The oven keeps temperature even and allows the custard to finish cooking gently, giving a uniformly set center without extra browning. You will notice the aroma deepen as they rest, and the texture firms up so slices slice cleanly. Add fresh butter in small amounts between batches so the pan maintains that gentle sizzle and avoids sticking, but avoid excess which can make the crust greasy. Avoid stacking slices while hot on the sheet as trapped steam can soften the crust; arrange them in a single layer. The final resting period is crucial for a perfect mouthfeel, because residual heat completes coagulation and produces that classic custardy interior.
Notes
- Choose enriched breads: When I want a rich, tender interior I reach for challah or brioche, because their higher fat content yields a silkier custard and more luxurious mouthfeel.
- Adjust soak time: Thicker slices need longer soaking, but if the bread is fresh reduce soak time to avoid a soggy center; test with one slice first.
- Keep batches warm: Use a 275˚F oven to hold finished slices while you finish the rest, this keeps texture consistent and frees you to cook without rushing.
- Butter management: Wipe the pan between batches if browned bits build up, then add a bit more butter to maintain even browning and prevent sticking.
- Flavor tweaks: Small additions like a touch more cinnamon or a pinch of salt can sharpen flavors, but tweak sparingly so the custard remains balanced.