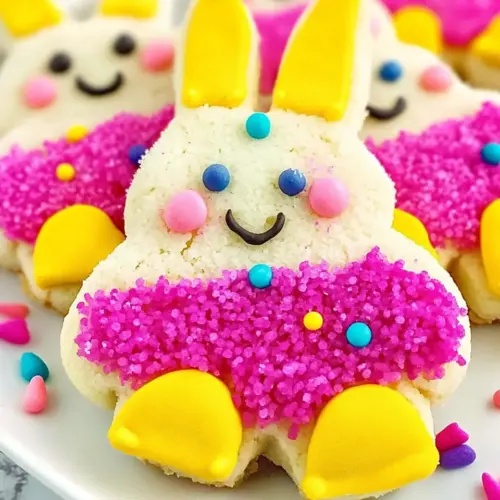
Bunny Cookies
Bunny Cookies are crisp cutout sugar cookies topped with creamy frosting and sparkling colored sugar for a festive, kid friendly treat. These easy to decorate cookies are perfect for spring and Easter gatherings, offering a satisfying crunch and sweet creamy finish. They make a cheerful addition to party platters, and the hands on decorating turns baking into a shared activity sure to create memories.
Equipment
- Baking Sheet
- Piping bag with small star tip
- Shallow plates
- Cookie Cutter
Ingredients
- 1 recipe Cutout sugar cookies with frosting Provides the base cookie dough and decorative frosting to shape and decorate bunny-shaped cookies; use a favorite cutout sugar cookie recipe for tender, buttery cookies that hold their shape when baked. Chill the dough before cutting to maintain clean edges, and bake until just set to avoid overbrowning. Frost with a smooth, stable buttercream or royal frosting to allow toppings to adhere and create crisp decorative details.
- Colored Sugar Adds a sparkling, colorful finish and subtle crunch when sprinkled over frosted cookies; use fine or coarse colored sugar depending on the desired texture and visual effect. Apply while the frosting is still tacky so the sugar adheres evenly and avoids clumping. Choose colors that complement the bunny design to enhance the festive appearance.
- Sprinkles optional Provides optional variety and extra texture for decorating cookies; use an assortment of shapes, sizes, and colors to create eyes, noses, or accents on bunny designs. Sprinkle selectively to avoid overpowering delicate frosting details and to maintain a balanced look. Store extras in an airtight container to preserve freshness and crunch for future batches.
Instructions
- When making your sugar cookies, cut out bunny shapes. Bake as directed.: Warm oven aromas will begin to fill the kitchen, a comforting mix of butter and sugar that signals progress and encourages patience. You should notice the edges firming and becoming pale gold, which indicates proper bake time, and the surface will look set rather than glossy. The reason this matters is that well shaped and cooled cookies provide a stable canvas for decoration, so take the time to chill dough and press cutters firmly for clean outlines. A common mistake is overworking the dough, which makes cookies tough; handle it gently and chill as needed to prevent spreading.
- Once cool, tint your frosting the color of your sanding sugars.: The tactile action of stirring food color into frosting should yield a smooth, evenly shaded paste that matches the brightness of your chosen Colored Sugar . A small spoonful of color can go a long way, and it is easier to deepen the shade than to lighten it, so add color sparingly. This step matters because matching colors ensures the sugar adheres and looks seamless, and a mismatched shade can make details read as sloppy. Avoid adding too much liquid to thin the frosting , which will make it runny and prevent proper adhesion.
- Place sugar on a shallow plate (use different plates for different colors).: The shallow plate lets you press a frosted cookie into the sugar with control, producing even coverage and minimizing waste. When you dip, the sugar will catch on the frosting's surface texture, creating that sparkling finish, and using separate plates prevents color transfer. This technique matters because mixing colors on one plate can create muddy hues, and keeping plates shallow helps you rotate cookies without losing your grip. One thing to watch for is static cling, which can scatter sugar; a gentle tap and tidy workspace keeps it contained.
- Frost bunnies all over with frosting. Dip frosting side down in sugar and press to coat.: When you spread frosting , aim for a thin, even layer that still feels tacky so sugar will stick, and the press should be firm but gentle to avoid denting the cookie. You will feel a satisfying slight resistance as the sugar embeds into the icing, and visually the cookie will transform, gaining a glinting, textured coat. This approach matters because too much frosting will smudge the edges and too little will give sparse coverage. Avoid pressing so hard that the cookie cracks or the icing squeezes out the sides.
- Place white frosting in a piping bag fitted with a small star tip. Pipe a tail on the bottom of the cookie.: The tactile spring of the piping bag when you squeeze gives precise control, and the little star pattern makes an adorable textured tail that holds its shape. The contrast between the colored sugar body and the white piped tail adds dimension and a handcrafted look. This technique matters because a defined tail reads as detail rather than an afterthought, and a consistent pressure yields evenly sized stars. A slip to avoid is filling the bag too full, which makes control harder; fill it only halfway for better handling.
- Use sprinkles to make eyes and noses.: Adding tiny sprinkles for facial features brings personality and charm, and the small point of color really completes each bunny. Gently press each sprinkle into the still-tacky area of the frosting so it adheres without sliding, and arrange features symmetrically for a polished look. This detail matters because faces make cookies feel intentional and cute, and a crooked placement can look unintended. Beware of heavy fingers that may flatten the frosting and leave fingerprints.
- Store in an airtight container for up to 3 days.: The sensory shift from crisp initial bite to slightly softer interior is normal as moisture redistributes in the container, and keeping them airtight preserves that balance for a few days. Place sheets of parchment between layers to prevent sticking and protect delicate decorations like piped tails. This storage method matters because exposure to air will dry the cookies, and refrigeration can dull the frosting sheen, so room temperature in a sealed container is best. A frequent mistake is stacking while frosting is wet, which smudges designs; allow full drying time before storing.
Notes
- Make mini cookies: Reduce the cutter size to create bite sized bunnies that are perfect for party platters, they bake faster so watch closely and remove when the edges just set.
- Vary the sugar finish: Use different sanding sugar textures for contrast, choosing a coarser grain for sparkle and a finer grain for a softer sheen, and test one cookie to confirm adhesion.
- Assemble a decorating station: Set out multiple colors of Colored Sugar and small bowls of Sprinkles so each guest can personalize their bunny without crowding the workspace.
- Time saving piping: If you are short on time, use a small round tip instead of a star tip for a quick dot tail that still reads as a tail but takes less precision.
- Prepare ahead: Bake the cookies a day early and store them uniced in an airtight container, then decorate the day of the event for fresher looking frosting and crisper sugar adherence.