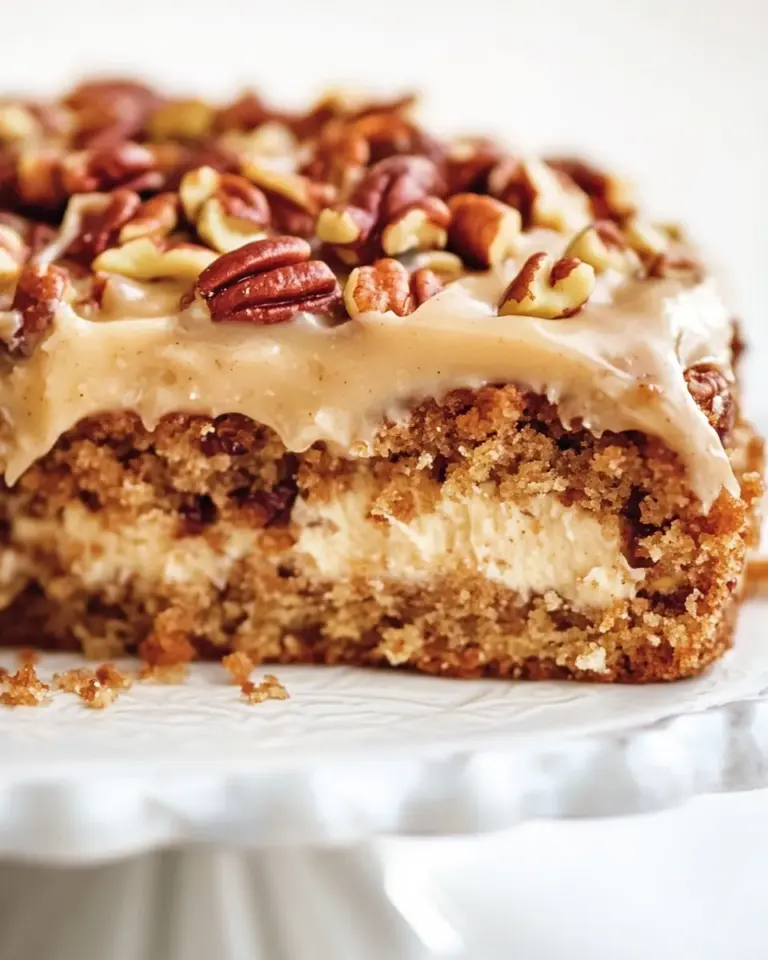
Valentines Day Chocolate Bark
Valentines Day Chocolate Bark started as a grab at comfort and turned into a ritual I reach for whenever I want a quick, festive treat to share. The first time I made it, I was tidying up after a late afternoon of baking and found a pack of graham crackers hiding in the pantry, a lonely chocolate bar on the counter, and a jar of colorful M&M’s that begged to be used. I assembled everything on a whim, and what emerged was crunchy, glossy, and impossibly easy to break into handfuls for friends who stopped by.
Each batch since then carries a little memory: the way the chocolate sheen reflected the kitchen light, the tiny thud as I pressed the M&M’s into the warm surface, and the childish grin when sprinkles landed like confetti. I like that this recipe is unfussy, it celebrates texture and color, and it lets you be playful with toppings. When I bring a tray to a small get together, people admire the rustic look and then wonder how something so simple tastes so special.
Over the years I have tweaked timing and placement, learning when to chill the sheet for an optimal snap, and how to break pieces so they look intentionally irregular. If you enjoy hands on, fast results that still feel homemade and thoughtful, this treat will quickly become a go to. It pairs wonderfully with casual conversation, movie nights, and last minute celebrations that call for something sweet and shareable.
Recipe Snapshot
13 mins
10 mins
3 mins
Medium
200 kcal
American
Paleo, Gluten-Free
Desserts
9 x 13 baking sheet, Double boiler, Offset spatula
The Best Thing About This Valentines Day Chocolate Bark
Easy, impressive results
I love that Valentines Day Chocolate Bark gives you a beautiful dessert with very little fuss. The technique is straightforward, which means I can pull it together between errands and still deliver a glossy, crowd pleasing tray. When I serve it, folks assume I spent a lot more time than I did, and that always makes me smile.
Textural contrast that sings
The combination of crunchy graham crackers, smooth melted chocolate, and crunchy M&M’s plus sprinkles creates a playful mouthfeel. I find this contrast keeps every bite interesting, and it is especially satisfying when the chocolate snaps cleanly. It is a simple trick to make a dessert feel layered and thoughtfully composed.
Totally customizable
I often change how I arrange the toppings to match the occasion. For Valentine occasions I lean into pink and red sprinkles, but the method handles any colors or small add ins you want to press on while the chocolate is warm. That flexibility makes this recipe a go to for holidays and quick gifts.
Minimal equipment and stress free prep
Because the recipe needs only basic tools and a short hands on time, I can get it ready while finishing other tasks. I particularly appreciate that chilling does the heavy lifting, so you can prepare and then let the fridge set everything while you relax. It is a forgiving process, which is perfect for makers who do not want to babysit the stove.
Great for sharing
I find the rustic pieces are ideal for handing out at gatherings or packing into simple cellophane bags for gifts. People enjoy the homemade feel and the fact that each piece is unique. This recipe encourages generosity, and I always end up saving a few for later bites.
Ingredients for Valentines Day Chocolate Bark
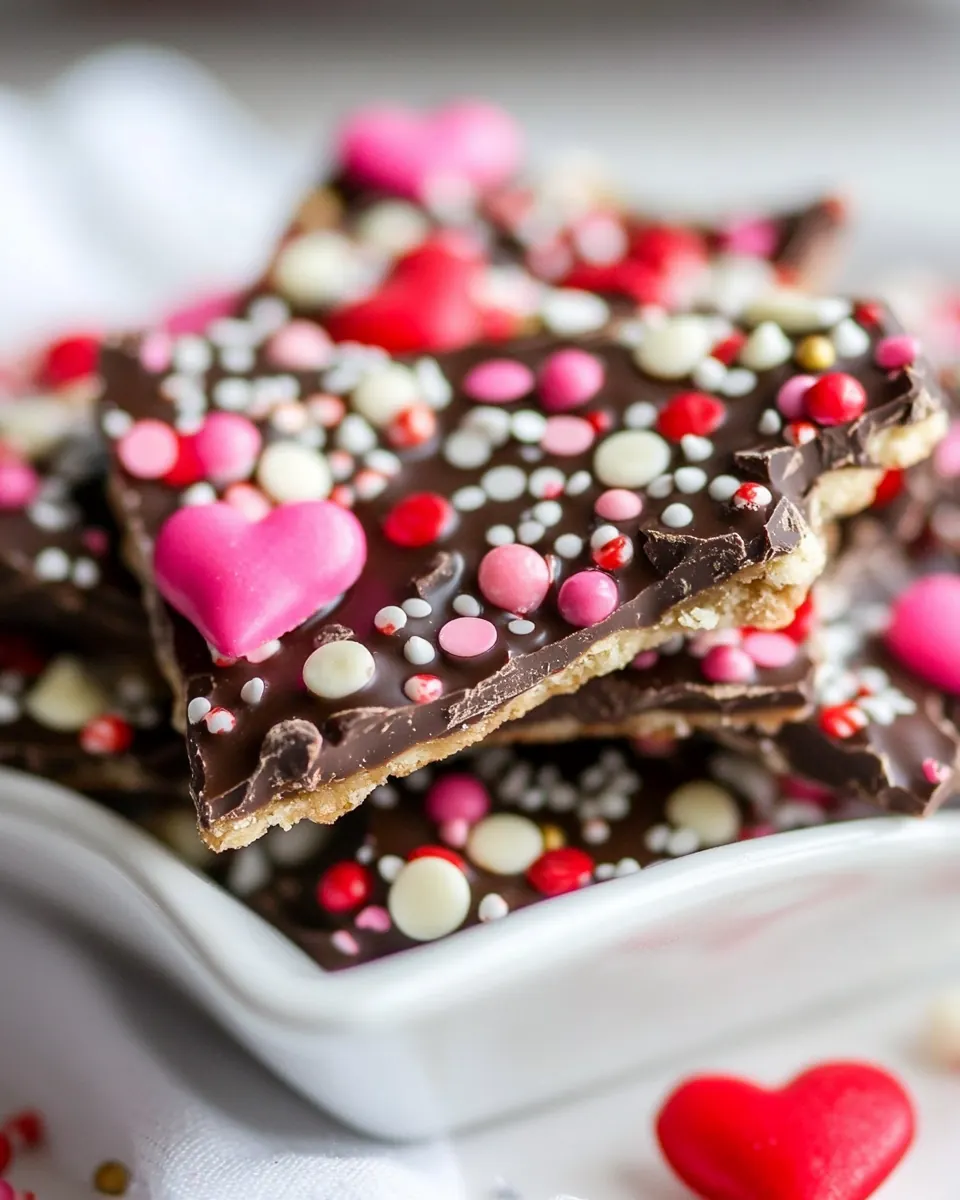
These ingredients are intentionally simple, each playing a clear role. The graham crackers provide a crisp base, the chocolate offers sheen and flavor to bind everything, the M&M’s add color and crunch, and the sprinkles deliver festive visual flair. Together they create a balanced treat that is as much about texture as it is about taste.
- 7 graham crackers: Crushed into small pieces to form a crunchy base layer that holds the bark together and adds texture; can be arranged whole or broken for variety. Provides a mildly sweet, slightly salty flavor that balances the dark chocolate and complements the candy toppings.
- 4.25 oz bar of chocolate I used Hershey's Special Dark: Melted and poured as the binding element that solidifies around the other components; choose a bar with a flavor profile you enjoy since it dominates the bark. Adds rich cocoa depth and a smooth mouthfeel, and can be tempered or simply melted for an easy finish.
- 1/2 c M&M's: Scattered over the melted chocolate to add vibrant color, extra crunch, and pockets of sweet candy flavor; press lightly so they adhere before the chocolate sets. Offer playful pops of peanut-free chocolate and sugar that contrast the bitter chocolate and crunchy crackers.
- sprinkles: Sprinkled on top to provide festive color, delicate crunch, and visual appeal; use sparingly or generously depending on desired look. Introduces tiny bursts of sweetness and texture while making the bark attractive for a Valentine’s Day presentation.
The Process for Making Valentines Day Chocolate Bark

Below I walk you through each step with sensory cues and troubleshooting tips so you get glossy, snappy bark every time. The sequence is simple, but attention to small details like chocolate temperature and chilling time makes a big difference.
- Layer graham crackers in a 9" x 13" baking sheet.: Your sense of sight and touch matter here, aim for a mostly even single layer that covers the pan with little overlap. You want a stable, crunchy platform so when the chocolate is poured it spreads over a firm surface. Listen for the slight scrape as the crackers settle into place, and look for even coverage, avoiding large gaps. If pieces wobble, gently tap the pan on the counter to settle them. A common mistake is leaving big gaps which can lead to uneven topping distribution, so take a moment to fit pieces together snugly.
- Melt chocolate in a double boiler.: As the water simmers gently below, the chocolate will transform into a glossy, velvety pour. Watch the texture closely, stirring slowly with a spatula to encourage even melting and to prevent any gritty lumps. The aroma will deepen, a warm cocoa scent that signals readiness. Avoid letting steam or a single drop of water touch the chocolate , because moisture causes it to seize into a grainy mass. If it becomes too thick, remove from heat and stir, or add a sliver of unmelted chocolate to smooth it out rather than introducing water.
- Spread over the crackers.: When the chocolate reaches a smooth, ribbon like flow, pour it over the arranged graham crackers and use an offset spatula to coax it into the corners. You should see a glossy, reflective surface as you spread, and the sound is a soft scrape as the spatula glides. Aim for an even layer that covers the crackers without pooling excessively at the edges, because too much thickness can make chilling take much longer. A frequent error is working with chocolate that is too hot, which can melt the crackers; let it cool slightly until it is warm but not steaming.
- Arrange the M&M's.: Press the M&M's into the warm surface in a pattern you like, spacing them so each bite has a few candies. The M&M's should sink just enough to adhere but remain whole and brightly colored. Visually, this is the moment the bark comes alive, with pops of color across the glossy field. If you wait too long and the chocolate firms, the candies will not stick, so work promptly. One common mistake is clustering them too tightly which can make breaking the bark messy; aim for balanced distribution.
- Add sprinkles.: Scatter sprinkles lightly across the surface to enhance color and texture, pressing very gently if needed so they touch the chocolate . You will feel the tiny grains settle under your fingers and see an immediate lift in presentation. Sprinkle variety can change the mood, so choose shapes and hues that suit the occasion. Be careful not to overapply, as too many sprinkles can mask the crunchy base and dominate the bite.
- Let set in the fridge for at least 30 minutes.: As the tray chills, the chocolate will firm up and develop a satisfying snap, and the cool air brings a clean, slightly rigid texture to the surface. You might hear a faint clink when you move the pan after chilling, indicating a good set. Putting the bark in the fridge speeds the process but avoid leaving it long enough to attract condensation when removed, which can dull the shine. A common oversight is rushing this step, trying to break the bark before it is fully set, resulting in sticky or smeared edges.
- Brake into pieces.: Use a bench scraper or sturdy knife to break or cut the set bark into irregular pieces, aiming for varied sizes for sharing. The ideal sound is a crisp snap as the chocolate fractures, and the edges should look clean with toppings intact. If the bark seems to crumble excessively, it may have been chilled too long or the chocolate layer may be uneven; bring it to room temperature for a few minutes to cut more cleanly. Avoid sawing back and forth, which can dislodge toppings; instead use a decisive press or gentle bend to separate pieces.
Substitutions and Tips

This recipe thrives on simplicity, so small adjustments can personalize it without altering the approach. Below are detailed tips to help you get the best texture, flavor, and presentation for Valentines Day Chocolate Bark. Each tip starts with a practical phrase to make it easy to scan while you work.
- Choose quality chocolate: Select a bar you enjoy eating, as its flavor is central. Darker chocolate balances sweetness from the M&M’s and sprinkles, while milk chocolate adds more creaminess. Avoid chocolate chips made with stabilizers for a smoother melt.
- Control the melt temperature: Keep the double boiler water at a gentle simmer and stir the chocolate consistently. This prevents graininess and helps maintain a glossy finish, which matters for both texture and appearance.
- Pack the base carefully: Arrange the graham crackers tightly in the pan so the chocolate forms a continuous layer and the bark breaks into satisfying pieces instead of falling apart.
- Work quickly with toppings: Apply the M&M’s and sprinkles while the chocolate is fluid, so they sink in just enough to stick and remain decorative.
- Adjust chilling for climate: In a warm kitchen chill longer to ensure a firm set, and in a cold kitchen shorten the fridge time to avoid condensation forming when you uncover the tray.
- Store properly: Keep the bark in an airtight container in the fridge for up to a week to retain snap and freshness, separating layers with parchment to avoid sticking.
Serving This Valentines Day Chocolate Bark
This sweet treat is ideal for casual gatherings, thoughtful gifts, and quick celebratory moments. Below are serving ideas, storage guidance, and occasion suggestions to help you present Valentines Day Chocolate Bark beautifully and practically.
- Casual gatherings: Arrange the pieces on a small platter so guests can pick and mingle, pairing the bark with coffee or tea for a relaxed finish to a meal.
- Gift packaging: Wrap small clusters in cellophane tied with ribbon for a homemade gift, placing a few varied sized pieces in each bag for visual interest.
- Party platters: Mix bark pieces with other small sweets on a dessert board, using the colorful M&M’s to anchor the display and provide contrast.
- Occasions: Serve this for Valentine themed events, casual brunches, movie nights, or as a simple dessert after a family dinner.
- Storage tips: Refrigerate in an airtight container and layer parchment between pieces to prevent sticking; bring to room temperature briefly before serving for best texture.
- Seasonal pairings: Lean into themed colors for holidays, and pair with warm beverages during colder months to balance the cool, crisp texture of the bark.
FAQ
Conclusion
What makes this recipe special is how a few pantry staples transform into a festive, textured treat that looks impressive but requires minimal effort. The glossy melted chocolate, crisp graham base, and playful candies create a combination that always draws compliments. Give this a try when you want a fast sweet to share, and enjoy the ease of a recipe that lets you be creative without a long time commitment. It is personal, forgiving, and reliably delicious, perfect for last minute celebrations or thoughtful homemade gifts.

Valentines Day Chocolate Bark
Equipment
- 9 x 13 baking sheet
- Double boiler
- Offset Spatula
Ingredients
- 7 graham crackers Crushed into small pieces to form a crunchy base layer that holds the bark together and adds texture; can be arranged whole or broken for variety. Provides a mildly sweet, slightly salty flavor that balances the dark chocolate and complements the candy toppings.
- 4.25 oz bar of chocolate I used Hershey's Special Dark Melted and poured as the binding element that solidifies around the other components; choose a bar with a flavor profile you enjoy since it dominates the bark. Adds rich cocoa depth and a smooth mouthfeel, and can be tempered or simply melted for an easy finish.
- 1/2 c M&M's Scattered over the melted chocolate to add vibrant color, extra crunch, and pockets of sweet candy flavor; press lightly so they adhere before the chocolate sets. Offer playful pops of peanut-free chocolate and sugar that contrast the bitter chocolate and crunchy crackers.
- sprinkles Sprinkled on top to provide festive color, delicate crunch, and visual appeal; use sparingly or generously depending on desired look. Introduces tiny bursts of sweetness and texture while making the bark attractive for a Valentine’s Day presentation.
Instructions
- Layer graham crackers in a 9" x 13" baking sheet.: Your sense of sight and touch matter here, aim for a mostly even single layer that covers the pan with little overlap. You want a stable, crunchy platform so when the chocolate is poured it spreads over a firm surface. Listen for the slight scrape as the crackers settle into place, and look for even coverage, avoiding large gaps. If pieces wobble, gently tap the pan on the counter to settle them. A common mistake is leaving big gaps which can lead to uneven topping distribution, so take a moment to fit pieces together snugly.
- Melt chocolate in a double boiler.: As the water simmers gently below, the chocolate will transform into a glossy, velvety pour. Watch the texture closely, stirring slowly with a spatula to encourage even melting and to prevent any gritty lumps. The aroma will deepen, a warm cocoa scent that signals readiness. Avoid letting steam or a single drop of water touch the chocolate , because moisture causes it to seize into a grainy mass. If it becomes too thick, remove from heat and stir, or add a sliver of unmelted chocolate to smooth it out rather than introducing water.
- Spread over the crackers.: When the chocolate reaches a smooth, ribbon like flow, pour it over the arranged graham crackers and use an offset spatula to coax it into the corners. You should see a glossy, reflective surface as you spread, and the sound is a soft scrape as the spatula glides. Aim for an even layer that covers the crackers without pooling excessively at the edges, because too much thickness can make chilling take much longer. A frequent error is working with chocolate that is too hot, which can melt the crackers; let it cool slightly until it is warm but not steaming.
- Arrange the M&M's.: Press the M&M's into the warm surface in a pattern you like, spacing them so each bite has a few candies. The M&M's should sink just enough to adhere but remain whole and brightly colored. Visually, this is the moment the bark comes alive, with pops of color across the glossy field. If you wait too long and the chocolate firms, the candies will not stick, so work promptly. One common mistake is clustering them too tightly which can make breaking the bark messy; aim for balanced distribution.
- Add sprinkles.: Scatter sprinkles lightly across the surface to enhance color and texture, pressing very gently if needed so they touch the chocolate . You will feel the tiny grains settle under your fingers and see an immediate lift in presentation. Sprinkle variety can change the mood, so choose shapes and hues that suit the occasion. Be careful not to overapply, as too many sprinkles can mask the crunchy base and dominate the bite.
- Let set in the fridge for at least 30 minutes.: As the tray chills, the chocolate will firm up and develop a satisfying snap, and the cool air brings a clean, slightly rigid texture to the surface. You might hear a faint clink when you move the pan after chilling, indicating a good set. Putting the bark in the fridge speeds the process but avoid leaving it long enough to attract condensation when removed, which can dull the shine. A common oversight is rushing this step, trying to break the bark before it is fully set, resulting in sticky or smeared edges.
- Brake into pieces.: Use a bench scraper or sturdy knife to break or cut the set bark into irregular pieces, aiming for varied sizes for sharing. The ideal sound is a crisp snap as the chocolate fractures, and the edges should look clean with toppings intact. If the bark seems to crumble excessively, it may have been chilled too long or the chocolate layer may be uneven; bring it to room temperature for a few minutes to cut more cleanly. Avoid sawing back and forth, which can dislodge toppings; instead use a decisive press or gentle bend to separate pieces.
Notes
- Choose quality chocolate: Select a bar you enjoy eating, as its flavor is central. Darker chocolate balances sweetness from the M&M's and sprinkles, while milk chocolate adds more creaminess. Avoid chocolate chips made with stabilizers for a smoother melt.
- Control the melt temperature: Keep the double boiler water at a gentle simmer and stir the chocolate consistently. This prevents graininess and helps maintain a glossy finish, which matters for both texture and appearance.
- Pack the base carefully: Arrange the graham crackers tightly in the pan so the chocolate forms a continuous layer and the bark breaks into satisfying pieces instead of falling apart.
- Work quickly with toppings: Apply the M&M's and sprinkles while the chocolate is fluid, so they sink in just enough to stick and remain decorative.
- Adjust chilling for climate: In a warm kitchen chill longer to ensure a firm set, and in a cold kitchen shorten the fridge time to avoid condensation forming when you uncover the tray.
- Store properly: Keep the bark in an airtight container in the fridge for up to a week to retain snap and freshness, separating layers with parchment to avoid sticking.