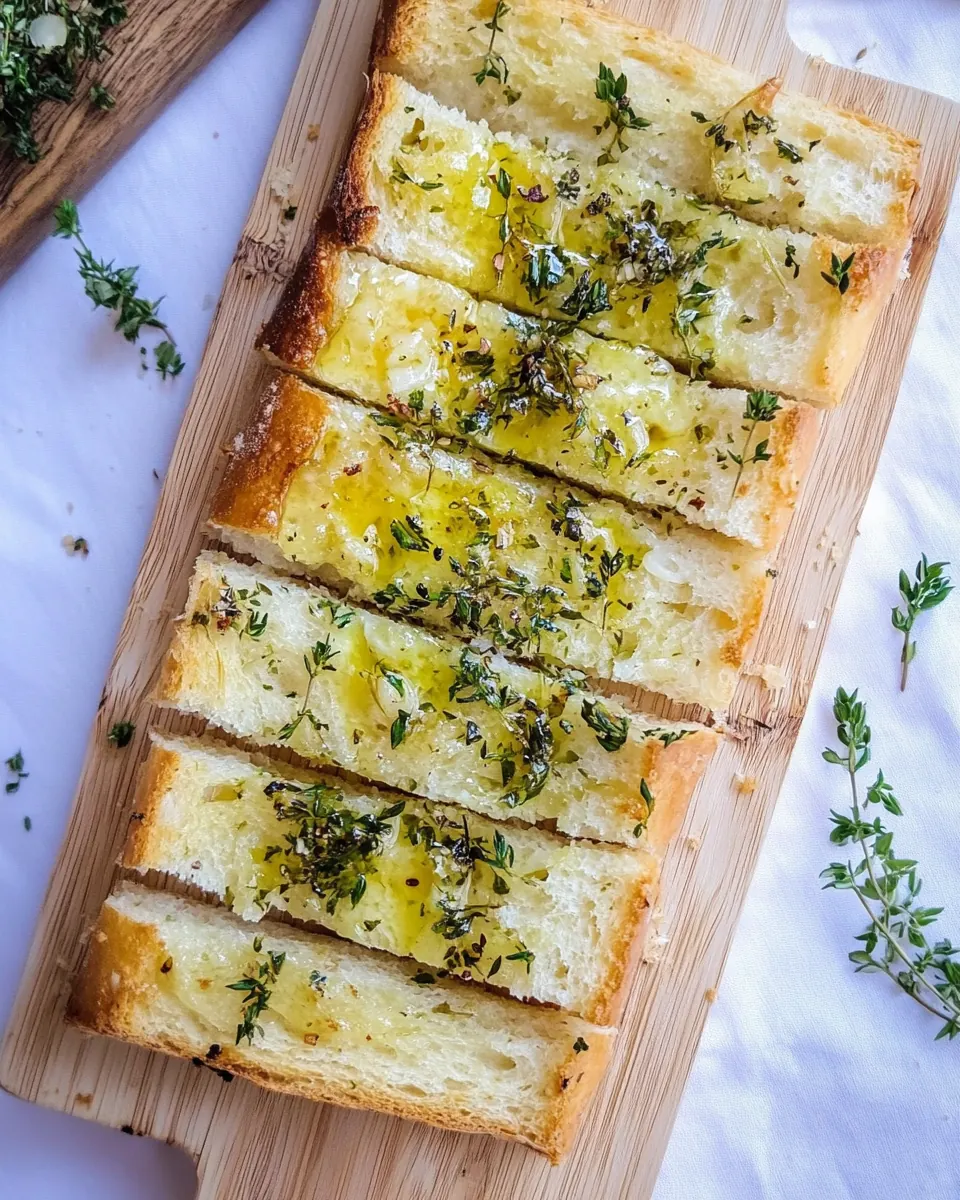
Ultimate Garlic Bread
Ultimate Garlic Bread has been my weekend fallback ever since I burned my first store bought garlic loaf years ago, then learned how forgiving bread and garlic can be when treated with a little patience and care.
The first time I made Ultimate Garlic Bread for a group, I remember carrying the foil wrapped loaf into the kitchen while friends chatted on the patio. The aroma of garlic and melting butter pulled everyone inside, and the soft interior with a crisp crust disappeared in minutes. I still laugh thinking about the way a simple mix of herbs and melted butter turned a casual evening into something that felt intentionally cozy.
Over time I tuned the ratio of roasted garlic to butter, learned when to add the cheese for perfect melt, and started to think about texture as much as flavor. There are evenings I prefer the loaf sliced and served warm with a sprinkling of Parmesan, and other nights when a gooey layer of mozzarella takes center stage. I love how flexible this recipe is, it adapts to what you already have in the kitchen and rewards small, thoughtful choices.
Recipe Snapshot
20 mins
5 mins
15 mins
Medium
200 kcal
Italian
Keto, Gluten-Free
Side Dishes
Oven, Baking sheet, Small bowl, Serrated knife, Aluminum foil
Why This Ultimate Garlic Bread Is a Winner
Comforting, nostalgic appeal
I grew up with simple, buttery bread at family dinners, and Ultimate Garlic Bread taps into that same comfortable place. The combination of warm crust and a soft, herb kissed interior brings back weekend meals and late night conversations. I find that this recipe is an easy way to make any dinner feel more homey and welcoming.
Built on familiar, quality ingredients
Because the recipe leans on a few strong players like garlic, butter, and a good loaf of bread, each ingredient shines. I love that you do not need obscure items to get big results. When I choose nicely roasted garlic and fresh herbs, the flavor is layered and bright without being fussy.
Fast but impressive
One of the reasons I reach for Ultimate Garlic Bread is how quickly it comes together. In under half an hour you can transform a plain loaf into something that looks and tastes like it took longer. That speed makes it perfect for last minute guests, weeknight dinners, and casual gatherings where you still want to impress.
Versatility at the table
I often serve this bread as a side, but it can also star as a snack or small plate. I like keeping the base simple and letting guests customize with extra cheese or herbs. The recipe is forgiving, so you can scale it, swap herbs, or add a sprinkle of red pepper flakes for a little lift.
Textural satisfaction
What stands out to me is the contrast between a slightly crisp exterior and a luscious, buttery interior. That interplay is what keeps people going back for more. With the right timing in the oven, you get deep savory notes from the roasted garlic and just enough crunch to make each bite interesting.
Everything You Need for Ultimate Garlic Bread
I think of these ingredients as a small team where each player has a clear role. The loaf provides structure and texture, the roasted garlic delivers the core savory note, and butter carries flavor into the bread. Fresh herbs and Parmesan add brightness and umami, while salt, pepper, and a pinch of red pepper flakes bring balance and a faint kick.
- 1 large loaf of Italian ciabatta or French baguette: Provide structure and a hearty base for the garlic bread; slice horizontally or into thick pieces to maximize buttery coverage and create a crisp exterior while keeping a soft interior. Choose a fresh loaf with a sturdy crumb to absorb the garlic butter without becoming soggy, and toast until golden for optimal texture contrast.
- 3 tablespoons garlic roasted garlic: Impart a deeply savory roasted garlic flavor throughout the bread; mash or finely chop to distribute evenly in the butter mixture and enhance aromatic complexity. Use roasted garlic for a milder, slightly sweet profile that browns gently during baking and complements the herbs and cheese.
- 4 tablespoons unsalted butter melted: Bind and carry flavors while creating a rich, golden finish when melted; mix thoroughly with garlic and herbs so it soaks into the bread and crisps on the surface. Use unsalted butter to control overall seasoning, adjusting salt separately for balance and to prevent over-salting.
- 1/4 cup mixed minced fresh herbs (oregano, basil, rosemary, parsley): Add fresh, bright herbal notes that lift the richness of butter and garlic; finely mince to allow even distribution and release aromatic oils. Combine oregano, basil, rosemary, and parsley for a balanced, Mediterranean-inspired herb profile that complements Parmesan and enhances complexity.
- 1/4 cup freshly grated Parmesan cheese: Contribute a nutty, salty umami boost and a slightly granular texture when sprinkled over the top; grate freshly for best melting and flavor dispersion. Use Parmesan to add savory depth that crisps lightly under heat and pairs well with herbs and roasted garlic.
- 1/4 teaspoon salt: Enhance and balance flavors by controlling overall saltiness; sprinkle just enough to elevate the garlic, herbs, and cheese without overpowering them. Use measured salt to fine-tune the seasoning after combining butter and other components, especially since Parmesan adds saltiness as well.
- 1/4 teaspoon pepper: Provide subtle savory warmth and help highlight other flavors without dominating them; freshly ground pepper adds a gentle heat that pairs well with garlic and herbs. Use coarse or fine grind according to preference, adjusting quantity to suit taste and to complement red pepper flakes if used.
- 1 pinch red pepper flakes: Introduce a sharp, spicy kick for those who enjoy heat; use a pinch to add lively contrast to the buttery, cheesy, and herbaceous elements. Sprinkle sparingly for a hint of heat that elevates flavor complexity without overwhelming the dish.
Preparation Steps for Ultimate Garlic Bread
These directions are straightforward, but I like to approach them like a ritual. A few small rituals keep texture and flavor on point, and I walk through the steps slowly to tune into the smells and visuals that tell you when the loaf is ready.
- Preheat the oven to 400 degrees.: The moment you turn the oven on, you will notice a dry warmth building which helps ensure the crust crisps up correctly; preheating to 400 degrees sets the stage for golden edges and warm interior without drying the crumb. The air should feel evenly hot when you open the oven door, and the racks will be at the right temperature to brown the loaf. One common mistake is not allowing the oven to fully reach temperature, which can leave the crust soft instead of crisp. If your oven runs hot or cold, use an oven thermometer to confirm accuracy. I also wipe the baking sheet clean so there is no leftover residue that could burn and add bitter notes.
- Slice the loaf in half lengthwise.: As you slice the loaf lengthwise, the sound is a soft crack followed by the airy crumb exposing itself, which is your cue that the bread is fresh and ready to accept the mixture. A long, even cut keeps the two halves uniform so they heat consistently. Use a serrated knife and a gentle sawing motion to avoid compressing the crumb; pressing down will mash the interior and prevent the butter from soaking in properly. If the loaf is very dense, consider cutting slightly less deep to preserve structure. I like to hold the loaf steady with a towel to keep my fingers safe while maintaining control.
- Slice the loaf in half lengthwise.: When you stir the mixture, the aroma of warm butter and roasted garlic will bloom, releasing an inviting fragrance that promises depth. Combining the ingredients at room temperature helps everything emulsify and cling to the bread; if the butter is too hot, it can separate and make the mixture greasy. Mix until the texture is smooth and the herbs are evenly distributed; the Parmesan should be incorporated but not clumped. Avoid over mixing which can break down the herbs and make the mixture pasty. Taste a small dab to check salt and pepper balance, adjusting carefully because the Parmesan already contributes saltiness.
- In a small bowl, mix the roasted garlic, butter, herbs, parmesan cheese, salt and pepper then set aside.: As you spread, press gently so the mixture sinks slightly into the pockets of the crumb, and watch the butter glisten across the surface. The goal is even coverage without saturating any one area. Spreading slowly helps you control how much mixture each bite will get; too much in one spot makes that section heavy and dense. A common slip is applying the mixture only near the edges, which leaves the center bland; work from the center outwards for balance. If some bits of herb pile up, smooth them with the back of the spoon for a uniform look and melt.
- In a small bowl, mix the roasted garlic, butter, herbs, parmesan cheese, salt and pepper then set aside.: Wrapping in foil traps steam and encourages the flavors to infuse into the crumb, creating a soft, buttery interior while protecting the crust from burning. When I seal the foil, I fold tightly to keep heat consistent, and the baking sheet underneath catches any drips. One downside is that steam can soften the crust more than you might like, which is why timing matters. If you prefer a crisper crust, you can unwrap for the final minutes, but avoid unwrapping too early or the crumb will dry out. Ensure the foil is sealed but not overly tight, so steam circulates a bit within the packet.
- Take a spoon and spread the garlic mixture over the inside of each loaf. Seal the loaf together and wrap with aluminum foil. Place the wrapped bread on a baking sheet.: During baking the aroma becomes pronounced, filling the kitchen with warm roasted notes and herbaceous perfume. The bread will feel slightly firmer to the touch when done, and if you peel back a corner of the foil you will see the butter absorbed into the crumb. This step allows the flavors to penetrate rather than merely sit on the surface. A common error is underbaking which leaves the inside cold and the butter unmelted, so check that the center is warm. If you bake longer than recommended, the crumb can become too soft or even gummy, so keep a close eye at the end of the time.
- Take a spoon and spread the garlic mixture over the inside of each loaf. Seal the loaf together and wrap with aluminum foil. Place the wrapped bread on a baking sheet.: Letting it rest keeps steam from rushing out and drying the bread, and it allows flavors to settle so cutting does not squeeze the filling out. The foil will be hot, and you will notice a concentrated scent of roasted garlic when you finally open it. Resist the urge to unwrap immediately because hot steam can create a mess and also scorch your hands. If you are impatient, use oven mitts and open a small vent first, but be cautious of the steam burst.
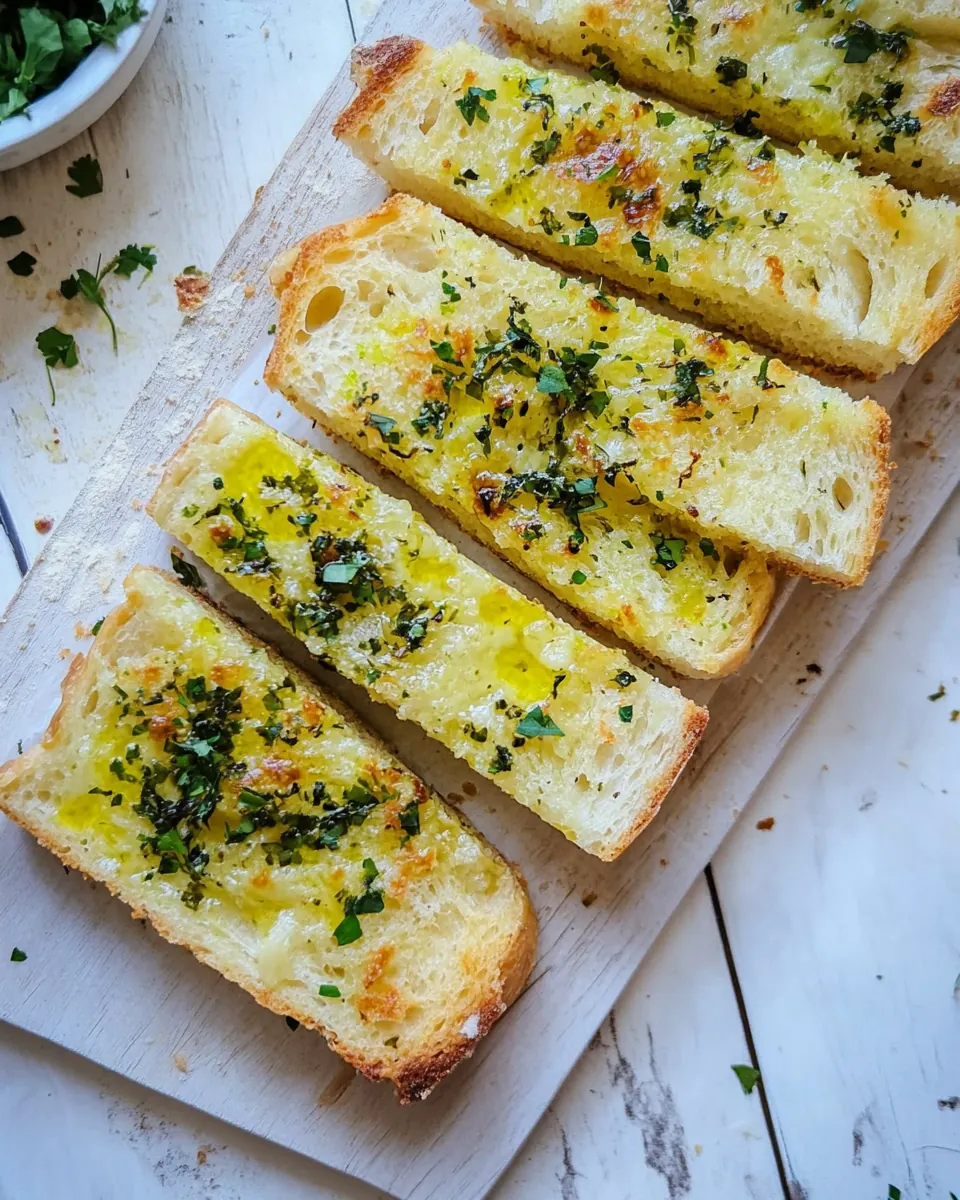
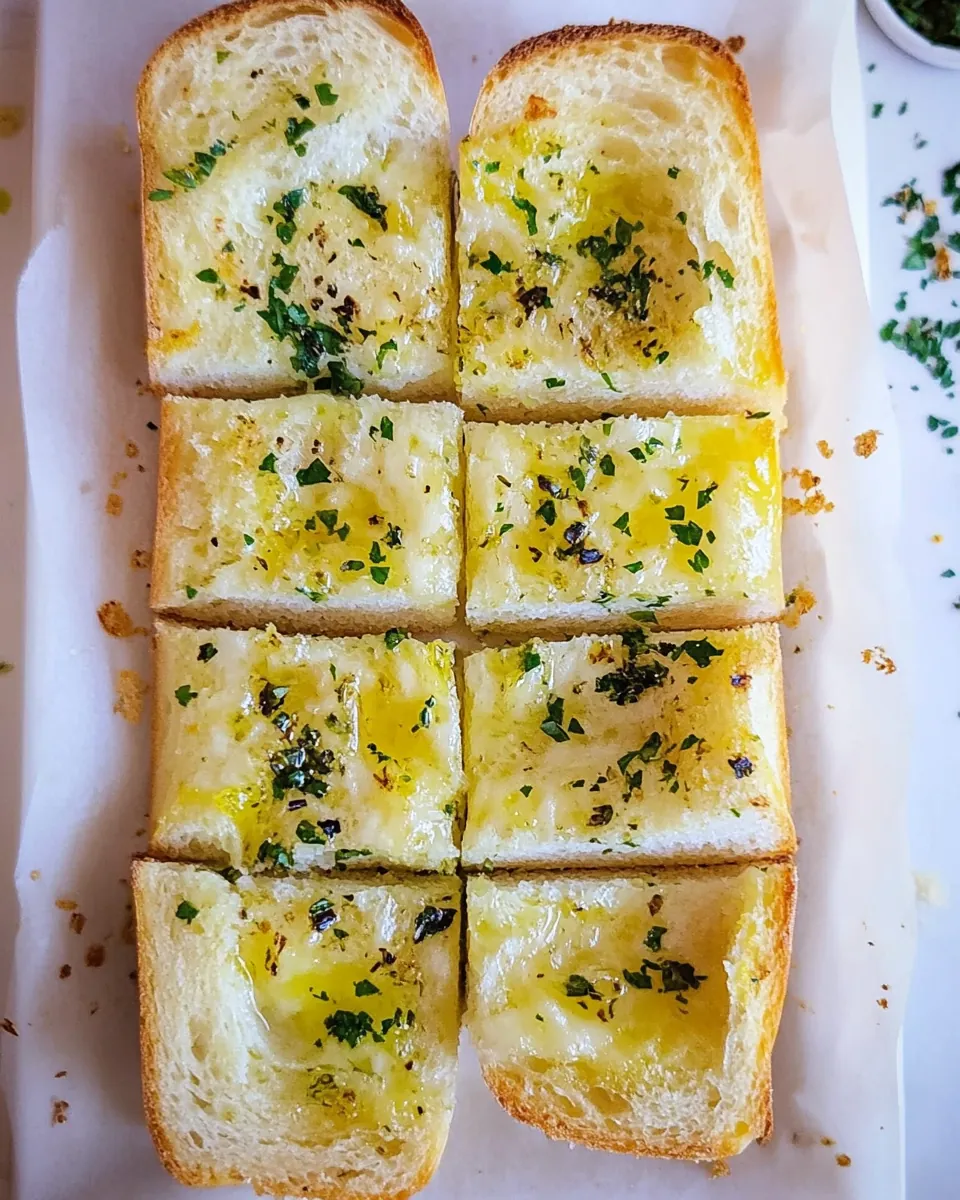
- Bake it in the oven for 15 minutes until the garlic herb flavors are fully absorbed into the bread.: Freshly sliced, each piece will show the glossy pockets of herbed butter and a fine dusting of Parmesan. The first bite should yield a warm, herb infused center and a hint of crisp at the edges. If you choose to add mozzarella, return the sliced or halved loaf to the oven for 3 to 5 minutes until the cheese melts into a gooey layer, which adds a stretchy, indulgent texture. A mistake to avoid is letting the bread sit too long before serving, which cools the butter and mutes the aroma. Keep napkins handy, the melted butter can be deliciously drippy.
Helpful Hints
I find tips are where small choices make the biggest difference. Below are practical notes and expansions based on my experience making Ultimate Garlic Bread repeatedly for friends and family. These are drawn from the recipe notes and from what I have learned over many bakes.
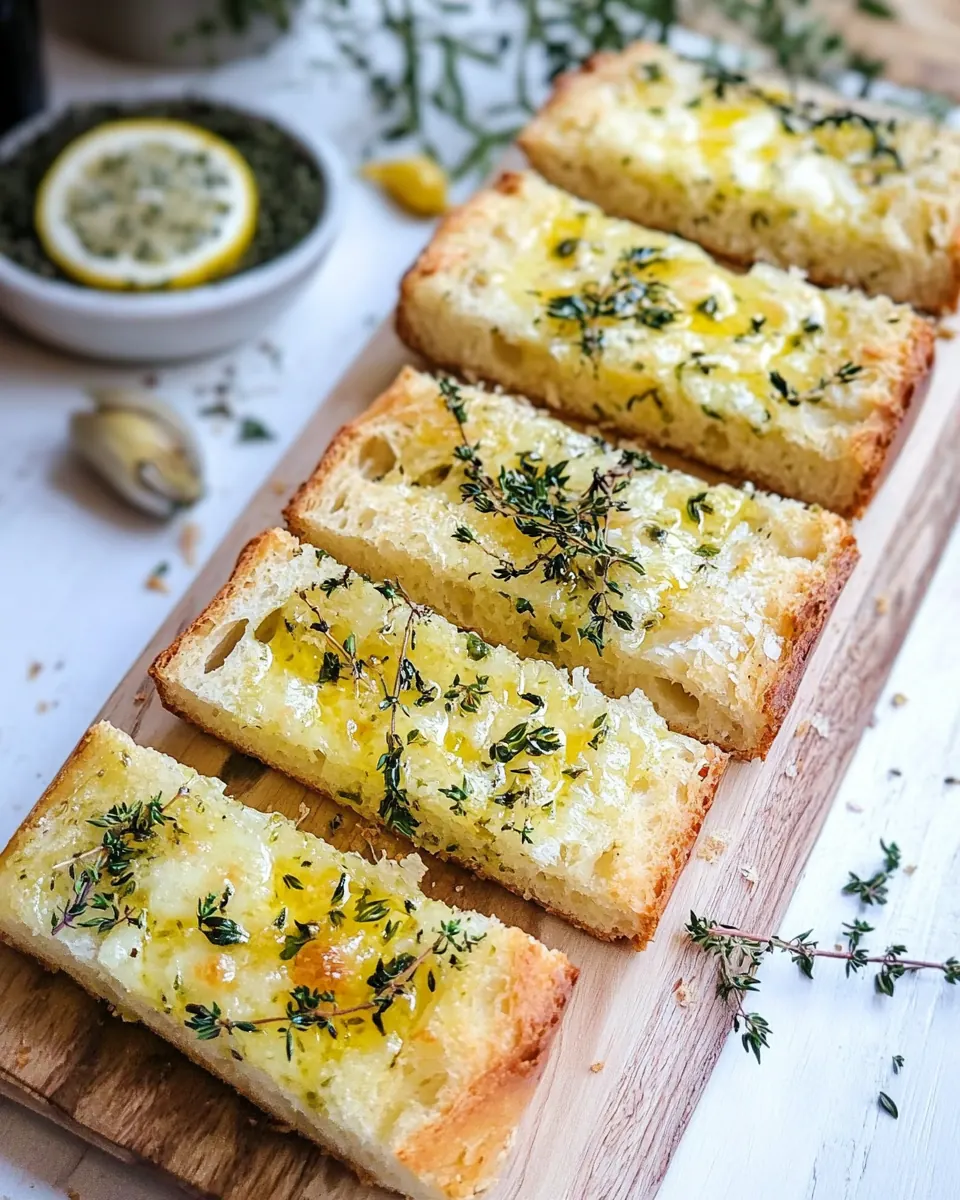
- Choose the right loaf: A crusty Italian ciabatta or a French baguette holds up well to the butter and garlic mixture, giving you a nice contrast between a crisp exterior and a soft, flavorful interior.
- Prefer roasted garlic: Roasted garlic offers a sweeter, more caramelized flavor than raw garlic, which helps the bread taste rich without harshness; roast your own heads of garlic in foil at 400 degrees for about 30 to 40 minutes if you have the time.
- Butter versus oil: You can use melted butter for classic richness or olive oil for a lighter, slightly fruity note; I often blend both to balance flavor and mouthfeel, but stick with unsalted butter to control seasoning.
- Herb timing matters: Fresh herbs are best added right before mixing so they retain brightness; dry herbs can be used in a pinch, but you may want to increase quantity slightly for the same impact.
- Cheese choice: Parmesan adds savory depth and complex notes but will not get stretchy like mozzarella; if you want melty, gooey cheese, top with shredded mozzarella and return to the oven for a few minutes until bubbly.
- Freezing and reheating: Wrap the cooled loaf tightly in foil and freeze for up to three months; to reheat, thaw at room temperature then warm at 350 degrees for about 5 minutes or until heated through, this helps retain texture and flavor.
Great Combinations for Ultimate Garlic Bread
Ultimate Garlic Bread pairs well with a variety of mains and occasions, from simple weeknight dinners to festive gatherings. Below I outline serving ideas, side pairings, and storage tips to help you plan meals around the loaf.
- Classic pasta dinners: Serve the bread alongside tomato based pastas for soaking up sauces, it acts as a flavorful vehicle for every last bite.
- Hearty soups: Pair with vegetable or tomato soups for dipping; the bread adds texture and richness that complements brothy bowls during cooler evenings.
- Casual gatherings: Cut into strips and place on a board with sliced cheeses and olives for an easy appetizer offering that guests can pick at while mingling.
- Family meals: For weeknight dinners, use the loaf to add a special touch; it elevates simple proteins and vegetables into a satisfying spread without extra fuss.
- Storage suggestions: Wrap leftover loaf tightly in foil and refrigerate for a day or two, or freeze for up to three months; to reheat, warm gently in the oven at 350 degrees until heated through so the crust restores some crunch.
- Seasonal pairings: In spring and summer, highlight fresh herbs like basil and parsley; in cooler months, use heartier herbs such as rosemary to complement richer mains.
FAQ
Conclusion
What makes this recipe special is its ability to turn a simple loaf into something warm, flavorful, and universally loved. The marriage of roasted garlic, melted butter, fresh herbs, and a quality loaf creates a balance of texture and aroma that elevates any meal. Give it a try the next time you want a no fuss side that feels thoughtful and indulgent. You will likely find yourself making it again because it is fast, forgiving, and reliably delicious.
Ultimate Garlic Bread
Equipment
- Oven
- Baking Sheet
- Small Bowl
- Serrated Knife
- Aluminum Foil
Ingredients
- 1 large loaf of Italian ciabatta or French baguette Provide structure and a hearty base for the garlic bread; slice horizontally or into thick pieces to maximize buttery coverage and create a crisp exterior while keeping a soft interior. Choose a fresh loaf with a sturdy crumb to absorb the garlic butter without becoming soggy, and toast until golden for optimal texture contrast.
- 3 tablespoons garlic roasted garlic Impart a deeply savory roasted garlic flavor throughout the bread; mash or finely chop to distribute evenly in the butter mixture and enhance aromatic complexity. Use roasted garlic for a milder, slightly sweet profile that browns gently during baking and complements the herbs and cheese.
- 4 tablespoons unsalted butter melted Bind and carry flavors while creating a rich, golden finish when melted; mix thoroughly with garlic and herbs so it soaks into the bread and crisps on the surface. Use unsalted butter to control overall seasoning, adjusting salt separately for balance and to prevent over-salting.
- 1/4 cup mixed minced fresh herbs (oregano, basil, rosemary, parsley) Add fresh, bright herbal notes that lift the richness of butter and garlic; finely mince to allow even distribution and release aromatic oils. Combine oregano, basil, rosemary, and parsley for a balanced, Mediterranean-inspired herb profile that complements Parmesan and enhances complexity.
- 1/4 cup freshly grated Parmesan cheese Contribute a nutty, salty umami boost and a slightly granular texture when sprinkled over the top; grate freshly for best melting and flavor dispersion. Use Parmesan to add savory depth that crisps lightly under heat and pairs well with herbs and roasted garlic.
- 1/4 teaspoon salt Enhance and balance flavors by controlling overall saltiness; sprinkle just enough to elevate the garlic, herbs, and cheese without overpowering them. Use measured salt to fine-tune the seasoning after combining butter and other components, especially since Parmesan adds saltiness as well.
- 1/4 teaspoon pepper Provide subtle savory warmth and help highlight other flavors without dominating them; freshly ground pepper adds a gentle heat that pairs well with garlic and herbs. Use coarse or fine grind according to preference, adjusting quantity to suit taste and to complement red pepper flakes if used.
- 1 pinch red pepper flakes Introduce a sharp, spicy kick for those who enjoy heat; use a pinch to add lively contrast to the buttery, cheesy, and herbaceous elements. Sprinkle sparingly for a hint of heat that elevates flavor complexity without overwhelming the dish.
Instructions
- Preheat the oven to 400 degrees.: The moment you turn the oven on, you will notice a dry warmth building which helps ensure the crust crisps up correctly; preheating to 400 degrees sets the stage for golden edges and warm interior without drying the crumb. The air should feel evenly hot when you open the oven door, and the racks will be at the right temperature to brown the loaf. One common mistake is not allowing the oven to fully reach temperature, which can leave the crust soft instead of crisp. If your oven runs hot or cold, use an oven thermometer to confirm accuracy. I also wipe the baking sheet clean so there is no leftover residue that could burn and add bitter notes.
- Slice the loaf in half lengthwise.: As you slice the loaf lengthwise, the sound is a soft crack followed by the airy crumb exposing itself, which is your cue that the bread is fresh and ready to accept the mixture. A long, even cut keeps the two halves uniform so they heat consistently. Use a serrated knife and a gentle sawing motion to avoid compressing the crumb; pressing down will mash the interior and prevent the butter from soaking in properly. If the loaf is very dense, consider cutting slightly less deep to preserve structure. I like to hold the loaf steady with a towel to keep my fingers safe while maintaining control.
- Slice the loaf in half lengthwise.: When you stir the mixture, the aroma of warm butter and roasted garlic will bloom, releasing an inviting fragrance that promises depth. Combining the ingredients at room temperature helps everything emulsify and cling to the bread; if the butter is too hot, it can separate and make the mixture greasy. Mix until the texture is smooth and the herbs are evenly distributed; the Parmesan should be incorporated but not clumped. Avoid over mixing which can break down the herbs and make the mixture pasty. Taste a small dab to check salt and pepper balance, adjusting carefully because the Parmesan already contributes saltiness.
- In a small bowl, mix the roasted garlic, butter, herbs, parmesan cheese, salt and pepper then set aside.: As you spread, press gently so the mixture sinks slightly into the pockets of the crumb, and watch the butter glisten across the surface. The goal is even coverage without saturating any one area. Spreading slowly helps you control how much mixture each bite will get; too much in one spot makes that section heavy and dense. A common slip is applying the mixture only near the edges, which leaves the center bland; work from the center outwards for balance. If some bits of herb pile up, smooth them with the back of the spoon for a uniform look and melt.
- In a small bowl, mix the roasted garlic, butter, herbs, parmesan cheese, salt and pepper then set aside.: Wrapping in foil traps steam and encourages the flavors to infuse into the crumb, creating a soft, buttery interior while protecting the crust from burning. When I seal the foil, I fold tightly to keep heat consistent, and the baking sheet underneath catches any drips. One downside is that steam can soften the crust more than you might like, which is why timing matters. If you prefer a crisper crust, you can unwrap for the final minutes, but avoid unwrapping too early or the crumb will dry out. Ensure the foil is sealed but not overly tight, so steam circulates a bit within the packet.
- Take a spoon and spread the garlic mixture over the inside of each loaf. Seal the loaf together and wrap with aluminum foil. Place the wrapped bread on a baking sheet.: During baking the aroma becomes pronounced, filling the kitchen with warm roasted notes and herbaceous perfume. The bread will feel slightly firmer to the touch when done, and if you peel back a corner of the foil you will see the butter absorbed into the crumb. This step allows the flavors to penetrate rather than merely sit on the surface. A common error is underbaking which leaves the inside cold and the butter unmelted, so check that the center is warm. If you bake longer than recommended, the crumb can become too soft or even gummy, so keep a close eye at the end of the time.
- Take a spoon and spread the garlic mixture over the inside of each loaf. Seal the loaf together and wrap with aluminum foil. Place the wrapped bread on a baking sheet.: Letting it rest keeps steam from rushing out and drying the bread, and it allows flavors to settle so cutting does not squeeze the filling out. The foil will be hot, and you will notice a concentrated scent of roasted garlic when you finally open it. Resist the urge to unwrap immediately because hot steam can create a mess and also scorch your hands. If you are impatient, use oven mitts and open a small vent first, but be cautious of the steam burst.
- Bake it in the oven for 15 minutes until the garlic herb flavors are fully absorbed into the bread.: Freshly sliced, each piece will show the glossy pockets of herbed butter and a fine dusting of Parmesan. The first bite should yield a warm, herb infused center and a hint of crisp at the edges. If you choose to add mozzarella, return the sliced or halved loaf to the oven for 3 to 5 minutes until the cheese melts into a gooey layer, which adds a stretchy, indulgent texture. A mistake to avoid is letting the bread sit too long before serving, which cools the butter and mutes the aroma. Keep napkins handy, the melted butter can be deliciously drippy.
Notes
- Choose the right loaf: A crusty Italian ciabatta or a French baguette holds up well to the butter and garlic mixture, giving you a nice contrast between a crisp exterior and a soft, flavorful interior.
- Prefer roasted garlic: Roasted garlic offers a sweeter, more caramelized flavor than raw garlic, which helps the bread taste rich without harshness; roast your own heads of garlic in foil at 400 degrees for about 30 to 40 minutes if you have the time.
- Butter versus oil: You can use melted butter for classic richness or olive oil for a lighter, slightly fruity note; I often blend both to balance flavor and mouthfeel, but stick with unsalted butter to control seasoning.
- Herb timing matters: Fresh herbs are best added right before mixing so they retain brightness; dry herbs can be used in a pinch, but you may want to increase quantity slightly for the same impact.
- Cheese choice: Parmesan adds savory depth and complex notes but will not get stretchy like mozzarella; if you want melty, gooey cheese, top with shredded mozzarella and return to the oven for a few minutes until bubbly.
- Freezing and reheating: Wrap the cooled loaf tightly in foil and freeze for up to three months; to reheat, thaw at room temperature then warm at 350 degrees for about 5 minutes or until heated through, this helps retain texture and flavor.