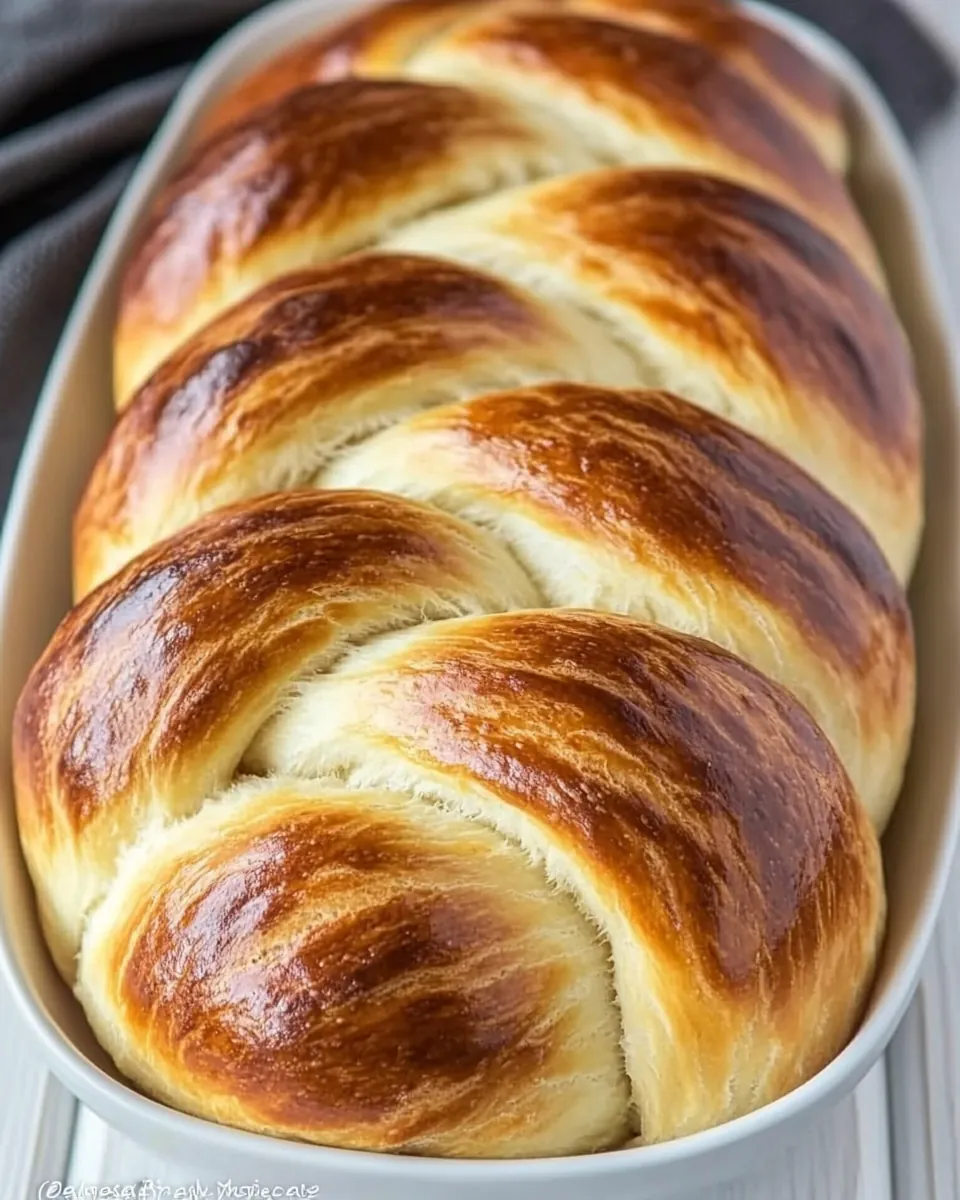
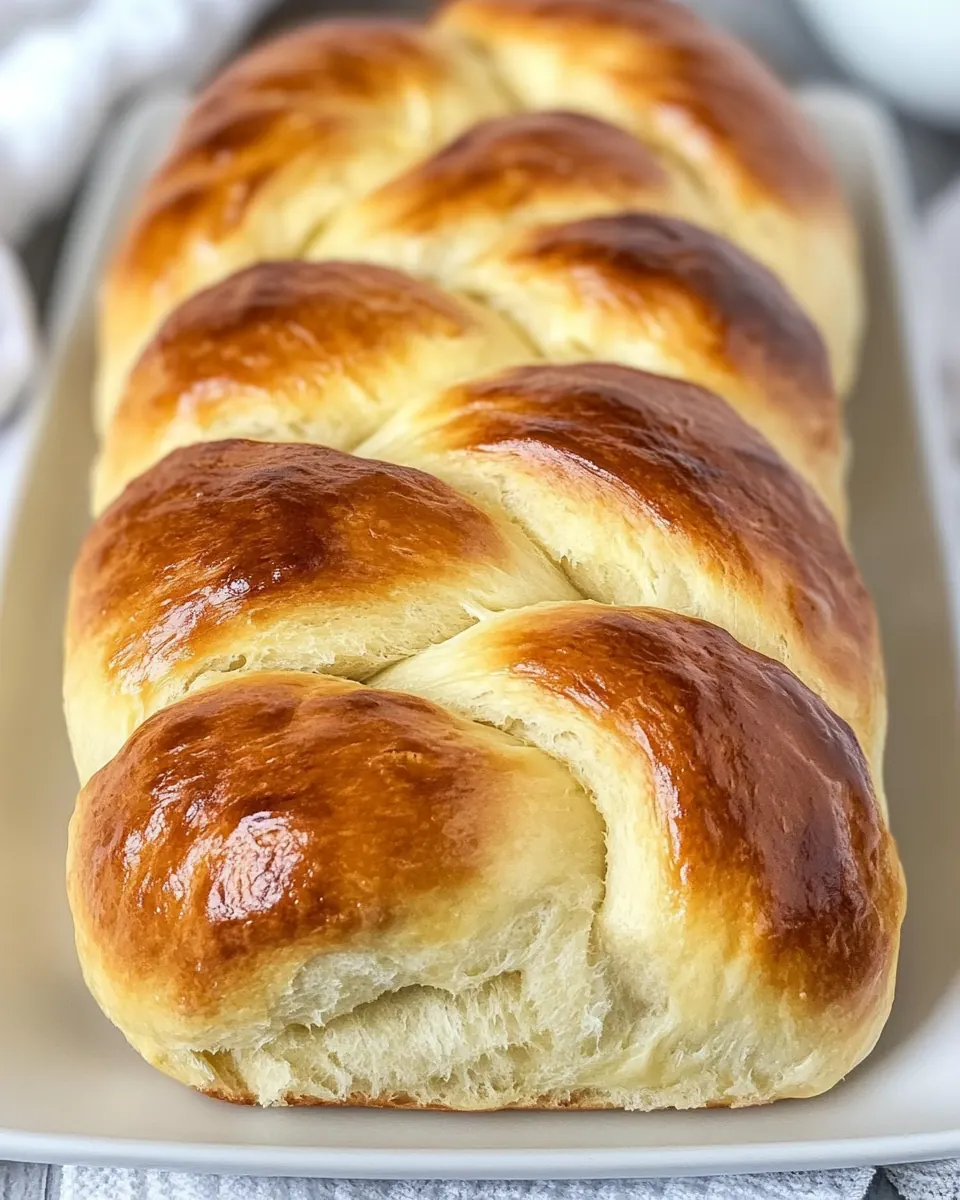
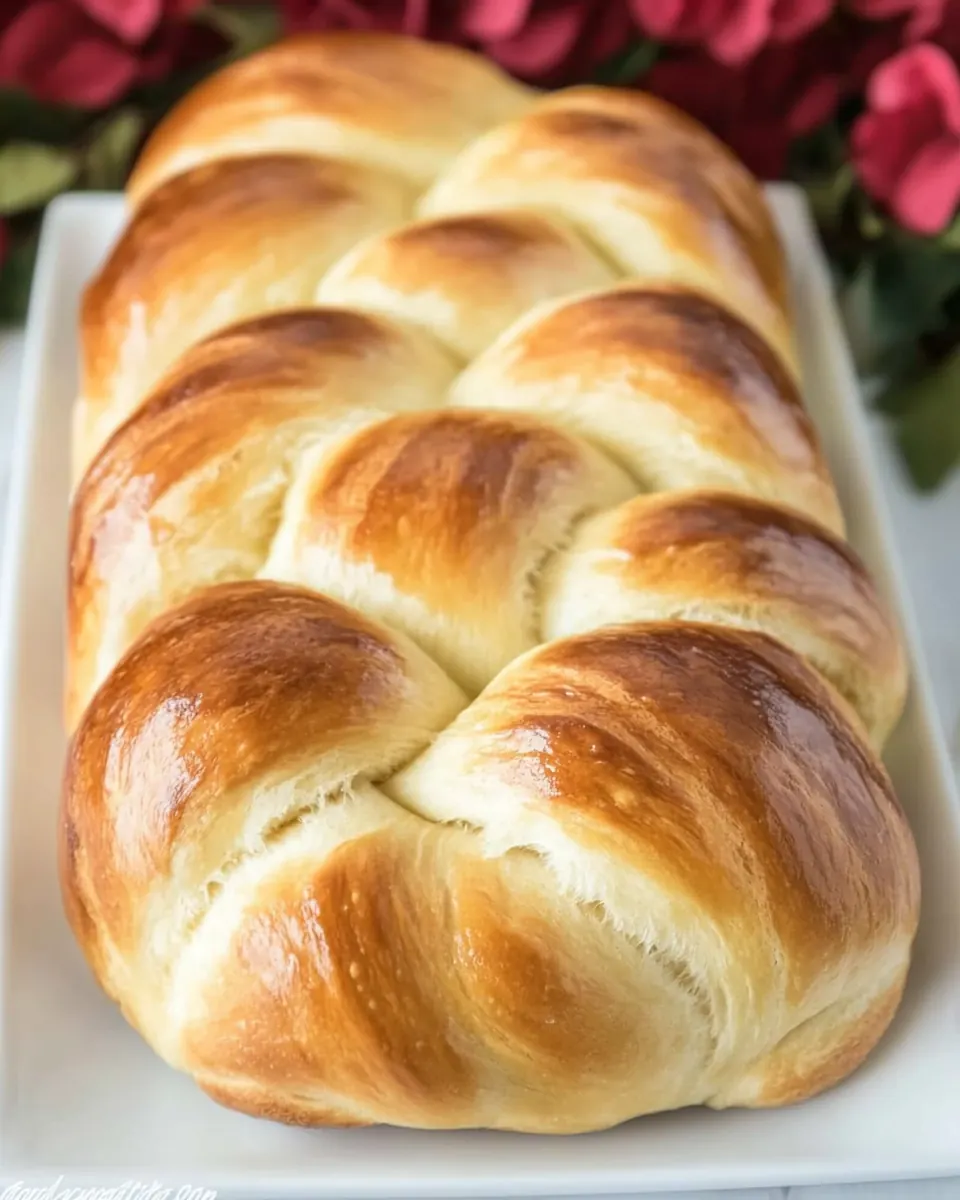
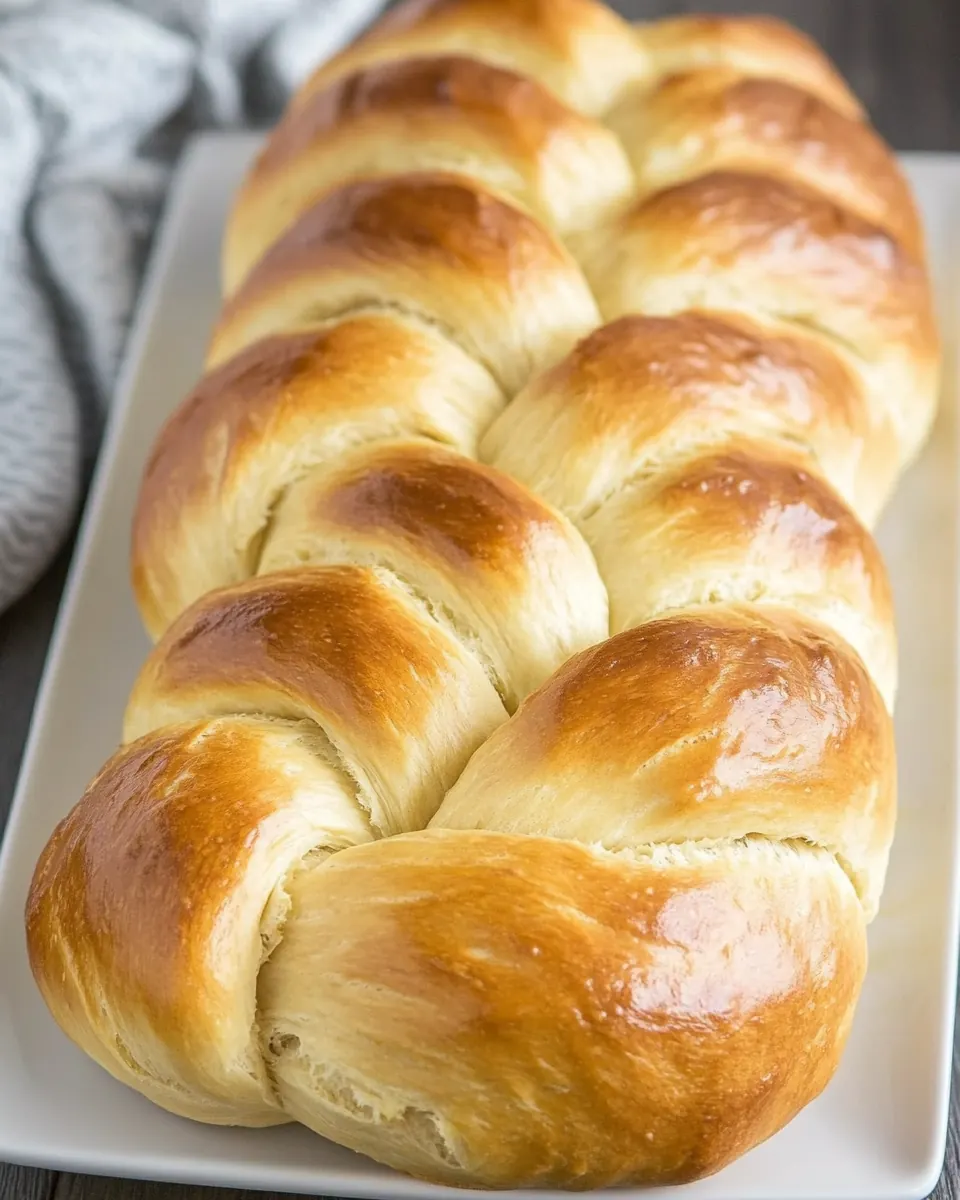
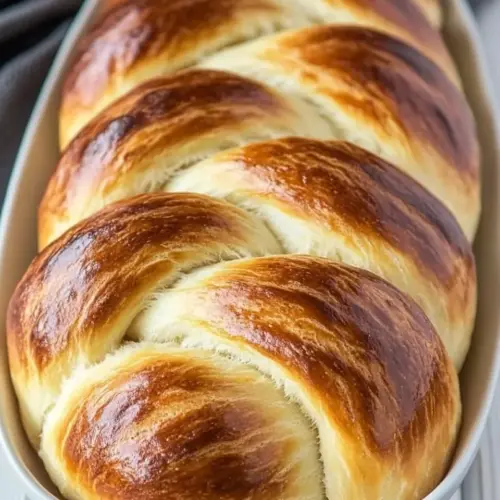
Swiss Butter Braided Bread
Swiss Butter Braided Bread is the kind of loaf that makes a kitchen hum with warmth, a scent that takes me back to slow weekend mornings at my grandmother’s counter. The first time I baked this bread I remember the nervous excitement as the dough came together, the soft sheen of melted butter pooling at the edges, and the way the room felt suddenly cozy and very alive. I folded the strands with careful fingers, thinking about how simple ingredients can produce something gently luxurious.
There is a rhythm to making Swiss Butter Braided Bread, a comforting sequence of mixing, kneading, and rising that asks you to slow down and pay attention. When the loaf finally bakes, the aroma of warm butter and caramelizing sugar fills the house and invites anyone nearby to linger. I love how this bread is both humble and celebratory, easy enough for a weekday treat, yet elegant enough to bring to a weekend brunch.
Over time I developed little rituals that make the process feel more like a ritual than a chore. I warm the milk just enough so my fingers can stand it, and I always watch the dough at its first rise, checking for tiny bubbles that signal yeast is doing its happy work. The glossy egg wash gives the braid its golden coat, and slicing into the finished loaf still gives me a thrill every single time.
Recipe Snapshot
60 mins
30 mins
30 mins
Medium
250 kcal
Swiss
Gluten-Free, Low FODMAP
Breakfast
Stand mixer, Paddle attachment, Parchment lined baking sheet, Wire rack
The Best Thing About This Swiss Butter Braided Bread
The irresistible buttery flavor
I adore how butter is the star in Swiss Butter Braided Bread. It whispers richness into every crumb without overwhelming the palate. I find that using melted butter folded into the dough yields a tender interior that stays soft for days, and that buttery scent while it bakes is utterly addictive.
Elegant yet approachable
What I love most is that this loaf looks fancy on a table, but it is surprisingly approachable to make. The braid elevates the presentation, yet the techniques are straightforward. When guests see the finished braid, they assume it required hours of fuss, and I secretly enjoy that little triumph of simplicity masquerading as sophistication.
Great texture from simple technique
The method encourages patience, especially during the rises, and that patience pays off. The dough becomes silky and slightly springy, and the final crumb is soft with a tender chew. I’ve learned to avoid overflouring, because a slightly sticky dough yields a better crumb, and that small restraint makes a big difference.
Versatile for occasions
This bread fits many moments. I bring it to holiday breakfasts, but it also makes weekday toast feel special. I like that you can slice it for sandwiches, tear it for snacking, or serve it warm with a smear of butter for an effortless treat. The braid gives it a centerpiece quality that suits celebrations and casual meals alike.
Reliable and forgiving
I’ve found this recipe forgiving for home bakers. Yeast activity can vary, but small adjustments in proofing time and temperature let you adapt. I always watch visual cues, like a doubled loaf or a glossy, well set crust, and that focus helps me get predictable results. For new bakers, this is a recipe that builds confidence fast.
Key Ingredients for Swiss Butter Braided Bread
This is a bread about harmony. The interplay of milk, sugar, and butter creates a tender, slightly sweet crumb, while the eggs enrich the dough and help structure. Instant yeast ensures a reliable rise, and a touch of salt balances the flavors. Together, these elements create a loaf that is rich but not heavy, with a soft interior and a golden, glossy crust.
- 1/2 cup milk: Warm and slightly scald milk enhances dough softness and activates yeast when cooled to lukewarm; contributes to tender crumb and richer flavor through fat and lactose content.
- 1/2 cup sugar: Granulated sugar feeds yeast during fermentation to promote rise while adding subtle sweetness; also contributes to crust browning and tenderizes the crumb by retaining moisture.
- 6 tablespoons butter, melted: Melted butter enriches the dough with fat for a tender, flaky texture and buttery flavor; disperses easily to improve dough workability and extend freshness.
- 2 eggs plus 1 egg yolk: Beaten whole eggs plus an extra yolk add structure, richness, and color to the dough while supplying moisture and emulsifiers that improve crumb uniformity and tenderness.
- 2 1/2 teaspoons or one envelope instant yeast (Red Star Platinum yeast preferred): Instant yeast provides reliable leavening power to produce volume and lightness in the braided loaf; preferred Red Star Platinum offers consistent rise and quick activation.
- 1/4 teaspoon salt: Fine salt strengthens gluten structure, balances sweetness, and enhances overall flavor; a small amount controls yeast activity to ensure even fermentation.
- 2 3/4 cups all-purpose flour: All-purpose flour supplies the bulk of the dough, providing proteins that form gluten for structure and chew; measured quantity yields the intended dough consistency for braiding and shaping.
- 1 egg, for glaze: Beaten egg for glaze creates a shiny, golden crust when brushed on before baking and helps any seeds or toppings adhere while enhancing visual appeal.
How to Assemble Swiss Butter Braided Bread
Assembling this loaf is a gentle process of building structure and patience. You will mix, knead, allow two rises, braid, glaze, and bake. Pay attention to feel, and let visual cues guide you rather than the clock alone.
- In a stand mixer bowl with the paddle attachment, combine milk, sugar, and melted butter.: The moment you combine warmed milk , sugar , and melted butter you will notice a comforting, creamy aroma that sets the tone for the dough. The sugar dissolves quickly into the warm liquid, creating a slightly glossy mixture, and the melted butter disperses to coat the liquid so it blends smoothly with the eggs later. This step matters because uniform liquids allow the flour to hydrate evenly, preventing dry pockets in the dough. A common mistake is adding cold butter , which can cause clumping and uneven texture. If your mixer splatters, stop and scrape the bowl to keep ingredients fully incorporated.
- Mix in eggs, then yeast. Slowly add in salt, then flour with mixer on low.: Once the liquid base is cohesive, adding the eggs introduces richness and helps the mixture thicken slightly, giving the dough structure. After the eggs are fully mixed in, sprinkle the instant yeast so it contacts the warm liquid and begins activating. You should see the mixture become creamier and slightly thicker, with a smooth sheen. This order ensures the yeast meets a hospitable environment without being shocked by heat or salt. Avoid adding yeast to piping hot liquid, which can kill it; lukewarm is ideal.
- Let continue to mix for 2 more minutes to knead (unless your mixer starts to overheat). Alternatively, knead by hand on a lightly floured surface. The dough will be soft.: Adding the salt before the flour and incorporating the flour slowly helps you control the dough’s hydration. As the flour integrates, the texture will shift from sticky batter to a cohesive mass. Keep the mixer on low to avoid overworking, and watch the dough pull away from the sides in a slightly tacky ball. This technique is important for building gluten gradually, which yields a braid that holds shape without becoming tough. A common error is dumping all the flour at once, which can create lumps and uneven hydration.
- Let rise in a greased bowl covered with greased plastic wrap at a warm room temperature for 1-1 1/2 hours or till doubled in bulk.: After the dough forms, a short knead in the mixer develops gluten enough for structure while keeping the loaf tender. You will notice the dough become smoother and more elastic, springing back slightly when pressed. If your mixer shows signs of strain, switch to hand kneading to avoid motor damage. This step is crucial because underkneading results in a dense crumb, while overkneading can make the loaf tough. A sign of adequate knead is a soft, slightly tacky dough that holds a shape.
- Deflate the dough and divide it into 3 equal pieces. On a lightly floured surface, roll each piece into a 15-inch rope. Braid starting at the middle and working to one end, then repeating on the other side. Carefully transfer to a parchment-lined baking sheet.: Working by hand gives you direct tactile feedback, feeling the dough transform as gluten aligns. The surface should be lightly floured to prevent sticking, but avoid adding too much flour which dries the dough. With hand kneading you should stretch and fold the dough repeatedly until it becomes smooth and slightly elastic. This method matters for small mixers or for those who enjoy the hands-on approach. Overflouring at this stage is a common mistake, leading to a tighter crumb.
- Cover with greased plastic wrap and let rise till doubled, about 1-1 1/2 hours.: Place the dough in a lightly greased bowl so it can expand without sticking, and cover it so humidity is retained. During this rise you will see the volume increase and the surface develop small bubbles, signals that yeast is active. A warm, draft free spot accelerates proofing, but too hot a location can produce an overly rapid rise and weaker flavor. Resist poking too frequently; instead, judge by size. If the dough does not double, give it extra time rather than increasing temperature drastically.
- Preheat oven to 375º. Whisk the remaining egg and brush over the surface of the braid.: After the first rise, gently deflating releases large gas pockets and redistributes yeast and nutrients for the final proof. Dividing into three even portions ensures a balanced braid, and rolling each into a 15 inch rope gives a uniform look and consistent bake. You will feel the dough soften as you roll, and slight resistance indicates good gluten development. Uneven ropes lead to a lopsided braid, so measure or eye for equal thickness.
- Bake for 30 minutes, covering with foil for the last 5-10 minutes if the loaf is browning too fast.: Braiding from the center out helps maintain tension and creates a symmetrical loaf. As you weave, watch the ropes tuck neatly under the loaf so it keeps shape while rising. The braid should look seamless and taut without being stretched thin. Transferring to parchment prevents sticking and makes moving the braid to the oven effortless. Tight braids can restrict oven spring, while too loose braids may spread.
- Cool on a wire rack.: The final proof allows the braid to puff and gain oven spring. You will notice the braid become pillowy and soft to the touch, with a gentle jiggle when nudged. This rest is essential for a light crumb and an even bake. If the dough over proofs, the structure can collapse in the oven, so keep an eye on volume rather than time strictly. A warning sign of overproofing is a loaf that does not bounce back when pressed gently.
- Preheat oven to 375º whisk the remaining egg and brush over the surface of the braid: A well preheated oven gives immediate oven spring and helps set the crust. Whisking the remaining egg until smooth and brushing it evenly creates a glossy, golden exterior. Be sure the brush covers the braid without pooling in crevices. The aroma at this point is rich and buttery, and the shiny surface is a good indicator the crust will brown beautifully. If the egg wash pools, it can burn in the oven, so brush lightly.
- Bake for 30 minutes covering with foil for the last 5 to 10 minutes if the loaf is browning too fast: As the loaf bakes you will smell caramelizing sugars and melting butter , and the crust will shift from pale to deep golden. Use the foil shield during the final minutes if the crust reaches color before the crumb is fully done, this prevents overbrowning while the interior finishes. A done loaf will sound hollow when tapped at the base and register a warm interior. Underbaking leaves a gummy crumb, so if in doubt allow a few extra minutes with the foil in place.
- Cool on a wire rack: Cooling is more than waiting it is part of the finish. Placing the loaf on a wire rack allows air to circulate so the crust stays crisp and the interior sets without steaming. The aroma will continue to develop as it cools, and slicing too soon can compress the crumb and make it gummy. Let it rest until slightly warm for best texture. A common error is carving a hot loaf which causes the slices to tear rather than slice cleanly.
Change It Up
If you want to experiment, there are gentle ways to vary this braid while keeping its soul intact. Below are practical ideas that respect the dough and enhance enjoyment. Each tip highlights a small change that yields a meaningful difference.
- Use warm milk to activate the yeast without scorching it, aim for just warm to the touch which helps the dough come together smoothly.
- Don’t overflour when rolling the ropes, a light dusting prevents sticking but too much flour will dry the dough and tighten the crumb.
- Adjust proofing time to your kitchen temperature, cooler rooms need longer rising times and warmer rooms will be faster.
- Protect the crust in the final bake by tenting with foil if the braid browns too quickly, ensuring a fully baked interior without a burned exterior.
- Make ahead by refrigerating the shaped braid overnight for a slow cold proof, then bake the next morning for fresh bread with deeper flavor.
Serve This Swiss Butter Braided Bread With
This bread pairs beautifully with simple accompaniments and suits many occasions from casual breakfasts to festive brunches. Below are thoughtful ways to serve it, including occasions and storage notes for best enjoyment.
- Warm with butter for breakfast or brunch, slice while slightly warm and offer softened butter for spreading, the crumb will soak up the richness.
- Tear for sharing at gatherings, place the braid at the center of a table so guests can pull pieces and enjoy the glossy crust and tender interior.
- Include on a brunch menu alongside fruit and cheese, its golden appearance makes it a lovely centerpiece for special mornings like holidays or weekend get togethers.
- Store at room temperature wrapped in a tea towel for up to two days to maintain crust and crumb balance, for longer keep in a sealed container in the refrigerator.
- Freeze for later by double wrapping slices or the whole loaf, thaw slowly at room temperature and refresh briefly in a warm oven before serving for best texture.
FAQ
Conclusion
This Swiss Butter Braided Bread is special because it turns a handful of simple pantry ingredients into a tender, golden loaf that feels both indulgent and comfortingly familiar. Try it when you want a centerpiece for a weekend breakfast or an elegant addition to a brunch spread. The techniques are forgiving, the rewards are immediate, and baking it becomes a ritual that fills your home with warm, buttery aroma. Give it a go and enjoy the simple pleasure of pulling apart a warm, glossy slice.
Swiss Butter Braided Bread
Equipment
- Stand mixer
- Paddle attachment
- Parchment lined baking sheet
- Wire Rack
Ingredients
- 1/2 cup milk Warm and slightly scald milk enhances dough softness and activates yeast when cooled to lukewarm; contributes to tender crumb and richer flavor through fat and lactose content.
- 1/2 cup sugar Granulated sugar feeds yeast during fermentation to promote rise while adding subtle sweetness; also contributes to crust browning and tenderizes the crumb by retaining moisture.
- 6 tablespoons butter, melted Melted butter enriches the dough with fat for a tender, flaky texture and buttery flavor; disperses easily to improve dough workability and extend freshness.
- 2 eggs plus 1 egg yolk Beaten whole eggs plus an extra yolk add structure, richness, and color to the dough while supplying moisture and emulsifiers that improve crumb uniformity and tenderness.
- 2 1/2 teaspoons or one envelope instant yeast (Red Star Platinum yeast preferred) Instant yeast provides reliable leavening power to produce volume and lightness in the braided loaf; preferred Red Star Platinum offers consistent rise and quick activation.
- 1/4 teaspoon salt Fine salt strengthens gluten structure, balances sweetness, and enhances overall flavor; a small amount controls yeast activity to ensure even fermentation.
- 2 3/4 cups all-purpose flour All-purpose flour supplies the bulk of the dough, providing proteins that form gluten for structure and chew; measured quantity yields the intended dough consistency for braiding and shaping.
- 1 egg, for glaze Beaten egg for glaze creates a shiny, golden crust when brushed on before baking and helps any seeds or toppings adhere while enhancing visual appeal.
Instructions
- In a stand mixer bowl with the paddle attachment, combine milk, sugar, and melted butter.: The moment you combine warmed milk , sugar , and melted butter you will notice a comforting, creamy aroma that sets the tone for the dough. The sugar dissolves quickly into the warm liquid, creating a slightly glossy mixture, and the melted butter disperses to coat the liquid so it blends smoothly with the eggs later. This step matters because uniform liquids allow the flour to hydrate evenly, preventing dry pockets in the dough. A common mistake is adding cold butter , which can cause clumping and uneven texture. If your mixer splatters, stop and scrape the bowl to keep ingredients fully incorporated.
- Mix in eggs, then yeast. Slowly add in salt, then flour with mixer on low.: Once the liquid base is cohesive, adding the eggs introduces richness and helps the mixture thicken slightly, giving the dough structure. After the eggs are fully mixed in, sprinkle the instant yeast so it contacts the warm liquid and begins activating. You should see the mixture become creamier and slightly thicker, with a smooth sheen. This order ensures the yeast meets a hospitable environment without being shocked by heat or salt. Avoid adding yeast to piping hot liquid, which can kill it; lukewarm is ideal.
- Let continue to mix for 2 more minutes to knead (unless your mixer starts to overheat). Alternatively, knead by hand on a lightly floured surface. The dough will be soft.: Adding the salt before the flour and incorporating the flour slowly helps you control the dough’s hydration. As the flour integrates, the texture will shift from sticky batter to a cohesive mass. Keep the mixer on low to avoid overworking, and watch the dough pull away from the sides in a slightly tacky ball. This technique is important for building gluten gradually, which yields a braid that holds shape without becoming tough. A common error is dumping all the flour at once, which can create lumps and uneven hydration.
- Let rise in a greased bowl covered with greased plastic wrap at a warm room temperature for 1-1 1/2 hours or till doubled in bulk.: After the dough forms, a short knead in the mixer develops gluten enough for structure while keeping the loaf tender. You will notice the dough become smoother and more elastic, springing back slightly when pressed. If your mixer shows signs of strain, switch to hand kneading to avoid motor damage. This step is crucial because underkneading results in a dense crumb, while overkneading can make the loaf tough. A sign of adequate knead is a soft, slightly tacky dough that holds a shape.
- Deflate the dough and divide it into 3 equal pieces. On a lightly floured surface, roll each piece into a 15-inch rope. Braid starting at the middle and working to one end, then repeating on the other side. Carefully transfer to a parchment-lined baking sheet.: Working by hand gives you direct tactile feedback, feeling the dough transform as gluten aligns. The surface should be lightly floured to prevent sticking, but avoid adding too much flour which dries the dough. With hand kneading you should stretch and fold the dough repeatedly until it becomes smooth and slightly elastic. This method matters for small mixers or for those who enjoy the hands-on approach. Overflouring at this stage is a common mistake, leading to a tighter crumb.
- Cover with greased plastic wrap and let rise till doubled, about 1-1 1/2 hours.: Place the dough in a lightly greased bowl so it can expand without sticking, and cover it so humidity is retained. During this rise you will see the volume increase and the surface develop small bubbles, signals that yeast is active. A warm, draft free spot accelerates proofing, but too hot a location can produce an overly rapid rise and weaker flavor. Resist poking too frequently; instead, judge by size. If the dough does not double, give it extra time rather than increasing temperature drastically.
- Preheat oven to 375º. Whisk the remaining egg and brush over the surface of the braid.: After the first rise, gently deflating releases large gas pockets and redistributes yeast and nutrients for the final proof. Dividing into three even portions ensures a balanced braid, and rolling each into a 15 inch rope gives a uniform look and consistent bake. You will feel the dough soften as you roll, and slight resistance indicates good gluten development. Uneven ropes lead to a lopsided braid, so measure or eye for equal thickness.
- Bake for 30 minutes, covering with foil for the last 5-10 minutes if the loaf is browning too fast.: Braiding from the center out helps maintain tension and creates a symmetrical loaf. As you weave, watch the ropes tuck neatly under the loaf so it keeps shape while rising. The braid should look seamless and taut without being stretched thin. Transferring to parchment prevents sticking and makes moving the braid to the oven effortless. Tight braids can restrict oven spring, while too loose braids may spread.
- Cool on a wire rack.: The final proof allows the braid to puff and gain oven spring. You will notice the braid become pillowy and soft to the touch, with a gentle jiggle when nudged. This rest is essential for a light crumb and an even bake. If the dough over proofs, the structure can collapse in the oven, so keep an eye on volume rather than time strictly. A warning sign of overproofing is a loaf that does not bounce back when pressed gently.
- Preheat oven to 375º whisk the remaining egg and brush over the surface of the braid: A well preheated oven gives immediate oven spring and helps set the crust. Whisking the remaining egg until smooth and brushing it evenly creates a glossy, golden exterior. Be sure the brush covers the braid without pooling in crevices. The aroma at this point is rich and buttery, and the shiny surface is a good indicator the crust will brown beautifully. If the egg wash pools, it can burn in the oven, so brush lightly.
- Bake for 30 minutes covering with foil for the last 5 to 10 minutes if the loaf is browning too fast: As the loaf bakes you will smell caramelizing sugars and melting butter , and the crust will shift from pale to deep golden. Use the foil shield during the final minutes if the crust reaches color before the crumb is fully done, this prevents overbrowning while the interior finishes. A done loaf will sound hollow when tapped at the base and register a warm interior. Underbaking leaves a gummy crumb, so if in doubt allow a few extra minutes with the foil in place.
- Cool on a wire rack: Cooling is more than waiting it is part of the finish. Placing the loaf on a wire rack allows air to circulate so the crust stays crisp and the interior sets without steaming. The aroma will continue to develop as it cools, and slicing too soon can compress the crumb and make it gummy. Let it rest until slightly warm for best texture. A common error is carving a hot loaf which causes the slices to tear rather than slice cleanly.
Notes
- Use warm milk to activate the yeast without scorching it, aim for just warm to the touch which helps the dough come together smoothly.
- Don’t overflour when rolling the ropes, a light dusting prevents sticking but too much flour will dry the dough and tighten the crumb.
- Adjust proofing time to your kitchen temperature, cooler rooms need longer rising times and warmer rooms will be faster.
- Protect the crust in the final bake by tenting with foil if the braid browns too quickly, ensuring a fully baked interior without a burned exterior.
- Make ahead by refrigerating the shaped braid overnight for a slow cold proof, then bake the next morning for fresh bread with deeper flavor.