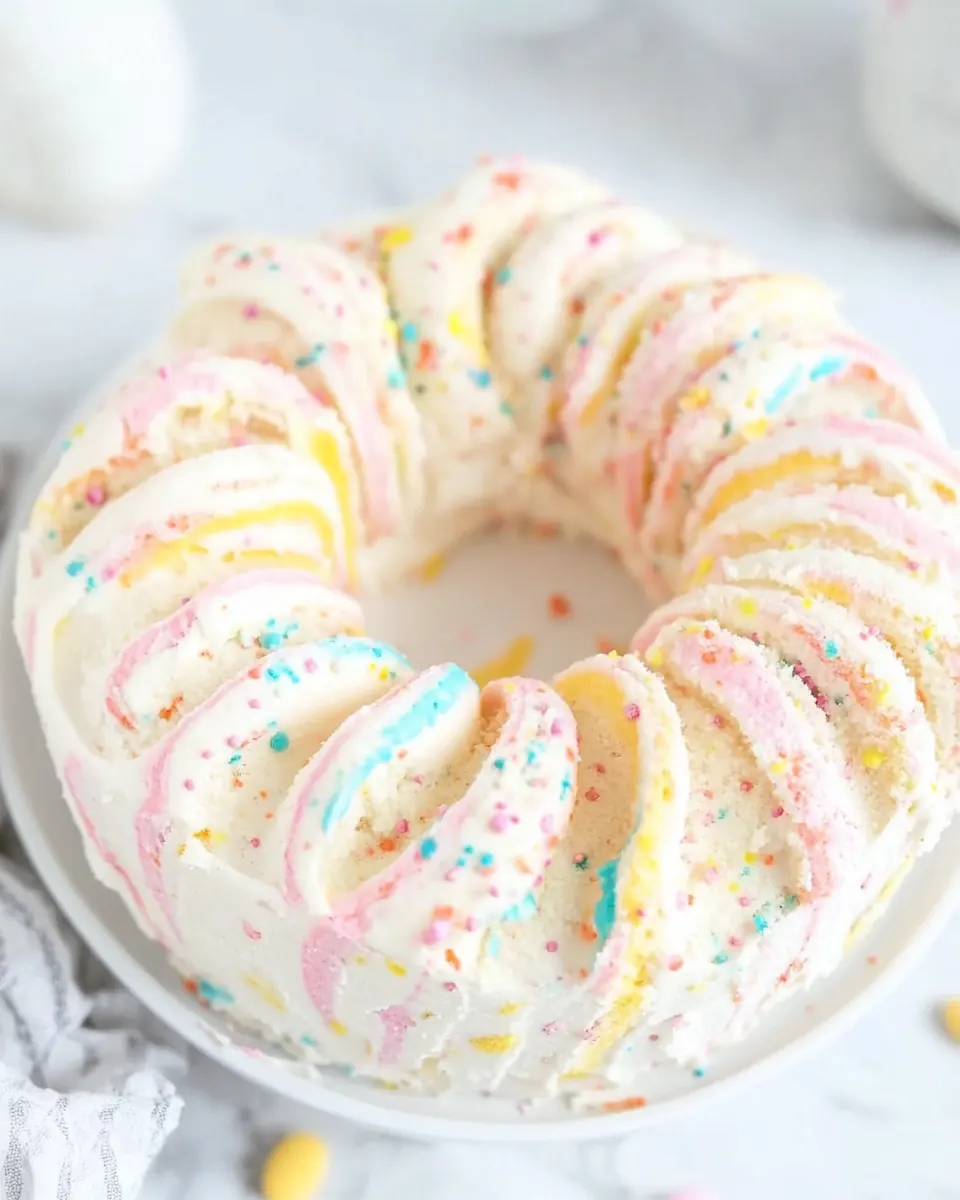
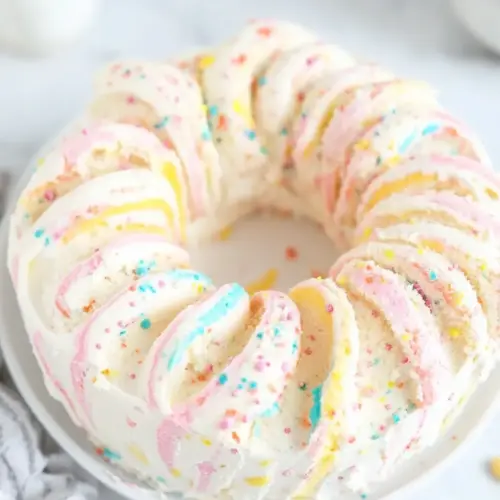
Swirled Easter Cake
Swirled Easter Cake was the first pastel dessert I ever attempted for a family spring gathering, and it instantly became a highlight. I still remember standing in my kitchen with a bowl of smooth, white batter and three tiny jars of food coloring, feeling playful and a little nervous about getting the swirls just right. My niece insisted on the brightest pink, my nephew begged for blue, and I quietly favored a soft yellow, so we turned the task into a cheerful color negotiation that felt like a tiny holiday tradition forming.
The memory of the batter smelling faintly sweet, and the kitchen filling with that warm, bakery aroma as the cake baked, is something I keep returning to. Every time I make Swirled Easter Cake now, I think about that first moment of laughter, the careful spooning of colored batter, and the satisfying swoosh of a knife creating whimsical marbling. It is a simple technique that makes the cake feel celebratory without adding complexity, and that combination of ease and festivity is what keeps me making it for spring gatherings.
I also love how this cake translates to different crowds. For a kid filled table, the pastel sprinkles add a playful crunch and sparkle. For a neighborhood brunch, the swirls make a humble sheet cake look intentionally festive, and I often catch guests peeking at the cross section to admire the pattern. Over time, subtle tweaks like using egg whites for a lighter crumb or folding in a touch of sour cream for moisture helped me perfect the texture, making Swirled Easter Cake reliably tender and moist every time.
Recipe Snapshot
60 mins
25 mins
35 mins
Medium
300 kcal
American
Gluten-Free, Low FODMAP
Desserts
Electric mixer, 9×13 baking dish, Mixing bowls, Spatula, Butter knife
Why You’ll Love This Swirled Easter Cake
Playful Visual Impact
I adore how Swirled Easter Cake turns ordinary batter into a pastel centerpiece. The swirling technique is forgiving yet dramatic, so even imperfect patterns look intentionally whimsical. I find that guests are immediately drawn to the sliced cross section, and it sparks conversation, which is always a joy at holiday gatherings.
Simple, Accessible Technique
One of the reasons I keep returning to this recipe is its accessibility. You do not need advanced skills or specialty equipment, just basic bowls and a knife to swirl the colors. I appreciate recipes that make impressive results approachable, and this one rewards minimal effort with maximum charm.
Reliable Moisture and Texture
The combination of boxed white cake mix, sour cream, and egg whites gives a tender crumb that stays moist for days. I learned that using egg whites makes the cake lighter, while the sour cream contributes a subtle tang and richness that keeps slices from feeling dry. That balance is what transforms a simple sheet cake into something memorable.
Customizable Without Complication
You can easily play with the palette of colors or the intensity of swirls without changing the structure. I often adjust the vibrancy of the food coloring to suit the occasion, and the buttercream pairs beautifully, so you can dress the cake up or keep it simple. This makes the recipe perfect for a range of spring events, from casual family brunches to more formal gatherings.
Kid Friendly and Festive
I love serving this at Easter because it invites participation. Kids can help drop spoonfuls of colored batter, and adults can take charge of the frosting. That collaborative process becomes part of the celebration, and the cake ends up tasting like more than the sum of its ingredients. For me, that shared experience is as important as the final slice.
Ingredients You’ll Need for Swirled Easter Cake
These ingredients come together to create a moist, visually playful sheet cake. The cake mix provides a dependable structure, while the egg whites and sour cream lighten and moisten the crumb. The frosting ingredients give a creamy finish that contrasts with the soft cake, and the sprinkles add a festive textural note.
- 15.25 ounce box white cake mix: Provides the base cake mix containing flour, leavening, and sugar to create the cake structure; simplifies preparation and ensures consistent texture when combined with wet ingredients. Enhances crumb and browning while acting as the primary dry component that absorbs liquids and fats.
- 1/4 cup water: Adds moisture to the batter, helping to hydrate dry ingredients and control consistency; influences the cake's tenderness by adjusting batter viscosity. Also aids in dissolving sugar and distributing ingredients evenly throughout the mix.
- 4 egg whites: Contributes lean protein and structure without yolk fat, helping the cake rise and maintain a light, airy crumb; beaten egg whites incorporate air for increased volume. Supports stability and creates a delicate, tender texture while reducing richness compared to whole eggs.
- 1/2 cup vegetable oil: Introduces fat that tenderizes the crumb and adds moistness, improving mouthfeel and keeping the cake soft; helps carry flavor and promote browning. Also contributes to a more tender structure by coating flour proteins and limiting gluten formation.
- 1 cup sour cream: Provides richness and acidity that tenderizes the crumb and adds slight tang; increases moisture and lends a dense, creamy texture. Helps balance sweetness and contributes to a richer flavor profile compared with milk alone.
- 2 teaspoons vanilla extract: Delivers floral, sweet flavor notes that enhance overall taste and aroma; complements the cake mix and balances tang from sour cream. Small amount brightens the flavor profile without overpowering other components.
- blue, pink, and yellow food coloring: Supplies concentrated dyes to tint portions of batter for a festive swirled appearance; allows creation of pastel shades characteristic of Easter cakes. Adds visual appeal without affecting structure, using only a few drops for color intensity control.
- pastel sprinkles: Adds crunchy, decorative texture and colorful visual interest to the finished cake; creates a festive look appropriate for celebrations. Sprinkle sparingly to avoid moisture absorption and preserve crispness.
- 1/2 cup butter softened: Provides the fat base for frosting, giving it a creamy, spreadable texture and rich flavor; softened butter aerates when whipped to create light frosting. Acts as the primary fat that blends with sugar to form smooth, flavorful icing.
- 2 cups powdered sugar: Offers concentrated sweetness and structure to frostings, dissolving into butter to create a stable, pipeable consistency; helps thicken and sweeten the icing. Powdered form ensures smooth texture without graininess when mixed properly.
- 1/4 teaspoons salt: Balances sweetness and enhances flavor depth by cutting through the richness of frosting; small amount regulates taste and can stabilize the icing. Also aids in preserving overall flavor harmony in the finished frosting.
- 1 1/2 teaspoons vanilla extract: Provides additional vanilla flavoring for the frosting, reinforcing aromatic sweetness and complementing butter and sugar; boosts overall taste cohesion. Small quantity delivers noticeable vanilla presence without overwhelming other flavors.
- 2 4 tablespoons heavy cream or milk: Adjusts frosting consistency to achieve desired spreadability or pipeability; small additions thin the icing for easier spreading while larger amounts create looser glazes. Can be used to correct texture depending on humidity and powdered sugar absorption.
Cooking Method for Swirled Easter Cake
These steps guide you from mixing to decorating while keeping the process simple. I like to move deliberately, preparing bowls and tools so the batter is ready for coloring and swirling. The directions below expand each step with sensory cues and troubleshooting notes to help you feel confident at every stage.
- Preheat oven to 350 degrees Fahrenheit. Grease a 9×13 baking dish and set aside.: The air will fill with a faint warm, neutral smell as the oven comes up to 350 degrees Fahrenheit, which signals readiness to bake. I always grease the pan thoroughly, feeling the smooth, slightly oily surface as I run a paper towel over it, to ensure the cake releases cleanly. If your oven runs hot, rotate the pan halfway through baking for even browning, otherwise edges can darken before the center sets. A common mistake is preheating insufficiently, which can cause uneven rise; make sure the oven reaches the full temperature before inserting the cake. Using a 9×13 dish creates the classic sheet cake shape and allows the swirls to distribute across broad slices.
- In a large mixing bowl, use an electric mixer to beat cake mix, water, egg whites, oil, sour cream, and clear vanilla extract. Mix on low speed for 30 seconds or until combined. Scrape the edges of the bowl. Then beat on medium speed for 2 minutes more, scraping the edges occasionally.: As you combine these ingredients, you will notice the batter shift from powdery flakes to a glossy, smooth mass, releasing a sweet, vanilla aroma that hints at the final cake. The initial low speed prevents dry flour from puffing into your face, while the medium speed develops a consistent texture and incorporates some air for lightness. I always scrape the bowl at least twice, feeling the batter cling to the spatula so you do not miss any pockets of dry mix. If the batter seems lumpy after mixing, a brief low speed spin will usually smooth it; avoid overmixing, which can tighten the crumb and make it tough. A common mistake here is adding too much liquid while adjusting colors later, so keep the measured amounts accurate.
- Pour 2 cups of the batter into the prepared pan.: The first measure of batter forms the white base for your swirls, and you will see it spread into a satin layer across the pan, reflecting a slight sheen from the oil. Pour gently to avoid splashing or creating air pockets, and use a spatula to smooth the surface so the colored spoonfuls sit evenly. If the base is uneven, the colored dollops can sink or create lopsided swirls, so take the extra few seconds to level the batter. A typical oversight is overfilling the pan; confirm you have set aside the correct amount for the base to leave room for the colored batter on top.
- Divide the remaining batter between 3 medium bowls (about 1/2 cup each). Add a few drops of blue, pink, and yellow food coloring (one color per bowl) to the batter, stirring well after each drop, until the batter reaches the desired color.: As you tint the batter, you will watch it transform from ivory to soft pastels; a little color goes a long way, so add drops gradually and mix to assess the shade. The batter will slightly thin as you stir, but the change is minimal if you use gel coloring. I recommend tasting a tiny smear to check the balance, though do not overdo it, as the cake should remain subtly sweet. A frequent mistake is using too much liquid coloring, which can loosen the batter and alter bake time, so prefer gel or concentrated dye. Keep the bowls on a towel to avoid spills, and stir until the color is uniform for the prettiest swirls.
- Place spoonfuls of each colored batter in random places on top of the white batter. Run a butter knife back and forth through the batter to swirl the added color.: Dropping spoonfuls creates playful islands of color that will fold into the white base, producing soft marbling as you glide the knife. You should hear a faint scraping sound as the knife passes through the batter, and you'll see ribbons of color merge and feather into each other, which is the visual cue you want. Move the knife in gentle strokes rather than vigorous swirls to avoid overmixing the colors into a muddy hue. A typical error is swirling too much, which erases the distinct pastel pockets, so stop when you achieve broad, flowing patterns rather than tight blends.
- Bake cake for 30-35 minutes or until an inserted toothpick comes out clean. Cool completely before frosting.: While baking, the kitchen fills with a warm vanilla scent and the top will turn a very light golden at the edges, offering a visual cue that it is near done. The toothpick test remains the most reliable indicator; insert it into the center and watch for batter to cling or come away clean. After removing the pan, let the cake cool until it feels just warm to the touch on the surface, then transfer to a rack if you want faster cooling. Frosting a hot cake will melt the buttercream and create a glossy, sagging finish, so patience is key. Avoid opening the oven frequently during the bake, as that can cause the center to sink.
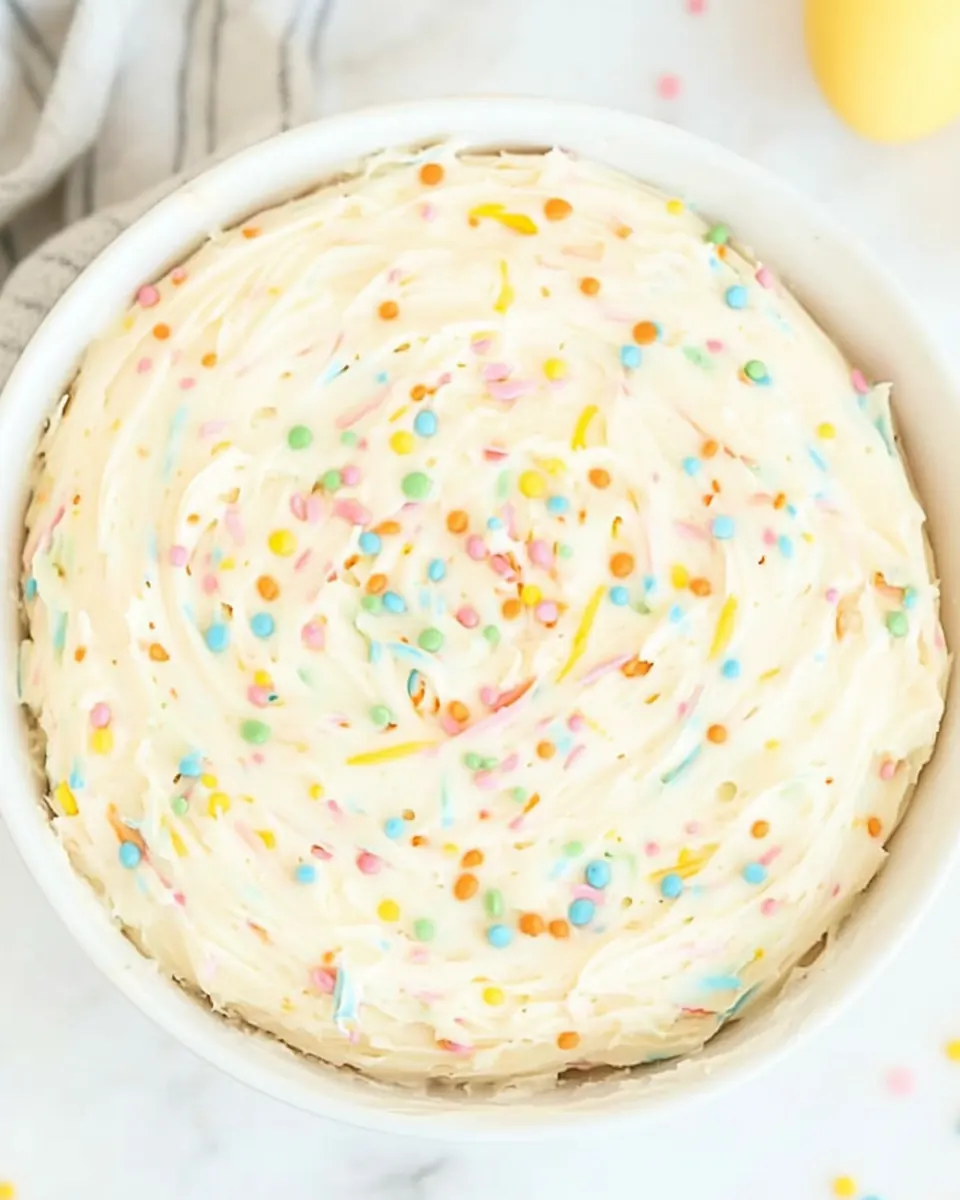
- Place softened butter in mixing bowl. Then with an electric mixer, whip the butter for 1-2 minutes until it is lighter in color and a bit fluffy.: The butter will lighten and gain air, developing a pale, nearly whipped texture and a slightly sweet aroma as you beat it. This step builds the foundation for a fluffy frosting, and I always check that the butter is thoroughly softened by pressing a finger into it; it should give easily. Using cold or melted butter are both mistakes to avoid, since cold leads to lumps and melted makes a runny frosting. Whipping at medium speed gives the ideal aeration; too fast can cause splatter, while too slow delays the light color and volume you want.
- Add the powdered sugar and salt. Beat on low to medium speed for about 1 minute until well combined, occasionally scraping the sides of the bowl.: When the sugar goes in, the mixture will thicken and develop a faint sanding texture that disappears as you continue to beat. The salt sharpens the sweetness and balances flavor, making the frosting taste more nuanced. Scraping the bowl prevents undissolved pockets of sugar, which can create graininess. A common issue is adding all the sugar at once at high speed, causing a cloud of powder and uneven mixing, so add gradually and start slow to incorporate cleanly.
- Add the vanilla extract and 2 tablespoons of cream and beat for one minute. Slowly add more cream, if necessary, to get the desired consistency. Whip for 1 more minute or until light and fluffy.: The frosting will begin to lighten and smooth, and the cream adjusts the spreadability so it glides over the cake. I prefer starting with less cream and adding more to avoid a glaze that runs; the final frosting should hold soft peaks and spread evenly. You will notice a glossy sheen and a pillowy texture when it is ready, which signals a great spreading experience. Over thinning is a typical mistake, so add liquid sparingly and test by dragging the spatula through the frosting to check for body.
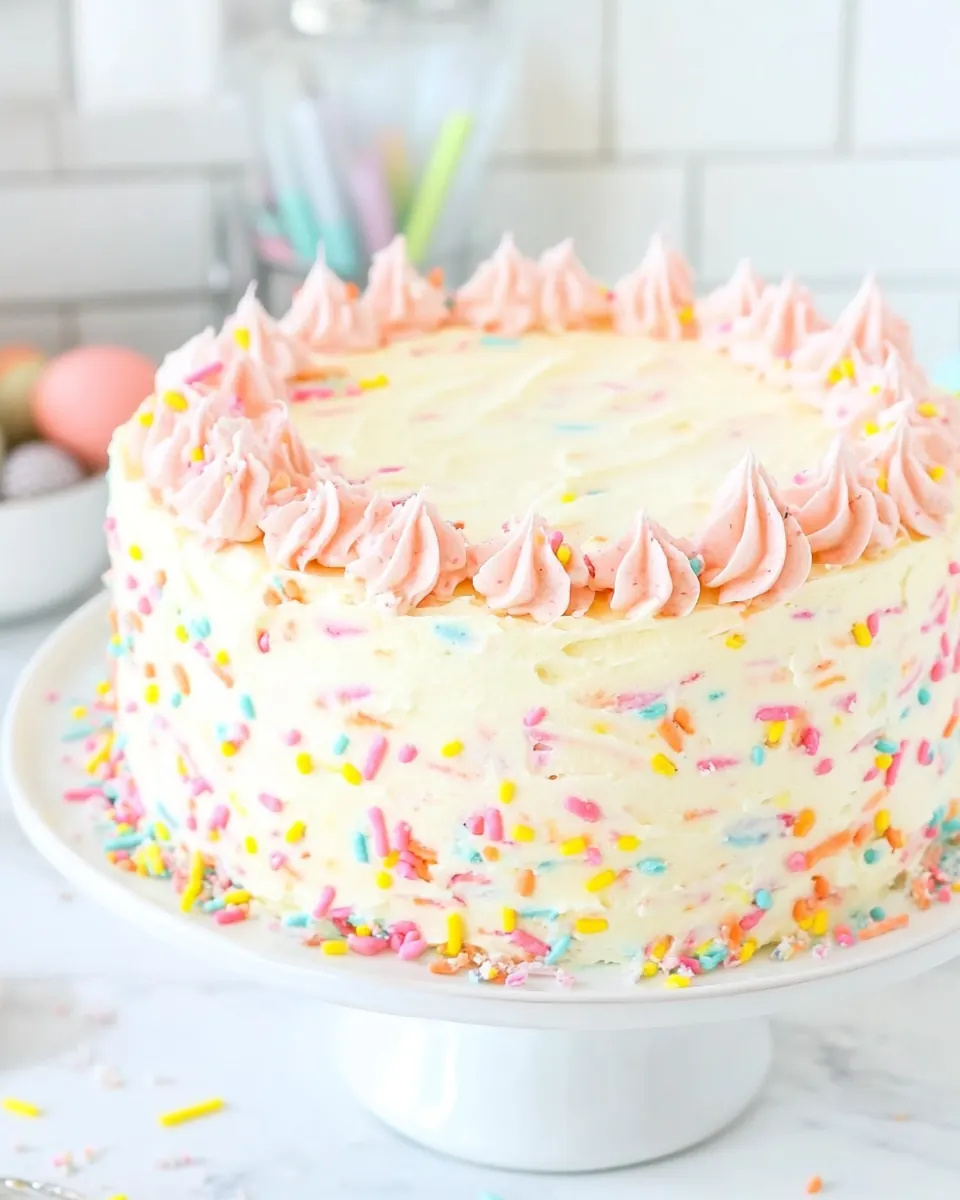
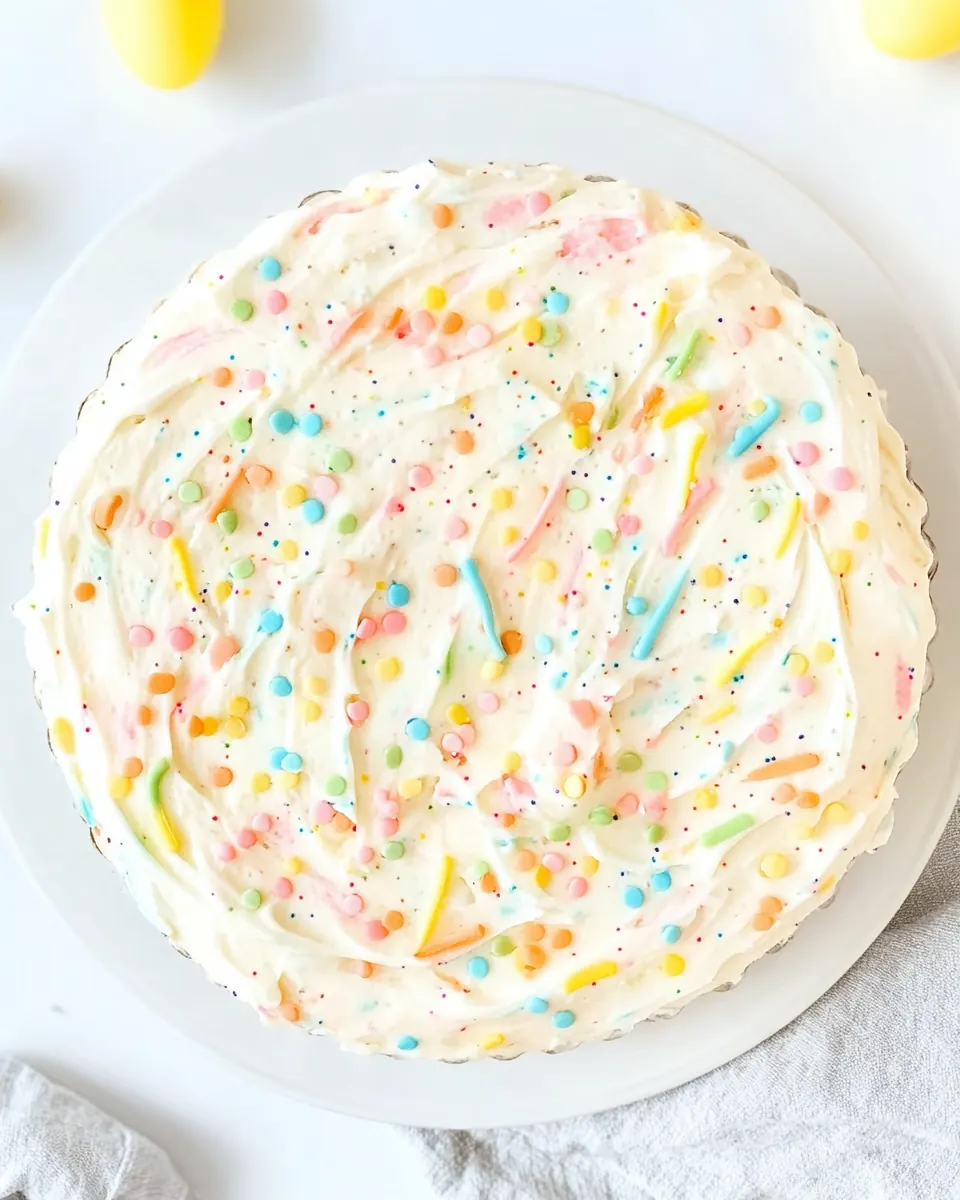
- Frost and decorate the cake with Easter sprinkles.: As you spread the frosting, the cake surface should feel cool to the touch, and the buttercream will make a smooth, opaque layer that invites decoration. Gently press the pastel sprinkles into the frosting so they adhere without sinking, creating a playful top layer that complements the interior swirls. If your frosting is too soft and the sprinkles sink, chill the cake for a few minutes to firm the frosting, then finish decorating. A common misstep is overhandling the top, which can disturb the swirls at the edges; use steady motions and trust the frosting to smooth out minor imperfections.
Ways to Customize
You can tailor Swirled Easter Cake to your celebration by adjusting colors, decorations, and frosting texture. Small changes make a noticeable difference, and each tweak keeps the method simple while personalizing the finish. Below are practical ways I’ve adapted this cake for different gatherings.
- Adjust the Color Intensity Use fewer drops of food coloring for subtler pastels, or a touch more for brighter swirls, testing on a small portion before tinting an entire bowl.
- Change the Sprinkle Style Try confetti style for playful texture or pearl sprinkles for an elegant look, applying them immediately after frosting to ensure they stick.
- Make Smaller Portions Bake in an 8 inch square pan for a thicker cake, reducing baking time slightly and checking with a toothpick earlier.
- Switch Frosting Consistency Use 2 tablespoons of cream for a stiffer frosting, or up to 4 tablespoons for a glossier, softer finish, adding liquid slowly until you reach the desired spreadability.
- Prep Ahead Bake the cake a day in advance and keep it covered at room temperature, then frost on the day you plan to serve for the freshest presentation.
What to Serve With Swirled Easter Cake
This cake pairs well with light beverages and simple accompaniments that let the pastel star shine. Consider serving it alongside fresh fruit or a subtly flavored hot drink for contrast. Below are thoughtful serving ideas for different occasions and storage notes to keep the cake tasting its best.
- Spring Brunch Pairing Serve slices with a bowl of mixed berries on the side, offering a bright, slightly tart counterpoint to the sweet cake, which makes a lovely brunch centerpiece.
- Kid Friendly Gatherings Present with cold milk in small cups and a plate of cut fruit, creating a balanced plate that’s easy for children to enjoy during holiday activities.
- Afternoon Tea Offer the cake with mild, non flavored teas to let the cake‘s vanilla and pastel visual appeal take center stage, using small dessert forks for a refined touch.
- Storage Tips Keep the cake covered at room temperature in plastic wrap or a lidded container for three to four days, and avoid refrigerating which can dry the cake out; if your kitchen is warm, store in a cool spot instead.
- Seasonal Presentation Garnish with extra pastel sprinkles or edible flowers for a spring party, arranging slices on a platter to highlight the swirled cross sections and create an eye catching display.
- Occasion Notes This cake is ideal for Easter celebrations and spring gatherings where a festive yet simple dessert is desired, fitting both casual family tables and more styled brunch spreads.
FAQ
Conclusion
What makes this recipe special is how effortlessly it turns simple, pantry friendly ingredients into a festive, pastel showstopper that feels celebratory. Its combination of a moist, tender crumb and playful swirls makes it ideal for spring gatherings and holiday tables. Give it a try the next time you want a dessert that looks impressive yet remains easy to prepare, and enjoy the smiles it brings as people admire the colorful cross sections. I hope making this cake becomes a small tradition for you, bringing color and sweetness to your celebrations.
Swirled Easter Cake
Equipment
- Electric Mixer
- 9×13 baking dish
- Mixing Bowls
- Spatula
- Butter knife
Ingredients
- 15.25 ounce box white cake mix Provides the base cake mix containing flour, leavening, and sugar to create the cake structure; simplifies preparation and ensures consistent texture when combined with wet ingredients. Enhances crumb and browning while acting as the primary dry component that absorbs liquids and fats.
- 1/4 cup water Adds moisture to the batter, helping to hydrate dry ingredients and control consistency; influences the cake's tenderness by adjusting batter viscosity. Also aids in dissolving sugar and distributing ingredients evenly throughout the mix.
- 4 egg whites Contributes lean protein and structure without yolk fat, helping the cake rise and maintain a light, airy crumb; beaten egg whites incorporate air for increased volume. Supports stability and creates a delicate, tender texture while reducing richness compared to whole eggs.
- 1/2 cup vegetable oil Introduces fat that tenderizes the crumb and adds moistness, improving mouthfeel and keeping the cake soft; helps carry flavor and promote browning. Also contributes to a more tender structure by coating flour proteins and limiting gluten formation.
- 1 cup sour cream Provides richness and acidity that tenderizes the crumb and adds slight tang; increases moisture and lends a dense, creamy texture. Helps balance sweetness and contributes to a richer flavor profile compared with milk alone.
- 2 teaspoons vanilla extract Delivers floral, sweet flavor notes that enhance overall taste and aroma; complements the cake mix and balances tang from sour cream. Small amount brightens the flavor profile without overpowering other components.
- blue, pink, and yellow food coloring Supplies concentrated dyes to tint portions of batter for a festive swirled appearance; allows creation of pastel shades characteristic of Easter cakes. Adds visual appeal without affecting structure, using only a few drops for color intensity control.
- pastel sprinkles Adds crunchy, decorative texture and colorful visual interest to the finished cake; creates a festive look appropriate for celebrations. Sprinkle sparingly to avoid moisture absorption and preserve crispness.
- 1/2 cup butter softened Provides the fat base for frosting, giving it a creamy, spreadable texture and rich flavor; softened butter aerates when whipped to create light frosting. Acts as the primary fat that blends with sugar to form smooth, flavorful icing.
- 2 cups powdered sugar Offers concentrated sweetness and structure to frostings, dissolving into butter to create a stable, pipeable consistency; helps thicken and sweeten the icing. Powdered form ensures smooth texture without graininess when mixed properly.
- 1/4 teaspoons salt Balances sweetness and enhances flavor depth by cutting through the richness of frosting; small amount regulates taste and can stabilize the icing. Also aids in preserving overall flavor harmony in the finished frosting.
- 1 1/2 teaspoons vanilla extract Provides additional vanilla flavoring for the frosting, reinforcing aromatic sweetness and complementing butter and sugar; boosts overall taste cohesion. Small quantity delivers noticeable vanilla presence without overwhelming other flavors.
- 2 -4 tablespoons heavy cream or milk Adjusts frosting consistency to achieve desired spreadability or pipeability; small additions thin the icing for easier spreading while larger amounts create looser glazes. Can be used to correct texture depending on humidity and powdered sugar absorption.
Instructions
- Preheat oven to 350 degrees Fahrenheit. Grease a 9×13 baking dish and set aside.: The air will fill with a faint warm, neutral smell as the oven comes up to 350 degrees Fahrenheit, which signals readiness to bake. I always grease the pan thoroughly, feeling the smooth, slightly oily surface as I run a paper towel over it, to ensure the cake releases cleanly. If your oven runs hot, rotate the pan halfway through baking for even browning, otherwise edges can darken before the center sets. A common mistake is preheating insufficiently, which can cause uneven rise; make sure the oven reaches the full temperature before inserting the cake. Using a 9×13 dish creates the classic sheet cake shape and allows the swirls to distribute across broad slices.
- In a large mixing bowl, use an electric mixer to beat cake mix, water, egg whites, oil, sour cream, and clear vanilla extract. Mix on low speed for 30 seconds or until combined. Scrape the edges of the bowl. Then beat on medium speed for 2 minutes more, scraping the edges occasionally.: As you combine these ingredients, you will notice the batter shift from powdery flakes to a glossy, smooth mass, releasing a sweet, vanilla aroma that hints at the final cake. The initial low speed prevents dry flour from puffing into your face, while the medium speed develops a consistent texture and incorporates some air for lightness. I always scrape the bowl at least twice, feeling the batter cling to the spatula so you do not miss any pockets of dry mix. If the batter seems lumpy after mixing, a brief low speed spin will usually smooth it; avoid overmixing, which can tighten the crumb and make it tough. A common mistake here is adding too much liquid while adjusting colors later, so keep the measured amounts accurate.
- Pour 2 cups of the batter into the prepared pan.: The first measure of batter forms the white base for your swirls, and you will see it spread into a satin layer across the pan, reflecting a slight sheen from the oil. Pour gently to avoid splashing or creating air pockets, and use a spatula to smooth the surface so the colored spoonfuls sit evenly. If the base is uneven, the colored dollops can sink or create lopsided swirls, so take the extra few seconds to level the batter. A typical oversight is overfilling the pan; confirm you have set aside the correct amount for the base to leave room for the colored batter on top.
- Divide the remaining batter between 3 medium bowls (about 1/2 cup each). Add a few drops of blue, pink, and yellow food coloring (one color per bowl) to the batter, stirring well after each drop, until the batter reaches the desired color.: As you tint the batter, you will watch it transform from ivory to soft pastels; a little color goes a long way, so add drops gradually and mix to assess the shade. The batter will slightly thin as you stir, but the change is minimal if you use gel coloring. I recommend tasting a tiny smear to check the balance, though do not overdo it, as the cake should remain subtly sweet. A frequent mistake is using too much liquid coloring, which can loosen the batter and alter bake time, so prefer gel or concentrated dye. Keep the bowls on a towel to avoid spills, and stir until the color is uniform for the prettiest swirls.
- Place spoonfuls of each colored batter in random places on top of the white batter. Run a butter knife back and forth through the batter to swirl the added color.: Dropping spoonfuls creates playful islands of color that will fold into the white base, producing soft marbling as you glide the knife. You should hear a faint scraping sound as the knife passes through the batter, and you'll see ribbons of color merge and feather into each other, which is the visual cue you want. Move the knife in gentle strokes rather than vigorous swirls to avoid overmixing the colors into a muddy hue. A typical error is swirling too much, which erases the distinct pastel pockets, so stop when you achieve broad, flowing patterns rather than tight blends.
- Bake cake for 30-35 minutes or until an inserted toothpick comes out clean. Cool completely before frosting.: While baking, the kitchen fills with a warm vanilla scent and the top will turn a very light golden at the edges, offering a visual cue that it is near done. The toothpick test remains the most reliable indicator; insert it into the center and watch for batter to cling or come away clean. After removing the pan, let the cake cool until it feels just warm to the touch on the surface, then transfer to a rack if you want faster cooling. Frosting a hot cake will melt the buttercream and create a glossy, sagging finish, so patience is key. Avoid opening the oven frequently during the bake, as that can cause the center to sink.
- Place softened butter in mixing bowl. Then with an electric mixer, whip the butter for 1-2 minutes until it is lighter in color and a bit fluffy.: The butter will lighten and gain air, developing a pale, nearly whipped texture and a slightly sweet aroma as you beat it. This step builds the foundation for a fluffy frosting, and I always check that the butter is thoroughly softened by pressing a finger into it; it should give easily. Using cold or melted butter are both mistakes to avoid, since cold leads to lumps and melted makes a runny frosting. Whipping at medium speed gives the ideal aeration; too fast can cause splatter, while too slow delays the light color and volume you want.
- Add the powdered sugar and salt. Beat on low to medium speed for about 1 minute until well combined, occasionally scraping the sides of the bowl.: When the sugar goes in, the mixture will thicken and develop a faint sanding texture that disappears as you continue to beat. The salt sharpens the sweetness and balances flavor, making the frosting taste more nuanced. Scraping the bowl prevents undissolved pockets of sugar, which can create graininess. A common issue is adding all the sugar at once at high speed, causing a cloud of powder and uneven mixing, so add gradually and start slow to incorporate cleanly.
- Add the vanilla extract and 2 tablespoons of cream and beat for one minute. Slowly add more cream, if necessary, to get the desired consistency. Whip for 1 more minute or until light and fluffy.: The frosting will begin to lighten and smooth, and the cream adjusts the spreadability so it glides over the cake. I prefer starting with less cream and adding more to avoid a glaze that runs; the final frosting should hold soft peaks and spread evenly. You will notice a glossy sheen and a pillowy texture when it is ready, which signals a great spreading experience. Over thinning is a typical mistake, so add liquid sparingly and test by dragging the spatula through the frosting to check for body.
- Frost and decorate the cake with Easter sprinkles.: As you spread the frosting, the cake surface should feel cool to the touch, and the buttercream will make a smooth, opaque layer that invites decoration. Gently press the pastel sprinkles into the frosting so they adhere without sinking, creating a playful top layer that complements the interior swirls. If your frosting is too soft and the sprinkles sink, chill the cake for a few minutes to firm the frosting, then finish decorating. A common misstep is overhandling the top, which can disturb the swirls at the edges; use steady motions and trust the frosting to smooth out minor imperfections.
Notes
- Adjust the Color Intensity Use fewer drops of food coloring for subtler pastels, or a touch more for brighter swirls, testing on a small portion before tinting an entire bowl.
- Change the Sprinkle Style Try confetti style for playful texture or pearl sprinkles for an elegant look, applying them immediately after frosting to ensure they stick.
- Make Smaller Portions Bake in an 8 inch square pan for a thicker cake, reducing baking time slightly and checking with a toothpick earlier.
- Switch Frosting Consistency Use 2 tablespoons of cream for a stiffer frosting, or up to 4 tablespoons for a glossier, softer finish, adding liquid slowly until you reach the desired spreadability.
- Prep Ahead Bake the cake a day in advance and keep it covered at room temperature, then frost on the day you plan to serve for the freshest presentation.