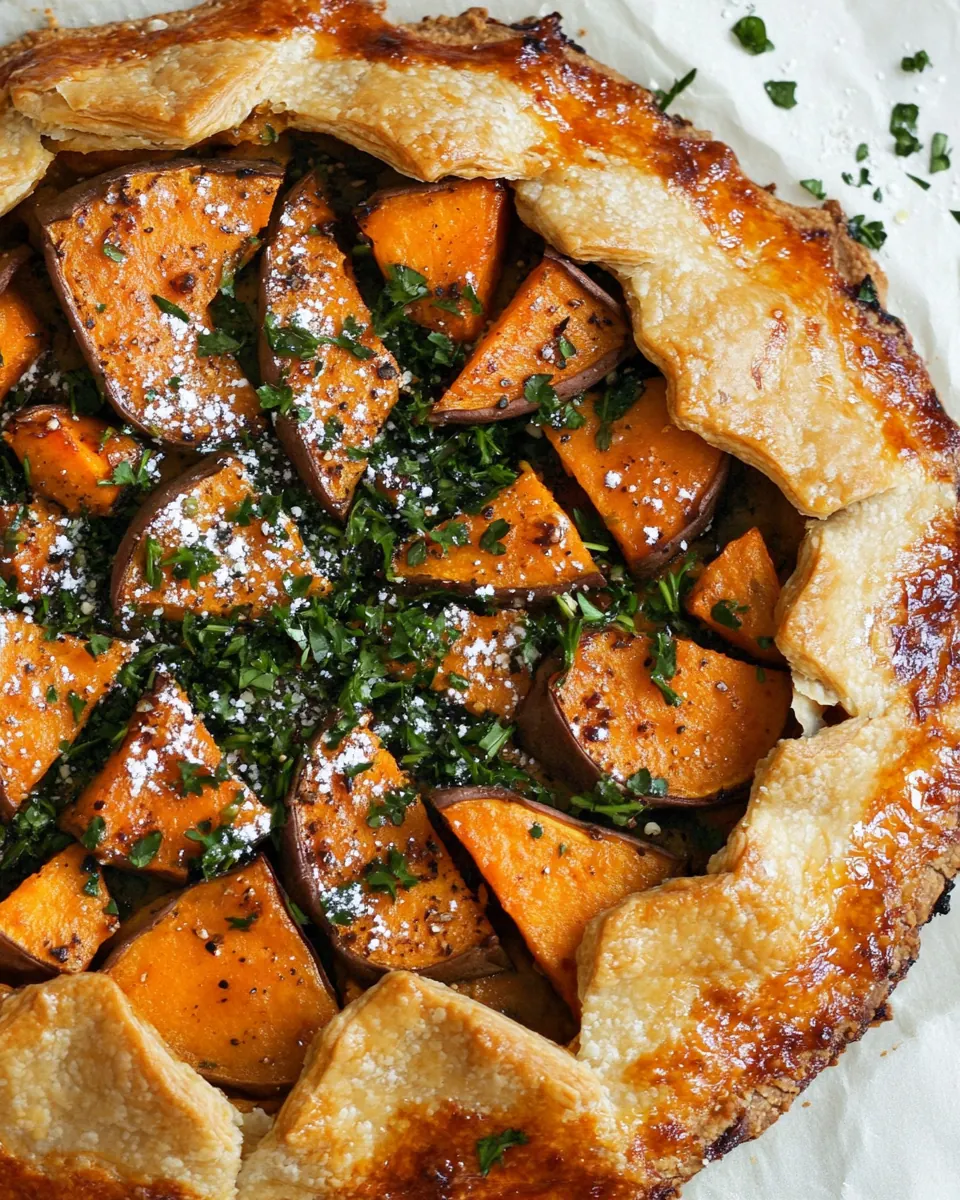
Sweet Potato Galette
Sweet Potato Galette is one of those recipes I keep returning to when I want something comforting yet a little bit unexpected. The first time I made it I was chasing the kind of warm, cozy dish that feels like a hug, but with a crisp, rustic edge. I remember standing at my counter, hands dusted with flour, listening to the soft scrape of the grater as thin, almost translucent slices of sweet potatoes piled up. The aroma of olive oil coating the slices made the whole kitchen feel lively, and I knew this would become a repeat dish.
Over the years I have tweaked the balance between the flaky crust and the tender filling, learning small lessons that mattered a lot. Folding the edges taught me patience, and making the chili oil taught me how much a little heat elevates sweetness. Friends who visit usually comment on the crunchy, buttery rim and the way the sweet potatoes melt into a silky texture against the crisp pastry. That reaction never gets old.
I often bring this Sweet Potato Galette to casual dinners because it travels well and looks impressive without being fussy. The parsley and toasted walnuts add a bright, nutty finish, while the chili oil gives a warm pop that keeps people asking for the recipe. Over time I have discovered that the simplest swaps, like using part whole wheat for the crust, underline the dish’s homey quality while adding structure and flavor. When I make it now, I do so with a small ritual: cold butter grated quickly, dough chilled just long enough, and slices slicked in oil so they roast instead of steam. It makes all the difference.
Recipe Snapshot
1 hr 20 mins
35 mins
45 mins
Medium
250 kcal
American
Vegan, Gluten-Free
Dinner
Mandoline, Mixing Bowl, Sheet Tray, Parchment Paper, Small Skillet
Why This Sweet Potato Galette Works
Rustic elegance without fuss
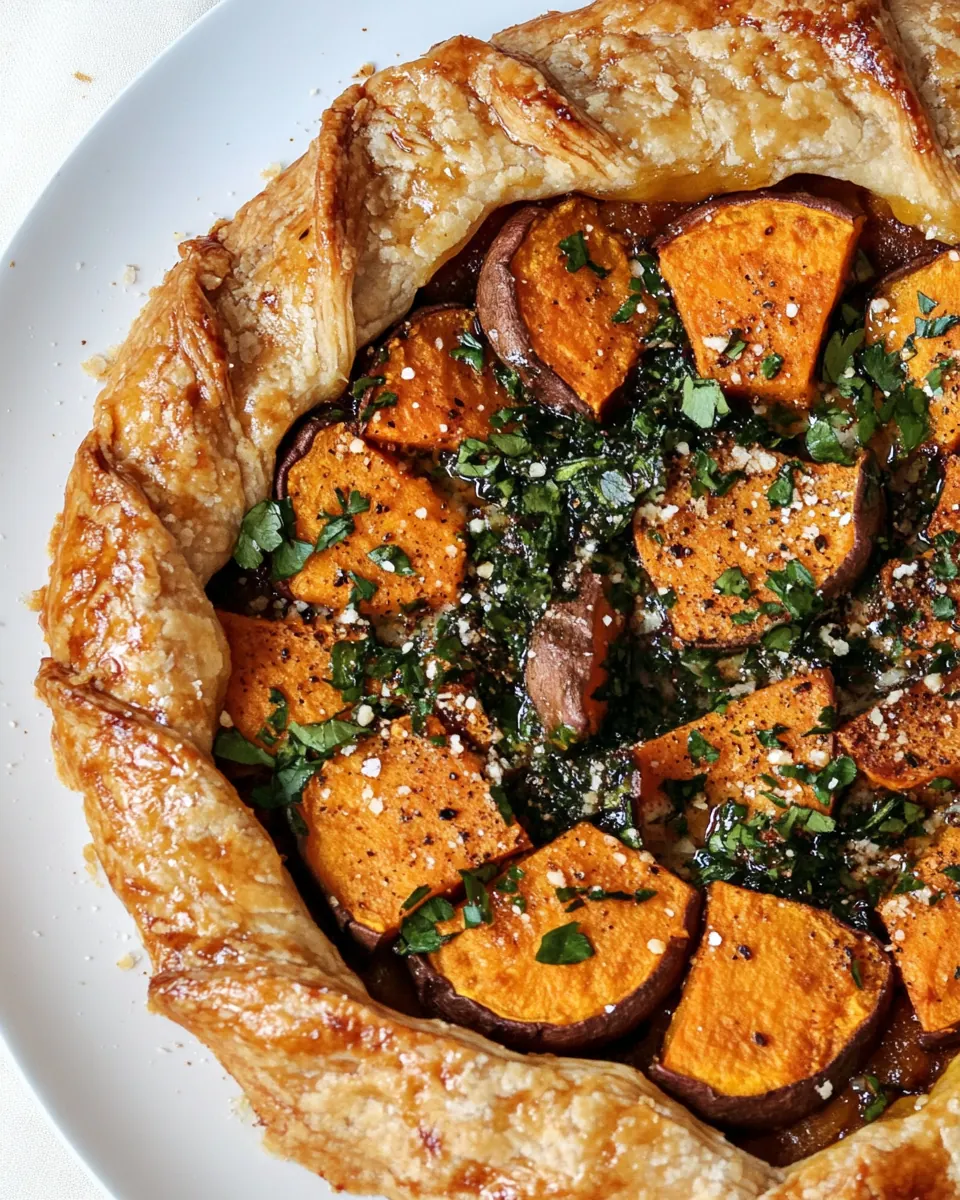
I love how Sweet Potato Galette looks like a homemade centerpiece but comes together without complicated steps. The freeform crust gives it an artisan look, so you can serve something that feels special without hours of decorating. I often get compliments on the golden, pleated edge, and that instant sense of accomplishment keeps me making it again.
Balance of textures and flavors
The interplay of flaky crust and tender, roasted sweet potatoes is the reason I come back to this recipe. The crust provides a satisfying crunch, while the slices soften into a creamy mouthfeel. A sprinkle of fresh parsley and the crunch of toasted walnuts add contrast, and the finishing drizzle of chili oil wakes up the natural sweetness of the sweet potatoes.
Flexible and approachable
I appreciate that this galette adapts to what you have on hand. You can make the dough mostly whole wheat for a nuttier note, or stick with mostly all purpose flour for a flakier outcome. The technique is forgiving, which makes it a great recipe to bring into weeknight rotation or to scale up for guests.
Bright finishing touches
The simple parsley and walnut gremolata paired with the chili oil creates a finish that feels like a chef trick, even though it is easy. I find that letting the oil bloom with crushed red pepper while the galette bakes concentrates flavor, and you end up with a fragrant, glossy drizzle that pulls everything together.
Seasonal appeal
This dish shines in the fall when sweet potatoes are at their peak, but its comforting profile makes it welcome any time you want something earthy yet elegant. I love serving it for casual dinners, potlucks, or a cozy weekend meal when the weather nudges you toward baked dishes.
Sweet Potato Galette Ingredients
These ingredients are selected to create a balance between a tender, flaky crust and a warmly spiced, silky filling. The flours combine to give structure and a pleasant nutty note, while the cold butter creates flaky layers. The sweet potatoes roast gently in olive oil to concentrate sweetness and develop a lightly caramelized edge. The parsley and toasted walnuts finish the galette with freshness and crunch, and the chili oil adds a lively, aromatic heat.
- 3/4 cup unbleached all-purpose flour: Combine to form a tender, slightly nutty pastry base; the all-purpose flour provides structure and gluten needed for a flaky crust. Use measured amounts to ensure proper dough consistency and balance with whole wheat flour for texture.
- 3/4 cup whole wheat flour: Contribute a hearty, earthy texture and boost fiber in the dough; whole wheat flour balances the pastry’s flavor and adds chew. Mix with all-purpose flour to retain flakiness while introducing wholesome character.
- 1/4 teaspoons salt: Season the dough lightly to enhance overall flavor; salt tightens gluten and brings out the natural taste of the flours. Dissolve into the dry ingredients so seasoning distributes evenly throughout the pastry.
- 10 tablespoons cold butter: Cut into small cubes and keep cold to create flaky layers; cold butter releases steam during baking that yields lift and tenderness. Work quickly to incorporate until pea-sized pieces remain for optimal crust texture.
- 1/4 –1/2 cup of ice water: Adjust to bind the dough without making it sticky; ice water hydrates the flour and helps the fat coalesce into discrete pockets for flakiness. Add gradually to achieve a cohesive dough that still feels cold to the touch.
- 2 medium sweet potatoes: Roast, steam, or bake until tender to form the galette’s sweet, creamy filling; sweet potatoes bring natural sweetness and body to each slice. Slice or mash after cooking to layer evenly on the crust and ensure even baking.
- 1 tablespoon olive oil: Toss with sweet potato slices to promote even roasting and add a mild fruity flavor; olive oil helps brown edges and prevents sticking. Use sparingly to maintain the galette’s delicate balance of moisture and crispness.
- 1/2 teaspoons salt: Season filling components to enhance savory contrast with sweet potatoes; this salt heightens natural flavors and balances the dish. Sprinkle evenly over the prepared potatoes before assembling the galette.
- 1/2 cup fresh flat-leaf parsley: Add bright, herbaceous freshness and a slight peppery note to the filling or garnish; parsley lightens the richness of the potatoes and oil. Chop finely to distribute color and flavor throughout the galette.
- 1/4 cup toasted walnuts: Introduce crunchy texture and a warm, toasty flavor when scattered over the filling; toasted walnuts provide pleasant contrast to creamy potatoes. Chop or roughly break them before sprinkling to ensure even distribution.
- Pinch of salt: Provide a subtle extra seasoning touch to taste during assembly or before baking; a pinch of salt can refine the flavor profile without overpowering. Add cautiously to avoid oversalting, especially with other salty elements.
- 1/4 cup olive oil: Moisten and bind filling components while contributing fruity, healthy fat; olive oil also aids in browning and mouthfeel. Drizzle evenly to create a cohesive filling and promote a golden crust edge.
- 1 teaspoon crushed red pepper: Lend a spicy, warming kick to the galette when sprinkled sparingly; crushed red pepper adds depth and gentle heat that complements sweetness. Use according to heat preference to avoid overpowering delicate flavors.
How to Make Sweet Potato Galette
Rolling up my sleeves for this galette is one of my favorite kitchen rituals. The dough is simple to assemble, and the assembly of the galette itself is meditative. As the oven works its magic, the scents of butter and roasted tubers fill the house, signaling that something comforting is coming together.
- To start, prep the crust: Place the flours and salt in a bowl and stir to combine. Grate the butter into the bowl and toss with your hands, rubbing the butter into the flour for about 30 seconds. Add enough of the cold water to bring the dough together in a shaggy ball that is not too firm and not too sticky. Shape into a disk and wrap in plastic or beeswax paper. Refrigerate for 20 minutes.: The moment your hands begin to work the mixture you will feel the transformation from separate dry ingredients to a cohesive base, the flours breaking into a uniform texture beneath your palms. The scent at this stage is subtle and flour forward, and creating a consistent distribution of salt matters for even seasoning later. When you grate the cold butter into the bowl, you will notice little pale ribbons that blend into the flour, and rubbing them briefly creates tactile warmth that helps coat the pieces. This technique is crucial because the coated butter pieces steam during baking, forming delicate layers in the crust. A common mistake is overworking the dough at this point, which builds gluten and leads to a tough crust, so handle it quickly and with light motions. If the mixture appears clumpy, chill the bowl for a few minutes to firm up the butter before continuing. The visual cue to stop is when the mixture looks like coarse crumbs with pea sized bits of butter .
- While the dough is chilling, scrub the sweet potatoes well and pat dry. Using a mandoline, slice the sweet potatoes into 1/8" thick slices. Place in a bowl and toss with olive oil and salt.: As you rub, you should feel the butter break into smaller fragments and the mixture start to smell faintly creamy. This short, brisk action avoids melting the butter , ensuring flaky layers in the final crust rather than a greasy, dense base. The sound is minimal a soft scratch against the bowl, but you will notice the texture change under your fingers. If your hands get warm, pop the bowl into the fridge for a few minutes, because warm butter will ruin the intended structure. Avoid adding water while rubbing the fat in; moisture will prematurely activate gluten and interfere with flakiness.
- Heat your oven to 400˚F. Remove the dough and transfer it to a lightly floured surface. Roll into about a 14" circle and transfer to a sheet tray covered with parchment. Starting from the center, begin to layer the sweet potatoes around, leaving about a 2" space on the edges. Continue layering until you’ve used all the sweet potatoes.: When you begin adding the ice water, add it tablespoon by tablespoon, watching as the mixture comes together into a loose, shaggy ball. The tactile feedback is the best indicator here you want it cohesive but slightly tacky so it can be rolled without cracking, yet not so wet it sticks to the surface. You will notice a subtle sheen when the dough has the right hydration, and it should hold shape when pressed. This balance matters because over hydrated dough will spread during baking and lose its edge, while under hydrated dough will crack and be hard to fold. If you overshoot, chill the dough and gently knead in a dusting of flour. Keep the dough cold for a flakier result.
- Begin to fold and pleat the edges of the crust over the sweet potatoes. Brush with olive oil or melted butter if desired then transfer to the oven. Bake for about 45 minutes until the crust is golden and the sweet potatoes are soft.: Forming the dough into a disc creates a compact shape that chills evenly, and wrapping it prevents it from drying out. As the dough chills, the butter firms and the gluten relaxes, which makes rolling easier and supports flakiness. You will feel the dough become firmer to the touch after chilling, and it should be cool but pliable when you take it out. A frequent misstep is skipping this chill time, which can make the crust shrink or tear during rolling. If your kitchen is warm, extend chilling by another 10 minutes to keep the butter solid.
- While the galette is baking, chop the parsley and walnuts together until both are finely minced. Transfer to a bowl and toss in a bit of salt. In a small skillet, add the olive oil and heat until hot. Place the crushed red pepper in a heat-safe bowl and pour the oil over. Let sit until the galette is done.: As you slice, you will notice thin translucent rounds stacking like coins, their edges glinting from the moisture. Even thickness is essential so all pieces roast evenly and soften at the same time. The olive oil and salt you add next will coat each slice, helping them brown rather than steam, and the repetitive motion of slicing can be almost meditative. A caution: be careful with the mandoline it creates uniformity quickly but can be dangerous without a guard. If slices vary, place thicker ones toward the center where they can have more heat and time to soften.
- Before serving, drizzle with the chili oil and sprinkle the parsley mixture generously.: When you toss the slices, the oil gives them a faint sheen and the salt begins to draw out moisture, which promotes caramelization in the oven. You should hear a soft swish as the slices move against each other, and the scent of olive oil will become more pronounced. This step is critical because if the slices are left dry, they will not brown properly and can end up with a dull texture. Over oiling will make them greasy, so aim for a light, even coating that lets edges crisp while centers stay tender.
- Heat your oven to 400˚F Remove the dough and transfer it to a lightly floured surface Roll into about a 14" circle and transfer to a sheet tray covered with parchment: Rolling the disk to roughly 14 inches gives you enough pastry to encase the filling with an attractive rim. Use light flouring to prevent sticking, and rotate the dough frequently so it rolls evenly. As you transfer it to parchment, the dough should glide smoothly and keep its round shape. When you lift, the surface should feel cool and slightly tacky, signifying the right balance of hydration. A common error is rolling too thin which can cause tears during folding, so aim for an even thickness that supports the layers of sweet potatoes .
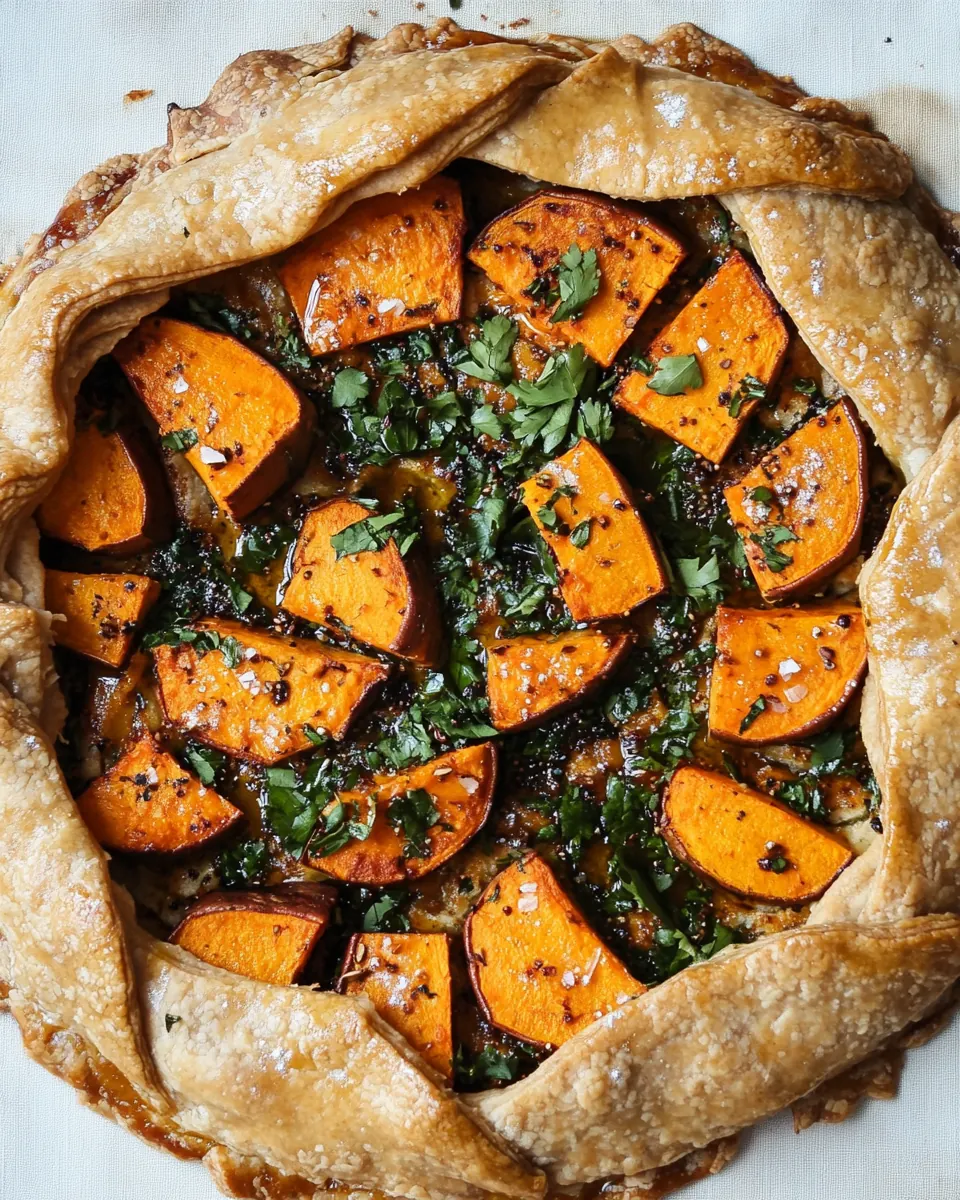
- Starting from the center begin to layer the sweet potatoes around leaving about a 2" space on the edges Continue layering until you’ve used all the sweet potatoes: Layering from the center outward in slightly overlapping circles creates a pleasing visual pattern and helps the slices compact as they roast, creating a creamy texture. The gentle overlap ensures each slice browns at the exposed edge while staying tender where it touches its neighbor. You will hear a soft, dry rustle as the rounds settle into place, and the circle should build up to a shallow mound. Avoid stacking too thick in one spot or you risk undercooked pockets; spread slices evenly for uniform doneness.
- Begin to fold and pleat the edges of the crust over the sweet potatoes Brush with olive oil or melted butter if desired then transfer to the oven: Folding and pleating the edge protects the filling and creates the galette’s rustic appearance, while brushing the rim with olive oil or melted butter encourages deep browning and a glossy finish. As you pleat, the dough will feel pliable, and the pleats should sit snug against the filling. The sensory cue to look for is a golden gleam forming on the crust within the first 20 minutes of baking. If your pleats tear, simply patch with a small piece of extra dough to maintain the shape. Place the galette on the middle rack for even heat circulation.
- Bake for about 45 minutes until the crust is golden and the sweet potatoes are soft: As it roasts, you will notice aromas of toasty dough and caramelizing sweet potatoes , and the sound is the faint crackle of the crust as steam escapes. Visual cues are important the rim should be a deep golden brown and the exposed sweet potato edges should look slightly caramelized and glossy. The interior is done when a knife slides through the slices easily and they yield with a tender resistance. Underbaking will leave the center firm, while overbaking can dry the filling, so check toward the end of the cook time and tent with foil if the rim is browning too quickly.
- While the galette is baking chop the parsley and walnuts together until both are finely minced Transfer to a bowl and toss in a bit of salt: The fresh, herbaceous smell of chopped parsley and the warm nuttiness of toasted walnuts create a bright counterpoint to the baked filling. Mince them finely so they cling to the galette when sprinkled, and the texture will contrast nicely with the soft sweet potatoes . Tossing with a pinch of salt brings out their flavors. Avoid chopping too long or the herbs can become pasty, losing their fresh brightness.
- In a small skillet add the olive oil and heat until hot Place the crushed red pepper in a heat safe bowl and pour the oil over Let sit until the galette is done: Heating the olive oil and pouring it over the crushed red pepper blooms the spice releasing essential oils and creating a fragrant chili oil. The scent will become warm and inviting, and you will see tiny bubbles as the oil cools against the pepper. This infusion adds aroma and a controlled heat that contrasts the sweetness beneath. Watch the oil carefully while heating to avoid smoking, which will impart a bitter flavor. Allowing it to rest concentrates the flavor without additional cooking.
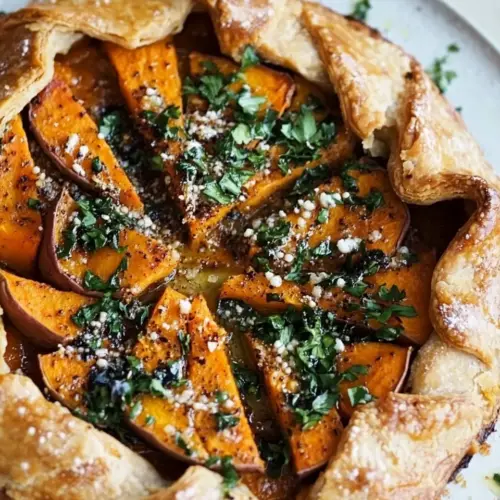
- Before serving drizzle with the chili oil and sprinkle the parsley mixture generously: The final assembly is about balance the glossy chili oil brings a shimmering heat that brightens each bite while the chopped parsley and walnuts add freshness and crunch. As you drizzle, the oil creates tiny specks of red that catch the light, and the scent of warmed pepper rises. Serve slightly warm so the textural contrasts are at their best the crust remains crisp and the filling is tender. A mistake to avoid is drizzling too early, which can make the crust soggy; finish just before serving for best texture.
Recipe Variations about Sweet Potato Galette
I like to see this galette as a flexible template, one that welcomes small, thoughtful swaps depending on what you have and who you are feeding. Below are practical variations and ideas to adapt the recipe while keeping the core technique intact.
- Whole grain forward: Increase the ratio of whole wheat flour slightly for a nuttier crust, chill a touch longer, and expect a heartier texture that pairs well with the galette’s sweet filling.
- Herb swap: If you want a different herbal profile, try finely chopping fresh thyme or chives in place of some of the parsley for a subtle aromatic shift without changing the balance.
- Nut alternatives: Substitute toasted almonds or pecans for the walnuts to vary texture and flavor while keeping the crunchy contrast intact.
- Oil finish intensity: Adjust the amount of crushed red pepper in the chili oil to dial heat up or down, letting the oil sit longer for a more intense infusion.
- Make ahead: Prepare the dough a day ahead and keep it wrapped in the fridge, or assemble the galette on parchment and refrigerate before baking to save time on the day of serving.
Accompaniments for Sweet Potato Galette
This galette plays well across many occasions from a casual lunch to a holiday side. The list below outlines serving ideas, storage advice, and seasonal pairings that highlight the galette’s strengths.
- Serve warm or room temperature: The galette is excellent slightly warm so the crust is still crisp, or at room temperature for easy transport to gatherings.
- Pair with a simple salad: A crisp green salad with a light vinaigrette cuts through the richness, adding a refreshing contrast for lunch or dinner.
- Holiday table: For fall gatherings such as Thanksgiving, present the galette as a rustic vegetarian side that complements roasted mains and pillowy mashed vegetables.
- Storage tips: Store leftovers wrapped in foil or an airtight container in the fridge for up to three days, and reheat in a 350F oven to revive the crust crispness.
- Seasonal pairings: In autumn pair with roasted root vegetables and crisp apples, while in cooler months serve alongside heartier grain salads for a comforting meal.
- Occasion flexibility: Bring it to potlucks for an easy shareable dish, or slice it for an elegant starter at a dinner party.
FAQ
Conclusion
This Sweet Potato Galette stands out because it balances a flaky, slightly nutty crust with tender, caramelized sweet potatoes and a lively chili oil finish. It is both comforting and elegant, making it ideal for weeknight dinners or as a centerpiece side for gatherings. I encourage you to try it because the technique is approachable and the results are reliably impressive. Enjoy the ritual of rolling and layering, and savor the way simple ingredients transform into a memorable dish.
Sweet Potato Galette
Equipment
- Mandoline
- Mixing Bowl
- Sheet tray
- Parchment Paper
- Small skillet
Ingredients
- 3/4 cup unbleached all-purpose flour Combine to form a tender, slightly nutty pastry base; the all-purpose flour provides structure and gluten needed for a flaky crust. Use measured amounts to ensure proper dough consistency and balance with whole wheat flour for texture.
- 3/4 cup whole wheat flour Contribute a hearty, earthy texture and boost fiber in the dough; whole wheat flour balances the pastry’s flavor and adds chew. Mix with all-purpose flour to retain flakiness while introducing wholesome character.
- 1/4 teaspoons salt Season the dough lightly to enhance overall flavor; salt tightens gluten and brings out the natural taste of the flours. Dissolve into the dry ingredients so seasoning distributes evenly throughout the pastry.
- 10 tablespoons cold butter Cut into small cubes and keep cold to create flaky layers; cold butter releases steam during baking that yields lift and tenderness. Work quickly to incorporate until pea-sized pieces remain for optimal crust texture.
- 1/4 –1/2 cup of ice water Adjust to bind the dough without making it sticky; ice water hydrates the flour and helps the fat coalesce into discrete pockets for flakiness. Add gradually to achieve a cohesive dough that still feels cold to the touch.
- 2 medium sweet potatoes Roast, steam, or bake until tender to form the galette’s sweet, creamy filling; sweet potatoes bring natural sweetness and body to each slice. Slice or mash after cooking to layer evenly on the crust and ensure even baking.
- 1 tablespoon olive oil Toss with sweet potato slices to promote even roasting and add a mild fruity flavor; olive oil helps brown edges and prevents sticking. Use sparingly to maintain the galette’s delicate balance of moisture and crispness.
- 1/2 teaspoons salt Season filling components to enhance savory contrast with sweet potatoes; this salt heightens natural flavors and balances the dish. Sprinkle evenly over the prepared potatoes before assembling the galette.
- 1/2 cup fresh flat-leaf parsley Add bright, herbaceous freshness and a slight peppery note to the filling or garnish; parsley lightens the richness of the potatoes and oil. Chop finely to distribute color and flavor throughout the galette.
- 1/4 cup toasted walnuts Introduce crunchy texture and a warm, toasty flavor when scattered over the filling; toasted walnuts provide pleasant contrast to creamy potatoes. Chop or roughly break them before sprinkling to ensure even distribution.
- Pinch of salt Provide a subtle extra seasoning touch to taste during assembly or before baking; a pinch of salt can refine the flavor profile without overpowering. Add cautiously to avoid oversalting, especially with other salty elements.
- 1/4 cup olive oil Moisten and bind filling components while contributing fruity, healthy fat; olive oil also aids in browning and mouthfeel. Drizzle evenly to create a cohesive filling and promote a golden crust edge.
- 1 teaspoon crushed red pepper Lend a spicy, warming kick to the galette when sprinkled sparingly; crushed red pepper adds depth and gentle heat that complements sweetness. Use according to heat preference to avoid overpowering delicate flavors.
Instructions
- To start, prep the crust: Place the flours and salt in a bowl and stir to combine. Grate the butter into the bowl and toss with your hands, rubbing the butter into the flour for about 30 seconds. Add enough of the cold water to bring the dough together in a shaggy ball that is not too firm and not too sticky. Shape into a disk and wrap in plastic or beeswax paper. Refrigerate for 20 minutes.: The moment your hands begin to work the mixture you will feel the transformation from separate dry ingredients to a cohesive base, the flours breaking into a uniform texture beneath your palms. The scent at this stage is subtle and flour forward, and creating a consistent distribution of salt matters for even seasoning later. When you grate the cold butter into the bowl, you will notice little pale ribbons that blend into the flour, and rubbing them briefly creates tactile warmth that helps coat the pieces. This technique is crucial because the coated butter pieces steam during baking, forming delicate layers in the crust. A common mistake is overworking the dough at this point, which builds gluten and leads to a tough crust, so handle it quickly and with light motions. If the mixture appears clumpy, chill the bowl for a few minutes to firm up the butter before continuing. The visual cue to stop is when the mixture looks like coarse crumbs with pea sized bits of butter .
- While the dough is chilling, scrub the sweet potatoes well and pat dry. Using a mandoline, slice the sweet potatoes into 1/8" thick slices. Place in a bowl and toss with olive oil and salt.: As you rub, you should feel the butter break into smaller fragments and the mixture start to smell faintly creamy. This short, brisk action avoids melting the butter , ensuring flaky layers in the final crust rather than a greasy, dense base. The sound is minimal a soft scratch against the bowl, but you will notice the texture change under your fingers. If your hands get warm, pop the bowl into the fridge for a few minutes, because warm butter will ruin the intended structure. Avoid adding water while rubbing the fat in; moisture will prematurely activate gluten and interfere with flakiness.
- Heat your oven to 400˚F. Remove the dough and transfer it to a lightly floured surface. Roll into about a 14" circle and transfer to a sheet tray covered with parchment. Starting from the center, begin to layer the sweet potatoes around, leaving about a 2" space on the edges. Continue layering until you’ve used all the sweet potatoes.: When you begin adding the ice water, add it tablespoon by tablespoon, watching as the mixture comes together into a loose, shaggy ball. The tactile feedback is the best indicator here you want it cohesive but slightly tacky so it can be rolled without cracking, yet not so wet it sticks to the surface. You will notice a subtle sheen when the dough has the right hydration, and it should hold shape when pressed. This balance matters because over hydrated dough will spread during baking and lose its edge, while under hydrated dough will crack and be hard to fold. If you overshoot, chill the dough and gently knead in a dusting of flour. Keep the dough cold for a flakier result.
- Begin to fold and pleat the edges of the crust over the sweet potatoes. Brush with olive oil or melted butter if desired then transfer to the oven. Bake for about 45 minutes until the crust is golden and the sweet potatoes are soft.: Forming the dough into a disc creates a compact shape that chills evenly, and wrapping it prevents it from drying out. As the dough chills, the butter firms and the gluten relaxes, which makes rolling easier and supports flakiness. You will feel the dough become firmer to the touch after chilling, and it should be cool but pliable when you take it out. A frequent misstep is skipping this chill time, which can make the crust shrink or tear during rolling. If your kitchen is warm, extend chilling by another 10 minutes to keep the butter solid.
- While the galette is baking, chop the parsley and walnuts together until both are finely minced. Transfer to a bowl and toss in a bit of salt. In a small skillet, add the olive oil and heat until hot. Place the crushed red pepper in a heat-safe bowl and pour the oil over. Let sit until the galette is done.: As you slice, you will notice thin translucent rounds stacking like coins, their edges glinting from the moisture. Even thickness is essential so all pieces roast evenly and soften at the same time. The olive oil and salt you add next will coat each slice, helping them brown rather than steam, and the repetitive motion of slicing can be almost meditative. A caution: be careful with the mandoline it creates uniformity quickly but can be dangerous without a guard. If slices vary, place thicker ones toward the center where they can have more heat and time to soften.
- Before serving, drizzle with the chili oil and sprinkle the parsley mixture generously.: When you toss the slices, the oil gives them a faint sheen and the salt begins to draw out moisture, which promotes caramelization in the oven. You should hear a soft swish as the slices move against each other, and the scent of olive oil will become more pronounced. This step is critical because if the slices are left dry, they will not brown properly and can end up with a dull texture. Over oiling will make them greasy, so aim for a light, even coating that lets edges crisp while centers stay tender.
- Heat your oven to 400˚F Remove the dough and transfer it to a lightly floured surface Roll into about a 14" circle and transfer to a sheet tray covered with parchment: Rolling the disk to roughly 14 inches gives you enough pastry to encase the filling with an attractive rim. Use light flouring to prevent sticking, and rotate the dough frequently so it rolls evenly. As you transfer it to parchment, the dough should glide smoothly and keep its round shape. When you lift, the surface should feel cool and slightly tacky, signifying the right balance of hydration. A common error is rolling too thin which can cause tears during folding, so aim for an even thickness that supports the layers of sweet potatoes .
- Starting from the center begin to layer the sweet potatoes around leaving about a 2" space on the edges Continue layering until you’ve used all the sweet potatoes: Layering from the center outward in slightly overlapping circles creates a pleasing visual pattern and helps the slices compact as they roast, creating a creamy texture. The gentle overlap ensures each slice browns at the exposed edge while staying tender where it touches its neighbor. You will hear a soft, dry rustle as the rounds settle into place, and the circle should build up to a shallow mound. Avoid stacking too thick in one spot or you risk undercooked pockets; spread slices evenly for uniform doneness.
- Begin to fold and pleat the edges of the crust over the sweet potatoes Brush with olive oil or melted butter if desired then transfer to the oven: Folding and pleating the edge protects the filling and creates the galette’s rustic appearance, while brushing the rim with olive oil or melted butter encourages deep browning and a glossy finish. As you pleat, the dough will feel pliable, and the pleats should sit snug against the filling. The sensory cue to look for is a golden gleam forming on the crust within the first 20 minutes of baking. If your pleats tear, simply patch with a small piece of extra dough to maintain the shape. Place the galette on the middle rack for even heat circulation.
- Bake for about 45 minutes until the crust is golden and the sweet potatoes are soft: As it roasts, you will notice aromas of toasty dough and caramelizing sweet potatoes , and the sound is the faint crackle of the crust as steam escapes. Visual cues are important the rim should be a deep golden brown and the exposed sweet potato edges should look slightly caramelized and glossy. The interior is done when a knife slides through the slices easily and they yield with a tender resistance. Underbaking will leave the center firm, while overbaking can dry the filling, so check toward the end of the cook time and tent with foil if the rim is browning too quickly.
- While the galette is baking chop the parsley and walnuts together until both are finely minced Transfer to a bowl and toss in a bit of salt: The fresh, herbaceous smell of chopped parsley and the warm nuttiness of toasted walnuts create a bright counterpoint to the baked filling. Mince them finely so they cling to the galette when sprinkled, and the texture will contrast nicely with the soft sweet potatoes . Tossing with a pinch of salt brings out their flavors. Avoid chopping too long or the herbs can become pasty, losing their fresh brightness.
- In a small skillet add the olive oil and heat until hot Place the crushed red pepper in a heat safe bowl and pour the oil over Let sit until the galette is done: Heating the olive oil and pouring it over the crushed red pepper blooms the spice releasing essential oils and creating a fragrant chili oil. The scent will become warm and inviting, and you will see tiny bubbles as the oil cools against the pepper. This infusion adds aroma and a controlled heat that contrasts the sweetness beneath. Watch the oil carefully while heating to avoid smoking, which will impart a bitter flavor. Allowing it to rest concentrates the flavor without additional cooking.
- Before serving drizzle with the chili oil and sprinkle the parsley mixture generously: The final assembly is about balance the glossy chili oil brings a shimmering heat that brightens each bite while the chopped parsley and walnuts add freshness and crunch. As you drizzle, the oil creates tiny specks of red that catch the light, and the scent of warmed pepper rises. Serve slightly warm so the textural contrasts are at their best the crust remains crisp and the filling is tender. A mistake to avoid is drizzling too early, which can make the crust soggy; finish just before serving for best texture.
Notes
- Whole grain forward: Increase the ratio of whole wheat flour slightly for a nuttier crust, chill a touch longer, and expect a heartier texture that pairs well with the galette’s sweet filling.
- Herb swap: If you want a different herbal profile, try finely chopping fresh thyme or chives in place of some of the parsley for a subtle aromatic shift without changing the balance.
- Nut alternatives: Substitute toasted almonds or pecans for the walnuts to vary texture and flavor while keeping the crunchy contrast intact.
- Oil finish intensity: Adjust the amount of crushed red pepper in the chili oil to dial heat up or down, letting the oil sit longer for a more intense infusion.
- Make ahead: Prepare the dough a day ahead and keep it wrapped in the fridge, or assemble the galette on parchment and refrigerate before baking to save time on the day of serving.