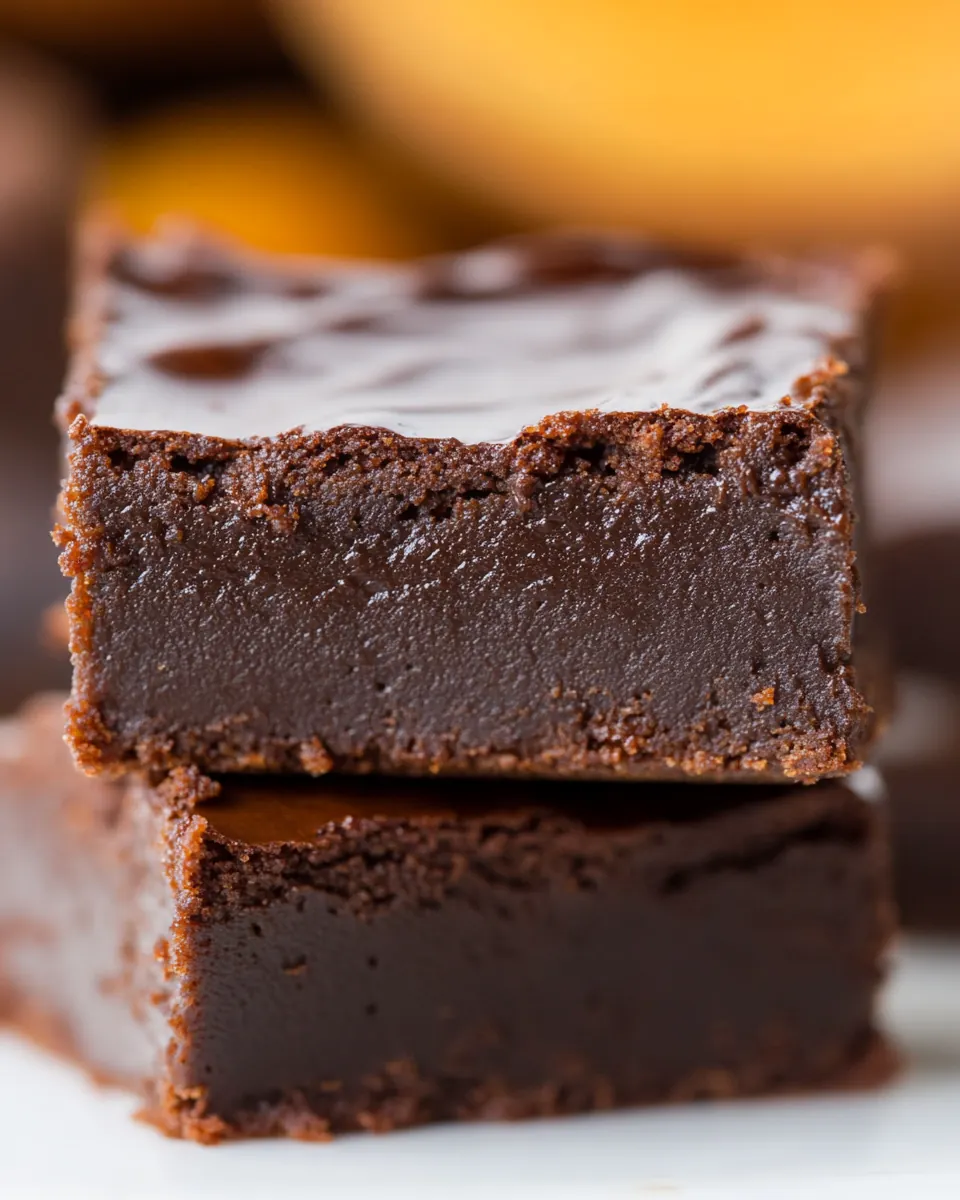
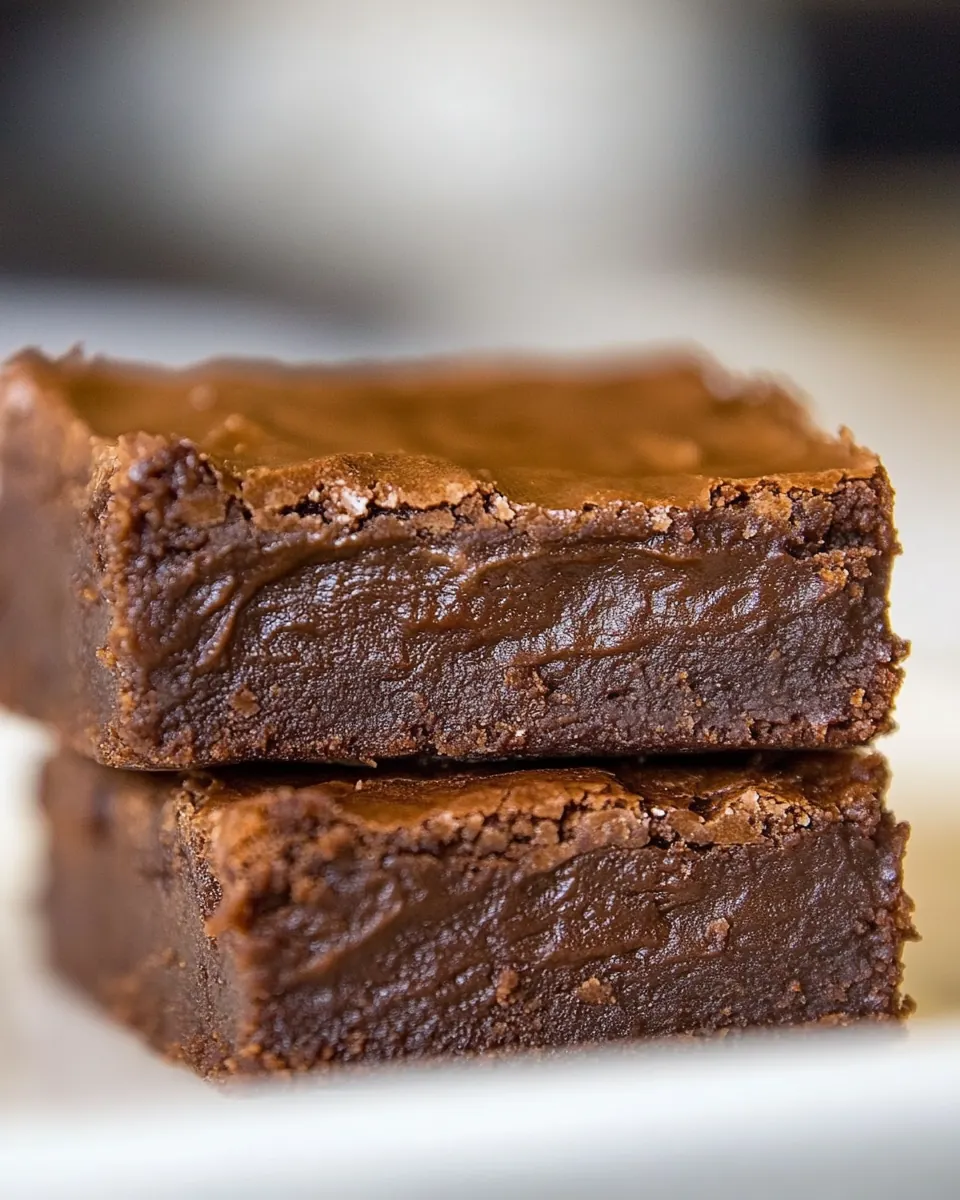
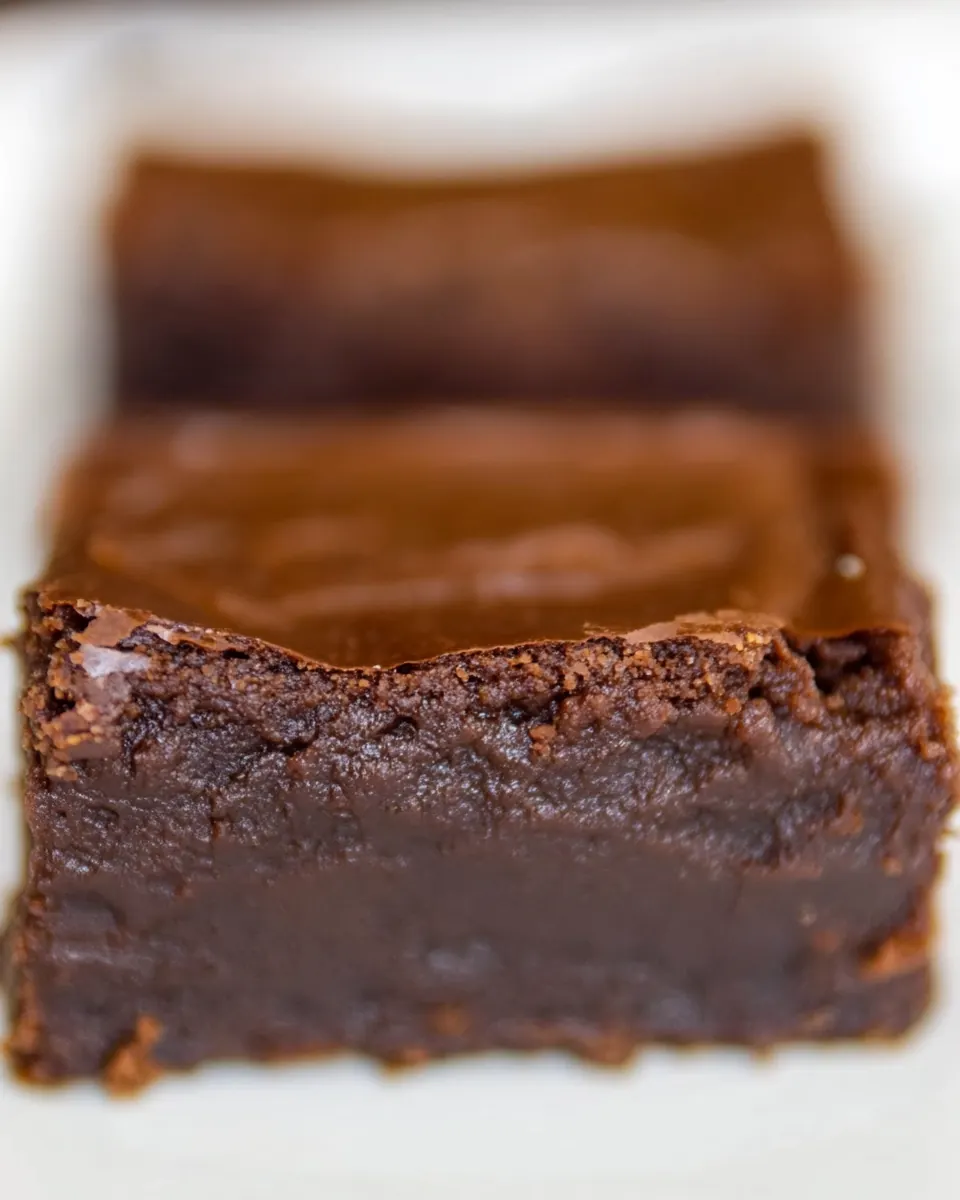
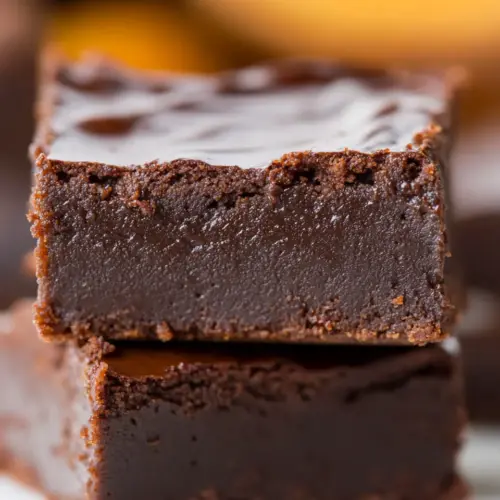
Sweet Potato Brownies
Sweet Potato Brownies started showing up in my life the autumn I wanted dessert to feel like a cozy hug rather than a guilty secret. I remember the first batch I made after a Sunday market visit, arms full of vibrant sweet potato and a craving for chocolate comfort that did not rely on butter or eggs. The texture surprised me, tender and fudgy, and the aroma that filled my kitchen was earthy and warm, making the whole house smell like a tiny bakery.
Over time I refined the mix so the flavors sing together without being fussy. These bars became my go to when friends popped by unexpectedly, or when I needed a portable treat for a picnic. I love how the recipe can be simple and forgiving, turning pantry staples like cocoa powder and flour into something special. When I bring a pan to gatherings people always ask what is in them, and I enjoy saying they are a little bit sneaky and wholly satisfying.
Recipe Snapshot
30 mins
10 mins
20 mins
Easy
150 kcal
American
Vegan, Low FODMAP
Desserts
8-inch baking pan, Parchment paper, Mixing bowl, Whisk or spatula, Measuring cups and spoons
What You’ll Enjoy About This Sweet Potato Brownies
1. Surprisingly rich and naturally moist
I find these Sweet Potato Brownies stand out because the sweet potato brings real moisture and body, so you get a fudgy center without heavy dairy or eggs. I especially appreciate that the crumb stays tender yet cohesive, which means you can slice them neatly for guests. The mouthfeel is dense in the best way, offering chocolate notes that are balanced rather than cloying.
2. Pantry friendly and flexible
One of the things I tell friends is that this recipe is forgiving. You can use different types of flour mentioned in the ingredients and still end up with a winning bite. That flexibility makes it a go to on busy evenings when I want dessert fast. I also like that the recipe plays nicely with allergy friendly subs called out in the ingredient list, so it’s inclusive without compromising taste.
3. Quick to pull together
From my experience, the list of actions is short and the assembly is intuitive. The batter comes together in minutes once you have softened the peanut or almond butter, so these are perfect for nights when you crave chocolate but do not want a long baking session. I often admire how the oven does the heavy lifting while I tidy up or prepare a cup of tea.
4. Textural contrast and optional add ins
The recipe’s optional mini chocolate chips add pockets of melty goodness and a little spark of texture that elevates each bite. I like sprinkling a few extra chips on top before baking so the finished squares look irresistible. That little touch turns a humble pan of batter into something that feels celebratory.
5. Great for seasonal baking
Because of the sweet potato, these brownies feel right for cooler months, yet they are easy enough for any time you want cozy dessert vibes. I often bring them to fall gatherings, and they pair well with warm beverages. The simplicity and flavor make them a recipe I return to again and again.
Ingredients to Make Sweet Potato Brownies
These ingredients are chosen to build fudgy, chocolate forward bars without relying on eggs or heavy dairy. The core idea is balance: the sweet potato provides moisture and natural sweetness, the nut butter adds richness and structure, while the cocoa powder delivers confident chocolate flavor. Flour and baking soda give lift and texture, and a touch of salt sharpens the overall profile. Each player has a job, so the finished brownies feel indulgent but approachable.
- 3/4 cups sweet potato puree: Adds natural moisture and a subtly sweet, earthy flavor that keeps the brownies dense and fudgy; pureed texture helps bind the batter and reduces the need for excess oil or eggs.
- 1 cup peanut or almond butter, or allergy-friendly sub: Provides rich, creamy fat and pronounced nutty taste while acting as a binder and tenderizer for structure; offers protein and can be swapped for allergy–friendly alternatives without altering texture much.
- 1 tsp pure vanilla extract: Imparts a warm, aromatic flavor that brightens and balances the richness of chocolate and nuts; helps enhance overall sweetness perception without adding sugar.
- 6 tbsp flour (Oat, white, or spelt flour work. Readers reported success with almond flour): Contributes structure and lightness by absorbing moisture and forming the crumb; choice of flour influences texture—oat and spelt add chew, white keeps them classic, almond makes them slightly denser.
- 1/2 cup mini chocolate chips + more for the top (optional): Adds bursts of melty chocolate throughout and optional topping for texture contrast and intensified chocolate flavor; mini size distributes evenly without weighing down the batter.
- 2/3 cups sugar (for sugar free, try these Keto Brownies): Provides primary sweetness to balance bitter cocoa and earthy sweet potato notes; amount can be adjusted or substituted for lower-sugar alternatives to change glycemic impact and final sweetness.
- 6 tbsp cocoa powder: Delivers deep chocolate flavor and rich color while contributing slight dryness that the sweet potato and nut butter balance; intensity and unsweetened form control overall chocolate bitterness.
- 1 1/2 tsp baking soda: Acts as a leavening agent to create gentle rise and prevent overly dense brownies while reacting with acidic components for tenderness; measured small to preserve fudgy texture.
- 1/8 tsp salt: Enhances and balances flavors by cutting sweetness and deepening chocolate notes; small amount helps accentuate other ingredients without making the batter salty.
Step by Step Guide for Sweet Potato Brownies

These instructions will guide you through each stage with sensory cues and troubleshooting tips so you end with fudgy, perfectly set brownies. Take your time with texture and temperature, and you will be rewarded with bars that cut cleanly and taste even better the next day.
- If using homemade sweet potato puree, see how to make it above. To make the brownies, start by preheating the oven to 325 F. Line an 8-inch pan with parchment, or grease well. If not easily stir-able, gently heat nut butter to soften. Whisk it with the sweet potato and vanilla until smooth. Stir all remaining ingredients together (making sure the salt and baking soda are evenly incorporated), then pour dry into wet. Stir to form a batter. Smooth into the baking pan, scooping out all traces of batter. Use a second sheet of parchment to really smooth everything down. Bake 20 minutes. They should look underdone when you take them out. The brownies firm up as they cool. If for some reason yours are too gooey after cooling, loosely cover and refrigerate a few hours. Frost if desired.: The aroma of roasted sweet potato is warm and slightly caramelized, signaling a deep flavor base; this matters because homemade puree often contains less water and more body, which yields a richer batter. If your puree is too loose, simmer it briefly until it thickens, otherwise the brownies can be overly wet. A common mistake is skipping smoothing or mashing, which leaves fibrous bits that disrupt the fudgy texture.
- To make the brownies start by preheating the oven to 325 F: You may notice the warm air and quiet hum of the oven as it comes to temperature, and an accurate oven ensures even bake and set. Allowing a full preheat means the exterior begins setting immediately, which helps the top form without overbaking the center. Do not under-preheat because inconsistent oven heat causes uneven rise and a gummy center.
- Line an 8-inch pan with parchment or grease well: When you press the parchment into the pan you should feel it conform and see smooth edges, making removal effortless after cooling; this technique prevents sticking and keeps the edges neat. Greasing well alone can work, but parchment is safer for clean slices. Avoid skipping parchment, as the brownies can adhere and break apart when you try to lift them out.
- If not easily stir-able gently heat nut butter to soften: Warm nut butter should smell toasty and feel silky when stirred, which helps it blend seamlessly with the sweet potato . I heat briefly in the microwave in short bursts, stirring between bursts to avoid overheating. A mistake people make is heating too long, changing the oil separation and affecting texture.
- Whisk it with the sweet potato and vanilla until smooth: As you whisk, observe the batter turning glossy and homogeneous with an even chocolate hue once combined with the cocoa; this smoothness indicates proper emulsification and helps prevent pockets of dry flour later. If lumps remain, continue whisking gently until the mixture is uniform. Overwhisking can incorporate too much air, which alters the fudgy result.
- Stir all remaining ingredients together making sure the salt and baking soda are evenly incorporated: When you combine the dry ingredients you should see a uniformly dark powder, with the baking soda and salt dissolved into the mix; this evenness helps the brownies rise and taste balanced. Sifting helps, but thorough stirring also does the job. A common pitfall is uneven distribution, which creates salty pockets or uneven lift.
- Then pour dry into wet: Pouring the dry into the wet should create a denser batter that falls slowly from your spoon, not runny or crumbly; this texture means hydration is balanced and the bars will be moist yet set. Use a folding motion to integrate without encouraged overmixing. A typical error is dumping everything in and aggressively beating, producing a tougher crumb.
- Stir to form a batter: At this stage the batter should be glossy, slightly viscous, and coat the spatula uniformly, giving you visual confirmation of proper mixing; the cocoa aroma will also intensify. Stop stirring when no streaks of flour remain. Overworking the batter is a frequent mistake that tightens the structure and reduces tenderness.
- Smooth into the baking pan scooping out all traces of batter: As you scrape the batter in, you will feel it spread smoothly under the spatula and observe a uniform surface, which helps even baking. For consistent height, level the top carefully, and use a second parchment to press and perfect the top if desired. If you leave pockets of batter or ridges, the brownies may bake unevenly and produce taller peaks and undercooked valleys.
- Use a second sheet of parchment to really smooth everything down: Pressing with a second parchment creates an even, glossy top and ensures neat slices once cooled; it also minimizes air pockets. The gentle pressure evens thickness so the interior bakes uniformly, reducing the chance of gooey spots. Avoid pressing too hard, as that can compact the batter excessively and change texture.
- Bake 20 minutes: You will hear the oven hum and see the top set into a matte finish while edges pull slightly away from the pan, visual cues the bake is progressing properly. The center should still look slightly underdone and glossy, which is perfect because it sets as the brownies cool. Remove them promptly because overbaking dries the crumb, a common mistake when timing is overly generous.
- They should look underdone when you take them out: The surface will have a slight sheen and the middle will jiggle faintly, signs that residual heat will finish the set while preserving fudge like texture; this technique keeps them moist. If you wait for a toothpick to come out completely clean you risk a drier result, so trust the visual cues. A typical error is leaving them in until fully firm, which sacrifices fudginess.
- The brownies firm up as they cool: Cooling transforms a glossy, soft center into a sliceable, dense fudgy bar, and you should notice aromas mellow and intensify as they rest. For clean cuts wait until they reach near room temperature; chilling helps if you need to slice sooner. Cutting too early causes crumbling, that is the most frequent mistake at this stage.
- If for some reason yours are too gooey after cooling loosely cover and refrigerate a few hours: Chilling tightens the structure, making very gooey brownies sliceable and improving clean presentation; you will also see flavors meld and deepen during this rest. Use a loose cover to prevent condensation from making the top sticky. Avoid prolonged refrigeration beyond a day without proper sealing, because the edges can pick up fridge odors.
- Frost if desired: A thin frosting layer will add contrast and visual polish, and when spread the frosting should feel smooth and set to the touch after a short rest; I usually pick a simple glaze so it does not overpower the chocolate sweet potato notes. If you frost while still warm the topping may slide or melt, so wait until cooled. A common mistake is adding thick frosting that masks the delicate balance built into the recipe.
Tips for Success
I like to think of these tips as the small details that dramatically improve your results. They focus on texture, timing, and those little swaps that keep the brownies reliable every time. Follow them and you will get consistent, fudgy bars that look as good as they taste.
- Warm nut butter slightly Warm the peanut or almond butter just until stirrable to make blending effortless and to avoid lumps in the batter.
- Use thick sweet potato puree If your sweet potato puree is watery, gently simmer it to thicken so the batter holds together and the brownies are not soggy.
- Do not overmix Stir until combined to avoid developing gluten in the flour, which keeps the brownies tender rather than chewy.
- Trust the underdone look Remove the pan when the center still jiggles slightly, as residual heat finishes the bake, preserving fudginess.
- Sift cocoa if needed Sifting prevents lumps and ensures the chocolate flavor distributes evenly through the batter.
- Chill briefly for neat slices If you need to slice quickly, refrigerate for a couple of hours to firm the brownies for clean cuts.
Best Served With
These brownies are versatile and can be served warm or at room temperature, making them great for casual snacks or dessert plates. They pair well with beverages and can be dressed up for gatherings. Below are ways I like to present them, plus storage notes and occasion ideas.
- Warm with a warm beverage Serve a warm square with a hot cup of tea or coffee for an afternoon treat, the steam accentuates the chocolate aroma and makes each bite feel indulgent.
- Room temperature for gatherings Let the brownies cool fully and arrange on a platter for parties, they are easy for guests to grab and are sturdy for transport to potlucks.
- Chilled for neat presentation If you want clean edges for a dessert plate, chill the pan for a couple of hours, then slice with a hot knife wiped between cuts to keep slices pristine.
- Packable for picnics These bars travel well in a container lined with parchment, making them a convenient dessert to bring to outdoor meals or casual meet ups.
- Occasion ideas I often bring them to fall gatherings or serve them during cozy weekend brunches because the sweet potato lends a seasonal touch, yet they are equally appropriate for everyday dessert.
- Storage tips Store in an airtight container at room temperature for a day or two, or refrigerate for longer storage; if refrigerated, allow them to come close to room temperature before serving for best texture.
FAQ
Conclusion
These Sweet Potato Brownies are special because they deliver intense chocolate flavor with a moist, fudgy texture thanks to the sweet potato and nut butter. Try them when you want an easy, pantry friendly dessert that feels both cozy and a little unexpected. They are simple to make, forgiving in technique, and versatile for gatherings or casual snacking. I hope you give them a try and find they become a favorite for fall baking or anytime you want a comforting sweet treat.
Sweet Potato Brownies
Equipment
- 8 inch baking pan
- Parchment Paper
- Mixing Bowl
- Whisk or spatula
- Measuring Cups and Spoons
Ingredients
- 3/4 cups sweet potato puree Adds natural moisture and a subtly sweet, earthy flavor that keeps the brownies dense and fudgy; pureed texture helps bind the batter and reduces the need for excess oil or eggs.
- 1 cup peanut or almond butter, or allergy-friendly sub Provides rich, creamy fat and pronounced nutty taste while acting as a binder and tenderizer for structure; offers protein and can be swapped for allergy-friendly alternatives without altering texture much.
- 1 tsp pure vanilla extract Imparts a warm, aromatic flavor that brightens and balances the richness of chocolate and nuts; helps enhance overall sweetness perception without adding sugar.
- 6 tbsp flour (Oat, white, or spelt flour work. Readers reported success with almond flour) Contributes structure and lightness by absorbing moisture and forming the crumb; choice of flour influences texture—oat and spelt add chew, white keeps them classic, almond makes them slightly denser.
- 1/2 cup mini chocolate chips + more for the top, optional Adds bursts of melty chocolate throughout and optional topping for texture contrast and intensified chocolate flavor; mini size distributes evenly without weighing down the batter.
- 2/3 cups sugar (for sugar free, try these Keto Brownies) Provides primary sweetness to balance bitter cocoa and earthy sweet potato notes; amount can be adjusted or substituted for lower-sugar alternatives to change glycemic impact and final sweetness.
- 6 tbsp cocoa powder Delivers deep chocolate flavor and rich color while contributing slight dryness that the sweet potato and nut butter balance; intensity and unsweetened form control overall chocolate bitterness.
- 1 1/2 tsp baking soda Acts as a leavening agent to create gentle rise and prevent overly dense brownies while reacting with acidic components for tenderness; measured small to preserve fudgy texture.
- 1/8 tsp salt Enhances and balances flavors by cutting sweetness and deepening chocolate notes; small amount helps accentuate other ingredients without making the batter salty.
Instructions
- If using homemade sweet potato puree, see how to make it above. To make the brownies, start by preheating the oven to 325 F. Line an 8-inch pan with parchment, or grease well. If not easily stir-able, gently heat nut butter to soften. Whisk it with the sweet potato and vanilla until smooth. Stir all remaining ingredients together (making sure the salt and baking soda are evenly incorporated), then pour dry into wet. Stir to form a batter. Smooth into the baking pan, scooping out all traces of batter. Use a second sheet of parchment to really smooth everything down. Bake 20 minutes. They should look underdone when you take them out. The brownies firm up as they cool. If for some reason yours are too gooey after cooling, loosely cover and refrigerate a few hours. Frost if desired.: The aroma of roasted sweet potato is warm and slightly caramelized, signaling a deep flavor base; this matters because homemade puree often contains less water and more body, which yields a richer batter. If your puree is too loose, simmer it briefly until it thickens, otherwise the brownies can be overly wet. A common mistake is skipping smoothing or mashing, which leaves fibrous bits that disrupt the fudgy texture.
- To make the brownies start by preheating the oven to 325 F: You may notice the warm air and quiet hum of the oven as it comes to temperature, and an accurate oven ensures even bake and set. Allowing a full preheat means the exterior begins setting immediately, which helps the top form without overbaking the center. Do not under-preheat because inconsistent oven heat causes uneven rise and a gummy center.
- Line an 8-inch pan with parchment or grease well: When you press the parchment into the pan you should feel it conform and see smooth edges, making removal effortless after cooling; this technique prevents sticking and keeps the edges neat. Greasing well alone can work, but parchment is safer for clean slices. Avoid skipping parchment, as the brownies can adhere and break apart when you try to lift them out.
- If not easily stir-able gently heat nut butter to soften: Warm nut butter should smell toasty and feel silky when stirred, which helps it blend seamlessly with the sweet potato . I heat briefly in the microwave in short bursts, stirring between bursts to avoid overheating. A mistake people make is heating too long, changing the oil separation and affecting texture.
- Whisk it with the sweet potato and vanilla until smooth: As you whisk, observe the batter turning glossy and homogeneous with an even chocolate hue once combined with the cocoa; this smoothness indicates proper emulsification and helps prevent pockets of dry flour later. If lumps remain, continue whisking gently until the mixture is uniform. Overwhisking can incorporate too much air, which alters the fudgy result.
- Stir all remaining ingredients together making sure the salt and baking soda are evenly incorporated: When you combine the dry ingredients you should see a uniformly dark powder, with the baking soda and salt dissolved into the mix; this evenness helps the brownies rise and taste balanced. Sifting helps, but thorough stirring also does the job. A common pitfall is uneven distribution, which creates salty pockets or uneven lift.
- Then pour dry into wet: Pouring the dry into the wet should create a denser batter that falls slowly from your spoon, not runny or crumbly; this texture means hydration is balanced and the bars will be moist yet set. Use a folding motion to integrate without encouraged overmixing. A typical error is dumping everything in and aggressively beating, producing a tougher crumb.
- Stir to form a batter: At this stage the batter should be glossy, slightly viscous, and coat the spatula uniformly, giving you visual confirmation of proper mixing; the cocoa aroma will also intensify. Stop stirring when no streaks of flour remain. Overworking the batter is a frequent mistake that tightens the structure and reduces tenderness.
- Smooth into the baking pan scooping out all traces of batter: As you scrape the batter in, you will feel it spread smoothly under the spatula and observe a uniform surface, which helps even baking. For consistent height, level the top carefully, and use a second parchment to press and perfect the top if desired. If you leave pockets of batter or ridges, the brownies may bake unevenly and produce taller peaks and undercooked valleys.
- Use a second sheet of parchment to really smooth everything down: Pressing with a second parchment creates an even, glossy top and ensures neat slices once cooled; it also minimizes air pockets. The gentle pressure evens thickness so the interior bakes uniformly, reducing the chance of gooey spots. Avoid pressing too hard, as that can compact the batter excessively and change texture.
- Bake 20 minutes: You will hear the oven hum and see the top set into a matte finish while edges pull slightly away from the pan, visual cues the bake is progressing properly. The center should still look slightly underdone and glossy, which is perfect because it sets as the brownies cool. Remove them promptly because overbaking dries the crumb, a common mistake when timing is overly generous.
- They should look underdone when you take them out: The surface will have a slight sheen and the middle will jiggle faintly, signs that residual heat will finish the set while preserving fudge like texture; this technique keeps them moist. If you wait for a toothpick to come out completely clean you risk a drier result, so trust the visual cues. A typical error is leaving them in until fully firm, which sacrifices fudginess.
- The brownies firm up as they cool: Cooling transforms a glossy, soft center into a sliceable, dense fudgy bar, and you should notice aromas mellow and intensify as they rest. For clean cuts wait until they reach near room temperature; chilling helps if you need to slice sooner. Cutting too early causes crumbling, that is the most frequent mistake at this stage.
- If for some reason yours are too gooey after cooling loosely cover and refrigerate a few hours: Chilling tightens the structure, making very gooey brownies sliceable and improving clean presentation; you will also see flavors meld and deepen during this rest. Use a loose cover to prevent condensation from making the top sticky. Avoid prolonged refrigeration beyond a day without proper sealing, because the edges can pick up fridge odors.
- Frost if desired: A thin frosting layer will add contrast and visual polish, and when spread the frosting should feel smooth and set to the touch after a short rest; I usually pick a simple glaze so it does not overpower the chocolate sweet potato notes. If you frost while still warm the topping may slide or melt, so wait until cooled. A common mistake is adding thick frosting that masks the delicate balance built into the recipe.
Notes
- Warm nut butter slightly Warm the peanut or almond butter just until stirrable to make blending effortless and to avoid lumps in the batter.
- Use thick sweet potato puree If your sweet potato puree is watery, gently simmer it to thicken so the batter holds together and the brownies are not soggy.
- Do not overmix Stir until combined to avoid developing gluten in the flour, which keeps the brownies tender rather than chewy.
- Trust the underdone look Remove the pan when the center still jiggles slightly, as residual heat finishes the bake, preserving fudginess.
- Sift cocoa if needed Sifting prevents lumps and ensures the chocolate flavor distributes evenly through the batter.
- Chill briefly for neat slices If you need to slice quickly, refrigerate for a couple of hours to firm the brownies for clean cuts.