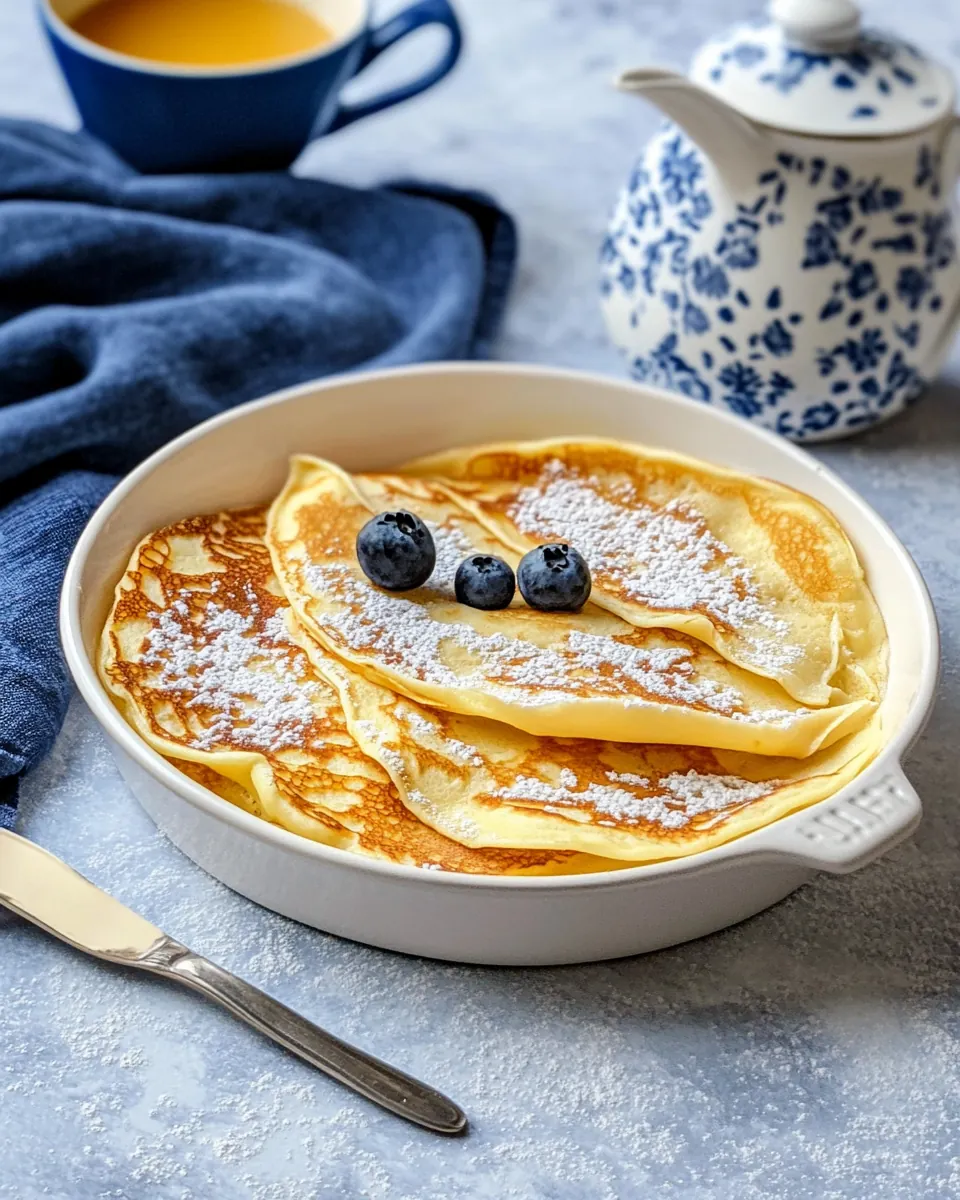
Swedish Pancakes
Swedish Pancakes have been my secret for turning slow weekend mornings into tiny celebrations, a recipe I first learned from a friend who grew up in Stockholm. The first time I made them, the kitchen filled with a warm, eggy aroma that somehow felt both familiar and a little exotic, and I knew these delicate, thin pancakes would become a regular request at our table.
I remember the sound of the batter as it hit the hot pan, a soft hiss that promised crisp edges and tender centers. Over the years I have adjusted the balance of milk and flour to keep the texture impossibly thin yet still sturdy enough to hold a spoonful of jam or a scatter of fresh fruit. Each time I make Swedish Pancakes, I think of slow conversation, sticky jam on fingertips, and the comfort of an easy recipe that never demands perfection.
There are memories tied up in the little rituals: whisking the eggs until they are pale and slightly frothy, melting the butter until it smells nutty, and tilting the pan just so to get that classic lace like edge. Guests often ask for the secret, expecting a complicated technique, and I smile because the truth is simple: patience, a hot pan, and good ingredients. When you serve these, you get an immediate payoff, people smiling and reaching across the table for another. That feeling is what keeps me coming back to this batter.
Recipe Snapshot
35 mins
10 mins
25 mins
Medium
200 kcal
Swedish
Gluten-Free, Low FODMAP
Breakfast
Nonstick Skillet, Whisk, Mixing Bowls, Spatula
Why You Need This Swedish Pancakes
They are effortlessly elegant
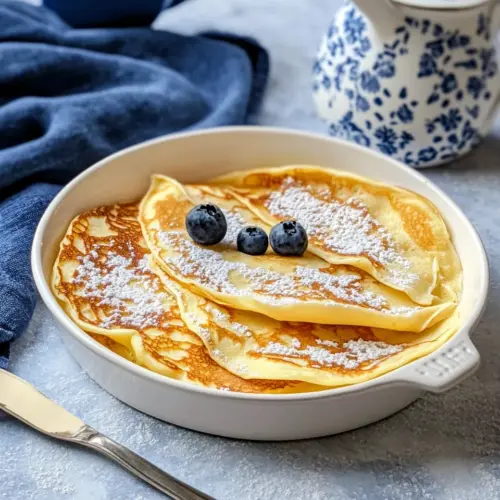
I love how Swedish Pancakes look like something special, even though they come together with pantry staples. Their thin, lacy edges and silky centers make a humble stack feel like a celebration, and I always enjoy the little nods of approval when someone tastes their first bite.
Speed with finesse
These pancakes are quick to make, and I appreciate recipes that let me spend more time at the table than by the stove. With a short whisk and a hot skillet, you get consistent results, which is why I reach for this batter on busy mornings when I want a treat without a big time commitment.
Versatility on the plate
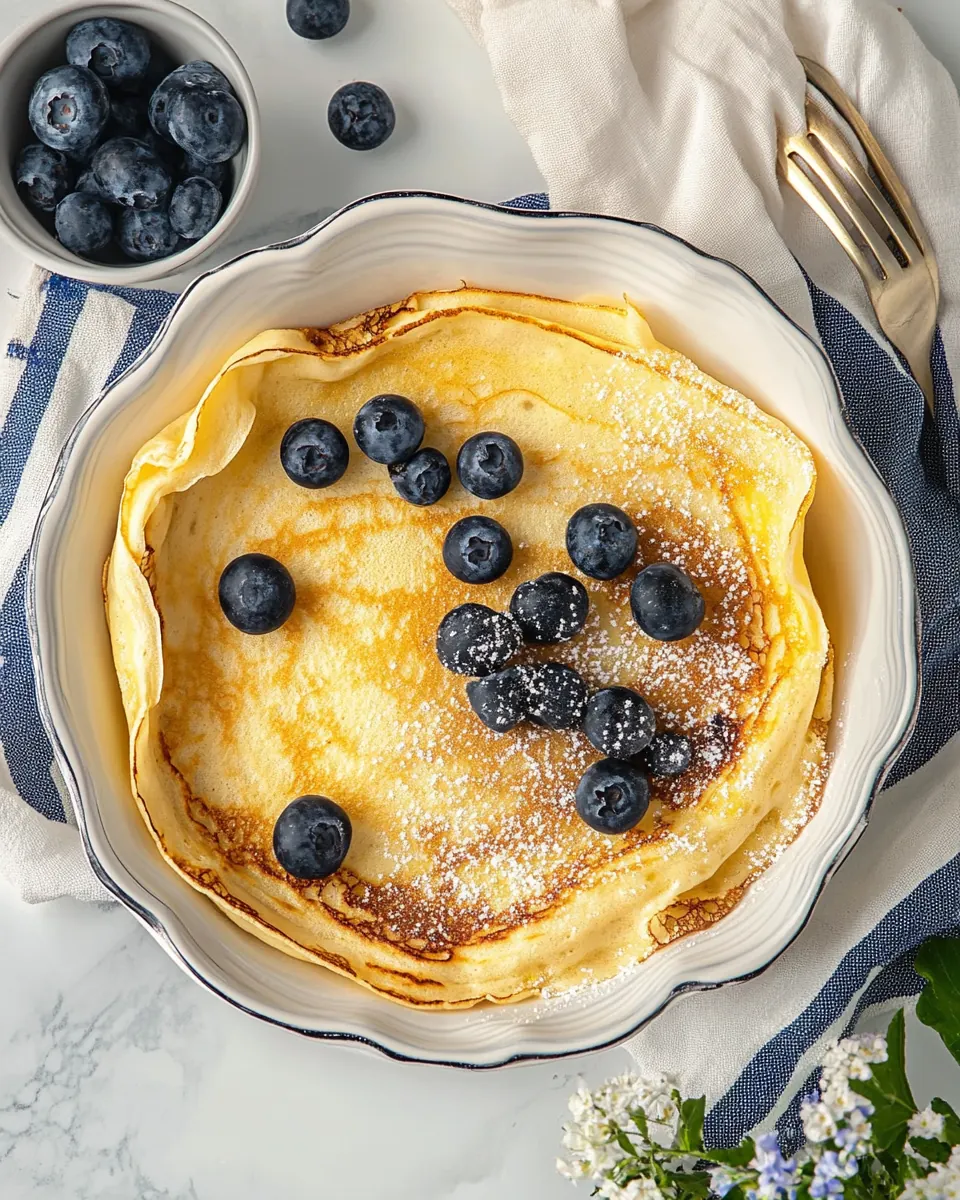
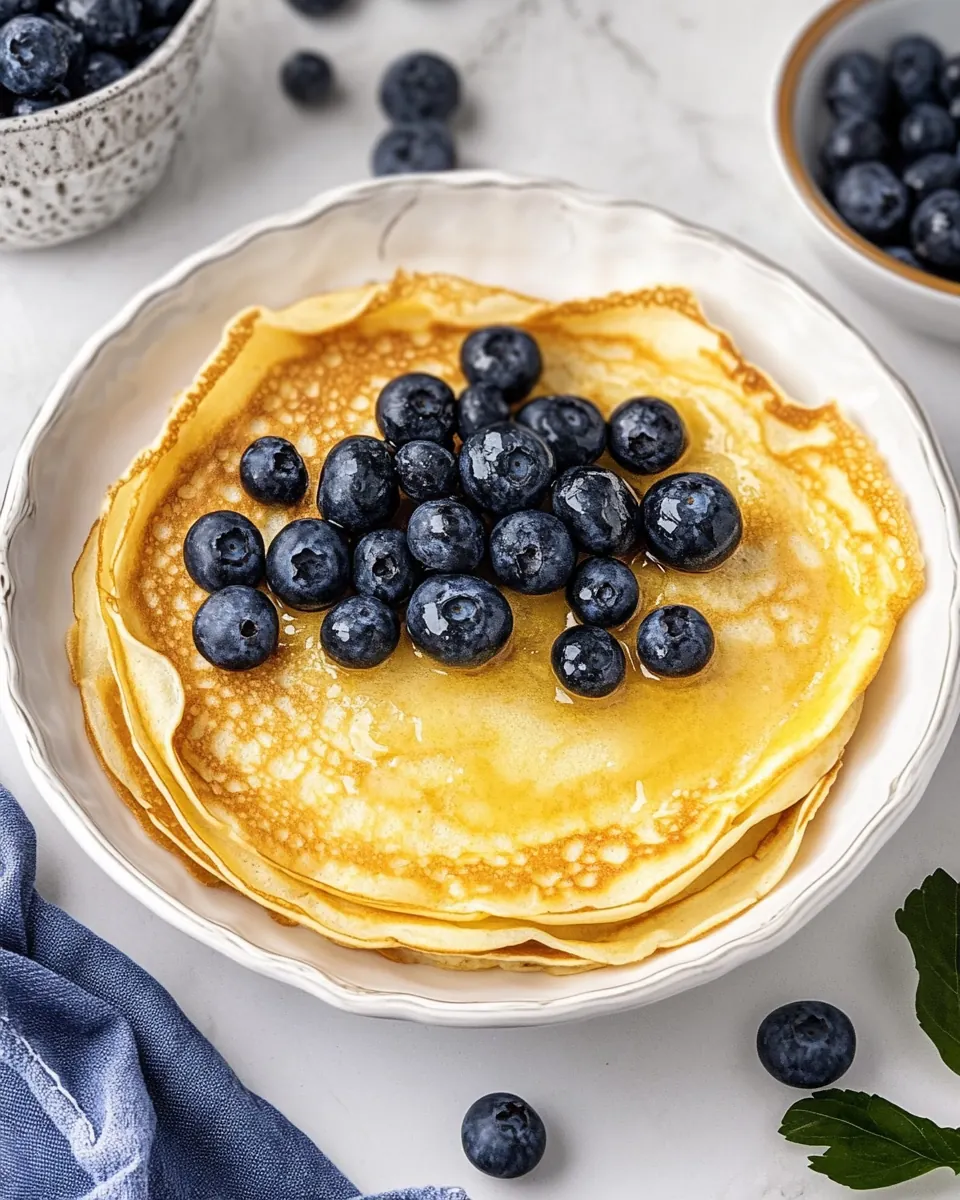
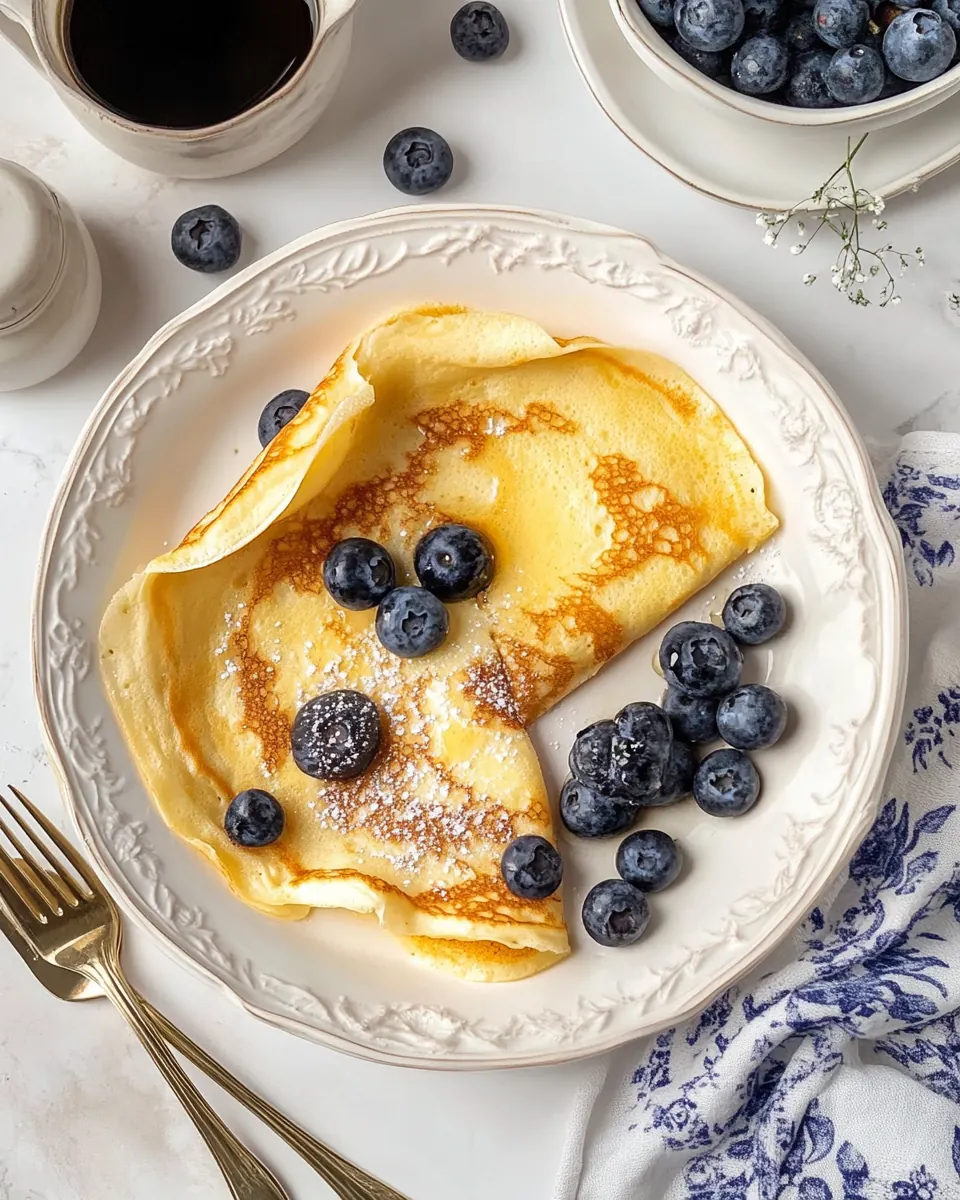
I often change the toppings depending on the season. In late summer I pile on sliced berries, while in winter a spoonful of jam or a dusting of sugar comforts everyone. Because the pancakes are mild and slightly sweet, they partner beautifully with both fruity and creamy toppings.
Gentle textures that please everyone
These are neither heavy nor flimsy, they have a delicate chew that makes them satisfyingly substantial without weighing you down. I love serving them to kids and adults alike, because they manage to feel indulgent and light at the same time.
Reliable technique
I appreciate that the method is forgiving. Even if your batter is a touch thick, a splash of milk fixes it. If your pan runs hot, a slightly lower flame gives you more control. Over time you learn to read the visual cues, and that predictability is something I always recommend to home cooks.
What You’ll Need for Swedish Pancakes
These ingredients form a simple, harmonious batter that yields thin, tender pancakes. The eggs add structure and richness, the milk creates a smooth batter and tender crumb, and the flour provides body. A touch of sugar brightens the flavor while a pinch of salt balances sweetness. Finally, melted butter brings silkiness and a toasty note, and more butter for cooking ensures the pancakes develop golden edges.
- 3 large eggs: Beat and incorporate structure and richness into the batter by providing protein and leavening support; whisk until smooth to help create a tender, cohesive pancake texture. Offer flavor depth and assist in browning when cooked on a hot griddle, contributing to a golden surface and slight lift.
- 1 1/4 cups whole milk: Moisten and thin the batter for proper pourability and cooking consistency while adding creamy richness that enhances mouthfeel. Temper the batter temperature and suspend dry ingredients for even mixing, helping achieve thin, flexible Swedish pancakes.
- 3/4 cup all-purpose flour: Bind and give body to the batter by supplying starches that set during cooking to form the pancake's body and structure. Absorb liquids for appropriate viscosity and contribute mild flavor and lightness when combined with eggs and milk.
- 1 1/2 tablespoons granulated sugar: Add gentle sweetness to balance flavors and enhance browning through caramelization on the cooking surface. Improve overall taste profile without overpowering, helping the pancakes develop a pleasant, slightly sweet finish.
- 1/4 teaspoons salt: Enhance and balance overall flavor by providing a subtle savory contrast that amplifies sweetness and other ingredients. Regulate taste perception to prevent the pancakes from tasting flat, while playing a minor role in chemical interactions during cooking.
- 1 1/2 tablespoons unsalted butter, melted (plus more for cooking): Enrich and add silkiness to the batter while providing fat that improves tenderness and flavor; melted form distributes evenly for consistent texture. Supply lubrication for cooking to reduce sticking and promote even browning when additional butter is used in the pan.
Instructions for Swedish Pancakes
These instructions walk you through making a smooth batter and cooking pancakes to a delicate golden finish. Read each step and trust your senses, you will learn the visual and auditory cues that signal perfect pancakes.
- In a medium bowl, whisk the eggs until well beaten.: The whisking produces a uniform, slightly frothy mixture that helps incorporate air into the batter, leading to lighter pancakes. You should notice the eggs lighten in color and the surface becomes a bit foamy. A common mistake is under whisking, which can leave streaks of yolk and uneven texture. Use a whisk and circular motion to fully combine whites and yolks, scraping the bowl so no pockets of egg remain.
- Add the milk to the eggs, whisk to combine.: Pouring the milk in slowly while whisking softens the eggs and creates a homogeneous liquid base, making it easier to incorporate the flour later. You will see the mixture thin and take on a uniform pale color. If you add the milk too quickly without whisking, separation can occur and the batter may be uneven. Keep whisking until there are no visible streaks of egg or milk, and the mixture flows smoothly off the whisk.
- In a separate bowl, mix the flour, sugar, and salt.: Dry mixing distributes the sweet and savory elements evenly, so each bite tastes balanced. The flour should look powdery and free of lumps, while the sugar and salt will be dispersed through the dry mix. A common issue is clumps in the flour, which can create pockets in the batter, so break up any lumps with a fork or sift if needed.
- Gradually mix the dry ingredients into the wet ingredients while whisking until the mixture is smooth. If it is too thick, incorporate a splash of milk to thin it out.: Adding the dry mix in stages prevents lumps and lets you monitor consistency, resulting in a silkier batter. Visually, the mixture should become glossy and pourable, without visible flour streaks. If you add all the flour at once, you risk clumping, which leads to an uneven texture. If the batter seems too viscous, add milk in teaspoon amounts until the batter runs smoothly off the whisk.
- Whisk in the melted butter until well combined.: The melted butter lends a velvety mouthfeel and a toasty aroma to the batter, and whisking it in emulsifies the fat into the mixture. You will smell a warm, buttery note and see the batter take on a slight sheen. If you add very hot butter, it can cook the eggs, causing bits to coagulate; allow the butter to cool slightly before combining. Ensure the butter is fully incorporated so the pancakes brown evenly and do not separate during cooking.
- Heat a nonstick skillet or griddle over medium heat. Lightly coat with butter.: A properly heated pan creates the quick set at the edges that forms the signature lacy border, and butter in the pan promotes even browning. The surface should shimmer but not smoke, and you may hear a soft sizzle when batter hits the pan. If the pan is too cool the pancakes will absorb fat and stay pale, while an overly hot pan will burn the exterior before the center cooks. Keep the heat steady and spread a thin film of butter with a paper towel or brush.
- Pour about 1/4 cup of batter onto the skillet, tilting the pan to spread the batter thinly.: The batter should glide and create a thin round that almost fills the pan, forming a uniform layer. As it spreads you will notice the edges begin to set quickly and tiny bubbles may appear across the surface. Pouring too much batter results in thick pancakes that do not cook through evenly, so aim for a light pour and tilt the pan to encourage an even, lace like edge.
- Cook for 1–2 minutes, until the edges are lightly browned and the top appears set.: During this stage the underside develops color and the top loses its glossy sheen, indicating readiness to flip. Look for delicate golden edges and a set surface, and listen for a gentle sizzle rather than a loud crackle. Flipping too early can tear the pancake, while waiting too long can overbrown the underside. Use a thin spatula to lift an edge and check the color before proceeding.
- Flip the pancake and cook for another minute until golden.: The second side cooks quickly, finishing the interior and creating a balanced golden tone. You should see an appetizing, even color and feel a slight spring when you press the center with the spatula. A common error is pressing down on the pancake while cooking, which flattens and dries it out. Allow it to cook with minimal handling so the texture stays tender and slightly springy.
- Transfer to a plate. Repeat with the remaining batter.: Stacking the pancakes on a warmed plate helps maintain temperature while you finish the batch, and the residual heat keeps them pliable. If you stack too many at once without a warm plate they can cool and lose some of their lacy charm. Keep the cooked pancakes covered loosely with foil or a clean towel if you need to hold them for a short time, this preserves warmth without trapping steam.
- Serve warm with your choice of toppings.: Warm pancakes are at their best, as toppings meld into the surface creating a luscious bite. Choose toppings that complement the mild sweetness, and you will notice jams soaking slightly into the surface while fresh fruit adds bright contrast. Serving them cold dulls the texture and flavor, so aim to plate them right away for the most satisfying experience.
Make It Your Own
I like to tweak small details to suit the mood of the morning, and you can easily adapt these pancakes to your tastes. Below are practical ideas to personalize the batter, presentation, and cooking approach so every batch feels a little different.
- Warm the milk slightly before adding for a silkier batter and a more tender crumb, but do not make it hot enough to cook the eggs when combined.
- Control the heat by testing with a small dollop of batter first; if it browns too quickly lower the temperature a touch to avoid overcoloring.
- Use unsalted butter so you control the sodium level, and add the extra cooking butter sparingly to keep edges crisp without greasiness.
- Thin the batter gradually with teaspoons of milk rather than large additions, this keeps you in control of the pourable consistency.
- Serve immediately on warmed plates so the pancakes remain soft and the toppings meld into the surface instead of cooling and firming up.
What Complements This Swedish Pancakes
These pancakes are wonderfully adaptable and pair well with a range of toppings and small plates. Below are ideas for accompaniments, serving occasions, and storage notes that help you plan a meal around these delicate crepes.
- Classic jam and sugar are simple and nostalgic, perfect for a relaxed weekend breakfast or brunch gathering where people can help themselves.
- Fresh fruit like sliced berries or stone fruit brightens the plate, making the pancakes suitable for spring and summer entertaining.
- Citrus curd or compote provides a tangy contrast to the buttery pancakes, elevating them for a special occasion breakfast or celebratory brunch.
- Yogurt or crème fraîche adds creaminess and slight tang, a lovely balance to sweet toppings for a more sophisticated bite.
- Family friendly meals these pancakes are great for holiday breakfasts, casual brunches, or Ramadan suhoor where a light, comforting dish is appreciated.
- Storage tips cool pancakes completely before stacking and wrap tightly, refrigerate for up to two days, and rewarm gently in a skillet or oven to retain texture.
- Seasonal pairing pair with bright summer fruits in warm months, and preserved fruit or compote in cooler months for a cozy twist.
FAQ
Conclusion
What makes this recipe special is how effortlessly it turns common pantry ingredients into something elegant and comforting. The thin, tender pancakes offer a balance of silkiness and crisp edges that invites both simple toppings and more composed accompaniments. I encourage you to try these pancakes on a weekend morning or for a relaxed brunch, letting the familiar routine of whisking and cooking become a small, satisfying ritual. Serve them warm, experiment with toppings you love, and enjoy the smiles as people reach for seconds.
Swedish Pancakes
Equipment
- nonstick skillet
- Whisk
- Mixing Bowls
- Spatula
Ingredients
- 3 large eggs Beat and incorporate structure and richness into the batter by providing protein and leavening support; whisk until smooth to help create a tender, cohesive pancake texture. Offer flavor depth and assist in browning when cooked on a hot griddle, contributing to a golden surface and slight lift.
- 1 1/4 cups whole milk Moisten and thin the batter for proper pourability and cooking consistency while adding creamy richness that enhances mouthfeel. Temper the batter temperature and suspend dry ingredients for even mixing, helping achieve thin, flexible Swedish pancakes.
- 3/4 cup all-purpose flour Bind and give body to the batter by supplying starches that set during cooking to form the pancake's body and structure. Absorb liquids for appropriate viscosity and contribute mild flavor and lightness when combined with eggs and milk.
- 1 1/2 tablespoons granulated sugar Add gentle sweetness to balance flavors and enhance browning through caramelization on the cooking surface. Improve overall taste profile without overpowering, helping the pancakes develop a pleasant, slightly sweet finish.
- 1/4 teaspoons salt Enhance and balance overall flavor by providing a subtle savory contrast that amplifies sweetness and other ingredients. Regulate taste perception to prevent the pancakes from tasting flat, while playing a minor role in chemical interactions during cooking.
- 1 1/2 tablespoons unsalted butter, melted (plus more for cooking) Enrich and add silkiness to the batter while providing fat that improves tenderness and flavor; melted form distributes evenly for consistent texture. Supply lubrication for cooking to reduce sticking and promote even browning when additional butter is used in the pan.
Instructions
- In a medium bowl, whisk the eggs until well beaten.: The whisking produces a uniform, slightly frothy mixture that helps incorporate air into the batter, leading to lighter pancakes. You should notice the eggs lighten in color and the surface becomes a bit foamy. A common mistake is under whisking, which can leave streaks of yolk and uneven texture. Use a whisk and circular motion to fully combine whites and yolks, scraping the bowl so no pockets of egg remain.
- Add the milk to the eggs, whisk to combine.: Pouring the milk in slowly while whisking softens the eggs and creates a homogeneous liquid base, making it easier to incorporate the flour later. You will see the mixture thin and take on a uniform pale color. If you add the milk too quickly without whisking, separation can occur and the batter may be uneven. Keep whisking until there are no visible streaks of egg or milk, and the mixture flows smoothly off the whisk.
- In a separate bowl, mix the flour, sugar, and salt.: Dry mixing distributes the sweet and savory elements evenly, so each bite tastes balanced. The flour should look powdery and free of lumps, while the sugar and salt will be dispersed through the dry mix. A common issue is clumps in the flour, which can create pockets in the batter, so break up any lumps with a fork or sift if needed.
- Gradually mix the dry ingredients into the wet ingredients while whisking until the mixture is smooth. If it is too thick, incorporate a splash of milk to thin it out.: Adding the dry mix in stages prevents lumps and lets you monitor consistency, resulting in a silkier batter. Visually, the mixture should become glossy and pourable, without visible flour streaks. If you add all the flour at once, you risk clumping, which leads to an uneven texture. If the batter seems too viscous, add milk in teaspoon amounts until the batter runs smoothly off the whisk.
- Whisk in the melted butter until well combined.: The melted butter lends a velvety mouthfeel and a toasty aroma to the batter, and whisking it in emulsifies the fat into the mixture. You will smell a warm, buttery note and see the batter take on a slight sheen. If you add very hot butter, it can cook the eggs, causing bits to coagulate; allow the butter to cool slightly before combining. Ensure the butter is fully incorporated so the pancakes brown evenly and do not separate during cooking.
- Heat a nonstick skillet or griddle over medium heat. Lightly coat with butter.: A properly heated pan creates the quick set at the edges that forms the signature lacy border, and butter in the pan promotes even browning. The surface should shimmer but not smoke, and you may hear a soft sizzle when batter hits the pan. If the pan is too cool the pancakes will absorb fat and stay pale, while an overly hot pan will burn the exterior before the center cooks. Keep the heat steady and spread a thin film of butter with a paper towel or brush.
- Pour about 1/4 cup of batter onto the skillet, tilting the pan to spread the batter thinly.: The batter should glide and create a thin round that almost fills the pan, forming a uniform layer. As it spreads you will notice the edges begin to set quickly and tiny bubbles may appear across the surface. Pouring too much batter results in thick pancakes that do not cook through evenly, so aim for a light pour and tilt the pan to encourage an even, lace like edge.
- Cook for 1–2 minutes, until the edges are lightly browned and the top appears set.: During this stage the underside develops color and the top loses its glossy sheen, indicating readiness to flip. Look for delicate golden edges and a set surface, and listen for a gentle sizzle rather than a loud crackle. Flipping too early can tear the pancake, while waiting too long can overbrown the underside. Use a thin spatula to lift an edge and check the color before proceeding.
- Flip the pancake and cook for another minute until golden.: The second side cooks quickly, finishing the interior and creating a balanced golden tone. You should see an appetizing, even color and feel a slight spring when you press the center with the spatula. A common error is pressing down on the pancake while cooking, which flattens and dries it out. Allow it to cook with minimal handling so the texture stays tender and slightly springy.
- Transfer to a plate. Repeat with the remaining batter.: Stacking the pancakes on a warmed plate helps maintain temperature while you finish the batch, and the residual heat keeps them pliable. If you stack too many at once without a warm plate they can cool and lose some of their lacy charm. Keep the cooked pancakes covered loosely with foil or a clean towel if you need to hold them for a short time, this preserves warmth without trapping steam.
- Serve warm with your choice of toppings.: Warm pancakes are at their best, as toppings meld into the surface creating a luscious bite. Choose toppings that complement the mild sweetness, and you will notice jams soaking slightly into the surface while fresh fruit adds bright contrast. Serving them cold dulls the texture and flavor, so aim to plate them right away for the most satisfying experience.
Notes
- Warm the milk slightly before adding for a silkier batter and a more tender crumb, but do not make it hot enough to cook the eggs when combined.
- Control the heat by testing with a small dollop of batter first; if it browns too quickly lower the temperature a touch to avoid overcoloring.
- Use unsalted butter so you control the sodium level, and add the extra cooking butter sparingly to keep edges crisp without greasiness.
- Thin the batter gradually with teaspoons of milk rather than large additions, this keeps you in control of the pourable consistency.
- Serve immediately on warmed plates so the pancakes remain soft and the toppings meld into the surface instead of cooling and firming up.