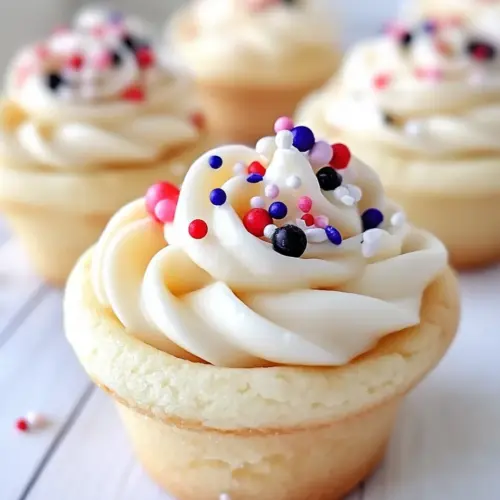
Sugar Cookie Cups
Sugar Cookie Cups have been a holiday party secret of mine for years, and the first time I brought them to a family gathering they vanished in minutes. I remember standing in a warm kitchen, laughing with my cousin while we pressed soft cookie dough into muffin tins, tasting a stray bit of cream cheese filling and trading stories about childhood bake sales. There is something about the tiny, handheld size that invites curiosity, and everyone loves a treat that feels a little fancy but is truly simple to make.
Over time I began to experiment with different fruits and fillings, learning which textures play best with that crisp cookie edge and the pillowy interior. I like serving a batch chilled, the filling set but still silky, with glossy berries stacked on top so each bite has a burst of freshness. When I make Sugar Cookie Cups for friends, whoever arrives first usually claims the biggest, most fruited one, and I do not blame them. These are the kind of dessert that sparks conversation and a few recipe requests, and they travel well to potlucks or afternoon tea.
Recipe Snapshot
27 mins
15 mins
12 mins
Medium
150 kcal
American
Gluten-Free, Low FODMAP
Desserts
Muffin tin, Nonstick spray, Mixing bowl, Sharp knife, Spoon or tart shaper
Why This Sugar Cookie Cups Shines
Perfect party portion
I love that Sugar Cookie Cups are already portioned, so guests can grab one without a fork. The compact size makes them ideal for buffets, and I always appreciate how little cleanup they require. When I host, the ease of assembly means I can chat with guests instead of being stuck at the counter.
Textural contrast that wows
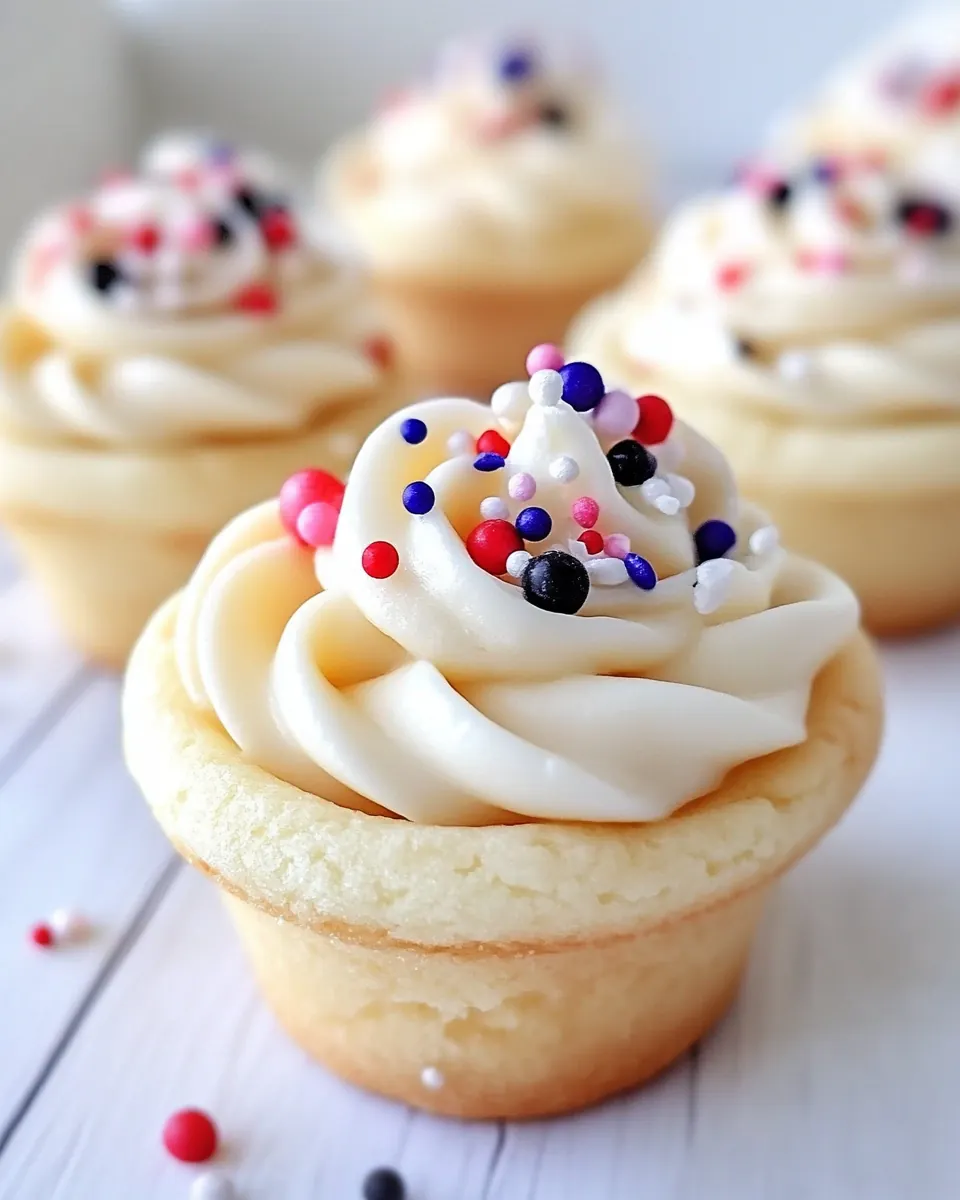
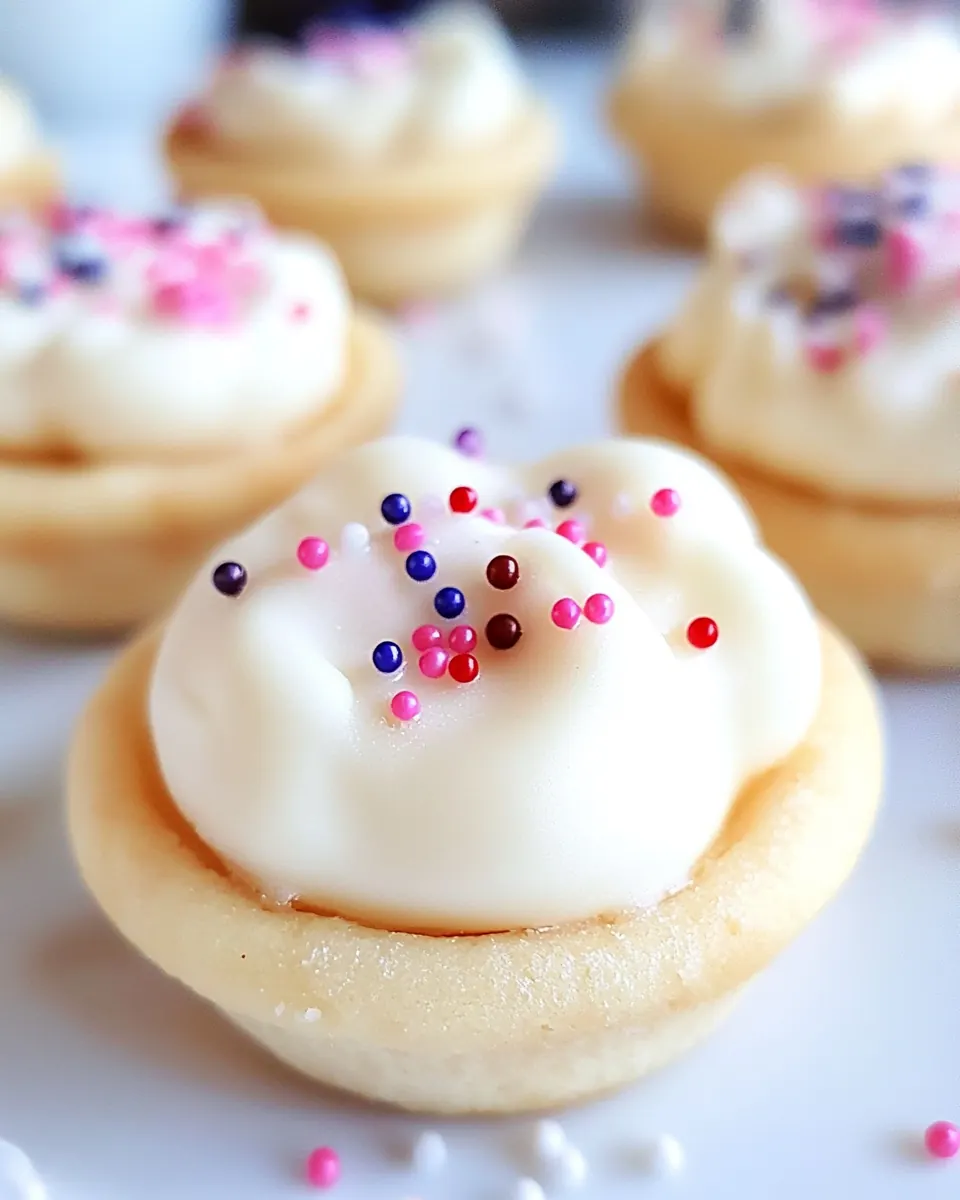
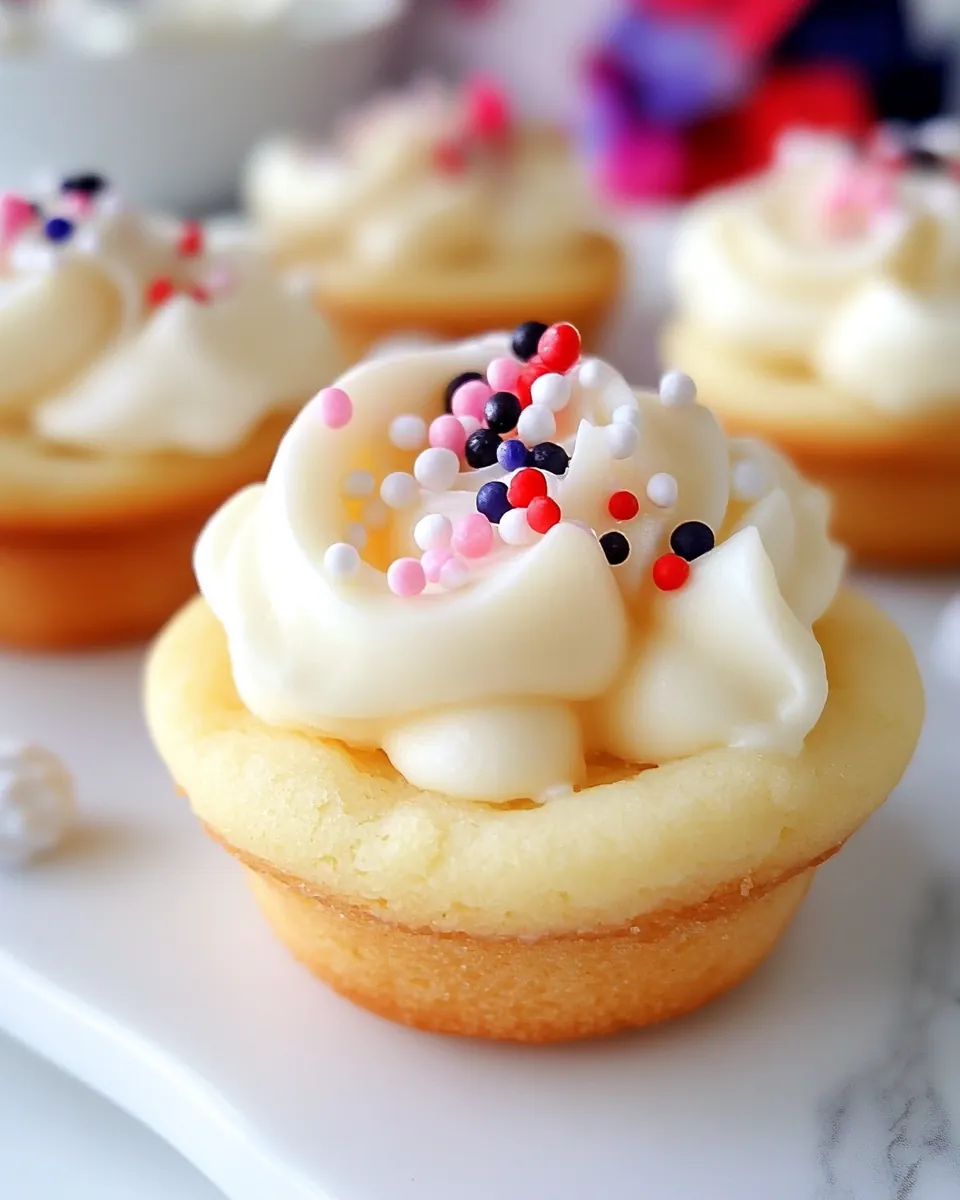
The crisp rim of the baked sugar cookie dough against a creamy cream cheese filling is what keeps people coming back. I learned that slightly pressing the dough up the sides creates a thin, golden shell that holds the filling without becoming soggy, which makes the bite lively and satisfying.
Endless customization
I find these cups incredibly adaptable. Fresh fruit on top brightens the richness, but you can swap in other no bake fillings for different occasions. That flexibility means I can make them for a spring brunch or an after dinner platter, and they still feel appropriate.
Great for make ahead
One of the reasons I keep this recipe in my entertaining rotation is that you can bake the shells a day in advance and assemble them when needed. Chilling the filled cups for an hour helps the filling set, which makes transport and presentation much easier, a trick I use whenever I’m bringing desserts to a potluck.
Straightforward ingredients
This recipe relies on pantry friendly items and one refrigerated tube of dough, so it is approachable even on busy days. I appreciate recipes that minimize fuss while still delivering on flavor, and these little cups strike that balance every time.
Main Ingredients for Sugar Cookie Cups
These ingredients are deliberately simple and work together to deliver crisp, buttery shells with a tangy, sweet filling and bright fruit on top. The star players are the ready made cookie base for structure, the cream cheese filling for richness, and the fresh fruit for a vibrant finish. Together they create contrast in texture and flavor, which is what makes these cups so memorable.
- 16.5 oz . refrigerated sugar cookie dough: Used as the base dough to form the cookie cups; press into muffin tins to create a sturdy shell that bakes golden and slightly crisp on the edges while remaining tender inside.
- 8 oz . cream cheese softened: Blended into the filling to create a rich, creamy texture; beat until smooth so it combines seamlessly with butter and powdered sugar for a silky, tangy filling.
- 1/4 cup butter softened: Whipped with cream cheese to add richness and smoothness to the filling; soften well so it incorporates easily and yields a spreadable consistency.
- 2 cups powdered sugar: Sweetens and stabilizes the filling while providing a smooth, dustable texture; sift or add gradually to prevent lumps and reach desired sweetness and thickness.
- 1 teaspoon vanilla: Adds a warm, aromatic note to the filling; use pure vanilla extract for a clean flavor that enhances the sweetness and balances the tang of cream cheese.
- Pinch salt: Balances sweetness and enhances flavor depth; a small pinch rounds out the filling’s taste and prevents it from being overly sweet.
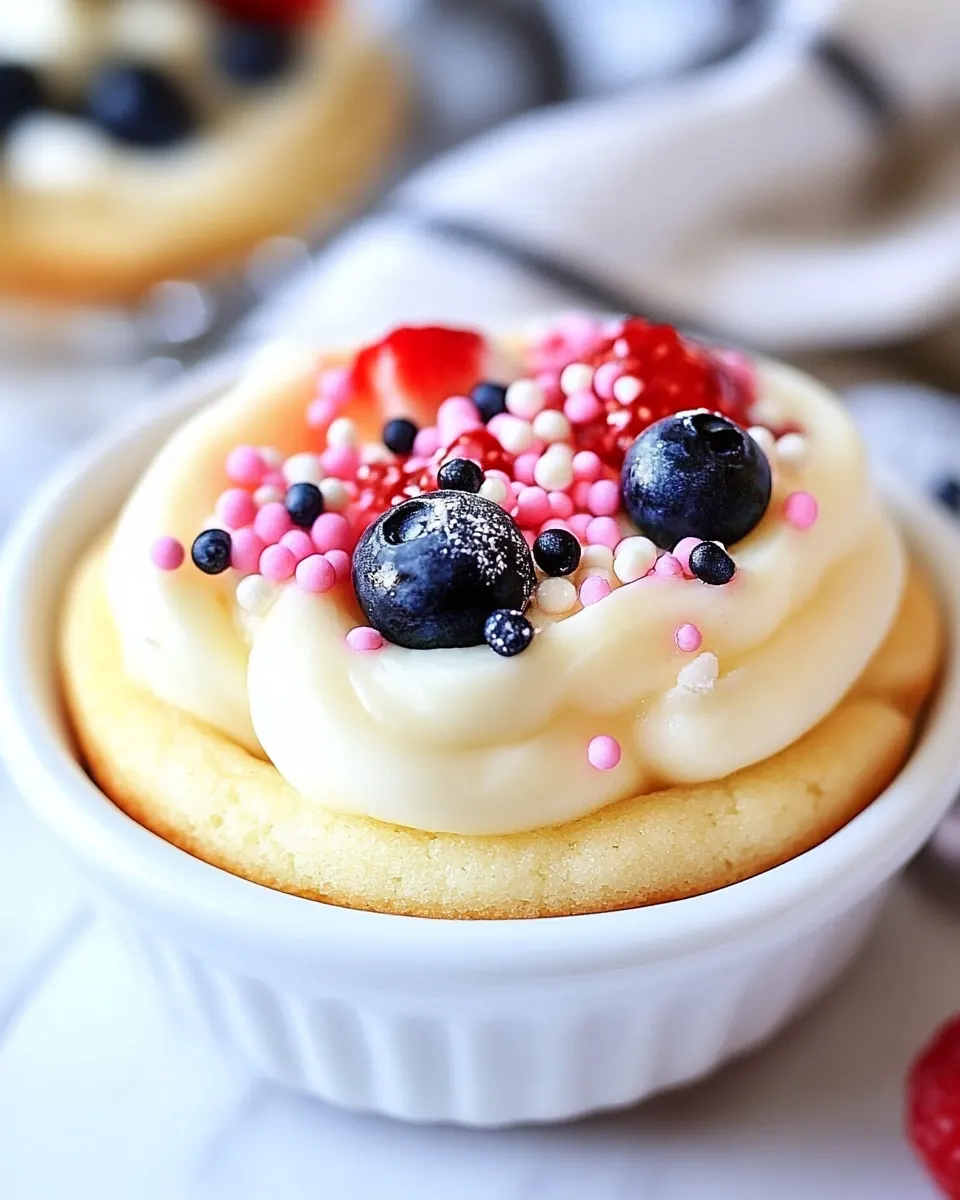
- Fresh fruit such as strawberries, blackberries, blueberries, and kiwi — washed, peeled if needed, and cut into bite-sized pieces: Provides fresh, juicy topping and bright, contrasting flavors and colors; prepare by washing, peeling if needed, and cutting into bite–sized pieces to arrange atop each filled cookie cup.
- Additional powdered sugar for dusting (optional): Optional finishing touch to add visual appeal and a delicate extra sweetness; lightly dust over assembled cookie cups just before serving for a bakery-style presentation.
How to Make Sugar Cookie Cups
This recipe is straightforward to follow, but small details make a big difference in texture and presentation. Below I walk you through each step with sensory cues and practical troubleshooting so your cookie cups come out looking and tasting their best.
- Preheat your oven to 350°F and grease a regular-size muffin tin (12 cups) with nonstick spray. Set aside.: Warm air fills the kitchen as the oven climbs to 350°F , and a light spray of oil on the muffin tin helps the edges release cleanly once baked. You should smell a faint toasty note as the oven nears temperature, which tells you it is ready. This step is important because a properly heated oven produces even browning; without it the cups may bake unevenly. A common mistake is skipping the greasing, which can cause the cookie cups to stick and break when you try to remove them.
- Let the sugar cookie dough sit out at room temperature for about 20 minutes to soften slightly. Use a sharp knife to slice the dough into 12 even pieces, about 1 inch thick.: As the dough softens it becomes pillowy and easier to slice, with a gentle, buttery aroma. Evenly sized slices ensure consistent baking time and uniform cups, so aim for pieces that look similar in height. If you rush and the dough is still cold, it will crack when you press it; if it is too warm it becomes sticky. A dull knife can drag the dough, so a sharp knife gives cleaner cuts.
- Press each dough slice into the bottom of a muffin cup. Use a tart shaper or the back of a spoon to press the dough up the sides, creating a cup shape.: You will feel the dough spread and thin as you press, and the surface should look smooth and even against the tin. Press gently but firmly to form a uniform wall that will hold the filling, watching for thin spots that could leak. The tactile feedback is important, you should hear a faint sigh as excess air escapes and see the dough adhere to the tin. One mistake is over thinning the walls, which leads to fragile cups that may crack; aim for consistent thickness.
- Bake for 10 to 12 minutes, or until the edges are golden brown. Let them cool completely in the muffin tin before removing.: During baking you will notice the aroma shift to a warm, buttery scent and the edges turning a pale golden color, which signals readiness. The bottoms should look set and not doughy. Cooling in the tin lets the cups firm up, preventing collapse when you remove them; if you try to unmold while warm they might deform. A common error is underbaking, leaving a raw interior that makes the base dense rather than crisp.
- In a medium bowl, beat together the cream cheese and butter until smooth. Add powdered sugar, vanilla, and a pinch of salt. Beat again until the filling is fluffy and creamy.: As you beat the cream cheese and butter , the mixture should turn glossy and smooth, with a light, tangy scent. Adding the powdered sugar slowly prevents a grainy texture and lets you control sweetness. The finished filling should be airy and hold soft peaks, indicating it will pipe or spoon nicely. Overworking the mixture can incorporate too much air, making it loose, while under mixing leaves lumps; aim for a consistently smooth texture.
- Spoon the cream cheese filling into each cooled cookie cup. Use the back of a spoon to gently smooth out the tops. Top each filled cookie cup with a mix of fresh fruit. Chill in the refrigerator for about 1 hour before serving.: The contrast between the cool, creamy filling and room temperature shells is delightful, and you should feel a slight chill when you touch the filled cups. Arranging the fruit creates glossy pops of color and a burst of tartness with each bite. Chilling firms the filling so it does not ooze during serving; skip this and the cups may be messy. A common oversight is adding wet fruit that releases juice, which can make the shell soggy, so pat fruit dry before topping.
- Optional: Dust with powdered sugar right before serving for an extra finish.: Dust with powdered sugar right before serving for an extra finish. : A light dusting of powdered sugar adds a soft visual cue and a whisper of sweetness, and it should settle gently on the fruit and edges without melting. Do this at the last moment to preserve the delicate white powder. If you dust too early the sugar will dissolve and disappear, so wait until you are ready to present them.
Helpful Notes about Sugar Cookie Cups
These notes expand on the little adjustments that take your Sugar Cookie Cups from good to memorable. I include variations and practical advice so you can make batches for different occasions with confidence.
- Make ahead: Bake the cookie shells up to one day ahead and store them in an airtight container at room temperature so they stay crisp. Fill and chill before serving.
- Filling swaps: Try whipped topping mixed with instant pudding for a lighter, no bake filling, or fold in a small amount of marshmallow fluff for extra lift and sweetness.
- Fruit choices: Use firm, ripe fruit like berries and diced kiwi for color and texture; avoid overly ripe fruit that will release juice and make shells soggy.
- Presentation: Pipe the filling for a clean look and arrange fruit deliberately, placing larger pieces first then tucking smaller berries to fill gaps.
- Serving temperature: Serve chilled or slightly cool from the fridge, as this accentuates the creamy filling and keeps the shells crisp during eating.
Perfect Matches for Sugar Cookie Cups
These ideas will help you decide how and when to serve your Sugar Cookie Cups. The list includes pairings, occasions, and storage suggestions to keep these tiny treats tasting fresh and special.
- Brunch or tea service: Serve on a tiered tray with small sandwiches and scones for a light, elegant spread that balances sweet and savory bites.
- Holiday gatherings: These cups make a festive dessert for family parties, where individual portions reduce fuss and encourage guests to sample a variety of sweets.
- Potlucks and picnics: Chill the filled cups and transport them in a rigid container with a layer of parchment to maintain shape and prevent sliding.
- Party favors: Pack a set of three in a small box for guests to take home, including a note about keeping them chilled until serving.
- Seasonal twists: Use summer berries for a bright, sunny platter, or choose late winter citrus segments for a fresh contrast in cooler months.
- Storage tips: Keep unfilled shells at room temperature in an airtight container for up to two days; filled cups should be refrigerated and enjoyed within two to three days for best texture.
FAQ
Conclusion
What makes these Sugar Cookie Cups special is their perfect balance of texture and flavor, a crisp buttery shell paired with a silky, tangy filling and bright fresh fruit. They are easy to make, customizable, and travel well, so they are ideal for gatherings big and small. Give them a try the next time you want a dessert that looks elegant with very little fuss, and enjoy watching how quickly they disappear.
Sugar Cookie Cups
Equipment
- Muffin Tin
- Nonstick spray
- Mixing Bowl
- Sharp Knife
- Spoon or tart shaper
Ingredients
- 16.5 oz . refrigerated sugar cookie dough Used as the base dough to form the cookie cups; press into muffin tins to create a sturdy shell that bakes golden and slightly crisp on the edges while remaining tender inside.
- 8 oz . cream cheese softened Blended into the filling to create a rich, creamy texture; beat until smooth so it combines seamlessly with butter and powdered sugar for a silky, tangy filling.
- 1/4 cup butter softened Whipped with cream cheese to add richness and smoothness to the filling; soften well so it incorporates easily and yields a spreadable consistency.
- 2 cups powdered sugar Sweetens and stabilizes the filling while providing a smooth, dustable texture; sift or add gradually to prevent lumps and reach desired sweetness and thickness.
- 1 teaspoon vanilla Adds a warm, aromatic note to the filling; use pure vanilla extract for a clean flavor that enhances the sweetness and balances the tang of cream cheese.
- Pinch salt Balances sweetness and enhances flavor depth; a small pinch rounds out the filling’s taste and prevents it from being overly sweet.
- Fresh fruit such as strawberries, blackberries, blueberries, and kiwi — washed, peeled if needed, and cut into bite-sized pieces Provides fresh, juicy topping and bright, contrasting flavors and colors; prepare by washing, peeling if needed, and cutting into bite-sized pieces to arrange atop each filled cookie cup.
- Additional powdered sugar for dusting optional Optional finishing touch to add visual appeal and a delicate extra sweetness; lightly dust over assembled cookie cups just before serving for a bakery-style presentation.
Instructions
- Preheat your oven to 350°F and grease a regular-size muffin tin (12 cups) with nonstick spray. Set aside.: Warm air fills the kitchen as the oven climbs to 350°F , and a light spray of oil on the muffin tin helps the edges release cleanly once baked. You should smell a faint toasty note as the oven nears temperature, which tells you it is ready. This step is important because a properly heated oven produces even browning; without it the cups may bake unevenly. A common mistake is skipping the greasing, which can cause the cookie cups to stick and break when you try to remove them.
- Let the sugar cookie dough sit out at room temperature for about 20 minutes to soften slightly. Use a sharp knife to slice the dough into 12 even pieces, about 1 inch thick.: As the dough softens it becomes pillowy and easier to slice, with a gentle, buttery aroma. Evenly sized slices ensure consistent baking time and uniform cups, so aim for pieces that look similar in height. If you rush and the dough is still cold, it will crack when you press it; if it is too warm it becomes sticky. A dull knife can drag the dough, so a sharp knife gives cleaner cuts.
- Press each dough slice into the bottom of a muffin cup. Use a tart shaper or the back of a spoon to press the dough up the sides, creating a cup shape.: You will feel the dough spread and thin as you press, and the surface should look smooth and even against the tin. Press gently but firmly to form a uniform wall that will hold the filling, watching for thin spots that could leak. The tactile feedback is important, you should hear a faint sigh as excess air escapes and see the dough adhere to the tin. One mistake is over thinning the walls, which leads to fragile cups that may crack; aim for consistent thickness.
- Bake for 10 to 12 minutes, or until the edges are golden brown. Let them cool completely in the muffin tin before removing.: During baking you will notice the aroma shift to a warm, buttery scent and the edges turning a pale golden color, which signals readiness. The bottoms should look set and not doughy. Cooling in the tin lets the cups firm up, preventing collapse when you remove them; if you try to unmold while warm they might deform. A common error is underbaking, leaving a raw interior that makes the base dense rather than crisp.
- In a medium bowl, beat together the cream cheese and butter until smooth. Add powdered sugar, vanilla, and a pinch of salt. Beat again until the filling is fluffy and creamy.: As you beat the cream cheese and butter , the mixture should turn glossy and smooth, with a light, tangy scent. Adding the powdered sugar slowly prevents a grainy texture and lets you control sweetness. The finished filling should be airy and hold soft peaks, indicating it will pipe or spoon nicely. Overworking the mixture can incorporate too much air, making it loose, while under mixing leaves lumps; aim for a consistently smooth texture.
- Spoon the cream cheese filling into each cooled cookie cup. Use the back of a spoon to gently smooth out the tops. Top each filled cookie cup with a mix of fresh fruit. Chill in the refrigerator for about 1 hour before serving.: The contrast between the cool, creamy filling and room temperature shells is delightful, and you should feel a slight chill when you touch the filled cups. Arranging the fruit creates glossy pops of color and a burst of tartness with each bite. Chilling firms the filling so it does not ooze during serving; skip this and the cups may be messy. A common oversight is adding wet fruit that releases juice, which can make the shell soggy, so pat fruit dry before topping.
- Optional: Dust with powdered sugar right before serving for an extra finish.: Dust with powdered sugar right before serving for an extra finish. : A light dusting of powdered sugar adds a soft visual cue and a whisper of sweetness, and it should settle gently on the fruit and edges without melting. Do this at the last moment to preserve the delicate white powder. If you dust too early the sugar will dissolve and disappear, so wait until you are ready to present them.
Notes
- Make ahead: Bake the cookie shells up to one day ahead and store them in an airtight container at room temperature so they stay crisp. Fill and chill before serving.
- Filling swaps: Try whipped topping mixed with instant pudding for a lighter, no bake filling, or fold in a small amount of marshmallow fluff for extra lift and sweetness.
- Fruit choices: Use firm, ripe fruit like berries and diced kiwi for color and texture; avoid overly ripe fruit that will release juice and make shells soggy.
- Presentation: Pipe the filling for a clean look and arrange fruit deliberately, placing larger pieces first then tucking smaller berries to fill gaps.
- Serving temperature: Serve chilled or slightly cool from the fridge, as this accentuates the creamy filling and keeps the shells crisp during eating.