Easy Strawberry Ghosts
Easy Strawberry Ghosts are the kind of cheerful little treats that make me smile every time I pull them from the fridge. I first made them at a small neighborhood Halloween party when I wanted something simple, seasonal, and entirely homemade that would stand out on a dessert table without taking all night to assemble. The combination of bright, juicy strawberries and glossy white chocolate felt playful and festive, and the tiny faces I drew with dark chocolate always invited a laugh from kids and adults alike.
I remember balancing a tray on my lap while a movie played and my friends chatted, the kitchen smelling faintly of melting chocolate and almond, sticky fingers and good conversation all around. Making Easy Strawberry Ghosts turned out to be less about perfection and more about the shared joy of decorating and nibbling together. Over the years I learned little tricks, like drying strawberries very thoroughly and letting the white coating set so the faces don’t run, that help these look both cute and polished.
Recipe Snapshot
25 mins
15 mins
10 mins
Easy
120 kcal
American
Keto, Paleo
Desserts
Microwave safe bowl, Waxed paper lined baking sheet, Toothpick
What Sets This Easy Strawberry Ghosts Apart
They are unexpectedly quick and kid friendly
I love how fast these come together, you can finish a whole batch in under an hour if you streamline things. Kids can help wash and hold the strawberries, and decorating the faces is an easy task for small hands, so these are perfect for a party where you want involvement, not mess.
Simple, clean ingredient list
There are only a few pantry staples here, and each one pulls its weight. The bulk of the flavor comes from ripe strawberries and the contrast between creamy white and slightly bitter semi sweet chocolate for the eyes. You do not need exotic items to make these feel special.
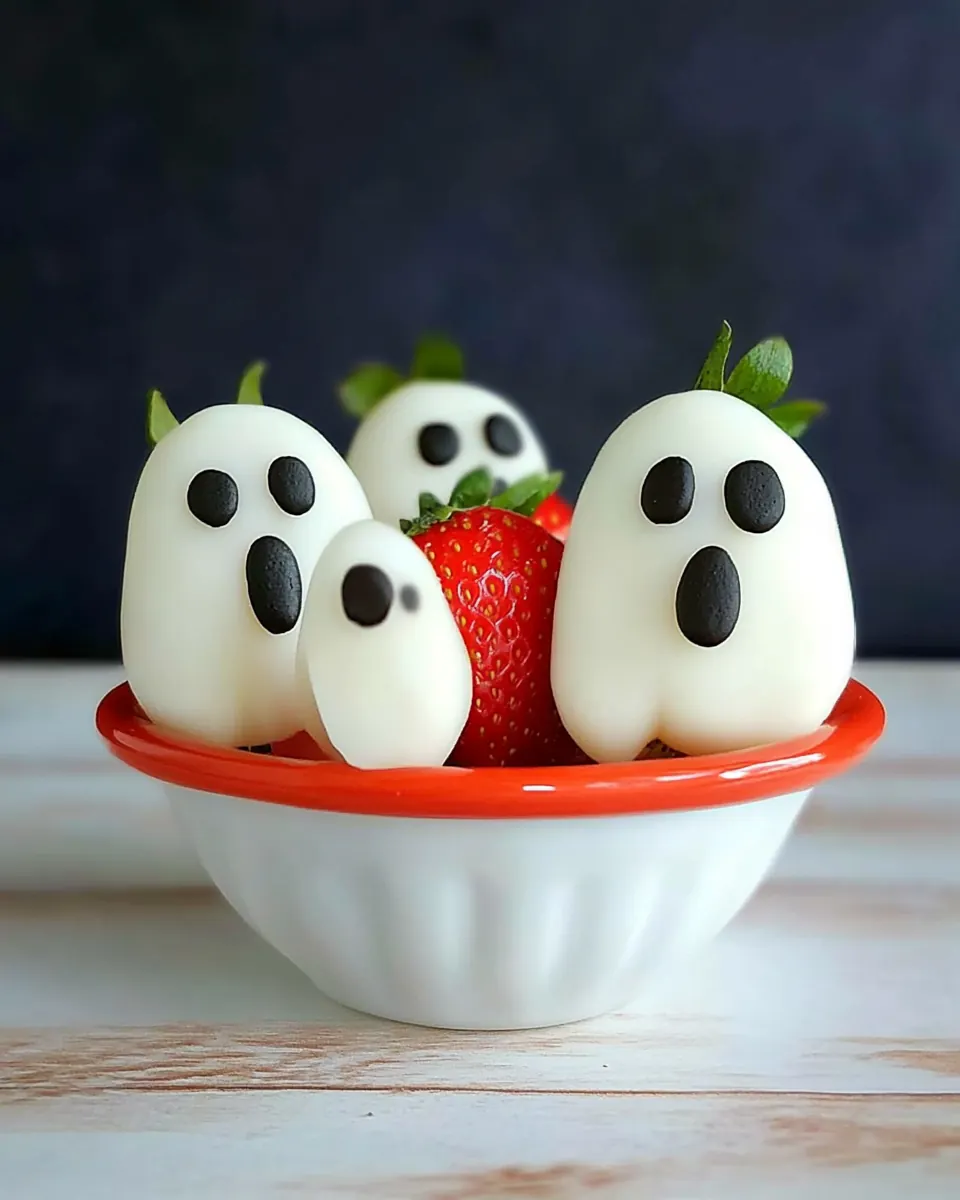
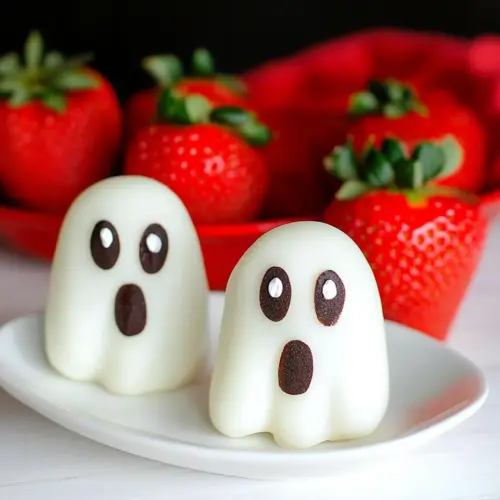
Visually striking for seasonal tables
I keep coming back to how charming these look on a platter, their white tails trailing like little comets. They stand out on dessert tables and photograph beautifully, which is great when you want festive photos for social sharing or a simple homemade touch for guests.
Flexible and forgiving technique
Even if your first dip is a little lumpy or a face goes sideways, these recover. If the melt thickens, reheating gently or stirring smooths it. Small imperfections add personality, but the method is forgiving enough that you can get consistently good results.
Great for portion control and parties
Because each piece is a single strawberry, they are naturally portion controlled and easy to pop, pass, or plate. You can scale the recipe up for a crowd or make a dozen for an intimate gathering, and they always feel festive without being heavy.
Everything You Need for Easy Strawberry Ghosts
These few ingredients come together to create a charming seasonal bite. The key players are the fruit, which provides bright, natural sweetness, and two types of chocolate, which create contrast and detail. The tiny bit of shortening helps the white chocolate melt silky and coat smoothly, while the almond flavor lifts the overall scent profile so each ghost smells as good as it looks.
- 30 fresh strawberries: Provide sweetness and a fresh, juicy base for the ghosts; select firm ripe berries to hold their shape when dipped. Chill briefly before coating to help the chocolate set quickly and prevent melting. Hull carefully to create a clean top for the stem and an easy place to hold when decorating.
- 8 ounces Baker’s Premium White Chocolate Morsels chopped: Form a smooth, creamy coating that sets white for the ghost appearance; gently melt over low heat or in short microwave bursts to avoid scorching. Stir until fully fluid and glossy, then add the shortening and almond extract to improve texture and flavor. Use immediately while warm to achieve an even dip and coverage on each strawberry.
- 1 teaspoon shortening: Improve the melted white chocolate’s viscosity and create a silkier, glossier finish; add only a small amount to avoid thinning too much. Melt briefly with the chocolate and stir until fully incorporated for easier dipping and a smoother surface. Keep warm to maintain fluidity but avoid overheating to preserve bloom-free appearance.
- 1/8 teaspoon almond extract: Add a delicate nutty-floral note to enhance the white chocolate flavor without overpowering the strawberries; measure sparingly as it’s potent. Stir into the melted white chocolate to distribute the aroma evenly and complement the overall sweetness. Consider omitting if any guest has nut allergies, substituting a small drop of vanilla if needed.
- 1/4 cup Baker's Semi-Sweet Chocolate Morsels: Create contrasting facial features for the strawberry ghosts when melted and piped; use semi–sweet morsels to add dark, defined eyes and mouths. Melt in a small bag or piping tool for precise decoration and dot onto the set white chocolate. Keep enough on hand to touch up any faces that need stronger definition after chilling.
Directions for Easy Strawberry Ghosts
These directions are straightforward, but taking a patient, sensory approach makes the difference between charming ghosts and blotchy blobs. Move steadily, pay attention to how the melted chocolate looks and feels, and keep your strawberries perfectly dry so the coating adheres.
- Wash strawberries and gently pat with paper towels until completely dry. In a microwave-safe bowl, melt white chocolate and shortening at 50% power; stir until smooth. Stir in extract.: Start with the texture and scent, the surface should be cool to the touch and slightly fragrant of fresh berry. Drying is crucial because any surface moisture will cause the melted white chocolate to seize or slide off, leaving bare spots. When you press a paper towel against a berry it should leave no damp mark, and you may notice a faint, sweet aroma when they are at the right dryness. A common mistake is rushing this step, which leads to patchy coatings; take the time to air dry them a few minutes after towel drying if needed.
- Dip strawberries in chocolate mixture; place on a waxed paper-lined baking sheet, allowing excess chocolate to form the ghosts' tails. Freeze 5 minutes.: As you stir, focus on the visual change, the morsels will soften then melt into a glossy, velvety pool. You should hear only a quiet settling sound as the lumps dissolve, and the steam should be minimal if you use medium power. The shortening gives the mixture a silken sheen and fluidity so it coats without clumping, and stirring encourages even heat distribution. Overheating will cause the white chocolate to grain or separate, so heat in short bursts and stir between each interval. If it looks grainy, stop heating and continue stirring to bring it together; reheating too aggressively is the usual pitfall.
- In microwave, melt remaining chocolate chips; stir until smooth. Dip a toothpick into melted chocolate and draw two eyes and a mouth on each ghost. Refrigerate leftovers.: Right after the melt is glossy and smooth, add the tiny pinch of almond extract and fold it in gently. You will notice an immediate lift in aroma, that bakery like scent which complements the sweet coating. The extract should be barely perceptible on the tongue, enhancing the overall profile without tasting artificial. Avoid adding more than instructed, because too much extract overpowers the natural strawberry flavor. One common mistake is adding flavoring to searing hot chocolate which can evaporate the nuance, so stir it in while the mixture is warm but not scalding.
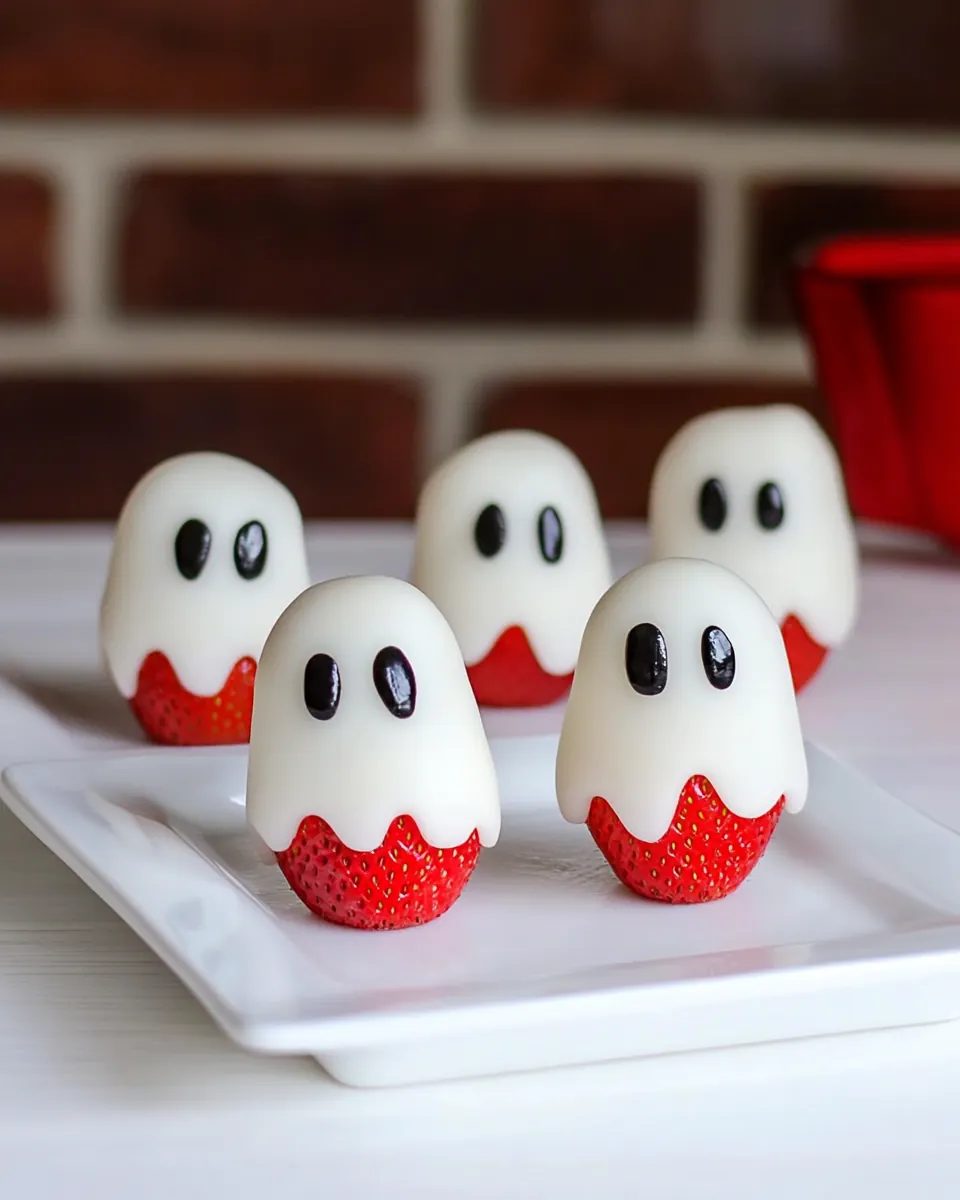
- Dip strawberries in chocolate mixture; place on a waxed paper-lined baking sheet, allowing excess chocolate to form the ghosts' tails.: As you dip, notice the way the coating clings then slides back to form a tail, creating that classic ghost silhouette. Hold the strawberry by the stem and rotate it slowly to achieve an even coat, then let the extra coating drip off naturally; you may hear a faint tapping of drops hitting the paper. The visual cue to stop is when the berry is smoothly covered and a tapered tail trails behind it. A typical misstep is shaking too vigorously to remove excess, which flattens the tail; instead, gentle rotation works best.
- Freeze 5 minutes.: Chilling sets the white chocolate quickly, firming the surface so you can add features without smudging. Five minutes in a freezer gives a crisp matte finish and cools the berry so condensation is minimal when you next handle it. You should feel the coating give a slight resistance when touched through the paper, indicating it is set. Do not leave them in the freezer long enough to crack the chocolate or chill the fruit solid, which can impact texture; the goal is a quick firming, not deep freeze.
- In microwave, melt remaining chocolate chips; stir until smooth.: Melt the semi sweet chocolate in short intervals and stir to a glossy, pourable state. The aroma will be deeper, slightly bitter compared to the white coating, which is exactly what you want for facial details. If it becomes too thick, a brief, gentle reheating or a drop of neutral oil can restore fluidity, but avoid thinning it excessively. A common error is overheating so the chocolate loses its sheen and becomes grainy, so moderate heat and steady stirring prevent that.
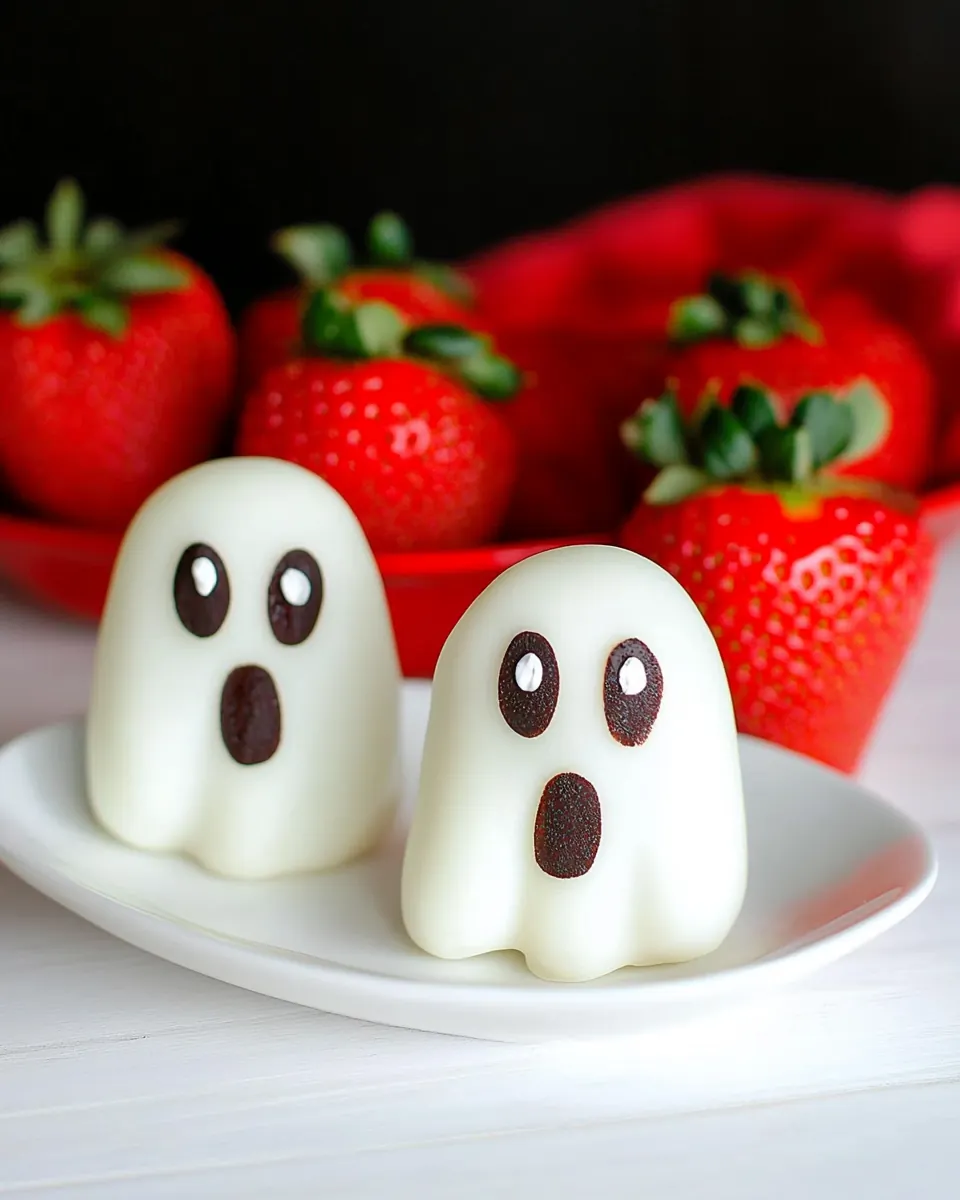
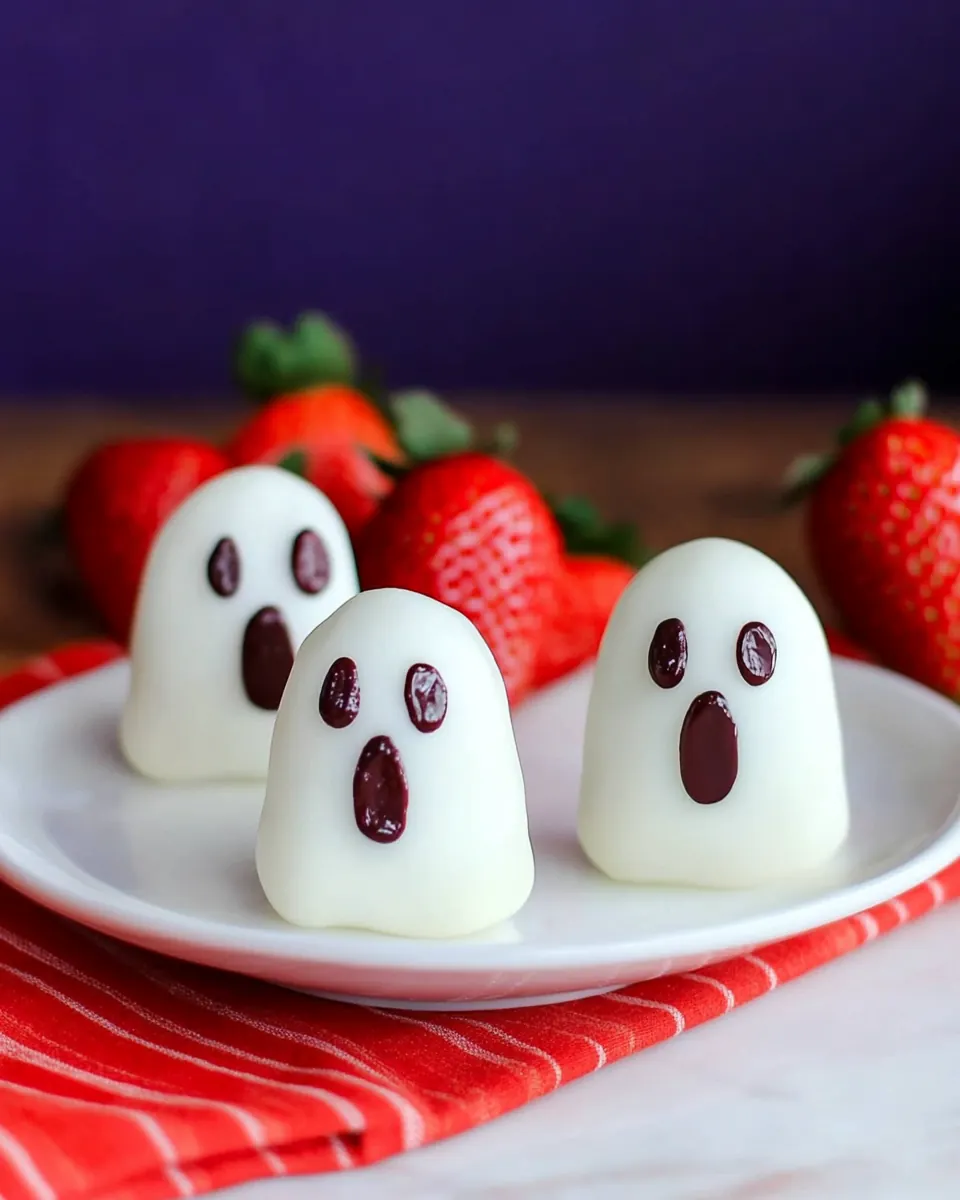
- Dip a toothpick into melted chocolate and draw two eyes and a mouth on each ghost.: When you apply the details, you will notice the satisfying snap of the dark dots setting on the white surface. Use a light hand, dipping the tip and touching gently to create small, defined dots and tiny lines for mouths. The contrast should be sharp, and the dark chocolate will set quickly on the chilled white surface. A frequent mistake is pressing too hard with the toothpick, which can gouge the coating; delicate taps create the best faces.
- Refrigerate leftovers.: Store any remaining coated or melted chocolate in airtight containers in the fridge to keep them stable between uses. Leftover dipped berries should chill uncovered for a short time to fully set, then transfer to a covered container with parchment between layers to prevent sticking. Note the texture change when refrigerated cold for too long can make berries firmer, so bring them to a cool room temperature before serving for the best mouthfeel. Avoid leaving coated berries at room temperature for extended periods, especially on warm days, as the white coating can soften and become sticky.
Tips for Success
These practical tips will help you get consistent, picture perfect results when making Easy Strawberry Ghosts. Small technique choices make a big difference for coating, set, and appearance.
- Choose firm, ripe strawberries: Firmer berries hold the coating better and are easier to dip without losing juice, giving you cleaner shapes and less slipping.
- Chop larger white morsels if needed: Breaking up big pieces helps them melt uniformly, avoiding hot spots that scorch, which keeps the texture smooth and glossy.
- Use a toothpick for precision: A toothpick gives you the control to dot eyes and fine mouths without smudging the white surface.
- Work in small batches: Melting only what you need prevents repeated reheating, which can dull the chocolate and change texture.
- Keep a cool workspace: Warm rooms make coatings soften and run, so a slightly cooler kitchen yields crisper tails and cleaner faces.
What to Pair With Easy Strawberry Ghosts
These bites work well as a light finish or playful addition to a seasonal spread. Consider pairing them with other simple items that emphasize freshness, and think about occasion appropriate presentation so they shine visually and in flavor combinations.
- Serve on a white platter for contrast, the pale ghosts will pop visually and look intentionally styled on a clean surface.
- Offer alongside herbal iced tea, the mild bitterness complements the sweet white coating and refreshes the palate between bites.
- Set them near citrusy fruit, like sliced oranges or mandarin segments, to add brightness and balance out the sweet chocolate.
- Plate for Halloween parties, place them on tiered trays or among autumn leaves for a festive display that reads seasonal and homemade.
- Store in a cool fridge for up to two days, layer them with parchment in an airtight container to preserve shape and prevent sticking during transport.
- Bring to family gatherings, these travel and serve easily, making them ideal for potlucks or holiday dessert tables where small, shareable bites are appreciated.
FAQ
Conclusion
Easy Strawberry Ghosts stand out because they transform a handful of simple ingredients into something festive, charming, and shareable. They are quick to make, visually delightful, and forgiving enough for cooks at any skill level to enjoy. Give them a try at your next seasonal gathering or family snack time, and let the decorating become a fun, communal moment. The combination of fresh strawberries, creamy white chocolate, and small dark details creates a playful contrast that guests will remember, and the hands on nature of assembly makes them a great activity to include children or friends in the kitchen.
Easy Strawberry Ghosts
Equipment
- Microwave-safe Bowl
- Waxed paper lined baking sheet
- Toothpick
Ingredients
- 30 fresh strawberries Provide sweetness and a fresh, juicy base for the ghosts; select firm ripe berries to hold their shape when dipped. Chill briefly before coating to help the chocolate set quickly and prevent melting. Hull carefully to create a clean top for the stem and an easy place to hold when decorating.
- 8 ounces Baker’s Premium White Chocolate Morsels chopped Form a smooth, creamy coating that sets white for the ghost appearance; gently melt over low heat or in short microwave bursts to avoid scorching. Stir until fully fluid and glossy, then add the shortening and almond extract to improve texture and flavor. Use immediately while warm to achieve an even dip and coverage on each strawberry.
- 1 teaspoon shortening Improve the melted white chocolate’s viscosity and create a silkier, glossier finish; add only a small amount to avoid thinning too much. Melt briefly with the chocolate and stir until fully incorporated for easier dipping and a smoother surface. Keep warm to maintain fluidity but avoid overheating to preserve bloom-free appearance.
- 1/8 teaspoon almond extract Add a delicate nutty-floral note to enhance the white chocolate flavor without overpowering the strawberries; measure sparingly as it’s potent. Stir into the melted white chocolate to distribute the aroma evenly and complement the overall sweetness. Consider omitting if any guest has nut allergies, substituting a small drop of vanilla if needed.
- 1/4 cup Baker's Semi-Sweet Chocolate Morsels Create contrasting facial features for the strawberry ghosts when melted and piped; use semi-sweet morsels to add dark, defined eyes and mouths. Melt in a small bag or piping tool for precise decoration and dot onto the set white chocolate. Keep enough on hand to touch up any faces that need stronger definition after chilling.
Instructions
- Wash strawberries and gently pat with paper towels until completely dry. In a microwave-safe bowl, melt white chocolate and shortening at 50% power; stir until smooth. Stir in extract.: Start with the texture and scent, the surface should be cool to the touch and slightly fragrant of fresh berry. Drying is crucial because any surface moisture will cause the melted white chocolate to seize or slide off, leaving bare spots. When you press a paper towel against a berry it should leave no damp mark, and you may notice a faint, sweet aroma when they are at the right dryness. A common mistake is rushing this step, which leads to patchy coatings; take the time to air dry them a few minutes after towel drying if needed.
- Dip strawberries in chocolate mixture; place on a waxed paper-lined baking sheet, allowing excess chocolate to form the ghosts' tails. Freeze 5 minutes.: As you stir, focus on the visual change, the morsels will soften then melt into a glossy, velvety pool. You should hear only a quiet settling sound as the lumps dissolve, and the steam should be minimal if you use medium power. The shortening gives the mixture a silken sheen and fluidity so it coats without clumping, and stirring encourages even heat distribution. Overheating will cause the white chocolate to grain or separate, so heat in short bursts and stir between each interval. If it looks grainy, stop heating and continue stirring to bring it together; reheating too aggressively is the usual pitfall.
- In microwave, melt remaining chocolate chips; stir until smooth. Dip a toothpick into melted chocolate and draw two eyes and a mouth on each ghost. Refrigerate leftovers.: Right after the melt is glossy and smooth, add the tiny pinch of almond extract and fold it in gently. You will notice an immediate lift in aroma, that bakery like scent which complements the sweet coating. The extract should be barely perceptible on the tongue, enhancing the overall profile without tasting artificial. Avoid adding more than instructed, because too much extract overpowers the natural strawberry flavor. One common mistake is adding flavoring to searing hot chocolate which can evaporate the nuance, so stir it in while the mixture is warm but not scalding.
- Dip strawberries in chocolate mixture; place on a waxed paper-lined baking sheet, allowing excess chocolate to form the ghosts' tails.: As you dip, notice the way the coating clings then slides back to form a tail, creating that classic ghost silhouette. Hold the strawberry by the stem and rotate it slowly to achieve an even coat, then let the extra coating drip off naturally; you may hear a faint tapping of drops hitting the paper. The visual cue to stop is when the berry is smoothly covered and a tapered tail trails behind it. A typical misstep is shaking too vigorously to remove excess, which flattens the tail; instead, gentle rotation works best.
- Freeze 5 minutes.: Chilling sets the white chocolate quickly, firming the surface so you can add features without smudging. Five minutes in a freezer gives a crisp matte finish and cools the berry so condensation is minimal when you next handle it. You should feel the coating give a slight resistance when touched through the paper, indicating it is set. Do not leave them in the freezer long enough to crack the chocolate or chill the fruit solid, which can impact texture; the goal is a quick firming, not deep freeze.
- In microwave, melt remaining chocolate chips; stir until smooth.: Melt the semi sweet chocolate in short intervals and stir to a glossy, pourable state. The aroma will be deeper, slightly bitter compared to the white coating, which is exactly what you want for facial details. If it becomes too thick, a brief, gentle reheating or a drop of neutral oil can restore fluidity, but avoid thinning it excessively. A common error is overheating so the chocolate loses its sheen and becomes grainy, so moderate heat and steady stirring prevent that.
- Dip a toothpick into melted chocolate and draw two eyes and a mouth on each ghost.: When you apply the details, you will notice the satisfying snap of the dark dots setting on the white surface. Use a light hand, dipping the tip and touching gently to create small, defined dots and tiny lines for mouths. The contrast should be sharp, and the dark chocolate will set quickly on the chilled white surface. A frequent mistake is pressing too hard with the toothpick, which can gouge the coating; delicate taps create the best faces.
- Refrigerate leftovers.: Store any remaining coated or melted chocolate in airtight containers in the fridge to keep them stable between uses. Leftover dipped berries should chill uncovered for a short time to fully set, then transfer to a covered container with parchment between layers to prevent sticking. Note the texture change when refrigerated cold for too long can make berries firmer, so bring them to a cool room temperature before serving for the best mouthfeel. Avoid leaving coated berries at room temperature for extended periods, especially on warm days, as the white coating can soften and become sticky.
Notes
- Choose firm, ripe strawberries: Firmer berries hold the coating better and are easier to dip without losing juice, giving you cleaner shapes and less slipping.
- Chop larger white morsels if needed: Breaking up big pieces helps them melt uniformly, avoiding hot spots that scorch, which keeps the texture smooth and glossy.
- Use a toothpick for precision: A toothpick gives you the control to dot eyes and fine mouths without smudging the white surface.
- Work in small batches: Melting only what you need prevents repeated reheating, which can dull the chocolate and change texture.
- Keep a cool workspace: Warm rooms make coatings soften and run, so a slightly cooler kitchen yields crisper tails and cleaner faces.