Strawberry Dump Cake
Strawberry Dump Cake is the kind of dessert I turn to when life gets busy and I still want something that tastes like a celebration. The first time I made this, a last minute picnic invitation landed on my calendar, and I had nothing more than a couple of cans of fruit and a box of cake mix. I remember standing in my kitchen, stirring a quick cream cheese mixture while the sunlight warmed the counter, feeling oddly victorious about how little effort it required.
I love that Strawberry Dump Cake doesn’t pretend to be fancy. It’s honest comfort in a pan, with bright berry filling and a tender, crumbly top. Over time I learned small tricks that make a big difference, like using cold butter sliced very thin so it melts into the dry cake mix and creates pockets of crunchy golden goodness. Family and friends always ask for seconds, and it has become my go to for casual gatherings because it frees me up to chat instead of babysit a complicated bake.
Recipe Snapshot
60 mins
15 mins
45 mins
Medium
250 kcal
American
Gluten-Free, Low FODMAP
Desserts
9×13-inch baking dish, Mixing bowl, Spoon or spatula, Knife
Why We Love This Strawberry Dump Cake
1. Effortless, reliable dessert
I adore how straightforward this recipe is. With canned strawberry filling and boxed cake mix, it comes together in minutes, and yet the result tastes like you spent hours in the kitchen. For busy weeknights or impromptu company, I can promise it will rescue you without drama.
2. Bright, nostalgic flavor
The vivid sweetness of the strawberry filling paired with the tangy cream cheese layer creates a balance I reach for whenever I want something cheerful and familiar. I often hear memories from guests who grew up on similar treats, and that nostalgic note is part of its charm.
3. Textural contrast that sings
What makes this stand out for me is the juxtaposition of a bubbling, jammy strawberry base with a buttery, slightly crisp top. Using cold butter in thin slices makes the top develop irregular, crunchy pockets while the interior stays gooey, and that variance keeps every bite interesting.
4. Flexible and forgiving
I love recipes that allow small adjustments, and this one is very tolerant. If you prefer less sweet, you can adjust how much of the cake mix is exposed. If you want a smoother topping, spreading the cream cheese mixture a little thinner helps. The method is forgiving if the oven runs a little hot or cool, which gives me confidence when I’m sharing with friends.
5. Crowd pleasing and transportable
This dish scales easily, which is why it’s a staple for gatherings. It travels well when covered, and it’s simple to serve warm or at room temperature. I often bring it to potlucks because it reliably disappears fast.
Strawberry Dump Cake Ingredients
The philosophy behind these ingredients is simple: bright fruit, a creamy counterpoint, and a dry mix that becomes a rustic, buttery crust. Each element plays a clear role. The strawberry filling provides the juicy, saucy heart. The cream cheese and sour cream bring tang and silkiness to balance the sweetness. The boxed cake mix becomes a quick, reliable topping when combined with cold butter that melts into golden pockets.
- 31.5 ounces strawberry pie filling (two 15.75-ounce cans): Provide sweet, saucy fruit filling and moisture to the dessert while supplying a bright strawberry flavor and glossy appearance; pour evenly into the baking dish as the base layer for the dump cake.
- 8 ounces cream cheese (softened): Offer a rich, creamy texture and slight tang that balances sweetness; beat until smooth and spread or dollop over the fruit layer to create a luscious middle component.
- 1/4 cups sour cream: Contribute a mellow tang and creamy body that lightens the filling; fold with the cream cheese to achieve a smoother, slightly tangy layer that complements the strawberries.
- 1/2 cup powdered sugar: Add fine sweetness and help stabilize the cream cheese mixture for a silky mouthfeel; sift or mix thoroughly to avoid lumps and to evenly sweeten the filling layer.
- 1 teaspoon vanilla extract: Impart warm, aromatic vanilla notes to enhance and unify the flavors; stir into the cream cheese mixture to elevate the overall taste profile subtly.
- 1 package vanilla cake mix (or white cake mix): Provide a sweet, cakey topping that bakes into a golden, crumbly crust; sprinkle dry across the assembled layers to create structure and contrast in texture after baking.
- 1/2 cups salted butter (cold): Supply fat that melts into the cake mix to produce tender, moist crumbs and rich flavor; grate or thinly slice cold butter over the cake mix so it distributes and browns evenly.
- fresh strawberries (whole or halved for serving) (optional): Serve as a fresh, optional garnish that adds bright color and a juicy bite when serving; slice or halve and arrange atop portions for an appealing presentation.
How to Make Strawberry Dump Cake

Making this cake is straightforward, but the magic happens while it bakes. Read each step fully so you know what visual and sensory cues to watch for, then follow along. I find that slowing down for a moment during assembly pays off in texture and evenness.
- Preheat the oven to 350°F.: Warmth in the oven creates the environment for the strawberry filling to bubble and for the topping to brown evenly. You should feel comfortable placing the pan in after about 10 minutes of preheating, when the temperature is stabilized. If your oven has hot spots, rotate the pan halfway through baking to prevent uneven browning. A common mistake is not preheating long enough, which can lengthen bake time and affect texture; always allow the oven to reach the set temperature before sliding the pan in.
- Spread the strawberry filling from both cans in the bottom of a 9×13-inch baking dish.: When you spoon in the filling, you will notice a glossy, syrupy texture that spreads easily across the dish. Tap the pan on the counter to settle the filling and create an even layer. The bubbling action during baking transforms this into a jammy core, so evenness matters to ensure consistent bubbling across the pan. Avoid piling filling higher in the center, which can cause uneven baking and longer cook time in the middle.
- In a medium bowl, beat together the cream cheese, sour cream, powdered sugar, and vanilla extract until light and fluffy.: As you whisk, the mixture will lighten in color and become airy, lending a soft texture when dolloped over the filling. The aroma will pick up the sweet, aromatic note of vanilla , and the cream cheese will lose its stiffness. If you still feel lumps, keep beating on low speed, or warm the bowl slightly to help smoothing. A typical pitfall is using cold cream cheese , which leads to lumps and uneven pockets when spooned on top.
- Scoop dollops of the cream cheese mixture across the surface of the strawberry filling. Try to spread the cream cheese a little bit so that the surface of the dump cake is as even as possible.: When placing dollops, you will see contrast between the pale cream and the deep red filling, and lightly spreading helps create gentle ribbons of cream within the fruit. The visual cue to look for is a mostly even top with some exposed filling that will bubble up. If you try to completely smooth the layer, it may sink into the filling too much, so aim for gentle spreading. One mistake is overworking the mixture so it becomes too thin and loses its distinct creamy pockets.
- Sprinkle the cake mix evenly over the strawberry and cream cheese layers.: When you dust the dry cake mix , it should cover the surface in a consistent blanket. This dry layer will form the baked topping, so even coverage ensures uniform browning and texture. Lightly shake the box or use a sieve to distribute the mix if you prefer more control. Leaving bare spots risks powdery, underbaked areas after baking, which is why even spread is important.
- Slice very thin pats of butter and spread over the entire top of the dry cake mix. Cover as much of the cake mix as possible.: The thin butter slices will glisten as they warm and begin to sink into the dry mix, creating tiny pools that melt and form crisp edges. The sound is subtle, just a soft settle, but visually you will see the butter sitting atop the dry mix. Covering most of the surface helps prevent dry, powdery spots; if you skip this, some areas may remain uncooked. A common error is using large chunks of butter , which can leave greasy pockets instead of flaky crispness.
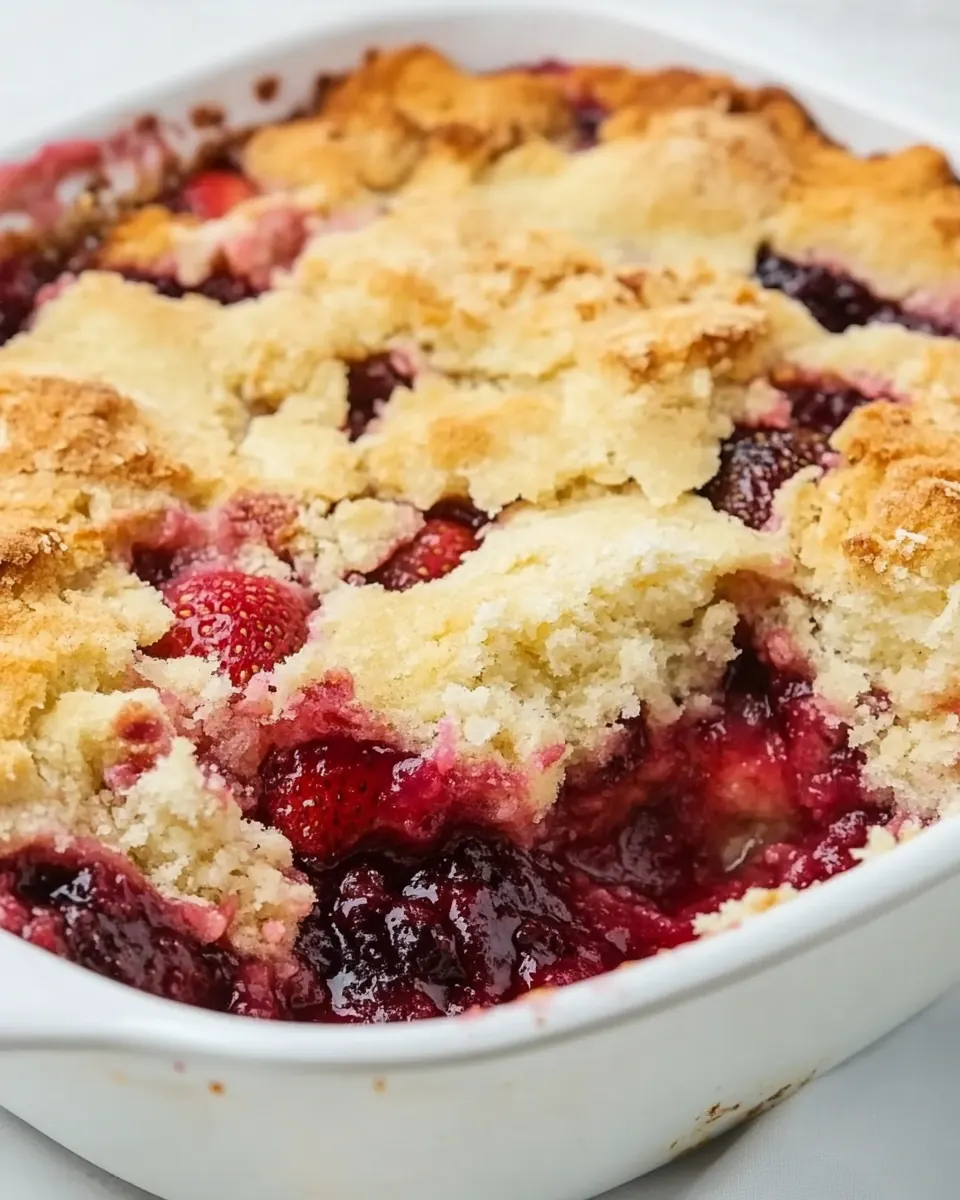
- Bake about 40 to 45 minutes until the topping is browned, even in the center, and the strawberry filling is bubbling up from the bottom.: While baking, you will notice the kitchen filling with a warm, sweet aroma and the edges beginning to bubble first. The visual cue for doneness is an evenly browned top with bubbling fruit visible at seams and corners. The bubbling indicates the filling has reached a temperature where it thickens and melds with the topping, producing that classic dump cake texture. Avoid underbaking, which leaves the cake mix powdery, and overbaking, which can dry out the topping. If the top browns too quickly, tent loosely with foil to prevent burning while the center finishes bubbling.
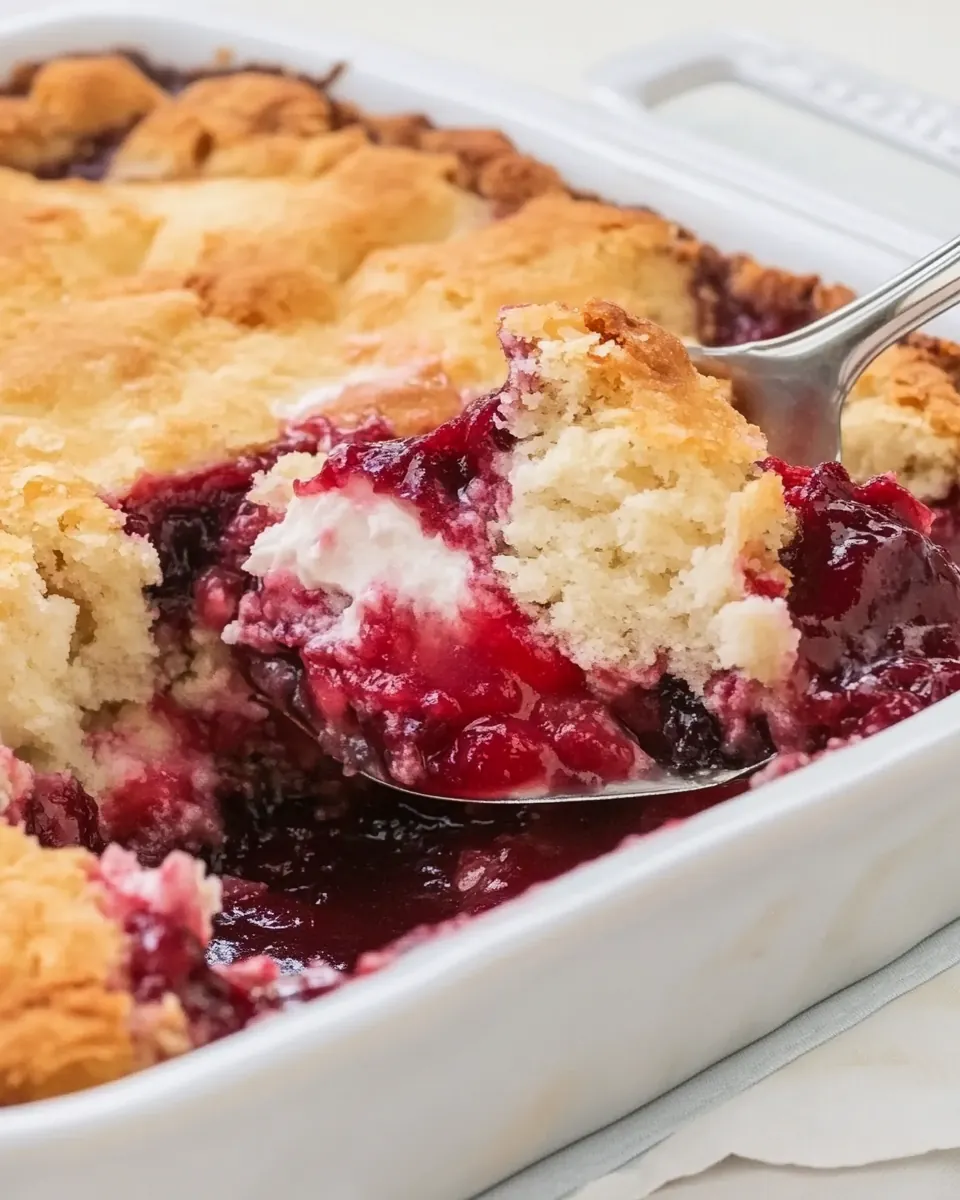
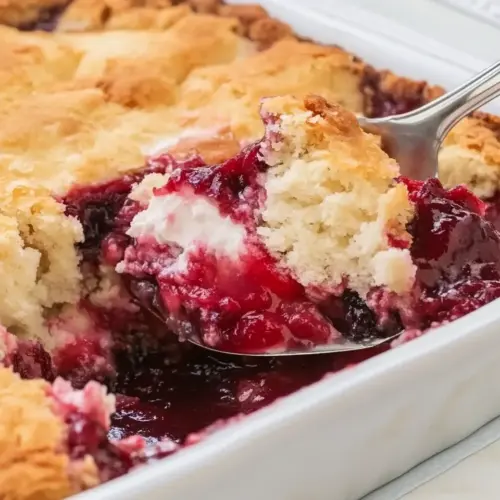
- Serve warm or cooled.: When you cut into it, the contrast between the warm, saucy strawberry center and the buttery top is most pronounced while warm, offering a lovely steam and fragrant scent. Cooling sets the filling slightly, making cleaner slices and a firmer texture. If you plan to serve later, cool completely, then cover and refrigerate; gently reheat portions in the oven to revive the crisp pockets. A mistake to avoid is storing when very hot, which can trap steam and make the topping soggy; allow partial cooling first.
Tips for Success

These tips will help you nail texture, temperature, and timing. Read them before you assemble so you can prep ingredients correctly and avoid common traps. I find the small steps matter more than you might think.
- Choose a plain cake mix: Pick a vanilla or white cake mix without pudding added so the topping crisps correctly, as pudding mixes can cause a denser, wetter top.
- Cold butter technique: Keep the butter cold and slice it very thin so it can be distributed evenly, melting into pockets rather than pooling and making greasy spots.
- Room temperature cream cheese: Let the cream cheese sit until soft to the touch so it whips smooth with the powdered sugar and sour cream, preventing lumps and making spreading easier.
- Even distribution of filling: Spread the strawberry filling so it covers the pan consistently, which encourages uniform bubbling and prevents dry edges.
- Watch for bubbling: The visual indicator of doneness is the filling bubbling up at seams and corners, that bubbling confirms the interior has heated through and thickened.
Side Dish Ideas for Strawberry Dump Cake
This dessert pairs well with simple, cool accompaniments and suits many occasions. Think seasonal gatherings, potlucks, or relaxed family dinners, and plan sides that contrast temperature and texture. Below are practical serving suggestions and pairing ideas to help you present it memorably.
- Serve with whipped cream: A dollop of lightly sweetened whipped cream adds airy contrast to the dense, gooey dessert and brightens each bite.
- Pair with vanilla ice cream: A scoop of vanilla ice cream melts over warm portions, creating a creamy sauce that mellows the sweet-tart strawberry flavor.
- Bring to potlucks: It travels well covered and can be served at room temperature, making it ideal for casual gatherings or picnics in spring when strawberries are seasonal.
- Serve for brunch or dessert: This works for a relaxed brunch spread or as a comforting dessert after dinner, offering flexible timing and easy plating.
- Storage tips: Cool the cake before covering to avoid steam making the topping soggy, then store covered in the refrigerator for up to three days and reheat briefly for crispness.
- Seasonal variations: In spring and summer, fresh strawberries on top add brightness; for cooler months, serve slightly warmed with cream to emphasize cozy comfort.
FAQ
Conclusion
This Strawberry Dump Cake shines because it delivers bright, saucy fruit and a buttery, cake like topping with almost no fuss. It’s an approachable dessert that still feels special, perfect for casual gatherings or when you want a comforting treat without a lengthy recipe. Give it a try the next time you need a dessert that pleases a crowd and lets you spend more time visiting than baking. I’ll be surprised if it doesn’t become one of your easy go to recipes for spring gatherings and simple celebrations.
Strawberry Dump Cake
Equipment
- 9x13-inch Baking Dish
- Mixing Bowl
- Spoon or spatula
- Knife
Ingredients
- 31.5 ounces strawberry pie filling (two 15.75-ounce cans) Provide sweet, saucy fruit filling and moisture to the dessert while supplying a bright strawberry flavor and glossy appearance; pour evenly into the baking dish as the base layer for the dump cake.
- 8 ounces cream cheese (softened) Offer a rich, creamy texture and slight tang that balances sweetness; beat until smooth and spread or dollop over the fruit layer to create a luscious middle component.
- 1/4 cups sour cream Contribute a mellow tang and creamy body that lightens the filling; fold with the cream cheese to achieve a smoother, slightly tangy layer that complements the strawberries.
- 1/2 cup powdered sugar Add fine sweetness and help stabilize the cream cheese mixture for a silky mouthfeel; sift or mix thoroughly to avoid lumps and to evenly sweeten the filling layer.
- 1 teaspoon vanilla extract Impart warm, aromatic vanilla notes to enhance and unify the flavors; stir into the cream cheese mixture to elevate the overall taste profile subtly.
- 1 package vanilla cake mix (or white cake mix) Provide a sweet, cakey topping that bakes into a golden, crumbly crust; sprinkle dry across the assembled layers to create structure and contrast in texture after baking.
- 1/2 cups salted butter (cold) Supply fat that melts into the cake mix to produce tender, moist crumbs and rich flavor; grate or thinly slice cold butter over the cake mix so it distributes and browns evenly.
- fresh strawberries (whole or halved for optional serving) Serve as a fresh, optional garnish that adds bright color and a juicy bite when serving; slice or halve and arrange atop portions for an appealing presentation.
Instructions
- Preheat the oven to 350°F.: Warmth in the oven creates the environment for the strawberry filling to bubble and for the topping to brown evenly. You should feel comfortable placing the pan in after about 10 minutes of preheating, when the temperature is stabilized. If your oven has hot spots, rotate the pan halfway through baking to prevent uneven browning. A common mistake is not preheating long enough, which can lengthen bake time and affect texture; always allow the oven to reach the set temperature before sliding the pan in.
- Spread the strawberry filling from both cans in the bottom of a 9×13-inch baking dish.: When you spoon in the filling, you will notice a glossy, syrupy texture that spreads easily across the dish. Tap the pan on the counter to settle the filling and create an even layer. The bubbling action during baking transforms this into a jammy core, so evenness matters to ensure consistent bubbling across the pan. Avoid piling filling higher in the center, which can cause uneven baking and longer cook time in the middle.
- In a medium bowl, beat together the cream cheese, sour cream, powdered sugar, and vanilla extract until light and fluffy.: As you whisk, the mixture will lighten in color and become airy, lending a soft texture when dolloped over the filling. The aroma will pick up the sweet, aromatic note of vanilla , and the cream cheese will lose its stiffness. If you still feel lumps, keep beating on low speed, or warm the bowl slightly to help smoothing. A typical pitfall is using cold cream cheese , which leads to lumps and uneven pockets when spooned on top.
- Scoop dollops of the cream cheese mixture across the surface of the strawberry filling. Try to spread the cream cheese a little bit so that the surface of the dump cake is as even as possible.: When placing dollops, you will see contrast between the pale cream and the deep red filling, and lightly spreading helps create gentle ribbons of cream within the fruit. The visual cue to look for is a mostly even top with some exposed filling that will bubble up. If you try to completely smooth the layer, it may sink into the filling too much, so aim for gentle spreading. One mistake is overworking the mixture so it becomes too thin and loses its distinct creamy pockets.
- Sprinkle the cake mix evenly over the strawberry and cream cheese layers.: When you dust the dry cake mix , it should cover the surface in a consistent blanket. This dry layer will form the baked topping, so even coverage ensures uniform browning and texture. Lightly shake the box or use a sieve to distribute the mix if you prefer more control. Leaving bare spots risks powdery, underbaked areas after baking, which is why even spread is important.
- Slice very thin pats of butter and spread over the entire top of the dry cake mix. Cover as much of the cake mix as possible.: The thin butter slices will glisten as they warm and begin to sink into the dry mix, creating tiny pools that melt and form crisp edges. The sound is subtle, just a soft settle, but visually you will see the butter sitting atop the dry mix. Covering most of the surface helps prevent dry, powdery spots; if you skip this, some areas may remain uncooked. A common error is using large chunks of butter , which can leave greasy pockets instead of flaky crispness.
- Bake about 40 to 45 minutes until the topping is browned, even in the center, and the strawberry filling is bubbling up from the bottom.: While baking, you will notice the kitchen filling with a warm, sweet aroma and the edges beginning to bubble first. The visual cue for doneness is an evenly browned top with bubbling fruit visible at seams and corners. The bubbling indicates the filling has reached a temperature where it thickens and melds with the topping, producing that classic dump cake texture. Avoid underbaking, which leaves the cake mix powdery, and overbaking, which can dry out the topping. If the top browns too quickly, tent loosely with foil to prevent burning while the center finishes bubbling.
- Serve warm or cooled.: When you cut into it, the contrast between the warm, saucy strawberry center and the buttery top is most pronounced while warm, offering a lovely steam and fragrant scent. Cooling sets the filling slightly, making cleaner slices and a firmer texture. If you plan to serve later, cool completely, then cover and refrigerate; gently reheat portions in the oven to revive the crisp pockets. A mistake to avoid is storing when very hot, which can trap steam and make the topping soggy; allow partial cooling first.
Notes
- Choose a plain cake mix: Pick a vanilla or white cake mix without pudding added so the topping crisps correctly, as pudding mixes can cause a denser, wetter top.
- Cold butter technique: Keep the butter cold and slice it very thin so it can be distributed evenly, melting into pockets rather than pooling and making greasy spots.
- Room temperature cream cheese: Let the cream cheese sit until soft to the touch so it whips smooth with the powdered sugar and sour cream, preventing lumps and making spreading easier.
- Even distribution of filling: Spread the strawberry filling so it covers the pan consistently, which encourages uniform bubbling and prevents dry edges.
- Watch for bubbling: The visual indicator of doneness is the filling bubbling up at seams and corners, that bubbling confirms the interior has heated through and thickened.