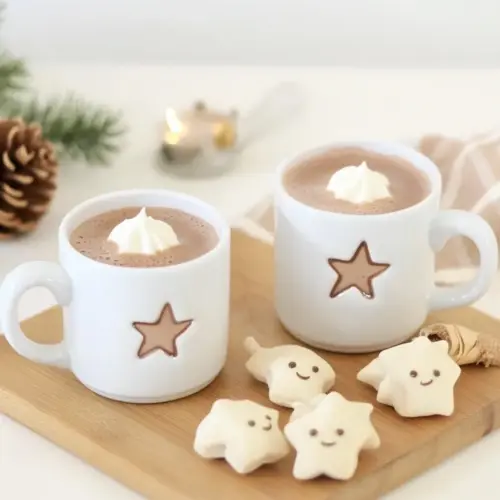
Star Hot Chocolate Toppers
Star Hot Chocolate Toppers started as a tiny weekend experiment that turned my ordinary cocoa into something celebratory and playful. I remember the first time I dolloped a frozen star onto a steaming mug, the way the cream softened at the edges and left little snowflake trails as it melted, and how that small gesture made an evening with friends feel intentionally festive. That moment stuck with me, and ever since I’ve kept a stack of these frozen shapes in the freezer for any time I want to lift a simple drink into something memorable.
There is something almost ceremonial about preparing the little stars, from whipping the cream until it holds its shape, to dusting the tray before freezing, to the satisfying press of a cookie cutter as it releases a perfect silhouette. I love that they are so customizable, and that a few pantry items transform a basic mug of hot cocoa into an experience you slow down for. Often I make a big sheet and invite neighbors or the kids to pick shapes and decorating ideas, which makes the whole process social as well as whimsical.
Recipe Snapshot
2 hr 15 mins
15 mins
120 mins
Hard
150 kcal
American
Gluten-Free, Low FODMAP
Desserts
Whisk, Mixing bowl, Baking tray, Baking paper, Star cookie cutter, Spatula
The Magic of This Star Hot Chocolate Toppers
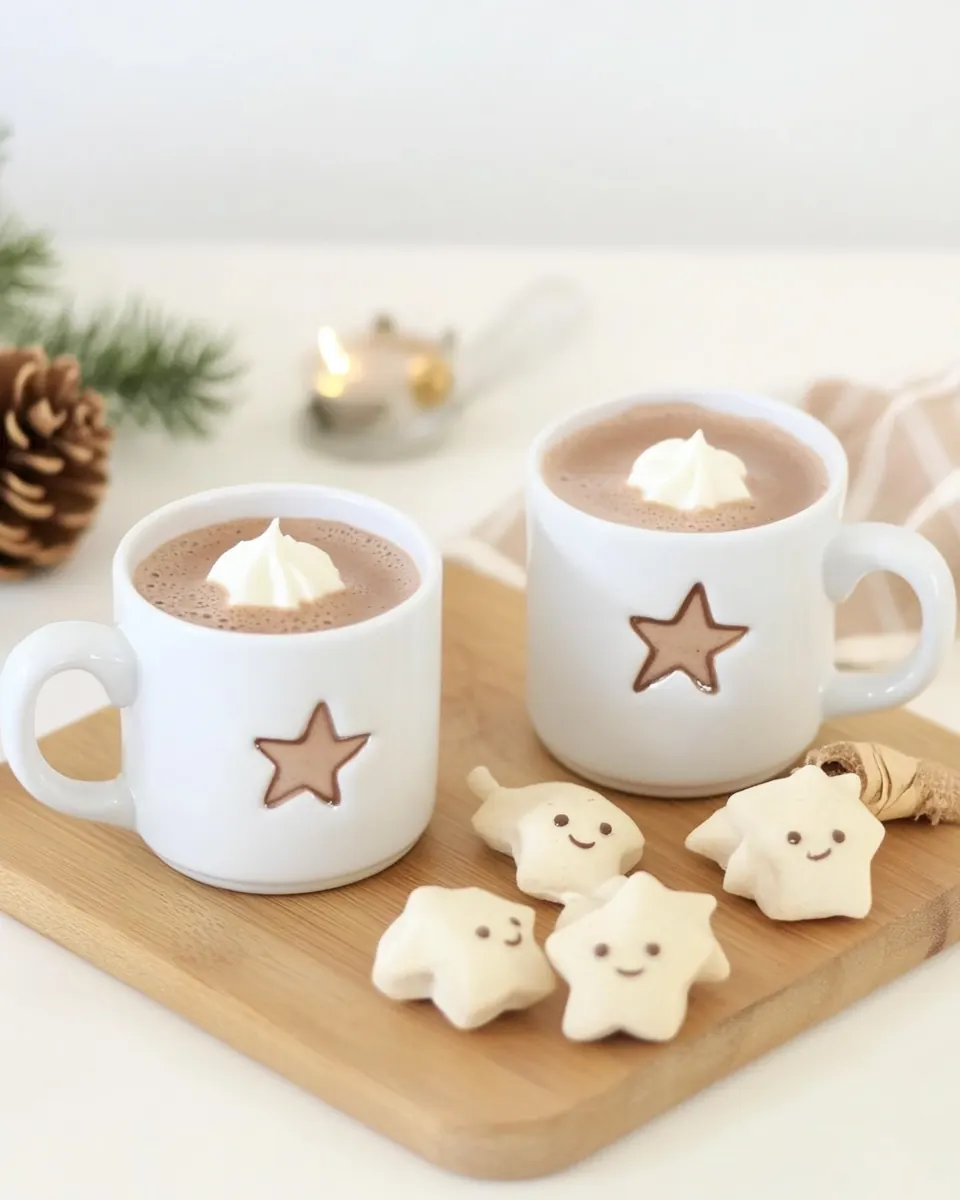
They create instant magic
When I float a Star Hot Chocolate Toppers star on a mug of hot chocolate, the reaction is immediate and joyful. The visual impact is huge for so little effort, and I love seeing people pause, grin, and snap a photo. Presentation matters, and these stars are an effortless way to elevate a drink without complicated steps.
Simple ingredients, stunning results
I appreciate recipes that rely on pantry-friendly items. With just cream, vanilla essence, and icing sugar, you get a frozen garnish that tastes delicate and fresh. The ingredients layer well, the whipped cream holds up in the freezer, and the tiny addition of vanilla essence transforms the flavor beyond plain dairy.
Make ahead convenience
One of my favorite things is how these toppers let you prep ahead. I keep trays of shapes in the freezer for guests or a cozy night in. Having them ready means you can serve a warm drink quickly, but still with a handcrafted touch. This is especially handy during busy holiday mornings.
Kid friendly and customizable
I often recruit kids to choose cutters and sprinkle ideas. They love the hands on element, and it is a low risk activity that results in something useful. You can switch shapes for seasons, and adding a tiny dust of cocoa or edible sparkles before freezing changes the mood entirely.
Minimal waste and versatile uses
Because these toppers are small and freezer stable, they help avoid waste. Leftover whipped cream can become a topping for puddings or fruit, and the shapes can also dress iced coffee or milkshakes. I find a little creativity goes a long way with this technique.
Essential Ingredients for Star Hot Chocolate Toppers
The philosophy behind these components is delightfully straightforward. Each ingredient plays a clear role: the cream provides structure and richness, the vanilla essence brings aromatic warmth, and the icing sugar confectiners sugar / powdered sugar adds a touch of sweetness that stabilizes the whipped texture. Together they form a stable, scoopable mixture that freezes into clean shapes while keeping a light, meltaway mouthfeel.
- 250 ml cream: Whip until soft peaks form to create a light, airy topping that adds richness and a velvety texture to hot chocolate; can be piped or dolloped for decorative star shapes and helps balance sweetness in each cup.
- 1 teaspoon vanilla essence: Flavour subtly to enhance the aroma and depth of the topper; a small amount brightens the creamy component and complements chocolate notes without overpowering the overall drink.
- 1 tablespoon icing sugar confectiners sugar / powdered sugar: Sweeten gently to achieve a smooth, even sweetness and to stabilize whipped cream for piping; powdered sugar dissolves quickly, preventing grittiness while helping maintain shape and adding a fine, polished finish.
Preparation Steps for Star Hot Chocolate Toppers
These instructions are written to guide you step by step with sensory cues and troubleshooting so your frozen stars come out perfectly. Take your time during whipping and freezing, and keep tools cold when cutting. Below, each core step is followed by detailed notes to help you succeed.
- Whip the cream, vanilla and icing sugar until thick and soft peaks have formed.: You will hear a change from a whispery swoosh to a firmer, rhythmic beat as the cream thickens; the texture should look glossy and should mound on the whisk, forming soft peaks that gently fold over. The aroma will brighten as the vanilla essence releases, giving a warm, inviting scent. This stage matters because underwhipped cream will not hold the star shape, while overwhipping makes it grainy or turn to butter. If the mixture looks runny, keep whipping in short bursts and scrape down the bowl to ensure even aeration. A common mistake is rushing and overworking, which causes separation; if that starts, try to stop immediately and gently fold to even out consistency.
- Line a baking tray or large container with baking paper (make sure it will fit in your freezer). Spread the whipped cream over the baking tray so that is around one and a half centimeters thick.: The baking paper prevents sticking and makes removal easy, while spreading the mixture evenly ensures uniform freezing. Visually you want a smooth, even surface about the thickness specified, free of high peaks which can make cutting inconsistent. The cream should look satiny as you smooth it with a spatula, and slight air pockets may appear as tiny pinprick dimples. If the layer is uneven, the thinner areas will freeze harder and may break when cutting; the thicker areas will take longer. Avoid pressing too firmly, which squeezes out air and can yield denser stars.
- Freeze for at least two hours or until firm (overnight is even better).: During freezing, the cream firm up and the surface will take on a matte look as moisture crystallizes; the cold will lock in shape so cutting clean silhouettes is possible. You may notice a faint sheen of frost if your freezer is very cold, which is okay, but prolonged exposure to fluctuating temperatures can create icy crystals. The reason to prefer overnight is that it ensures the centers are fully set, reducing crumbling when cutting. A typical error is insufficient freezing time, which results in ragged edges; if that happens, return the tray to the freezer for an extra hour and check the center by gently pressing with a fingertip through the paper.
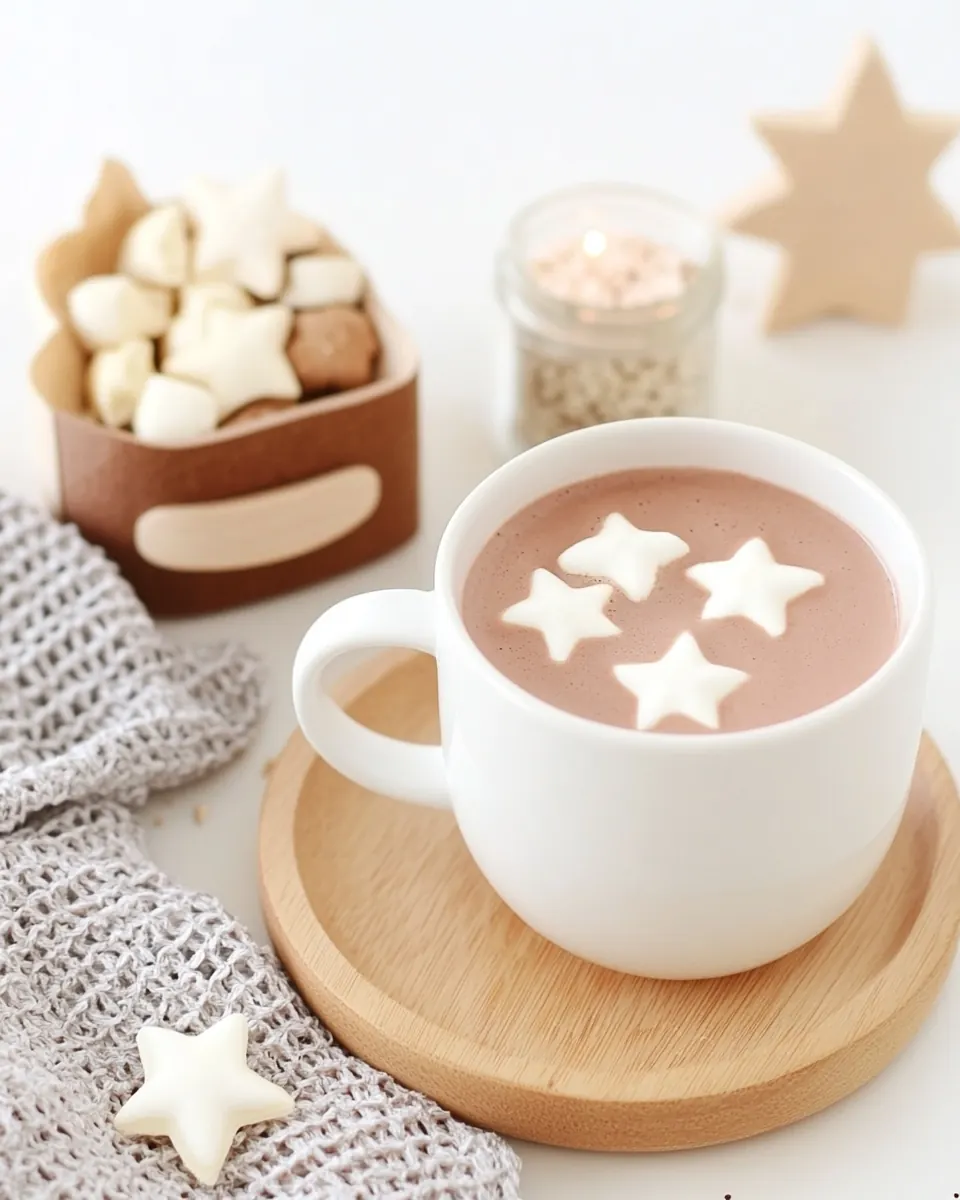
- Use your star-shaped cookie cutter to cut out star shapes, pop them on top of a hot chocolate to make the hot chocolate super special.: When cutting, the surface should resist the cutter and yield a clean edge with minimal tearing, and you may hear a soft snap as the frozen cream releases. Work quickly to avoid warming the shapes with your hands; placing a second chilled tray nearby helps you move cut stars immediately to a cold surface. This technique matters because warm hands or a warm cutter will smear the detail and melt the delicate edges. A common pitfall is pressing down and twisting the cutter which can distort the silhouette; instead press straight down and lift vertical to maintain shape integrity.
Helpful Notes about Star Hot Chocolate Toppers
These notes expand on practical ways to make your toppers look and taste their best, and suggest ways to prep for gatherings. Each tip begins with a short bold phrase so you can scan quickly, followed by detailed guidance.
- Keep tools cold — Cold bowls and whisks help the cream whip faster and reach the desired texture with less risk of overwhipping. Pop them in the fridge or freezer briefly before starting.
- Sift the sugar — If your icing sugar confectiners sugar / powdered sugar has any lumps, sift it before adding to avoid grittiness and ensure a velvety final texture.
- Use a shallow tray — A shallow, wide tray helps you spread an even layer that freezes uniformly, which is essential for clean cutting of shapes later.
- Decorate before freezing — If you want cocoa dust, edible glitter, or sprinkles, add them gently on top before placing the tray in the freezer so they set into the surface.
- Store correctly — Stack cut stars between pieces of parchment on a chilled tray and keep them in an airtight container in the freezer to prevent freezer burn and odor transfer.
What to Serve With Star Hot Chocolate Toppers
These toppers pair beautifully with cozy beverages and light sweets, and they are a charming addition to seasonal tables or quiet nights in. Below I outline serving scenarios, storage tips, and pairing ideas in a list format so you can mix and match suggestions based on the occasion.
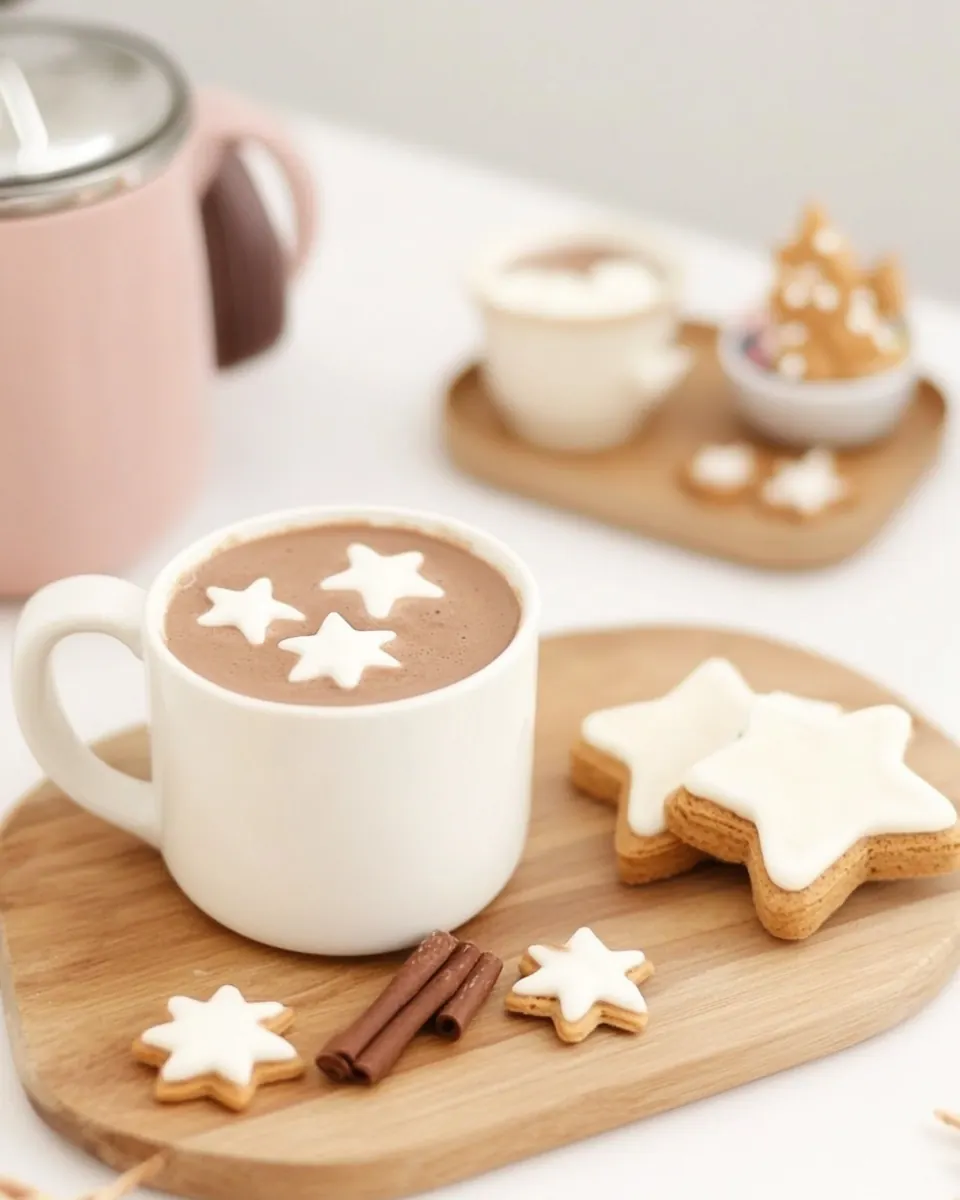
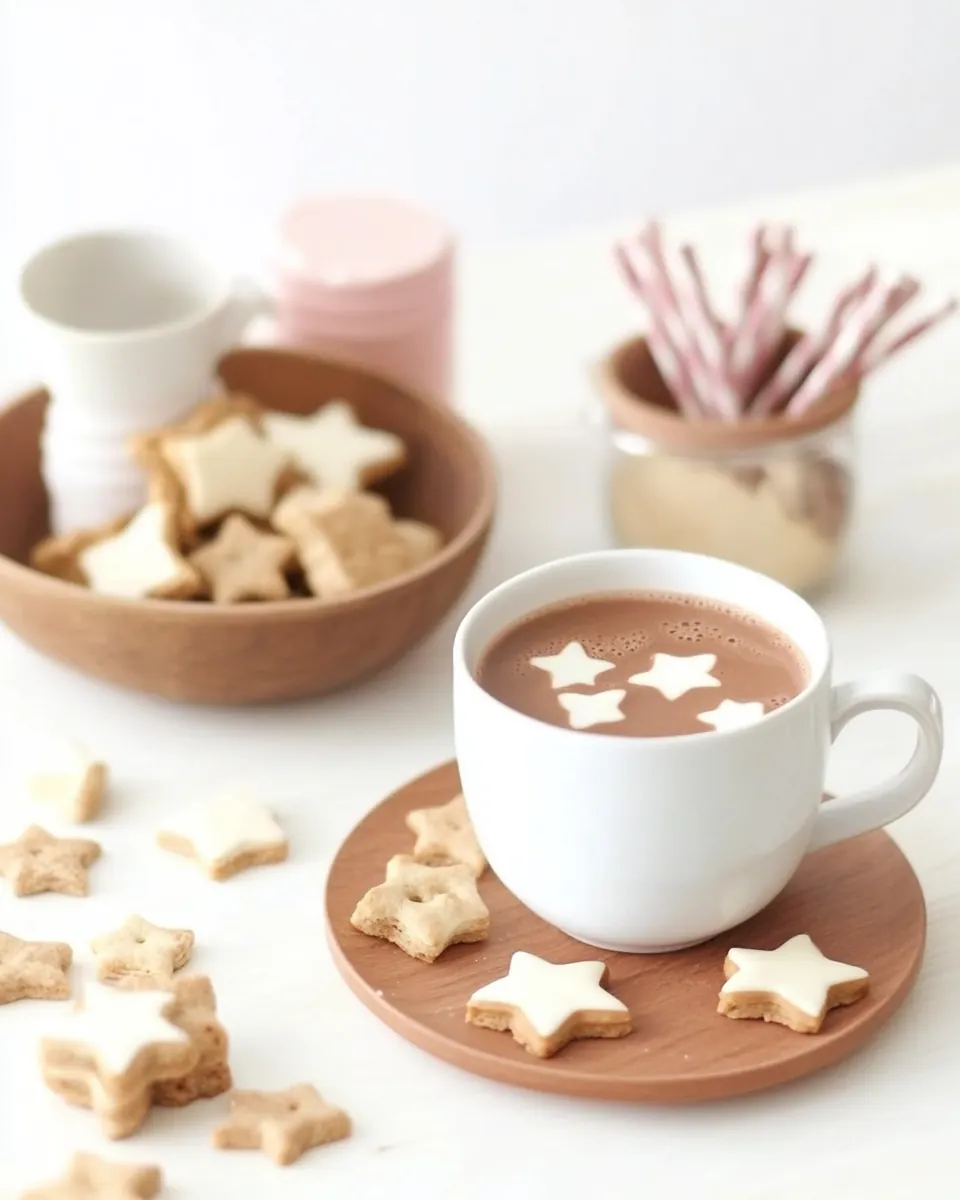
- Classic hot chocolate — Serve your mug of hot chocolate with a single Star Hot Chocolate Toppers star perched on top for an instant festive touch, ideal for winter evenings or a Christmas gathering.
- Spiced cocoa — A lightly spiced cocoa with cinnamon or nutmeg pairs well when a star melts slowly on top, introducing a creamy counterpoint to the warm spices and creating a layered taste experience.
- Family brunch — Offer a tray of frozen stars at a brunch station where guests can top their hot drinks, adding a playful DIY element to the table and making mornings feel special.
- Kid friendly parties — Use different shaped cutters and let children pick stars and sprinkle options; these toppers turn regular mugs into celebratory treats without complicated prep.
- Storage advice — Keep extras in a sealed container in the freezer; when ready to use, transfer directly from freezer to mug to minimize melting during plating.
- Seasonal variations — Swap the star cutter for hearts or trees to match holidays or themes, making this technique versatile across occasions such as Christmas or winter gatherings.
FAQ
Conclusion
What makes this recipe special is its ability to turn a simple mug of hot chocolate into a small, memorable celebration. These frozen stars combine three humble ingredients into a playful garnish that looks festive and melts into a creamy finish. Give them a try the next time you want an effortless upgrade for drinks, and keep a batch ready to make ordinary moments feel a bit more intentional and joyful. I hope you enjoy the ritual of making and sharing these, they are one of those easy touches that people notice and appreciate.
Star Hot Chocolate Toppers
Equipment
- Whisk
- Mixing Bowl
- Baking Tray
- Baking paper
- Star cookie cutter
- Spatula
Ingredients
- 250 ml cream Whip until soft peaks form to create a light, airy topping that adds richness and a velvety texture to hot chocolate; can be piped or dolloped for decorative star shapes and helps balance sweetness in each cup.
- 1 teaspoon vanilla essence Flavour subtly to enhance the aroma and depth of the topper; a small amount brightens the creamy component and complements chocolate notes without overpowering the overall drink.
- 1 tablespoon icing sugar confectiners sugar / powdered sugar Sweeten gently to achieve a smooth, even sweetness and to stabilize whipped cream for piping; powdered sugar dissolves quickly, preventing grittiness while helping maintain shape and adding a fine, polished finish.
Instructions
- Whip the cream, vanilla and icing sugar until thick and soft peaks have formed.: You will hear a change from a whispery swoosh to a firmer, rhythmic beat as the cream thickens; the texture should look glossy and should mound on the whisk, forming soft peaks that gently fold over. The aroma will brighten as the vanilla essence releases, giving a warm, inviting scent. This stage matters because underwhipped cream will not hold the star shape, while overwhipping makes it grainy or turn to butter. If the mixture looks runny, keep whipping in short bursts and scrape down the bowl to ensure even aeration. A common mistake is rushing and overworking, which causes separation; if that starts, try to stop immediately and gently fold to even out consistency.
- Line a baking tray or large container with baking paper (make sure it will fit in your freezer). Spread the whipped cream over the baking tray so that is around one and a half centimeters thick.: The baking paper prevents sticking and makes removal easy, while spreading the mixture evenly ensures uniform freezing. Visually you want a smooth, even surface about the thickness specified, free of high peaks which can make cutting inconsistent. The cream should look satiny as you smooth it with a spatula, and slight air pockets may appear as tiny pinprick dimples. If the layer is uneven, the thinner areas will freeze harder and may break when cutting; the thicker areas will take longer. Avoid pressing too firmly, which squeezes out air and can yield denser stars.
- Freeze for at least two hours or until firm (overnight is even better).: During freezing, the cream firm up and the surface will take on a matte look as moisture crystallizes; the cold will lock in shape so cutting clean silhouettes is possible. You may notice a faint sheen of frost if your freezer is very cold, which is okay, but prolonged exposure to fluctuating temperatures can create icy crystals. The reason to prefer overnight is that it ensures the centers are fully set, reducing crumbling when cutting. A typical error is insufficient freezing time, which results in ragged edges; if that happens, return the tray to the freezer for an extra hour and check the center by gently pressing with a fingertip through the paper.
- Use your star-shaped cookie cutter to cut out star shapes, pop them on top of a hot chocolate to make the hot chocolate super special.: When cutting, the surface should resist the cutter and yield a clean edge with minimal tearing, and you may hear a soft snap as the frozen cream releases. Work quickly to avoid warming the shapes with your hands; placing a second chilled tray nearby helps you move cut stars immediately to a cold surface. This technique matters because warm hands or a warm cutter will smear the detail and melt the delicate edges. A common pitfall is pressing down and twisting the cutter which can distort the silhouette; instead press straight down and lift vertical to maintain shape integrity.
Notes
- Keep tools cold — Cold bowls and whisks help the cream whip faster and reach the desired texture with less risk of overwhipping. Pop them in the fridge or freezer briefly before starting.
- Sift the sugar — If your icing sugar confectiners sugar / powdered sugar has any lumps, sift it before adding to avoid grittiness and ensure a velvety final texture.
- Use a shallow tray — A shallow, wide tray helps you spread an even layer that freezes uniformly, which is essential for clean cutting of shapes later.
- Decorate before freezing — If you want cocoa dust, edible glitter, or sprinkles, add them gently on top before placing the tray in the freezer so they set into the surface.
- Store correctly — Stack cut stars between pieces of parchment on a chilled tray and keep them in an airtight container in the freezer to prevent freezer burn and odor transfer.