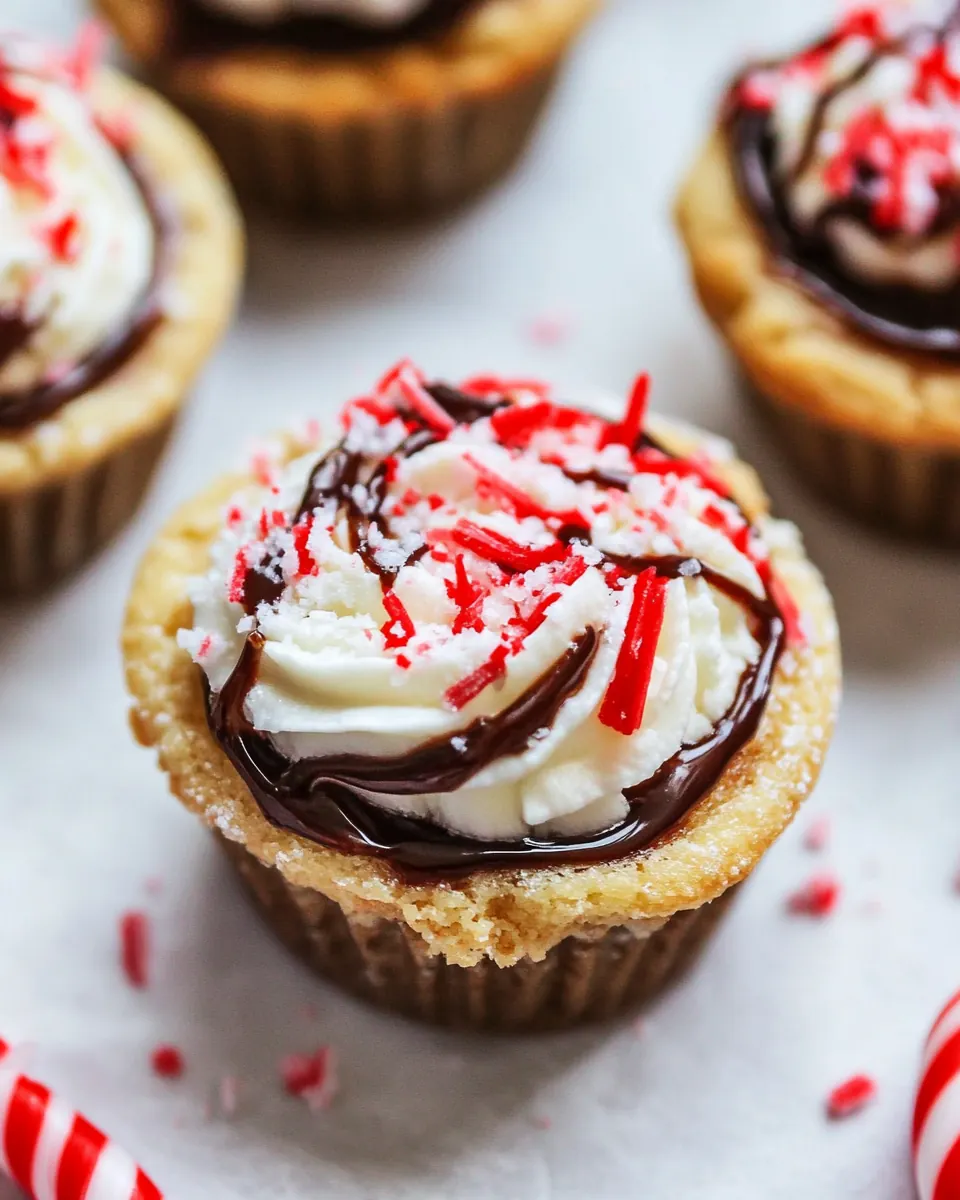
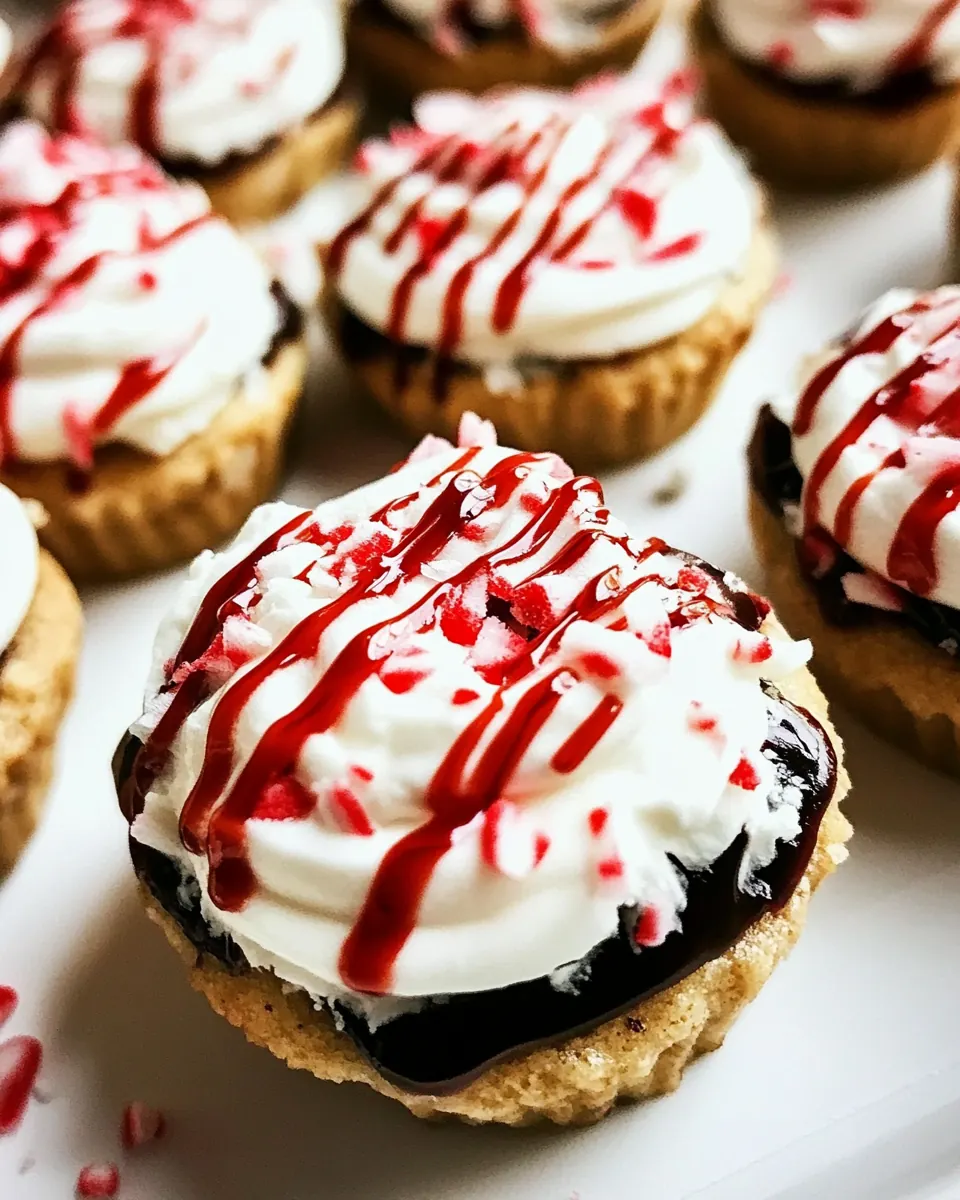
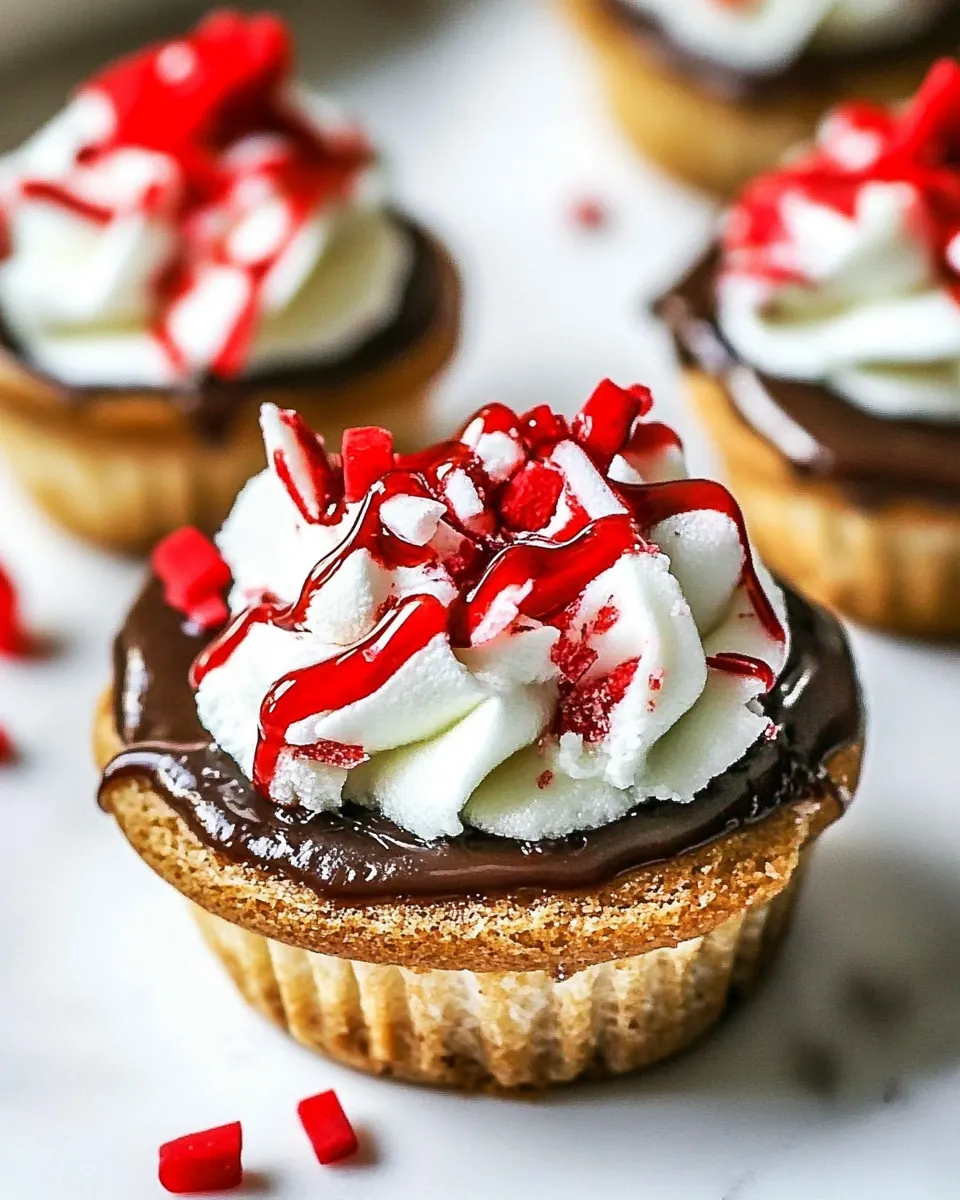
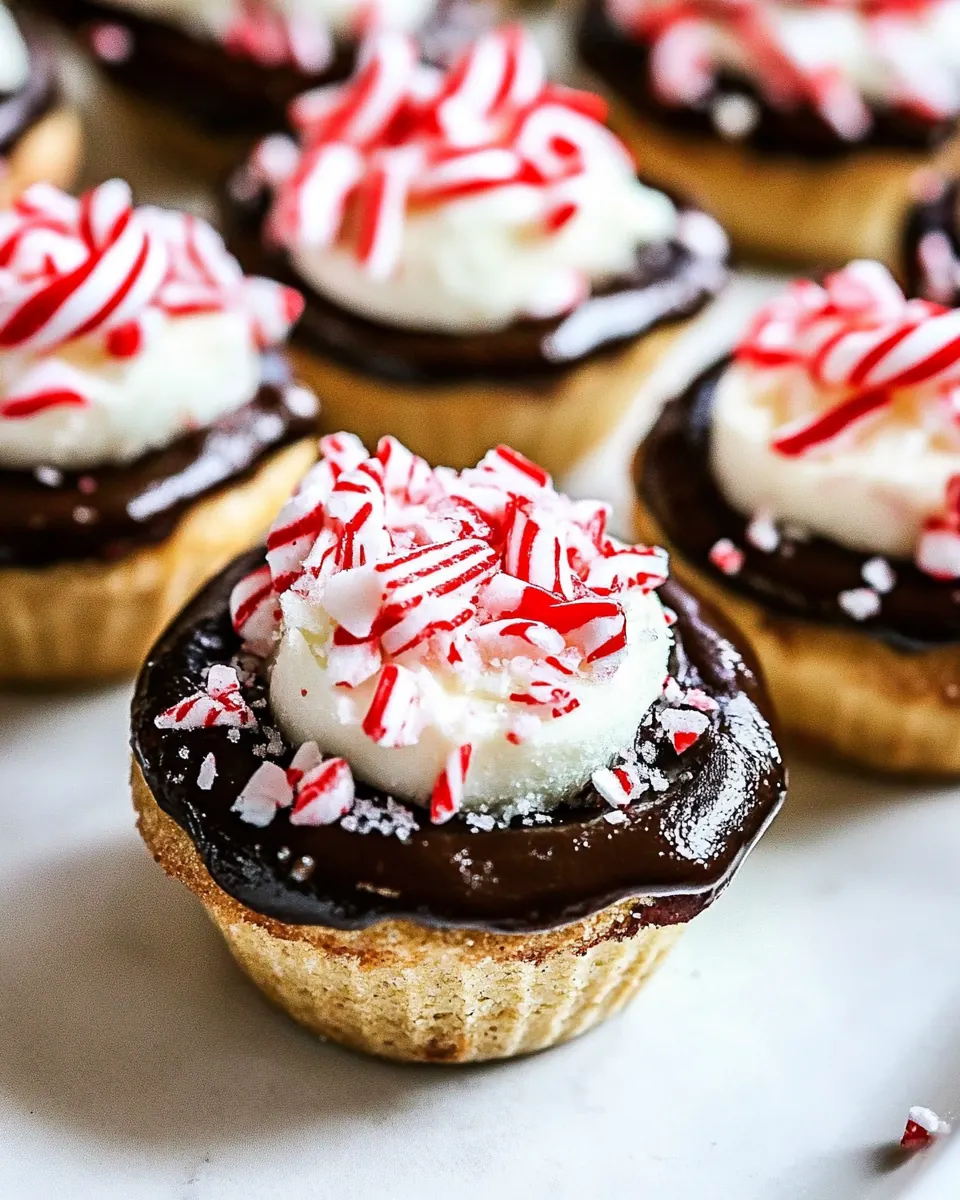
Peppermint Tarts
Peppermint Tarts arrived in my kitchen the first December I tried to recreate a bakery treat that always vanished from holiday platters an hour after I set it down.
I remember that evening clearly, the windows fogged from the steam of tea, while I fumbled through a drawer for the tin muffin tray I rarely used. The memory of crisp cookie crust giving way to a creamy, mint kissed chocolate center is what pushed me to test and tweak until the balance felt right. Over several batches I learned how the dough behaves when chilled, why a quick press into the pan creates the perfect shell, and how a gentle swirl of warm ganache finishes the tarts without collapsing the filling.
These little bites became my shortcut when guests stopped by unexpectedly, and they turned into the thing I bring to cookie exchanges because they travel well and look festive with crushed candy cane atop. They are small, but they command attention, and making them taught me patience in a kitchen where holiday chaos often rules. I love how a single tart carries a crisp, buttery voice from the crust, then a soft, minty chocolate reply from the center. If you have a moment this season, these mini tarts are an approachable way to impress without spending all day baking.
Recipe Snapshot
2 hr 20 mins
120 mins
20 mins
Hard
180 kcal
American
Gluten-Free, Low FODMAP
Desserts
Electric mixer, Mini muffin tin, Small saucepan, Medium bowl, Wire rack
Why This Peppermint Tarts Shines
The perfect holiday bite
I fell for Peppermint Tarts because they condense all the festive flavors of winter into one neat mouthful. The contrast between the tender crust and the cool minted filling keeps every bite interesting, which makes them addictive at gatherings.
Make ahead friendly
I often make the shells a day ahead, because they keep their shape and texture, and that low stress planning means I can enjoy the evening instead of fussing in the kitchen. The recipe stores well, so you can prepare in stages and still have that freshly finished look on party day.
Simple techniques, big payoff
There are no finicky temperatures or rare tools, just straightforward mixing and gentle heating. I like recipes that reward attention to small details, and with these tarts every small step makes the result feel special, from creaming to chilling to filling.
Textural harmony
The crust is buttery and slightly crumbly, while the filling sets silky with a sheen from the ganache. That textural dialogue is what keeps guests reaching back for seconds, and it makes each tart feel like a composed dessert rather than a cookie.
A festive finish
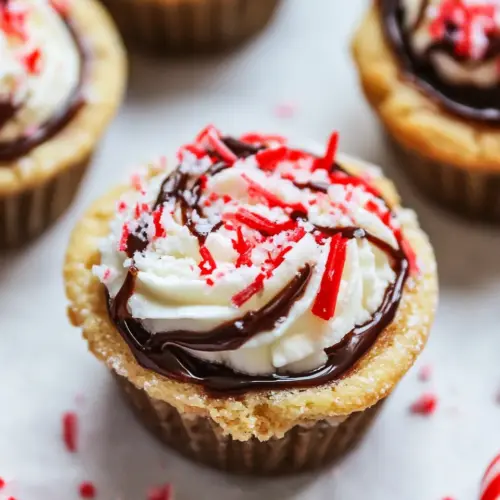
Crushed candy cane adds a crunchy, minty flourish and a holiday look. I love how the red streaks pop against glossy chocolate, it turns a simple bite into something celebratory with minimal effort.
Peppermint Tarts Ingredients
These ingredients form a classic holiday team where the crust plays the structural role, and the fillings bring richness and brightness. The key players are the fats for tender texture, the sugars for flavor depth, and the chocolate combined with peppermint for the signature taste. They are straightforward, dependable, and work together to balance crispness and creaminess.
- 1/4 cup (57 g) unsalted butter softened: Softened to creaming consistency, provides richness and moisture while tenderizing the dough for a delicate texture and buttery flavor.
- 1/4 cup (47 g) vegetable shortening (i.e. Crisco): Solid fat used for stability and flakiness, contributes to tender crumb and helps create a slightly crisp edge in baked tarts.
- 2 ounces (57 g) cream cheese softened: Softened to blend smoothly, adds tangy richness and contributes to a soft, slightly tender crumb while enhancing overall flavor depth.
- 1 cup (200 g) packed brown sugar: Packed for volume and caramel flavor, supplies sweetness and moisture while also contributing chewiness and color during baking.
- 1/2 teaspoon baking powder: Leavening agent that provides light lift and a gentle rise, ensuring the tart base is slightly airy without becoming cake-like.
- 1/2 teaspoon salt: Seasoning that balances sweetness and enhances other flavors, also strengthens gluten structure slightly and controls overall taste.
- 1 large egg: Adds structure and richness, contributes moisture and binding while helping the dough set and develop a tender crumb.
- 2 teaspoons vanilla extract: Flavoring that imparts aromatic warmth and rounds out sweetness, helping to deepen and balance the dessert's overall profile.
- 2 1/2 cups (304 g) all-purpose flour: Dry binder giving structure and bulk, forms the dough matrix, absorbs fats and liquids, and yields the tender yet stable crumb.
- 5 ounces (71 g) semisweet chocolate coarsely chopped: Coarsely chopped for melting or folding, provides intense chocolate flavor and pockets of semi-sweet richness throughout the tarts.
- 2 tablespoons (28 g) unsalted butter: Added for melting in ganache or filling, contributes creaminess and enhances the chocolate's smooth mouthfeel and shine.
- 1 large egg: Provides additional binding and gloss when used in an egg wash or filling, enriching color and contributing to a cohesive texture.
- 1/3 cup (67 g) packed brown sugar: Packed for concentrated sweetness and molasses notes, contributes both sweetness and chewiness to the filling or topping.
- 2 teaspoons vanilla extract: Aromatic liquid that enhances sweetness and rounds flavors, used to intensify the dessert's vanilla notes and complexity.
- 1/2 teaspoon peppermint extract: Potent flavoring used sparingly to introduce cooling, minty brightness, balancing the chocolate and adding a distinctive peppermint punch.
- 1/3 cup (79 ml) heavy whipping cream: Rich dairy that lends creaminess and helps create a silky ganache or creamy filling, improving mouthfeel and smoothness.
- 3 ounces (42 g) chopped semisweet chocolate: Chopped for incorporating into fillings or melting, adds additional chocolate intensity and small textural contrast in each bite.
- 3 4 candy canes crushed, for garnish: Crushed as a garnish to add crunchy texture and bright mint flavor, providing festive color contrast and a refreshing finish.
Step by Step Guide for Peppermint Tarts
I find that following these steps in order keeps the process calm and predictable, especially when juggling multiple components. Take your time with each stage, and use the sensory cues and troubleshooting notes to keep things on track. I like to prepare my workspace so I can move smoothly from dough to filling to ganache.
- Preheat oven to 325°F. Spray mini muffin tins with nonstick cooking spray.: The room fills with a warm, faintly sweet smell as the oven begins to climb, creating a steady backdrop for the rest of the work. Preheating ensures the shells start to set immediately, which helps them hold shape rather than slumping, and spraying the tins prevents sticking so the delicate shells come out clean and intact. A common mistake is not fully preheating, which can cause the shells to bake unevenly and collapse. Check the oven thermometer if yours runs hot or cold to keep the actual temperature accurate.
- Beat butter, shortening, and cream cheese with an electric mixer on medium to high speed for 30 seconds. Add brown sugar, baking powder, and salt. Beat until combined, scraping the sides of the bowl occasionally. Beat in the egg and vanilla until combined. Slowly mix in the flour.: When you cream these fats, you'll notice the mixture lighten and develop a slightly whipped texture, which helps create a tender shell. The sugar melts into the fats, releasing a warm caramel scent as it blends. Scraping the bowl ensures even mixing so no pockets of unmixed fat remain, which would create uneven texture in the finished crust. If you rush the flour stage and overmix, gluten will develop, making the crust tougher, so stop as soon as the dough comes together. If the mixture feels too soft, chilling briefly helps firm it up for shaping.
- If dough is too sticky to handle, you can chill it for 30-60 minutes. Otherwise, continue below.: Chilling tightens the fats and firms the dough, making it easier to roll into even balls and press into cups, and you will notice the dough becomes less tacky and more manageable. This resting also relaxes any gluten that formed, yielding a more tender crust after baking. A pitfall is leaving the dough out too long after chilling so it softens excessively; work quickly or chill in batches to maintain shape. If the kitchen is very warm, a longer chill is often necessary to avoid sticky hands and uneven shells.
- Shape dough into 36 balls (about 1 1/4 inches each). Lightly press balls onto the bottoms and up the sides of the muffin cups.: As you shape each ball, feel for uniform density, because evenly sized shells bake at the same rate and produce consistent texture across the batch. Lightly pressing forms a thin base with slightly higher walls, which will contain the filling without becoming dough heavy. Pressing too hard can compress the dough and yield a dense crust, while pressing too lightly risks gaps and thin spots that collapse when filled. Keep a gentle, steady pressure as you build the shell walls.
- Make the filling: stir chocolate and butter in a small saucepan over low heat until melted. Remove from heat. Stir in egg, brown sugar, and vanilla and peppermint extracts. Spoon 1 slightly rounded teaspoon of filling into each dough-lined muffin cup.: stir chocolate and butter in a small saucepan over low heat until melted. Remove from heat. Stir in egg, brown sugar, and vanilla and peppermint extracts. Spoon 1 slightly rounded teaspoon of filling into each dough-lined muffin cup. : Low heat prevents scorching the chocolate and keeps the mixture glossy as the butter melts into it, releasing a rich cocoa aroma. Once removed from heat, the residual warmth helps integrate the egg without scrambling it, and the sugar dissolves into a silky base, carrying the mint and vanilla notes. Spoon carefully so the filling seats within the shell without overflowing, aiming for uniform amounts so each tart bakes consistently. A typical blunder is adding the egg while the chocolate is too hot, which can curdle the filling; always allow a brief cool moment off the heat before stirring the egg in.
- Bake for 15-20 minutes until the crust is just firm and filling is puffed and set. Cool in muffin cups on a wire rack for 5 minutes. Carefully remove tarts from muffin cups; cool completely on a rack.: During baking the kitchen fills with a toasty, chocolaty scent, and you will watch the filling puff slightly and develop a glossy surface. The shells will turn a pale golden hue around the edges, which signals they are done. Cooling briefly in the pan stabilizes the structure so they release cleanly, and finishing on a rack prevents sogginess by allowing air circulation. A common error is overbaking, which dries the filling and makes the shells brittle, so check frequently toward the end of the time window and remove when set but still slightly soft at the center for the best texture.
- While the tarts are cooling, make the chocolate ganache. Place the chocolate in a medium sized bowl. In a small saucepan, heat the whipping cream over medium heat until it boils. Pour the cream over the chocolate and let sit 5 minutes. Stir until smooth.: The hot cream blooming the chocolate releases a deep, warm chocolate aroma and yields a satiny ganache that is glossy and pourable. Letting the cream sit before stirring gives the heat time to soften the chocolate gently, ensuring a smooth emulsion. Stirring slowly produces a mirror like sheen, and the finished ganache should move like liquid silk. If the ganache looks grainy, keep stirring gently or warm it briefly over a water bath to reemulsify; avoid overheating which can separate fats and ruin the texture.
- Spoon a little ganache over each cooled tart. Sprinkle with crushed candy canes for garnish. Store in an airtight container for up to 3 days or freeze in a single layer in an airtight container or bag for up to 1 month.: The cooled tarts accept the warm ganache with a satisfying glossy finish, and the contrast of the cold baked shell with the still slightly warm ganache creates an inviting temperature play. The crushed candy canes add visual sparkle and a crisp minty crack as you bite in, completing the holiday profile. For storage, airtight containers preserve texture and prevent the candy from softening, and freezing in a single layer avoids sticking together. A mistake to watch for is stacking warm tarts, which traps moisture and makes the shells soggy, so ensure they are fully cooled before packing.
Substitutions and Tips
I like to keep tips practical and focused on preserving texture and flavor, because these small decisions make a big difference in tiny desserts like these. Below are detailed notes that address common questions and help you adapt the recipe to your kitchen.
- Chilling tip Use a 30 to 60 minute chill for sticky dough. Chilling firms the fats so you can shape uniform shells, and it prevents the dough from spreading during baking. If your kitchen is warm, err on the longer side and chill the entire bowl wrapped in plastic for the best control.
- Egg handling Add the egg to the filling off the heat to avoid scrambling. Let the melted chocolate mixture cool slightly for a minute or two, then whisk the egg in briskly; this creates a smooth custard texture and prevents graininess.
- Chocolate choices Use a mid quality semisweet chocolate for both the filling and ganache to balance sweetness with cocoa depth. Higher cocoa percentages give more pronounced chocolate notes, while lower percentages create sweeter, creamier results.
- Serving cold versus room temperature These tarts are excellent slightly chilled or at room temperature. Chilled tarts have firmer filling and a clean bite, while room temperature brings out creaminess and more pronounced flavors. Decide based on your preference and the occasion.
- Freezing method Freeze in a single layer on a tray before transferring to an airtight container to prevent sticking. Thaw in the refrigerator or at room temperature briefly before serving to restore texture without condensation forming on the chocolate.
- Garnish timing Sprinkle crushed candy canes after the ganache has set slightly, so they adhere but keep their crunch. Adding them while the ganache is too warm can cause the candy to sink or lose its visual pop.
What Goes Well With This Peppermint Tarts
These tarts pair beautifully with warm drinks and make a lovely addition to dessert spreads. Below are serving suggestions, occasions, and storage ideas to help you present them at their best.
- Coffee or mint tea Serve alongside a hot beverage to contrast the cool peppermint and glossy ganache, creating a balance between warm and cool sips that guests appreciate during holiday gatherings.
- Holiday cookie platter Combine with other small bites for a varied dessert table; their visual pop from crushed candy cane makes them stand out among more neutral colored cookies.
- After dinner treat Offer one or two tarts on a small dessert plate after a heavy meal, the mint refreshes the palate and the small size keeps portions controlled while still feeling indulgent.
- Gift box idea Pack cooled tarts in a single layer in a festive box with parchment between layers for a homemade edible gift that travels well and feels special.
- Storage advice Keep in an airtight container in the refrigerator for up to three days for best texture, and freeze if you need longer storage, taking care to thaw gently before serving.
- Seasonal pairing These are ideal for winter and holiday parties, perfect for cookie exchanges, festive brunches, or as a sweet finish to a holiday dinner where minty notes complement seasonal flavors.
FAQ
Conclusion
Peppermint Tarts stand out because they capture holiday flavors in a neat, irresistible package, balancing a tender buttery shell with a silky mint chocolate center and a festive candy cane finish. Try them the next time you want an easy yet impressive dessert to share with friends or family. They are forgiving, portable, and perfect for making ahead so you can enjoy the celebration rather than being stuck at the stove.
Peppermint Tarts
Equipment
- Electric Mixer
- Mini Muffin Tin
- Small Saucepan
- Medium Bowl
- Wire Rack
Ingredients
- 1/4 cup (57 g) unsalted butter softened Softened to creaming consistency, provides richness and moisture while tenderizing the dough for a delicate texture and buttery flavor.
- 1/4 cup (47 g) vegetable shortening (i.e. Crisco) Solid fat used for stability and flakiness, contributes to tender crumb and helps create a slightly crisp edge in baked tarts.
- 2 ounces (57 g) cream cheese softened Softened to blend smoothly, adds tangy richness and contributes to a soft, slightly tender crumb while enhancing overall flavor depth.
- 1 cup (200 g) packed brown sugar Packed for volume and caramel flavor, supplies sweetness and moisture while also contributing chewiness and color during baking.
- 1/2 teaspoon baking powder Leavening agent that provides light lift and a gentle rise, ensuring the tart base is slightly airy without becoming cake-like.
- 1/2 teaspoon salt Seasoning that balances sweetness and enhances other flavors, also strengthens gluten structure slightly and controls overall taste.
- 1 large egg Adds structure and richness, contributes moisture and binding while helping the dough set and develop a tender crumb.
- 2 teaspoons vanilla extract Flavoring that imparts aromatic warmth and rounds out sweetness, helping to deepen and balance the dessert's overall profile.
- 2 1/2 cups (304 g) all-purpose flour Dry binder giving structure and bulk, forms the dough matrix, absorbs fats and liquids, and yields the tender yet stable crumb.
- 5 ounces (71 g) semisweet chocolate coarsely chopped Coarsely chopped for melting or folding, provides intense chocolate flavor and pockets of semi-sweet richness throughout the tarts.
- 2 tablespoons (28 g) unsalted butter Added for melting in ganache or filling, contributes creaminess and enhances the chocolate's smooth mouthfeel and shine.
- 1 large egg Provides additional binding and gloss when used in an egg wash or filling, enriching color and contributing to a cohesive texture.
- 1/3 cup (67 g) packed brown sugar Packed for concentrated sweetness and molasses notes, contributes both sweetness and chewiness to the filling or topping.
- 2 teaspoons vanilla extract Aromatic liquid that enhances sweetness and rounds flavors, used to intensify the dessert's vanilla notes and complexity.
- 1/2 teaspoon peppermint extract Potent flavoring used sparingly to introduce cooling, minty brightness, balancing the chocolate and adding a distinctive peppermint punch.
- 1/3 cup (79 ml) heavy whipping cream Rich dairy that lends creaminess and helps create a silky ganache or creamy filling, improving mouthfeel and smoothness.
- 3 ounces (42 g) chopped semisweet chocolate Chopped for incorporating into fillings or melting, adds additional chocolate intensity and small textural contrast in each bite.
- 3 -4 candy canes crushed, for garnish Crushed as a garnish to add crunchy texture and bright mint flavor, providing festive color contrast and a refreshing finish.
Instructions
- Preheat oven to 325°F. Spray mini muffin tins with nonstick cooking spray.: The room fills with a warm, faintly sweet smell as the oven begins to climb, creating a steady backdrop for the rest of the work. Preheating ensures the shells start to set immediately, which helps them hold shape rather than slumping, and spraying the tins prevents sticking so the delicate shells come out clean and intact. A common mistake is not fully preheating, which can cause the shells to bake unevenly and collapse. Check the oven thermometer if yours runs hot or cold to keep the actual temperature accurate.
- Beat butter, shortening, and cream cheese with an electric mixer on medium to high speed for 30 seconds. Add brown sugar, baking powder, and salt. Beat until combined, scraping the sides of the bowl occasionally. Beat in the egg and vanilla until combined. Slowly mix in the flour.: When you cream these fats, you'll notice the mixture lighten and develop a slightly whipped texture, which helps create a tender shell. The sugar melts into the fats, releasing a warm caramel scent as it blends. Scraping the bowl ensures even mixing so no pockets of unmixed fat remain, which would create uneven texture in the finished crust. If you rush the flour stage and overmix, gluten will develop, making the crust tougher, so stop as soon as the dough comes together. If the mixture feels too soft, chilling briefly helps firm it up for shaping.
- If dough is too sticky to handle, you can chill it for 30-60 minutes. Otherwise, continue below.: Chilling tightens the fats and firms the dough, making it easier to roll into even balls and press into cups, and you will notice the dough becomes less tacky and more manageable. This resting also relaxes any gluten that formed, yielding a more tender crust after baking. A pitfall is leaving the dough out too long after chilling so it softens excessively; work quickly or chill in batches to maintain shape. If the kitchen is very warm, a longer chill is often necessary to avoid sticky hands and uneven shells.
- Shape dough into 36 balls (about 1 1/4 inches each). Lightly press balls onto the bottoms and up the sides of the muffin cups.: As you shape each ball, feel for uniform density, because evenly sized shells bake at the same rate and produce consistent texture across the batch. Lightly pressing forms a thin base with slightly higher walls, which will contain the filling without becoming dough heavy. Pressing too hard can compress the dough and yield a dense crust, while pressing too lightly risks gaps and thin spots that collapse when filled. Keep a gentle, steady pressure as you build the shell walls.
- Make the filling: stir chocolate and butter in a small saucepan over low heat until melted. Remove from heat. Stir in egg, brown sugar, and vanilla and peppermint extracts. Spoon 1 slightly rounded teaspoon of filling into each dough-lined muffin cup.: stir chocolate and butter in a small saucepan over low heat until melted. Remove from heat. Stir in egg, brown sugar, and vanilla and peppermint extracts. Spoon 1 slightly rounded teaspoon of filling into each dough-lined muffin cup. : Low heat prevents scorching the chocolate and keeps the mixture glossy as the butter melts into it, releasing a rich cocoa aroma. Once removed from heat, the residual warmth helps integrate the egg without scrambling it, and the sugar dissolves into a silky base, carrying the mint and vanilla notes. Spoon carefully so the filling seats within the shell without overflowing, aiming for uniform amounts so each tart bakes consistently. A typical blunder is adding the egg while the chocolate is too hot, which can curdle the filling; always allow a brief cool moment off the heat before stirring the egg in.
- Bake for 15-20 minutes until the crust is just firm and filling is puffed and set. Cool in muffin cups on a wire rack for 5 minutes. Carefully remove tarts from muffin cups; cool completely on a rack.: During baking the kitchen fills with a toasty, chocolaty scent, and you will watch the filling puff slightly and develop a glossy surface. The shells will turn a pale golden hue around the edges, which signals they are done. Cooling briefly in the pan stabilizes the structure so they release cleanly, and finishing on a rack prevents sogginess by allowing air circulation. A common error is overbaking, which dries the filling and makes the shells brittle, so check frequently toward the end of the time window and remove when set but still slightly soft at the center for the best texture.
- While the tarts are cooling, make the chocolate ganache. Place the chocolate in a medium sized bowl. In a small saucepan, heat the whipping cream over medium heat until it boils. Pour the cream over the chocolate and let sit 5 minutes. Stir until smooth.: The hot cream blooming the chocolate releases a deep, warm chocolate aroma and yields a satiny ganache that is glossy and pourable. Letting the cream sit before stirring gives the heat time to soften the chocolate gently, ensuring a smooth emulsion. Stirring slowly produces a mirror like sheen, and the finished ganache should move like liquid silk. If the ganache looks grainy, keep stirring gently or warm it briefly over a water bath to reemulsify; avoid overheating which can separate fats and ruin the texture.
- Spoon a little ganache over each cooled tart. Sprinkle with crushed candy canes for garnish. Store in an airtight container for up to 3 days or freeze in a single layer in an airtight container or bag for up to 1 month.: The cooled tarts accept the warm ganache with a satisfying glossy finish, and the contrast of the cold baked shell with the still slightly warm ganache creates an inviting temperature play. The crushed candy canes add visual sparkle and a crisp minty crack as you bite in, completing the holiday profile. For storage, airtight containers preserve texture and prevent the candy from softening, and freezing in a single layer avoids sticking together. A mistake to watch for is stacking warm tarts, which traps moisture and makes the shells soggy, so ensure they are fully cooled before packing.
Notes
- Chilling tip Use a 30 to 60 minute chill for sticky dough. Chilling firms the fats so you can shape uniform shells, and it prevents the dough from spreading during baking. If your kitchen is warm, err on the longer side and chill the entire bowl wrapped in plastic for the best control.
- Egg handling Add the egg to the filling off the heat to avoid scrambling. Let the melted chocolate mixture cool slightly for a minute or two, then whisk the egg in briskly; this creates a smooth custard texture and prevents graininess.
- Chocolate choices Use a mid quality semisweet chocolate for both the filling and ganache to balance sweetness with cocoa depth. Higher cocoa percentages give more pronounced chocolate notes, while lower percentages create sweeter, creamier results.
- Serving cold versus room temperature These tarts are excellent slightly chilled or at room temperature. Chilled tarts have firmer filling and a clean bite, while room temperature brings out creaminess and more pronounced flavors. Decide based on your preference and the occasion.
- Freezing method Freeze in a single layer on a tray before transferring to an airtight container to prevent sticking. Thaw in the refrigerator or at room temperature briefly before serving to restore texture without condensation forming on the chocolate.
- Garnish timing Sprinkle crushed candy canes after the ganache has set slightly, so they adhere but keep their crunch. Adding them while the ganache is too warm can cause the candy to sink or lose its visual pop.