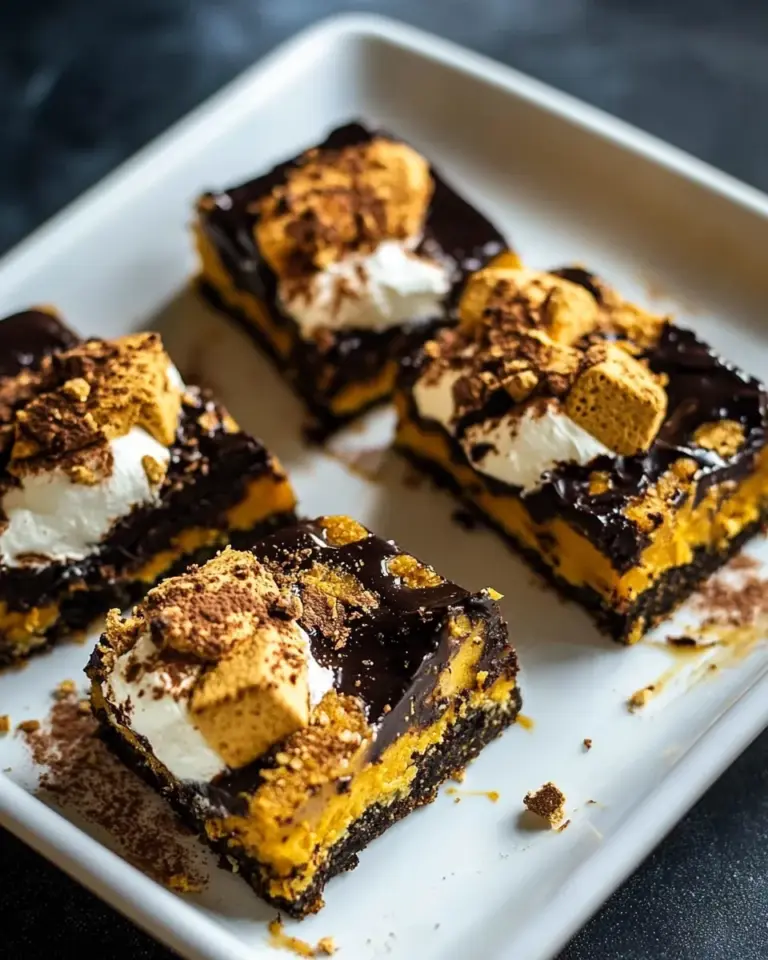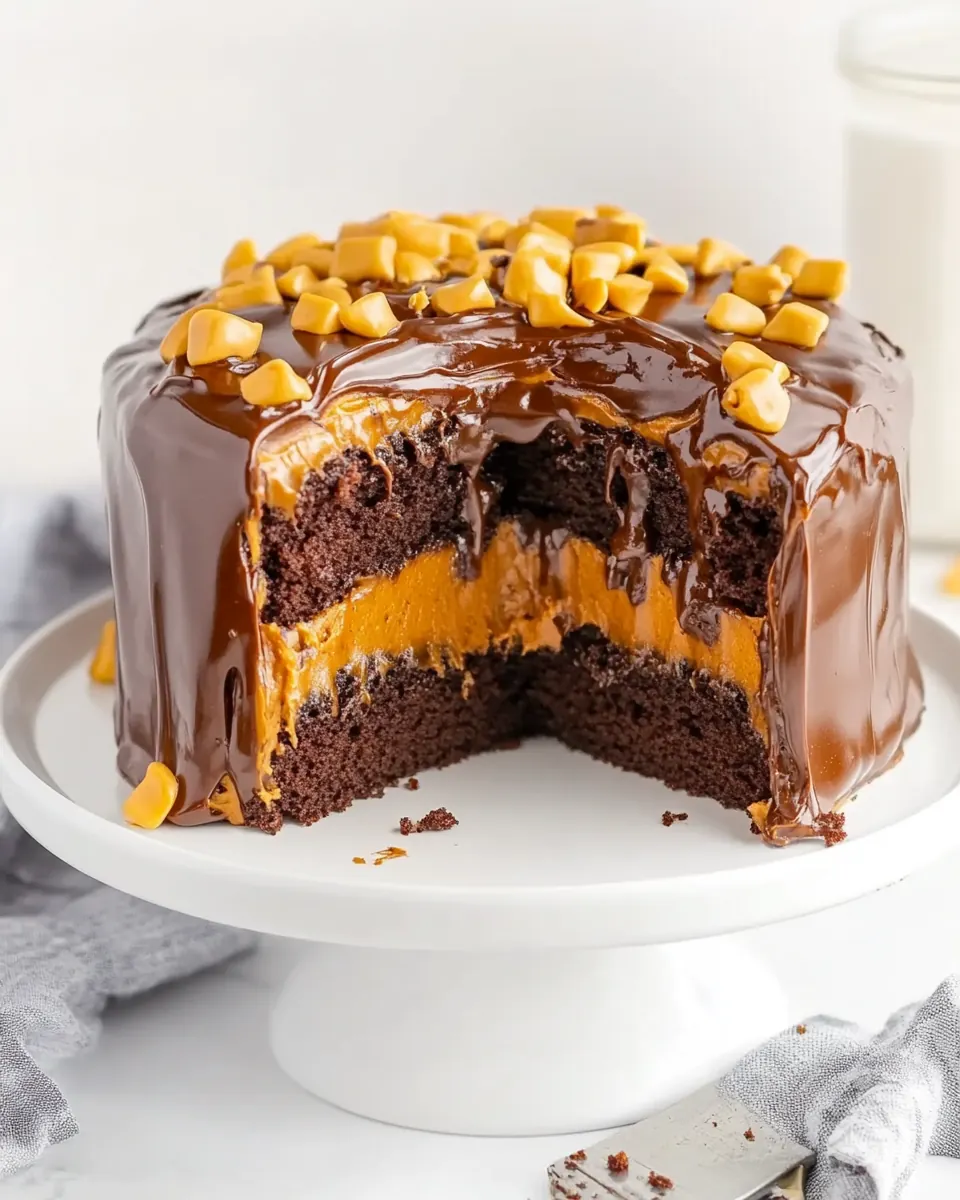
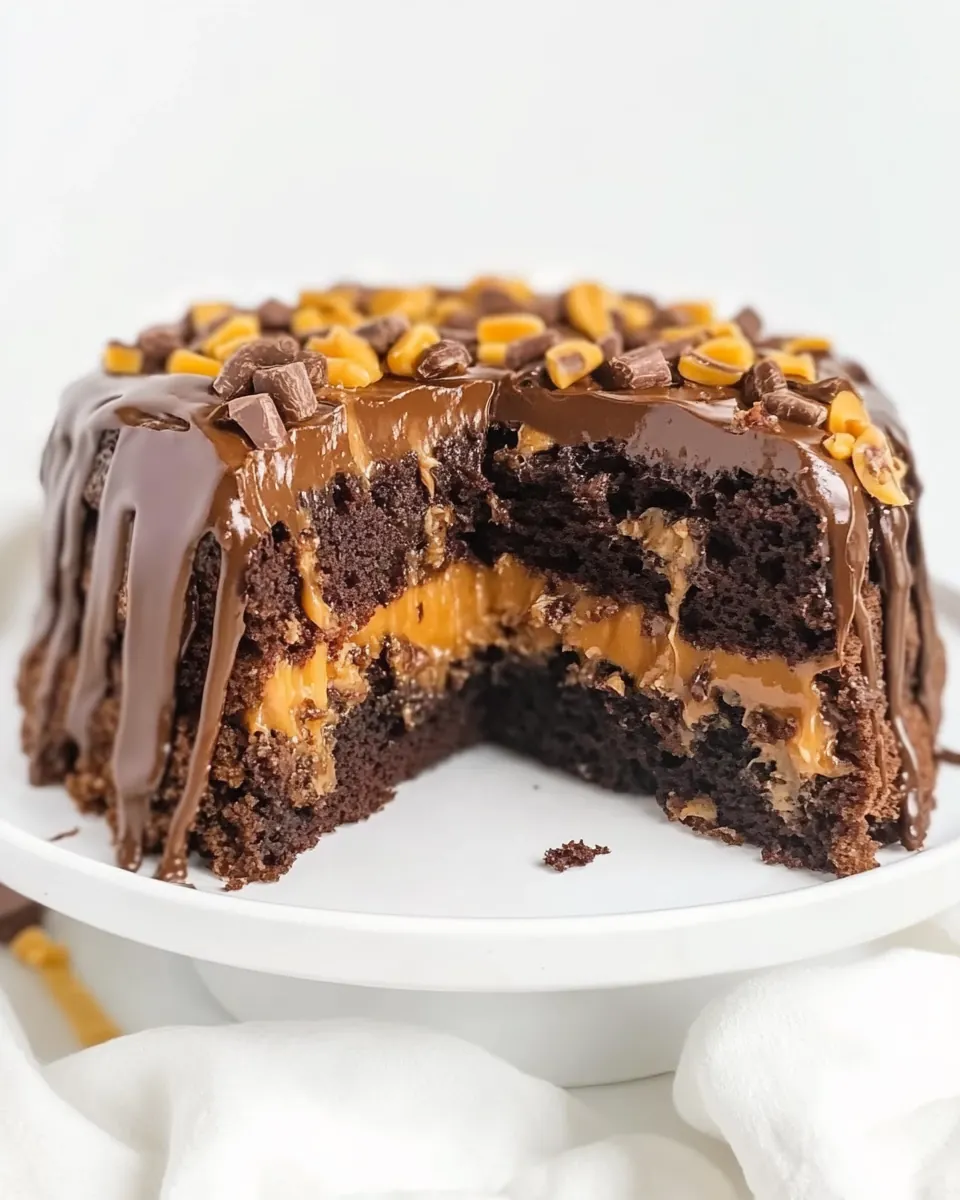
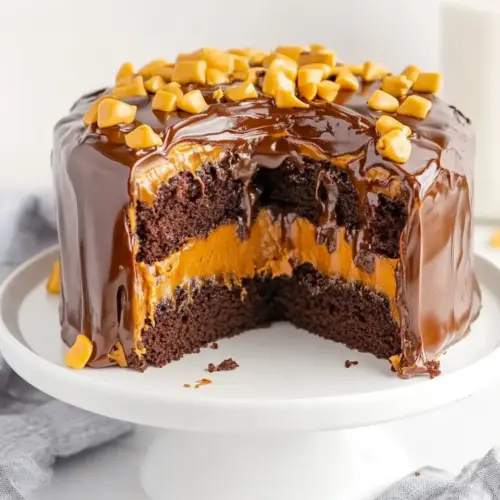
Snickers Cake
Snickers Cake is the sort of dessert I reach for when I want a show stopping treat that still feels cozy and approachable. The first time I made this cake I was racing the clock before a family gathering, and the way the warm caramel pooled into pockets beneath a fudgy top convinced everyone to come back for seconds. Walking away from the oven with that scent of melting chocolate and toasted peanuts hooked me instantly, and it has become my secret for birthdays and casual get togethers alike.
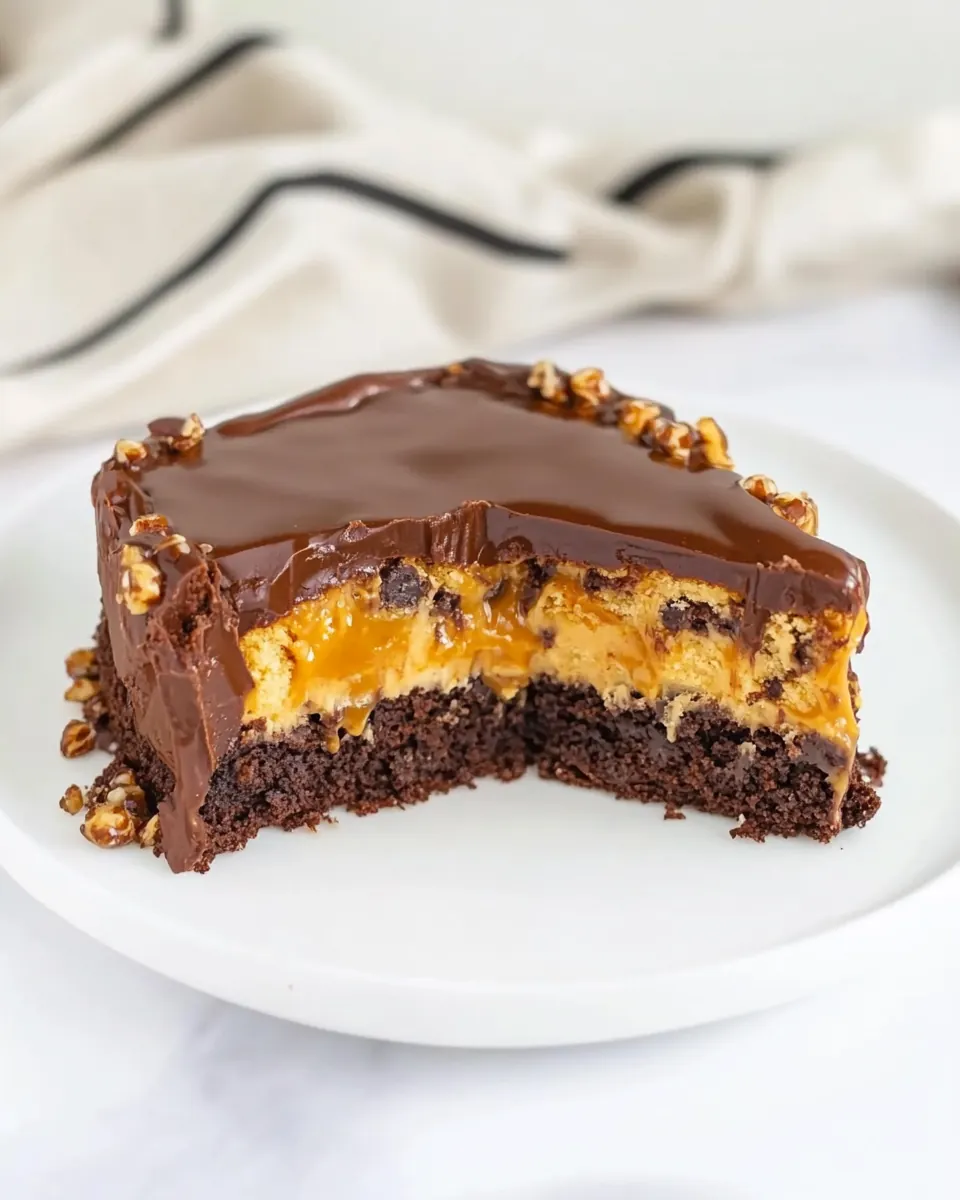
Over the years I have learned small habits that make this recipe foolproof. I tell friends to trust texture more than time, because the batter feels different than a typical boxed cake batter; it is dense and sticky, and that is exactly what creates those candy bar like layers. When I slice into it I look for a gleam of caramel at the edges, and that tiny snag in the top crust always makes guests lean in to take a bite. I love serving it slightly warm, when the frosting still tastes a touch melty, though it also keeps beautifully for a couple of days.
Recipe Snapshot
45 mins
15 mins
30 mins
Medium
350 kcal
American
Gluten-Free, Low FODMAP
Desserts
9×9 baking dish, parchment paper, mixing bowl, medium saucepan, spoon
The Charm of This Snickers Cake
It tastes like the candy bar you love
I grew up sneaking candy and this cake condenses those flavors into something celebratory. The combination of rich chocolate, gooey caramel, and crunchy peanuts recreates that familiar Snickers profile while feeling decidedly homemade. I always say it is more satisfying than grabbing a candy bar because the textures are amplified across bigger bites.
Simple shortcuts, maximum impact
Using a boxed chocolate cake mix keeps the recipe approachable, yet the method here transforms it into a multi layered dessert. I appreciate recipes where a few smart moves deliver complexity without hours of fuss. For busy evenings I can pull this together quickly, and the payoff is perceptible in both flavor and presentation.
Layers that deliver contrast
The interplay between thick cake batter, warm caramel, and scattered peanuts creates bite after bite of contrast. The semi melted chips and the caramel pockets sing against the tender crumb, so every forkful is interesting. I find guests pause to identify each layer, which makes serving this cake a conversation starter.
Forgiving to make, forgiving to slice
Because the batter is dense and the caramel stable once cooled, the cake is surprisingly forgiving. If you slightly overbake the first layer it still accepts the second layer and frosting without drying out. I like that even less experienced bakers can get great results and still feel proud sharing it with others.
Perfect for gatherings
This cake scales in spirit and in portion. I often bake it for holidays or potlucks, and its candy bar familiarity appeals to kids and adults. The garnish of extra peanuts and a drizzle of bottled caramel makes it look like effort without demanding specialized skills.
Key Ingredients for Snickers Cake
The philosophy here is to combine pantry friendly components that cooperate to recreate the Snickers flavor profile at scale. Each element has a role: the boxed chocolate cake mix gives structure and fudgy cocoa notes, the caramel supplies chew and shine, and the chopped peanuts add toasty crunch. The frosting and extra drizzle finish the cake with smooth sweetness and visual appeal.
- 15.25 ounces box chocolate cake mix (I used Duncan Hines Devil’s Food brand (Do not follow the instructions on the back of the box)): Provides a chocolate base and structure for the cake; delivers cocoa flavor and leavening when combined with other wet ingredients. Choose the specified Devil’s Food mix for richer chocolate taste and follow the recipe directions rather than the box instructions to achieve the intended texture.
- 3/4 cup evaporated milk (divided): Adds concentrated milk solids and creaminess, used both in the batter and for melting caramels; divided usage controls moisture and helps create a smooth caramel topping. Warm slightly if needed to incorporate easily with candies and to thin caramel for drizzling.
- 1/2 cup unsalted butter (melted and cooled): Contributes fat and richness to the batter while promoting tender crumb; melting and cooling prevents cooking the egg and ensures even incorporation. Use unsalted butter to control overall salt level, especially because other components may contain sodium.
- 1 large egg (room temperature): Provides structure, moisture, and emulsification to the cake; room temperature egg blends more smoothly with melted butter and batter. Beat gently into the wet ingredients to help incorporate air and create a consistent crumb.
- 11 ounces Kraft caramel candies (unwrapped): Supplies sweet, chewy caramel that melts into a sauce or layer when heated; unwrapped candies simplify melting and avoid contamination from wrappers. Heat gently with some evaporated milk to create a smooth caramel layer without seizing.
- 1/2 cup semi-sweet chocolate chips: Offers concentrated chocolate flavor and helps create a ganache-like swirl or add-ins when melted; semi–sweet chips balance the cake’s sweetness. Melt or fold in as directed to achieve pockets of chocolate or a cohesive drizzle.
- 3/4 cup chopped blanched peanuts (divided): Provides crunchy texture and nutty flavor, with a divided portion used inside the cake and for topping; blanched peanuts lend a milder taste and smoother mouthfeel. Chop evenly to distribute bites of peanut throughout the dessert.
- 16 ounces milk chocolate frosting: Supplies a ready-to-use, spreadable chocolate topping to finish the cake and add visual appeal; milk chocolate frosting complements the caramel and peanuts. Smooth over the cooled cake for an even, glossy finish that pairs with additional garnishes.
- Bottled caramel sauce and remaining chopped peanuts (for garnish): Adds glossy caramel drizzle and extra crunchy texture for finishing; bottled caramel sauce ensures consistent pourability while remaining chopped peanuts enhance contrast. Use remaining peanuts and sauce to decorate and signal the Snickers-inspired flavors.
Recipe Directions for Snickers Cake
This recipe is approachable but benefits from attention to sensory cues. Read the steps through once so you know when to watch for color changes and texture shifts. Keep tools ready, and plan to cool the cake fully before frosting for the cleanest finish.
- Preheat the oven to 350°F. Line a 9×9 baking dish with parchment paper. Be sure to allow for enough parchment paper to overhang the sides of the pan. This allows easy removal of the Snickers cake to frost, cut, and serve. Set aside.: The room fills with a warm, baking scent as the oven comes up to 350°F, an aroma that primes you for comfort baking. Lining the pan with parchment that overhangs is a tactile trick I never skip, because it makes lifting the whole cake effortless and keeps the sides from sticking. You should hear the faint hum of the oven and see a steady dial climb to the target temperature, which ensures even rise and consistent crumb. If your parchment slips, lightly grease the pan first to hold it in place, otherwise the batter can pool unevenly. A common mistake is not preheating fully, which leads to an uneven initial bake and a denser bottom layer.
- In a large mixing bowl, stir together the packet of Devil’s food cake mix, 1/2 cup evaporated milk, melted & cooled butter, and the egg just until all ingredients are combined. The batter will be very thick.: As you stir, notice the batter change from powdery to dense and glossy, a sign the liquids are evenly incorporated. The scent will be cocoa forward and richer than a standard cake batter due to the melted butter . Mixing just until combined avoids overworking the structure, which would yield a tougher crumb. If the batter feels too dry, check your measurements because boxed mixes vary slightly, and resist the urge to overmix in an attempt to smooth it out. A common error is overbeating, which introduces air and can alter the dense texture you want.
- Gently press half of the cake batter into the bottom of the parchment-lined pan. You may need to lightly wet your fingertips with cool water to help press the mixture into the pan. Bake for 15 minutes.: Pressing the batter gives a compact base that will support the caramel and toppings. The sensation is sticky but controlled; wetting fingertips helps you spread without tearing the parchment. During the first bake you should see the edges set and a slight sheen become matte, an indicator the layer is ready for its caramel topping. If you press too thinly, the layer can overbake and dry out, so aim for an even, modest thickness. Avoid using warm fingers to press, or the batter may smear unevenly.
- While the cake is baking, you will need to place your unwrapped soft caramel candies and evaporated milk into a medium saucepan, on medium-low heat, for 6 to 8 minutes or just until all the caramel candies are melted, and the sauce is smooth. Turn off the heat to the saucepan and allow the caramel sauce to cool slightly while the cake finishes its first bake.: As the caramels melt you will smell deep, buttery notes and see a glossy amber sauce form, swirling slowly like warm honey. Stirring gently prevents scorching, and using medium low heat keeps the texture silky rather than grainy. When the sauce is smooth and fluid, take the pan off the heat and watch it settle, which prevents burning and helps it thicken slightly for better layering. A typical mistake is cranking the heat which will scorch the caramel and make it grainy, so keep the flame low and patient.
- Top the warm cake with semi-sweet chocolate chips, 1/2 cup chopped peanuts, and caramel sauce.: Placing the semi sweet chocolate chips onto the warm layer allows them to soften without fully melting, creating little pockets of melty chocolate later. The chopped blanched peanuts add immediate contrast with their dry, toasted scent against the flowing caramel . Drizzling the warm caramel creates glossy ribbons that sink slightly into the warm cake, an effect that yields concentrated flavor spots. If you pour too much hot caramel, it may soak the layer excessively, so aim for a generous but controlled amount. Avoid distributing ingredients unevenly, as that will create inconsistent bites across slices.
- Drop large spoonfuls of the remaining batter over the top of the caramel. Using a spoon, or damp fingertips, just lightly try to spread the batter. This batter will spread as it bakes, so you do not have to be precise when spreading the batter over the top. You really just want to make sure that most of the surface area has batter on it before the final bake.: When you dot the batter across the caramel, you will see it sit like islands, some merging during baking into a cohesive top. The tactile act of gently smoothing with damp fingers feels like painting, and it avoids tearing the parchment. This approach allows the caramel to peek through in places, creating visual contrast and flavor pockets. Resist the temptation to scrape the pan clean, because creating gaps is part of the appeal. A mistake here is over smoothing, which can eliminate the desirable pockets of caramel and nuts.
- Return to the oven and bake for an additional 15 to 20 minutes or just until the top layer of cake is baked.: During this final bake the kitchen fills with a richer cocoa and toasted nut aroma as the top layer firms and the chocolate chips soften. Watch for the top to set, with edges pulling slightly from the parchment and a toothpick coming out mostly clean with a few moist crumbs. The visual cue is a golden sheen where the batter has cooked through, and you may hear a faint crackle as the surface finishes. Overbaking will dry the cake and mute the caramel pockets, so err on the shorter end of the time window and check early. A common misstep is assuming the center is done when the edges look ready, so always test the center gently.
- Remove the cake from the oven and allow it to cool completely on the counter before removing the cake from the pan, using the overhanging parchment paper to help pull the cake out of the pan. Frost the cake with the tub of milk chocolate frosting, and garnish it with a drizzle of bottled caramel sauce and additional 1/4 cup chopped peanuts before slicing and serving.: Cooling fully lets the caramel set and prevents the frosting from sliding, and the cake will give off a faint nutty aroma as it returns to room temperature. Using the parchment overhang to lift the cake is satisfying and keeps the edges intact. When you spread the milk chocolate frosting , it will glide smoothly and create a glossy finish that contrasts with the matte cake surface. The final drizzle of bottled caramel and extra chopped peanuts add shine and crunch that entice the first slice. A typical error is frosting too soon, which melts the frosting and makes slicing messy, so cool the cake thoroughly before topping.
How to Switch It Up

If you want to vary the presentation or tweak textures, there are several easy options that keep the core identity intact. Below are practical adjustments and finishing touches that change the cake‘s feel while staying true to the Snickers inspiration.
- Swap the frosting style Replace the tub frosting with a silky ganache for a glossier, slightly less sweet finish if you prefer a denser top layer.
- Toast the peanuts Lightly toasting the chopped peanuts in a skillet for two to three minutes brings out deeper nuttiness and crunch before adding them to the cake.
- Control caramel consistency If your caramel seems thin, let it cool a few extra minutes to thicken, which helps prevent it from soaking too far into the cake layers.
- Scatter more chocolate chips Use mini semi sweet chocolate chips for more even distribution of melty chocolate pockets throughout the top layer.
- Make ahead and chill The cake keeps well refrigerated for up to three days, and chilling firms the caramel so slices hold together beautifully for transport.
Perfect Matches for Snickers Cake
This cake pairs well with simple accompaniments that either echo the candy bar notes or provide a light counterpoint. Think coffee or lightly spiced milk, and serve it for casual celebrations where a rich dessert is welcome. Below are serving ideas, storage tips, and occasions where the cake shines.
- Serve with coffee A robust cup of black coffee or a mild espresso balances the sweetness and brightens the chocolate notes, making each bite feel less heavy.
- Pair with milk Cold milk is a classic companion, especially for children, and highlights the caramel and chocolate in an old fashioned, comforting way.
- Occasion idea Works for birthday parties and potlucks where a familiar candy inspired dessert will have broad appeal and travel well when chilled.
- Storage tip Refrigerate leftovers in an airtight container, and bring to room temperature before serving for the best texture and flavor.
- Seasonal pairing This cake is great year round, particularly in cooler months when rich, nutty desserts feel extra satisfying for gatherings.
FAQ
Conclusion
Snickers Cake is special because it translates the beloved candy bar into a communal dessert that balances gooey caramel, melty chocolate, and crunchy peanuts in every slice. Give it a try when you want a crowd pleasing, nostalgic treat that still feels homemade. Share it with friends, and enjoy the way familiar flavors come together to make someone smile.
Snickers Cake
Equipment
- 9x9 baking dish
- Parchment Paper
- Mixing Bowl
- Medium Saucepan
- Spoon
Ingredients
- 15.25 ounces box chocolate cake mix (I used Duncan Hines Devil’s Food brand (Do not follow the instructions on the back of the box)) Provides a chocolate base and structure for the cake; delivers cocoa flavor and leavening when combined with other wet ingredients. Choose the specified Devil’s Food mix for richer chocolate taste and follow the recipe directions rather than the box instructions to achieve the intended texture.
- 3/4 cup evaporated milk (divided) Adds concentrated milk solids and creaminess, used both in the batter and for melting caramels; divided usage controls moisture and helps create a smooth caramel topping. Warm slightly if needed to incorporate easily with candies and to thin caramel for drizzling.
- 1/2 cup unsalted butter (melted and cooled) Contributes fat and richness to the batter while promoting tender crumb; melting and cooling prevents cooking the egg and ensures even incorporation. Use unsalted butter to control overall salt level, especially because other components may contain sodium.
- 1 large egg (room temperature) Provides structure, moisture, and emulsification to the cake; room temperature egg blends more smoothly with melted butter and batter. Beat gently into the wet ingredients to help incorporate air and create a consistent crumb.
- 11 ounces Kraft caramel candies (unwrapped) Supplies sweet, chewy caramel that melts into a sauce or layer when heated; unwrapped candies simplify melting and avoid contamination from wrappers. Heat gently with some evaporated milk to create a smooth caramel layer without seizing.
- 1/2 cup semi-sweet chocolate chips Offers concentrated chocolate flavor and helps create a ganache-like swirl or add-ins when melted; semi-sweet chips balance the cake’s sweetness. Melt or fold in as directed to achieve pockets of chocolate or a cohesive drizzle.
- 3/4 cup chopped blanched peanuts (divided) Provides crunchy texture and nutty flavor, with a divided portion used inside the cake and for topping; blanched peanuts lend a milder taste and smoother mouthfeel. Chop evenly to distribute bites of peanut throughout the dessert.
- 16 ounces milk chocolate frosting Supplies a ready-to-use, spreadable chocolate topping to finish the cake and add visual appeal; milk chocolate frosting complements the caramel and peanuts. Smooth over the cooled cake for an even, glossy finish that pairs with additional garnishes.
- Bottled caramel sauce and remaining chopped peanuts (for garnish) Adds glossy caramel drizzle and extra crunchy texture for finishing; bottled caramel sauce ensures consistent pourability while remaining chopped peanuts enhance contrast. Use remaining peanuts and sauce to decorate and signal the Snickers-inspired flavors.
Instructions
- Preheat the oven to 350°F. Line a 9×9 baking dish with parchment paper. Be sure to allow for enough parchment paper to overhang the sides of the pan. This allows easy removal of the Snickers cake to frost, cut, and serve. Set aside.: The room fills with a warm, baking scent as the oven comes up to 350°F, an aroma that primes you for comfort baking. Lining the pan with parchment that overhangs is a tactile trick I never skip, because it makes lifting the whole cake effortless and keeps the sides from sticking. You should hear the faint hum of the oven and see a steady dial climb to the target temperature, which ensures even rise and consistent crumb. If your parchment slips, lightly grease the pan first to hold it in place, otherwise the batter can pool unevenly. A common mistake is not preheating fully, which leads to an uneven initial bake and a denser bottom layer.
- In a large mixing bowl, stir together the packet of Devil’s food cake mix, 1/2 cup evaporated milk, melted & cooled butter, and the egg just until all ingredients are combined. The batter will be very thick.: As you stir, notice the batter change from powdery to dense and glossy, a sign the liquids are evenly incorporated. The scent will be cocoa forward and richer than a standard cake batter due to the melted butter . Mixing just until combined avoids overworking the structure, which would yield a tougher crumb. If the batter feels too dry, check your measurements because boxed mixes vary slightly, and resist the urge to overmix in an attempt to smooth it out. A common error is overbeating, which introduces air and can alter the dense texture you want.
- Gently press half of the cake batter into the bottom of the parchment-lined pan. You may need to lightly wet your fingertips with cool water to help press the mixture into the pan. Bake for 15 minutes.: Pressing the batter gives a compact base that will support the caramel and toppings. The sensation is sticky but controlled; wetting fingertips helps you spread without tearing the parchment. During the first bake you should see the edges set and a slight sheen become matte, an indicator the layer is ready for its caramel topping. If you press too thinly, the layer can overbake and dry out, so aim for an even, modest thickness. Avoid using warm fingers to press, or the batter may smear unevenly.
- While the cake is baking, you will need to place your unwrapped soft caramel candies and evaporated milk into a medium saucepan, on medium-low heat, for 6 to 8 minutes or just until all the caramel candies are melted, and the sauce is smooth. Turn off the heat to the saucepan and allow the caramel sauce to cool slightly while the cake finishes its first bake.: As the caramels melt you will smell deep, buttery notes and see a glossy amber sauce form, swirling slowly like warm honey. Stirring gently prevents scorching, and using medium low heat keeps the texture silky rather than grainy. When the sauce is smooth and fluid, take the pan off the heat and watch it settle, which prevents burning and helps it thicken slightly for better layering. A typical mistake is cranking the heat which will scorch the caramel and make it grainy, so keep the flame low and patient.
- Top the warm cake with semi-sweet chocolate chips, 1/2 cup chopped peanuts, and caramel sauce.: Placing the semi sweet chocolate chips onto the warm layer allows them to soften without fully melting, creating little pockets of melty chocolate later. The chopped blanched peanuts add immediate contrast with their dry, toasted scent against the flowing caramel . Drizzling the warm caramel creates glossy ribbons that sink slightly into the warm cake, an effect that yields concentrated flavor spots. If you pour too much hot caramel, it may soak the layer excessively, so aim for a generous but controlled amount. Avoid distributing ingredients unevenly, as that will create inconsistent bites across slices.
- Drop large spoonfuls of the remaining batter over the top of the caramel. Using a spoon, or damp fingertips, just lightly try to spread the batter. This batter will spread as it bakes, so you do not have to be precise when spreading the batter over the top. You really just want to make sure that most of the surface area has batter on it before the final bake.: When you dot the batter across the caramel, you will see it sit like islands, some merging during baking into a cohesive top. The tactile act of gently smoothing with damp fingers feels like painting, and it avoids tearing the parchment. This approach allows the caramel to peek through in places, creating visual contrast and flavor pockets. Resist the temptation to scrape the pan clean, because creating gaps is part of the appeal. A mistake here is over smoothing, which can eliminate the desirable pockets of caramel and nuts.
- Return to the oven and bake for an additional 15 to 20 minutes or just until the top layer of cake is baked.: During this final bake the kitchen fills with a richer cocoa and toasted nut aroma as the top layer firms and the chocolate chips soften. Watch for the top to set, with edges pulling slightly from the parchment and a toothpick coming out mostly clean with a few moist crumbs. The visual cue is a golden sheen where the batter has cooked through, and you may hear a faint crackle as the surface finishes. Overbaking will dry the cake and mute the caramel pockets, so err on the shorter end of the time window and check early. A common misstep is assuming the center is done when the edges look ready, so always test the center gently.
- Remove the cake from the oven and allow it to cool completely on the counter before removing the cake from the pan, using the overhanging parchment paper to help pull the cake out of the pan. Frost the cake with the tub of milk chocolate frosting, and garnish it with a drizzle of bottled caramel sauce and additional 1/4 cup chopped peanuts before slicing and serving.: Cooling fully lets the caramel set and prevents the frosting from sliding, and the cake will give off a faint nutty aroma as it returns to room temperature. Using the parchment overhang to lift the cake is satisfying and keeps the edges intact. When you spread the milk chocolate frosting , it will glide smoothly and create a glossy finish that contrasts with the matte cake surface. The final drizzle of bottled caramel and extra chopped peanuts add shine and crunch that entice the first slice. A typical error is frosting too soon, which melts the frosting and makes slicing messy, so cool the cake thoroughly before topping.
Notes
- Swap the frosting style Replace the tub frosting with a silky ganache for a glossier, slightly less sweet finish if you prefer a denser top layer.
- Toast the peanuts Lightly toasting the chopped peanuts in a skillet for two to three minutes brings out deeper nuttiness and crunch before adding them to the cake.
- Control caramel consistency If your caramel seems thin, let it cool a few extra minutes to thicken, which helps prevent it from soaking too far into the cake layers.
- Scatter more chocolate chips Use mini semi sweet chocolate chips for more even distribution of melty chocolate pockets throughout the top layer.
- Make ahead and chill The cake keeps well refrigerated for up to three days, and chilling firms the caramel so slices hold together beautifully for transport.