Pumpkin S’mores Bars
Pumpkin S’mores Bars came into my kitchen one crisp October afternoon when I wanted a dessert that tasted like childhood around a campfire but also nodded to the season with a spoonful of pumpkin.
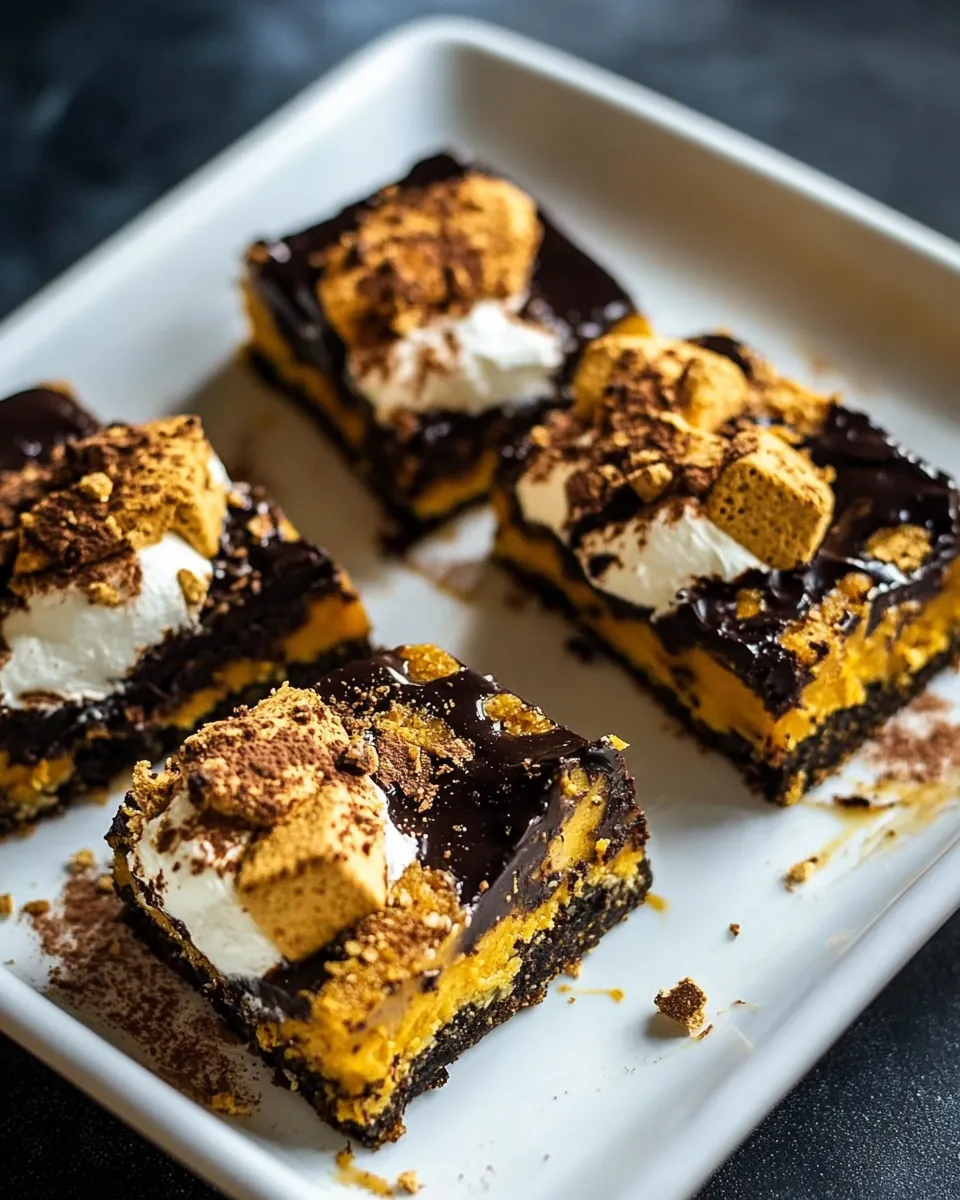
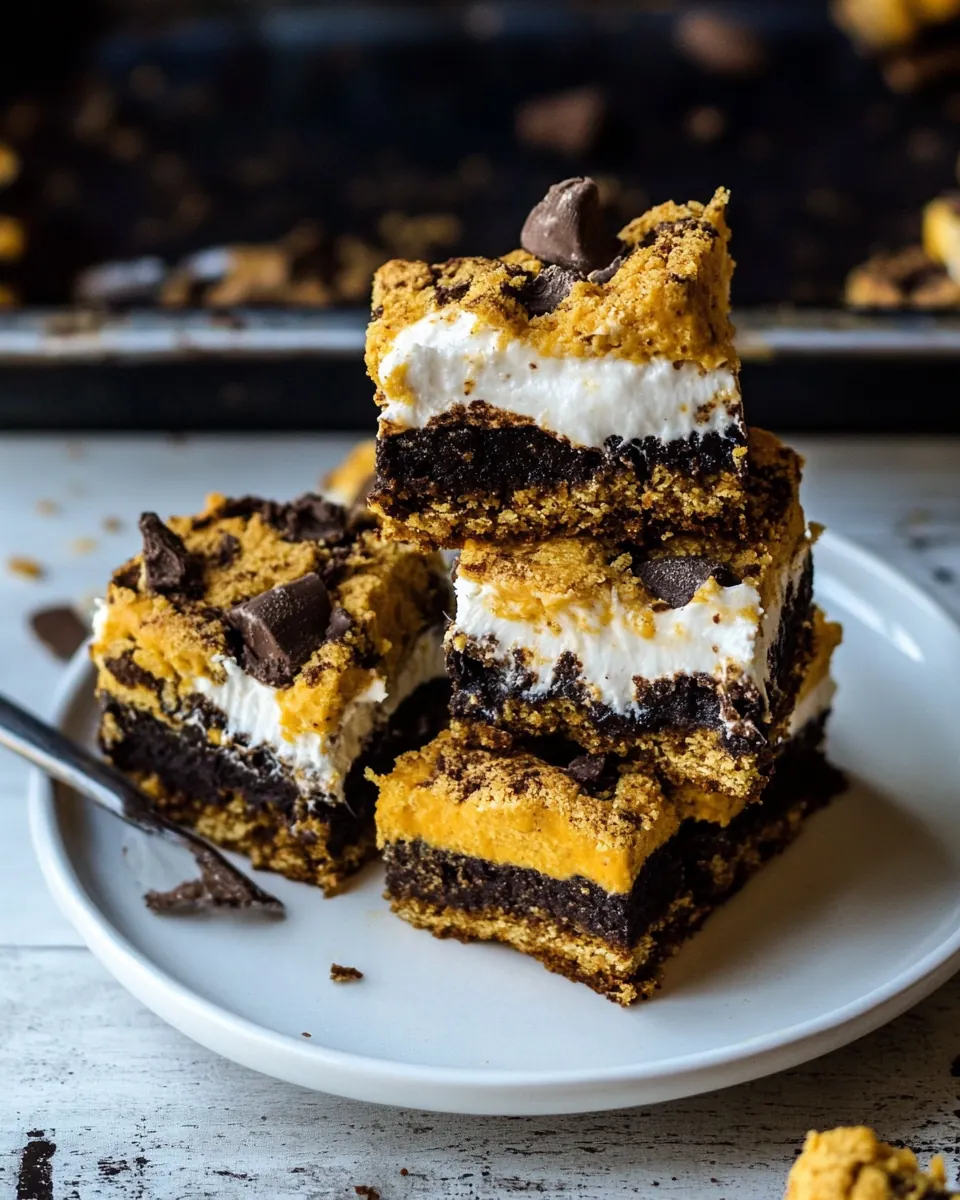
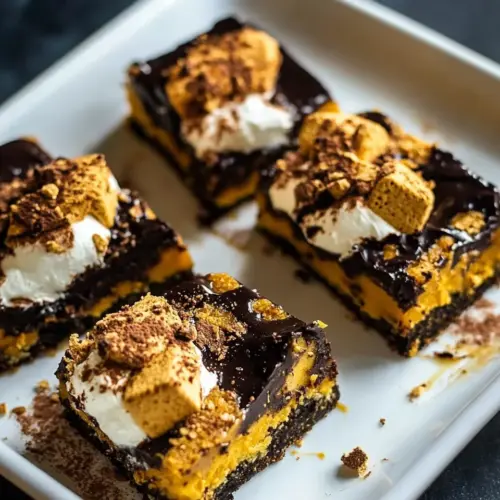
I remember pulling out a worn baking pan that belonged to my grandmother, the same pan that has seen countless experiments, and thinking about how fun it would be to fold autumn spices into a treat usually reserved for toasted marshmallows. I mixed the batter with a little reverence, tasting spices and butter on my fingertip, and felt instantly transported to years of fall festivals. The texture, when it came out of the oven, was tender and slightly chewy, and that contrast with the crisp, toasty marshmallows on top made me grin.
Friends who stopped by that evening asked for the recipe before they’d finished their plates. We ate the bars warm, fingers sticky, cups of tea cooling beside us. Each bite combined the creamy tang of pumpkin with melted chocolate and the satisfying crunch of graham crackers, making a dessert that felt familiar and new at once. Over the next few weeks I refined the balance of sugar and spice so the pumpkin shines but never overwhelms the gooey marshmallow and chocolate notes.
These bars have become my go to for informal gatherings in the fall, the recipe I turn to when I want something easy to slice and hand around. They travel well, slice cleanly if fully cooled, and evoke the kind of cozy nostalgia that makes you want to light candles and linger. When you make Pumpkin S’mores Bars, you’ll likely find yourself smiling at how simple ingredients can deliver such a comforting, seasonal treat.
Recipe Snapshot
60 mins
20 mins
40 mins
Medium
250 kcal
American
Gluten-Free, Low FODMAP
Desserts
Stand mixer, 9 x 13 inch baking pan, Mixing bowls, Spatula
Why Try This Pumpkin S’mores Bars
They strike a perfect seasonal chord
I love Pumpkin S’mores Bars because they combine classic fall flavors with a playful, nostalgic format. The pumpkin and pumpkin pie spice give the bars a warm, aromatic backbone that feels right for cool evenings, while the graham crackers, chocolate, and mini marshmallows bring a campfire memory into the oven. This blend makes the recipe ideal for holiday potlucks or a cozy treat after a crisp walk.
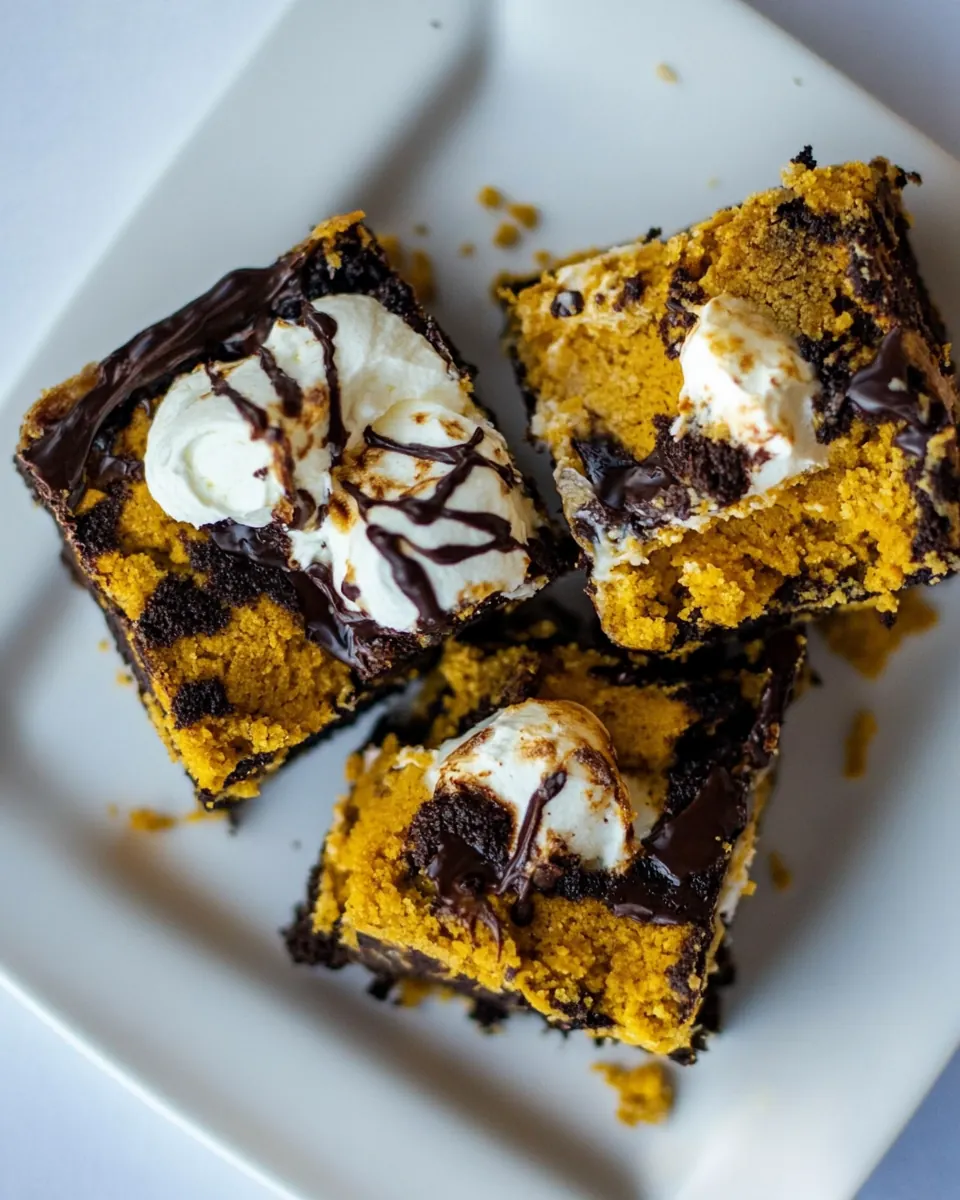
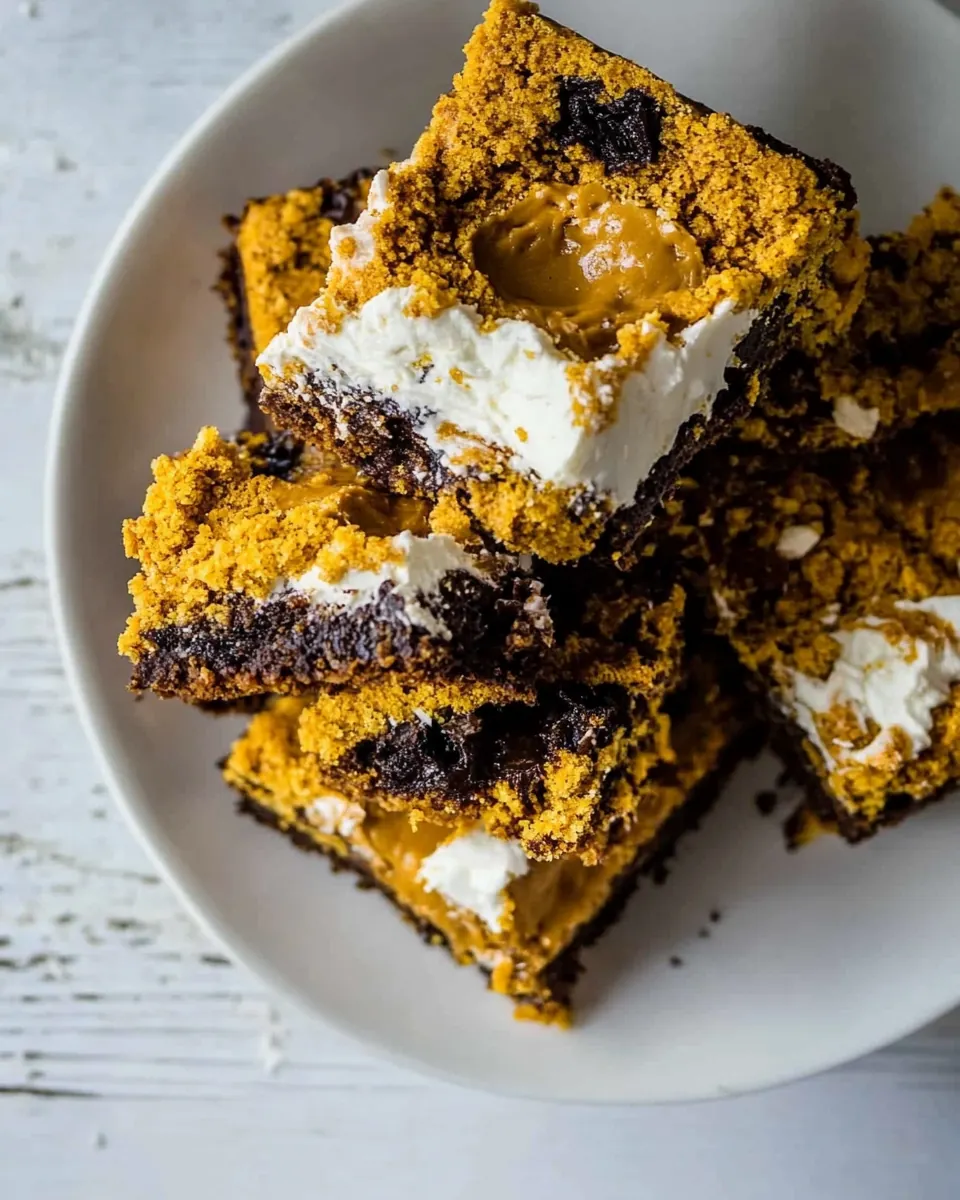
Textural contrast keeps each bite interesting
What I personally appreciate is the contrast between the tender pumpkin batter and the crunchy, slightly toasty topping. The base stays soft and a little cakey from the all purpose flour and butter, while the sprinkled graham crackers and melted chocolate add layers of chew and snap. The mini marshmallows puff up and brown, giving pockets of gooey sweetness that break up the structure in the most satisfying way.
It’s approachable for bakers of all skill levels
I often choose this recipe when I need something crowd friendly because the process is straightforward and forgiving. The batter comes together in one mixer bowl, and the directions do not demand complicated techniques. That approachability means you can focus on tasting and adjusting, not on stress, which I always find makes baking more enjoyable.
Flexible and easily shareable
Another reason I keep coming back to Pumpkin S’mores Bars is how well they travel and serve. You can bake them in a 9 x 13 inch pan, cool completely, then lift with foil and slice into tidy bars. They pack into a tin or on a platter without losing much of their charm. If you want to dress them up for guests, a quick torching of the marshmallow tops gives a showy finish.
Comfort food with a playful twist
Finally, these bars are comfort food that doesn’t feel heavy or indulgent in the wrong way. They deliver sweetness, spice, and texture in a compact square. I find that people of all ages gravitate toward them, making them a reliable choice for gatherings when you want an easy crowd pleaser.
What Goes Into Pumpkin S’mores Bars
These ingredients reflect a philosophy of balance, pairing pantry staples with distinct seasonal notes. The all purpose flour and butter create a tender crumb, while the pumpkin puree and pumpkin pie spice bring warmth and moisture. The topping ingredients provide contrast and nostalgia, completing the bars with melting chocolate, crunchy graham crackers, and pillowy mini marshmallows.
- 2 cup all-purpose flour 1 teaspoon baking soda 1 tablespoon pumpkin pie spice 3/4 teaspoon salt 2 sticks unsalted butter 1 cup sugar 1/4 cup light brown sugar 1 large egg 1 cup pure pumpkin puree 2 teaspoon pure vanilla extract 3 chocolate bars – 1.45 oz each, chopped 2 graham crackers, broken into chunky crumbs 1 3/4 cup mini marshmallows: Provide the dry structure and bulk for the bars, absorbing liquids and creating a tender crumb; mix with the baking soda, pumpkin pie spice, and salt to ensure even texture and consistent flavor throughout. Measure carefully so the bars hold together while remaining soft, avoiding excess flour that would yield a tough result.
How to Assemble Pumpkin S’mores Bars
These directions are straightforward, and I recommend reading them fully before starting. The steps guide you from preparing the pan to lifting and slicing the cooled bars. Take your time at the creaming and topping stages to ensure the best texture.
- Preheat oven to 350 degrees. Line the bottom and sides of a 9 x 13 inch baking pan with foil. Leave a bit of foil over the edges to help with removal of bars after baking. Lightly spray foil with non-stick spray. Set aside.: Expect a faint warmth in the kitchen as the oven comes up to temperature, and that anticipatory scent primes you for baking. The preheated oven ensures even structure setting and predictable browning, which is crucial so the center bakes through while the top toasts nicely. One common mistake is not allowing the oven to fully preheat, which can lead to underbaked centers or uneven rise. If your oven runs hot, use an oven thermometer to verify that it reads 350 degrees before you put the pan in.
- In a medium bowl, whisk together flour, baking soda, pumpkin pie spice and salt; set aside.: The crinkling sound of the foil signals prep, and leaving a bit over the edges gives you helpful handles to lift the bars later. This step matters because the foil prevents sticking and helps with easy removal, preserving clean edges when you slice. A frequent oversight is using foil without spraying it, which can lead to some sticking; lightly spray the foil so the bars release without tearing. Make sure the foil sits smoothly against the pan to avoid deep creases that can imprint the finished bars.
- In the bowl of a stand mixer, cream together butter and sugars on medium-high speed until smooth. Add egg and vanilla and mix until incorporated. Beat in pumpkin puree (mixture may appear curdled). Reduce speed to low and gently add dry ingredients, mixing until just combined.: The light sheen on the foil helps the bars release, and you can feel the tiny beads of oil if you run a fingertip across the pan. Spraying prevents the bottom layer from adhering to the foil, which is especially important with a buttery batter. Too much spray can pool and slightly alter the bottom texture, so a light, even coat is best. Avoid aerosol excess by holding the can several inches away and sweeping across the surface.
- Spread mixture in prepared baking dish and top with crushed graham crackers, chocolate bars and mini marshmallows. Bake for 35-40 minutes or until toothpick comes out with moist crumbs. Cool completely before removing from pan.: This pause allows you to gather ingredients and tools, creating a calmer workflow and preventing last minute scrambling. Taking a breath here is practical, it helps you confirm everything is measured and within reach, which reduces the chance of overmixing later. One misstep is starting the mixing process while the pan prep is incomplete, which can lead to rushed transfers and uneven spreading. Use this moment to preheat your mixer and line up the bowls so the process flows smoothly.
- Use foil flaps to gently lift bars from baking dish. Cut bars and serve.: You will hear the bowl scrape as you whisk and smell the spice lift from the blend, a small aromatic preview of the final bars. Combining these dry components distributes leavening and seasoning evenly, ensuring consistent texture and flavor in every bite. A common error is failing to whisk thoroughly, resulting in concentrated pockets of spice or baking soda; take a full minute to whisk until the mixture looks homogenous. Sift if your flour is clumpy to ensure an even crumb.
- In the bowl of a stand mixer, cream together butter and sugars on medium high speed until smooth: The creaming process should produce a pale, airy mixture, and you will notice the texture change as the butter and sugars become lighter. This step traps air which helps give the bars a tender lift, so do not rush it. A typical mistake is using butter that is too soft or melted, which prevents proper aeration and yields a dense result; aim for butter softened to room temperature but still slightly cool to the touch. Stop and scrape the bowl down once or twice to ensure even creaming.
- Add egg and vanilla and mix until incorporated: When you add the egg and vanilla, you may hear a slight change in mixing sound and see the batter smooth out; incorporate fully so there are no streaks. This addition brings structure and flavor, making sure the batter binds and the vanilla rounds out sweetness. If the egg is too cold you may see curdling; bringing room temperature ingredients together avoids that. If curdling happens, continue mixing gently and the dry ingredients will bring the batter back together.
- Beat in pumpkin puree: The batter will look a bit curdled at first when you add the pumpkin puree , but that texture is normal and resolves once the dry ingredients are folded in. The pumpkin contributes moisture and a silky mouthfeel, which keeps the bars from being dry. A common mistake is adding too much pumpkin, which can make the batter overly wet and slow to set; measure the puree carefully. If the mixture is overly loose, chill briefly before adding the dry mix to help maintain structure.
- Reduce speed to low and gently add dry ingredients, mixing until just combined: You'll see the flour disappear into the batter, and the motion should be slow to avoid developing gluten that toughens the crumb. The rationale is to protect tenderness while ensuring even distribution of leavening and spice. Overmixing at this stage is the classic pitfall, producing dense bars, so stop mixing the moment you no longer see streaks of flour. Scrape the bowl and finish folding by hand if necessary to ensure a gentle, even combine.
- Spread mixture in prepared baking dish: Use a spatula to press the batter into an even layer and listen to the soft scrape as the batter settles; an even thickness promotes uniform baking. This matters because thin spots can overbake while thick spots remain underdone, so smooth the surface for consistent results. Press gently to avoid compacting the batter which can make it tight instead of tender. If the batter resists spreading, wet the spatula slightly to allow a smooth finish without tearing the foil lining.
- Top with crushed graham crackers, chocolate bars and mini marshmallows: Scatter the graham crackers and chopped chocolate evenly, then sprinkle the mini marshmallows on top so they puff and toast in places rather than sinking completely. The sound of crumbs hitting batter is satisfying, and the visual contrast is part of what makes the bars so appealing after baking. A common oversight is piling toppings in one spot which leads to uneven melting and texture; aim for an even distribution so each square gets a little of everything. Press toppings lightly to ensure they nestle into the batter and stay in place while baking.
- Bake for 35 to 40 minutes or until toothpick comes out with moist crumbs: As the bars bake, the kitchen will fill with pumpkin spice and warm butter aromas, and you will notice the marshmallows toasting and the chocolate softening. This timing ensures the center sets while the top develops golden spots; checking with a toothpick that yields moist crumbs indicates a tender, properly baked interior. A typical mistake is removing the pan too early, resulting in a raw center, or leaving it too long which dries the bars and overbrowns the marshmallows. Start checking at 35 minutes and watch closely so you catch that perfect moment.
- Cool completely before removing from pan: Cooling allows the crumb to firm up and the chocolate to set slightly, making clean slicing possible; the surface will lose its hot, glossy sheen as it comes to room temperature. This step is essential for neat bars and proper texture, as cutting while warm can cause gooey collapse. One mistake is impatience, cutting into the bars while still hot and getting ragged edges; wait until fully cooled and the bars will slice cleanly. You can chill briefly to speed the process if you are in a hurry, but avoid freezing which changes texture.
- Use foil flaps to gently lift bars from baking dish: The foil handles make removal easy, and you will feel the slight resistance release as the bars separate from the pan. Lifting preserves the bars intact, avoiding broken edges, and makes it simple to transfer to a cutting board. A common error is pulling too quickly, which can tear the foil and break the bars; lift steadily and keep one hand supporting the underside.
- Cut bars and serve: When you slice, use a sharp knife and if you want clean edges, warm the blade briefly under hot water and dry it before cutting, wiping between slices for tidy presentation. The contrast of chewy base and toasted mini marshmallows is delightful, and serving at room temperature highlights both gooey and tender elements. Rushing to serve while the bars are not set can make them collapse, so be patient; if they seem sticky, refrigerate for 20 to 30 minutes before slicing to firm them up.
Customization Ideas
If you want to tweak Pumpkin S’mores Bars, small changes can amplify different aspects of the recipe. Below are focused ideas that maintain the recipe’s spirit while letting you personalize texture and flavor. Use these suggestions as starting points, not rules.
- Swap the chocolate layout Change the distribution of the chopped chocolate by reserving half for the top and folding half into the batter for molten pockets and a glossy surface.
- Adjust spice intensity Increase or decrease the pumpkin pie spice by a quarter teaspoon increments to suit your taste without overwhelming the pumpkin note.
- Control marshmallow browning For a deeper toast on the mini marshmallows, place the bars under the broiler for a few seconds while watching closely to avoid burning.
- Make cutting easier Chill the cooled pan for 20 minutes before slicing to firm the chocolate and marshmallow layers for neater bars.
- Scale the recipe If you need fewer bars, halve the ingredients and bake in an 8 x 8 inch pan, reducing bake time and checking earlier for doneness.
What Goes Well With This Pumpkin S’mores Bars
These bars pair well with warm beverages and simple accompaniments that balance sweetness and evoke cozy fall gatherings. Serve them at casual get togethers, autumn potlucks, or as a sweet finish to a seasonal dinner. Below are detailed serving ideas and storage tips to help you present them beautifully and keep them tasting great.
- Serve with hot beverages Pair slices with hot coffee, spiced tea, or hot chocolate to complement the warm spices and toasted marshmallow notes. The contrast between a steaming mug and a slightly cooled bar is very satisfying for chilly evenings.
- Make it a dessert platter Arrange the bars with a few small bowls of extra chopped chocolate and crushed graham crackers so guests can add texture or extra richness as they like. This makes it interactive and fun for gatherings.
- Occasions These bars are ideal for fall parties, Halloween festivities, school bake sales, and casual dinner desserts. Their approachable size makes them great for sharing and for serving to kids and adults alike.
- Storage tips Store cooled bars in an airtight container at room temperature for up to three days, or refrigerate for up to five days to keep the chocolate firmer. If you refrigerate, allow bars to come to room temperature for the best chew and flavor before serving.
- Seasonal pairings Serve them alongside apples or pear slices for a fresh contrast, or as part of a dessert table that includes spiced cookies and warm breads to enhance the harvest theme.
- Presentation idea Stack bars on a rustic board and garnish with a few whole graham crackers and a scattering of extra mini marshmallows for a casual, inviting look that highlights the s’mores inspiration.
FAQ
Conclusion
These bars shine because they combine familiar s’mores elements with cozy pumpkin spice in a single, shareable tray bake. They are approachable to make, full of textural contrast, and perfect for fall gatherings or an easy weeknight dessert, offering a nostalgic twist that still feels fresh. Give them a try this season, slice them up for friends, and enjoy watching people smile at that first gooey, spiced bite. I hope they become a go to in your recipe box when you want something warm, fun, and comforting.
Pumpkin S'mores Bars
Equipment
- Stand mixer
- 9 x 13-inch baking pan
- Mixing Bowls
- Spatula
Ingredients
- 2 cup all-purpose flour 1 teaspoon baking soda 1 tablespoon pumpkin pie spice 3/4 teaspoon salt 2 sticks unsalted butter 1 cup sugar 1/4 cup light brown sugar 1 large egg 1 cup pure pumpkin puree 2 teaspoon pure vanilla extract 3 chocolate bars - 1.45 oz each, chopped 2 graham crackers, broken into chunky crumbs 1 3/4 cup mini marshmallows Provide the dry structure and bulk for the bars, absorbing liquids and creating a tender crumb; mix with the baking soda, pumpkin pie spice, and salt to ensure even texture and consistent flavor throughout. Measure carefully so the bars hold together while remaining soft, avoiding excess flour that would yield a tough result.
Instructions
- Preheat oven to 350 degrees. Line the bottom and sides of a 9 x 13 inch baking pan with foil. Leave a bit of foil over the edges to help with removal of bars after baking. Lightly spray foil with non-stick spray. Set aside.: Expect a faint warmth in the kitchen as the oven comes up to temperature, and that anticipatory scent primes you for baking. The preheated oven ensures even structure setting and predictable browning, which is crucial so the center bakes through while the top toasts nicely. One common mistake is not allowing the oven to fully preheat, which can lead to underbaked centers or uneven rise. If your oven runs hot, use an oven thermometer to verify that it reads 350 degrees before you put the pan in.
- In a medium bowl, whisk together flour, baking soda, pumpkin pie spice and salt; set aside.: The crinkling sound of the foil signals prep, and leaving a bit over the edges gives you helpful handles to lift the bars later. This step matters because the foil prevents sticking and helps with easy removal, preserving clean edges when you slice. A frequent oversight is using foil without spraying it, which can lead to some sticking; lightly spray the foil so the bars release without tearing. Make sure the foil sits smoothly against the pan to avoid deep creases that can imprint the finished bars.
- In the bowl of a stand mixer, cream together butter and sugars on medium-high speed until smooth. Add egg and vanilla and mix until incorporated. Beat in pumpkin puree (mixture may appear curdled). Reduce speed to low and gently add dry ingredients, mixing until just combined.: The light sheen on the foil helps the bars release, and you can feel the tiny beads of oil if you run a fingertip across the pan. Spraying prevents the bottom layer from adhering to the foil, which is especially important with a buttery batter. Too much spray can pool and slightly alter the bottom texture, so a light, even coat is best. Avoid aerosol excess by holding the can several inches away and sweeping across the surface.
- Spread mixture in prepared baking dish and top with crushed graham crackers, chocolate bars and mini marshmallows. Bake for 35-40 minutes or until toothpick comes out with moist crumbs. Cool completely before removing from pan.: This pause allows you to gather ingredients and tools, creating a calmer workflow and preventing last minute scrambling. Taking a breath here is practical, it helps you confirm everything is measured and within reach, which reduces the chance of overmixing later. One misstep is starting the mixing process while the pan prep is incomplete, which can lead to rushed transfers and uneven spreading. Use this moment to preheat your mixer and line up the bowls so the process flows smoothly.
- Use foil flaps to gently lift bars from baking dish. Cut bars and serve.: You will hear the bowl scrape as you whisk and smell the spice lift from the blend, a small aromatic preview of the final bars. Combining these dry components distributes leavening and seasoning evenly, ensuring consistent texture and flavor in every bite. A common error is failing to whisk thoroughly, resulting in concentrated pockets of spice or baking soda; take a full minute to whisk until the mixture looks homogenous. Sift if your flour is clumpy to ensure an even crumb.
- In the bowl of a stand mixer, cream together butter and sugars on medium high speed until smooth: The creaming process should produce a pale, airy mixture, and you will notice the texture change as the butter and sugars become lighter. This step traps air which helps give the bars a tender lift, so do not rush it. A typical mistake is using butter that is too soft or melted, which prevents proper aeration and yields a dense result; aim for butter softened to room temperature but still slightly cool to the touch. Stop and scrape the bowl down once or twice to ensure even creaming.
- Add egg and vanilla and mix until incorporated: When you add the egg and vanilla, you may hear a slight change in mixing sound and see the batter smooth out; incorporate fully so there are no streaks. This addition brings structure and flavor, making sure the batter binds and the vanilla rounds out sweetness. If the egg is too cold you may see curdling; bringing room temperature ingredients together avoids that. If curdling happens, continue mixing gently and the dry ingredients will bring the batter back together.
- Beat in pumpkin puree: The batter will look a bit curdled at first when you add the pumpkin puree , but that texture is normal and resolves once the dry ingredients are folded in. The pumpkin contributes moisture and a silky mouthfeel, which keeps the bars from being dry. A common mistake is adding too much pumpkin, which can make the batter overly wet and slow to set; measure the puree carefully. If the mixture is overly loose, chill briefly before adding the dry mix to help maintain structure.
- Reduce speed to low and gently add dry ingredients, mixing until just combined: You'll see the flour disappear into the batter, and the motion should be slow to avoid developing gluten that toughens the crumb. The rationale is to protect tenderness while ensuring even distribution of leavening and spice. Overmixing at this stage is the classic pitfall, producing dense bars, so stop mixing the moment you no longer see streaks of flour. Scrape the bowl and finish folding by hand if necessary to ensure a gentle, even combine.
- Spread mixture in prepared baking dish: Use a spatula to press the batter into an even layer and listen to the soft scrape as the batter settles; an even thickness promotes uniform baking. This matters because thin spots can overbake while thick spots remain underdone, so smooth the surface for consistent results. Press gently to avoid compacting the batter which can make it tight instead of tender. If the batter resists spreading, wet the spatula slightly to allow a smooth finish without tearing the foil lining.
- Top with crushed graham crackers, chocolate bars and mini marshmallows: Scatter the graham crackers and chopped chocolate evenly, then sprinkle the mini marshmallows on top so they puff and toast in places rather than sinking completely. The sound of crumbs hitting batter is satisfying, and the visual contrast is part of what makes the bars so appealing after baking. A common oversight is piling toppings in one spot which leads to uneven melting and texture; aim for an even distribution so each square gets a little of everything. Press toppings lightly to ensure they nestle into the batter and stay in place while baking.
- Bake for 35 to 40 minutes or until toothpick comes out with moist crumbs: As the bars bake, the kitchen will fill with pumpkin spice and warm butter aromas, and you will notice the marshmallows toasting and the chocolate softening. This timing ensures the center sets while the top develops golden spots; checking with a toothpick that yields moist crumbs indicates a tender, properly baked interior. A typical mistake is removing the pan too early, resulting in a raw center, or leaving it too long which dries the bars and overbrowns the marshmallows. Start checking at 35 minutes and watch closely so you catch that perfect moment.
- Cool completely before removing from pan: Cooling allows the crumb to firm up and the chocolate to set slightly, making clean slicing possible; the surface will lose its hot, glossy sheen as it comes to room temperature. This step is essential for neat bars and proper texture, as cutting while warm can cause gooey collapse. One mistake is impatience, cutting into the bars while still hot and getting ragged edges; wait until fully cooled and the bars will slice cleanly. You can chill briefly to speed the process if you are in a hurry, but avoid freezing which changes texture.
- Use foil flaps to gently lift bars from baking dish: The foil handles make removal easy, and you will feel the slight resistance release as the bars separate from the pan. Lifting preserves the bars intact, avoiding broken edges, and makes it simple to transfer to a cutting board. A common error is pulling too quickly, which can tear the foil and break the bars; lift steadily and keep one hand supporting the underside.
- Cut bars and serve: When you slice, use a sharp knife and if you want clean edges, warm the blade briefly under hot water and dry it before cutting, wiping between slices for tidy presentation. The contrast of chewy base and toasted mini marshmallows is delightful, and serving at room temperature highlights both gooey and tender elements. Rushing to serve while the bars are not set can make them collapse, so be patient; if they seem sticky, refrigerate for 20 to 30 minutes before slicing to firm them up.
Notes
- Swap the chocolate layout Change the distribution of the chopped chocolate by reserving half for the top and folding half into the batter for molten pockets and a glossy surface.
- Adjust spice intensity Increase or decrease the pumpkin pie spice by a quarter teaspoon increments to suit your taste without overwhelming the pumpkin note.
- Control marshmallow browning For a deeper toast on the mini marshmallows, place the bars under the broiler for a few seconds while watching closely to avoid burning.
- Make cutting easier Chill the cooled pan for 20 minutes before slicing to firm the chocolate and marshmallow layers for neater bars.
- Scale the recipe If you need fewer bars, halve the ingredients and bake in an 8 x 8 inch pan, reducing bake time and checking earlier for doneness.