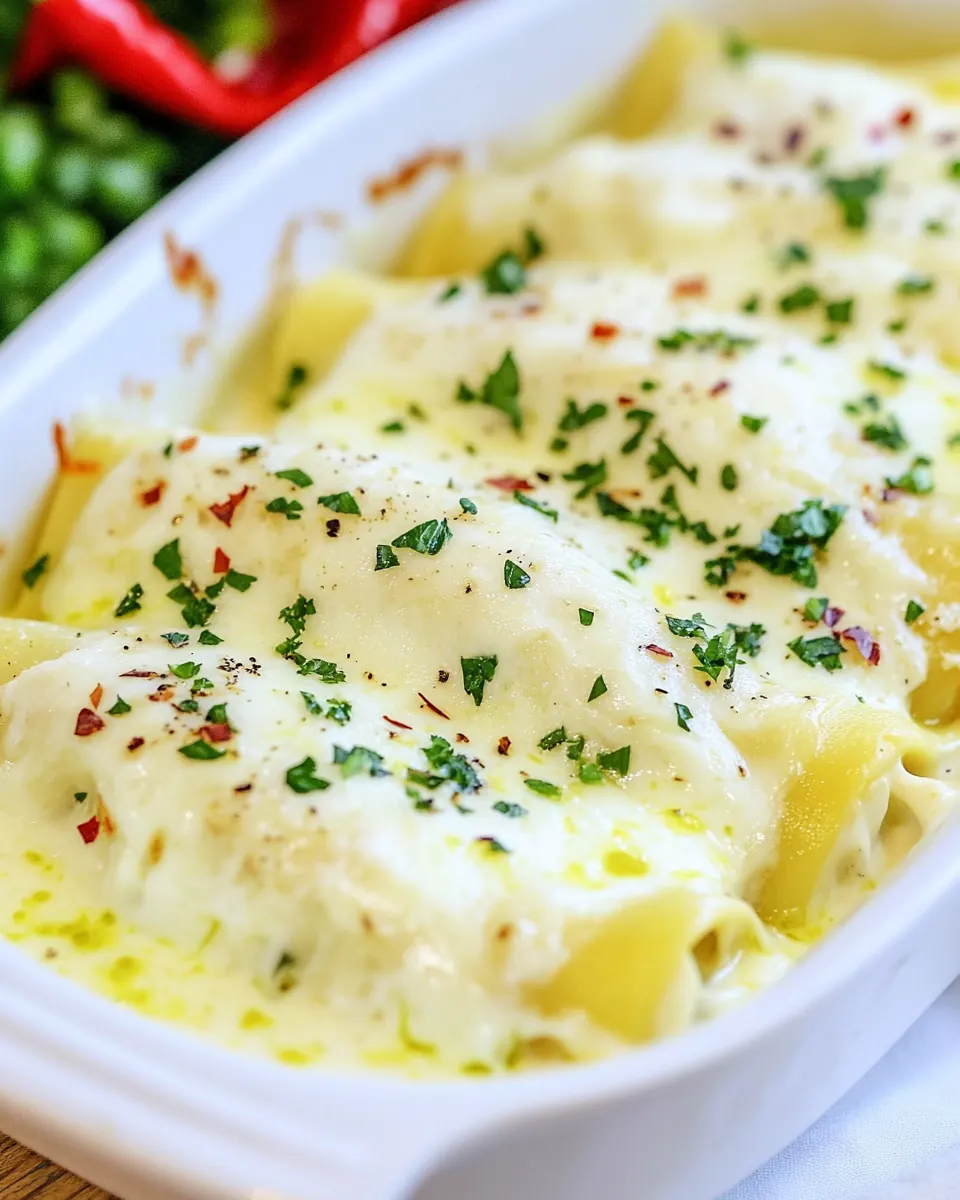
Creamy Chicken Alfredo Manicotti
Creamy Chicken Alfredo Manicotti is one of those recipes that wrapped itself around my weeknight routine the moment I tasted it. The first time I made it, I was juggling a busy evening and a bag of pantry rescues, and the way the chicken mingled with the silky ricotta cheese and warm Alfredo sauce felt like a cozy dinner hug. I remember wiping a stray smear of sauce off the counter, thinking this would become a family staple, and it did, fast.
Over the years I’ve adjusted little details to suit mood and time. I like to shred the rotisserie chicken by hand so each bite has that rustic texture, and I always sneak in a handful of wilted spinach because it adds color and a fresh lift. When the baking dish emerges from the oven, the top is bubbling and the aroma is rich and savory, and somehow the simple act of plating becomes a small celebration. Guests often ask for the recipe, and I enjoy telling the story of the first chaotic night it saved.
Recipe Snapshot
55 mins
30 mins
25 mins
Medium
450 kcal
Italian
Keto, Gluten-Free
Dinner
Large pot, Skillet, Mixing bowl, Piping bag or zip top bag, 13 x 9 baking dish, Oven
What’s Great About This Creamy Chicken Alfredo Manicotti
Comforting, familiar flavors
I love how Creamy Chicken Alfredo Manicotti delivers those warm, familiar notes we crave. The combination of ricotta cheese, parmesan, and Alfredo sauce creates a luxuriously creamy mouthfeel that comforts without being fussy, which is why I often reach for it on evenings when I want a soothing, satisfying meal.
Easy to feed a crowd
Once you assemble the tubes in a 13 x 9 baking dish, it feels like magic how many servings you get. I appreciate how straightforward it is to scale up, and the dish travels well from oven to table. I’ve brought this to potlucks, and people always appreciate a hearty, cheesy main they can scoop onto a plate.
Hands off during baking
After the careful work of stuffing the shells, the oven does the rest. That hands off period buys me time to prep a salad or catch up with whoever I’m cooking for. The bubbling cheese and golden edges are the reward, and I often use that baking time to set a relaxed pace for the evening.
Versatile and forgiving
Whether I use a homemade Alfredo sauce or a store bought jar, the dish still sings. I find it forgiving when measurements are approximate, and swapping in different shredded cheeses or adjusting salt levels never breaks the final result. This flexibility makes it perfect for cooks who want great flavor without perfectionism.
Nutrient boosters tucked in
Adding fresh spinach and parsley doesn’t just brighten the plate, it lifts the nutrition profile. I like that the recipe feels indulgent yet balanced, with protein from the chicken and calcium from the cheeses. Small touches like these help me serve something both hearty and thoughtful.
Key Ingredients for Creamy Chicken Alfredo Manicotti

These ingredients are chosen to build layers of texture and flavor. The shells hold a creamy, savory filling, while the cheeses bring both melting stretch and sharp savory notes. The spinach and parsley add freshness that balances the richness, and the chicken supplies the hearty protein that makes this a true main course.
- 1 box manicotti: Boil until al dente and hold for stuffing; provides the tubular shells that contain the filling and bake nicely without collapsing. Offers a sturdy vehicle for sauce and cheeses while absorbing some moisture. Ensure tubes are cooked per package directions to avoid overcooking during baking.
- 9 oz bag fresh spinach: Wilt quickly in a hot pan to reduce moisture and concentrate flavor; contributes bright color and a tender, slightly earthy note to the filling. Adds nutrients and balances the richness of cheeses and Alfredo sauce. Squeeze out excess liquid to prevent a watery filling or soggy pasta.
- 1/2 rotisserie chicken remove the meat from the bones and shred it: Shred finely after removing from bones to distribute protein evenly throughout the filling; supplies savory, cooked chicken flavor and texture. Acts as the primary protein component that complements the creamy cheeses. Ensure meat is free of bones and skin for a consistent bite.
- 1 egg: Beat and mix into the filling to bind cheeses and spinach together; adds structure and helps the mixture hold its shape inside manicotti. Contributes a subtle richness and helps create a creamier interior when baked. Use one egg to gently set the filling without making it rubbery.
- 18 oz ricotta cheese: Fold into the filling for a rich, creamy base with mild, slightly tangy dairy notes; provides bulk and smooth texture to the filling mixture. Helps meld other ingredients and holds moisture during baking. Stir to combine thoroughly for an even, scoopable consistency.
- 1 cup grated parmesan: Sprinkle into the filling and over the assembled manicotti for nutty, salty depth and to enhance savory flavor. Adds umami and helps create a gratin-like top when combined with other cheeses. Use grated parmesan for sharpness and to thicken the filling slightly.
- 2 cups shredded Italian blend cheese you can also use mozzarella, divided: Mix most into the filling and reserve some for topping to achieve gooey, melty stretch and a smooth finish; contributes mild, creamy flavor characteristic of Italian-style cheeses. Balances textures between ricotta and parmesan and browns attractively when baked. Divide as directed to maximize creamy interior and golden topping.
- Alfredo sauce double the recipe – or use store-bought: Coat and smother the stuffed manicotti either from homemade or store–bought to impart a rich, velvety sauce that ties the dish together; doubles the creamy profile and keeps pasta moist while baking. Provides flavorful fat and seasoning that complements cheeses and chicken. Use a double batch if a saucier, indulgent casserole is desired.
- fresh parsley for garnish: Chiffonade or finely chop and scatter over the finished dish for a fresh, herbaceous finish and visual brightness; adds mild grassy aroma and slight peppery note. Serves as a contrasting garnish to cut through richness and elevate presentation. Add just before serving to preserve color and fragrance.
How to Assemble Creamy Chicken Alfredo Manicotti
This assembly is hands on and satisfying. Take your time with the filling texture and piping, because neat tubes make for an elegant presentation. Follow each step and rely on sensory cues like aroma and bubbling to know you’re on track.
- Preheat oven to 375 degrees F.: Warmth in the room and the scent of a ready oven set the stage for even baking. You want a fully preheated oven so the dish starts cooking immediately, which promotes even bubbling and light browning on the cheese top. A common error is putting the dish into a not fully preheated oven, which lengthens bake time and can lead to uneven cheesing. Listen for the faint hum of the oven, and if you have an oven thermometer check for true temperature accuracy. The heat helps the sauce thicken and the cheeses to meld properly, creating that desirable glossy finish.
- Bring a large pot of salted water to a boil, and cook the manicotti until al dente. Drain and set aside.: You should smell the faintly salty steam as the water comes to a rolling boil, and the manicotti will go from opaque to tender in minutes. Cooking to al dente ensures the tubes hold their shape during filling and baking. Overcooking makes them fragile and prone to tearing, which complicates piping. After draining, lay the tubes on a lightly oiled tray so they do not stick together, and cool until warm to the touch. If they feel gummy, they were overcooked; if they are still very firm, they're undercooked and may remain hard after baking.
- In the meantime, place a small skillet over medium heat, add 1 tablespoon of olive oil, and cook the spinach in it until wilted. Transfer it to a cutting board and roughly chop it.: The skillet will hiss softly as the spinach hits the hot oil, releasing a green, herbaceous aroma. Cooking concentrates the flavor and reduces moisture, which is crucial so the filling does not become watery. Chop the wilted leaves to distribute them evenly through the filling. Avoid overheating, which can make the spinach flavor bitter and dry. If the skillet looks crowded, cook the spinach in batches so it steams rather than sautés, which affects texture.
- In a large bowl, combine the ricotta cheese, 1 cup Italian blend cheese, parmesan cheese, shredded chicken, chopped spinach, and the egg. Stir well until thoroughly combined.: The bowl will fill with creamy textures and a savory scent as the cheeses meet the shredded chicken . Stirring brings the mixture together into a cohesive filling, with bits of green visible throughout. This step matters because a well combined filling ensures every tube has balanced flavor. A frequent slip is under mixing, which leaves pockets of dry cheese or unblended egg. Use a sturdy spoon and scrape the bowl sides to incorporate everything evenly. If the mixture feels too loose, chill briefly to firm it up for easier piping.
- Next, spoon the mixture into a piping bag or large Ziploc bag. Cut off the corner enough to pipe the filling.: When you squeeze the bag, you should feel steady resistance, and the filling should flow in a thick ribbon. Piping is neater than spooning and fills tubes consistently. If the filling splatters or clogs, the bag opening may be too large or small, so adjust the cut. Avoid using an overfilled bag, which is hard to control; portion into two bags if needed. The tactile feedback of piping tells you when the tubes are full without bursting.
- Add 1 cup of Alfredo sauce over the bottom of a 13 x 9 baking dish.: Pouring the first layer of Alfredo sauce creates a slick base that prevents sticking and adds moisture. The sauce should coat the bottom evenly, offering pockets of saucy richness beneath each tube. If you skip this, the manicotti can stick and dry on the underside. Aim for a caramel colored rim along the dish and smooth the sauce with a spoon to ensure full coverage. A thin, uneven base will give uneven moisture to the pasta.
- Pipe the cheese filling into the manicotti tubes and arrange them on the bottom of the baking dish one next to each other.: As you pipe, the filling should glisten and hold shape inside each tube. Arranging them snugly helps support the tubes so they do not topple and allows cheese to meld across seams. You want to see smooth, filled ends, not air pockets. A common mistake is overcrowding the dish which prevents even heat circulation; leave a little space at the edges for airflow. If a tube tears, you can spoon the filling into it gently rather than forcing more pressure through the piping bag.
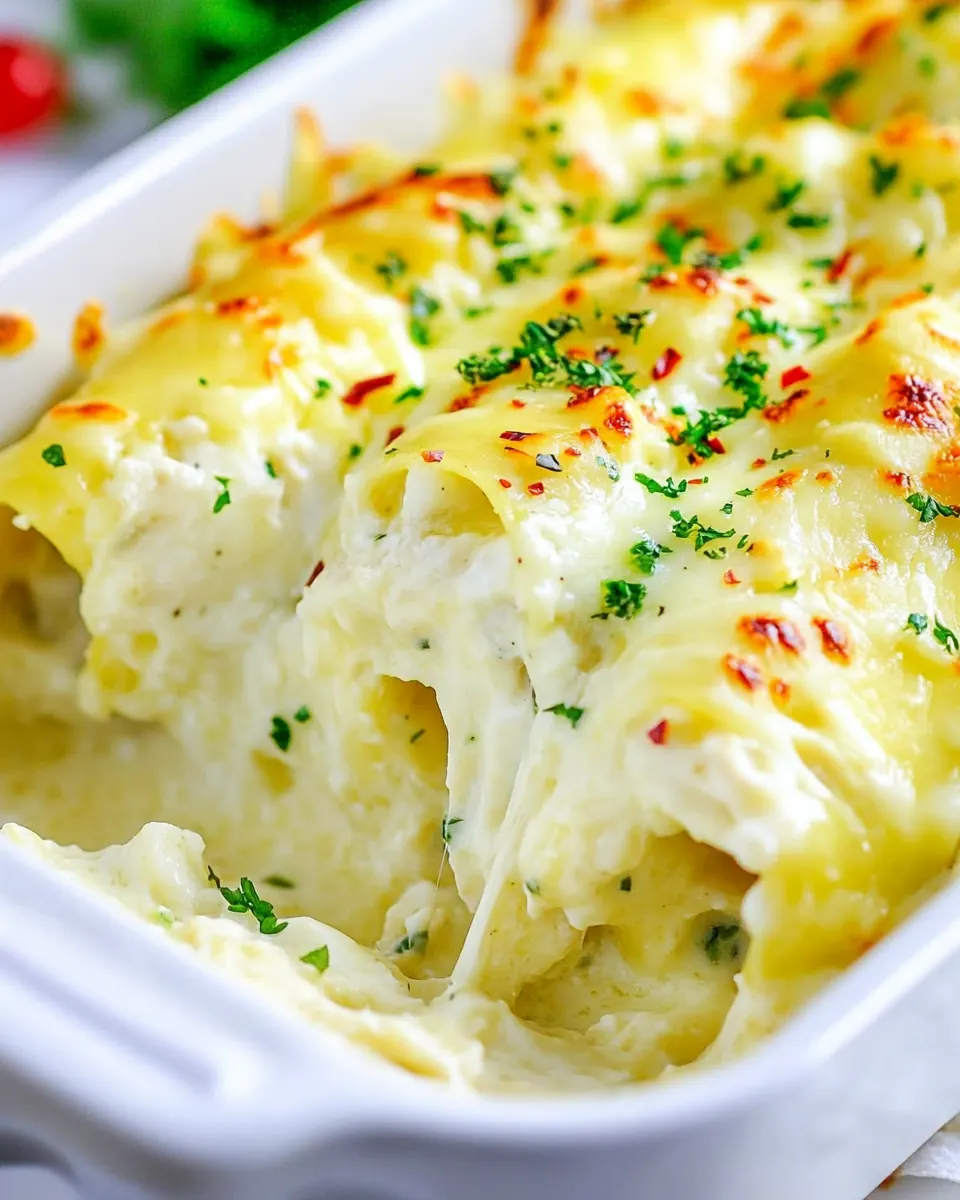
- Pour the remaining Alfredo sauce evenly on top of the manicotti, and sprinkle with the remaining 1 cup of shredded cheese.: The top layer of Alfredo sauce should blanket the tubes, and the shredded cheese will create a golden, bubbling crust. As the oven heat reaches the dish, the cheeses will liquefy and then brown slightly at the edges. Be mindful of too much sauce, which can cause the topping to slide off; evenly distribute to maintain a cohesive surface. If the top seems dry before baking, add an extra spoonful of sauce to ensure creaminess throughout.
- Bake for 20-25 minutes, until the cheese is bubbly.: During baking you will hear a gentle sputter as bubbles form and the aroma deepens into rich, toasty notes. The cheese should be fully melted and show spots of light golden brown. This stage develops flavor and textural contrast between the creamy interior and slightly browned top. Opening the oven too often releases heat and slows browning, so resist frequent checks. If the top browns too quickly, tent with foil to prevent burning while allowing the inside to finish cooking.
- Cool for 10 minutes, sprinkle with parsley, and serve.: Allowing the dish to rest helps the filling set so slices hold together, and the steam settles into a silkier sauce. The first forkful should be warm and creamy rather than scalding, and the fresh bite of chopped parsley brightens the dish. Serving immediately may lead to loose filling, while waiting too long cools the sauce excessively. A ten minute rest balances texture and temperature for ideal plating.
Helpful Notes about Creamy Chicken Alfredo Manicotti
This section collects practical advice I return to whenever I make Creamy Chicken Alfredo Manicotti. These notes aim to simplify prep and improve results, especially on busy nights.
- Cheese selection matters Choose a flavorful grated parmesan and a good Italian blend for melting. Freshly grate the parmesan if possible for the brightest flavor, and reserve half the shredded blend for topping so the bake develops a crunchy, golden finish.
- Control moisture After cooking the spinach, press it between paper towels to remove excess liquid. Too much moisture will thin the filling and make the manicotti soggy, so take a moment to drain thoroughly.
- Piping makes assembly faster Use a sturdy piping bag or a zip top bag with the corner trimmed. Piping yields uniform tubes and reduces spills, which helps the final presentation and ensures even distribution of filling.
- Rest before serving Let the baked dish cool for about ten minutes before serving. This pause helps the filling set so each portion slices cleanly and the sauce settles into a silky consistency instead of running off the plate.
- Make ahead advantage You can assemble the dish, cover tightly, and refrigerate for up to 24 hours before baking. If chilled, add a few extra minutes to the bake time and tent with foil to prevent over browning while heating through.
How to Serve Creamy Chicken Alfredo Manicotti
Serving this dish is about balance and presentation. I like to pair it with lighter sides and a fresh herb garnish so the richness does not overwhelm the meal. This list covers practical serving ideas for different occasions and storage tips to keep leftovers delicious.
- Serve with a crisp green salad A peppery arugula or a mixed green salad tossed in a light vinaigrette complements the richness of the manicotti by adding acidity and texture contrast.
- Offer roasted or steamed vegetables Seasonal vegetables such as green beans or broccoli provide a slightly bitter counterpoint and add color to the plate, balancing the creamy profile of the main dish.
- Perfect for family dinners This recipe scales well for a cozy family meal. Place the 13 x 9 dish on the table and let everyone serve themselves for a communal, homey feel.
- Great for special occasions The bubbling cheese and golden top make it feel celebratory, so it works well for a weekend dinner party or a comforting holiday side when you want something hearty and familiar.
- Storage and reheating Cool to room temperature, then cover and refrigerate for up to three days. Reheat portions in the oven at a moderate temperature until warmed through, to preserve texture and prevent rubbery cheese.
- Garnish just before serving Sprinkle chopped parsley right before plating to keep its color and fresh flavor bright against the warm, creamy backdrop of the dish.
FAQ
Conclusion
Creamy Chicken Alfredo Manicotti stands out because it combines comforting, creamy cheeses with tender shredded chicken for a satisfying, dinner table favorite. Give it a try when you want a dish that feels indulgent but is straightforward to assemble. Between the bubbling cheese top and the hearty, herbed filling, it’s an inviting meal that brings people together with minimal fuss and maximum flavor.
Creamy Chicken Alfredo Manicotti
Equipment
- Large Pot
- Skillet
- Mixing Bowl
- Piping bag or zip top bag
- 13 x 9 baking dish
- Oven
Ingredients
- 1 box manicotti Boil until al dente and hold for stuffing; provides the tubular shells that contain the filling and bake nicely without collapsing. Offers a sturdy vehicle for sauce and cheeses while absorbing some moisture. Ensure tubes are cooked per package directions to avoid overcooking during baking.
- 9 oz bag fresh spinach Wilt quickly in a hot pan to reduce moisture and concentrate flavor; contributes bright color and a tender, slightly earthy note to the filling. Adds nutrients and balances the richness of cheeses and Alfredo sauce. Squeeze out excess liquid to prevent a watery filling or soggy pasta.
- 1/2 rotisserie chicken remove the meat from the bones and shred it Shred finely after removing from bones to distribute protein evenly throughout the filling; supplies savory, cooked chicken flavor and texture. Acts as the primary protein component that complements the creamy cheeses. Ensure meat is free of bones and skin for a consistent bite.
- 1 egg Beat and mix into the filling to bind cheeses and spinach together; adds structure and helps the mixture hold its shape inside manicotti. Contributes a subtle richness and helps create a creamier interior when baked. Use one egg to gently set the filling without making it rubbery.
- 18 oz ricotta cheese Fold into the filling for a rich, creamy base with mild, slightly tangy dairy notes; provides bulk and smooth texture to the filling mixture. Helps meld other ingredients and holds moisture during baking. Stir to combine thoroughly for an even, scoopable consistency.
- 1 cup grated parmesan Sprinkle into the filling and over the assembled manicotti for nutty, salty depth and to enhance savory flavor. Adds umami and helps create a gratin-like top when combined with other cheeses. Use grated parmesan for sharpness and to thicken the filling slightly.
- 2 cups shredded Italian blend cheese you can also use mozzarella, divided Mix most into the filling and reserve some for topping to achieve gooey, melty stretch and a smooth finish; contributes mild, creamy flavor characteristic of Italian-style cheeses. Balances textures between ricotta and parmesan and browns attractively when baked. Divide as directed to maximize creamy interior and golden topping.
- Alfredo sauce double the recipe - or use store-bought Coat and smother the stuffed manicotti either from homemade or store-bought to impart a rich, velvety sauce that ties the dish together; doubles the creamy profile and keeps pasta moist while baking. Provides flavorful fat and seasoning that complements cheeses and chicken. Use a double batch if a saucier, indulgent casserole is desired.
- fresh parsley for garnish Chiffonade or finely chop and scatter over the finished dish for a fresh, herbaceous finish and visual brightness; adds mild grassy aroma and slight peppery note. Serves as a contrasting garnish to cut through richness and elevate presentation. Add just before serving to preserve color and fragrance.
Instructions
- Preheat oven to 375 degrees F.: Warmth in the room and the scent of a ready oven set the stage for even baking. You want a fully preheated oven so the dish starts cooking immediately, which promotes even bubbling and light browning on the cheese top. A common error is putting the dish into a not fully preheated oven, which lengthens bake time and can lead to uneven cheesing. Listen for the faint hum of the oven, and if you have an oven thermometer check for true temperature accuracy. The heat helps the sauce thicken and the cheeses to meld properly, creating that desirable glossy finish.
- Bring a large pot of salted water to a boil, and cook the manicotti until al dente. Drain and set aside.: You should smell the faintly salty steam as the water comes to a rolling boil, and the manicotti will go from opaque to tender in minutes. Cooking to al dente ensures the tubes hold their shape during filling and baking. Overcooking makes them fragile and prone to tearing, which complicates piping. After draining, lay the tubes on a lightly oiled tray so they do not stick together, and cool until warm to the touch. If they feel gummy, they were overcooked; if they are still very firm, they're undercooked and may remain hard after baking.
- In the meantime, place a small skillet over medium heat, add 1 tablespoon of olive oil, and cook the spinach in it until wilted. Transfer it to a cutting board and roughly chop it.: The skillet will hiss softly as the spinach hits the hot oil, releasing a green, herbaceous aroma. Cooking concentrates the flavor and reduces moisture, which is crucial so the filling does not become watery. Chop the wilted leaves to distribute them evenly through the filling. Avoid overheating, which can make the spinach flavor bitter and dry. If the skillet looks crowded, cook the spinach in batches so it steams rather than sautés, which affects texture.
- In a large bowl, combine the ricotta cheese, 1 cup Italian blend cheese, parmesan cheese, shredded chicken, chopped spinach, and the egg. Stir well until thoroughly combined.: The bowl will fill with creamy textures and a savory scent as the cheeses meet the shredded chicken . Stirring brings the mixture together into a cohesive filling, with bits of green visible throughout. This step matters because a well combined filling ensures every tube has balanced flavor. A frequent slip is under mixing, which leaves pockets of dry cheese or unblended egg. Use a sturdy spoon and scrape the bowl sides to incorporate everything evenly. If the mixture feels too loose, chill briefly to firm it up for easier piping.
- Next, spoon the mixture into a piping bag or large Ziploc bag. Cut off the corner enough to pipe the filling.: When you squeeze the bag, you should feel steady resistance, and the filling should flow in a thick ribbon. Piping is neater than spooning and fills tubes consistently. If the filling splatters or clogs, the bag opening may be too large or small, so adjust the cut. Avoid using an overfilled bag, which is hard to control; portion into two bags if needed. The tactile feedback of piping tells you when the tubes are full without bursting.
- Add 1 cup of Alfredo sauce over the bottom of a 13 x 9 baking dish.: Pouring the first layer of Alfredo sauce creates a slick base that prevents sticking and adds moisture. The sauce should coat the bottom evenly, offering pockets of saucy richness beneath each tube. If you skip this, the manicotti can stick and dry on the underside. Aim for a caramel colored rim along the dish and smooth the sauce with a spoon to ensure full coverage. A thin, uneven base will give uneven moisture to the pasta.
- Pipe the cheese filling into the manicotti tubes and arrange them on the bottom of the baking dish one next to each other.: As you pipe, the filling should glisten and hold shape inside each tube. Arranging them snugly helps support the tubes so they do not topple and allows cheese to meld across seams. You want to see smooth, filled ends, not air pockets. A common mistake is overcrowding the dish which prevents even heat circulation; leave a little space at the edges for airflow. If a tube tears, you can spoon the filling into it gently rather than forcing more pressure through the piping bag.
- Pour the remaining Alfredo sauce evenly on top of the manicotti, and sprinkle with the remaining 1 cup of shredded cheese.: The top layer of Alfredo sauce should blanket the tubes, and the shredded cheese will create a golden, bubbling crust. As the oven heat reaches the dish, the cheeses will liquefy and then brown slightly at the edges. Be mindful of too much sauce, which can cause the topping to slide off; evenly distribute to maintain a cohesive surface. If the top seems dry before baking, add an extra spoonful of sauce to ensure creaminess throughout.
- Bake for 20-25 minutes, until the cheese is bubbly.: During baking you will hear a gentle sputter as bubbles form and the aroma deepens into rich, toasty notes. The cheese should be fully melted and show spots of light golden brown. This stage develops flavor and textural contrast between the creamy interior and slightly browned top. Opening the oven too often releases heat and slows browning, so resist frequent checks. If the top browns too quickly, tent with foil to prevent burning while allowing the inside to finish cooking.
- Cool for 10 minutes, sprinkle with parsley, and serve.: Allowing the dish to rest helps the filling set so slices hold together, and the steam settles into a silkier sauce. The first forkful should be warm and creamy rather than scalding, and the fresh bite of chopped parsley brightens the dish. Serving immediately may lead to loose filling, while waiting too long cools the sauce excessively. A ten minute rest balances texture and temperature for ideal plating.
Notes
- Cheese selection matters Choose a flavorful grated parmesan and a good Italian blend for melting. Freshly grate the parmesan if possible for the brightest flavor, and reserve half the shredded blend for topping so the bake develops a crunchy, golden finish.
- Control moisture After cooking the spinach, press it between paper towels to remove excess liquid. Too much moisture will thin the filling and make the manicotti soggy, so take a moment to drain thoroughly.
- Piping makes assembly faster Use a sturdy piping bag or a zip top bag with the corner trimmed. Piping yields uniform tubes and reduces spills, which helps the final presentation and ensures even distribution of filling.
- Rest before serving Let the baked dish cool for about ten minutes before serving. This pause helps the filling set so each portion slices cleanly and the sauce settles into a silky consistency instead of running off the plate.
- Make ahead advantage You can assemble the dish, cover tightly, and refrigerate for up to 24 hours before baking. If chilled, add a few extra minutes to the bake time and tent with foil to prevent over browning while heating through.