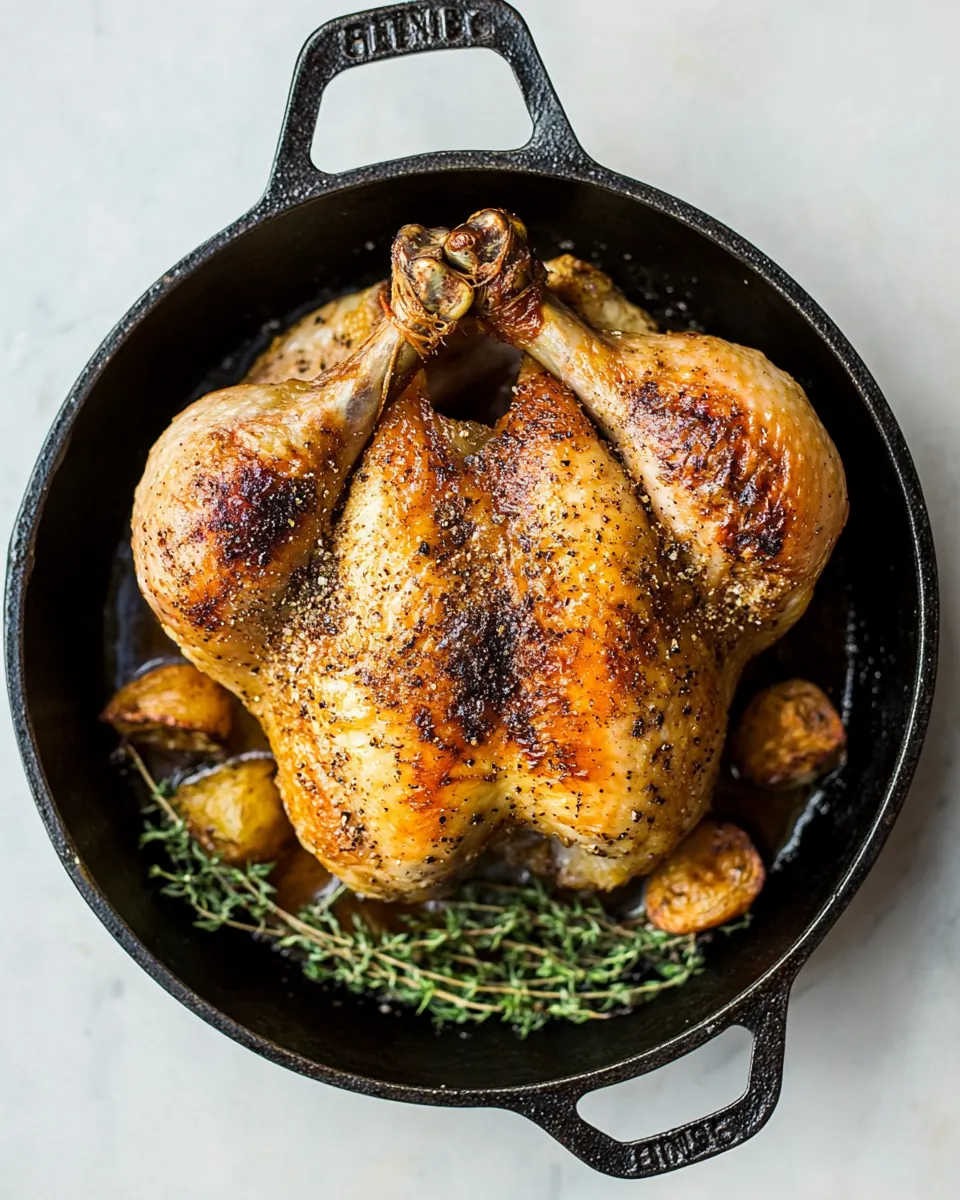
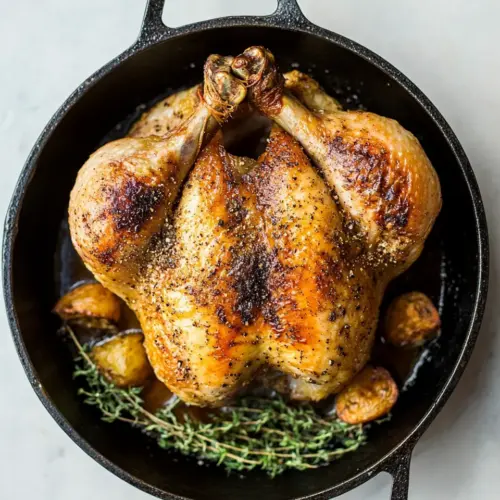
Skillet Roasted Chicken
Skillet Roasted Chicken is the kind of meal that makes the house smell like comfort and coax friends into lingering at the table.
I remember the first time I roasted a whole chicken in a skillet, the crisp skin pulling away with a satisfying crackle as I carved it. I had rushed home from work, the kind of evening where takeout seemed tempting, but instead I grabbed a cast iron, seasoned the chicken, and let the oven do the heavy lifting. By the time the timer went off, the kitchen was full of warm, savory steam, the aroma of roasted chicken and olive oil weaving through the rooms. My partner walked in, sighed, and said that smell alone was worth dinner.
Over the years I’ve tweaked the simple method until it felt effortless yet reliably impressive. There is joy in the little rituals, like patting the chicken dry, rubbing it with a bit of olive oil, and hearing the skillet hiss when you first place it into the hot oven. Those small actions build texture and flavor, and they help me slow down. This recipe is honest and unpretentious, the sort of dish I turn to when I want something restorative and real.
Recipe Snapshot
1 hr 5 mins
20 mins
45 mins
Medium
350 kcal
American
Keto, Paleo
Dinner
Cast iron skillet, Rimmed baking sheet, Meat thermometer
Why We Love This Skillet Roasted Chicken
Dependable Texture
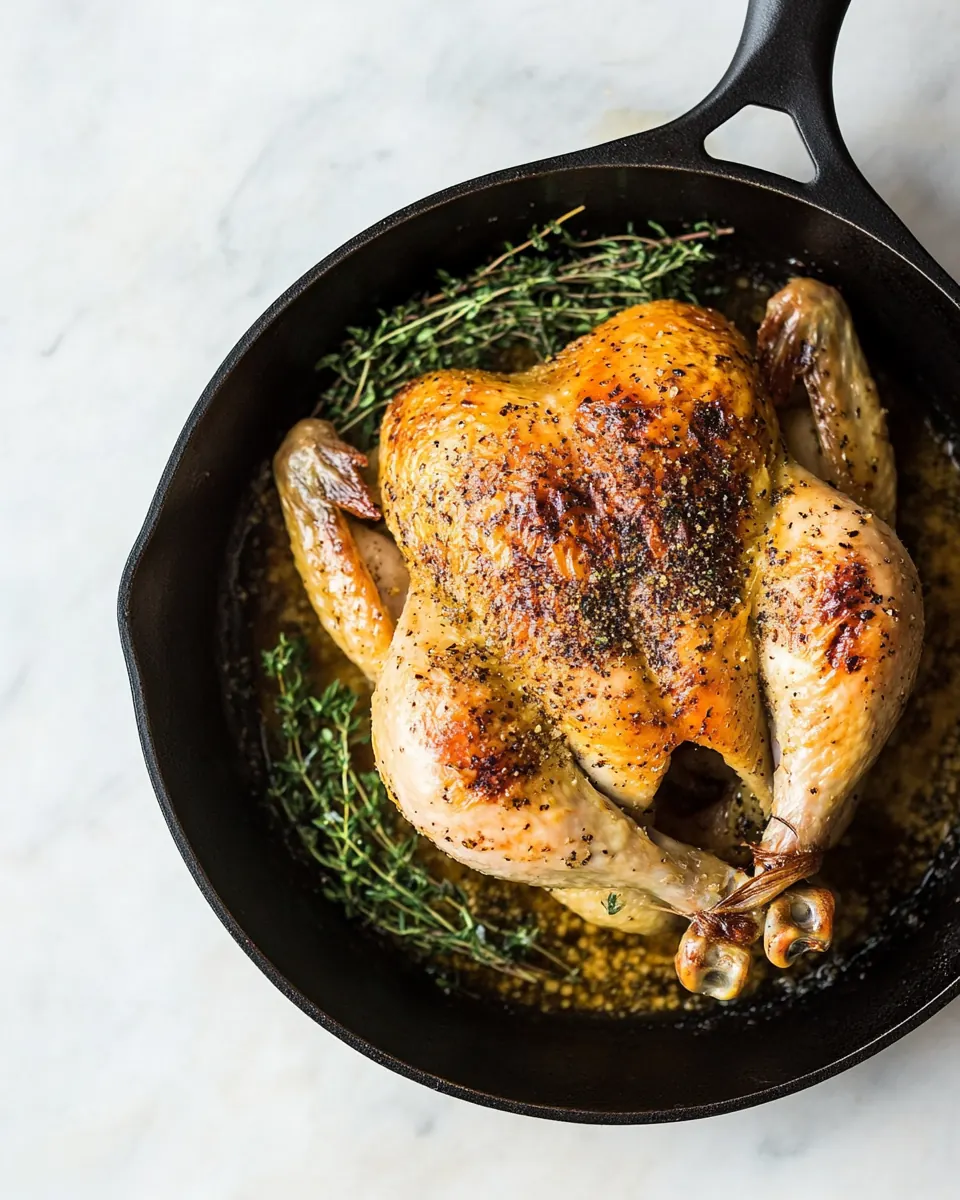
I love that Skillet Roasted Chicken reliably delivers a crisp, golden skin and tender meat. The high heat from the oven paired with a hot skillet means the skin renders and browns beautifully, creating a contrast between crunchy exterior and juicy interior that keeps me coming back.
Minimal Ingredients, Maximum Impact
This recipe shows how a few pantry staples like salt, pepper, and olive oil can transform a whole bird into something exceptional. I appreciate recipes that trust the ingredient, letting natural flavors shine without overwhelm.
Quick to Prep, Great for Guests
Even when I have unexpected company, I can get a chicken in the oven with little fuss. The prep is straightforward, and while it roasts you can focus on sides or settle in with a glass of water and conversation.
Flexible and Forgiving
Whether I salt the chicken hours ahead or just before roasting, the method adapts. The technique tolerates slight timing variances, and finishing under the broiler allows me to correct any missing color at the end.
Comfort Food That Feels Special
There is something quietly celebratory about pulling a skillet to the table and carving at it family style. This dish elevates a weeknight into a memory without requiring complicated steps, which is why I always keep this method in my rotation.
Recipe Ingredients for Skillet Roasted Chicken
These ingredients are intentionally simple, designed to let the chicken take center stage. The philosophy here is restraint, using a few quality components to promote browning, seasoning, and moisture retention. The key players are the chicken itself, coarse salt for seasoning, freshly ground pepper for brightness, and olive oil to help the skin crisp and carry flavor. If you choose to add a rub, it can layer complexity, but the recipe stands strong on basics.
- 1 small whole chicken (mine was 3 lbs.): Roast whole to provide the centerpiece protein and deliver moist meat with crispy skin when cooked properly; truss or tuck legs for even cooking and pat dry to promote browning.
- Salt & pepper: Season generously to enhance overall flavor balance and bring out natural savory notes; apply before and after oiling for deeper seasoning penetration and adjust to taste.
- 2 tablespoons olive oil divided: Coat sparingly to facilitate browning and help carry seasonings onto the skin; reserve half for pan use to prevent sticking and baste during roasting for extra crispness.
- Rub/seasoning (optional): Customize liberally to complement the chicken and add layered flavors; choose herbs, spices, or blends and apply under and over the skin for maximum infusion.
Skillet Roasted Chicken Instructions
These steps walk you through the rhythm of seasoning, heating, and roasting. Read them once to familiarize yourself with the flow, then enjoy the tactile process of patting, oiling, and finally carving a beautifully roasted chicken.
- If possible, salt the chicken at least an hour ahead of time (or even overnight – leave it in the fridge). Pat the chicken dry with paper towel and generously season the inside and outside with salt. Do this at least 15 minutes in advance if you can't do it ahead of time.: The air dried, salted skin will feel slightly tacky and the flesh firms as the salt draws moisture to the surface then reabsorbs it, which helps with seasoning depth and a juicier interior. You may notice a faint mineral scent as the salt works, which is normal and a good sign. A common mistake is skipping this step entirely when you have the time, which can result in a less seasoned center, so if you can plan ahead it's worth it.
- Preheat oven to 425 F and move the rack to the middle of the oven. Place your cast iron skillet in the oven so it warms up (I do this as soon as I start preheating the oven).: When you press the skin and it gives a dry, matte finish that's ideal for browning, the surface will crisp more readily in the oven. Salt the cavity too so each slice has balanced flavor. Avoid leaving damp surfaces, because moisture on the skin will steam instead of crisp.
- Pat the chicken dry again. Coat it in 1 tablespoon of the olive oil. Add some pepper and seasoning/rub if you're using one.: Allowing a brief resting period after seasoning permits the salt to start affecting the meat; you will notice a slight tightening of the skin and a more even distribution of salt. This short wait also reduces oven shock when the bird goes in. A trap to avoid is rushing straight from seasoning to roasting without drying, which undermines crisping.
- Once the oven is hot, take the skillet out and add the remaining olive oil. Move it around the inside of the pan so it's coated.: A fully preheated oven yields that immediate sizzle when the skillet enters, which promotes color and renders fat quickly. Positioning the rack in the middle ensures balanced airflow and heat around the pan. If you skip preheating or use a lower temperature, the skin will not brown properly and cooking time will increase unpredictably.
- Place the chicken in the middle of the skillet, breast side up. Return the skillet to the oven and roast for 45 minutes for a 3-lb. bird (see blog post for timing guidelines for other size chickens). I strongly suggest placing the skillet on a large baking sheet to catch some of the splatter (I did not do this and had to clean my oven).: A hot skillet creates instant contact heat that jumpstarts the Maillard reaction on the skin, giving you even browning. When you remove it, the pan should be shimmering with residual heat; handle carefully as it will be extremely hot. A frequent error is placing a cold pan in the oven, which delays browning and can make the skin rubbery.
- If the skin hasn't browned enough, broil it for a few minutes (watch it carefully so it doesn't burn).: After any resting or refrigeration the skin may collect additional moisture; drying it a second time is noticeable because the surface will look dull and feel dry to the touch, which is what you want for crisping. This step prevents steaming and promotes even color development. Do not skip this just to save a minute, as it often leads to softer skin.
- Let the chicken rest for 10-15 minutes before carving.: The oil will soak into the skin just enough to help it brown and carry any seasoning, and you should see a faint sheen when it is evenly applied. The sound you want later in the oven is a low steady sizzle, indicating good contact. Too much oil can pool and cause spattering, so use the measured amount.
- Add some pepper and seasoning or rub if you're using one: Freshly ground peppercorns will release a bright aroma as the bird heats, and a light rub can offer warmth or herbaceous notes. When applied thinly you will sense the seasoning layer without overpowering the natural meat. Be cautious with heavy sugar based rubs because they can char under the high oven temperature.
- Once the oven is hot take the skillet out and add the remaining olive oil: The oil should shimmer and thin out immediately on the hot metal, releasing a warm scent. This step lubricates the pan and reduces sticking while enhancing the initial sear. A common oversight is adding oil to a lukewarm skillet which does not produce the quick sizzle needed for browning.
- Move it around the inside of the pan so it's coated: Tilt and swirl so the oil covers the cooking surface; you should see a thin, glossy film. This even coating ensures the chicken will sear uniformly where it contacts the skillet. Not coating thoroughly can result in uneven color and hotspots where the skin sticks.
- Place the chicken in the middle of the skillet breast side up: Set the bird so its weight is centered and the breast faces upward, which helps the dark and light meat cook consistently. As it roasts you will hear a gentle sizzle and see juices bubbling at the pan edges; that visual cue means the fat is rendering properly. Avoid crowding the pan or tilting the bird, which can cause uneven roasting.
- Return the skillet to the oven and roast for 45 minutes for a 3 lb bird: During roasting, the aroma will deepen and the skin will progress from pale to golden then to a rich brown, and you may hear a higher pitched pop as juices hit the hot pan. This steady high heat ensures the skin crisps while the interior reaches safe temperature. A typical mistake is opening the oven frequently to check, which lowers the heat and extends cooking time.
- I strongly suggest placing the skillet on a large baking sheet to catch some of the splatter I did not do this and had to clean my oven: The baking sheet will catch drips and make cleanup far easier, and visually you will see rendered fat collecting there, a sign the bird is cooking properly. It also protects your oven from smoking if fat spits. Skipping this can mean a messy oven and potential smoke during broiling.
- If the skin hasn't browned enough broil it for a few minutes watch it carefully so it doesn't burn: Broiling adds intense top heat that crisps and colors the skin quickly, and you should only need a short burst, watching continuously to prevent char. The smell will turn more toasted and the edges may darken within minutes. Common mistake, leaving it unattended, often leads to burned spots instead of an even finish.
- Let the chicken rest for 10 to 15 minutes before carving: Resting allows juices to redistribute, you will notice the meat firms slightly and becomes easier to carve without losing moisture. Cutting too soon causes juices to run out, resulting in drier slices. Resist the urge to slice immediately if you want juicy results.
Recipe Tips about Skillet Roasted Chicken
These tips are meant to help you get consistent, impressive results every time you roast a whole chicken in a skillet. They expand on timing, seasoning, and finish techniques so you can relax and enjoy the process while the oven does the work.
- Thermometer is your friend Use an instant read thermometer and aim to remove the bird a few degrees below final target since carryover heat will finish cooking while resting.
- Dry skin for crisping Pat the skin thoroughly and consider air drying in the fridge for an hour or overnight to achieve the crispiest skin possible.
- Hot pan technique Preheat your cast iron so that the moment the chicken hits the skillet you hear an audible sizzle, which promotes browning and texture.
- Oil placement matters Add some oil to the chicken and some to the skillet so both surfaces encourage even browning and prevent sticking.
- Use a rimmed tray beneath Protect your oven from splatters by setting the skillet on a rimmed baking sheet during roasting.
- Finish under broiler if needed If color is lacking, a short burst under the broiler will add an attractive golden finish but watch it continuously.
How to Enjoy Skillet Roasted Chicken
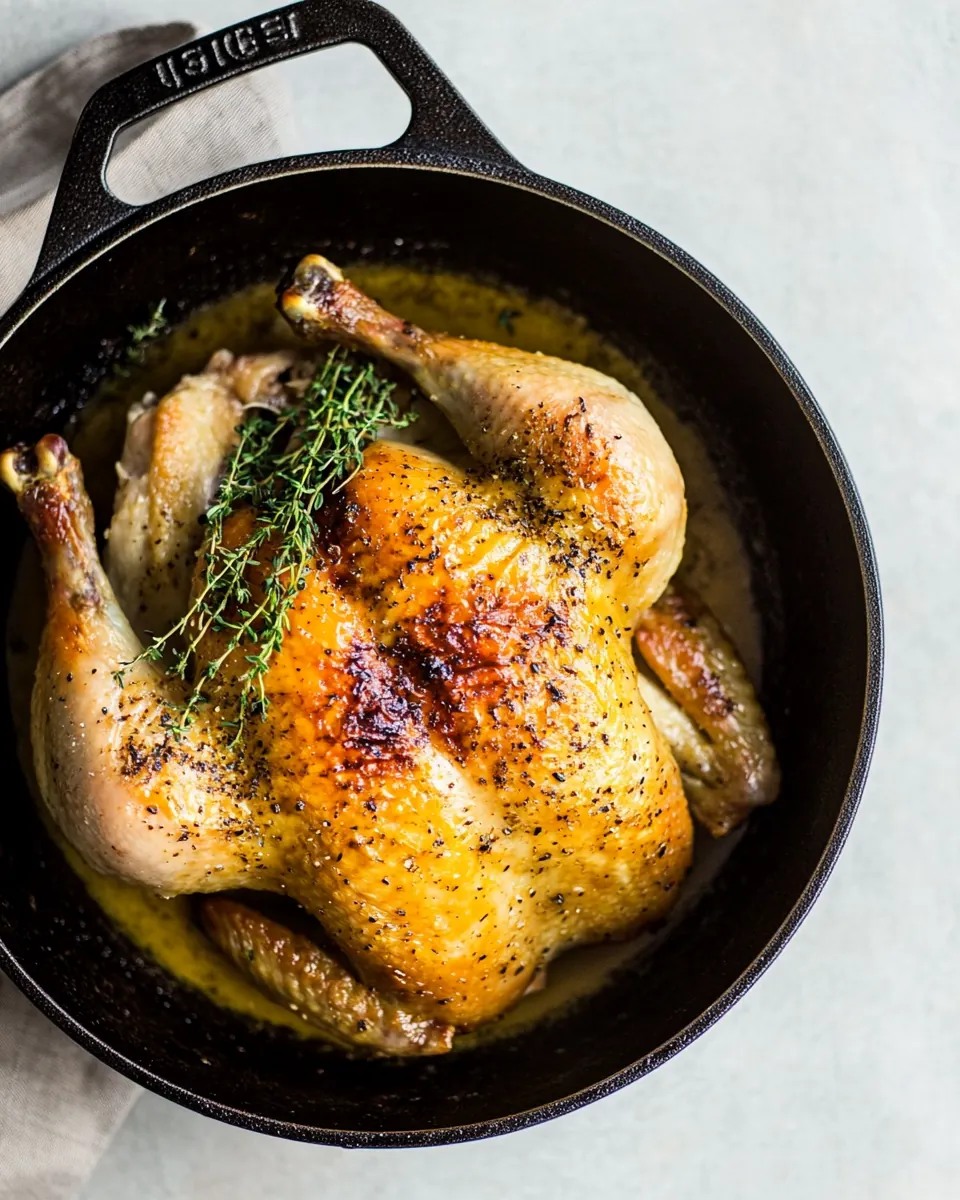
Serving this Skillet Roasted Chicken is as much about presentation as it is about taste. Carve it after resting and let everyone help themselves family style or arrange slices on a platter for a more formal meal. This dish fits weeknight dinners as well as special occasions like cozy fall gatherings.
- Serve with simple roasted vegetables Pair the chicken with roasted root vegetables that benefit from the pan juices for a rustic plate.
- Family style carving Bring the skillet to the table and carve at the counter so everyone gets warm, juicy pieces and you can share the experience.
- Leftover storage Cool leftovers, then refrigerate in an airtight container for up to four days, and reheat gently to avoid drying.
- Occasion ideas Great for a relaxed Sunday dinner or a fall evening when you want something comforting and unfussy.
- Seasonal pairing In autumn serve alongside braised greens or a simple grain salad to complement the roasted flavors.
- Make ahead notes Salt the chicken the night before and refrigerate uncovered to deepen flavor and improve skin texture.
FAQ
Conclusion
Skillet Roasted Chicken stands out for its combination of simplicity and satisfying results, delivering crisp skin and juicy meat with minimal ingredients. Give this method a try the next time you want a comforting, hands off roast that still feels special. Once you get comfortable with the timing and heat, it becomes one of those go to recipes you rely on for effortless, delicious meals that bring people together.
Skillet Roasted Chicken
Equipment
- Cast-Iron Skillet
- Rimmed Baking Sheet
- Meat Thermometer
Ingredients
- 1 small whole chicken (mine was 3 lbs.) Roast whole to provide the centerpiece protein and deliver moist meat with crispy skin when cooked properly; truss or tuck legs for even cooking and pat dry to promote browning.
- Salt & pepper Season generously to enhance overall flavor balance and bring out natural savory notes; apply before and after oiling for deeper seasoning penetration and adjust to taste.
- 2 tablespoons olive oil divided Coat sparingly to facilitate browning and help carry seasonings onto the skin; reserve half for pan use to prevent sticking and baste during roasting for extra crispness.
- Rub/seasoning optional Customize liberally to complement the chicken and add layered flavors; choose herbs, spices, or blends and apply under and over the skin for maximum infusion.
Instructions
- If possible, salt the chicken at least an hour ahead of time (or even overnight - leave it in the fridge). Pat the chicken dry with paper towel and generously season the inside and outside with salt. Do this at least 15 minutes in advance if you can't do it ahead of time.: The air dried, salted skin will feel slightly tacky and the flesh firms as the salt draws moisture to the surface then reabsorbs it, which helps with seasoning depth and a juicier interior. You may notice a faint mineral scent as the salt works, which is normal and a good sign. A common mistake is skipping this step entirely when you have the time, which can result in a less seasoned center, so if you can plan ahead it's worth it.
- Preheat oven to 425 F and move the rack to the middle of the oven. Place your cast iron skillet in the oven so it warms up (I do this as soon as I start preheating the oven).: When you press the skin and it gives a dry, matte finish that's ideal for browning, the surface will crisp more readily in the oven. Salt the cavity too so each slice has balanced flavor. Avoid leaving damp surfaces, because moisture on the skin will steam instead of crisp.
- Pat the chicken dry again. Coat it in 1 tablespoon of the olive oil. Add some pepper and seasoning/rub if you're using one.: Allowing a brief resting period after seasoning permits the salt to start affecting the meat; you will notice a slight tightening of the skin and a more even distribution of salt. This short wait also reduces oven shock when the bird goes in. A trap to avoid is rushing straight from seasoning to roasting without drying, which undermines crisping.
- Once the oven is hot, take the skillet out and add the remaining olive oil. Move it around the inside of the pan so it's coated.: A fully preheated oven yields that immediate sizzle when the skillet enters, which promotes color and renders fat quickly. Positioning the rack in the middle ensures balanced airflow and heat around the pan. If you skip preheating or use a lower temperature, the skin will not brown properly and cooking time will increase unpredictably.
- Place the chicken in the middle of the skillet, breast side up. Return the skillet to the oven and roast for 45 minutes for a 3-lb. bird (see blog post for timing guidelines for other size chickens). I strongly suggest placing the skillet on a large baking sheet to catch some of the splatter (I did not do this and had to clean my oven).: A hot skillet creates instant contact heat that jumpstarts the Maillard reaction on the skin, giving you even browning. When you remove it, the pan should be shimmering with residual heat; handle carefully as it will be extremely hot. A frequent error is placing a cold pan in the oven, which delays browning and can make the skin rubbery.
- If the skin hasn't browned enough, broil it for a few minutes (watch it carefully so it doesn't burn).: After any resting or refrigeration the skin may collect additional moisture; drying it a second time is noticeable because the surface will look dull and feel dry to the touch, which is what you want for crisping. This step prevents steaming and promotes even color development. Do not skip this just to save a minute, as it often leads to softer skin.
- Let the chicken rest for 10-15 minutes before carving.: The oil will soak into the skin just enough to help it brown and carry any seasoning, and you should see a faint sheen when it is evenly applied. The sound you want later in the oven is a low steady sizzle, indicating good contact. Too much oil can pool and cause spattering, so use the measured amount.
- Add some pepper and seasoning or rub if you're using one: Freshly ground peppercorns will release a bright aroma as the bird heats, and a light rub can offer warmth or herbaceous notes. When applied thinly you will sense the seasoning layer without overpowering the natural meat. Be cautious with heavy sugar based rubs because they can char under the high oven temperature.
- Once the oven is hot take the skillet out and add the remaining olive oil: The oil should shimmer and thin out immediately on the hot metal, releasing a warm scent. This step lubricates the pan and reduces sticking while enhancing the initial sear. A common oversight is adding oil to a lukewarm skillet which does not produce the quick sizzle needed for browning.
- Move it around the inside of the pan so it's coated: Tilt and swirl so the oil covers the cooking surface; you should see a thin, glossy film. This even coating ensures the chicken will sear uniformly where it contacts the skillet. Not coating thoroughly can result in uneven color and hotspots where the skin sticks.
- Place the chicken in the middle of the skillet breast side up: Set the bird so its weight is centered and the breast faces upward, which helps the dark and light meat cook consistently. As it roasts you will hear a gentle sizzle and see juices bubbling at the pan edges; that visual cue means the fat is rendering properly. Avoid crowding the pan or tilting the bird, which can cause uneven roasting.
- Return the skillet to the oven and roast for 45 minutes for a 3 lb bird: During roasting, the aroma will deepen and the skin will progress from pale to golden then to a rich brown, and you may hear a higher pitched pop as juices hit the hot pan. This steady high heat ensures the skin crisps while the interior reaches safe temperature. A typical mistake is opening the oven frequently to check, which lowers the heat and extends cooking time.
- I strongly suggest placing the skillet on a large baking sheet to catch some of the splatter I did not do this and had to clean my oven: The baking sheet will catch drips and make cleanup far easier, and visually you will see rendered fat collecting there, a sign the bird is cooking properly. It also protects your oven from smoking if fat spits. Skipping this can mean a messy oven and potential smoke during broiling.
- If the skin hasn't browned enough broil it for a few minutes watch it carefully so it doesn't burn: Broiling adds intense top heat that crisps and colors the skin quickly, and you should only need a short burst, watching continuously to prevent char. The smell will turn more toasted and the edges may darken within minutes. Common mistake, leaving it unattended, often leads to burned spots instead of an even finish.
- Let the chicken rest for 10 to 15 minutes before carving: Resting allows juices to redistribute, you will notice the meat firms slightly and becomes easier to carve without losing moisture. Cutting too soon causes juices to run out, resulting in drier slices. Resist the urge to slice immediately if you want juicy results.
Notes
- Thermometer is your friend Use an instant read thermometer and aim to remove the bird a few degrees below final target since carryover heat will finish cooking while resting.
- Dry skin for crisping Pat the skin thoroughly and consider air drying in the fridge for an hour or overnight to achieve the crispiest skin possible.
- Hot pan technique Preheat your cast iron so that the moment the chicken hits the skillet you hear an audible sizzle, which promotes browning and texture.
- Oil placement matters Add some oil to the chicken and some to the skillet so both surfaces encourage even browning and prevent sticking.
- Use a rimmed tray beneath Protect your oven from splatters by setting the skillet on a rimmed baking sheet during roasting.
- Finish under broiler if needed If color is lacking, a short burst under the broiler will add an attractive golden finish but watch it continuously.