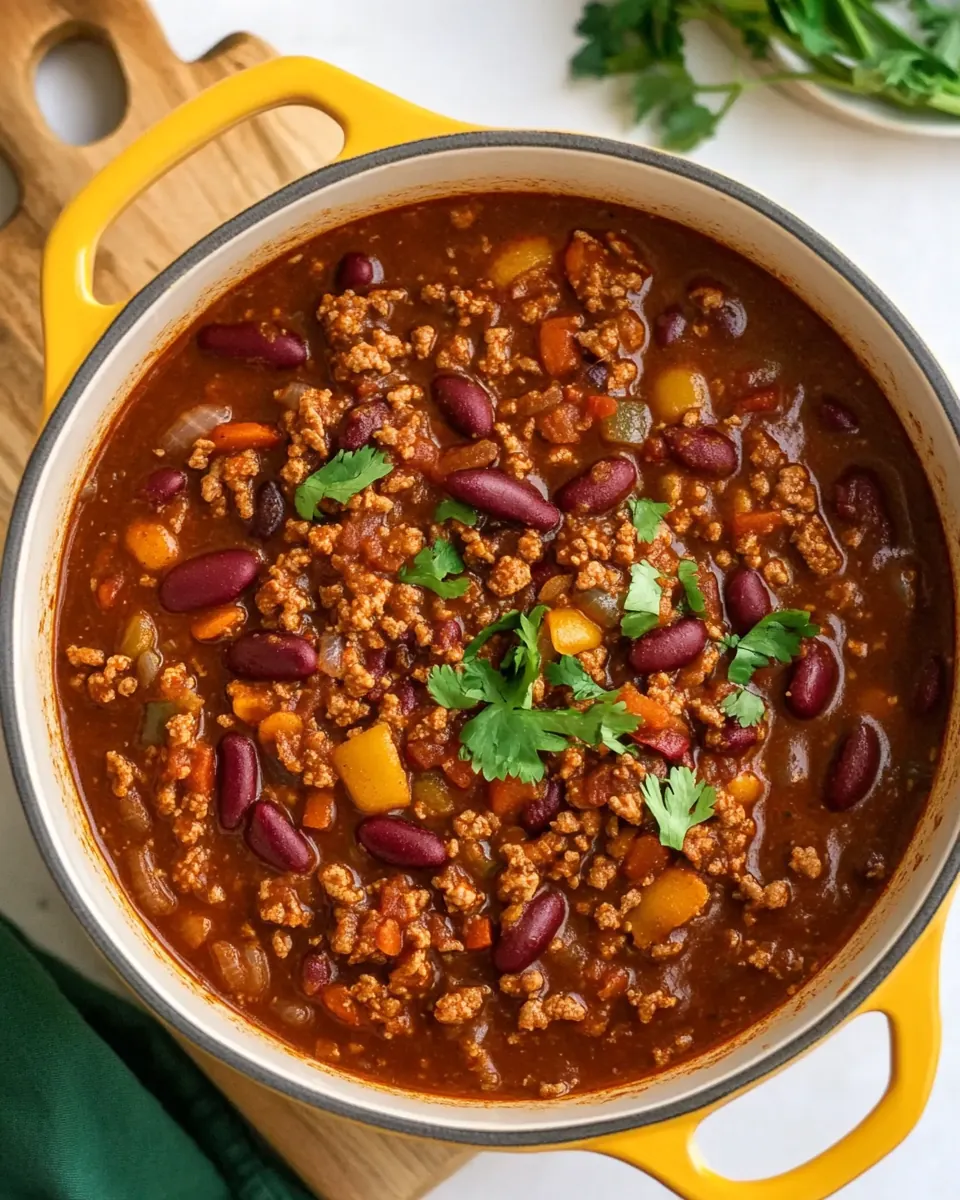
Quick Ground Turkey Chili
Quick Ground Turkey Chili has been my go to on frantic weeknights when the calendar is full and everyone is hungry now. I remember the first time I tossed together this bowl, moving between homework interruptions and a ringing phone, and how the kitchen filled with warm, smoky spice that somehow made everything else pause. The moment I ladled that steaming bowl, the house softened, conversations lengthened, and a simple dinner felt like a small celebration.
I still reach for this recipe when I want something that is both comforting and lean, something that lets the flavors sing without a long list of steps. My approach is pragmatic, I often use a sturdy pot, a wooden spoon, and a music playlist to keep the rhythm while onions sizzle and spices bloom. Over the years I refined tiny things, like when to add tomato paste so it caramelizes just enough to deepen the base, or the exact bubble of a gentle simmer that concentrates the sauce without drying the beans.
Recipe Snapshot
40 mins
10 mins
30 mins
Easy
350 kcal
American
Gluten-Free, Low FODMAP
Dinner
Large pot, Wooden spoon
What Makes This Quick Ground Turkey Chili Special
Flavor without fuss
I adore how Quick Ground Turkey Chili delivers rich, layered flavor in a fraction of the time of long braises. The combination of tomato paste, chili powder, and ground turkey builds a savory backbone that tastes much deeper than the clock suggests. When the spices toast briefly in the pot, the aroma moves from flat to vibrant, and that fast transformation keeps me coming back.
Healthy and satisfying
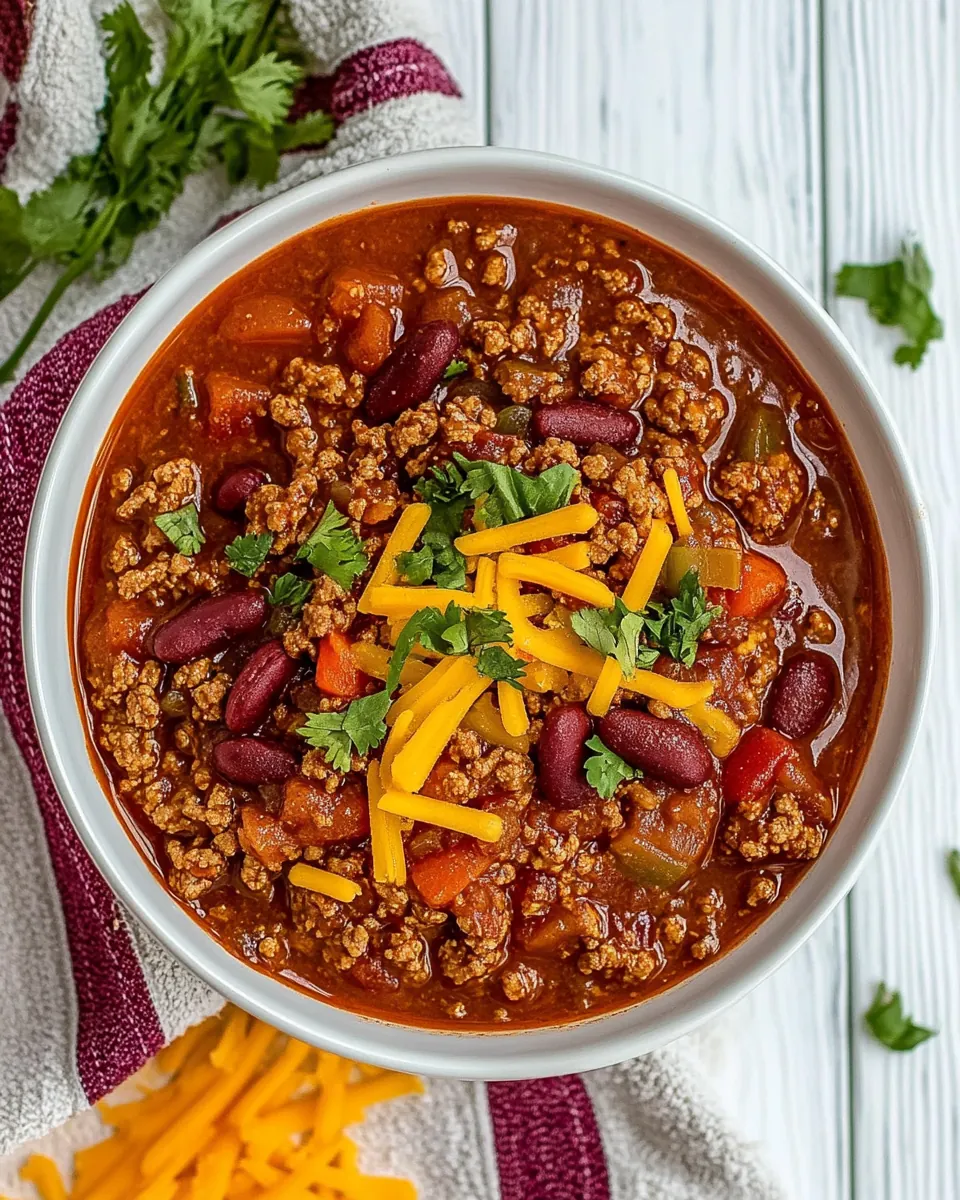
We want food that fills you up without weighing you down. Using 85% lean ground turkey keeps the texture meaty while cutting fat, and the canned beans bring fiber and bulk for lasting satisfaction. I find this balance perfect for weeknight dinners or lighter weekend meals when I do not want something overly heavy.
Flexible and forgiving
One reason I trust this bowl is its forgiveness. Whether your canned tomatoes are crushed or diced, or your beans are a mix of pinto and kidney, the pot adapts. If you need it thicker, a few extra minutes of simmering coax out concentration. If schedule demands it, this chili still holds up after reheating, which makes it ideal for leftovers or meal prep.
Fast technique that teaches
I love that the method shows key cooking principles without being intimidating. Browning ground turkey properly and blooming spices in olive oil are simple moves that elevate the entire dish. Once you master those micro skills, you carry them into countless other recipes, so each quick meal becomes a learning opportunity.
Kid friendly and customizable
My family appreciates how approachable the flavors are, and I often let kids add their own toppings like sour cream or shredded cheese. That interactive finish turns dinner into a small ritual, where everyone tailors a bowl to their taste. It also makes this chili a winner for casual gatherings and weeknight comfort alike.
Key Ingredients for Quick Ground Turkey Chili
These ingredients are straightforward, familiar, and built for synergy. Each item plays a clear role, from the aromatic base to the protein and the beans that add texture. I choose components that layer flavor quickly, allowing the pot to develop depth without fuss.
- 2 tablespoons olive oil: Heat gently in a skillet to provide a cooking fat that prevents sticking and adds a subtle fruity richness; use at the start to sauté aromatics and brown meat for depth of flavor.
- 1 large yellow or white onion diced: Dice finely and sauté until translucent to build a savory sweet base that enhances overall aroma and texture; contributes moisture and a mellow oniony backbone to the chili.
- 1 pound 85% lean ground turkey: Crumble and brown thoroughly to form the primary protein and texture of the chili; browning creates flavorful fond that deepens the dish when deglazed and simmered.
- 1 teaspoon salt plus more to taste: Season liberally during cooking and adjust at the end to balance and enhance all flavors; helps bring out the savory and spicy notes of the chili components.
- 1/4 cup (66 g) tomato paste: Stir in concentrated tomato flavor to provide body, richness, and a thick sauce consistency; use early to toast slightly and mellow acidity for a robust tomato base.
- 4 cloves garlic minced or pressed: Mince and add toward the beginning to infuse potent aromatic pungency and savory depth; helps brighten and layer flavors when cooked with onions and spices.
- 2 tablespoons chili powder: Sprinkle in to deliver the dominant chili flavor and earthy heat, tying the spices together; provides warmth and depth while defining the overall taste profile.
- 2 teaspoons ground cumin: Add to introduce warm, slightly citrusy earthiness that complements chili powder and meat; helps round out the spice blend and enhance savory notes.
- 1/2 teaspoon black pepper: Grind and season lightly during cooking to add a mild sharp heat and aromatic bite; balances richness and highlights other spice flavors without overwhelming.
- 14 ounces crushed or diced tomatoes: Pour in to contribute bright acidity, tomato texture, and additional liquid for simmering; helps create a saucy consistency and ties tomato paste into a coherent base.
- 1 15-ounce can pinto beans drained and rinsed: Rinse and fold in to add creamy texture, gentle earthiness, and extra heartiness; these beans increase protein, fiber, and a smooth contrast to the meat.
- 1 15-ounce can kidney beans drained and rinsed: Rinse and incorporate to contribute a firmer, meaty bean texture and subtle sweetness; enhances variety in mouthfeel and boosts overall volume and nutrition.
- 1 cup chicken broth: Pour as needed to adjust consistency and provide savory depth, using it to simmer and meld flavors; enriches the sauce and prevents over-thickening while adding umami.
- Sour cream (optional): Top optionally to add cool creaminess and tang that balances heat and richness; can be dolloped on serving for contrast in temperature and texture.
- Shredded cheese (optional): Sprinkle optionally to contribute melty, salty richness and a gooey texture when served warm; enhances comfort-food appeal and adds indulgent flavor.
- Cilantro (optional): Garnish optionally to add fresh, herbaceous brightness and a lively finish; chop and scatter over individual bowls to lift flavors and add color.
Instructions for Quick Ground Turkey Chili
I like to think of this as a series of sensory checkpoints, each one guiding you to the next. Keep your tools handy, smell and sight are the best indicators that a step is going well. Read through the steps, then move confidently, adjusting heat and timing as your stove and pot respond.
- In a large pot, heat oil over medium heat. Once the oil is hot, add your diced onion and cook until onions just begin to turn translucent around the edges, about 5 minutes.: As the olive oil warms you will notice a gentle shimmer across its surface and a faint scent of fruitiness. That shimmer is your signal the pan is ready to receive aromatics, and the heat should be steady enough that nothing smokes. The reason this matters is that oil carries the fat soluble flavors from spices and tomato paste , helping them bloom. A common mistake is overheating the oil until it smokes, which can introduce bitterness, so keep the setting to medium and give the oil a moment to calm before adding ingredients.
- To the onions, add the turkey and salt. Cook, stirring often, until turkey is browned.: Very soon after the onions hit the pot you will hear a lively sizzle and see the pieces glisten. Watch for translucence and softening around the edges, that indicates the sugars are releasing and the savory base is forming. The sound changes from aggressive sizzling to a gentler hiss as moisture leaves the onions. This step creates sweetness that balances the tomato acidity later on, and if you rush it with high heat the outsides will brown too quickly, losing the tender texture you want.
- Stir in tomato paste, garlic, chili powder, cumin, and pepper, and cook for 1 to 2 minutes until aromatic.: When the ground turkey goes in the pot it should hit with a subdued sizzle and quickly start to break into smaller pieces. Adding salt early helps draw out moisture and seasons the meat through. Browning is essential because those browned bits carry deep, savory notes, so stir often to promote even contact with the hot surface. A common problem is steaming rather than browning, which happens if there is excess moisture in the pan; if that occurs, raise the heat a touch and spread the meat so it has room to brown.
- Add the tomatoes (with their juices), drained beans, and broth. Bring to a low simmer and simmer the chili uncovered, stirring occasionally, for 20 to 30 minutes, until the meat is cooked through and chili has thickened.: As you stir the turkey you will see color develop, from pale to golden and then to small browned flecks that stick to the bottom, which are flavor gold. The aroma shifts from raw poultry to a toasty, roasted scent. The why here is simple, those browned pieces dissolve into the sauce as it simmers, giving more complexity. Avoid overcrowding the pot, because when meat piles up it steams and will not brown properly.
- Taste and add additional salt and pepper if necessary.: In this brief but fragrant moment you will notice the paste darken slightly and the spices release warm, heady aromas. Smelling the blend is one of the most satisfying cues that the dish is on track. Cooking the tomato paste and spices together removes any raw edge and amplifies depth. Watch carefully because garlic can brown quickly, and burnt garlic becomes bitter, so keep the motion steady and the time short.
- Spoon into bowls, top with sour cream and cheese if desired, and enjoy!: When the canned tomatoes , drained beans , and chicken broth enter the pot the mixture will steam briefly and then settle into a bubbling chorus. This is where everything begins to combine into a cohesive sauce, the acids and starches marrying to thicken as they simmer. The liquid level also determines final texture, so if you prefer a thicker chili, use a bit less broth or simmer longer. A pitfall here is adding too much liquid at once, which dilutes flavors; measure and adjust gradually.
- Bring to a low simmer and simmer the chili uncovered, stirring occasionally, for 20 to 30 minutes, until the meat is cooked through and chili has thickened: A low simmer will present small, steady bubbles that break the surface, not a rapid boil. Over these minutes the sauce will reduce and concentrate, releasing a deeper aroma and glossy texture. Stirring occasionally prevents sticking and helps you notice when the chili reaches your preferred thickness. Simmering uncovered allows water to evaporate, intensifying flavor, but simmering too long without liquid can dry the pot, so check periodically and add a splash of broth if it gets too tight.
- Taste and add additional salt and pepper if necessary: This tasting moment is where everything comes together, you will notice if the acidity needs balancing or if the dish is underseasoned. I always sample with a small spoon and let it cool a touch to get an accurate read. Seasoning at the end lets you fine tune without oversalting early on, and a common error is to skip tasting entirely and miss small adjustments that lift the bowl.
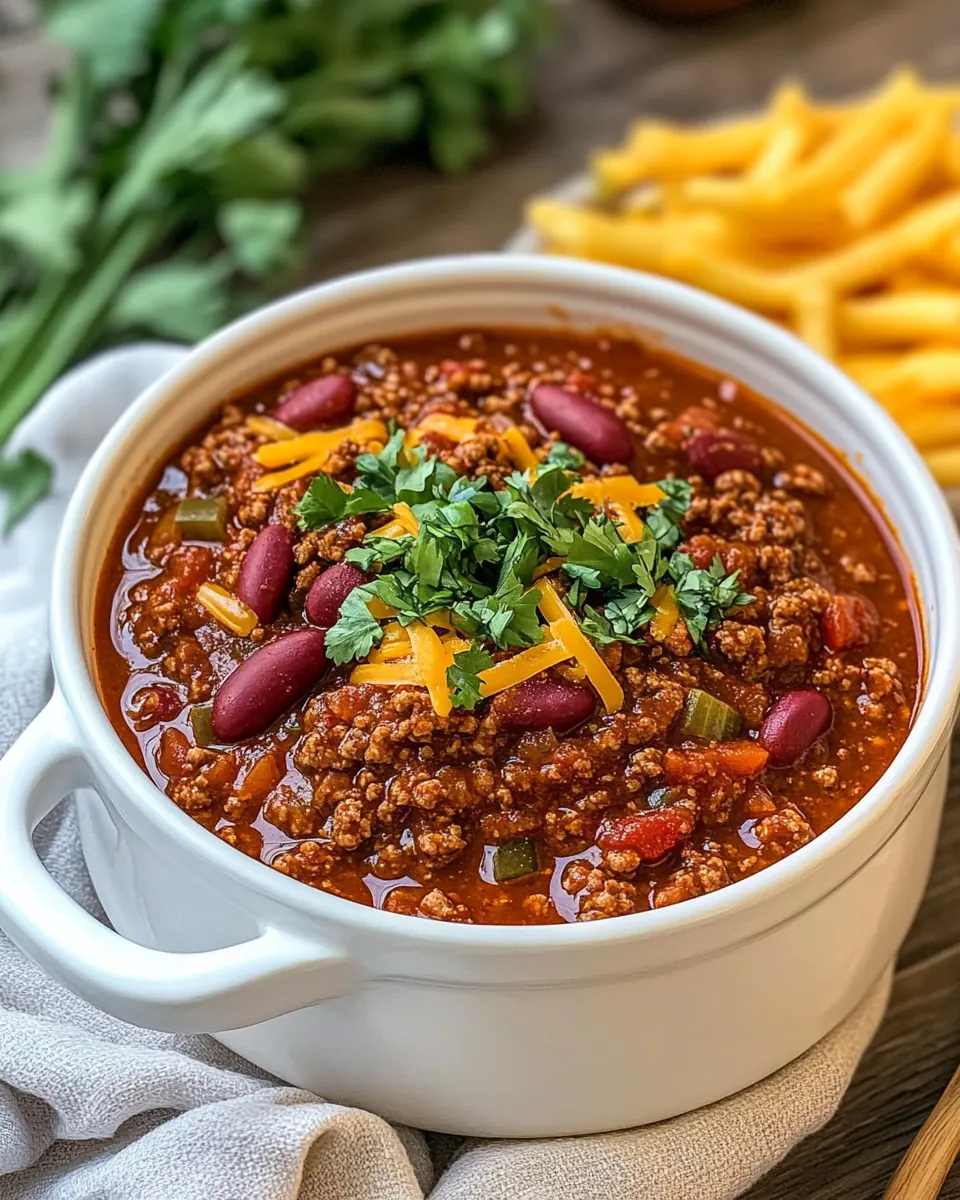
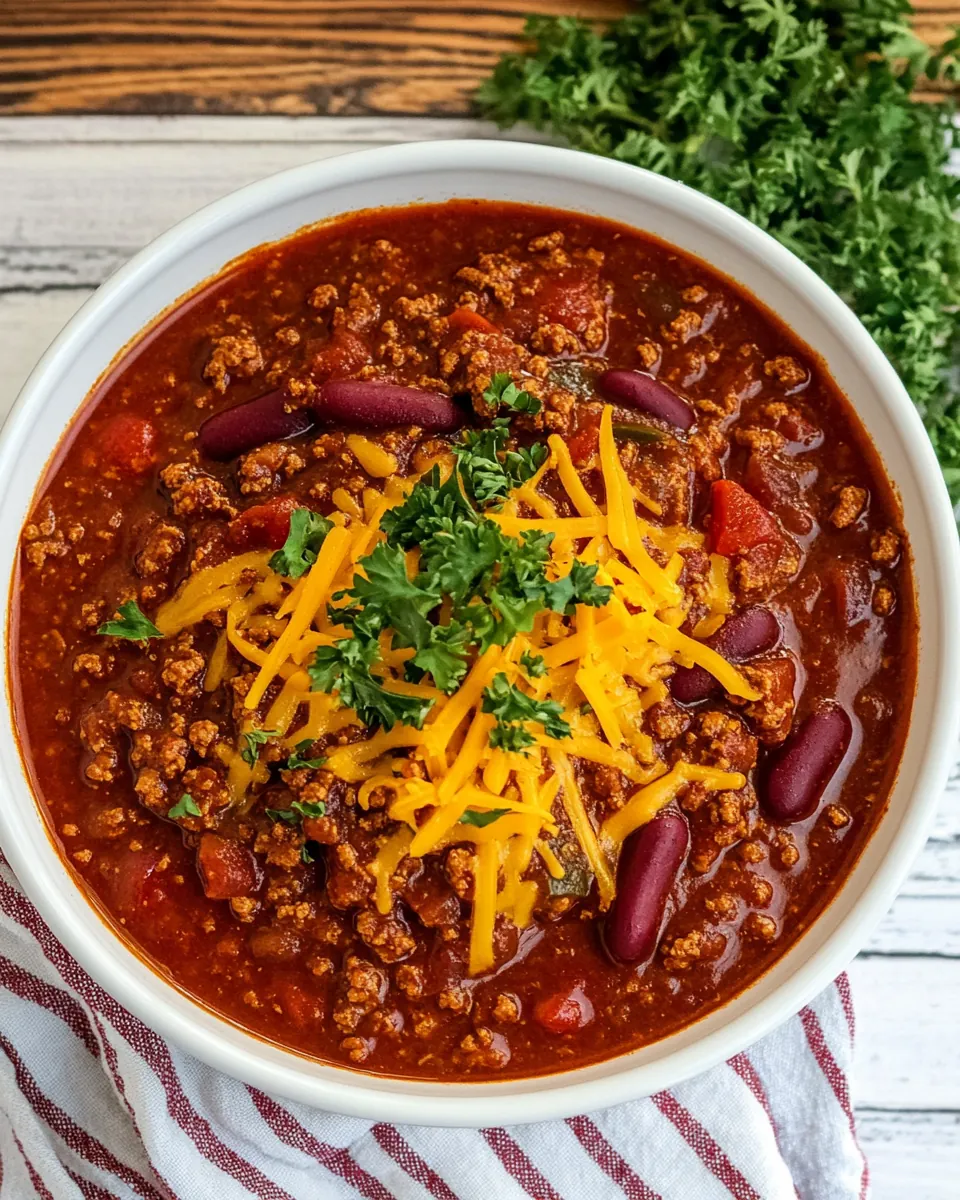
- Spoon into bowls, top with sour cream and cheese if desired, and enjoy: The final presentation should be warm and inviting, with a thin curl of steam and a bright aroma of spices. Adding a dollop of sour cream or a sprinkle of shredded cheese creates temperature contrast and richness, while a few cilantro leaves add fresh lift. Be mindful of hot bowls that retain heat strongly; let the chili rest a minute before serving to avoid scalding, and always taste one last time for balance before plating.
Recipe Notes about Quick Ground Turkey Chili
This section expands on practical notes and common variations that keep the recipe flexible and reliable. Below are detailed tips that I use in my kitchen to get consistent results and to adapt this chili to different moods and pantry situations.
- Bean swaps You can mix and match canned beans according to what you have on hand, just keep the total volume similar so the texture remains balanced. I often combine pinto and kidney beans for color and mouthfeel, and rinsing them removes the canning liquid which can dilute flavor. When using low sodium beans, taste and add salt as needed near the end of cooking.
- Broth alternatives If you do not have chicken broth, water or vegetable broth will work, though the depth of flavor will vary. Use a flavorful substitute if possible, and adjust seasoning since water provides no inherent savoriness. For quicker meals, a bouillon cube diluted in water can boost taste but check salt levels before serving.
- Thickness control To thicken the chili, simmer uncovered longer until the sauce reduces, stirring to prevent sticking. If you need to thin it, add a splash of warm broth and stir. Be aware that chilling thickens the chili further, so leave a touch thinner if you plan leftovers.
- Make ahead and freeze This chili freezes well, portioned in airtight containers. Cool completely before sealing to avoid ice crystals, and freeze for up to two months for best quality. Thaw overnight in the refrigerator and reheat gently on the stovetop, adding a little broth if it seems dry.
- Serving toppings Offer optional toppings like sour cream and shredded cheese at the table so everyone customizes their bowl. Fresh cilantro brightens the profile, and a squeeze of lime, if desired, would add acidity though it is not listed as an ingredient here.
What Complements This Quick Ground Turkey Chili
This chili pairs easily with simple sides and suits many occasions, from casual weeknights to cozy winter dinners. Below I describe serving ideas, storage notes, and seasonal pairings to help you plan the full meal.
- Classic pairings Serve with warm crusty bread or cornbread for scooping, the breads help mop up the sauce and provide textural contrast. A simple green salad makes for a fresh counterpoint to the warm spices.
- Occasion fit This recipe is ideal for weeknight dinners and winter evenings when you want something warm and satisfying. It also works well for casual gatherings where guests can customize bowls with optional toppings.
- Storage tips Refrigerate in an airtight container for up to 2 to 3 days. For longer storage, freeze in portions for up to 2 months, and defrost overnight in the refrigerator before reheating gently on the stovetop.
- Meal prep Make a double batch for lunches or for feeding a family across multiple nights. The flavors often deepen after a day in the fridge, so leftovers can be even better than the first serving.
- Seasonal notes This chili feels right in colder months like winter, when hearty bowls are especially welcome. It also adapts well to transitional seasons by adjusting the heat level with less or more chili powder.
FAQ
Conclusion
What makes this recipe special is its ability to deliver deep, satisfying flavor with minimal fuss, balancing lean ground turkey and hearty beans into a quick, comforting bowl. I encourage you to try it on a busy evening when you want something warm, nourishing, and versatile. Serve it simply or dress it up with your favorite toppings, and enjoy how fast a humble pot can bring people together.

Quick Ground Turkey Chili
Equipment
- Large Pot
- Wooden Spoon
Ingredients
- 2 tablespoons olive oil Heat gently in a skillet to provide a cooking fat that prevents sticking and adds a subtle fruity richness; use at the start to sauté aromatics and brown meat for depth of flavor.
- 1 large yellow or white onion diced Dice finely and sauté until translucent to build a savory sweet base that enhances overall aroma and texture; contributes moisture and a mellow oniony backbone to the chili.
- 1 pound 85% lean ground turkey Crumble and brown thoroughly to form the primary protein and texture of the chili; browning creates flavorful fond that deepens the dish when deglazed and simmered.
- 1 teaspoon salt plus more to taste Season liberally during cooking and adjust at the end to balance and enhance all flavors; helps bring out the savory and spicy notes of the chili components.
- 1/4 cup (66 g) tomato paste Stir in concentrated tomato flavor to provide body, richness, and a thick sauce consistency; use early to toast slightly and mellow acidity for a robust tomato base.
- 4 cloves garlic minced or pressed Mince and add toward the beginning to infuse potent aromatic pungency and savory depth; helps brighten and layer flavors when cooked with onions and spices.
- 2 tablespoons chili powder Sprinkle in to deliver the dominant chili flavor and earthy heat, tying the spices together; provides warmth and depth while defining the overall taste profile.
- 2 teaspoons ground cumin Add to introduce warm, slightly citrusy earthiness that complements chili powder and meat; helps round out the spice blend and enhance savory notes.
- 1/2 teaspoon black pepper Grind and season lightly during cooking to add a mild sharp heat and aromatic bite; balances richness and highlights other spice flavors without overwhelming.
- 14 ounces crushed or diced tomatoes Pour in to contribute bright acidity, tomato texture, and additional liquid for simmering; helps create a saucy consistency and ties tomato paste into a coherent base.
- 1 15-ounce can pinto beans drained and rinsed Rinse and fold in to add creamy texture, gentle earthiness, and extra heartiness; these beans increase protein, fiber, and a smooth contrast to the meat.
- 1 15-ounce can kidney beans drained and rinsed Rinse and incorporate to contribute a firmer, meaty bean texture and subtle sweetness; enhances variety in mouthfeel and boosts overall volume and nutrition.
- 1 cup chicken broth Pour as needed to adjust consistency and provide savory depth, using it to simmer and meld flavors; enriches the sauce and prevents over-thickening while adding umami.
- Sour cream optional Top optionally to add cool creaminess and tang that balances heat and richness; can be dolloped on serving for contrast in temperature and texture.
- Shredded cheese optional Sprinkle optionally to contribute melty, salty richness and a gooey texture when served warm; enhances comfort-food appeal and adds indulgent flavor.
- Cilantro optional Garnish optionally to add fresh, herbaceous brightness and a lively finish; chop and scatter over individual bowls to lift flavors and add color.
Instructions
- In a large pot, heat oil over medium heat. Once the oil is hot, add your diced onion and cook until onions just begin to turn translucent around the edges, about 5 minutes.: As the olive oil warms you will notice a gentle shimmer across its surface and a faint scent of fruitiness. That shimmer is your signal the pan is ready to receive aromatics, and the heat should be steady enough that nothing smokes. The reason this matters is that oil carries the fat soluble flavors from spices and tomato paste , helping them bloom. A common mistake is overheating the oil until it smokes, which can introduce bitterness, so keep the setting to medium and give the oil a moment to calm before adding ingredients.
- To the onions, add the turkey and salt. Cook, stirring often, until turkey is browned.: Very soon after the onions hit the pot you will hear a lively sizzle and see the pieces glisten. Watch for translucence and softening around the edges, that indicates the sugars are releasing and the savory base is forming. The sound changes from aggressive sizzling to a gentler hiss as moisture leaves the onions. This step creates sweetness that balances the tomato acidity later on, and if you rush it with high heat the outsides will brown too quickly, losing the tender texture you want.
- Stir in tomato paste, garlic, chili powder, cumin, and pepper, and cook for 1 to 2 minutes until aromatic.: When the ground turkey goes in the pot it should hit with a subdued sizzle and quickly start to break into smaller pieces. Adding salt early helps draw out moisture and seasons the meat through. Browning is essential because those browned bits carry deep, savory notes, so stir often to promote even contact with the hot surface. A common problem is steaming rather than browning, which happens if there is excess moisture in the pan; if that occurs, raise the heat a touch and spread the meat so it has room to brown.
- Add the tomatoes (with their juices), drained beans, and broth. Bring to a low simmer and simmer the chili uncovered, stirring occasionally, for 20 to 30 minutes, until the meat is cooked through and chili has thickened.: As you stir the turkey you will see color develop, from pale to golden and then to small browned flecks that stick to the bottom, which are flavor gold. The aroma shifts from raw poultry to a toasty, roasted scent. The why here is simple, those browned pieces dissolve into the sauce as it simmers, giving more complexity. Avoid overcrowding the pot, because when meat piles up it steams and will not brown properly.
- Taste and add additional salt and pepper if necessary.: In this brief but fragrant moment you will notice the paste darken slightly and the spices release warm, heady aromas. Smelling the blend is one of the most satisfying cues that the dish is on track. Cooking the tomato paste and spices together removes any raw edge and amplifies depth. Watch carefully because garlic can brown quickly, and burnt garlic becomes bitter, so keep the motion steady and the time short.
- Spoon into bowls, top with sour cream and cheese if desired, and enjoy!: When the canned tomatoes , drained beans , and chicken broth enter the pot the mixture will steam briefly and then settle into a bubbling chorus. This is where everything begins to combine into a cohesive sauce, the acids and starches marrying to thicken as they simmer. The liquid level also determines final texture, so if you prefer a thicker chili, use a bit less broth or simmer longer. A pitfall here is adding too much liquid at once, which dilutes flavors; measure and adjust gradually.
- Bring to a low simmer and simmer the chili uncovered, stirring occasionally, for 20 to 30 minutes, until the meat is cooked through and chili has thickened: A low simmer will present small, steady bubbles that break the surface, not a rapid boil. Over these minutes the sauce will reduce and concentrate, releasing a deeper aroma and glossy texture. Stirring occasionally prevents sticking and helps you notice when the chili reaches your preferred thickness. Simmering uncovered allows water to evaporate, intensifying flavor, but simmering too long without liquid can dry the pot, so check periodically and add a splash of broth if it gets too tight.
- Taste and add additional salt and pepper if necessary: This tasting moment is where everything comes together, you will notice if the acidity needs balancing or if the dish is underseasoned. I always sample with a small spoon and let it cool a touch to get an accurate read. Seasoning at the end lets you fine tune without oversalting early on, and a common error is to skip tasting entirely and miss small adjustments that lift the bowl.
- Spoon into bowls, top with sour cream and cheese if desired, and enjoy: The final presentation should be warm and inviting, with a thin curl of steam and a bright aroma of spices. Adding a dollop of sour cream or a sprinkle of shredded cheese creates temperature contrast and richness, while a few cilantro leaves add fresh lift. Be mindful of hot bowls that retain heat strongly; let the chili rest a minute before serving to avoid scalding, and always taste one last time for balance before plating.
Notes
- Bean swaps You can mix and match canned beans according to what you have on hand, just keep the total volume similar so the texture remains balanced. I often combine pinto and kidney beans for color and mouthfeel, and rinsing them removes the canning liquid which can dilute flavor. When using low sodium beans, taste and add salt as needed near the end of cooking.
- Broth alternatives If you do not have chicken broth, water or vegetable broth will work, though the depth of flavor will vary. Use a flavorful substitute if possible, and adjust seasoning since water provides no inherent savoriness. For quicker meals, a bouillon cube diluted in water can boost taste but check salt levels before serving.
- Thickness control To thicken the chili, simmer uncovered longer until the sauce reduces, stirring to prevent sticking. If you need to thin it, add a splash of warm broth and stir. Be aware that chilling thickens the chili further, so leave a touch thinner if you plan leftovers.
- Make ahead and freeze This chili freezes well, portioned in airtight containers. Cool completely before sealing to avoid ice crystals, and freeze for up to two months for best quality. Thaw overnight in the refrigerator and reheat gently on the stovetop, adding a little broth if it seems dry.
- Serving toppings Offer optional toppings like sour cream and shredded cheese at the table so everyone customizes their bowl. Fresh cilantro brightens the profile, and a squeeze of lime, if desired, would add acidity though it is not listed as an ingredient here.