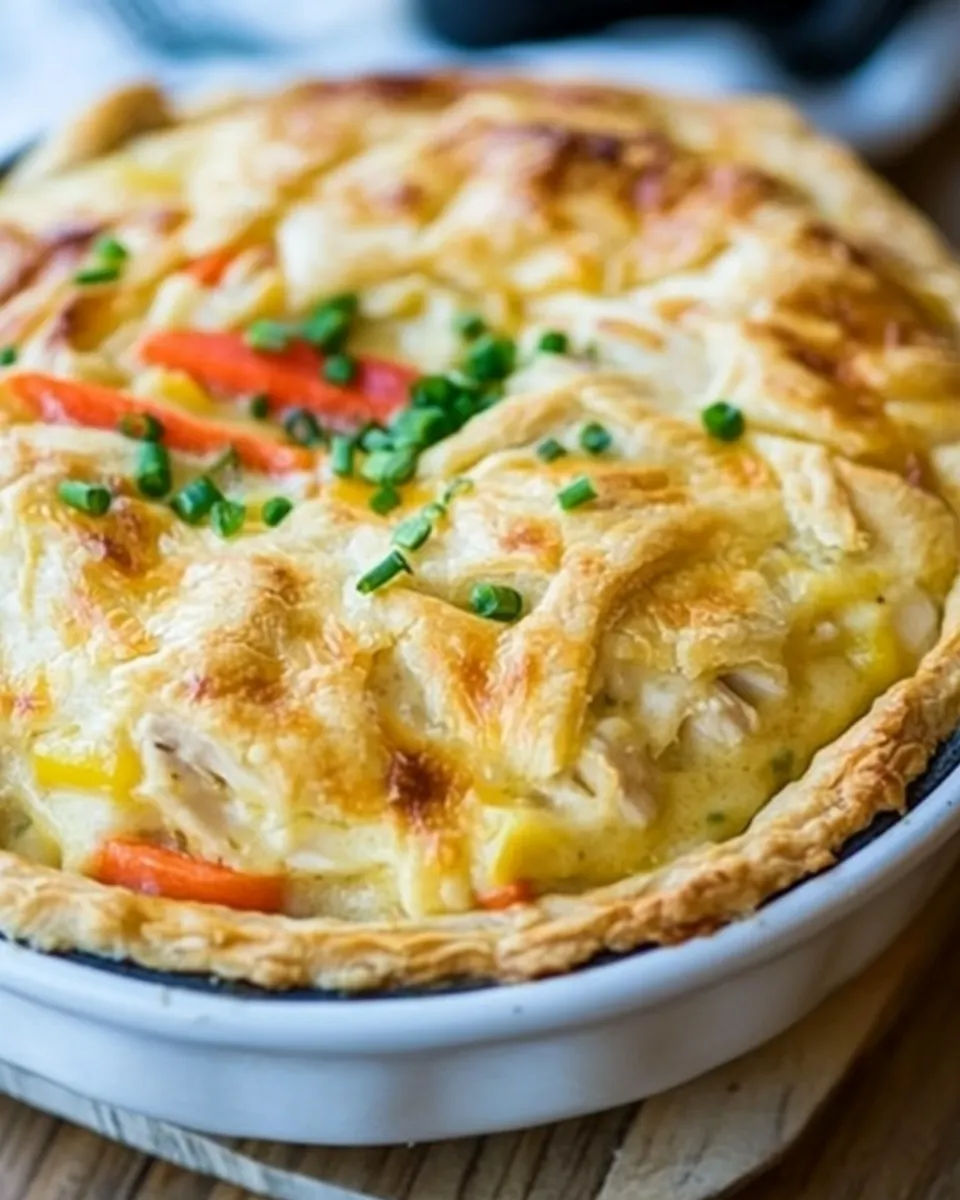
Skillet Chicken Pot Pie with Cheddar Crust
Skillet Chicken Pot Pie with Cheddar Crust is one of those dishes I turn to when I want something that feels both comforting and a little clever, all at once.
There was a rainy evening not long ago when I came home tired and hungry, and the thought of chopping, assembling, and waiting for something complicated made me sigh. Instead, I pulled a cast iron skillet from the rack, gathered a few staples, and by the time the house smelled like warm butter and simmered herbs, we were gathered at the table with big bowls and louder conversation. That night reminded me why I love one pan meals that deliver on texture, warmth, and memory.
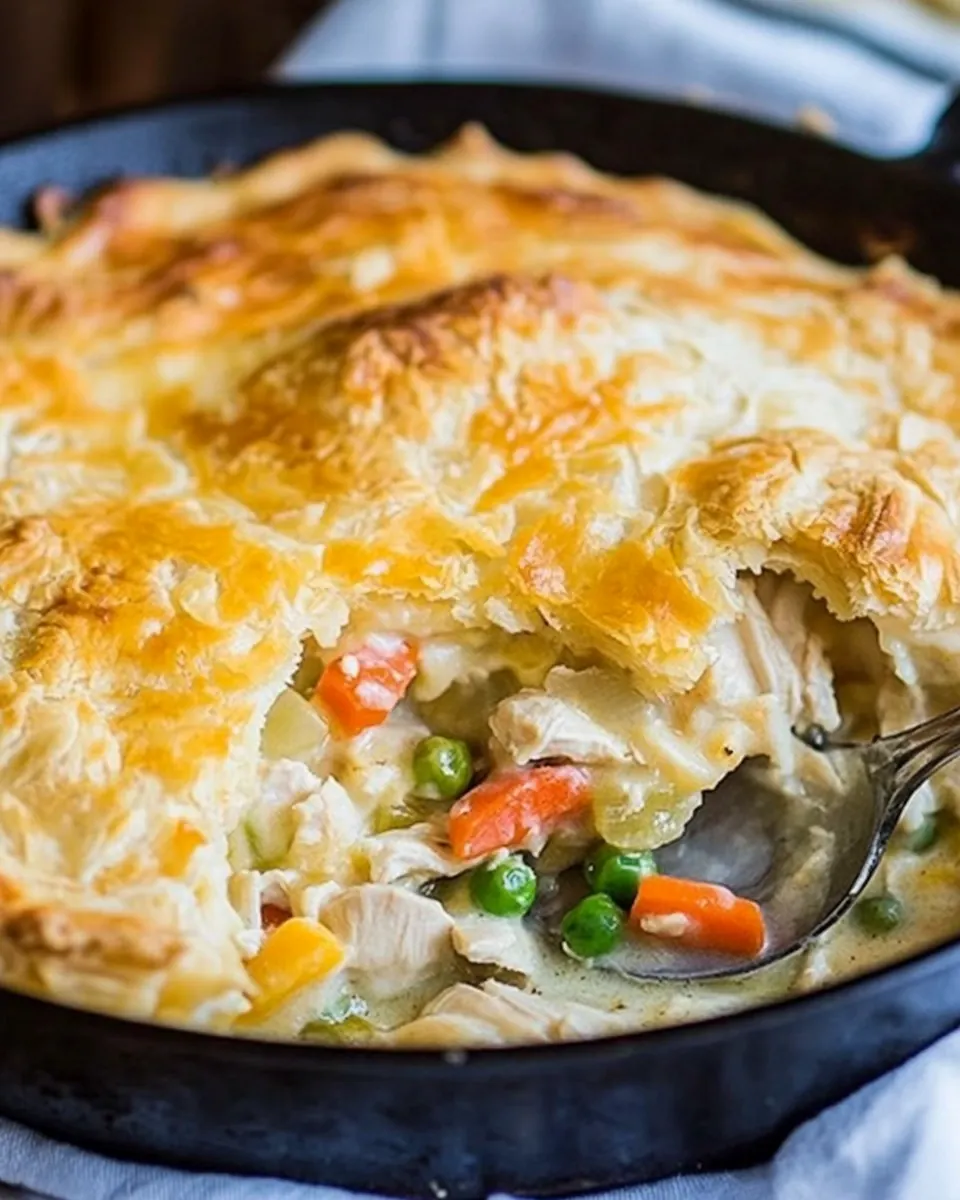
What I love about Skillet Chicken Pot Pie with Cheddar Crust is how the crisp, cheesy top gives way to a creamy, herb scented filling studded with tender chicken and sweet little peas. It’s the kind of recipe that makes weeknight cooking feel celebratory without requiring a weekend time commitment. I often tweak small things as I go, and that playful approach has made this dish a repeat in my meal rotation.
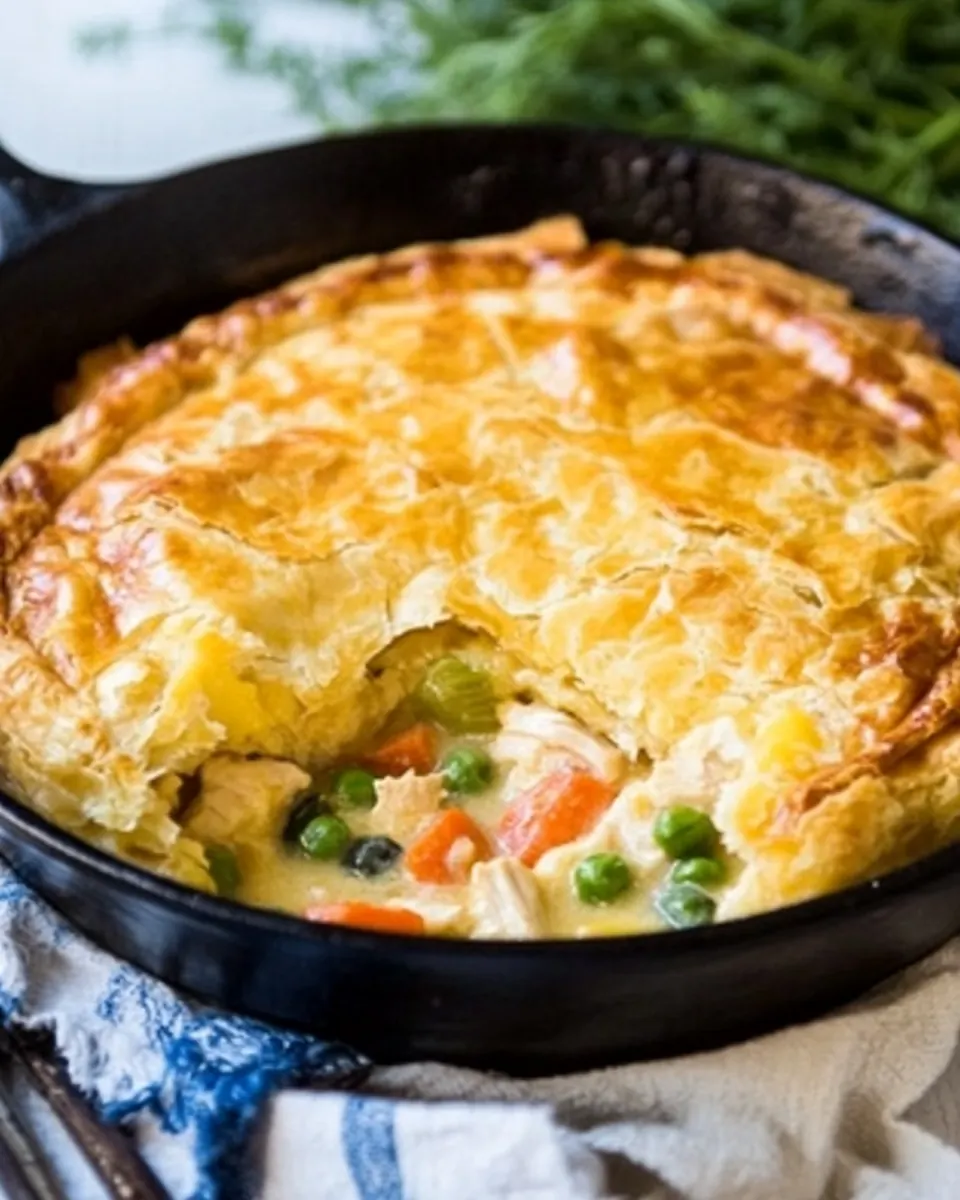
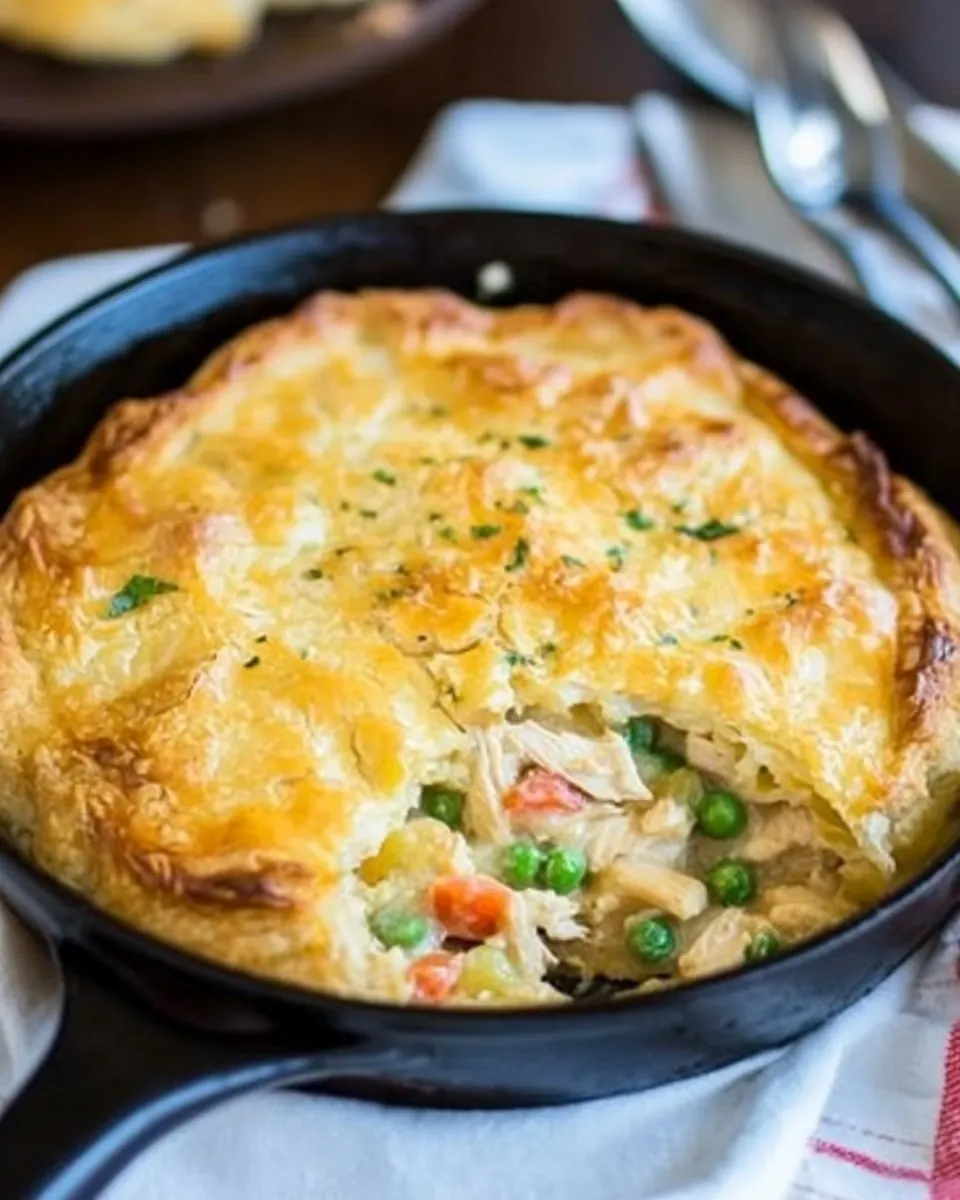
When friends come over, this recipe is a quiet show off. It browns beautifully in a 10-inch cast iron skillet, and serving it straight from the pan means less fuss and more lingering at the table. I’ll never forget the first time a guest proclaimed it “better than takeout” and asked for the recipe while reaching for a second helping. That’s the sort of affirmation that keeps me making it, again and again.
Recipe Snapshot
1 hr 5 mins
20 mins
45 mins
Medium
400 kcal
American
Gluten-Free, Low FODMAP
Dinner
Food Processor, 10-inch cast iron skillet
The Magic of This Skillet Chicken Pot Pie with Cheddar Crust
Comfort in a Pan
I adore how Skillet Chicken Pot Pie with Cheddar Crust wraps classic comfort into a single pan. The golden, cheesy crust gives a crunchy contrast to the filling, and that interplay is what keeps me coming back on chilly nights.
Speed without Sacrifice
We get the warmth and depth of a slow braise, but the method moves quickly. Using a skillet means heat distributes evenly, and you get a bubbly filling in under an hour, which is perfect for an easy weeknight dinner.
Cheese That Pulls It Together
The shredded cheddar cheese worked into the crust adds savory depth and a slightly tangy bite. It melts and browns in a way that a plain crust just cannot match, creating an irresistible top layer.
Flexible and Forgiving
I love that this recipe takes leftovers and turns them into something elevated. You can use roasted or poached chicken, and the filling adapts. That flexibility means fewer errands and more time for enjoying the meal.
One Pan, Less Cleanup
There is a special satisfaction in placing a finished pie into the center of the table straight from the skillet. Fewer dishes to wash, and more time to savor the aroma and flavors you created. I always find that this ease encourages more people to linger and chat.
Key Ingredients for Skillet Chicken Pot Pie with Cheddar Crust
These ingredients are curated to create a balance of flaky, cheesy crust and a rich, silky filling. The crust ingredients provide structure and savory lift, while the filling components build layers of flavor through sautéing and gentle simmering. Each player has a job: the cheddar cheese brings sharpness, the butter and flour form the backbone of texture, and the chicken and peas offer substance and color.
- 1 1/2 cups all-purpose flour: Combine into a flaky crust by cutting together with flour and chill to maintain small butter pockets, creating a tender, buttery pastry when baked.
- 1/2 teaspoons salt: Enhance dough seasoning by evenly dispersing into the flour mixture to balance flavor; be cautious not to over-salt if using salted butter or fillings.
- 12 tablespoons unsalted butter cut into small chunks and chilled: Incorporate chilled chunks into the flour to create a laminated texture; keep very cold so butter steams during baking and produces flakiness.
- 2/3 cups shredded cheddar cheese: Fold into the pastry dough to add sharp, savory flavor and melt into pockets that create a rich, cheesy crust for the pot pie.
- 5 to 6 1/2 tablespoons ice water: Add gradually while mixing the dough until it just comes together, using the minimum needed to bind without making the crust tough.
- 4 tablespoons butter: Sauté vegetables in to develop flavor and create a rich base; use to brown onions and soften carrots and celery before adding flour.
- 1/2 medium onion, diced: Sweat until translucent in butter to release sweetness and aroma; diced small for even distribution and tender bites in the filling.
- 1 carrot, peeled and thinly sliced: Slice thinly and cook until just tender to provide sweetness, texture, and body; thinner slices help them soften quickly in the skillet.
- 1 celery rib, diced: Cook until softened and aromatic to contribute subtle savory structure and moisture to the filling; dice small for even cooking.
- 1/2 cup all-purpose flour: Whisk into the butter and vegetables to form a roux, thickening the filling and creating a smooth, cohesive sauce for the chicken and peas.
- 1 1/3 cups chicken broth: Pour in slowly to deglaze the pan and build the sauce base; use to control thickness and add savory depth to the filling.
- 1 cup half and half: Stir in to enrich the sauce with creaminess and a velvety texture, balancing the broth and creating a luscious filling consistency.
- 1/2 teaspoons salt: Season the filling by dissolving into the sauce to enhance overall taste; add cautiously if other salty components are present.
- 1/4 teaspoon pepper: Season the filling to provide mild heat and depth; grind fresh if possible to avoid bitterness and to taste.
- 1/4 teaspoon dried thyme: Infuse the filling with an herbaceous, slightly floral note; sprinkle in to complement poultry and vegetables without overpowering.
- 1/4 teaspoon poultry seasoning: Add warmth and savory complexity with a blend of spices tailored for poultry; use sparingly to avoid masking fresh ingredients.
- 2/3 cup frozen peas, defrosted: Fold in at the end after thawing to contribute bright color, sweet flavor, and a pop of texture; stir gently to avoid mashing.
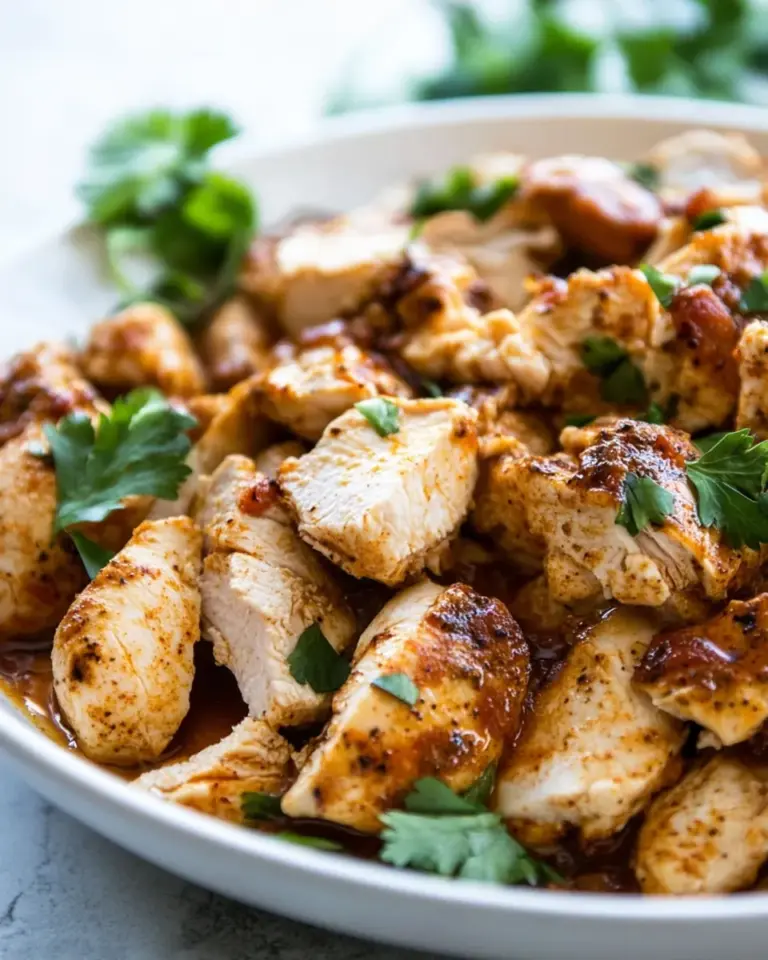
- 3 cups diced cooked chicken: Toss into the thickened sauce as the main protein, adding hearty texture and savory richness; use pre-cooked chicken for quick assembly.
- 1 egg, lightly beaten: Brush over the assembled crust to promote a glossy, golden finish and help any crust edges adhere while baking.
The Method for Skillet Chicken Pot Pie with Cheddar Crust
I like to walk into the kitchen with everything within reach and a warm skillet on the stove, because the rhythm of sautéing and stirring is half the joy. The steps below follow the original directions closely, but I add sensory cues and troubleshooting notes so you can feel confident at each moment.
- Make pie crust. Place flour and salt in a food processor and pulse to combine. Scatter chilled butter pieces on top. Pulse 10 to 12 times or until mixture resembles coarse crumbs. Add cheese and pulse to combine.: You should notice a mixture that looks like coarse sand with visible pea sized bits of butter , and the sound of the processor will shift from clumpy to more even as the pulses continue. This texture ensures pockets of steam during baking, resulting in flaky layers. The aroma will turn faintly dairy rich when the cheddar cheese is incorporated, adding a buttery, sharp note. Common mistakes include overprocessing which can make the dough mealy and dense, or using warm butter that smears instead of remaining distinct. If your mixture looks too uniform, pulse fewer times to restore texture.
- Transfer mixture to a large bowl. Sprinkle 5 tablespoons of ice water on top. Stir and press the dough together using a rubber spatula. If dough is not coming together, use a little more ice water.: As you work the dough, you will feel it gradually cohere into a shaggy mass, cool and slightly tacky. The cold water activates just enough gluten to bind while keeping the butter chilled. The tactile feedback is important, you should stop when it holds together without feeling wet. Too much water makes the dough sticky and elastic, which yields tough crust; too little and it will crumble. If you need more water, add it a teaspoon at a time, avoiding overhydration.
- Turn dough out onto a piece of plastic wrap. Flatten into a disk, wrap well and refrigerate for at least 1 hour and up to 24 hours.: After wrapping, the dough will firm and the chilled butter will solidify, which keeps the layers distinct when baked. Cooling also relaxes the gluten so the dough is easier to roll and less likely to shrink. You may feel the disk cool to the touch; that is a good sign. Common issues include skipping the chill step which often causes tearing or excessive shrinkage during baking, so be patient and allow the dough time to rest.
- Preheat oven to 400 degrees.: You will sense the kitchen warming as the oven comes to temperature, and preheating ensures the crust starts baking immediately on contact, producing flake and lift. A properly preheated oven also helps the filling to bubble at the same time the crust browns. Avoid placing the pie in an oven that has not reached 400 degrees, as that can produce a soggy bottom and an underbaked crust.
- To make filling, melt butter in a medium (10-inch) cast iron skillet over medium heat. Add onion, carrot, and celery and cook 5 minutes.: As the butter melts and the vegetables sizzle, you'll smell a sweet, savory aroma develop. The vegetables should soften and become translucent, releasing natural sugars that deepen the filling's flavor. A steady, moderate sizzle is ideal, not a loud pop which signals too high heat. If the vegetables begin to brown aggressively, lower the heat to prevent bitterness.
- Sprinkle flour on top. Cook and stir for 1 minute.: The flour should absorb the melted butter and coat the vegetables, forming the start of a roux. You will hear a gentle thickening sound and see the mixture become slightly glossy. Cooking the flour removes the raw taste and sets the stage for a smooth sauce when liquids are added. Do not skip this brief cooking time; undercooked flour can leave a pasty mouthfeel in the finished filling.
- Gradually add chicken broth whisking it into the flour well. Whisk in half and half.: Add the chicken broth slowly while whisking so the mixture remains lump free. The sauce will thicken and take on a velvety sheen as the starches swell. When you pour in the half and half , watch the sauce smooth out and become creamy, and listen for a gentle simmer. If you add the liquid too quickly, you may get lumps; keep whisking and if lumps form, strain or whisk vigorously until smooth.
- Add salt, pepper, thyme, and poultry seasoning. Let mixture simmer for a few minutes.: The simmer concentrates flavors and reduces the sauce slightly, giving it body. You will smell the dried thyme and the seasoning blend blooming, and the texture should feel thicker on the back of a spoon. Simmer only until the sauce coats the spoon; prolonged simmering can thin the filling as liquid reduces excessively or cause the dairy to separate.
- Stir in peas and chicken. Remove from heat.: Folding in the defrosted peas and diced cooked chicken finishes the filling. The contrast of warm gravy and tender morsels is key, and the green pops of peas brighten the plate. Remove from heat promptly to avoid overcooking the peas, which can turn them mushy. A common error is adding cold chicken straight from the fridge which cools the sauce; bring chicken closer to room temperature first.
- Remove dough from refrigerator and let it sit on the counter for 10 minutes.: This brief rest makes the dough more pliable for rolling while still keeping the butter cool. You will notice it soften slightly at the edges, which reduces crack risk when rolling. Do not let it sit too long or the butter will warm, making the dough sticky and harder to lift into the skillet.
- Sprinkle some flour on a piece of parchment paper. Place dough on paper and roll it into a circle that’s about 1/8-inch thick. Slide your hands under the parchment paper and transfer the pie dough to the pan, flipping it over on top of the pie filling and peeling the paper off of it. Trim excess dough or tuck it under the so that the crust fits the pan. Brush top with egg. Cut a few slits in the dough to allow steam to escape.: Rolling on parchment keeps the dough from sticking and helps you transfer it intact. The crust should look even and slightly translucent where it thins, and the sound of the rolling should be smooth and quiet. Brushing with the beaten egg adds sheen and encourages a deep golden color. Forgetting to cut vents traps steam and can cause soggy pockets, so be sure to make slits.
- Place in oven and bake 30 to 35 minutes, until pie crust is lightly browned and no longer feels doughy.: While baking you'll see the filling bubbling gently at the edges and the crust turning a rich golden tone. The aroma will be rich and buttery with a toasted cheddar cheese note from the crust. Check for a firm, set filling and a crust that feels cooked rather than doughy. Removing too early risks a runny center, while overbaking can dry the filling and make the crust overly crisp. Let it rest briefly before serving so the gravy settles.
Variations to Try
There are small, effective ways to tweak flavors and textures while keeping the heart of the dish intact. Below I expand on notes and idea starters that I use depending on pantry contents and the mood of the meal.
- Make Ahead: Chill the crust dough for up to 24 hours or freeze it for longer storage. Thaw overnight in the refrigerator before rolling.
- Savory Boost: Mix a tablespoon of melted butter with a pinch of poultry seasoning into the filling for an extra flavor layer without changing texture.
- Cheese Variation: Swap the cheddar cheese for a sharper aged version for more bite, keeping the same measurement to maintain dough balance.
- Vegetable Swap: If you prefer, increase the ratio of diced carrot and celery for more texture, or add a small handful of chopped fresh herbs at the end for brightness.
- Leftover Rescue: Use leftover roasted chicken or store bought rotisserie chicken to speed assembly while preserving rich flavor.
What Complements This Skillet Chicken Pot Pie with Cheddar Crust
This pie pairs beautifully with light, crisp sides and is versatile enough for many occasions. Whether it is a cozy family dinner or a casual gathering with friends, these suggestions aim to enhance textures and balance the richness of the filling.
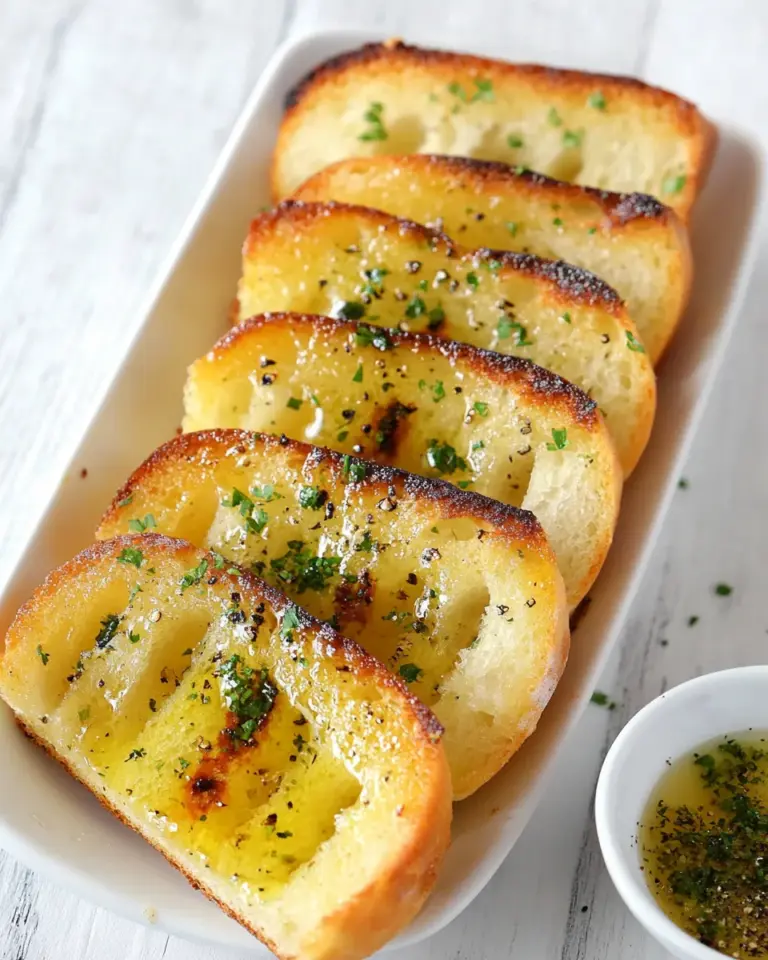
- Light Greens: Serve with a simple mixed greens salad dressed in a lemon vinaigrette to cut through the richness and add a fresh counterpoint.
- Roasted Vegetables: A tray of roasted seasonal vegetables brings caramelized flavors and complements the creamy filling while adding fiber and color.
- Weeknight Dinner: This dish works as the main course for a satisfying weeknight family meal, especially when paired with steamed green beans or a crisp slaw.
- Casual Gatherings: Bring the skillet to the table for communal serving; it creates an inviting centerpiece that encourages conversation and easy portioning.
- Storage Tips: Cool completely before covering. Refrigerate leftovers for up to three days, and reheat gently in a low oven to restore crispness to the crust.
- Seasonal Pairings: In winter, offer a side of roasted root vegetables and warm spiced cider for a comforting meal; in spring, pair with a bright herb salad to lift the flavors.
FAQ
Conclusion
This recipe shines because it combines a rich, creamy filling with a crispy, cheesy crust that everyone recognizes and loves. Give it a try on a chilly evening or when you want a one pan meal that feels a little special. Bring the skillet to the table, serve it with a simple salad, and enjoy the easy comfort and satisfying textures that make this dish a repeat in my kitchen.
Skillet Chicken Pot Pie with Cheddar Crust
Equipment
- Food Processor
- 10-inch cast iron skillet
Ingredients
- 1 1/2 cups all-purpose flour Combine into a flaky crust by cutting together with flour and chill to maintain small butter pockets, creating a tender, buttery pastry when baked.
- 1/2 teaspoons salt Enhance dough seasoning by evenly dispersing into the flour mixture to balance flavor; be cautious not to over-salt if using salted butter or fillings.
- 12 tablespoons unsalted butter cut into small chunks and chilled Incorporate chilled chunks into the flour to create a laminated texture; keep very cold so butter steams during baking and produces flakiness.
- 2/3 cups shredded cheddar cheese Fold into the pastry dough to add sharp, savory flavor and melt into pockets that create a rich, cheesy crust for the pot pie.
- 5 to 6 1/2 tablespoons ice water Add gradually while mixing the dough until it just comes together, using the minimum needed to bind without making the crust tough.
- 4 tablespoons butter Sauté vegetables in to develop flavor and create a rich base; use to brown onions and soften carrots and celery before adding flour.
- 1/2 medium onion, diced Sweat until translucent in butter to release sweetness and aroma; diced small for even distribution and tender bites in the filling.
- 1 carrot, peeled and thinly sliced Slice thinly and cook until just tender to provide sweetness, texture, and body; thinner slices help them soften quickly in the skillet.
- 1 celery rib, diced Cook until softened and aromatic to contribute subtle savory structure and moisture to the filling; dice small for even cooking.
- 1/2 cup all-purpose flour Whisk into the butter and vegetables to form a roux, thickening the filling and creating a smooth, cohesive sauce for the chicken and peas.
- 1 1/3 cups chicken broth Pour in slowly to deglaze the pan and build the sauce base; use to control thickness and add savory depth to the filling.
- 1 cup half and half Stir in to enrich the sauce with creaminess and a velvety texture, balancing the broth and creating a luscious filling consistency.
- 1/2 teaspoons salt Season the filling by dissolving into the sauce to enhance overall taste; add cautiously if other salty components are present.
- 1/4 teaspoon pepper Season the filling to provide mild heat and depth; grind fresh if possible to avoid bitterness and to taste.
- 1/4 teaspoon dried thyme Infuse the filling with an herbaceous, slightly floral note; sprinkle in to complement poultry and vegetables without overpowering.
- 1/4 teaspoon poultry seasoning Add warmth and savory complexity with a blend of spices tailored for poultry; use sparingly to avoid masking fresh ingredients.
- 2/3 cup frozen peas, defrosted Fold in at the end after thawing to contribute bright color, sweet flavor, and a pop of texture; stir gently to avoid mashing.
- 3 cups diced cooked chicken Toss into the thickened sauce as the main protein, adding hearty texture and savory richness; use pre-cooked chicken for quick assembly.
- 1 egg, lightly beaten Brush over the assembled crust to promote a glossy, golden finish and help any crust edges adhere while baking.
Instructions
- Make pie crust. Place flour and salt in a food processor and pulse to combine. Scatter chilled butter pieces on top. Pulse 10 to 12 times or until mixture resembles coarse crumbs. Add cheese and pulse to combine.: You should notice a mixture that looks like coarse sand with visible pea sized bits of butter , and the sound of the processor will shift from clumpy to more even as the pulses continue. This texture ensures pockets of steam during baking, resulting in flaky layers. The aroma will turn faintly dairy rich when the cheddar cheese is incorporated, adding a buttery, sharp note. Common mistakes include overprocessing which can make the dough mealy and dense, or using warm butter that smears instead of remaining distinct. If your mixture looks too uniform, pulse fewer times to restore texture.
- Transfer mixture to a large bowl. Sprinkle 5 tablespoons of ice water on top. Stir and press the dough together using a rubber spatula. If dough is not coming together, use a little more ice water.: As you work the dough, you will feel it gradually cohere into a shaggy mass, cool and slightly tacky. The cold water activates just enough gluten to bind while keeping the butter chilled. The tactile feedback is important, you should stop when it holds together without feeling wet. Too much water makes the dough sticky and elastic, which yields tough crust; too little and it will crumble. If you need more water, add it a teaspoon at a time, avoiding overhydration.
- Turn dough out onto a piece of plastic wrap. Flatten into a disk, wrap well and refrigerate for at least 1 hour and up to 24 hours.: After wrapping, the dough will firm and the chilled butter will solidify, which keeps the layers distinct when baked. Cooling also relaxes the gluten so the dough is easier to roll and less likely to shrink. You may feel the disk cool to the touch; that is a good sign. Common issues include skipping the chill step which often causes tearing or excessive shrinkage during baking, so be patient and allow the dough time to rest.
- Preheat oven to 400 degrees.: You will sense the kitchen warming as the oven comes to temperature, and preheating ensures the crust starts baking immediately on contact, producing flake and lift. A properly preheated oven also helps the filling to bubble at the same time the crust browns. Avoid placing the pie in an oven that has not reached 400 degrees, as that can produce a soggy bottom and an underbaked crust.
- To make filling, melt butter in a medium (10-inch) cast iron skillet over medium heat. Add onion, carrot, and celery and cook 5 minutes.: As the butter melts and the vegetables sizzle, you'll smell a sweet, savory aroma develop. The vegetables should soften and become translucent, releasing natural sugars that deepen the filling's flavor. A steady, moderate sizzle is ideal, not a loud pop which signals too high heat. If the vegetables begin to brown aggressively, lower the heat to prevent bitterness.
- Sprinkle flour on top. Cook and stir for 1 minute.: The flour should absorb the melted butter and coat the vegetables, forming the start of a roux. You will hear a gentle thickening sound and see the mixture become slightly glossy. Cooking the flour removes the raw taste and sets the stage for a smooth sauce when liquids are added. Do not skip this brief cooking time; undercooked flour can leave a pasty mouthfeel in the finished filling.
- Gradually add chicken broth whisking it into the flour well. Whisk in half and half.: Add the chicken broth slowly while whisking so the mixture remains lump free. The sauce will thicken and take on a velvety sheen as the starches swell. When you pour in the half and half , watch the sauce smooth out and become creamy, and listen for a gentle simmer. If you add the liquid too quickly, you may get lumps; keep whisking and if lumps form, strain or whisk vigorously until smooth.
- Add salt, pepper, thyme, and poultry seasoning. Let mixture simmer for a few minutes.: The simmer concentrates flavors and reduces the sauce slightly, giving it body. You will smell the dried thyme and the seasoning blend blooming, and the texture should feel thicker on the back of a spoon. Simmer only until the sauce coats the spoon; prolonged simmering can thin the filling as liquid reduces excessively or cause the dairy to separate.
- Stir in peas and chicken. Remove from heat.: Folding in the defrosted peas and diced cooked chicken finishes the filling. The contrast of warm gravy and tender morsels is key, and the green pops of peas brighten the plate. Remove from heat promptly to avoid overcooking the peas, which can turn them mushy. A common error is adding cold chicken straight from the fridge which cools the sauce; bring chicken closer to room temperature first.
- Remove dough from refrigerator and let it sit on the counter for 10 minutes.: This brief rest makes the dough more pliable for rolling while still keeping the butter cool. You will notice it soften slightly at the edges, which reduces crack risk when rolling. Do not let it sit too long or the butter will warm, making the dough sticky and harder to lift into the skillet.
- Sprinkle some flour on a piece of parchment paper. Place dough on paper and roll it into a circle that’s about 1/8-inch thick. Slide your hands under the parchment paper and transfer the pie dough to the pan, flipping it over on top of the pie filling and peeling the paper off of it. Trim excess dough or tuck it under the so that the crust fits the pan. Brush top with egg. Cut a few slits in the dough to allow steam to escape.: Rolling on parchment keeps the dough from sticking and helps you transfer it intact. The crust should look even and slightly translucent where it thins, and the sound of the rolling should be smooth and quiet. Brushing with the beaten egg adds sheen and encourages a deep golden color. Forgetting to cut vents traps steam and can cause soggy pockets, so be sure to make slits.
- Place in oven and bake 30 to 35 minutes, until pie crust is lightly browned and no longer feels doughy.: While baking you'll see the filling bubbling gently at the edges and the crust turning a rich golden tone. The aroma will be rich and buttery with a toasted cheddar cheese note from the crust. Check for a firm, set filling and a crust that feels cooked rather than doughy. Removing too early risks a runny center, while overbaking can dry the filling and make the crust overly crisp. Let it rest briefly before serving so the gravy settles.
Notes
- Make Ahead: Chill the crust dough for up to 24 hours or freeze it for longer storage. Thaw overnight in the refrigerator before rolling.
- Savory Boost: Mix a tablespoon of melted butter with a pinch of poultry seasoning into the filling for an extra flavor layer without changing texture.
- Cheese Variation: Swap the cheddar cheese for a sharper aged version for more bite, keeping the same measurement to maintain dough balance.
- Vegetable Swap: If you prefer, increase the ratio of diced carrot and celery for more texture, or add a small handful of chopped fresh herbs at the end for brightness.
- Leftover Rescue: Use leftover roasted chicken or store bought rotisserie chicken to speed assembly while preserving rich flavor.