Simple Apple Tart Recipe
Simple Apple Tart Recipe is the kind of baking I turn to when I want something that looks fancy but feels effortless. The first time I made this tart I was racing the clock before guests arrived, and the way the thin apple slices fanned across the golden pastry made everyone think I had spent hours. I still remember the warm, cinnamon kissed aroma that drifted through the kitchen as the oven did the heavy lifting.
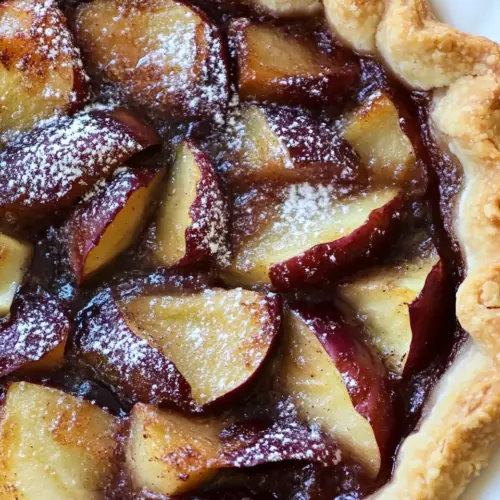
Over the years I have learned small tricks that make a big difference with this dessert, from how I arrange the apples so each bite has both sweet and tart notes, to the way I brush the melted butter for that perfect sheen. When I share this with friends, it becomes the topic of conversation, not because it is complicated, but because it tastes like comfort with a touch of elegance. The balance between a flaky crust and tender, fragrant apple is what keeps people coming back for seconds.
Recipe Snapshot
40 mins
10 mins
30 mins
Easy
220 kcal
American
Gluten-Free, Paleo
Desserts
Sheet pan, Oven
Why This Simple Apple Tart Recipe Hits Different
1. Elegant but approachable
I love how Simple Apple Tart Recipe looks like a patisserie treat, yet it is completely achievable at home. The visual appeal of the layered apple slices makes it great for guests, but the technique is forgiving, so I never stress when I bake it.
2. Balanced sweet and tart contrasts
The mix of a medium sweet apple and a medium tart apple gives the tart a lively flavor profile. I find the contrast keeps each bite interesting, preventing cloying sweetness and adding a bright note that complements the buttery crust.
3. Minimal ingredients, maximum impact
What drew me to this recipe initially was its simplicity. With just a prepared pie crust, a couple of types of apple, some melted butter, turbinado sugar, and apple pie spice, you get layers of texture and aroma. I appreciate recipes that let a few quality ingredients shine.
4. Versatile for occasions
I reach for Simple Apple Tart Recipe for casual coffee visits and for holiday tables. The tart is easy to scale, and its look makes it suitable for a cozy afternoon or a special gathering without extra fuss.
5. Great for learning pastry confidence
This tart is an excellent practice run for working with pastry edges and arranging fruit. When I teach friends, they feel proud after this one, and that boost of confidence often leads them to try more baking projects.
What You’ll Need for Simple Apple Tart Recipe
These ingredients are intentionally short and complementary. The pie crust forms the crisp, flaky base, while the two types of apple create a balance of sweetness and brightness. A little butter, some coarse sugar, and warming apple pie spice bring everything together with aroma and a caramelized finish.
- 1 Pie Crust Recipe: Provides a flaky, buttery base that holds the filling and edges together; roll or press into a tart pan and blind-bake or bake with filling as directed to ensure a crisp bottom. Enhances texture and overall presentation while carrying the flavors of the apples and spices.
- 1 (150 g) medium sweet apple, such as Honeycrisp, cored and sliced: Adds balanced natural sweetness and juicy flesh that softens during baking; slice evenly to ensure uniform cooking and layer attractively on the crust. Contributes aromatic complexity and a pleasant, sweet contrast to the tart apple.
- 1 (150 g) medium tart apple, such as Granny Smith, cored and sliced: Contributes bright acidity and firm texture that complements the sweeter apple; slice thinly for even baking and to maintain a pleasant bite in each slice. Balances sweetness and prevents the tart from tasting overly cloying.
- 3 tablespoons (42 g) melted butter: Provides rich flavor and helps the apple slices brown and caramelize while adding a glossy finish; brush over arranged apples before or during baking for even coating. Also contributes moisture and a slightly savory note that deepens the overall taste.
- 2 tablespoons (23 g) turbinado sugar: Adds a coarse crunchy sweetness that sparkles on top after baking; sprinkle over the butter-coated apples to create texture and enhance caramelization. Helps produce a pleasant crust and light caramel notes.
- 2 teaspoons (4 g) apple pie spice: Adds warm, aromatic depth with cinnamon, nutmeg, and complementary spices; toss with the apple slices so the spice evenly flavors the fruit before arranging. Enhances the classic apple-pie profile and brings cozy flavor to the tart.
How to Prepare Simple Apple Tart Recipe
These directions guide you from oven setup to the moment you slice into a warm tart. I like to move deliberately and gather everything before starting, so the process feels calm and rhythmic. As you work, notice visual and aromatic cues to know when each step is done correctly.
- Preheat oven to 350º F.: When the oven warms up you should feel a steady heat from the open door that smells faintly of dry warmth, and the temperature stabilizing ensures even baking. Preheating is crucial because a cold oven will delay crust set and can lead to soggy pastry. A common error is not allowing the oven enough time to reach temperature, which causes uneven browning. I often set a timer and tidy my workspace while the oven heats so I don't rush the next steps.
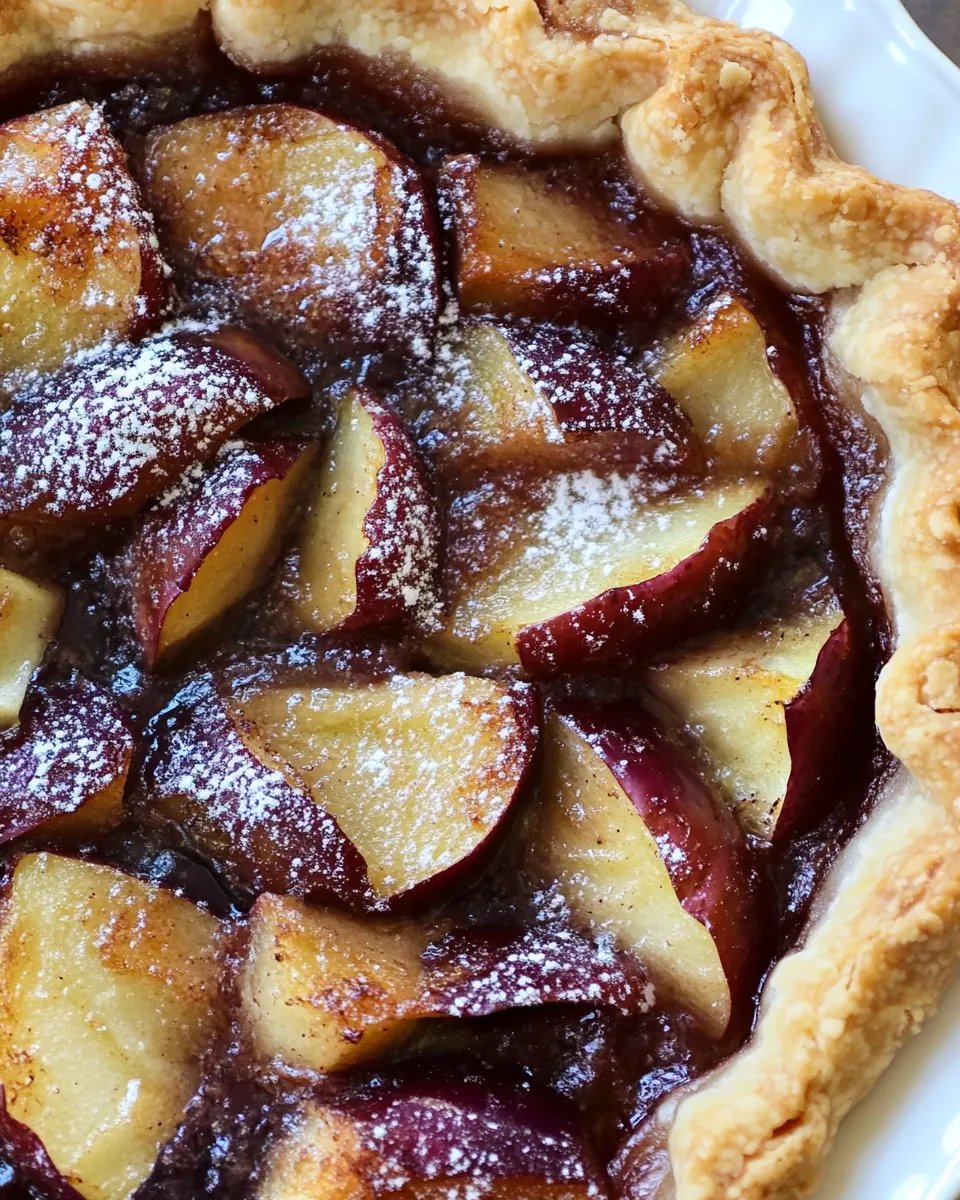
- Arrange pie crust onto a small sheet pan. Arrange apple slices alternately between sweet and tart on the pastry crust leaving about a 1 1/2 inch border around the edges. Turn the border of the pastry crust over onto the edge of the apple slices to form an edge of the tart.: The pastry feels cool and slightly firm; laying it on a sheet pan gives support for the fruit. You'll hear a soft rustle as you ease it onto the pan, and the crust should keep its shape. This matters because an unsupported crust can sag and leak juices. One mistake is skipping the sheet pan; without it, transferring the tart to the oven can be tricky and you might spill the filling.
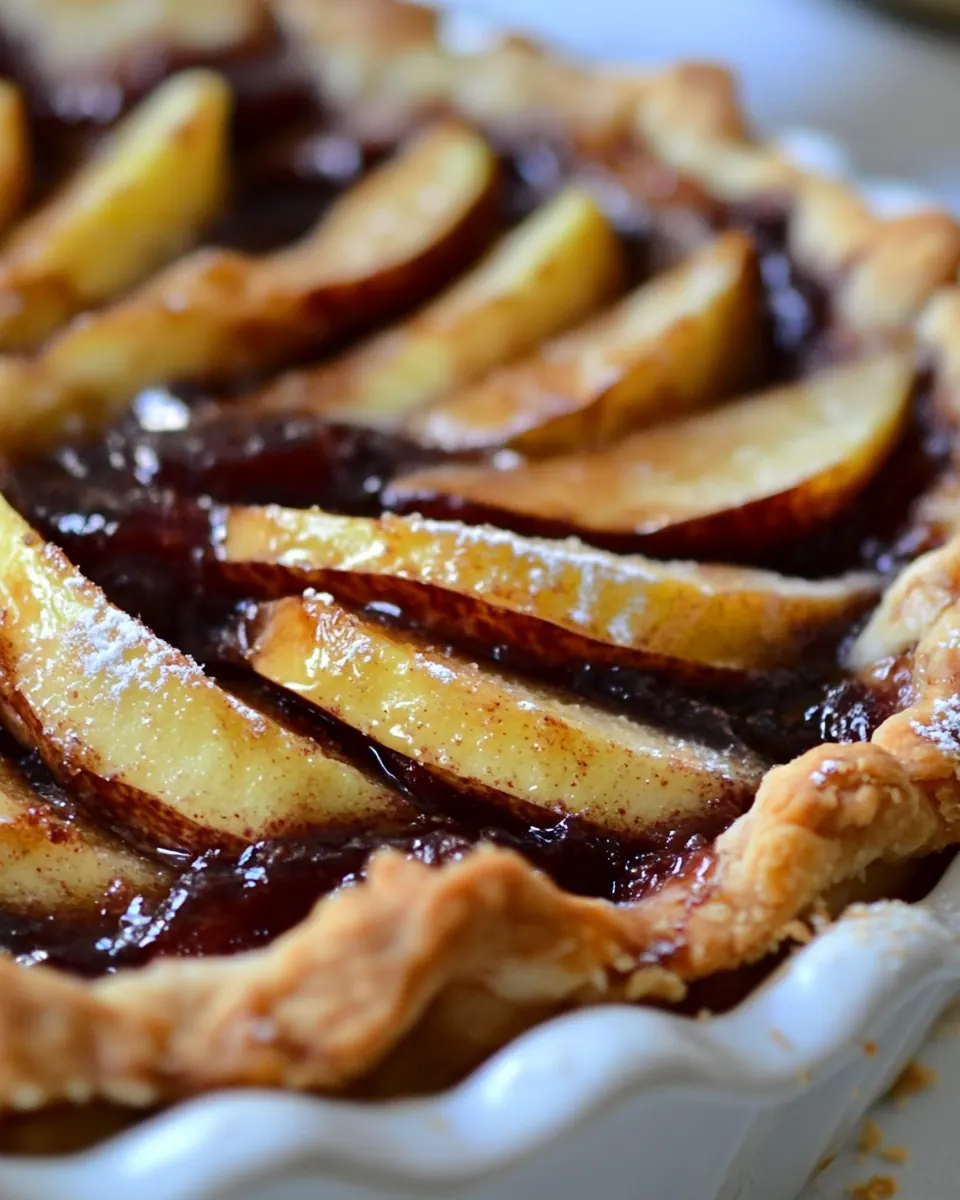
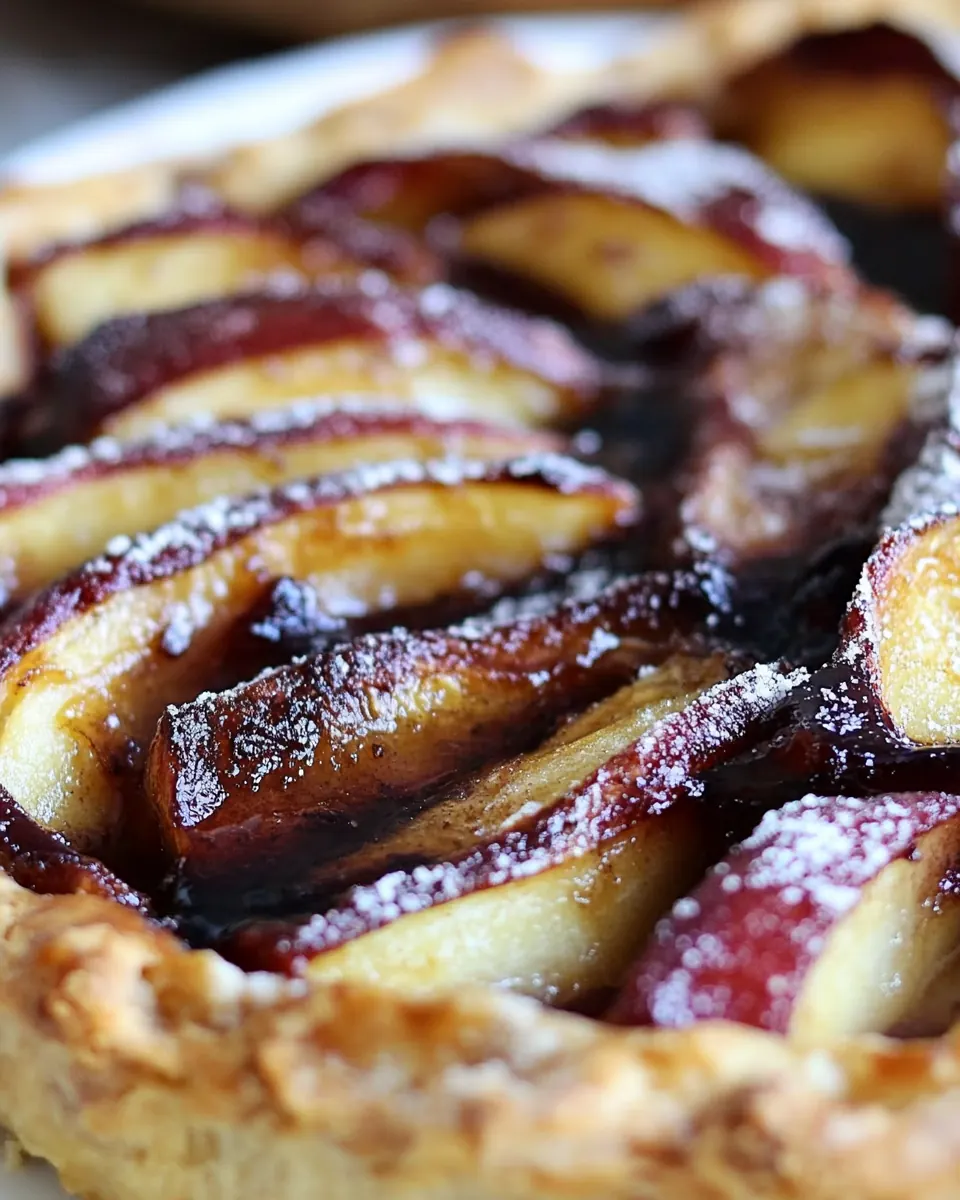
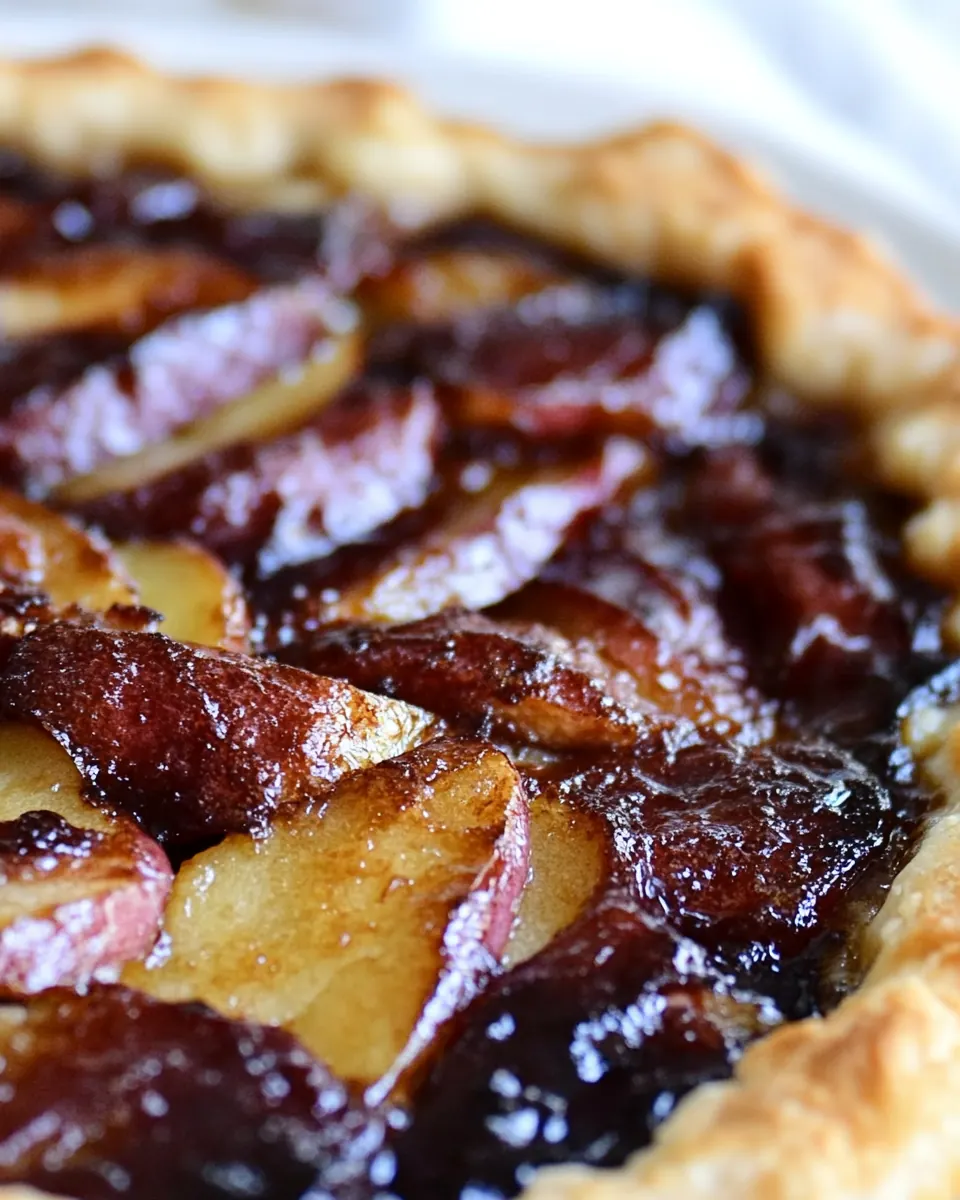
- Brush the pastry crust with some of the melted butter and drizzle the remaining over the apples. Sprinkle the apples and the edges of the crust with the sugar and then sprinkle the apples with the apple pie spice.: As you fan the slices, you'll notice the apples glint with juice and the layered pattern creates a pleasing visual rhythm. Alternating varieties ensures each bite contains sweet and tart balance. Uniform thickness is key so the slices bake evenly; if some pieces are thicker they'll take longer to soften. If slices slide, pat them gently with a paper towel to remove excess moisture before arranging.
- Bake until the apples have softened and the crust has cooked through and have turned golden brown, about 30 – 40 minutes.: Folding the crust creates a rustic frame that catches any bubbling juices and crisps up beautifully. The sound is quiet, but you can see how the pastry holds the fruit in place, and the folded edge browns nicely. Press lightly so the dough seals but do not overwork it or the crust may become dense. A common oversight is leaving the border too thin, which can overbrown quickly; aim for a consistent thickness.
- Remove from the oven and allow to cool about 5 minutes before cutting.: The butter will sizzle softly when it hits warm pastry, and it darkens the crust to a rich golden tone while adding a savory depth to the fruit. This step also encourages caramelization on the apple surfaces. Avoid using too much hot butter at once, which can pool and make parts of the crust greasy. If the butter is too cool it will not spread smoothly, so keep it warm but not boiling.
- Sprinkle the apples and the edges of the crust with the sugar and then sprinkle the apples with the apple pie spice: You should see a light dusting of coarse granules that will melt and caramelize into jewel like spots as the tart bakes. The spice releases warm aromatics that float as the oven heats. An even sprinkle ensures balanced flavor; clumps of spice or sugar will create bitter or overly sweet pockets. If you notice clumping, use your fingertips to break it up and distribute evenly.
- Bake until the apples have softened and the crust has cooked through and have turned golden brown, about 30 to 40 minutes: During baking you will smell a warm, sugary aroma and see the crust deepen to an even golden brown with the apples bubbling gently. The edges should feel firm to the touch when done. This baking window allows the apples to soften without turning to mush and the crust to crisp. A frequent mistake is opening the oven too often which causes temperature drops; resist checking until the lower end of the time range.
- Remove from the oven and allow to cool about 5 minutes before cutting: As the tart cools you get a brief moment of quiet steam and the juices settle, making cutting easier and preventing runoff. The crust firms slightly and the apple slices hold their shape. Cutting too soon will cause juices to run and ruin presentation, so patience is rewarded here. If you must speed cool, set the tart on a wire rack but avoid placing it in the fridge immediately which can make the crust soggy.
Tips and Variations
I like to keep this section practical, aimed at helping you get the best results with minimal fuss. These tips come from repeated trials and small refinements that changed the outcome for the better.
- Use two apple varieties: Alternating a sweet and a tart apple balances flavor and texture, ensuring the tart never tastes overly sugary.
- Chill the crust: A well chilled pie crust resists shrinking and stays flaky, which improves the final texture markedly.
- Even slicing: Aim for slices of consistent thickness to promote uniform baking and prevent some pieces from turning mushy while others remain firm.
- Control the butter temperature: Keep the butter warm enough to spread but not so hot that it pools and makes the crust greasy.
- Watch the sugar: Turbinado sugar gives a pleasant crunch, so sprinkle it evenly and avoid substituting with very fine sugar if you want that texture contrast.
Perfect Matches for Simple Apple Tart Recipe
This tart pairs well with simple accompaniments and suits many occasions. Below I outline serving ideas, seasonal notes, storage tips, and contexts where this tart shines.
- Casual coffee or tea service: Serve slices slightly warm with a cup of coffee or tea for a relaxed get together where the tart‘s warmth feels homey.
- Holiday dessert: The tart works well on a fall holiday table, where its cinnamon notes echo other seasonal flavors without overpowering the menu.
- Brunch centerpiece: Offer the tart alongside other light pastries for a midday menu; its visual appeal makes it a nice centerpiece for guests to admire.
- Storage tip: Keep leftovers wrapped loosely at room temperature for up to two days, or refrigerate for three to four days, reheating briefly to refresh the crust.
- Seasonal pairing: This recipe is ideal in fall when apples are at their peak, and it complements other autumn produce like roasted squash or spiced beverages.
FAQ
Conclusion
Simple Apple Tart Recipe stands out because it combines a flaky crust with two complementary apple varieties for a dessert that feels elevated yet remains simple to execute. The recipe’s ease and visual appeal make it a go to when I want to impress without stress. Give it a try this season, and enjoy the warm spice aroma and caramelized edges that always bring people to the table. I hope it becomes one of your dependable favorites for casual gatherings and special moments alike.
Simple Apple Tart Recipe
Equipment
- Sheet Pan
- Oven
Ingredients
- 1 Pie Crust Recipe Provides a flaky, buttery base that holds the filling and edges together; roll or press into a tart pan and blind-bake or bake with filling as directed to ensure a crisp bottom. Enhances texture and overall presentation while carrying the flavors of the apples and spices.
- 1 (150 g) medium sweet apple, such as Honeycrisp, cored and sliced Adds balanced natural sweetness and juicy flesh that softens during baking; slice evenly to ensure uniform cooking and layer attractively on the crust. Contributes aromatic complexity and a pleasant, sweet contrast to the tart apple.
- 1 (150 g) medium tart apple, such as Granny Smith, cored and sliced Contributes bright acidity and firm texture that complements the sweeter apple; slice thinly for even baking and to maintain a pleasant bite in each slice. Balances sweetness and prevents the tart from tasting overly cloying.
- 3 tablespoons (42 g) melted butter Provides rich flavor and helps the apple slices brown and caramelize while adding a glossy finish; brush over arranged apples before or during baking for even coating. Also contributes moisture and a slightly savory note that deepens the overall taste.
- 2 tablespoons (23 g) turbinado sugar Adds a coarse crunchy sweetness that sparkles on top after baking; sprinkle over the butter-coated apples to create texture and enhance caramelization. Helps produce a pleasant crust and light caramel notes.
- 2 teaspoons (4 g) apple pie spice Adds warm, aromatic depth with cinnamon, nutmeg, and complementary spices; toss with the apple slices so the spice evenly flavors the fruit before arranging. Enhances the classic apple-pie profile and brings cozy flavor to the tart.
Instructions
- Preheat oven to 350º F.: When the oven warms up you should feel a steady heat from the open door that smells faintly of dry warmth, and the temperature stabilizing ensures even baking. Preheating is crucial because a cold oven will delay crust set and can lead to soggy pastry. A common error is not allowing the oven enough time to reach temperature, which causes uneven browning. I often set a timer and tidy my workspace while the oven heats so I don't rush the next steps.
- Arrange pie crust onto a small sheet pan. Arrange apple slices alternately between sweet and tart on the pastry crust leaving about a 1 1/2 inch border around the edges. Turn the border of the pastry crust over onto the edge of the apple slices to form an edge of the tart.: The pastry feels cool and slightly firm; laying it on a sheet pan gives support for the fruit. You'll hear a soft rustle as you ease it onto the pan, and the crust should keep its shape. This matters because an unsupported crust can sag and leak juices. One mistake is skipping the sheet pan; without it, transferring the tart to the oven can be tricky and you might spill the filling.
- Brush the pastry crust with some of the melted butter and drizzle the remaining over the apples. Sprinkle the apples and the edges of the crust with the sugar and then sprinkle the apples with the apple pie spice.: As you fan the slices, you'll notice the apples glint with juice and the layered pattern creates a pleasing visual rhythm. Alternating varieties ensures each bite contains sweet and tart balance. Uniform thickness is key so the slices bake evenly; if some pieces are thicker they'll take longer to soften. If slices slide, pat them gently with a paper towel to remove excess moisture before arranging.
- Bake until the apples have softened and the crust has cooked through and have turned golden brown, about 30 – 40 minutes.: Folding the crust creates a rustic frame that catches any bubbling juices and crisps up beautifully. The sound is quiet, but you can see how the pastry holds the fruit in place, and the folded edge browns nicely. Press lightly so the dough seals but do not overwork it or the crust may become dense. A common oversight is leaving the border too thin, which can overbrown quickly; aim for a consistent thickness.
- Remove from the oven and allow to cool about 5 minutes before cutting.: The butter will sizzle softly when it hits warm pastry, and it darkens the crust to a rich golden tone while adding a savory depth to the fruit. This step also encourages caramelization on the apple surfaces. Avoid using too much hot butter at once, which can pool and make parts of the crust greasy. If the butter is too cool it will not spread smoothly, so keep it warm but not boiling.
- Sprinkle the apples and the edges of the crust with the sugar and then sprinkle the apples with the apple pie spice: You should see a light dusting of coarse granules that will melt and caramelize into jewel like spots as the tart bakes. The spice releases warm aromatics that float as the oven heats. An even sprinkle ensures balanced flavor; clumps of spice or sugar will create bitter or overly sweet pockets. If you notice clumping, use your fingertips to break it up and distribute evenly.
- Bake until the apples have softened and the crust has cooked through and have turned golden brown, about 30 to 40 minutes: During baking you will smell a warm, sugary aroma and see the crust deepen to an even golden brown with the apples bubbling gently. The edges should feel firm to the touch when done. This baking window allows the apples to soften without turning to mush and the crust to crisp. A frequent mistake is opening the oven too often which causes temperature drops; resist checking until the lower end of the time range.
- Remove from the oven and allow to cool about 5 minutes before cutting: As the tart cools you get a brief moment of quiet steam and the juices settle, making cutting easier and preventing runoff. The crust firms slightly and the apple slices hold their shape. Cutting too soon will cause juices to run and ruin presentation, so patience is rewarded here. If you must speed cool, set the tart on a wire rack but avoid placing it in the fridge immediately which can make the crust soggy.
Notes
- Use two apple varieties: Alternating a sweet and a tart apple balances flavor and texture, ensuring the tart never tastes overly sugary.
- Chill the crust: A well chilled pie crust resists shrinking and stays flaky, which improves the final texture markedly.
- Even slicing: Aim for slices of consistent thickness to promote uniform baking and prevent some pieces from turning mushy while others remain firm.
- Control the butter temperature: Keep the butter warm enough to spread but not so hot that it pools and makes the crust greasy.
- Watch the sugar: Turbinado sugar gives a pleasant crunch, so sprinkle it evenly and avoid substituting with very fine sugar if you want that texture contrast.