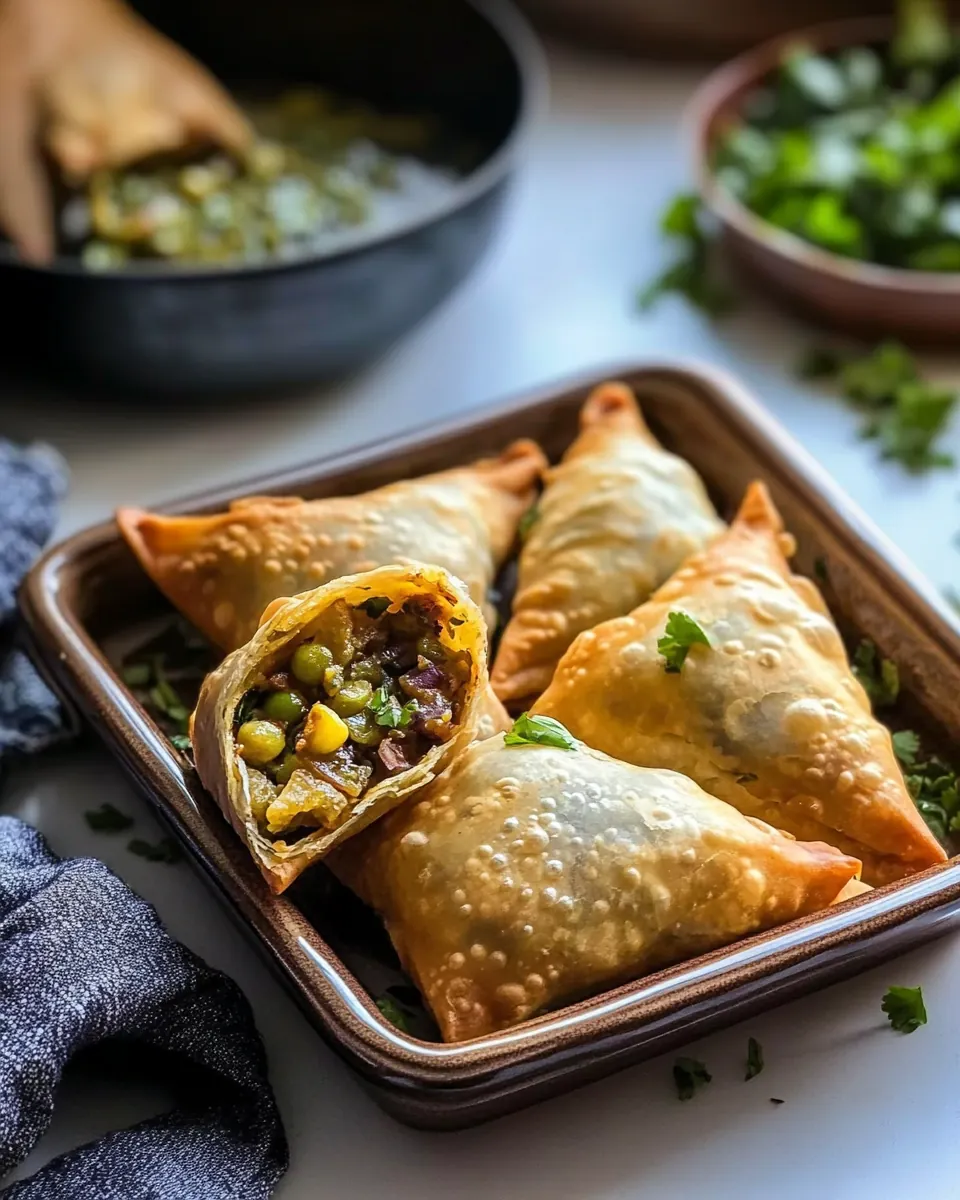
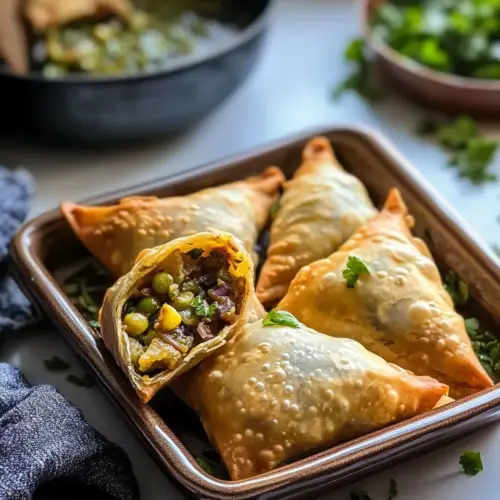
Samosas
Samosas have been my weekend ritual for years, a little crunchy promise that a simple afternoon can turn into a warm, communal feast.
I still remember the first time I rolled that flaky dough on my tiny counter, flour dusting the air, the smell of frying oil reminding me of street corners where I grew up. Making Samosas became a way to slow down, to talk to friends while we shaped each cone and stuffed it with a spiced potato filling. Sometimes I laugh at how messy my kitchen gets, yet somehow that mess always tastes like home.
There is something meditative about pressing the dough, folding the edges, and hearing that whisper of hot oil as the pastry hits the pan. Over time I tuned small details, like the exact temperature of the oil and the size of the potato chunks so the interior stays proud and textured, not pasty. Each batch tells a story of trial and friendly experimentation. I enjoy how Samosas bring people together, whether it is a casual lunch or a festive gathering.
When friends ask why I bother making them from scratch instead of buying frozen, I say it is all about control. I can make the pastry crisp yet delicate, and I can balance the spices so the filling sings but never shouts. That balance makes serving them irresistible. Every improvement felt like tuning an instrument until the final bite had the perfect crunch and a bright, savory center. That is the heart of my approach to Samosas, and why I keep making them.
Recipe Snapshot
1 hr 5 mins
45 mins
20 mins
Hard
250 kcal
Indian
Gluten-Free, Vegan
Appetizers
Large heavy bottom pan, Mixing bowl, Rolling pin, Parchment paper
Why This Samosas Hits Different
Crunchy Texture That Holds Up
I love how Samosas deliver a contrast of textures. The pastry becomes especially crisp when you control the oil temperature and do not overcrowd the pan. I often watch for a uniform golden color as the main clue that the crust is properly crisped.
Layered, Balanced Flavors
The filling uses simple pantry spices that layer together, giving warmth without overwhelming the potatoes. I appreciate how the toasted seeds and ginger create an aromatic backbone, while the lemon juice and cilantro bring a hint of brightness so each bite feels balanced.
Flexible and Crowd Friendly
Samosas are one of those recipes I make when friends drop by, because they scale easily. I usually double the filling and make a few extra dough balls, then freeze uncooked cones. That way, any gathering feels effortless and generous.
Hands On and Satisfying to Make
I enjoy the tactile part of this recipe. Kneading the dough until it is firm but not stiff, feeling the filling come together, shaping the cones, all of it is therapeutic. You get to sense when the dough is right, and that feels rewarding.
Perfect for Serving With Sauces
Because the filling is savory and bright, these are perfect companions to sweet chutneys or tangy sauces. I often serve them with a fruity chutney that cuts through the richness, which friends always ask for by name.
Essential Ingredients for Samosas
These ingredients are thoughtfully chosen to create a sturdy, flaky pastry and a fragrant, textured filling that work in harmony. The dough needs structure from all purpose flour and richness from ghee, clarified butter, while the filling relies on the hearty bite of russet potatoes and bright notes from lemon juice and cilantro. Spices and seeds provide aromatic interest and a toasted backbone.
- 2 cups all purpose flour: Provide structure and binding in the dough by forming a pliable, rollable pastry; adds neutral flavor so savory filling stands out. Combine with fat and water to create pockets that hold the spiced filling and crisp when fried.
- 1 teaspoon thyme: Add a subtle herbal note and mild earthiness to the dough or filling; supports the overall savory profile without overpowering other spices. Use sparingly to maintain balance and complement cilantro and garam masala.
- 1 teaspoon salt: Enhance overall seasoning and balance flavors throughout both dough and filling; helps highlight aromatic spices and vegetables. Dissolve into the dough for even distribution or sprinkle into the filling to taste.
- 1/4 cup ghee, clarified butter: Incorporate richness and flakiness into the dough by coating flour proteins and helping layers separate during frying; imparts a buttery aroma. Use at room temperature or melted depending on desired dough texture and handling.
- 8 12 tablespoons cold water: Bind the dough while controlling tenderness; add gradually until dough is just cohesive to avoid toughness. Keep water cold to maintain a flaky pastry texture and prevent excessive gluten development.
- 1 lb russet potatoes: Provide the starchy base and hearty body of the filling when boiled and mashed; contribute a creamy mouthfeel that absorbs spices. Choose russet for floury texture and easy mashing, ensuring even size for consistent cooking.
- 1 tablespoon ghee, clarified butter: Add depth and buttery flavor to the filling while helping sauté spices and aromatics; contributes subtle richness. Use during tempering to release essential oils from seeds and bind the ingredients.
- 1 teaspoon cumin seeds: Introduce warm, slightly bitter, and aromatic notes when toasted; contribute a nutty, fragrant base for the filling's spice profile. Crack or lightly crush after tempering to release oils and intensify flavor.
- 1 teaspoon coriander seeds: Contribute citrusy, warm, and slightly sweet undertones to the spice blend; support savory elements and add complexity. Lightly toast and crush to release the essential oils before mixing into the filling.
- 1/2 teaspoon fennel seeds: Deliver a sweet-anise, cooling undertone that balances heavier spices and adds aromatic lift; use sparingly so it doesn't dominate. Toast and grind or use whole for tempering to release a mild licorice scent.
- 1 tablespoon ginger, minced: Provide bright, pungent heat and fresh zing to the filling; helps cut through richness from potatoes and ghee. Mince finely so it distributes evenly, releasing fresh ginger oils during sautéing.
- 1 green chili, diced: Bring sharp heat and vegetal brightness to the filling; enhances overall spiciness and adds texture contrast. Remove seeds if milder heat is desired and sauté briefly to mellow raw pungency.
- 1 cup green peas: Contribute bursts of sweetness, color, and light vegetal texture to the filling; balance starchy potatoes with a tender pop. Use fresh or thawed frozen peas and add near the end of cooking to preserve shape and color.
- 1 teaspoon lemon juice: Introduce bright acidity to balance richness and lift the filling's flavors; helps meld spices and vegetables. Squeeze in at the end of cooking to preserve fresh citrus aroma without overpowering other seasonings.
- 1 teaspoon fennel powder: Add a concentrated fennel flavor in powdered form to enhance sweet-anise notes and provide aromatic continuity with whole fennel; offers uniform distribution. Use measured amounts to avoid overwhelming the spice balance.
- 1/2 teaspoon turmeric: Impart warm earthiness and golden color while reducing pungency of other spices; supports the curry-like profile of the filling. Incorporate early in cooking to bloom in hot oil and release its color and mild flavor.
- 1 teaspoon garam masala: Deliver complex warmth and blend multiple spices into a cohesive aromatic profile; finish the filling with rounded savory notes. Add toward the end of cooking to preserve volatile aromatics and avoid bitterness from overcooking.
- 1 tablespoon cilantro, minced: Provide a fresh, herbaceous lift and bright finish that complements the spices; add a clean green flavor to the filling. Chop finely and stir in off heat to preserve delicate flavor and color.
- salt to taste: Adjust seasoning to personal taste and ensure all elements are properly balanced; finalize saltiness after cooking. Add gradually and taste as the flavors concentrate to avoid over-salting.
- oil for frying: Create the crisp, golden exterior by deep-frying the assembled samosas; provide the necessary heat transfer for a flaky, crunchy shell. Choose an oil with a high smoke point and maintain steady temperature for even browning.
The Process for Making Samosas

This is a hands on recipe that moves through dough, filling, assembly, and frying. I like to set up my station so everything is within reach, and I work one dough ball at a time to prevent drying. The sequence matters because timing affects texture and flavor.
- In a bowl, whisk together 2 cups all purpose flour, 1 teaspoon thyme, and 1 teaspoon salt. Add 1/4 cup ghee, to the flour mixture and mix well with your fingers until all the ghee has been incorporated. You should have a shaggy dough that can hold its shape when pressed together.: The scent of flour combined with the faint herbal note of thyme creates a neutral canvas, and whisking evenly distributes the salt so every bite is balanced. You should see a uniform pale mixture with no pockets of seasoning, which helps the dough develop evenly when the ghee, clarified butter is incorporated. A common mistake is inadequate mixing, which leads to uneven texture in the pastry, so take a moment to whisk thoroughly.
- Add 8-12 tablespoons cold water, one tablespoon at a time, kneading the dough as you add it until it is fairly stiff. It shouldn't stick to your hands.: When you rub the ghee, clarified butter into the flour, it should feel like coarse sand or small peas, and you will notice a rich buttery aroma. This technique coats flour particles and prevents too much gluten formation, yielding flakier layers after frying. If you overwork this stage, the dough can become tough, so stop once the mixture resembles coarse crumbs.
- Cover the dough and let it rest for 30 minutes.: Pressing a handful should hold briefly, indicating proper fat distribution and hydration level. The shaggy look means you have not over-kneaded, which keeps the pastry tender. If it falls apart, add a little more water sparingly; if it is sticky, let it rest to relax the gluten.
- Peel 1 lb russet potatoes and cut them into 2-inch chunks. Then, boil them until they are just fork-tender. You don’t want them to be too soft and mushy.: Starting with cold water slows gluten development, which helps maintain tenderness. Knead just enough to bring the dough together into a cohesive ball, the surface should be smooth and firm to the touch. Rushing this step or adding too much water will yield a slack dough that is hard to shape and tears easily when you form cones.
- Drain the boiled potatoes, then roughly chop or crumble them; do not mash them. Set the potatoes aside.: A properly hydrated dough will feel pliable and slightly tacky, not sticky, which makes rolling and shaping manageable. If your hands are sticking, dust lightly with all purpose flour but avoid adding too much or the pastry may dry out. A sticky dough will tear when forming cones, so adjust water carefully.
- Heat 1 tablespoon ghee, in a medium-sized pan over medium-high heat. Add the 1 teaspoon cumin seeds, 1 teaspoon coriander seeds, and 1/2 teaspoon fennel seeds and saute until they begin to sizzle.: Resting relaxes gluten and allows the moisture to distribute evenly, making the dough easier to roll thin. You will notice it becomes more elastic and less likely to spring back while rolling. Skipping rest often results in dough that resists rolling and tears during shaping.
- To the pan, add 1 tablespoon ginger, 1 green chili, diced, and 1 cup green peas. Saute everything for about 2 minutes.: The earthy scent of russet potatoes is comforting, and cutting them into even chunks ensures uniform cooking. Larger chunks hold texture and avoid a gluey filling. A common error is cutting pieces that are too small, which leads to overcooked, mealy potatoes.
- Lastly, add 1 teaspoon lemon juice, 1/2 teaspoon turmeric, 1 teaspoon garam masala, 1 teaspoon fennel powder, 1 tablespoon cilantro, salt to taste, and potatoes. Mix everything well and saute for another 2 minutes.: You should hear a gentle simmer and see the water bubbling around the potato chunks, not a rolling boil that can break them apart. Fork tender means the fork slips in easily but the potato still holds a shape, which gives the filling texture. Overboiling will create a mashed consistency that lacks bite.
- Remove the filling from the pan and set it aside to cool. Once the filling has cooled nearly to room temperature, it is ready to assemble.: Draining removes excess moisture, and rough chopping leaves small, textured pieces that grip the spices and peas. You want visible potato structure in the filling, which gives each bite interest. Mashing would produce a pasty interior that does not contrast with the crisp pastry.
- Divide the dough into six equal portions, form into balls, cover, and let them rest for about 10 minutes.: Letting them cool slightly prevents the residual heat from wilting fresh ingredients like cilantro , and it helps the filling bind without becoming too soft. If you add hot potatoes to the pan, you risk overcooking the peas and losing bright flavors.
- Roll each ball into flat disks about 7 inches across. Press them between two pieces of parchment paper to roll flat.: When the ghee, clarified butter melts and shimmers, it will carry the aroma of toasted spices beautifully. You want a steady medium-high so the seeds sizzle rather than burn. If the fat smokes, lower the heat to avoid bitter flavors.
- Cover the flattened dough sections to keep them from drying out. Work with one dough section at a time.: The moment the seeds crackle, they release essential oils that perfume the kitchen with warm, nutty, and sweet notes. This sound is a great auditory cue that the spices are blooming. Be careful not to let them blacken, as that introduces bitterness to the filling.
- Cut the round in half, wet the flat edge of one half of the round, and press the ends together to form a cone.: The sizzling stops being dry and becomes aromatic as the ginger softens and the green chili releases its heat, while the green peas add a bright pop. Saute for about two minutes so the flavors marry but the peas retain a springy texture. Overcooking will make the peas dull and soft.
- Fill the cone with about two tablespoons of the filling and gently pack it in. Wet the inside edge of the open side and press it closed.: Two minutes is enough to shed raw edges off the ginger and chili and to warm the peas, creating a lively, fragrant base. You should smell a fragrant blend of spice and freshness, and the pan will have a gentle sizzle. If your pan is too hot, lower it to avoid burning the aromatics.
- Repeat with the other half of the round and then with the rest of the dough. This will yield 12 samosas.: The lemon juice brightens the mixture while turmeric and garam masala deepen the color and warmth. Toss in the chopped potatoes and let them pick up the spiced coating so each piece has pockets of flavor. A common oversight is adding lemon too early, which can dissipate its fresh acidity.
- Heat 2 inches of oil for frying in a large, heavy-bottom pan over medium heat. When the oil is hot enough, a toothpick or wooden skewer inserted into the oil should sizzle.: In this brief interval the potatoes absorb flavors and the filling firms up slightly, creating a textured, cohesive mixture. You will see the potatoes glisten and notice a layered aroma of toasted seeds and warm spice. Avoid over stirring, which can break the potato pieces down.
- Add enough samosas to the pan to leave some room in between. You will need to work in batches. Fry the samosas for about 1 minute on each side. They should be golden and crispy but not develop dark brown spots.: Cooling prevents the heat from wilting the pastry when you fill the cones and helps the filling bind. The smell will be fragrant and inviting, but patience here ensures easier assembly and fewer steam bursts inside the pastry. Stuffing with very hot filling can make the dough soggy.
- Remove the fried samosas from the pan and place them on a paper towel-lined plate to allow any excess oil to be absorbed.: At this point the filling holds together without being sticky, and the flavors have settled so you can taste and adjust seasoning. A lukewarm filling prevents steam pockets and soggy pastry during frying. If it is too warm, let it cool further before filling.
- Once all the samosas are finished frying, serve them fresh with Mango Chutney or tamarind sauce.: Resting makes each ball easier to roll thinly, and covering prevents surface drying. You will notice the dough relax and become more workable. Not resting can cause the pastry to spring back while rolling.
- Roll each ball into flat disks about 7 inches across: A seven inch disk gives you a good balance between enough pastry for sealing and thinness for crisping. Roll evenly so the thickness is uniform, which ensures even frying. Uneven thickness leads to parts that cook faster and either burn or remain doughy.
- Press them between two pieces of parchment paper to roll flat: Using parchment prevents sticking and helps you achieve a smooth surface. You will see a consistent, pale disk that feels silky under your rolling pin. If you peel and notice tearing, patch with a little flour and press gently rather than re rolling aggressively.
- Cover the flattened dough sections to keep them from drying out: A quick cover with a damp cloth or plastic wrap preserves pliability. Dry edges are harder to seal and can crack during frying, so keep sections covered until you form the cones. Working uncovered often causes frustrating cracks.
- Work with one dough section at a time: Focusing on one piece prevents the remainder from drying and ensures consistent assembly. The first few will teach you the rhythm, and then the process speeds up. If you rush and leave others exposed, you will need to re moisten edges which is messy.
- Cut the round in half, wet the flat edge of one half of the round, and press the ends together to form a cone: The wet edge acts as glue, and you will feel the pastry seal with a gentle pinch. A well sealed cone avoids leakage during frying, and the opening should hold shape to accept the filling. If you skip wetting, seams may open in the oil.
- Fill the cone with about two tablespoons of the filling and gently pack it in: The filling should sit snugly without bulging the pastry, and you will notice the warmth and scent when it is properly packed. Gently pressing ensures no air pockets form, which can burst during frying. Overfilling leads to splitting in the oil.
- Wet the inside edge of the open side and press it closed: A final seam seal ensures the samosa remains intact while frying, and you should hear a faint stick as the pastry adheres. Smooth the edge so it lies flat and even, producing a neat pyramid. Poor sealing is the most common reason for leakage and soggy spots.
- Repeat with the other half of the round and then with the rest of the dough: As you repeat, your movement will become fluid and the shapes more uniform, yielding roughly twelve samosas that are similar in size. Consistency makes frying easier because they will cook at the same rate. If sizes vary greatly, some will brown faster than others.
- This will yield 12 samosas: Counting them gives you a target and helps with portioning for frying batches so they cook evenly. If you prefer smaller snacks, you can make more with less filling per cone, but keep frying time in mind.
- Heat 2 inches of oil for frying in a large, heavy-bottom pan over medium heat: Two inches of hot oil allows the samosas to float slightly and develop an even crust, and a heavy pan maintains steady temperature. Look for a gentle shimmer and small wisps of steam. If the oil is too shallow, the samosas will bottom out and brown unevenly.
- When the oil is hot enough, a toothpick or wooden skewer inserted into the oil should sizzle: That sizzle is your readiness signal, and it tells you the oil is at the right stage for frying. Drop a small piece of dough to test; it should rise steadily and brown slowly. If the test browns instantly, lower the heat to avoid burning the exterior.
- Add enough samosas to the pan to leave some room in between: Crowding lowers the oil temperature and causes uneven frying, so leave space to maintain a gentle simmer around each piece. You will hear a steady, even sizzle when the spacing is correct. If the sound is frantic and the oil foams, remove a few so the temperature recovers.
- You will need to work in batches: Patience here keeps results consistent, and it helps maintain oil temperature for each batch. Between batches, adjust heat slightly so the next set cooks to the same golden hue. Rushing by adding too many will produce soggy, greasy samosas.
- Fry the samosas for about 1 minute on each side: The short frying time achieves a crisp, golden exterior without overcooking the filling, and you should watch for a warm golden color emerging evenly across surfaces. The sound becomes a steady gentle crackle, and the oil will stop vigorous bubbling. If any spots turn dark brown quickly, your oil is too hot and you should reduce the heat.
- They should be golden and crispy but not develop dark brown spots: The ideal visual cue is a warm golden color, signaling that the pastry is cooked through and crisp. Dark brown spots mean the exterior has been overheated, often leading to slightly bitter flavors. Adjust heat between batches to maintain that even golden tone.
- Remove the fried samosas from the pan and place them on a paper towel-lined plate to allow any excess oil to be absorbed: The paper towels help draw away surface oil so the pastry remains crisp, and you will notice steam briefly rising as residual moisture escapes. Transfer to a warm plate if serving immediately. Leaving them on the paper towel too long can cool them, so serve within a short window for optimal texture.
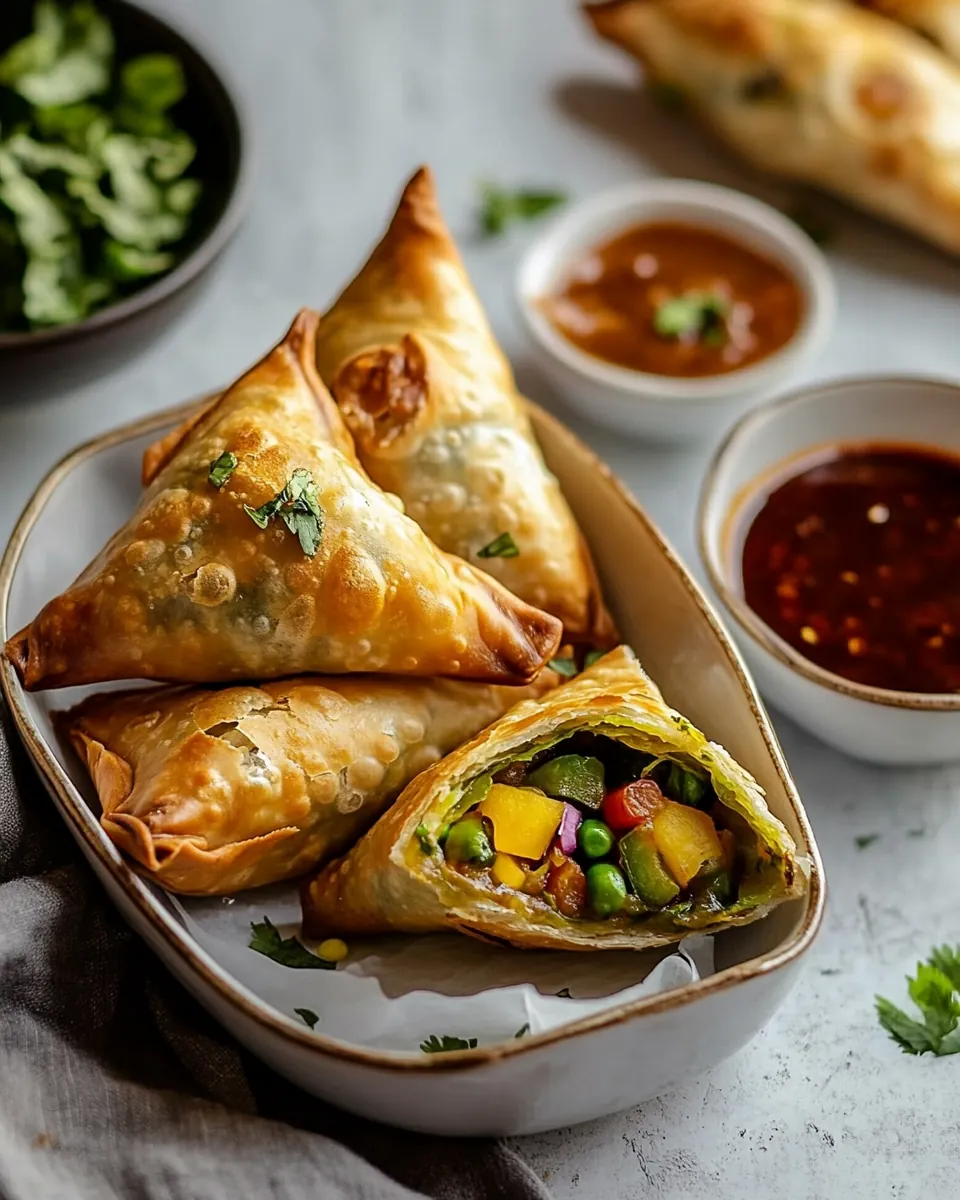
- Once all the samosas are finished frying, serve them fresh with Mango Chutney or tamarind sauce: Serving while warm ensures the crisp pastry and textured filling are at their best, and the sweet tang of chutney complements the spiced interior. Present them on a platter so guests can pick and dip, and enjoy the way the sauces enhance each mouthful.
Ways to Adapt This Recipe

These adaptations help you tailor Samosas to different occasions while keeping the core technique intact. I like to experiment but maintain the pastry to filling balance so the final bite is always satisfying.
- Make ahead folding You can shape and freeze uncooked samosas on a tray, then transfer them to a freezer bag. When ready to cook, fry from frozen, adding an extra minute or two to the frying time so the interior heats through.
- Adjust spice level Reduce the amount of green chili or remove seeds for milder heat, or increase for a spicier profile. Tasting the filling after cooling allows you to balance heat without risking over spicing the whole batch.
- Swap frying for shallow frying If you prefer to use less oil, shallow fry with about half the oil depth, turning frequently for even color. The texture will be slightly different but still satisfying if you keep the heat steady.
- Dough resting variations For an even flakier crust, chill the dough for one hour after mixing, then roll. This extra rest firms the fat and helps create more distinct layers on frying.
- Freeze filling separately If you want convenience without sacrificing texture, freeze the cooled filling in portioned scoops, then thaw in the refrigerator before assembling to keep the pastry dry.
Serving This Samosas
Serve Samosas while warm for the best crispness and contrast between pastry and filling. They are versatile for snacks, appetizers, or part of a larger meal, and pair beautifully with bright sauces that balance richness.
- Casual gatherings Arrange on a large platter with small bowls of Mango Chutney and tamarind sauce for dipping, so guests can graze and chat.
- Lunch or light dinner Serve two or three per person with a fresh salad and a cooling yogurt dip for a balanced meal that feels special but not heavy.
- Festive occasions Present them on decorative plates during celebrations, they work well for communal sharing during holidays and get togethers.
- Storage tips Store cooled samosas in an airtight container in the refrigerator for up to three days, and re crisp in a hot oven for 8 to 10 minutes before serving.
- Seasonal pairings In colder months I enjoy them with spiced chutneys and warm teas, while in warmer weather lighter, fruity dips complement the savory filling nicely.
FAQ
Conclusion
Samosas shine because they combine a crisp, flaky pastry with a warmly spiced, textured potato filling that is both familiar and exciting. If you enjoy hands on cooking and the satisfaction of sharing food, this recipe rewards the effort with impressive results and joyful feedback from guests. Give them a try the next time you want a snack that feels homemade and festive, and enjoy the way the crunch and spices bring people together.
Samosas
Equipment
- Large heavy bottom pan
- Mixing Bowl
- Rolling Pin
- Parchment Paper
Ingredients
- 2 cups all purpose flour Provide structure and binding in the dough by forming a pliable, rollable pastry; adds neutral flavor so savory filling stands out. Combine with fat and water to create pockets that hold the spiced filling and crisp when fried.
- 1 teaspoon thyme Add a subtle herbal note and mild earthiness to the dough or filling; supports the overall savory profile without overpowering other spices. Use sparingly to maintain balance and complement cilantro and garam masala.
- 1 teaspoon salt Enhance overall seasoning and balance flavors throughout both dough and filling; helps highlight aromatic spices and vegetables. Dissolve into the dough for even distribution or sprinkle into the filling to taste.
- 1/4 cup ghee, clarified butter Incorporate richness and flakiness into the dough by coating flour proteins and helping layers separate during frying; imparts a buttery aroma. Use at room temperature or melted depending on desired dough texture and handling.
- 8 -12 tablespoons cold water Bind the dough while controlling tenderness; add gradually until dough is just cohesive to avoid toughness. Keep water cold to maintain a flaky pastry texture and prevent excessive gluten development.
- 1 lb russet potatoes Provide the starchy base and hearty body of the filling when boiled and mashed; contribute a creamy mouthfeel that absorbs spices. Choose russet for floury texture and easy mashing, ensuring even size for consistent cooking.
- 1 tablespoon ghee, clarified butter Add depth and buttery flavor to the filling while helping sauté spices and aromatics; contributes subtle richness. Use during tempering to release essential oils from seeds and bind the ingredients.
- 1 teaspoon cumin seeds Introduce warm, slightly bitter, and aromatic notes when toasted; contribute a nutty, fragrant base for the filling's spice profile. Crack or lightly crush after tempering to release oils and intensify flavor.
- 1 teaspoon coriander seeds Contribute citrusy, warm, and slightly sweet undertones to the spice blend; support savory elements and add complexity. Lightly toast and crush to release the essential oils before mixing into the filling.
- 1/2 teaspoon fennel seeds Deliver a sweet-anise, cooling undertone that balances heavier spices and adds aromatic lift; use sparingly so it doesn't dominate. Toast and grind or use whole for tempering to release a mild licorice scent.
- 1 tablespoon ginger, minced Provide bright, pungent heat and fresh zing to the filling; helps cut through richness from potatoes and ghee. Mince finely so it distributes evenly, releasing fresh ginger oils during sautéing.
- 1 green chili, diced Bring sharp heat and vegetal brightness to the filling; enhances overall spiciness and adds texture contrast. Remove seeds if milder heat is desired and sauté briefly to mellow raw pungency.
- 1 cup green peas Contribute bursts of sweetness, color, and light vegetal texture to the filling; balance starchy potatoes with a tender pop. Use fresh or thawed frozen peas and add near the end of cooking to preserve shape and color.
- 1 teaspoon lemon juice Introduce bright acidity to balance richness and lift the filling's flavors; helps meld spices and vegetables. Squeeze in at the end of cooking to preserve fresh citrus aroma without overpowering other seasonings.
- 1 teaspoon fennel powder Add a concentrated fennel flavor in powdered form to enhance sweet-anise notes and provide aromatic continuity with whole fennel; offers uniform distribution. Use measured amounts to avoid overwhelming the spice balance.
- 1/2 teaspoon turmeric Impart warm earthiness and golden color while reducing pungency of other spices; supports the curry-like profile of the filling. Incorporate early in cooking to bloom in hot oil and release its color and mild flavor.
- 1 teaspoon garam masala Deliver complex warmth and blend multiple spices into a cohesive aromatic profile; finish the filling with rounded savory notes. Add toward the end of cooking to preserve volatile aromatics and avoid bitterness from overcooking.
- 1 tablespoon cilantro, minced Provide a fresh, herbaceous lift and bright finish that complements the spices; add a clean green flavor to the filling. Chop finely and stir in off heat to preserve delicate flavor and color.
- salt to taste Adjust seasoning to personal taste and ensure all elements are properly balanced; finalize saltiness after cooking. Add gradually and taste as the flavors concentrate to avoid over-salting.
- oil for frying Create the crisp, golden exterior by deep-frying the assembled samosas; provide the necessary heat transfer for a flaky, crunchy shell. Choose an oil with a high smoke point and maintain steady temperature for even browning.
Instructions
- In a bowl, whisk together 2 cups all purpose flour, 1 teaspoon thyme, and 1 teaspoon salt. Add 1/4 cup ghee, to the flour mixture and mix well with your fingers until all the ghee has been incorporated. You should have a shaggy dough that can hold its shape when pressed together.: The scent of flour combined with the faint herbal note of thyme creates a neutral canvas, and whisking evenly distributes the salt so every bite is balanced. You should see a uniform pale mixture with no pockets of seasoning, which helps the dough develop evenly when the ghee, clarified butter is incorporated. A common mistake is inadequate mixing, which leads to uneven texture in the pastry, so take a moment to whisk thoroughly.
- Add 8-12 tablespoons cold water, one tablespoon at a time, kneading the dough as you add it until it is fairly stiff. It shouldn't stick to your hands.: When you rub the ghee, clarified butter into the flour, it should feel like coarse sand or small peas, and you will notice a rich buttery aroma. This technique coats flour particles and prevents too much gluten formation, yielding flakier layers after frying. If you overwork this stage, the dough can become tough, so stop once the mixture resembles coarse crumbs.
- Cover the dough and let it rest for 30 minutes.: Pressing a handful should hold briefly, indicating proper fat distribution and hydration level. The shaggy look means you have not over-kneaded, which keeps the pastry tender. If it falls apart, add a little more water sparingly; if it is sticky, let it rest to relax the gluten.
- Peel 1 lb russet potatoes and cut them into 2-inch chunks. Then, boil them until they are just fork-tender. You don’t want them to be too soft and mushy.: Starting with cold water slows gluten development, which helps maintain tenderness. Knead just enough to bring the dough together into a cohesive ball, the surface should be smooth and firm to the touch. Rushing this step or adding too much water will yield a slack dough that is hard to shape and tears easily when you form cones.
- Drain the boiled potatoes, then roughly chop or crumble them; do not mash them. Set the potatoes aside.: A properly hydrated dough will feel pliable and slightly tacky, not sticky, which makes rolling and shaping manageable. If your hands are sticking, dust lightly with all purpose flour but avoid adding too much or the pastry may dry out. A sticky dough will tear when forming cones, so adjust water carefully.
- Heat 1 tablespoon ghee, in a medium-sized pan over medium-high heat. Add the 1 teaspoon cumin seeds, 1 teaspoon coriander seeds, and 1/2 teaspoon fennel seeds and saute until they begin to sizzle.: Resting relaxes gluten and allows the moisture to distribute evenly, making the dough easier to roll thin. You will notice it becomes more elastic and less likely to spring back while rolling. Skipping rest often results in dough that resists rolling and tears during shaping.
- To the pan, add 1 tablespoon ginger, 1 green chili, diced, and 1 cup green peas. Saute everything for about 2 minutes.: The earthy scent of russet potatoes is comforting, and cutting them into even chunks ensures uniform cooking. Larger chunks hold texture and avoid a gluey filling. A common error is cutting pieces that are too small, which leads to overcooked, mealy potatoes.
- Lastly, add 1 teaspoon lemon juice, 1/2 teaspoon turmeric, 1 teaspoon garam masala, 1 teaspoon fennel powder, 1 tablespoon cilantro, salt to taste, and potatoes. Mix everything well and saute for another 2 minutes.: You should hear a gentle simmer and see the water bubbling around the potato chunks, not a rolling boil that can break them apart. Fork tender means the fork slips in easily but the potato still holds a shape, which gives the filling texture. Overboiling will create a mashed consistency that lacks bite.
- Remove the filling from the pan and set it aside to cool. Once the filling has cooled nearly to room temperature, it is ready to assemble.: Draining removes excess moisture, and rough chopping leaves small, textured pieces that grip the spices and peas. You want visible potato structure in the filling, which gives each bite interest. Mashing would produce a pasty interior that does not contrast with the crisp pastry.
- Divide the dough into six equal portions, form into balls, cover, and let them rest for about 10 minutes.: Letting them cool slightly prevents the residual heat from wilting fresh ingredients like cilantro , and it helps the filling bind without becoming too soft. If you add hot potatoes to the pan, you risk overcooking the peas and losing bright flavors.
- Roll each ball into flat disks about 7 inches across. Press them between two pieces of parchment paper to roll flat.: When the ghee, clarified butter melts and shimmers, it will carry the aroma of toasted spices beautifully. You want a steady medium-high so the seeds sizzle rather than burn. If the fat smokes, lower the heat to avoid bitter flavors.
- Cover the flattened dough sections to keep them from drying out. Work with one dough section at a time.: The moment the seeds crackle, they release essential oils that perfume the kitchen with warm, nutty, and sweet notes. This sound is a great auditory cue that the spices are blooming. Be careful not to let them blacken, as that introduces bitterness to the filling.
- Cut the round in half, wet the flat edge of one half of the round, and press the ends together to form a cone.: The sizzling stops being dry and becomes aromatic as the ginger softens and the green chili releases its heat, while the green peas add a bright pop. Saute for about two minutes so the flavors marry but the peas retain a springy texture. Overcooking will make the peas dull and soft.
- Fill the cone with about two tablespoons of the filling and gently pack it in. Wet the inside edge of the open side and press it closed.: Two minutes is enough to shed raw edges off the ginger and chili and to warm the peas, creating a lively, fragrant base. You should smell a fragrant blend of spice and freshness, and the pan will have a gentle sizzle. If your pan is too hot, lower it to avoid burning the aromatics.
- Repeat with the other half of the round and then with the rest of the dough. This will yield 12 samosas.: The lemon juice brightens the mixture while turmeric and garam masala deepen the color and warmth. Toss in the chopped potatoes and let them pick up the spiced coating so each piece has pockets of flavor. A common oversight is adding lemon too early, which can dissipate its fresh acidity.
- Heat 2 inches of oil for frying in a large, heavy-bottom pan over medium heat. When the oil is hot enough, a toothpick or wooden skewer inserted into the oil should sizzle.: In this brief interval the potatoes absorb flavors and the filling firms up slightly, creating a textured, cohesive mixture. You will see the potatoes glisten and notice a layered aroma of toasted seeds and warm spice. Avoid over stirring, which can break the potato pieces down.
- Add enough samosas to the pan to leave some room in between. You will need to work in batches. Fry the samosas for about 1 minute on each side. They should be golden and crispy but not develop dark brown spots.: Cooling prevents the heat from wilting the pastry when you fill the cones and helps the filling bind. The smell will be fragrant and inviting, but patience here ensures easier assembly and fewer steam bursts inside the pastry. Stuffing with very hot filling can make the dough soggy.
- Remove the fried samosas from the pan and place them on a paper towel-lined plate to allow any excess oil to be absorbed.: At this point the filling holds together without being sticky, and the flavors have settled so you can taste and adjust seasoning. A lukewarm filling prevents steam pockets and soggy pastry during frying. If it is too warm, let it cool further before filling.
- Once all the samosas are finished frying, serve them fresh with Mango Chutney or tamarind sauce.: Resting makes each ball easier to roll thinly, and covering prevents surface drying. You will notice the dough relax and become more workable. Not resting can cause the pastry to spring back while rolling.
- Roll each ball into flat disks about 7 inches across: A seven inch disk gives you a good balance between enough pastry for sealing and thinness for crisping. Roll evenly so the thickness is uniform, which ensures even frying. Uneven thickness leads to parts that cook faster and either burn or remain doughy.
- Press them between two pieces of parchment paper to roll flat: Using parchment prevents sticking and helps you achieve a smooth surface. You will see a consistent, pale disk that feels silky under your rolling pin. If you peel and notice tearing, patch with a little flour and press gently rather than re rolling aggressively.
- Cover the flattened dough sections to keep them from drying out: A quick cover with a damp cloth or plastic wrap preserves pliability. Dry edges are harder to seal and can crack during frying, so keep sections covered until you form the cones. Working uncovered often causes frustrating cracks.
- Work with one dough section at a time: Focusing on one piece prevents the remainder from drying and ensures consistent assembly. The first few will teach you the rhythm, and then the process speeds up. If you rush and leave others exposed, you will need to re moisten edges which is messy.
- Cut the round in half, wet the flat edge of one half of the round, and press the ends together to form a cone: The wet edge acts as glue, and you will feel the pastry seal with a gentle pinch. A well sealed cone avoids leakage during frying, and the opening should hold shape to accept the filling. If you skip wetting, seams may open in the oil.
- Fill the cone with about two tablespoons of the filling and gently pack it in: The filling should sit snugly without bulging the pastry, and you will notice the warmth and scent when it is properly packed. Gently pressing ensures no air pockets form, which can burst during frying. Overfilling leads to splitting in the oil.
- Wet the inside edge of the open side and press it closed: A final seam seal ensures the samosa remains intact while frying, and you should hear a faint stick as the pastry adheres. Smooth the edge so it lies flat and even, producing a neat pyramid. Poor sealing is the most common reason for leakage and soggy spots.
- Repeat with the other half of the round and then with the rest of the dough: As you repeat, your movement will become fluid and the shapes more uniform, yielding roughly twelve samosas that are similar in size. Consistency makes frying easier because they will cook at the same rate. If sizes vary greatly, some will brown faster than others.
- This will yield 12 samosas: Counting them gives you a target and helps with portioning for frying batches so they cook evenly. If you prefer smaller snacks, you can make more with less filling per cone, but keep frying time in mind.
- Heat 2 inches of oil for frying in a large, heavy-bottom pan over medium heat: Two inches of hot oil allows the samosas to float slightly and develop an even crust, and a heavy pan maintains steady temperature. Look for a gentle shimmer and small wisps of steam. If the oil is too shallow, the samosas will bottom out and brown unevenly.
- When the oil is hot enough, a toothpick or wooden skewer inserted into the oil should sizzle: That sizzle is your readiness signal, and it tells you the oil is at the right stage for frying. Drop a small piece of dough to test; it should rise steadily and brown slowly. If the test browns instantly, lower the heat to avoid burning the exterior.
- Add enough samosas to the pan to leave some room in between: Crowding lowers the oil temperature and causes uneven frying, so leave space to maintain a gentle simmer around each piece. You will hear a steady, even sizzle when the spacing is correct. If the sound is frantic and the oil foams, remove a few so the temperature recovers.
- You will need to work in batches: Patience here keeps results consistent, and it helps maintain oil temperature for each batch. Between batches, adjust heat slightly so the next set cooks to the same golden hue. Rushing by adding too many will produce soggy, greasy samosas.
- Fry the samosas for about 1 minute on each side: The short frying time achieves a crisp, golden exterior without overcooking the filling, and you should watch for a warm golden color emerging evenly across surfaces. The sound becomes a steady gentle crackle, and the oil will stop vigorous bubbling. If any spots turn dark brown quickly, your oil is too hot and you should reduce the heat.
- They should be golden and crispy but not develop dark brown spots: The ideal visual cue is a warm golden color, signaling that the pastry is cooked through and crisp. Dark brown spots mean the exterior has been overheated, often leading to slightly bitter flavors. Adjust heat between batches to maintain that even golden tone.
- Remove the fried samosas from the pan and place them on a paper towel-lined plate to allow any excess oil to be absorbed: The paper towels help draw away surface oil so the pastry remains crisp, and you will notice steam briefly rising as residual moisture escapes. Transfer to a warm plate if serving immediately. Leaving them on the paper towel too long can cool them, so serve within a short window for optimal texture.
- Once all the samosas are finished frying, serve them fresh with Mango Chutney or tamarind sauce: Serving while warm ensures the crisp pastry and textured filling are at their best, and the sweet tang of chutney complements the spiced interior. Present them on a platter so guests can pick and dip, and enjoy the way the sauces enhance each mouthful.
Notes
- Make ahead folding You can shape and freeze uncooked samosas on a tray, then transfer them to a freezer bag. When ready to cook, fry from frozen, adding an extra minute or two to the frying time so the interior heats through.
- Adjust spice level Reduce the amount of green chili or remove seeds for milder heat, or increase for a spicier profile. Tasting the filling after cooling allows you to balance heat without risking over spicing the whole batch.
- Swap frying for shallow frying If you prefer to use less oil, shallow fry with about half the oil depth, turning frequently for even color. The texture will be slightly different but still satisfying if you keep the heat steady.
- Dough resting variations For an even flakier crust, chill the dough for one hour after mixing, then roll. This extra rest firms the fat and helps create more distinct layers on frying.
- Freeze filling separately If you want convenience without sacrificing texture, freeze the cooled filling in portioned scoops, then thaw in the refrigerator before assembling to keep the pastry dry.