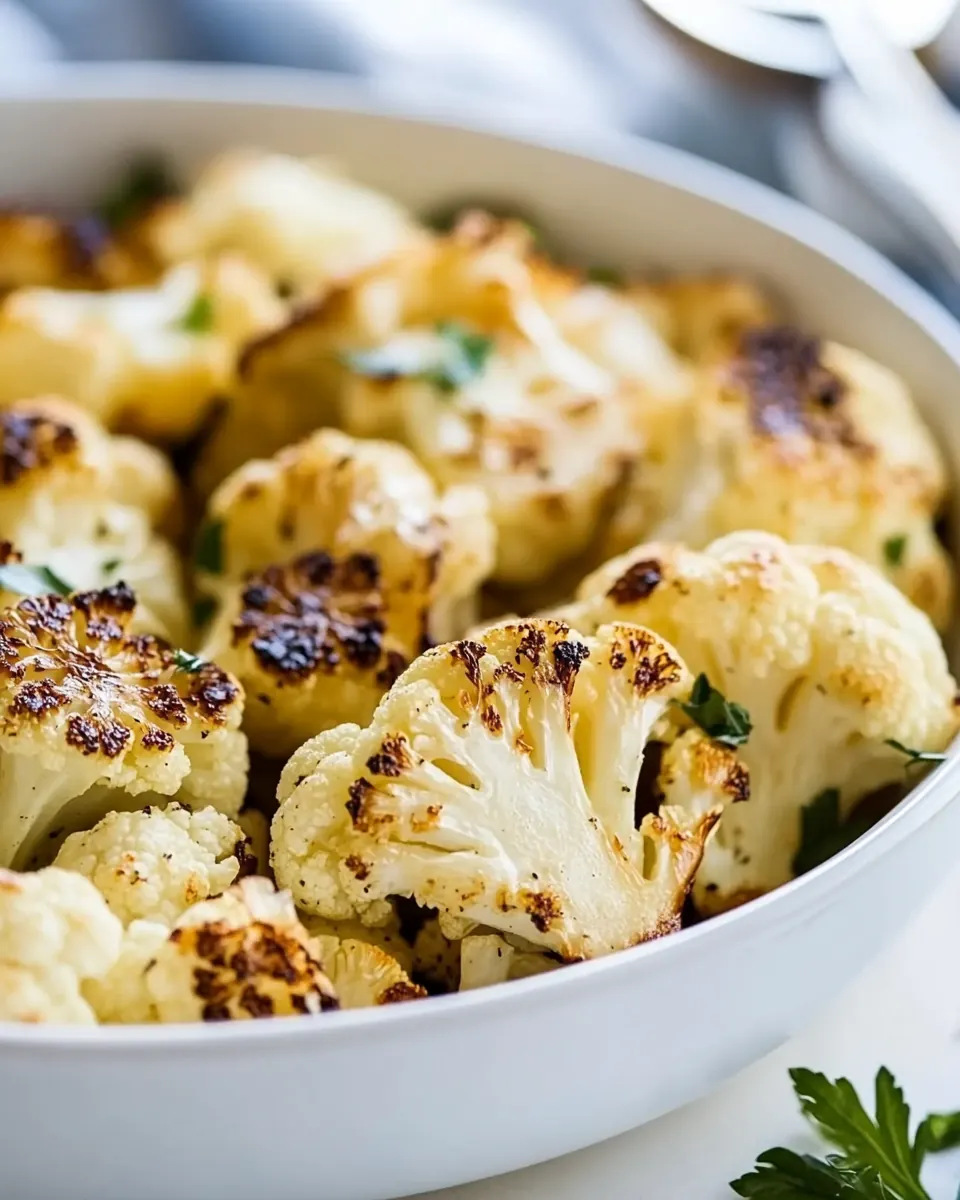
Roasted Cauliflower
Roasted Cauliflower is one of those simple dishes I come back to when I want big flavor with almost no fuss.
I remember the first time I roasted a head of cauliflower and how the kitchen filled with a warm, nutty aroma that felt like the start of something cozy. I was short on time but wanted a side that could stand up to a boldly seasoned main, so I cut the cauliflower into small florets to coax out caramelized edges. When it came out of the oven, the texture was a perfect balance of tender and crisp, and every bite had a toasty, slightly sweet note that made me smile.
Since then, I turn to Roasted Cauliflower for weeknight dinners, casual potlucks, and when I need to make a lot of people happy with minimal effort. The method is forgiving, and the results are reliably comforting. I’ll tell you how I coax the best texture and flavor from a single head of cauliflower, and why small changes in the process produce noticeably different results. Whether you want deeply browned bits or a softer finish, this approach helps you hit the texture you crave.
Recipe Snapshot
35 mins
5 mins
30 mins
Medium
120 kcal
American
Vegan, Gluten-Free
Side Dishes
Metal baking sheet, Aluminum foil, Metal spatula
Why This Roasted Cauliflower Is So Good
It is wildly simple
I love that Roasted Cauliflower requires just a handful of pantry items, yet rewards you with rich, focused flavor. A quick toss with olive oil, a sprinkle of kosher salt, and a pinch of black pepper are enough to transform the vegetable into something almost indulgent. Because the ingredient list is short, each component matters, and I enjoy tweaking quantities to suit my mood.
Texture you can trust
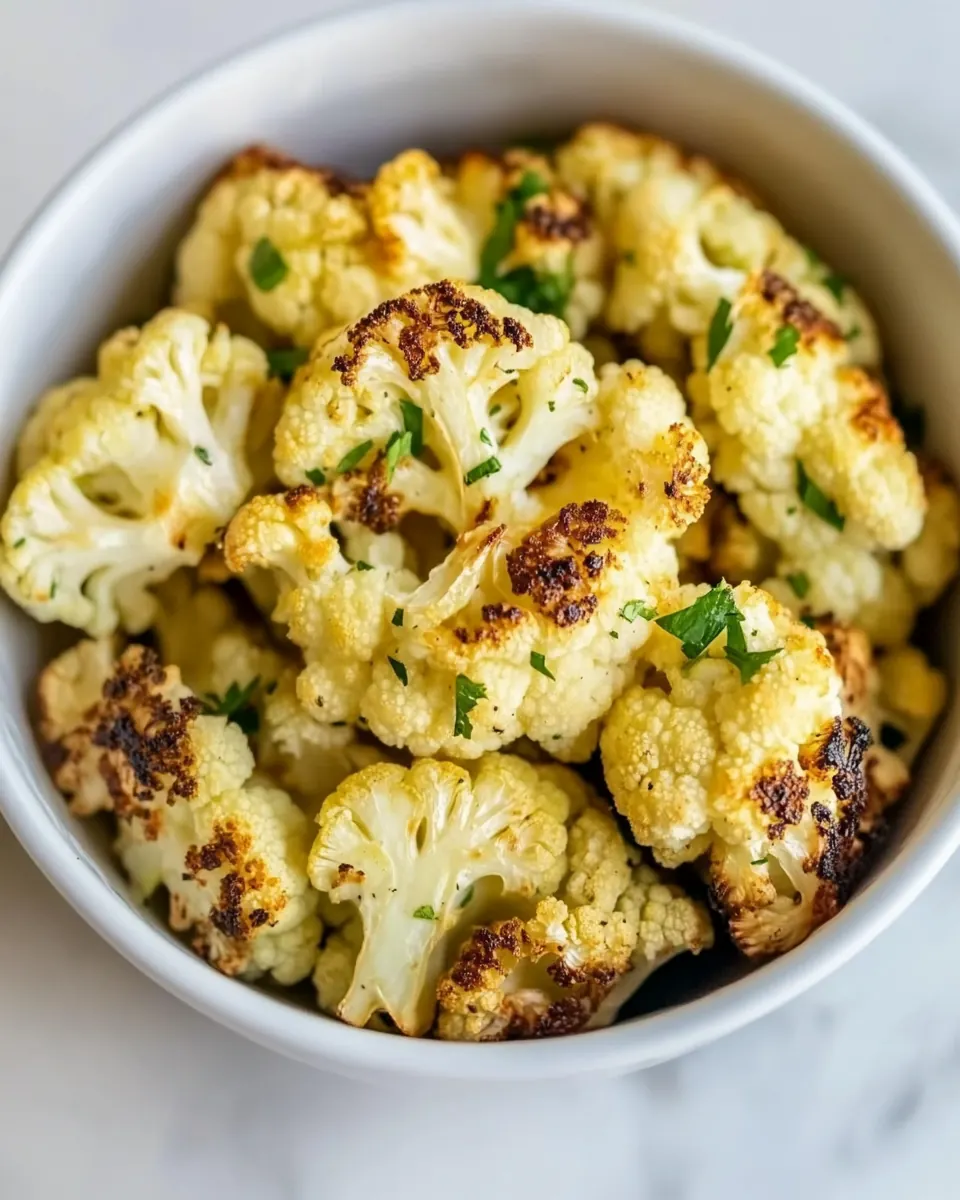
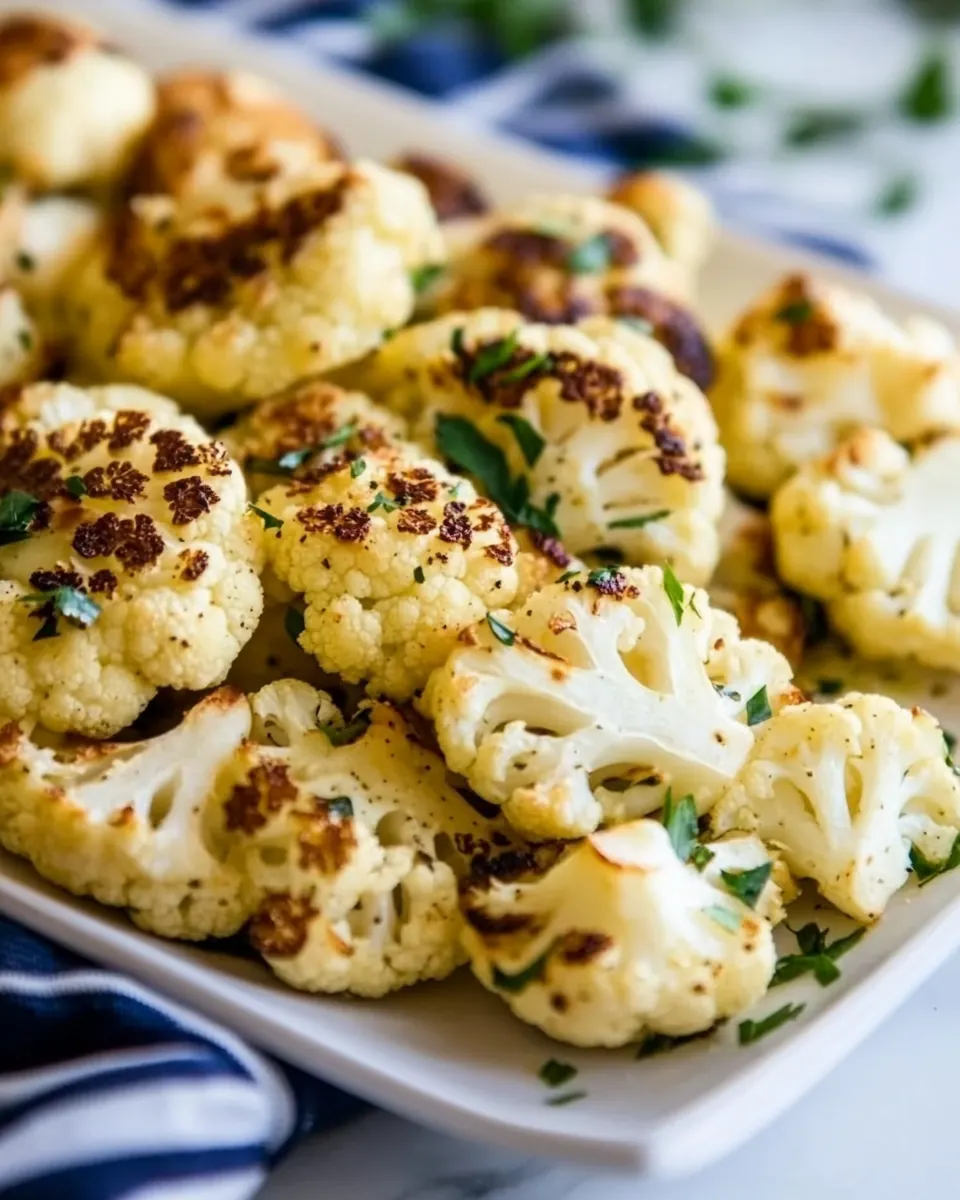
The roasting method delivers crispy edges and a creamy interior, a contrast I crave. When I cut the cauliflower into smaller florets, I get more surface area for browning, and that toasty caramelization creates savory notes that lift the whole dish. Roasting at a high temperature keeps the centers tender without turning them mushy.
Versatile on the table
I often switch up how I serve Roasted Cauliflower. It plays well next to a protein, stars on a vegetarian plate, or becomes a crunchy salad topper. Because the flavors are straightforward, it pairs with lots of cuisines, so I never feel boxed in when planning a meal.
Great for batch cooking
This recipe scales easily, and I like to prepare a full sheet pan for leftovers. Reheating briefly under a broiler or in a hot skillet revives the crisp edges, which is perfect for quick lunches or when I need a fast side during a busy week.
Comforting and crowd pleasing
Whether I’m cooking for family or friends, Roasted Cauliflower is one of those dishes that disappears fast. It satisfies picky eaters and adventurous palates alike, which is why I keep it in my regular rotation.
Recipe Ingredients for Roasted Cauliflower
These ingredients keep the recipe intentionally minimal. The philosophy is to let the natural sweetness of cauliflower shine, while olive oil helps promote browning, and salt plus pepper sharpen the flavor. Each component plays a clear role, so small adjustments yield noticeable differences in taste and texture.
- 1 head cauliflower: Trim and break into florets to provide the main vegetable base for roasting; delivers a tender interior and caramelized edges when cooked at high heat. Absorbs seasonings and oil, creating a savory centerpiece for the dish.
- 1 tablespoon olive oil: Coat the cauliflower evenly to promote browning and prevent drying; contributes subtle fruity flavor and helps salt and pepper adhere. Facilitates crisp exterior texture while keeping the florets moist inside.
- 1 teaspoon kosher salt: Season the florets evenly to enhance natural flavors and balance sweetness from caramelization; helps draw out moisture for better browning. Use kosher salt for a cleaner, less intense saltiness that distributes well across the vegetable.
- 1/4 teaspoon black pepper: Add a light, sharp heat to taste and highlight savory notes without overpowering; cracked black pepper creates a mild pungency that complements roasted cauliflower. Sprinkle sparingly to avoid dominating the delicate vegetable flavors.
How to Make Roasted Cauliflower
This method is straightforward and forgiving, so I like to give a quick orientation before you start. The goal is to create a sheet pan of florets that are tender inside with deeply browned, slightly crispy edges. Pay attention to visual cues and simple sensory notes as you go.
- Preheat oven to 450°F and coat a large metal baking sheet with a small amount of olive oil.: You will smell a warm, clean oven air as it approaches temperature, which ensures the surface heat is high enough to brown the cauliflower . The hot sheet helps create immediate sizzle when the florets hit the pan, promoting caramelized edges. Use a light film of olive oil so the pieces do not stick, but avoid pooling oil which can steam the florets instead of roasting them. A common error at this stage is not allowing the oven to fully preheat, which leads to pale, less flavorful results.
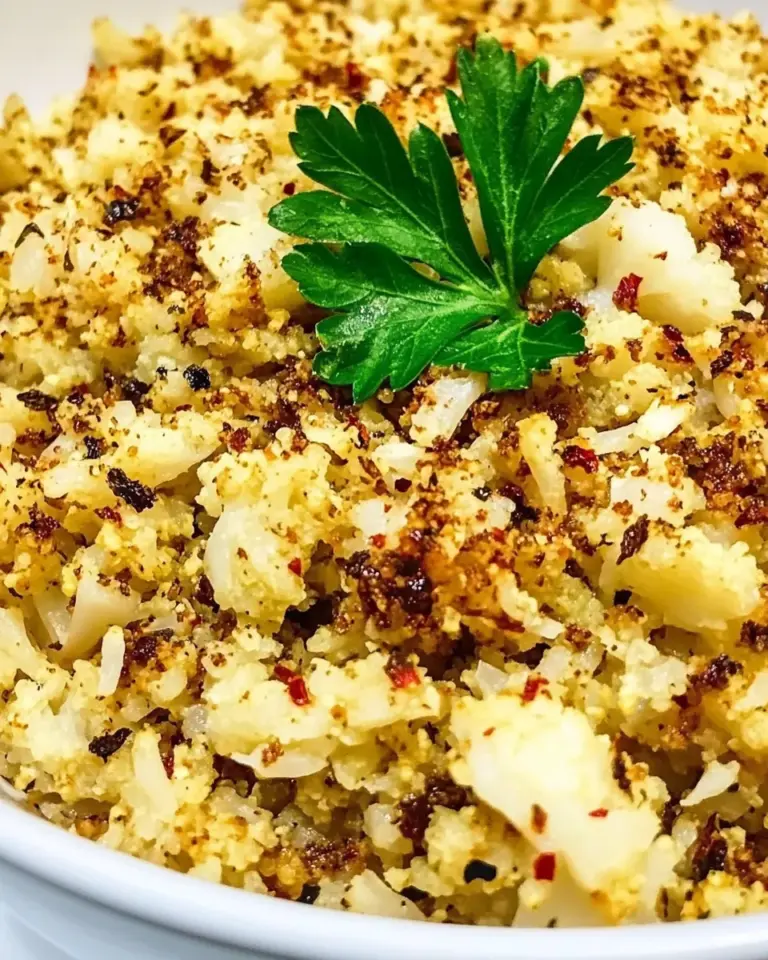
- Wash and dry cauliflower and cut into florets. The smaller you cut it, the more toasty and crispy the edges will get.: You will notice a fresh, green vegetal scent as you trim the head. Drying the pieces thoroughly is essential, because moisture on the surface turns to steam in the oven and prevents crisping. When you cut into smaller florets, they offer more exposed surface area, producing more toasty, crunchy edges. Avoid uneven sizes, which cause inconsistent cooking, leaving some pieces underdone while others burn.
- Place the cauliflower in a pile on the baking sheet, drizzle with about a tablespoon of olive oil and sprinkle with salt and pepper.: The little hiss of oil when it meets the hot sheet is satisfying and signals the start of caramelization. Tossing them in the oil lets the seasonings adhere, and you should see a faint glossy coat. If the oil is uneven, some florets will brown faster than others, so make sure every piece has a light coating. Overcrowding with excess oil or seasoning can result in uneven browning.
- Toss to coat and spread into a single layer on the baking sheet.: You'll hear the soft scrape as pieces settle into place, and seeing them in a single layer is crucial so hot air circulates around each floret for even browning. If pieces overlap, the covered spots steam instead of roast, producing limp texture. Resist the urge to crowd the pan, and use a second sheet if necessary to keep space between pieces.
- Cover tightly with aluminum foil and bake for 20 minutes.: Covering creates a short steam phase that helps cook the interiors through, making the centers tender. While covered, the oven air softens the vegetable, and you may notice a gentle, sweet smell as starches soften. The common mistake here is leaving the foil on too long, which prevents the surfaces from browning later. Remove the foil at the right time to allow the exterior to dry and crisp.
- Remove from the oven and using a metal spatula, gently flip the cauliflower.: When you lift the foil, a warm, roasted aroma will rise, and you may see some beginning caramelization. Gently flipping exposes new surfaces to direct heat, so you get more even browning. Use a metal spatula to separate any pieces that stuck, but be careful not to smash them, which would release moisture. Ripping or roughly turning can break florets and make the texture mushy.
- Return, uncovered to the oven, and roast for an additional 10-15 minutes, flipping again after about 10 minutes.: In this final stage, you will hear faint crackles as edges crisp, and the color deepens to golden and amber spots appear. This uncovered roast develops the signature toasty notes and slight chew on the tips. Flip once more to ensure all sides reach similar browning, and watch closely near the end to prevent burning. A frequent error is leaving the pan unattended during this last stretch, which can push some pieces from beautifully caramelized to bitterly charred.
Tips for Success
I like to think of these tips as small habits that consistently improve your results. They are practical, proven, and based on what I do in my own kitchen to get reliably crisp, flavorful Roasted Cauliflower.
- Use room temperature vegetables to help the florets roast evenly because cold centers take longer to heat through, which can lead to overbrowned outsides and undercooked middles.
- Choose a metal baking sheet rather than glass, because metal transmits heat faster and encourages better browning on the bottom of each floret.
- Trim into similar sized pieces so every floret finishes at the same time, minimizing guesswork and preventing some pieces from drying out while others remain firm.
- Apply oil sparingly and evenly since too much oil can pool and steam, while too little leaves dry spots that will not brown properly.
- Rotate the pan halfway through if your oven has hot spots, this simple movement promotes uniform color across the batch.
- Let the roasted pieces rest briefly off the heat to let their surface settle, which makes them easier to handle and deepens the flavors as they cool slightly.
Serving Ideas for Roasted Cauliflower
Roasted Cauliflower is easy to dress up or serve simply, and it works across many occasions. Below are thoughtful serving suggestions, pairing ideas, and storage guidance so you can make the most of every batch.
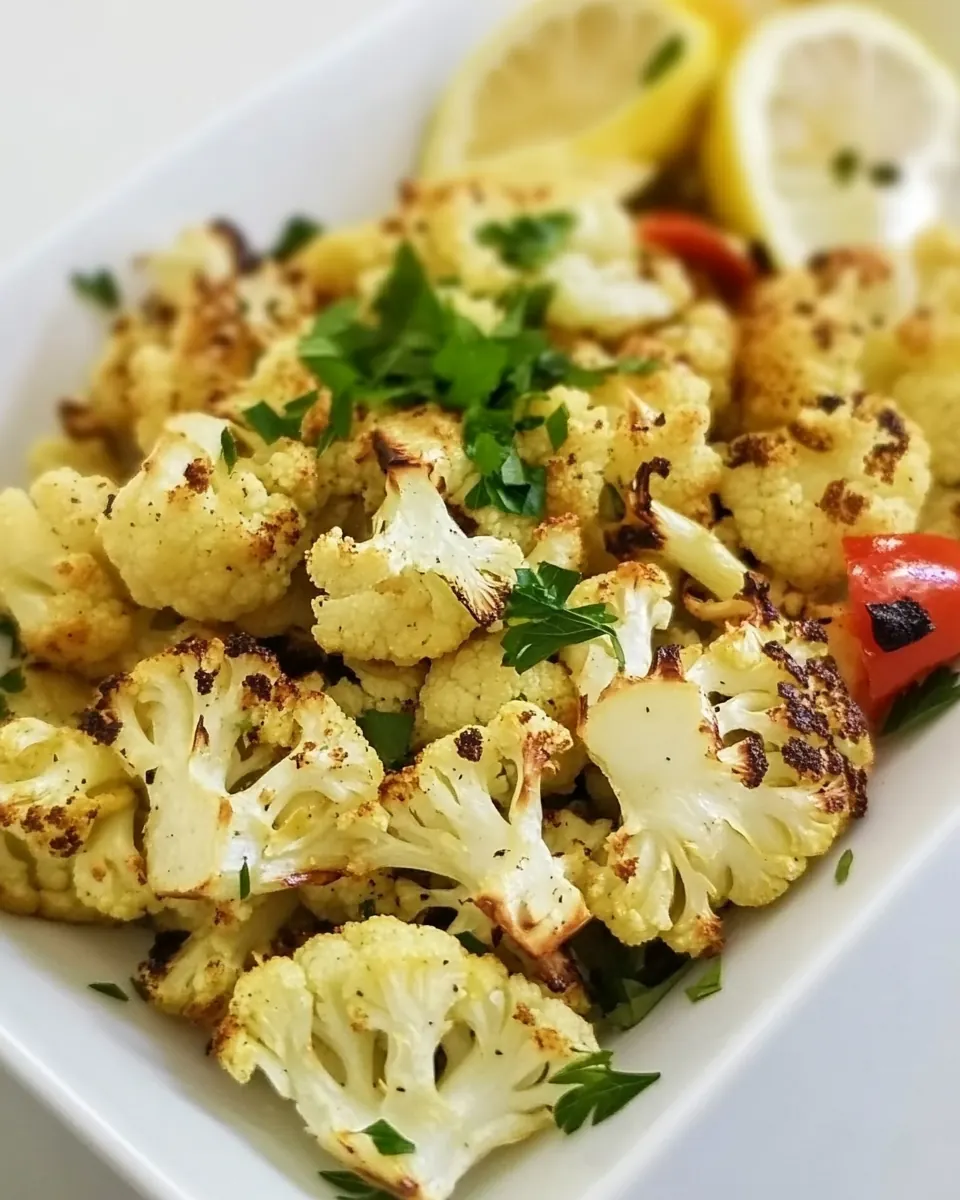
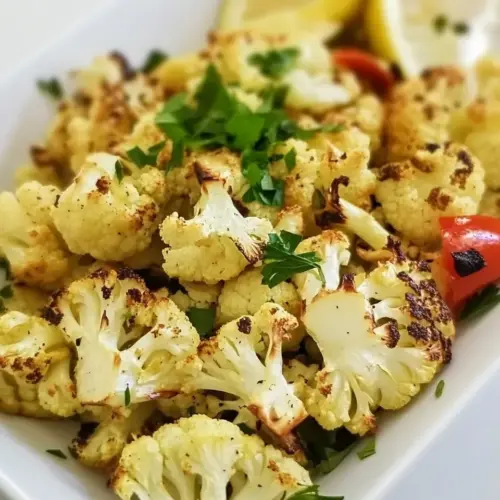
- Simple weeknight side, serve the roasted florets with a squeeze of fresh lemon or a sprinkle of chopped fresh herbs for a bright finish that complements roasted proteins.
- Vegetarian main, pile the florets on a bed of grains like quinoa or farro and drizzle with a tahini dressing to create a satisfying meatless plate.
- Party platter, arrange the roasted pieces with bowls of dips such as yogurt or hummus, offering guests an easy finger food that stays warm briefly under a heat lamp.
- Meal prep, store cooled florets in an airtight container in the fridge for up to four days and reheat in a hot skillet to revive crisp edges for quick lunches.
- Seasonal pairing, during fall I pair it with roasted root vegetables and mustardy dressings, which echo the warm, caramel notes of the cauliflower.
- Occasions, it is suitable for casual dinners, family gatherings, and during Ramadan I find it works well as part of an iftar spread because it is nourishing and easy to share.
FAQ
Conclusion
Roasted Cauliflower stands out for its simplicity and satisfying texture, combining tender interiors with toasty, caramelized edges. Give it a try the next time you want a low effort side that still feels special. I hope this method helps you get consistent results and encourages you to put this humble vegetable on repeat in your meal plans.
Roasted Cauliflower
Equipment
- Metal baking sheet
- Aluminum Foil
- Metal spatula
Ingredients
- 1 head cauliflower Trim and break into florets to provide the main vegetable base for roasting; delivers a tender interior and caramelized edges when cooked at high heat. Absorbs seasonings and oil, creating a savory centerpiece for the dish.
- 1 tablespoon olive oil Coat the cauliflower evenly to promote browning and prevent drying; contributes subtle fruity flavor and helps salt and pepper adhere. Facilitates crisp exterior texture while keeping the florets moist inside.
- 1 teaspoon kosher salt Season the florets evenly to enhance natural flavors and balance sweetness from caramelization; helps draw out moisture for better browning. Use kosher salt for a cleaner, less intense saltiness that distributes well across the vegetable.
- 1/4 teaspoon black pepper Add a light, sharp heat to taste and highlight savory notes without overpowering; cracked black pepper creates a mild pungency that complements roasted cauliflower. Sprinkle sparingly to avoid dominating the delicate vegetable flavors.
Instructions
- Preheat oven to 450°F and coat a large metal baking sheet with a small amount of olive oil.: You will smell a warm, clean oven air as it approaches temperature, which ensures the surface heat is high enough to brown the cauliflower . The hot sheet helps create immediate sizzle when the florets hit the pan, promoting caramelized edges. Use a light film of olive oil so the pieces do not stick, but avoid pooling oil which can steam the florets instead of roasting them. A common error at this stage is not allowing the oven to fully preheat, which leads to pale, less flavorful results.
- Wash and dry cauliflower and cut into florets. The smaller you cut it, the more toasty and crispy the edges will get.: You will notice a fresh, green vegetal scent as you trim the head. Drying the pieces thoroughly is essential, because moisture on the surface turns to steam in the oven and prevents crisping. When you cut into smaller florets, they offer more exposed surface area, producing more toasty, crunchy edges. Avoid uneven sizes, which cause inconsistent cooking, leaving some pieces underdone while others burn.
- Place the cauliflower in a pile on the baking sheet, drizzle with about a tablespoon of olive oil and sprinkle with salt and pepper.: The little hiss of oil when it meets the hot sheet is satisfying and signals the start of caramelization. Tossing them in the oil lets the seasonings adhere, and you should see a faint glossy coat. If the oil is uneven, some florets will brown faster than others, so make sure every piece has a light coating. Overcrowding with excess oil or seasoning can result in uneven browning.
- Toss to coat and spread into a single layer on the baking sheet.: You'll hear the soft scrape as pieces settle into place, and seeing them in a single layer is crucial so hot air circulates around each floret for even browning. If pieces overlap, the covered spots steam instead of roast, producing limp texture. Resist the urge to crowd the pan, and use a second sheet if necessary to keep space between pieces.
- Cover tightly with aluminum foil and bake for 20 minutes.: Covering creates a short steam phase that helps cook the interiors through, making the centers tender. While covered, the oven air softens the vegetable, and you may notice a gentle, sweet smell as starches soften. The common mistake here is leaving the foil on too long, which prevents the surfaces from browning later. Remove the foil at the right time to allow the exterior to dry and crisp.
- Remove from the oven and using a metal spatula, gently flip the cauliflower.: When you lift the foil, a warm, roasted aroma will rise, and you may see some beginning caramelization. Gently flipping exposes new surfaces to direct heat, so you get more even browning. Use a metal spatula to separate any pieces that stuck, but be careful not to smash them, which would release moisture. Ripping or roughly turning can break florets and make the texture mushy.
- Return, uncovered to the oven, and roast for an additional 10-15 minutes, flipping again after about 10 minutes.: In this final stage, you will hear faint crackles as edges crisp, and the color deepens to golden and amber spots appear. This uncovered roast develops the signature toasty notes and slight chew on the tips. Flip once more to ensure all sides reach similar browning, and watch closely near the end to prevent burning. A frequent error is leaving the pan unattended during this last stretch, which can push some pieces from beautifully caramelized to bitterly charred.
Notes
- Use room temperature vegetables to help the florets roast evenly because cold centers take longer to heat through, which can lead to overbrowned outsides and undercooked middles.
- Choose a metal baking sheet rather than glass, because metal transmits heat faster and encourages better browning on the bottom of each floret.
- Trim into similar sized pieces so every floret finishes at the same time, minimizing guesswork and preventing some pieces from drying out while others remain firm.
- Apply oil sparingly and evenly since too much oil can pool and steam, while too little leaves dry spots that will not brown properly.
- Rotate the pan halfway through if your oven has hot spots, this simple movement promotes uniform color across the batch.
- Let the roasted pieces rest briefly off the heat to let their surface settle, which makes them easier to handle and deepens the flavors as they cool slightly.