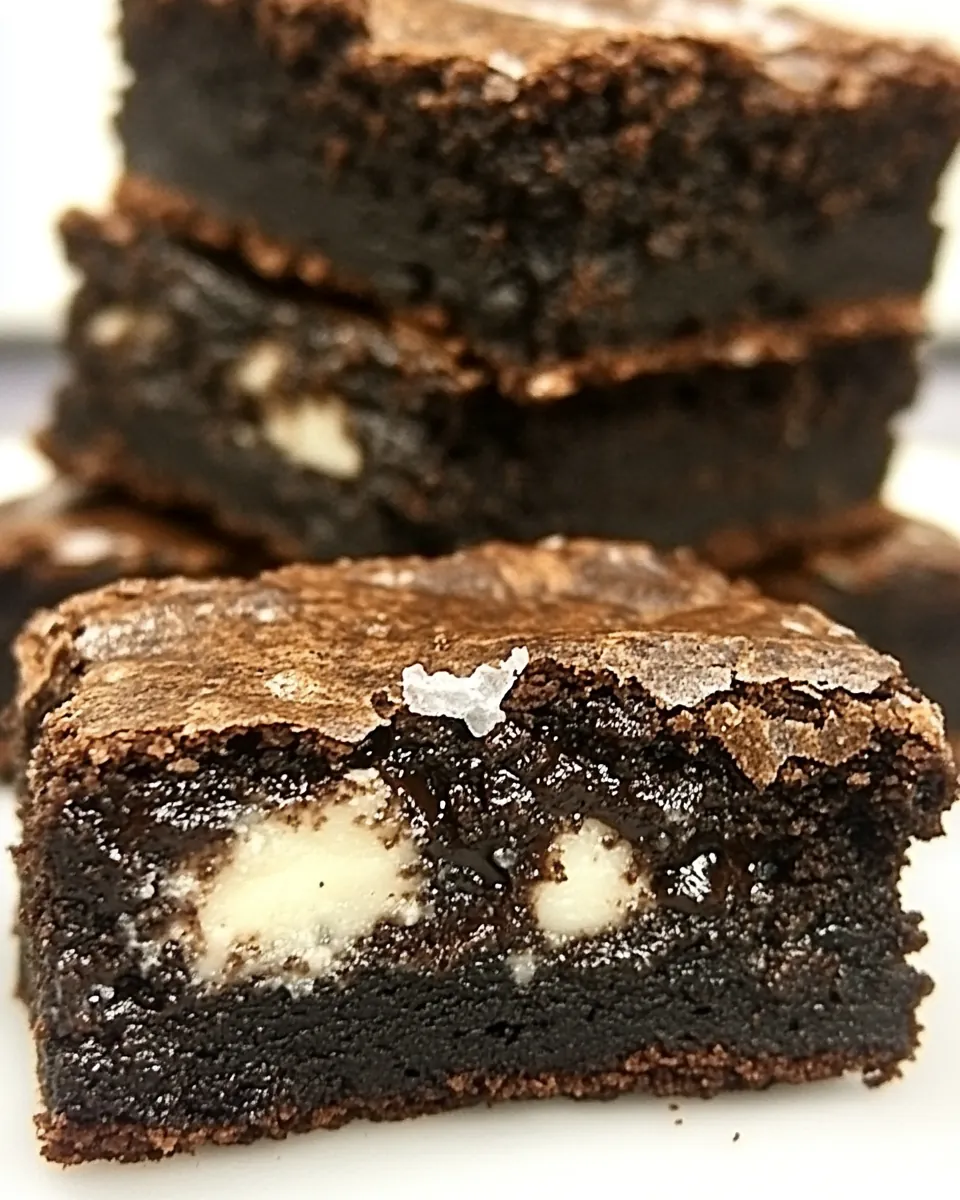
Chocolate Chip Cookie Oreo Fudge Brownie Bar
Chocolate Chip Cookie Oreo Fudge Brownie Bar is the kind of over the top treat I reach for when I want to make a crowd smile and feel a little nostalgic at the same time. The first time I layered soft cookie dough, whole sandwich cookies, and gooey fudge brownie batter in one pan I remember the way the kitchen smelled, like warm sugar and cocoa, and how everyone hovered impatiently while the bars cooled. I love how this recipe blends textures, because a single bite gives you a tender cookie edge, a crunchy Oreo middle, and a fudgy brownie top.
When I bring these to potlucks I never announce the components, I just serve squares and watch people guess. One friend swore there was a secret bakery inside my oven, another said it reminded them of after school treats. I find the magic is in the hands on process, pressing the dough, arranging the Oreos, and knowing that the final bake will knit everything together into one portable dessert. Over time I learned simple tricks that make the bars cut cleanly and keep the layers distinct, and those small habits make all the difference when I want consistent results.
Recipe Snapshot
1 hr 5 mins
20 mins
45 mins
Medium
250 kcal
American
Gluten-Free, Low FODMAP
Desserts
9×13 inch baking pan, Parchment paper, Electric mixer, Mixing bowls, Spatula
Why You Need This Chocolate Chip Cookie Oreo Fudge Brownie Bar
Layers that play well together
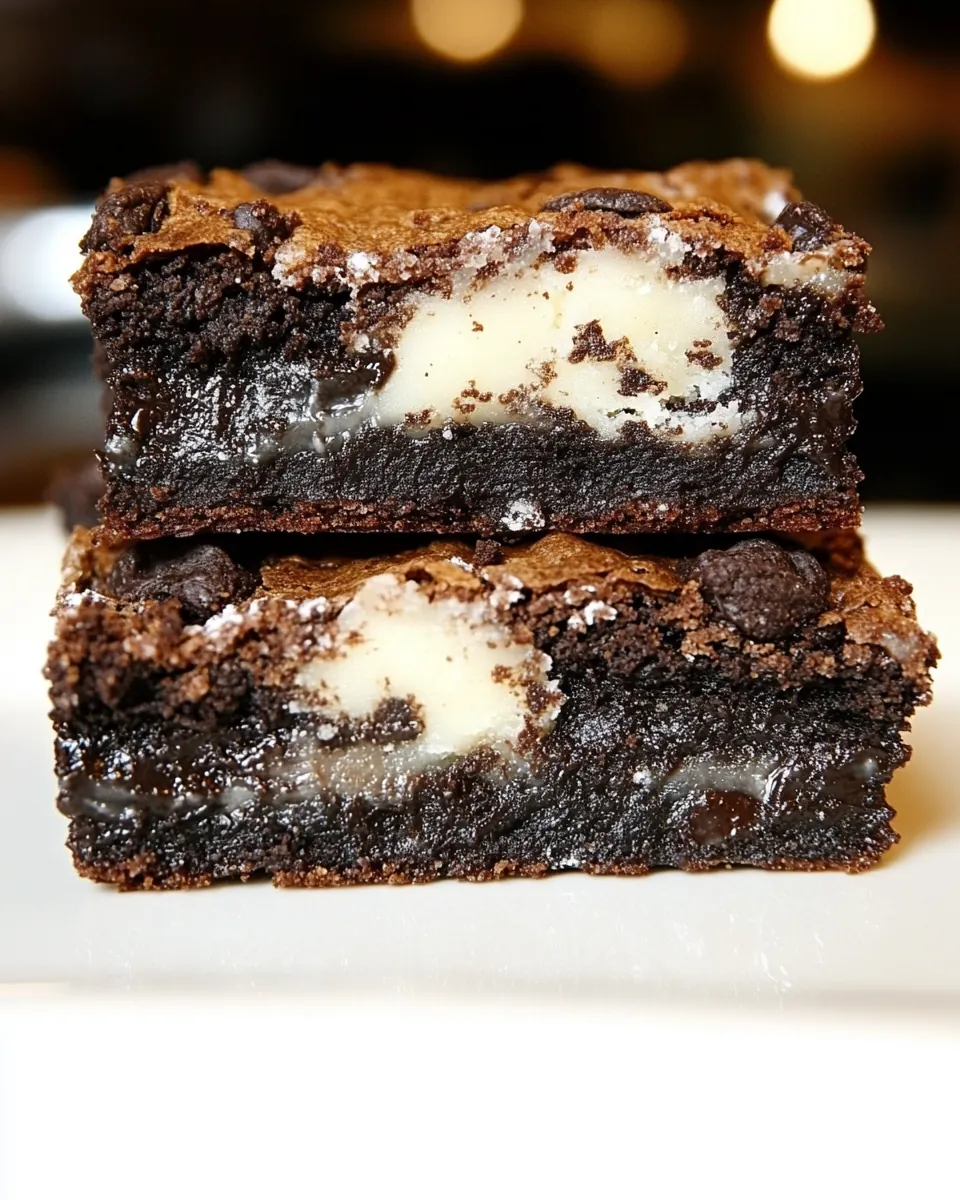
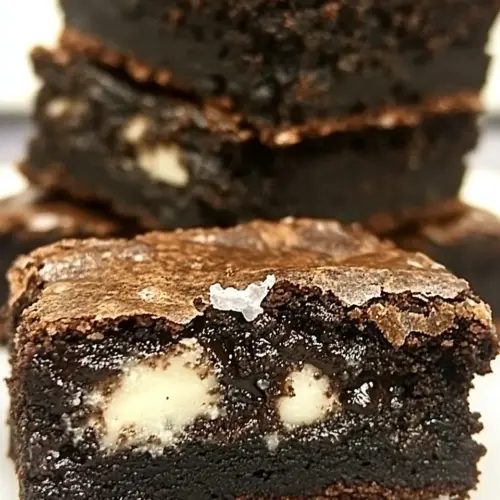
I love how the structure of Chocolate Chip Cookie Oreo Fudge Brownie Bar gives you three distinct textures in one slice. The tender cookie dough at the base provides a chewy cushion, the whole Oreos add a satisfying snap, and the fudgy brownie top seals everything with creamy richness. Each layer keeps its personality but harmonizes into a single unforgettable bite.
Simple ingredients, big payoff
One of the reasons I keep coming back to this recipe is its accessibility. With pantry staples like butter, flour, and chocolate chips, plus a boxed brownie mix if you wish, you can deliver bakery level drama without an intimidating ingredient list. That combination makes this a reliable choice for last minute gatherings, and I often get asked for the recipe because the results always look impressive.
Great for sharing and gifting
I’ve wrapped these bars in wax paper and ribbon more times than I can count, because they travel well and cut into tidy squares. The sturdiness of the base cookie layer helps them hold up, while the Oreo layer prevents the top from sliding, so they keep their charm on the go. I like gifting a small stack of bars when I want to show appreciation, they feel indulgent but approachable.
Customizable and forgiving
I appreciate that the recipe lets you tweak without breaking the final result. You can swap chocolate chip types, use different sandwich cookies, or stir in extra fudge bits, and the bars still come out fabulous. The method is forgiving because the layers support each other during baking, so even if one element is slightly softer the structure cooks into place. That makes this a great recipe to teach friends who are newer to baking.
Memorable sensory payoff
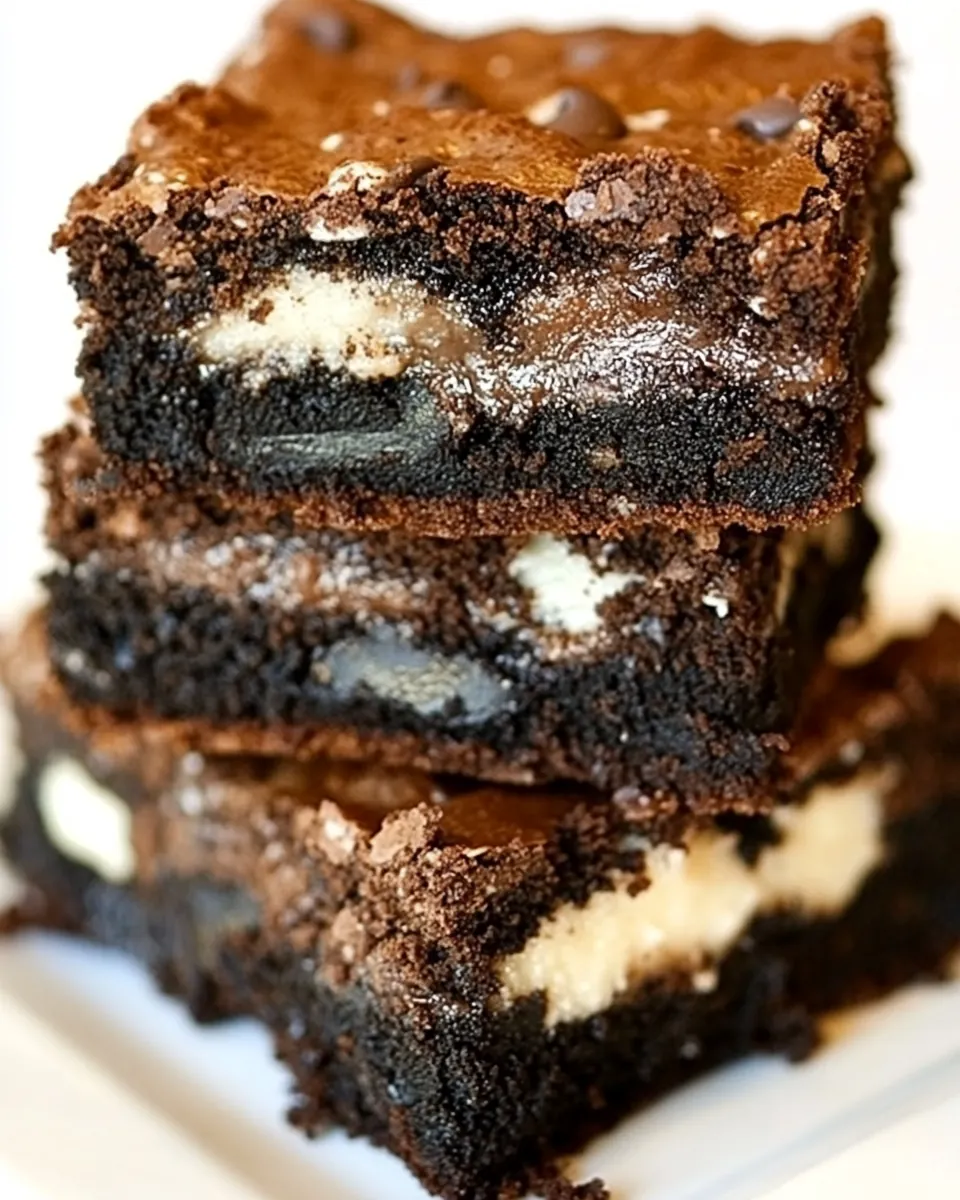
The sensory experience is what keeps me making this over and over. When you slice a bar you hear the quiet crinkle of an Oreo, smell warm butter and chocolate, and see a glossy, crackled brownie top. Those cues tell you the bake is successful, and serving it while the top is just set gives you that slightly molten center that everyone loves.
What You’ll Need for Chocolate Chip Cookie Oreo Fudge Brownie Bar
These ingredients are deliberately straightforward, chosen to create balanced layers that behave predictably in the oven. The key players are the rich butter and sugars that make the cookie base tender, the Oreos that add structure and crunch, and the brownie batter which contributes deep chocolate flavor and fudgy moisture. Together they form a dessert that is more than the sum of its parts.
- 1 cup (227 g) unsalted butter, at room temperature: Creamy and soft, provides the primary fat and tenderness to the dough while aiding in leavening and flavor development when creamed with sugars.
- 1 cup (200 g) granulated sugar: Granulated and fine, contributes sweetness and structure, helping to aerate the batter when creamed with butter for a light crumb.
- 3/4 cup (165 g) light brown sugar: Moist and caramel-like, adds depth of flavor and extra chewiness while balancing sweetness and enhancing browning in the baked bar.
- 2 eggs: Beaten and binding, supplies moisture, structure, and leavening through protein coagulation, enabling the batter to set and hold together.
- 1 tablespoon vanilla extract: Aromatic and sweet, injects warm, rounded flavor to the batter and complements chocolate and cookie components for a balanced profile.
- 2 1/2 cups (312.5 g) all-purpose flour: Starchy and structural, forms the bulk of the dry mix, provides gluten for chew and texture, and helps absorb fats and liquids evenly.
- 1 teaspoon baking soda: Leavening and lightening, reacts with acidic components to produce carbon dioxide, giving lift and a tender crumb to the cookie layer.
- 1 teaspoon salt: Flavor-balancing and preservative, enhances overall taste by suppressing bitterness and accentuating sweetness while controlling yeast activity.
- 2 cups (360 g) milk chocolate chips, (12 ounces): Melting and chocolaty, contributes pockets of gooey chocolate throughout the bar, adding sweetness, texture contrast, and rich flavor.
- 1 package Double Stuffed Oreos, (18-ounce): Crunchy and creamy-filled, supplies a contrasting texture and classic cookies-and-cream flavor when chopped or layered into the bars.
- 1 Family Size 9×13 Brownie mix, (or Chewy Brownies homemade recipe): Concentrated and fudgy, offers an instant brownie base or mix for a dense, chocolaty layer that pairs with the cookie components.
- 1/4 cup (76 ml) hot fudge topping: Glossy and syrupy, supplies a sticky, fudgy topping or swirl that intensifies chocolate flavor and adds a rich finish to the bars.
How to Cook Chocolate Chip Cookie Oreo Fudge Brownie Bar
This recipe is hands on but straightforward. You will prepare a cookie dough base, arrange the Oreos on top, then pour a fudgy brownie batter over everything before baking. I like to keep tools and ingredients organized so each layer goes down smoothly and the bake stays even.
- Preheat oven to 350 degrees F. Butter a 9 x 13-inch pan, line with parchment paper, and then butter the parchment paper.: The moment you scent the warm oven air you know the kitchen is primed, and that first buttery aroma sets the mood. Buttering the pan and parchment prevents sticking and helps you lift the finished slab out cleanly, which matters when slicing neat bars. If your oven runs hot, place the rack in the center to avoid overbrowning. A common mistake is skipping the parchment which can make removal difficult and cause tearing, so resist the urge to skip this step.
- In a small bowl, whisk together the flour, baking soda and salt; set aside. Cream together the butter and both sugars in a large bowl with an electric mixer on medium speed for 3 to 5 minutes. Add the eggs and vanilla and mix well to thoroughly combine. Reduce the mixer speed to low and slowly add the flour mixture into the mixer until the flour is just combined. Stir in chocolate chips. Spread the cookie dough in the bottom of the prepared 9×13 baking dish.: As the butter and sugars cream, smell the caramel hints from the brown sugar and notice the texture change to pale and fluffy, which is exactly what you're aiming for. This aeration creates a light texture in the cookie base and helps the dough spread evenly. If you cream too briefly the dough will be dense, and if you overbeat with a hand mixer you might incorporate too much air leading to excessive spreading, so aim for that glossy, light stage.
- Top the cookie dough with a layer of Oreos.: When you add the eggs and vanilla , the mixture smooths out and becomes slightly silkier, and the scent of vanilla will brighten everything. Room temperature eggs help this step go smoothly, preventing a broken emulsion. If the mixture looks curdled, pause and beat until uniform; chilling briefly can help if separation persists, but generally gentle, steady mixing brings it back.
- Mix together the brownie mix according to the package directions, adding 1/4 cup of hot fudge topping to the mix. Pour the brownie batter over the cookie dough and Oreos. Bake for 45-55 minutes. Let cool completely before slicing into bars. Store leftovers in an airtight container at room temperature.: You'll feel a gentle thickening and see streaks of flour disappear into a soft dough, a critical texture that supports the layers. Overmixing develops gluten which yields a tough base, so stop as soon as the last streak vanishes. A common pitfall is adding the flour too quickly, which can create lumps, so pour gradually for an even, tender result.
- Stir in chocolate chips.: Folding in the chocolate chips disperses pockets of melty chocolate throughout the base and gives playfulness to each bite. The dough will become studded visually, and a quick taste of raw dough should be buttery and sweet but not floury. Avoid using too many chips which might prevent the cookie layer from setting evenly, and if your chips sink during baking reduce their size slightly.
- Spread the cookie dough in the bottom of the prepared 9×13 baking dish.: Pressing the dough into an even layer creates a consistent foundation that bakes uniformly, and you can feel the dough's density under a floured spatula as you smooth it. A perfectly even thickness helps when planning bake time, because thin spots will brown faster than thick ones. One error I often see is overworking the dough while spreading, which tightens the texture, so press gently and evenly.
- Top the cookie dough with a layer of Oreos.: Laying the Oreos across the dough gives each bar a crunchy surprise and that signature cream stripe within the bite. Arrange them in a single snug layer so the brownie batter will cover them without leaving large gaps. A too-sparse layer changes the texture balance, and overlapping too much can create unevenness in the final slice, so aim for a neat, single coverage.
- Mix together the brownie mix according to the package directions, adding 1/4 cup of hot fudge topping to the mix.: When you whisk the brownie mix and introduce the hot fudge , the batter becomes luxuriantly glossy and aromatic with cocoa notes, signaling a fudgy finish. The hot fudge deepens the cocoa and encourages a tender, cohesive top layer that contrasts nicely with the cookie base. Avoid overmixing which can make the brownies cakier, and if the batter seems too thick for pouring, a tablespoon of milk can loosen it slightly without compromising texture.
- Pour the brownie batter over the cookie dough and Oreos.: As you pour, watch the batter settle into the pan and gently level itself, creating a glossy cap over the cookies. The visual cue you want is even coverage without giant pools, because that ensures a consistent bake across the surface. A frequent mistake is pouring unevenly which can expose Oreo edges and cause uneven baking, so tilt the pan slightly and nudge the batter with a spatula if needed to spread it.
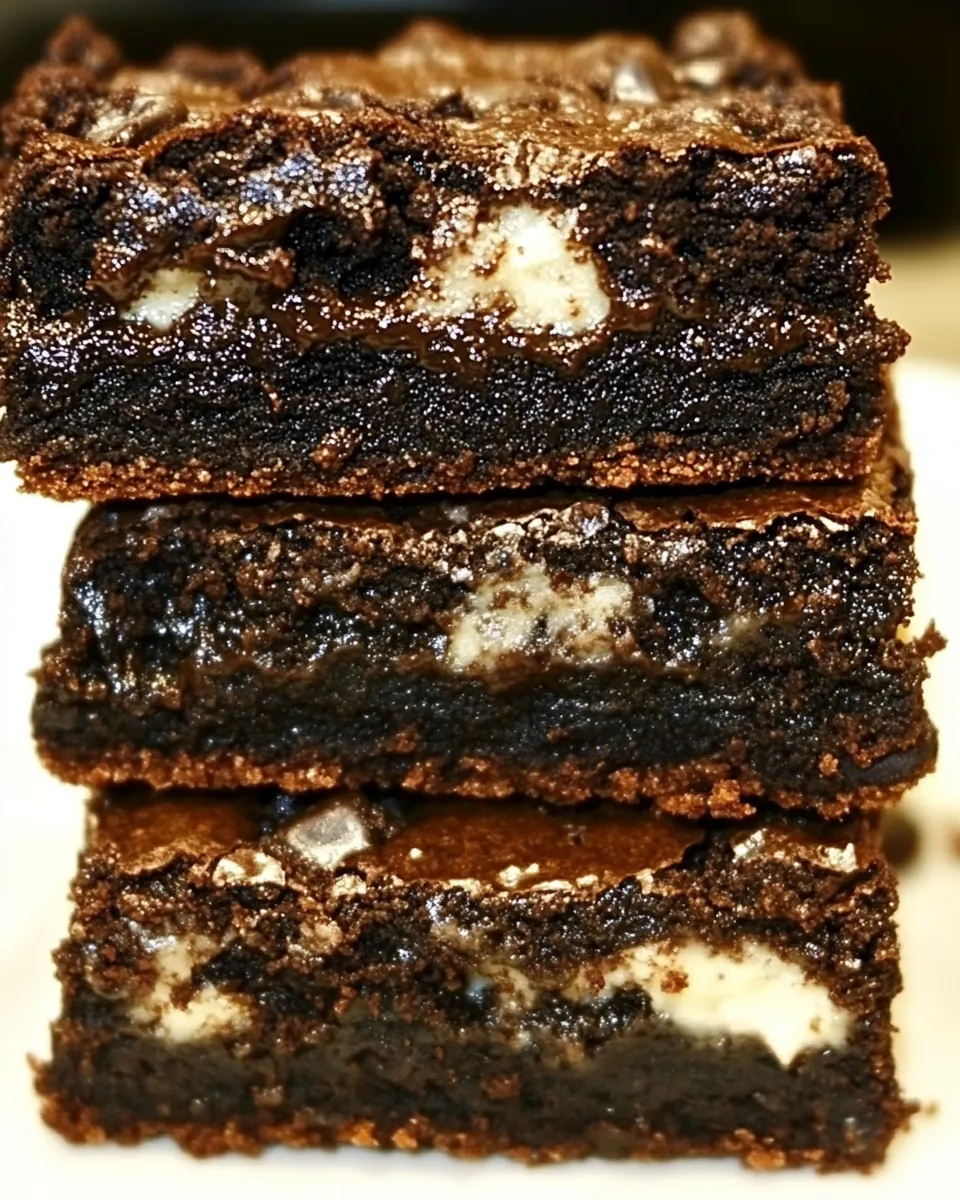
- Bake for 45-55 minutes. Let cool completely before slicing into bars.: During the bake you will notice the top develop small cracks and a slight sheen, the sign of a fudgy interior with a just set surface. The aroma will be rich and chocolate forward, and the edges will pull slightly from the pan. Cooling fully is crucial because the bars firm up as they rest, giving you clean slices; cutting too soon yields a gooey mess. If your bars are still wobbly after the listed time, allow extra cooling time rather than increasing the oven temperature which risks drying them out.
- Store leftovers in an airtight container at room temperature.: Once cooled, these bars keep well and the flavors meld over a day, so the texture benefits from short term storage. Keep them in a single layer or separated by parchment to prevent sticking. A common storage mistake is leaving them exposed to air which dries the edges, so always seal them tightly to preserve that fresh baked softness.
Ways to Customize
I like offering a few focused ideas for customizing Chocolate Chip Cookie Oreo Fudge Brownie Bar without changing the core method. Below are my favorite variations and why they work, each one designed to preserve the balance between cookie, Oreo, and brownie layers.
- Swap chocolate chip type Change to semi sweet or dark chocolate chips to deepen the chocolate flavor while keeping the same melting behavior, which can make the bars feel richer without impacting structure.
- Use a homemade brownie batter Make your own chewy brownie batter for more control over cocoa intensity and texture, ensuring a fudgier top if you prefer a denser chocolate bite.
- Press Oreos gently If you like more integrated layering, press the Oreos slightly into the cookie dough so they nestle but still keep a defined crunch after baking.
- Add extra hot fudge Swirl an additional tablespoon of hot fudge across the top before baking for glossy pockets of intense chocolate that sing against the cookie base.
- Cutting technique For the cleanest slices chill the baked slab for 30 to 60 minutes, then use a sharp knife dipped in hot water and wiped dry between cuts to produce neat bars.
- Mix-in moderation If adding extra mix ins to the cookie base, scale back the chocolate chips slightly to ensure the base sets properly and the layers remain distinct.
Serving This Chocolate Chip Cookie Oreo Fudge Brownie Bar
These bars fit many occasions, from casual coffee breaks to celebratory gatherings. I like to serve them at room temperature so the textures are distinct, and I always recommend neat squares for portion control. Below are detailed serving suggestions, pairings, and storage ideas to help you present them beautifully.
- Party platter Arrange squares on a large board with parchment beneath, spacing them so guests can grab without touching other pieces, ideal for birthdays or potlucks.
- Gift packaging Stack three or four bars in wax paper and tie with ribbon for a thoughtful neighbor or teacher gift that travels well.
- Casual dessert Serve warm with a small scoop of ice cream if you want a contrast between hot and cold, though cooling first yields cleaner slices for events.
- Storage short term Keep in an airtight container at room temperature for up to three days to maintain a tender cookie base and fudgy top.
- Storage longer term Freeze single layers wrapped tightly in plastic and foil for up to two months, thawing at room temperature before serving to preserve texture.
- Occasion pairing These bars work well for family gatherings, bake sales, or afternoon tea, and their generous sweetness makes them a favorite at holiday dessert tables.
FAQ
Conclusion
This recipe stands out because it layers three beloved treats into one addictive bar that sings with contrasting textures and deep chocolate flavor. Try making it when you want an easy but impressive dessert that feeds a crowd and produces consistent, crowd pleasing results. I encourage you to give it a go, enjoy the process of assembling the layers, and notice how proud your guests will be to devour each square.
Chocolate Chip Cookie Oreo Fudge Brownie Bar
Equipment
- 9x13-inch Baking Pan
- Parchment Paper
- Electric Mixer
- Mixing Bowls
- Spatula
Ingredients
- 1 cup (227 g) unsalted butter, at room temperature Creamy and soft, provides the primary fat and tenderness to the dough while aiding in leavening and flavor development when creamed with sugars.
- 1 cup (200 g) granulated sugar Granulated and fine, contributes sweetness and structure, helping to aerate the batter when creamed with butter for a light crumb.
- 3/4 cup (165 g) light brown sugar Moist and caramel-like, adds depth of flavor and extra chewiness while balancing sweetness and enhancing browning in the baked bar.
- 2 eggs Beaten and binding, supplies moisture, structure, and leavening through protein coagulation, enabling the batter to set and hold together.
- 1 tablespoon vanilla extract Aromatic and sweet, injects warm, rounded flavor to the batter and complements chocolate and cookie components for a balanced profile.
- 2 1/2 cups (312.5 g) all-purpose flour Starchy and structural, forms the bulk of the dry mix, provides gluten for chew and texture, and helps absorb fats and liquids evenly.
- 1 teaspoon baking soda Leavening and lightening, reacts with acidic components to produce carbon dioxide, giving lift and a tender crumb to the cookie layer.
- 1 teaspoon salt Flavor-balancing and preservative, enhances overall taste by suppressing bitterness and accentuating sweetness while controlling yeast activity.
- 2 cups (360 g) milk chocolate chips, (12 ounces) Melting and chocolaty, contributes pockets of gooey chocolate throughout the bar, adding sweetness, texture contrast, and rich flavor.
- 1 package Double Stuffed Oreos, (18-ounce) Crunchy and creamy-filled, supplies a contrasting texture and classic cookies-and-cream flavor when chopped or layered into the bars.
- 1 Family Size 9×13 Brownie mix, (or Chewy Brownies homemade recipe) Concentrated and fudgy, offers an instant brownie base or mix for a dense, chocolaty layer that pairs with the cookie components.
- 1/4 cup (76 ml) hot fudge topping Glossy and syrupy, supplies a sticky, fudgy topping or swirl that intensifies chocolate flavor and adds a rich finish to the bars.
Instructions
- Preheat oven to 350 degrees F. Butter a 9 x 13-inch pan, line with parchment paper, and then butter the parchment paper.: The moment you scent the warm oven air you know the kitchen is primed, and that first buttery aroma sets the mood. Buttering the pan and parchment prevents sticking and helps you lift the finished slab out cleanly, which matters when slicing neat bars. If your oven runs hot, place the rack in the center to avoid overbrowning. A common mistake is skipping the parchment which can make removal difficult and cause tearing, so resist the urge to skip this step.
- In a small bowl, whisk together the flour, baking soda and salt; set aside. Cream together the butter and both sugars in a large bowl with an electric mixer on medium speed for 3 to 5 minutes. Add the eggs and vanilla and mix well to thoroughly combine. Reduce the mixer speed to low and slowly add the flour mixture into the mixer until the flour is just combined. Stir in chocolate chips. Spread the cookie dough in the bottom of the prepared 9×13 baking dish.: As the butter and sugars cream, smell the caramel hints from the brown sugar and notice the texture change to pale and fluffy, which is exactly what you're aiming for. This aeration creates a light texture in the cookie base and helps the dough spread evenly. If you cream too briefly the dough will be dense, and if you overbeat with a hand mixer you might incorporate too much air leading to excessive spreading, so aim for that glossy, light stage.
- Top the cookie dough with a layer of Oreos.: When you add the eggs and vanilla , the mixture smooths out and becomes slightly silkier, and the scent of vanilla will brighten everything. Room temperature eggs help this step go smoothly, preventing a broken emulsion. If the mixture looks curdled, pause and beat until uniform; chilling briefly can help if separation persists, but generally gentle, steady mixing brings it back.
- Mix together the brownie mix according to the package directions, adding 1/4 cup of hot fudge topping to the mix. Pour the brownie batter over the cookie dough and Oreos. Bake for 45-55 minutes. Let cool completely before slicing into bars. Store leftovers in an airtight container at room temperature.: You'll feel a gentle thickening and see streaks of flour disappear into a soft dough, a critical texture that supports the layers. Overmixing develops gluten which yields a tough base, so stop as soon as the last streak vanishes. A common pitfall is adding the flour too quickly, which can create lumps, so pour gradually for an even, tender result.
- Stir in chocolate chips.: Folding in the chocolate chips disperses pockets of melty chocolate throughout the base and gives playfulness to each bite. The dough will become studded visually, and a quick taste of raw dough should be buttery and sweet but not floury. Avoid using too many chips which might prevent the cookie layer from setting evenly, and if your chips sink during baking reduce their size slightly.
- Spread the cookie dough in the bottom of the prepared 9×13 baking dish.: Pressing the dough into an even layer creates a consistent foundation that bakes uniformly, and you can feel the dough's density under a floured spatula as you smooth it. A perfectly even thickness helps when planning bake time, because thin spots will brown faster than thick ones. One error I often see is overworking the dough while spreading, which tightens the texture, so press gently and evenly.
- Top the cookie dough with a layer of Oreos.: Laying the Oreos across the dough gives each bar a crunchy surprise and that signature cream stripe within the bite. Arrange them in a single snug layer so the brownie batter will cover them without leaving large gaps. A too-sparse layer changes the texture balance, and overlapping too much can create unevenness in the final slice, so aim for a neat, single coverage.
- Mix together the brownie mix according to the package directions, adding 1/4 cup of hot fudge topping to the mix.: When you whisk the brownie mix and introduce the hot fudge , the batter becomes luxuriantly glossy and aromatic with cocoa notes, signaling a fudgy finish. The hot fudge deepens the cocoa and encourages a tender, cohesive top layer that contrasts nicely with the cookie base. Avoid overmixing which can make the brownies cakier, and if the batter seems too thick for pouring, a tablespoon of milk can loosen it slightly without compromising texture.
- Pour the brownie batter over the cookie dough and Oreos.: As you pour, watch the batter settle into the pan and gently level itself, creating a glossy cap over the cookies. The visual cue you want is even coverage without giant pools, because that ensures a consistent bake across the surface. A frequent mistake is pouring unevenly which can expose Oreo edges and cause uneven baking, so tilt the pan slightly and nudge the batter with a spatula if needed to spread it.
- Bake for 45-55 minutes. Let cool completely before slicing into bars.: During the bake you will notice the top develop small cracks and a slight sheen, the sign of a fudgy interior with a just set surface. The aroma will be rich and chocolate forward, and the edges will pull slightly from the pan. Cooling fully is crucial because the bars firm up as they rest, giving you clean slices; cutting too soon yields a gooey mess. If your bars are still wobbly after the listed time, allow extra cooling time rather than increasing the oven temperature which risks drying them out.
- Store leftovers in an airtight container at room temperature.: Once cooled, these bars keep well and the flavors meld over a day, so the texture benefits from short term storage. Keep them in a single layer or separated by parchment to prevent sticking. A common storage mistake is leaving them exposed to air which dries the edges, so always seal them tightly to preserve that fresh baked softness.
Notes
- Swap chocolate chip type Change to semi sweet or dark chocolate chips to deepen the chocolate flavor while keeping the same melting behavior, which can make the bars feel richer without impacting structure.
- Use a homemade brownie batter Make your own chewy brownie batter for more control over cocoa intensity and texture, ensuring a fudgier top if you prefer a denser chocolate bite.
- Press Oreos gently If you like more integrated layering, press the Oreos slightly into the cookie dough so they nestle but still keep a defined crunch after baking.
- Add extra hot fudge Swirl an additional tablespoon of hot fudge across the top before baking for glossy pockets of intense chocolate that sing against the cookie base.
- Cutting technique For the cleanest slices chill the baked slab for 30 to 60 minutes, then use a sharp knife dipped in hot water and wiped dry between cuts to produce neat bars.
- Mix-in moderation If adding extra mix ins to the cookie base, scale back the chocolate chips slightly to ensure the base sets properly and the layers remain distinct.