Poule au pot
Poule au pot is the kind of dish I return to when I want something honest, comforting, and quietly celebratory. The first time I made Poule au pot, I was chasing the kind of warmth that lingers in the kitchen long after the table is cleared. I remember the gentle simmer, the steam fogging the windows, and the way the house smelled of herbs and roasted chicken, a scent that felt like coming home from a long trip.
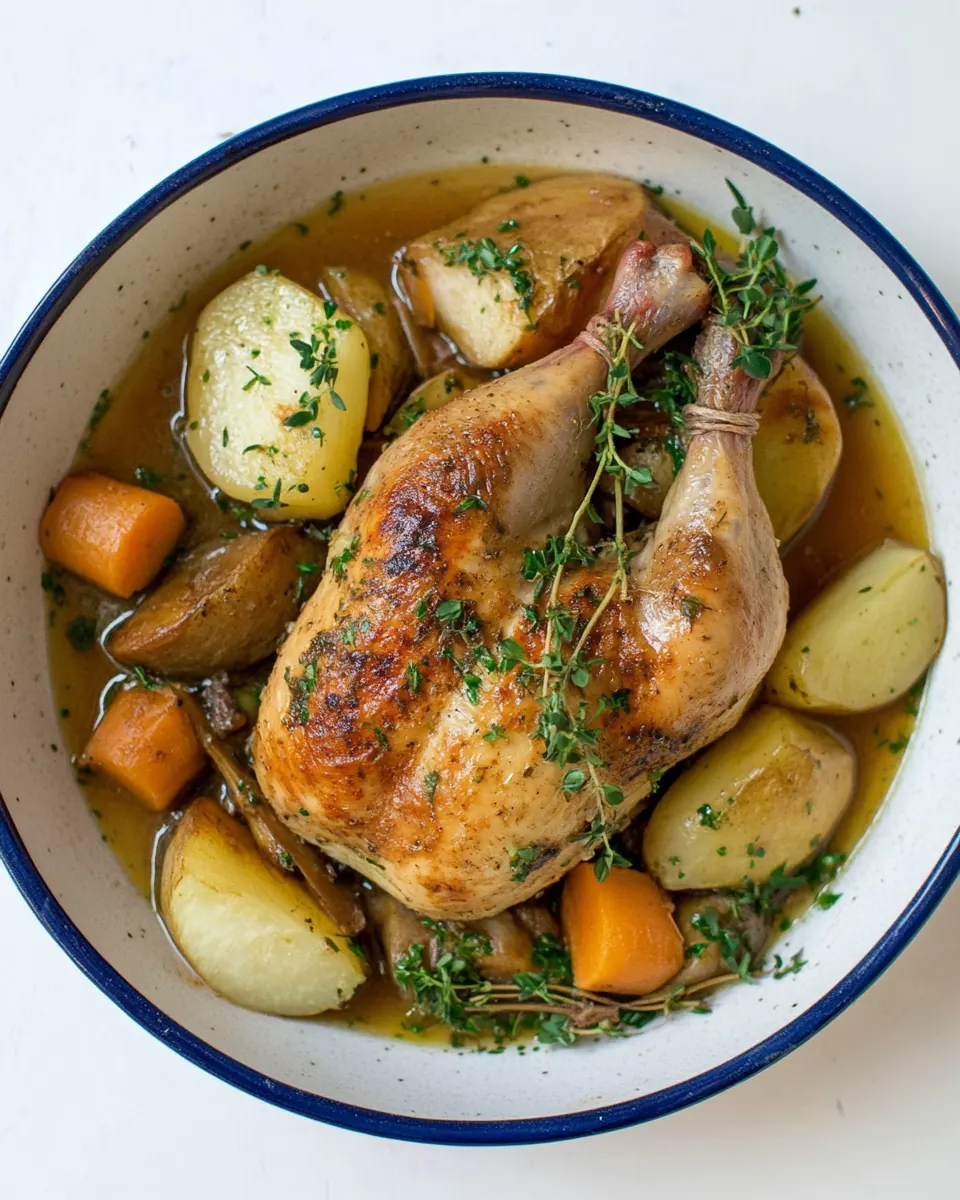
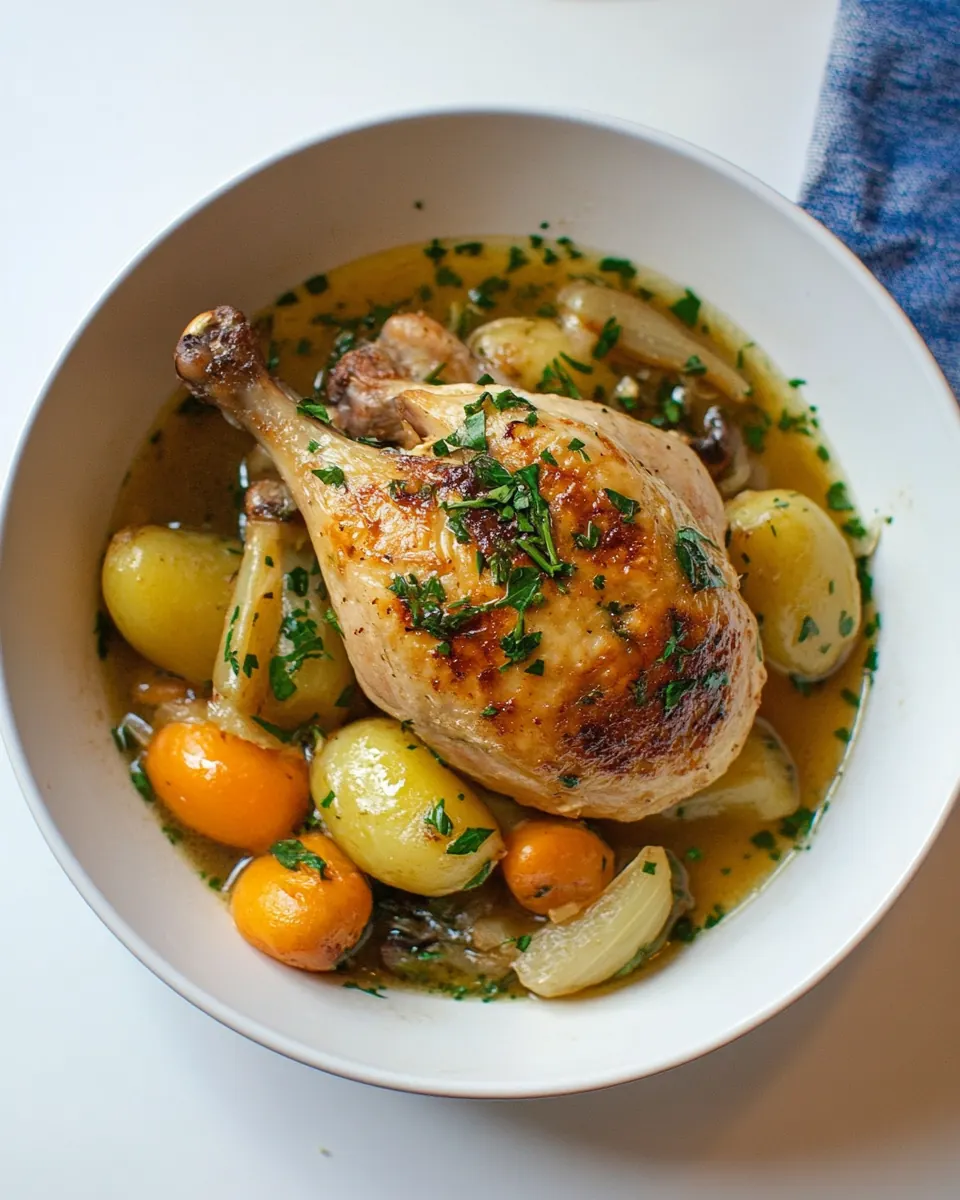
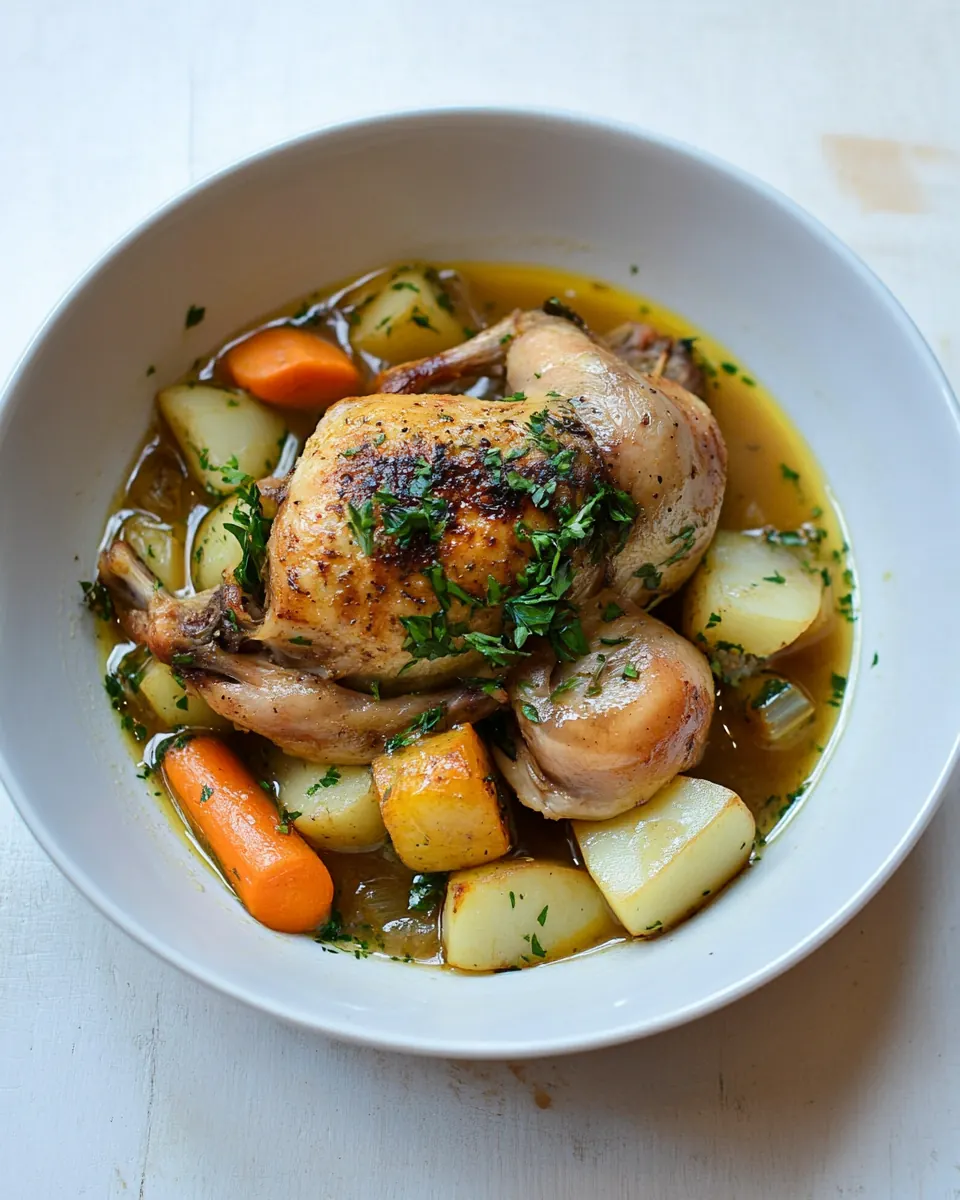
Over the years, Poule au pot has become my slow Sunday ritual. I love that it asks for patience rather than perfection, that it rewards small attentions with big flavors. When guests arrive, the presentation is humble yet striking: a whole braised chicken nestled among tender vegetables, the broth shimmering with glossy fat and flecks of fresh parsley. I often tell friends this is the recipe that will make your kitchen feel like a gathering place, without any fuss.
Recipe Snapshot
1 hr 15 mins
15 mins
60 mins
Medium
450 kcal
French
Gluten-Free, Paleo
Dinner
Dutch oven, Cheesecloth
What Sets This Poule au pot Apart
Hearty, Honest Flavor
I adore how Poule au pot delivers a deep, layered broth from simple components. By simmering a whole chicken with aromatics, the stock develops a rounded, savory character that feels greater than the sum of its parts. I always notice the moment the kitchen fills with a roasted, herbaceous scent, and I know the flavors are coming together.
Hands Off, High Reward
This dish rewards patience more than technique. Once you’ve browned the chicken and added the vegetables and bouquet garni, the pot does the heavy lifting. I find this liberating, because it leaves room to chat with guests, prepare a simple salad, or just sit and sip tea while the flavors deepen.
Vegetables That Shine
The combination of small potatoes, carrots, turnip, and pearl like onions cooks to tender perfection in the broth. Each vegetable absorbs the savory liquid, and you end up with jewel like bites that complement the chicken. I often serve those vegetables with a spoonful of broth, it feels indulgent without being heavy.
Comfort with Elegance
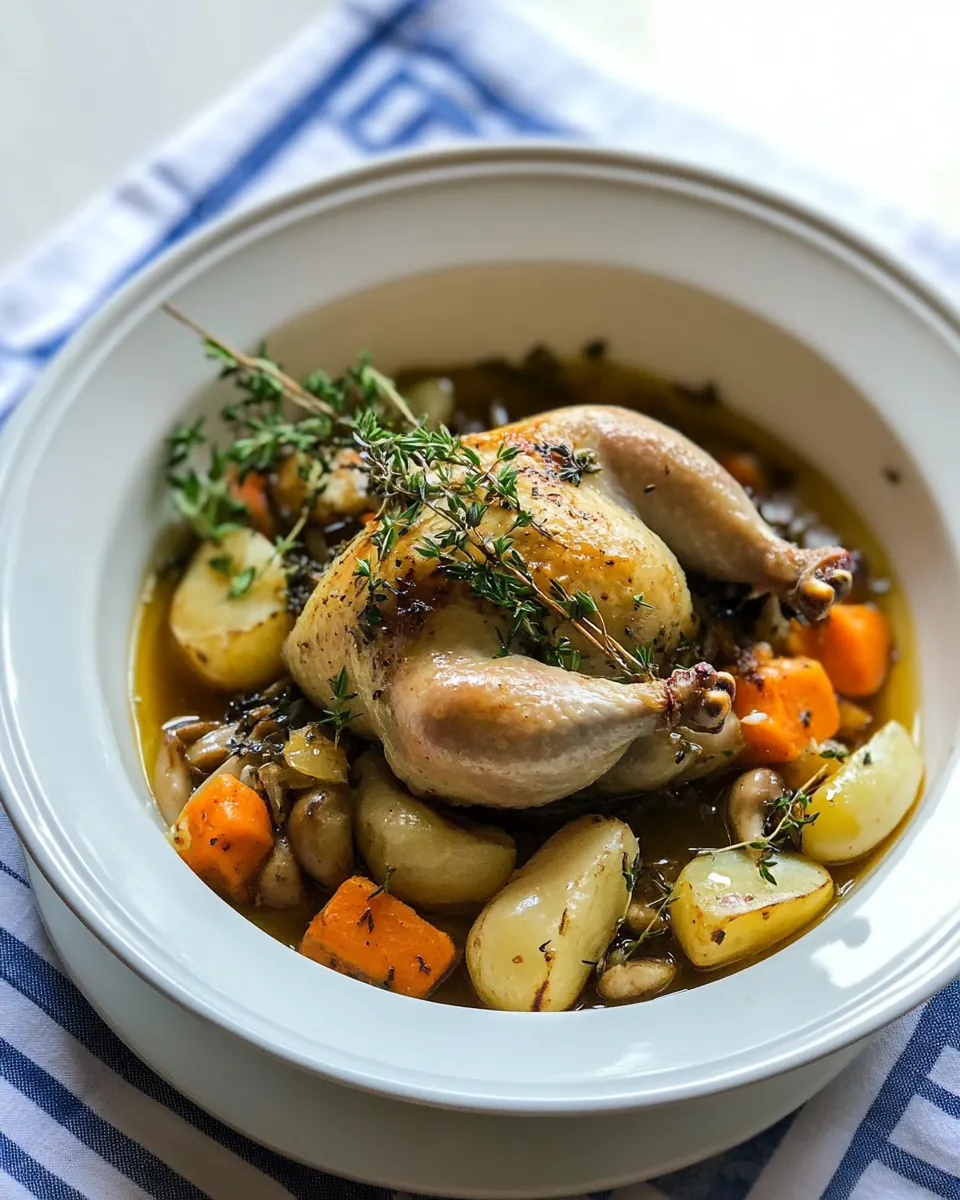
Despite its rustic roots, Poule au pot looks composed on the table. Tucking in sprigs of fresh parsley and arranging the vegetables around the bird makes the meal feel special. I love serving it when I want something both grounded and memorable.
Simple Ingredients, Maximum Trust
What keeps me coming back is how predictable the outcome is. With a few pantry staples like olive oil and a handful of herbs, you can produce a meal that comforts and satisfies. I often say this recipe is proof that restraint in seasoning and careful timing yield the best, truest flavors.
Ingredients for Poule au pot
These ingredients are chosen to work in harmony, coaxing depth from a humble set of components. The whole chicken provides body and richness, while the aromatics and herbs build an aromatic backbone. The vegetables soak up the broth, becoming tender carriers of flavor. Together, they create a bowl that is both nourishing and refined.
- 1 medium onion: Sauté gently to develop sweet, aromatic flavors that form the base of the broth; score or halve if large to release juices and caramelize edges for depth.
- 3 whole cloves: Puncture firmly into the onion to infuse the stock with warm, spicy, clove notes; keep whole so they can be removed after simmering.
- 5 branches fresh thyme: Tie together or add loose to release bright, herbaceous aroma that complements poultry; bruise the stems slightly to amplify essential oils during cooking.
- 2 bay leaves: Nestle into the simmering liquid to contribute a subtle, savory, slightly floral backbone; leave whole for easy removal before serving.
- 1 tablespoon olive oil: Heat briefly at the start to coat the pot and sauté aromatics; provide a clean, fruity olive-oil flavor that helps soften vegetables and brown chicken.
- 1 tablespoon butter: Melt gently to add rich, creamy mouthfeel and aid in browning the chicken and vegetables; combine with oil for a balanced fat profile.
- 1 whole chicken: Rinse and truss if desired, then submerge to poach gently for juicy, tender meat and to create a flavorful, gelatin-rich stock from bones and skin.
- 12 small boiling onions (or shallots), peeled: Add peeled to the pot to contribute sweet, caramelized bursts and textural contrast; cook until tender but still holding shape for presentation.
- 3 cloves garlic, peeled and minced: Mince and sauté briefly to release pungent, savory depth and aromatic complexity that enhances the broth and overall savory balance.
- 4 medium (250 g) carrots, peeled, cut into 3/4-inch (2 cm) batons: Cut into uniform batons to provide sweet, earthy flavor and body to the stew; simmer until tender to add natural sweetness and color.
- 1 medium (220 g) turnip, peeled and cut into 1-inch (3 cm) cubes: Cube evenly to offer mild, peppery-earthy notes and body to the soup; cook until soft to absorb and meld with the broth flavors.
- 1 tablespoon kosher or sea salt: Season generously to help extract and balance flavors throughout the cooking process; add gradually and taste-adjust toward the end for best control.
- freshly ground black pepper: Grind freshly to add bright, piquant heat and complexity; season at the table as well as during cooking for layered flavor.
- 10 small (400 g) new potatoes: Leave unpeeled or scrubbed and add to poach for creamy, waxy texture and to soak up the flavorful stock; serve whole or halved for rustic appeal.
- 1 quart (1 L) water: Pour to form the liquid base that gently poaches the chicken and carries flavors; adjust quantity to ensure all ingredients are submerged and evenly cooked.
- 1 quart (1 L) chicken stock, homemade or low-sodium (preferably): Combine with water as part of the poaching liquid to enrich taste and body; use low-sodium stock to control overall saltiness while adding savory depth.
- 4 5 stalks of fresh parsley, plus additional chopped parsley for garnish: Chop or tie as a bundle to impart fresh, green brightness and finish; reserve some chopped parsley for garnish to add color and freshness before serving.
How to Prepare Poule au pot
These steps guide you through building flavor with patience and attention. I like to approach the process with a calm mindset, focusing on the aromas and textures that signal progress. Keep tasting and watching the pot, the little cues are what tell you the dish is coming together.
- Make a bouquet garni by studding the onion with the cloves. Wrap them in a piece of cheesecloth or muslin along with the thyme and bay leaves, and tie them in securely with twine.: The kitchen will start to smell floral and clove forward as the aromatics mingle, a warm perfume that hints at the broth to come. Wrapping the onion , thyme , and bay leaves in cheesecloth keeps the small items contained so you can remove them easily, preventing astringent bits in the finished broth. Pay attention while tying the bundle, you want it snug enough to stay intact yet loose enough to let flavors escape. A common mistake is overstuffing the cloth which prevents infusion, so keep the bundle balanced. If you skip this step, you risk dispersing herb fragments that are harder to fish out later.
- Heat the olive oil and butter in a large Dutch oven over medium-high heat. When hot, place the chicken in it, breast side down and cook without moving it until the breast is golden brown, then turn the chicken to brown the chicken on the two thigh & leg sides, which'll take about 15 minutes. (You may need to prop the chicken against the side of the pot to hold it in place while you brown the sides.) If you have a little extra time, you can also brown the bottom.: You will hear a bright sizzle when the fat is hot enough, and the surface of the pot should shimmer. Browning the chicken adds complex, roasted notes that will echo through the broth, creating depth that cannot be replicated by simmering alone. Watch the skin for a golden mahogany color, and adjust the heat to avoid burning, because charred fat will produce bitter flavors. A frequent error is rushing this stage, resulting in pale skin and a thinner tasting broth; give it those minutes to develop color and aroma.
- Once browned, remove the chicken from the pot, place it on a plate, and add the onions to the pot. Cook, stirring occasionally, until browned, about 5 minutes. Add the garlic, carrots, turnip, and salt, along with some freshly ground pepper, and cook for another minute or two, stirring frequently. Put the chicken in the pot along with the bouquet garni. Place the potatoes around the chicken, tuck the parsley sprigs in next to the chicken and add the water and stock so it covers about three-quarters of the chicken. If you need more liquid, add additional water or stock.: You will see the skin take on a glossy, golden tone and hear a steady sizzle that settles into a comforting hiss. Let the bird sit until the edge releases easily from the pan, that separation tells you a proper sear occurred. Turn the chicken to brown the thighs and legs next, creating even caramelization all around. If you prop the bird against the pot side, be mindful of hot spots which can accelerate browning unevenly. One trap is flipping too often; constant movement prevents color development and reduces the aromatic payoff.
- Cover and bring the pot to a boil over high heat, then reduce the heat to a steady, but gentle simmer, with the lid partially opened. Cook for about 1 hour, until the chicken is tender and cooked through, as are the vegetables. Taste for salt and add more if desired.: As the onions hit the hot fat, they should hiss and begin to soften and caramelize, releasing sweet notes that will round the broth. Stir occasionally so they develop even color and do not cling to the bottom and burn, because burnt bits will darken the final flavor. Browning these onions for about five minutes builds a caramel complexity that balances the savory chicken . Avoid high heat that can crisp them too quickly and leave raw centers.
- Cook, stirring occasionally, until browned, about 5 minutes: In this phase, the aroma shifts from sharp to mellow, a gentle caramel sweetness rising from the pot. Frequent stirring helps the onions color uniformly, while allowing you to scrape up fond from the bottom which dissolves into the broth. If you notice any sticking, lower the heat and scrape, because heavy stuck bits can burn and create off notes. Many cooks underbrown the vegetables, losing a layer of flavor; give them time to sweeten and color.
- Add the garlic, carrots, turnip, and salt, along with some freshly ground pepper, and cook for another minute or two, stirring frequently: The moment you add the minced garlic , a sharp, savory scent will lift and almost sing against the sweeter caramelized onions . The carrots and turnip will pick up color on their edges, and the salt helps draw out juices that will mingle into the pan. Stirring prevents the garlic from burning, since a burnt clove turns bitter quickly. One pitfall is overcooking the garlic here, so be attentive and keep the process brief to preserve its fragrant contribution.
- Put the chicken in the pot along with the bouquet garni: When the chicken returns to the pot, the aromas meld instantly, and you should notice a savory steam rising that smells layered and complete. Tucking in the bundle of herbs ensures the liquid absorbs those notes without scattering leaves, which maintains a clean broth texture. Make sure the bird sits steadily; if it rocks, it may not brown evenly on all sides during the simmer. A common oversight is adding the herbs loose, making the final broth gritty with herb fragments.
- Place the potatoes around the chicken, tuck the parsley sprigs in next to the chicken and add the water and stock so it covers about three-quarters of the chicken: The arrangement helps even cooking, and the potatoes will slowly absorb the savory liquid, becoming glossy and tender. The scent becomes rounder now, as the pan juices combine with the liquid stock. Covering three quarters of the bird gives enough exposure for evaporation and concentration, without drying the exposed portion. If you fully submerge the bird, you may lose some of that roasted aroma; conversely, too little liquid will concentrate salt prematurely.
- If you need more liquid, add additional water or stock: Watch the level as the pot simmers, the liquid should gently lap the ingredients without boiling over. Adding more liquid dilutes intensity, so add sparingly until you reach the right balance. A useful cue is the sauce viscosity around the rim as it simmers, and you want enough to poach the meat while allowing flavors to concentrate gradually. A mistake is over diluting early, forcing you to re-season later which can be uneven.
- Cover and bring the pot to a boil over high heat, then reduce the heat to a steady, but gentle simmer, with the lid partially opened: You will see small bubbles rising steadily, and the aroma should become even, savory, and layered. Maintaining a gentle simmer prevents the meat from becoming tough, while allowing collagen to dissolve slowly into the broth for a silky mouthfeel. Keep the lid slightly ajar so steam can escape, avoiding a rolling boil that agitates the vegetables and toughens the chicken . Many cooks either simmer too fiercely or not enough, so watch for even, soft movement in the liquid.
- Cook for about 1 hour, until the chicken is tender and cooked through, as are the vegetables: During this hour the kitchen evolves into a comforting symphony of aromas, and the skin will have softened while the meat pulls away gently from the bone. Check the potatoes and carrots for tenderness by piercing them; they should yield without turning to mush. One helpful sign the chicken is done is when the leg moves freely in its joint and the juices run clear. Overcooking will make the meat dry, so test early if your bird is smaller than average.
- Taste for salt and add more if desired: The final tasting is where the dish comes alive, as the balance of salt, pepper, and herb brightness reveals itself. Use a warm spoonful of broth to judge seasoning, because cold tastes can mask subtle seasoning. Adjust gradually, because it is easier to add than to remove. A typical slip is over salting at the start, so taste before any heavy adjustments.
Ways to Adapt This Recipe
This section offers practical variations and ideas to make Poule au pot fit your pantry and the occasion. Each tip focuses on an actionable change, keeping the spirit of the recipe intact while offering small adjustments that matter.
- Use higher quality stock When possible, use homemade chicken stock for a richer, more gelatinous broth that improves mouthfeel and depth. If you must use store bought, choose a low sodium version so you control seasoning.
- Brown the bird well Spend the time to get an even golden crust on the chicken, because these roasted flavors transfer into the braising liquid and give the finished dish a roast like complexity.
- Timing the vegetables Add root vegetables early so they absorb flavor but still hold shape, and consider adding delicate items later to avoid overcooking and losing texture.
- Control the simmer Maintain a gentle simmer to keep the meat tender and the broth clear, aggressive boiling can emulsify fats and make the broth cloudy and greasy.
- Finish with fresh herbs Stir in chopped parsley just before serving to add brightness and a fresh contrast to the rich broth.
- Serve family style Present the pot at the table with garnish so guests can help themselves, it makes for an informal and inviting meal.
Pairing Suggestions for Poule au pot
Poule au pot pairs beautifully with simple sides and occasions that call for comfort with a touch of grace. I recommend light, fresh accompaniments that highlight the broth and vegetables rather than competing with them. This dish suits cozy family suppers as well as relaxed gatherings where you want something satisfying and low fuss.
- Light green salad A crisp salad dressed lightly in lemon and olive oil offers a bright counterpoint to the savory broth and tender chicken, adding textural contrast.
- Crusty bread or baguette Warm bread is perfect for sopping up the broth, turning each bowl into a comforting, spoon friendly experience.
- Simple steamed greens Blanched spinach or chard dressed with a drizzle of olive oil and a squeeze of lemon complements the richness without overpowering the dish.
- Occasions This recipe is ideal for winter family dinners, a relaxed Sunday lunch, or an intimate gathering where a comforting, composed centerpiece is welcome.
- Storage tips Refrigerate leftovers in an airtight container and consume within three days, the broth keeps well and flavors deepen overnight. Reheat gently on the stovetop to maintain a silky texture.
- Seasonal pairings In colder months, serve with roasted winter vegetables or a warm grain side to add heartiness. In milder seasons, keep sides light and herb forward to emphasize freshness.
FAQ
Conclusion
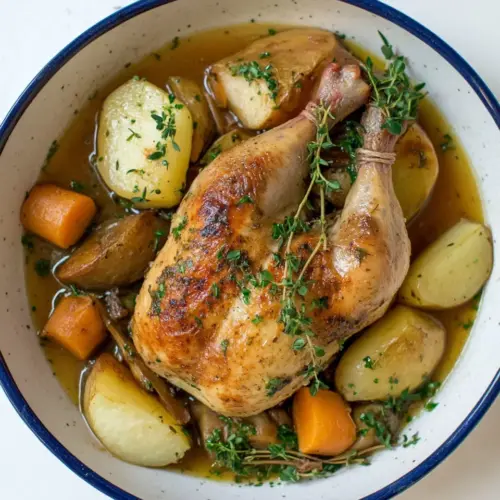
Poule au pot is special because it transforms simple ingredients into a deeply comforting, elegant meal that feels both rustic and refined. The harmony of a browned whole chicken, aromatic herbs, and simmered root vegetables creates a broth and plateful of tender, flavorful bites that invite sharing. Give it a try the next time you want a low stress, high comfort centerpiece; it rewards patience and small attentions with rich, memorable results.
Poule au pot
Equipment
- Dutch Oven
- Cheesecloth
Ingredients
- 1 medium onion Sauté gently to develop sweet, aromatic flavors that form the base of the broth; score or halve if large to release juices and caramelize edges for depth.
- 3 whole cloves Puncture firmly into the onion to infuse the stock with warm, spicy, clove notes; keep whole so they can be removed after simmering.
- 5 branches fresh thyme Tie together or add loose to release bright, herbaceous aroma that complements poultry; bruise the stems slightly to amplify essential oils during cooking.
- 2 bay leaves Nestle into the simmering liquid to contribute a subtle, savory, slightly floral backbone; leave whole for easy removal before serving.
- 1 tablespoon olive oil Heat briefly at the start to coat the pot and sauté aromatics; provide a clean, fruity olive-oil flavor that helps soften vegetables and brown chicken.
- 1 tablespoon butter Melt gently to add rich, creamy mouthfeel and aid in browning the chicken and vegetables; combine with oil for a balanced fat profile.
- 1 whole chicken Rinse and truss if desired, then submerge to poach gently for juicy, tender meat and to create a flavorful, gelatin-rich stock from bones and skin.
- 12 small boiling onions (or shallots), peeled Add peeled to the pot to contribute sweet, caramelized bursts and textural contrast; cook until tender but still holding shape for presentation.
- 3 cloves garlic, peeled and minced Mince and sauté briefly to release pungent, savory depth and aromatic complexity that enhances the broth and overall savory balance.
- 4 medium (250 g) carrots, peeled, cut into 3/4-inch (2 cm) batons Cut into uniform batons to provide sweet, earthy flavor and body to the stew; simmer until tender to add natural sweetness and color.
- 1 medium (220 g) turnip, peeled and cut into 1-inch (3 cm) cubes Cube evenly to offer mild, peppery-earthy notes and body to the soup; cook until soft to absorb and meld with the broth flavors.
- 1 tablespoon kosher or sea salt Season generously to help extract and balance flavors throughout the cooking process; add gradually and taste-adjust toward the end for best control.
- freshly ground black pepper Grind freshly to add bright, piquant heat and complexity; season at the table as well as during cooking for layered flavor.
- 10 small (400 g) new potatoes, Leave unpeeled or scrubbed and add to poach for creamy, waxy texture and to soak up the flavorful stock; serve whole or halved for rustic appeal.
- 1 quart (1 L) water Pour to form the liquid base that gently poaches the chicken and carries flavors; adjust quantity to ensure all ingredients are submerged and evenly cooked.
- 1 quart (1 L) chicken stock, homemade or low-sodium (preferably) Combine with water as part of the poaching liquid to enrich taste and body; use low-sodium stock to control overall saltiness while adding savory depth.
- 4 -5 stalks of fresh parsley, plus additional chopped parsley for garnish Chop or tie as a bundle to impart fresh, green brightness and finish; reserve some chopped parsley for garnish to add color and freshness before serving.
Instructions
- Make a bouquet garni by studding the onion with the cloves. Wrap them in a piece of cheesecloth or muslin along with the thyme and bay leaves, and tie them in securely with twine.: The kitchen will start to smell floral and clove forward as the aromatics mingle, a warm perfume that hints at the broth to come. Wrapping the onion , thyme , and bay leaves in cheesecloth keeps the small items contained so you can remove them easily, preventing astringent bits in the finished broth. Pay attention while tying the bundle, you want it snug enough to stay intact yet loose enough to let flavors escape. A common mistake is overstuffing the cloth which prevents infusion, so keep the bundle balanced. If you skip this step, you risk dispersing herb fragments that are harder to fish out later.
- Heat the olive oil and butter in a large Dutch oven over medium-high heat. When hot, place the chicken in it, breast side down and cook without moving it until the breast is golden brown, then turn the chicken to brown the chicken on the two thigh & leg sides, which'll take about 15 minutes. (You may need to prop the chicken against the side of the pot to hold it in place while you brown the sides.) If you have a little extra time, you can also brown the bottom.: You will hear a bright sizzle when the fat is hot enough, and the surface of the pot should shimmer. Browning the chicken adds complex, roasted notes that will echo through the broth, creating depth that cannot be replicated by simmering alone. Watch the skin for a golden mahogany color, and adjust the heat to avoid burning, because charred fat will produce bitter flavors. A frequent error is rushing this stage, resulting in pale skin and a thinner tasting broth; give it those minutes to develop color and aroma.
- Once browned, remove the chicken from the pot, place it on a plate, and add the onions to the pot. Cook, stirring occasionally, until browned, about 5 minutes. Add the garlic, carrots, turnip, and salt, along with some freshly ground pepper, and cook for another minute or two, stirring frequently. Put the chicken in the pot along with the bouquet garni. Place the potatoes around the chicken, tuck the parsley sprigs in next to the chicken and add the water and stock so it covers about three-quarters of the chicken. If you need more liquid, add additional water or stock.: You will see the skin take on a glossy, golden tone and hear a steady sizzle that settles into a comforting hiss. Let the bird sit until the edge releases easily from the pan, that separation tells you a proper sear occurred. Turn the chicken to brown the thighs and legs next, creating even caramelization all around. If you prop the bird against the pot side, be mindful of hot spots which can accelerate browning unevenly. One trap is flipping too often; constant movement prevents color development and reduces the aromatic payoff.
- Cover and bring the pot to a boil over high heat, then reduce the heat to a steady, but gentle simmer, with the lid partially opened. Cook for about 1 hour, until the chicken is tender and cooked through, as are the vegetables. Taste for salt and add more if desired.: As the onions hit the hot fat, they should hiss and begin to soften and caramelize, releasing sweet notes that will round the broth. Stir occasionally so they develop even color and do not cling to the bottom and burn, because burnt bits will darken the final flavor. Browning these onions for about five minutes builds a caramel complexity that balances the savory chicken . Avoid high heat that can crisp them too quickly and leave raw centers.
- Cook, stirring occasionally, until browned, about 5 minutes: In this phase, the aroma shifts from sharp to mellow, a gentle caramel sweetness rising from the pot. Frequent stirring helps the onions color uniformly, while allowing you to scrape up fond from the bottom which dissolves into the broth. If you notice any sticking, lower the heat and scrape, because heavy stuck bits can burn and create off notes. Many cooks underbrown the vegetables, losing a layer of flavor; give them time to sweeten and color.
- Add the garlic, carrots, turnip, and salt, along with some freshly ground pepper, and cook for another minute or two, stirring frequently: The moment you add the minced garlic , a sharp, savory scent will lift and almost sing against the sweeter caramelized onions . The carrots and turnip will pick up color on their edges, and the salt helps draw out juices that will mingle into the pan. Stirring prevents the garlic from burning, since a burnt clove turns bitter quickly. One pitfall is overcooking the garlic here, so be attentive and keep the process brief to preserve its fragrant contribution.
- Put the chicken in the pot along with the bouquet garni: When the chicken returns to the pot, the aromas meld instantly, and you should notice a savory steam rising that smells layered and complete. Tucking in the bundle of herbs ensures the liquid absorbs those notes without scattering leaves, which maintains a clean broth texture. Make sure the bird sits steadily; if it rocks, it may not brown evenly on all sides during the simmer. A common oversight is adding the herbs loose, making the final broth gritty with herb fragments.
- Place the potatoes around the chicken, tuck the parsley sprigs in next to the chicken and add the water and stock so it covers about three-quarters of the chicken: The arrangement helps even cooking, and the potatoes will slowly absorb the savory liquid, becoming glossy and tender. The scent becomes rounder now, as the pan juices combine with the liquid stock. Covering three quarters of the bird gives enough exposure for evaporation and concentration, without drying the exposed portion. If you fully submerge the bird, you may lose some of that roasted aroma; conversely, too little liquid will concentrate salt prematurely.
- If you need more liquid, add additional water or stock: Watch the level as the pot simmers, the liquid should gently lap the ingredients without boiling over. Adding more liquid dilutes intensity, so add sparingly until you reach the right balance. A useful cue is the sauce viscosity around the rim as it simmers, and you want enough to poach the meat while allowing flavors to concentrate gradually. A mistake is over diluting early, forcing you to re-season later which can be uneven.
- Cover and bring the pot to a boil over high heat, then reduce the heat to a steady, but gentle simmer, with the lid partially opened: You will see small bubbles rising steadily, and the aroma should become even, savory, and layered. Maintaining a gentle simmer prevents the meat from becoming tough, while allowing collagen to dissolve slowly into the broth for a silky mouthfeel. Keep the lid slightly ajar so steam can escape, avoiding a rolling boil that agitates the vegetables and toughens the chicken . Many cooks either simmer too fiercely or not enough, so watch for even, soft movement in the liquid.
- Cook for about 1 hour, until the chicken is tender and cooked through, as are the vegetables: During this hour the kitchen evolves into a comforting symphony of aromas, and the skin will have softened while the meat pulls away gently from the bone. Check the potatoes and carrots for tenderness by piercing them; they should yield without turning to mush. One helpful sign the chicken is done is when the leg moves freely in its joint and the juices run clear. Overcooking will make the meat dry, so test early if your bird is smaller than average.
- Taste for salt and add more if desired: The final tasting is where the dish comes alive, as the balance of salt, pepper, and herb brightness reveals itself. Use a warm spoonful of broth to judge seasoning, because cold tastes can mask subtle seasoning. Adjust gradually, because it is easier to add than to remove. A typical slip is over salting at the start, so taste before any heavy adjustments.
Notes
- Use higher quality stock When possible, use homemade chicken stock for a richer, more gelatinous broth that improves mouthfeel and depth. If you must use store bought, choose a low sodium version so you control seasoning.
- Brown the bird well Spend the time to get an even golden crust on the chicken, because these roasted flavors transfer into the braising liquid and give the finished dish a roast like complexity.
- Timing the vegetables Add root vegetables early so they absorb flavor but still hold shape, and consider adding delicate items later to avoid overcooking and losing texture.
- Control the simmer Maintain a gentle simmer to keep the meat tender and the broth clear, aggressive boiling can emulsify fats and make the broth cloudy and greasy.
- Finish with fresh herbs Stir in chopped parsley just before serving to add brightness and a fresh contrast to the rich broth.
- Serve family style Present the pot at the table with garnish so guests can help themselves, it makes for an informal and inviting meal.