Pistachio Pudding Linzer Cookies
Pistachio Pudding Linzer Cookies are one of those treats I always pull out for spring gatherings because they look charming and taste playful, and the first bite takes me straight back to a sunlit kitchen where I learned to roll dough with a distracted toddler humming at my feet.
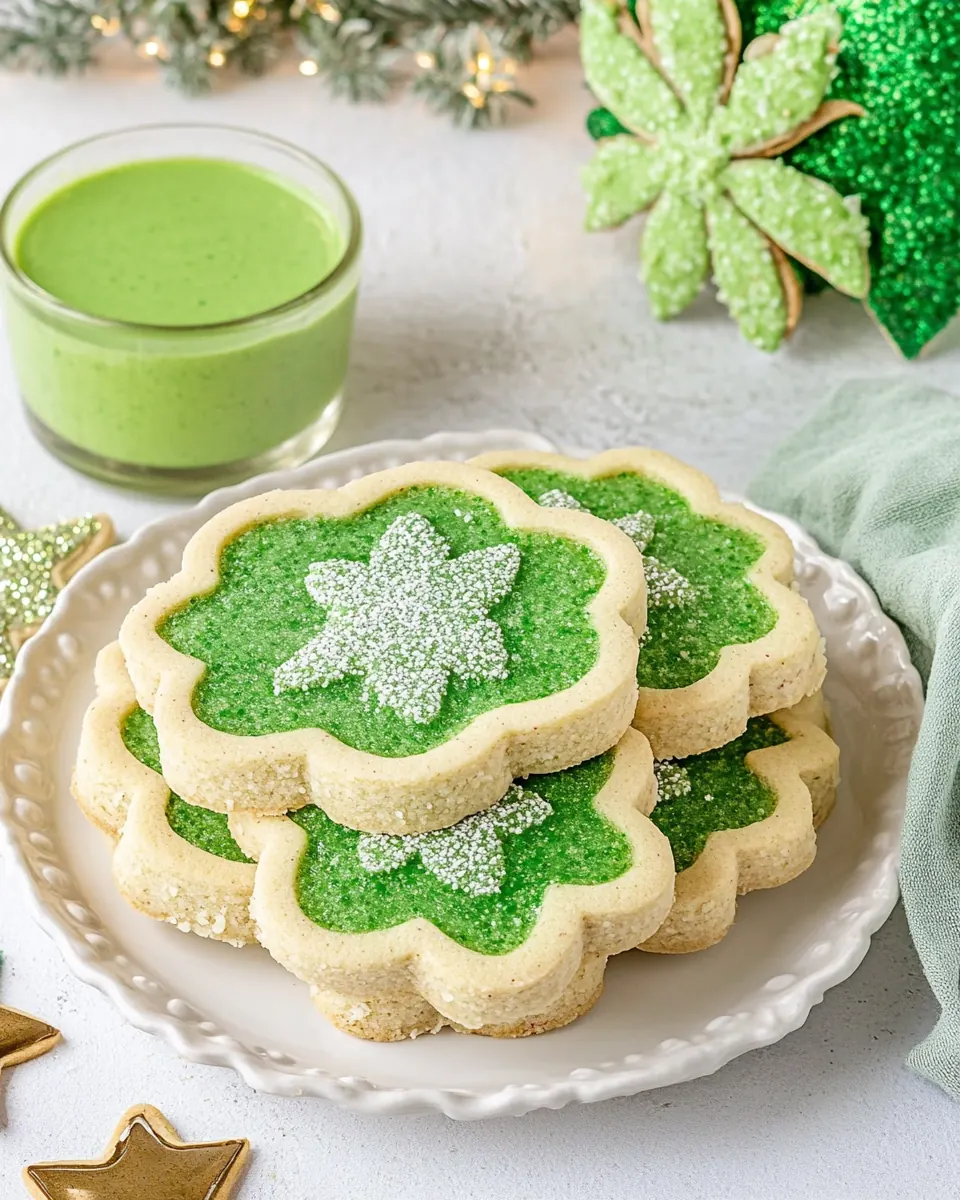
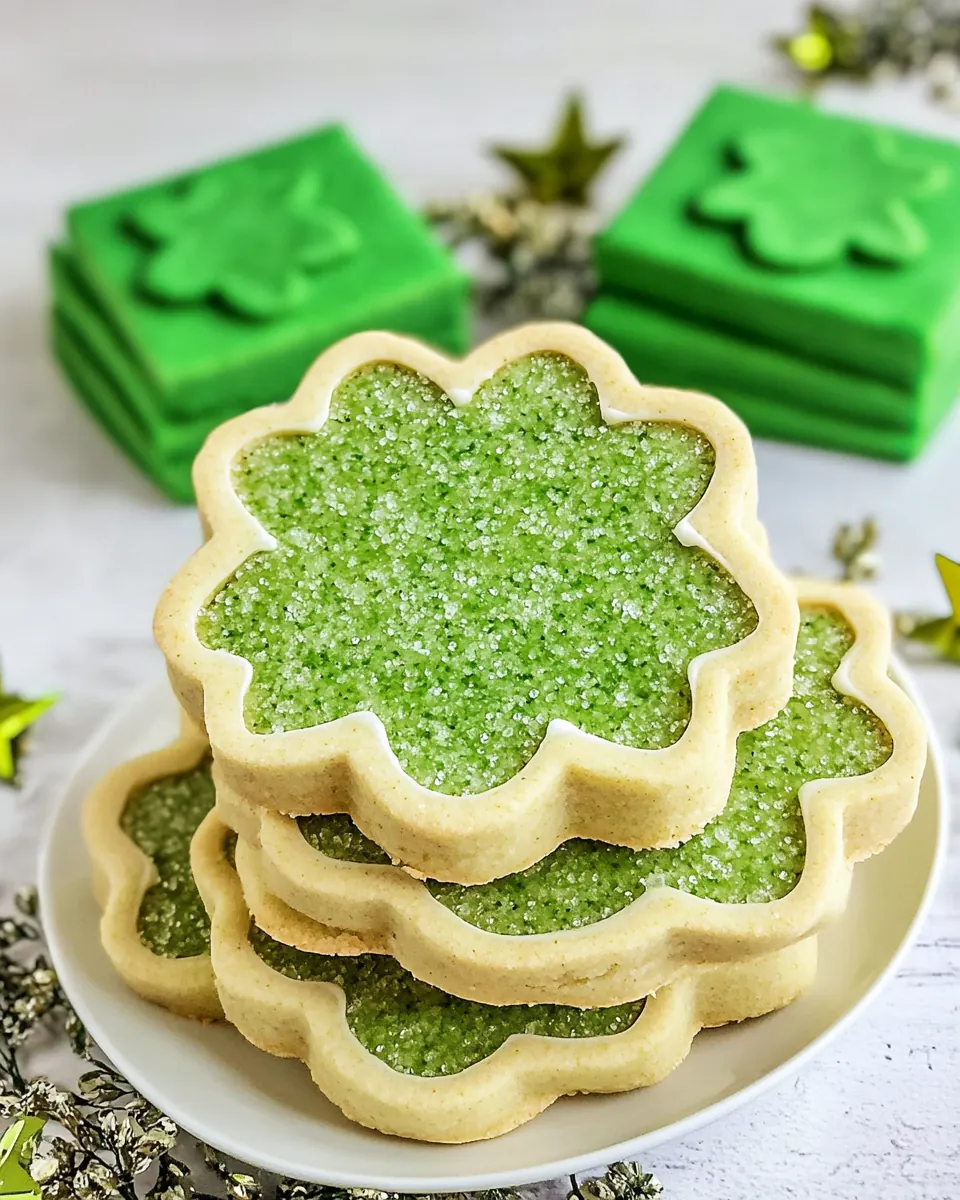
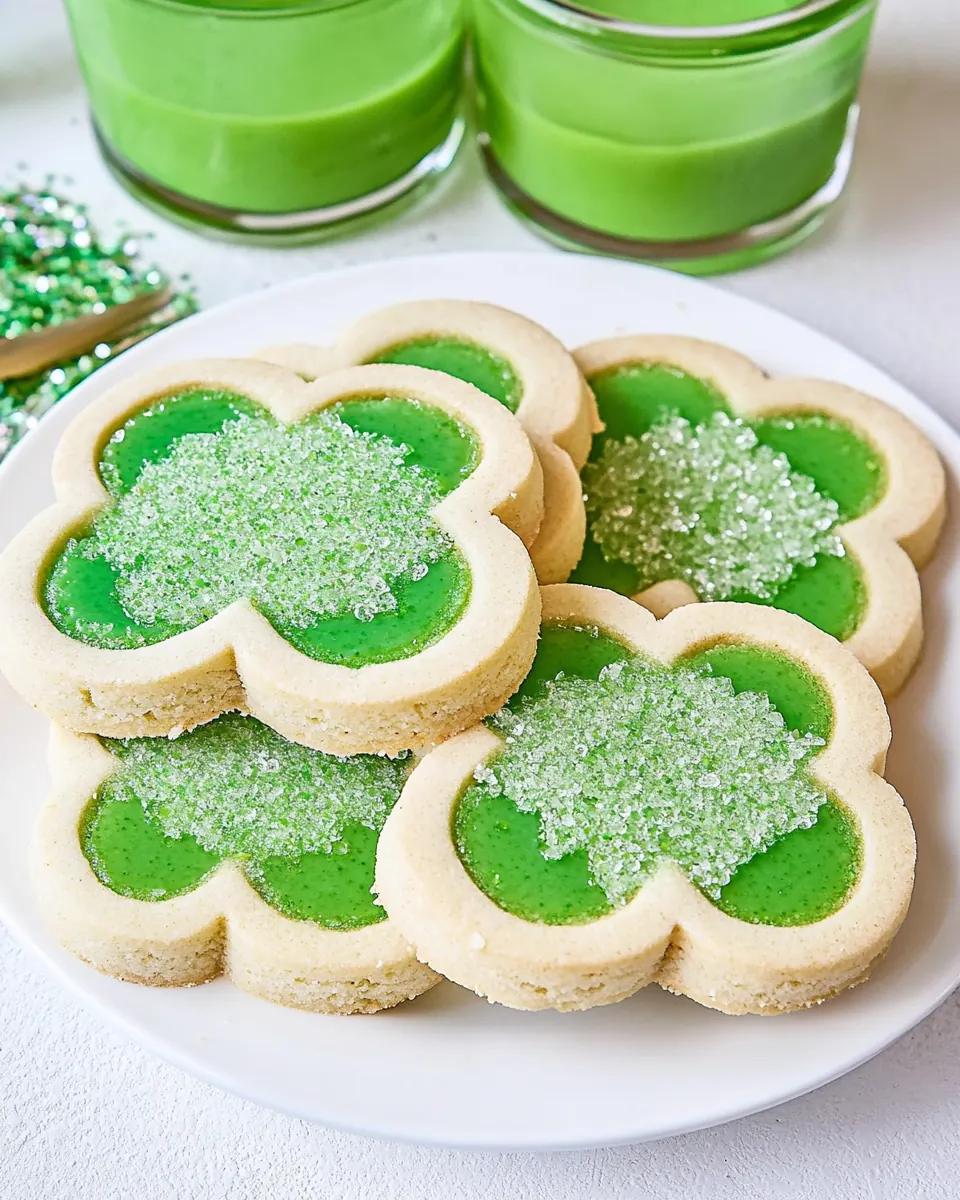
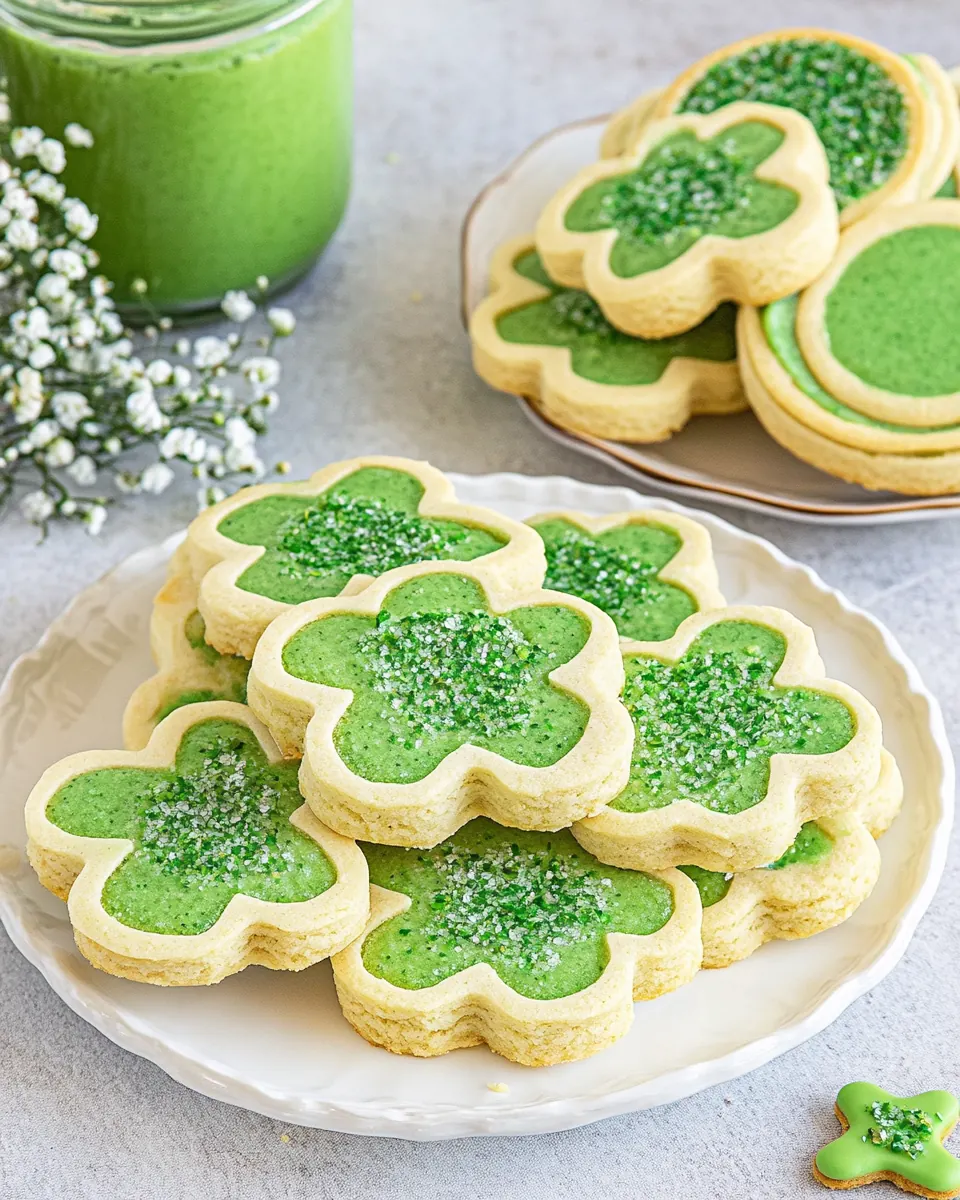
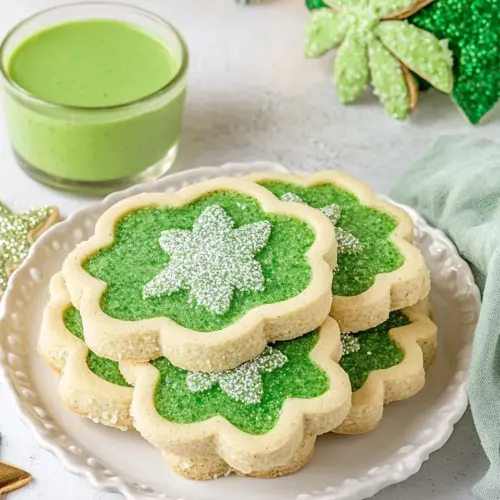
I still remember the afternoon I improvised these cookies after finding a box of pistachio pudding tucked behind other mixes. The soft green color felt festive, so I shaped the cookies into little clover windows and filled them with a pillowy frosting that peeked through like a secret. Friends arrived with coffee and stayed late, and everyone kept saying how the pistachio flavor was subtle but unmistakable, like a memory of pistachio gelato folded into cookie comfort.
These Pistachio Pudding Linzer Cookies became my go to for potlucks that need something pretty yet not fussy. I enjoy the ritual of chilling the dough, the precise little cuts, and the tiny clover windows that let you sneak a look at the filling. Baking them calms me, and the kids love pressing sprinkles into the centers, which always leads to giggles and a spatter of green across the counter. By the time the tray is full, the house smells sweet and buttery, and I already know who will ask for the recipe.
Recipe Snapshot
38 mins
30 mins
8 mins
Medium
200 kcal
American
Gluten-Free, Low FODMAP
Desserts
Stand mixer, 3 inch round cutter, 1.5 inch clover cutter, Baking sheet, Parchment paper, Wire rack, Pastry bag with M2 tip
What Sets This Pistachio Pudding Linzer Cookies Apart
They look impressive with little effort
I love how Pistachio Pudding Linzer Cookies present themselves. A few careful cuts and a frosted sandwich turn simple dough into something fête worthy. The clover windows give them presence on a cookie plate, so you seem to have made something elaborate without overworking yourself.
Unique, subtle pistachio flavor
The pudding mix brings a concentrated, slightly nutty note that reads as pistachio without needing ground nuts. I appreciate that it gives a consistent, reliable flavor every time, which is perfect when I want the cookies to taste the same across batches.
Soft texture with a tender crumb
These cookies are delicate rather than crunchy, and the sandwich format with a creamy frosting adds a lush mouthfeel. I enjoy the contrast when the outer edges crisp just a touch while the center remains tender, creating a pleasant bite.
Family friendly decorating
Kids love filling the clover windows with sprinkles, and the recipe invites little helpers. I often have family members pipe frosting while someone else drops sprinkles, which makes baking these a shared, social activity.
Flexible and forgiving method
The technique is pretty forgiving, and the chilling steps make the dough easy to handle. If you follow the main cues for dough firmness and cookie color, you’ll be rewarded with consistently good results. I find that even when I re roll scraps, the cookies still come out tasty and attractive.
What to Buy for Pistachio Pudding Linzer Cookies
These ingredients work together to give you tender, flavorful cookie sandwiches. The pudding mix provides concentrated pistachio notes, the butter adds richness and mouth coating, and the flour forms the structure that holds the clover window without crumbling. The frosting ingredients create a light, spreadable filling that plays nicely with the cookie texture.
- 1 box pistachio pudding mix 3.4 ounces: Provide a nutty, pistachio-flavored base and act as the primary leavener-flavoring component in the cookie dough; dissolve the pudding mix into the wet ingredients to evenly distribute pistachio taste and color throughout the batter, enhancing both aroma and sweetness.
- 1/2 cup unsalted butter softened: Soften to a creamy texture and contribute richness, moisture, and structure; cream with sugar to help aerate the dough, creating a tender crumb and helping bind dry ingredients together for easy handling and rolling.
- 3/4 cup granulated sugar: Sweeten and assist with creaming to incorporate air for a lighter texture; whip with butter until pale and fluffy to balance the savory butter and pistachio flavor while controlling overall sweetness in the cookie.
- 1 large egg: Bind the dough, add moisture and richness, and contribute to structure and browning; beat into the butter–sugar mixture to help emulsify fats and liquids for a cohesive, pliable dough that holds its cutout shape.
- 1 1/2 cups all-purpose flour: Provide bulk, structure, and the primary starch for the cookie; mix in gradually to form a firm yet tender dough, with gluten development kept minimal to maintain a delicate Linzer-style cookie texture.
- 1/4 teaspoons salt: Enhance overall flavor balance and strengthen gluten control slightly; sprinkle in to heighten the cookie's savory-sweet contrast and to bring out the pistachio notes without overpowering sweetness.
- 1/2 cup unsalted butter softened: Add additional richness and a creamy texture for the filling; beat until smooth to create a stable base for the frosting that complements the pistachio cookies without making them greasy.
- 8 ounces powdered sugar: Sweeten and thicken the filling to a spreadable consistency; sift and beat into butter to achieve a silky, smooth frosting that pipes or spreads easily between the cookie layers and helps the sprinkles adhere.
- 1/2 teaspoon vanilla paste or regular vanilla extract: Impart vanilla aroma and complexity to the frosting, rounding flavors and enhancing sweetness perception; stir into the filling for nuanced depth and a warm, familiar background note that balances pistachio flavor.
- 1 tablespoon 2% milk: Adjust frosting consistency and add slight creaminess for easier spreading; whisk in a small amount to loosen the filling if too stiff, ensuring a smooth finish and easy assembly of the Linzer sandwiches.
- Green sprinkles (optional): Provide optional decorative color and a festive finish to the assembled cookies; sprinkle sparingly on top of the filled cookies to add visual appeal and a textured bite without affecting the cookie structure.
Cooking Instructions for Pistachio Pudding Linzer Cookies
These directions walk you through chilling, cutting, baking, and assembling the cookie sandwiches. I like to keep my tools nearby and work in a calm sequence so each step flows into the next. Follow the sensory cues to know when to move on, especially for dough firmness and cookie color.
- In the bowl of a stand mixer, cream together pudding, butter, and granulated sugar until fluffy.: The bowl will smell sweet and nutty as the pudding mix and butter emulsify with the granulated sugar , and you will notice the texture shift from gritty to a smooth, satiny cream. This aeration traps tiny air bubbles that lighten the dough and help the cookies feel tender, so take time to reach a consistently fluffy texture. A common mistake is rushing this step, which results in dense cookies, so stop creaming only when the mixture lifts and holds a light sheen.
- Scrape down sides and beat in egg. Turn the speed down to low and slowly mix in flour and salt until well-combined.: After scraping the bowl, the mixture will look more uniform, and when you add the egg , the batter will momentarily look glossy and more cohesive. The egg provides structure and moisture, and as it incorporates, the mixture should smooth out without streaks. If you skip scraping, pockets of unmixed pudding or butter will remain, causing uneven flavor and texture, so be thorough but gentle to avoid overbeating.
- Spread dough onto a sheet of parchment paper. Cover with another sheet of parchment, and roll dough to approximately 1/8-inch thick. Transfer dough (on the parchment) to a cookie sheet and freeze for 20 minutes.: You will see the dough come together and lose some of its gloss as the flour absorbs moisture. Mixing on low prevents gluten from developing too much, which keeps the cookies tender rather than chewy. Stop as soon as there are no dry streaks, because overmixing creates tough cookies; the dough should feel slightly tacky but manageable.
- Once dough has chilled, remove from the freezer and place parchment on counter. Remove the top parchment, flip it over, place it on the dough again, and flip the entire thing over. Remove the parchment that is now on top. (This step will help keep your cookies from sticking to the parchment after cutting.) Cut out rounds using a 3-inch round cutter. For half the cookies, cut out the center shape with a 1.5-inch clover cutter. Place cookies back on baking sheet and put in the freezer.: When the dough is spread on parchment, it will feel cool and pliable under the rolling pin. Press it into an even layer so it chills uniformly, which makes cutting cleaner later. If you spread it unevenly, you will have cookies that bake at different rates, so aim for a consistent thickness across the sheet.
- Preheat oven to 350°F. Once the oven has preheated, remove cookies from the freezer, transfer to a clean parchment-lined baking sheet, and bake cookies for 6-8 minutes.: Rolling through the top parchment creates a smooth surface and prevents sticking, and you should see an even pale green sheet emerging. Thin edges will bake faster and can brown quickly, so check edges frequently. A common error is rolling too thin, leading to fragile cookies that tear when cut, so maintain the approximate thickness.
- Let cookies cool on baking sheet for 2 minutes before removing to a wire rack.: The dough will firm up and the surface becomes cool and slightly stiff, which helps maintain crisp cut edges when stamping shapes. This chilling is crucial for clean windows and neat shapes. If you skip freezing, the dough can spread in the oven and lose its crisp outlines, so allow the full chill time for best results.
- Once cookies are completely cooled, make the frosting. In the bowl of a stand mixer, beat together softened butter and powdered sugar. Add the vanilla paste and milk and beat until frosting is fluffy.: The chilled dough should feel solid but pliable. When you remove the top parchment and flip as instructed, the goal is to ensure the dough does not stick after cutting, producing clean releases. If the dough warms too quickly while you work, pop it back in the freezer briefly to keep shapes neat.
- To fill the cookies, fit a pastry bag with an M 2 tip and fill bag with frosting. Flip over full cookie round and pipe frosting onto bottom, starting from the outside and working your way in, in a circular motion. Top frosted cookie with clover-hole cookie.: The clean clack of the cutter signals a crisp edge, and you will see tidy rounds lifting from the parchment. For half the cookies, use a 1.5-inch clover cutter to make the center window; the clover creates a charming peek at the filling. Press straight down and wiggle as little as possible to avoid distorting the shape; otherwise, the window may close up during baking.
- To add sprinkles, fill clover hole completely with sprinkles. Gently press on sprinkles so they adhere evenly, then tip cookie onto a rimmed plate to remove excess sprinkles.: Returning the cut cookies to the freezer firms the edges again, ensuring they keep their shape when transferred to the oven. You will notice the dough goes from tacky to firm under your fingertips. If you skip this step, delicate shapes can slump and lose definition when baked.
- Preheat oven to 350°F: The oven should reach a stable temperature so the cookies bake evenly and the bottoms set properly. A consistent 350°F produces a light, pale cookie with slightly bronzed edges, which is the visual cue to aim for. If your oven runs hot, check with an oven thermometer to avoid overbrowning.
- Once the oven has preheated, remove cookies from the freezer, transfer to a clean parchment-lined baking sheet, and bake cookies for 6 to 8 minutes: During baking you will see the cookies puff slightly and the edges set, while the centers remain pale; that is your cue to remove them. The aroma of butter will fill the kitchen and the pistachio note will be subtle in the oven steam. Overbaking even by a minute can turn them dry, so watch closely in the final minutes.
- Let cookies cool on baking sheet for 2 minutes before removing to a wire rack: Resting briefly lets the cookies finish setting so they do not break when moved. The bottoms will still be slightly soft but will firm quickly on the rack. If you try to move them too soon, they can bend or crack, so use a thin spatula and be patient for those two minutes.
- Once cookies are completely cooled, make the frosting: As you beat softened butter and powdered sugar , the bowl will look snowy and the mixture will lighten in color. Adding the vanilla and milk yields a glossy, smooth frosting that smells sweet and aromatic. If the frosting is grainy, you may have added the powdered sugar too quickly, so beat until smooth and adjust milk in tiny amounts.
- In the bowl of a stand mixer, beat together softened butter and powdered sugar: The texture will go from fatty to whipped as air is incorporated, and the sound of the mixer will change from a heavy grind to a lighter hum. This step sets the stage for a fluffy filling that pipes neatly into the clover windows. If your mixer splatters, reduce speed and scrape the bowl to keep the texture even.
- Add the vanilla paste and milk and beat until frosting is fluffy: The vanilla deepens flavor while the milk softens consistency so it is spreadable and pipeable. The frosting should hold soft peaks and look silky. If it becomes too loose, add a touch more powdered sugar; if it is too stiff, a few drops of milk will rescue it.
- To fill the cookies, fit a pastry bag with an M 2 tip and fill bag with frosting: Filling a bag gives you control and a clean presentation; the tip size helps the frosting nestle into the cavity without overflowing. You will feel the gentle resistance as you pipe, and the frosting should mound slightly. If the bag is overfilled it can be hard to control pressure, so refill in smaller batches for steadier piping.
- Flip over full cookie round and pipe frosting onto bottom, starting from the outside and working your way in, in a circular motion: The circular piping creates a cushion that supports the top cookie and prevents spilling. You will see concentric rings of frosting building up, and the texture should be airy and stable. Piping too sparsely can lead to a flat sandwich, while overfilling causes frosting to squish out when you top with the window cookie.
- Top frosted cookie with clover-hole cookie: Gently press the top cookie down until the frosting slightly peeks through the window, creating an inviting view. The sandwich should feel cohesive without forcing frosting out the sides. Pressing too hard flattens the filling and can squeeze out sprinkles if you plan to use them, so aim for gentle contact only.
- To add sprinkles, fill clover hole completely with sprinkles: Pressing sprinkles in ensures they adhere to the frosting and form an even visual field in the window. Use a light tap to remove excess sprinkles and a rimmed plate to catch fall off. Overpacking sprinkles can make the top heavy and cause them to fall out easily, so aim for a neat, even layer.
- Gently press on sprinkles so they adhere evenly, then tip cookie onto a rimmed plate to remove excess sprinkles: The final step polishes the appearance and reduces mess. A soft press ensures sprinkles nestle into the frosting and stay put during serving. If you skip removing excess sprinkles, the presentation looks messy and you will lose vibrant color when plating.
How to Switch It Up
I like to offer small variations that keep the core idea intact while letting you adapt to what you have on hand or the occasion. Below are practical, tested tips to tweak flavor, texture, or presentation without derailing the recipe.
- Use vanilla paste for flecked frosting — Swap to vanilla paste to add tiny flecks and a richer vanilla aroma that contrasts nicely with the pistachio notes, making each sandwich look more artisanal.
- Adjust sprinkle color for themes — Change the green sprinkles to gold or white for weddings or to pastel shades for baby showers, which transforms the cookies to match the event palette.
- Make mini versions — Use smaller cutters to create bite sized cookies for dessert platters, which shortens bake time and increases the number of servings for parties.
- Sift powdered sugar for smoother frosting — Sifting prevents lumps and helps you achieve a silky frosting that pipes cleanly into the clover windows without clogging the pastry tip.
- Use parchment for rolling and transfer — Rolling between sheets helps you move the dough to a tray without distortion, ensuring consistent thickness and clean cuts for every cookie.
- Chill pans between batches — If the kitchen is warm, briefly chilling the baking sheet can keep cookie edges from softening, leading to more consistent shapes across trays.
Great Combinations for Pistachio Pudding Linzer Cookies
These sandwich cookies pair well with simple beverages and seasonal spreads, and they shine on dessert tables during spring gatherings. Below are thoughtful serving ideas, storage tips, and occasion pairings to make the most of them.
- Serve with a light tea — A cup of mild black or green tea complements the sweet pistachio notes without overpowering them, making these cookies ideal for afternoon tea or a baby shower.
- Plate for brunch — Arrange cookies on a tiered tray alongside fruit and scones for a festive brunch display where their pale green color adds a spring touch.
- Pack for picnics — Place cookies in a rigid container to protect the sandwich and keep sprinkles intact, perfect for outdoor gatherings in mild weather.
- Cookie exchange favorite — These look special and travel well, so they are a great pick for cookie swaps where presentation matters. Wrap in parchment and stack gently to maintain windows.
- Storage tip — Store in an airtight container at room temperature for up to three days, or freeze in a single layer for longer keeping; thaw slowly to avoid condensation on the frosting.
- Seasonal pairing — The subtle green hue makes these especially suited to spring holidays and celebrations where pastel colors are in theme.
FAQ
Conclusion
These Pistachio Pudding Linzer Cookies stand out because they blend delicate texture, subtle pistachio flavor, and an irresistible presentation that looks special with little fuss. I encourage you to give them a try when you want a spring worthy cookie that invites helping hands for decorating and leaves a memorable impression on guests. Baking them is a gentle, rewarding process that results in charming cookie sandwiches ideal for gatherings, and once you make them you may find they become a repeat favorite for festive trays.
Pistachio Pudding Linzer Cookies
Equipment
- Stand mixer
- 3 inch round cutter
- 1.5 inch clover cutter
- Baking Sheet
- Parchment Paper
- Wire Rack
- Pastry bag with M2 tip
Ingredients
- 1 box pistachio pudding mix 3.4 ounces Provide a nutty, pistachio-flavored base and act as the primary leavener-flavoring component in the cookie dough; dissolve the pudding mix into the wet ingredients to evenly distribute pistachio taste and color throughout the batter, enhancing both aroma and sweetness.
- 1/2 cup unsalted butter softened Soften to a creamy texture and contribute richness, moisture, and structure; cream with sugar to help aerate the dough, creating a tender crumb and helping bind dry ingredients together for easy handling and rolling.
- 3/4 cup granulated sugar Sweeten and assist with creaming to incorporate air for a lighter texture; whip with butter until pale and fluffy to balance the savory butter and pistachio flavor while controlling overall sweetness in the cookie.
- 1 large egg Bind the dough, add moisture and richness, and contribute to structure and browning; beat into the butter-sugar mixture to help emulsify fats and liquids for a cohesive, pliable dough that holds its cutout shape.
- 1 1/2 cups all-purpose flour Provide bulk, structure, and the primary starch for the cookie; mix in gradually to form a firm yet tender dough, with gluten development kept minimal to maintain a delicate Linzer-style cookie texture.
- 1/4 teaspoons salt Enhance overall flavor balance and strengthen gluten control slightly; sprinkle in to heighten the cookie's savory-sweet contrast and to bring out the pistachio notes without overpowering sweetness.
- 1/2 cup unsalted butter softened Add additional richness and a creamy texture for the filling; beat until smooth to create a stable base for the frosting that complements the pistachio cookies without making them greasy.
- 8 ounces powdered sugar Sweeten and thicken the filling to a spreadable consistency; sift and beat into butter to achieve a silky, smooth frosting that pipes or spreads easily between the cookie layers and helps the sprinkles adhere.
- 1/2 teaspoon vanilla paste or regular vanilla extract Impart vanilla aroma and complexity to the frosting, rounding flavors and enhancing sweetness perception; stir into the filling for nuanced depth and a warm, familiar background note that balances pistachio flavor.
- 1 tablespoon 2% milk Adjust frosting consistency and add slight creaminess for easier spreading; whisk in a small amount to loosen the filling if too stiff, ensuring a smooth finish and easy assembly of the Linzer sandwiches.
- Green sprinkles optional Provide optional decorative color and a festive finish to the assembled cookies; sprinkle sparingly on top of the filled cookies to add visual appeal and a textured bite without affecting the cookie structure.
Instructions
- In the bowl of a stand mixer, cream together pudding, butter, and granulated sugar until fluffy.: The bowl will smell sweet and nutty as the pudding mix and butter emulsify with the granulated sugar , and you will notice the texture shift from gritty to a smooth, satiny cream. This aeration traps tiny air bubbles that lighten the dough and help the cookies feel tender, so take time to reach a consistently fluffy texture. A common mistake is rushing this step, which results in dense cookies, so stop creaming only when the mixture lifts and holds a light sheen.
- Scrape down sides and beat in egg. Turn the speed down to low and slowly mix in flour and salt until well-combined.: After scraping the bowl, the mixture will look more uniform, and when you add the egg , the batter will momentarily look glossy and more cohesive. The egg provides structure and moisture, and as it incorporates, the mixture should smooth out without streaks. If you skip scraping, pockets of unmixed pudding or butter will remain, causing uneven flavor and texture, so be thorough but gentle to avoid overbeating.
- Spread dough onto a sheet of parchment paper. Cover with another sheet of parchment, and roll dough to approximately 1/8-inch thick. Transfer dough (on the parchment) to a cookie sheet and freeze for 20 minutes.: You will see the dough come together and lose some of its gloss as the flour absorbs moisture. Mixing on low prevents gluten from developing too much, which keeps the cookies tender rather than chewy. Stop as soon as there are no dry streaks, because overmixing creates tough cookies; the dough should feel slightly tacky but manageable.
- Once dough has chilled, remove from the freezer and place parchment on counter. Remove the top parchment, flip it over, place it on the dough again, and flip the entire thing over. Remove the parchment that is now on top. (This step will help keep your cookies from sticking to the parchment after cutting.) Cut out rounds using a 3-inch round cutter. For half the cookies, cut out the center shape with a 1.5-inch clover cutter. Place cookies back on baking sheet and put in the freezer.: When the dough is spread on parchment, it will feel cool and pliable under the rolling pin. Press it into an even layer so it chills uniformly, which makes cutting cleaner later. If you spread it unevenly, you will have cookies that bake at different rates, so aim for a consistent thickness across the sheet.
- Preheat oven to 350°F. Once the oven has preheated, remove cookies from the freezer, transfer to a clean parchment-lined baking sheet, and bake cookies for 6-8 minutes.: Rolling through the top parchment creates a smooth surface and prevents sticking, and you should see an even pale green sheet emerging. Thin edges will bake faster and can brown quickly, so check edges frequently. A common error is rolling too thin, leading to fragile cookies that tear when cut, so maintain the approximate thickness.
- Let cookies cool on baking sheet for 2 minutes before removing to a wire rack.: The dough will firm up and the surface becomes cool and slightly stiff, which helps maintain crisp cut edges when stamping shapes. This chilling is crucial for clean windows and neat shapes. If you skip freezing, the dough can spread in the oven and lose its crisp outlines, so allow the full chill time for best results.
- Once cookies are completely cooled, make the frosting. In the bowl of a stand mixer, beat together softened butter and powdered sugar. Add the vanilla paste and milk and beat until frosting is fluffy.: The chilled dough should feel solid but pliable. When you remove the top parchment and flip as instructed, the goal is to ensure the dough does not stick after cutting, producing clean releases. If the dough warms too quickly while you work, pop it back in the freezer briefly to keep shapes neat.
- To fill the cookies, fit a pastry bag with an M 2 tip and fill bag with frosting. Flip over full cookie round and pipe frosting onto bottom, starting from the outside and working your way in, in a circular motion. Top frosted cookie with clover-hole cookie.: The clean clack of the cutter signals a crisp edge, and you will see tidy rounds lifting from the parchment. For half the cookies, use a 1.5-inch clover cutter to make the center window; the clover creates a charming peek at the filling. Press straight down and wiggle as little as possible to avoid distorting the shape; otherwise, the window may close up during baking.
- To add sprinkles, fill clover hole completely with sprinkles. Gently press on sprinkles so they adhere evenly, then tip cookie onto a rimmed plate to remove excess sprinkles.: Returning the cut cookies to the freezer firms the edges again, ensuring they keep their shape when transferred to the oven. You will notice the dough goes from tacky to firm under your fingertips. If you skip this step, delicate shapes can slump and lose definition when baked.
- Preheat oven to 350°F: The oven should reach a stable temperature so the cookies bake evenly and the bottoms set properly. A consistent 350°F produces a light, pale cookie with slightly bronzed edges, which is the visual cue to aim for. If your oven runs hot, check with an oven thermometer to avoid overbrowning.
- Once the oven has preheated, remove cookies from the freezer, transfer to a clean parchment-lined baking sheet, and bake cookies for 6 to 8 minutes: During baking you will see the cookies puff slightly and the edges set, while the centers remain pale; that is your cue to remove them. The aroma of butter will fill the kitchen and the pistachio note will be subtle in the oven steam. Overbaking even by a minute can turn them dry, so watch closely in the final minutes.
- Let cookies cool on baking sheet for 2 minutes before removing to a wire rack: Resting briefly lets the cookies finish setting so they do not break when moved. The bottoms will still be slightly soft but will firm quickly on the rack. If you try to move them too soon, they can bend or crack, so use a thin spatula and be patient for those two minutes.
- Once cookies are completely cooled, make the frosting: As you beat softened butter and powdered sugar , the bowl will look snowy and the mixture will lighten in color. Adding the vanilla and milk yields a glossy, smooth frosting that smells sweet and aromatic. If the frosting is grainy, you may have added the powdered sugar too quickly, so beat until smooth and adjust milk in tiny amounts.
- In the bowl of a stand mixer, beat together softened butter and powdered sugar: The texture will go from fatty to whipped as air is incorporated, and the sound of the mixer will change from a heavy grind to a lighter hum. This step sets the stage for a fluffy filling that pipes neatly into the clover windows. If your mixer splatters, reduce speed and scrape the bowl to keep the texture even.
- Add the vanilla paste and milk and beat until frosting is fluffy: The vanilla deepens flavor while the milk softens consistency so it is spreadable and pipeable. The frosting should hold soft peaks and look silky. If it becomes too loose, add a touch more powdered sugar; if it is too stiff, a few drops of milk will rescue it.
- To fill the cookies, fit a pastry bag with an M 2 tip and fill bag with frosting: Filling a bag gives you control and a clean presentation; the tip size helps the frosting nestle into the cavity without overflowing. You will feel the gentle resistance as you pipe, and the frosting should mound slightly. If the bag is overfilled it can be hard to control pressure, so refill in smaller batches for steadier piping.
- Flip over full cookie round and pipe frosting onto bottom, starting from the outside and working your way in, in a circular motion: The circular piping creates a cushion that supports the top cookie and prevents spilling. You will see concentric rings of frosting building up, and the texture should be airy and stable. Piping too sparsely can lead to a flat sandwich, while overfilling causes frosting to squish out when you top with the window cookie.
- Top frosted cookie with clover-hole cookie: Gently press the top cookie down until the frosting slightly peeks through the window, creating an inviting view. The sandwich should feel cohesive without forcing frosting out the sides. Pressing too hard flattens the filling and can squeeze out sprinkles if you plan to use them, so aim for gentle contact only.
- To add sprinkles, fill clover hole completely with sprinkles: Pressing sprinkles in ensures they adhere to the frosting and form an even visual field in the window. Use a light tap to remove excess sprinkles and a rimmed plate to catch fall off. Overpacking sprinkles can make the top heavy and cause them to fall out easily, so aim for a neat, even layer.
- Gently press on sprinkles so they adhere evenly, then tip cookie onto a rimmed plate to remove excess sprinkles: The final step polishes the appearance and reduces mess. A soft press ensures sprinkles nestle into the frosting and stay put during serving. If you skip removing excess sprinkles, the presentation looks messy and you will lose vibrant color when plating.
Notes
- Use vanilla paste for flecked frosting — Swap to vanilla paste to add tiny flecks and a richer vanilla aroma that contrasts nicely with the pistachio notes, making each sandwich look more artisanal.
- Adjust sprinkle color for themes — Change the green sprinkles to gold or white for weddings or to pastel shades for baby showers, which transforms the cookies to match the event palette.
- Make mini versions — Use smaller cutters to create bite sized cookies for dessert platters, which shortens bake time and increases the number of servings for parties.
- Sift powdered sugar for smoother frosting — Sifting prevents lumps and helps you achieve a silky frosting that pipes cleanly into the clover windows without clogging the pastry tip.
- Use parchment for rolling and transfer — Rolling between sheets helps you move the dough to a tray without distortion, ensuring consistent thickness and clean cuts for every cookie.
- Chill pans between batches — If the kitchen is warm, briefly chilling the baking sheet can keep cookie edges from softening, leading to more consistent shapes across trays.