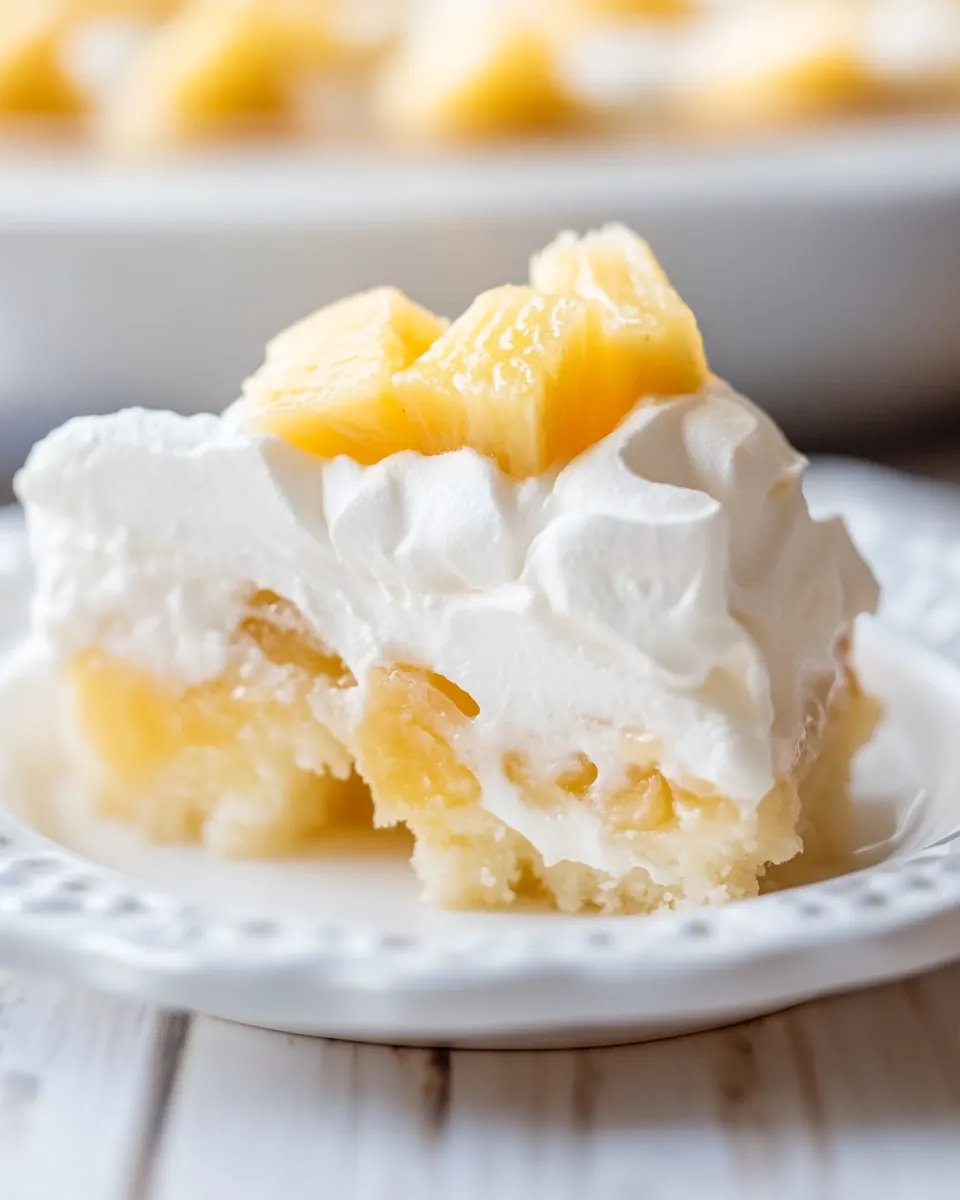
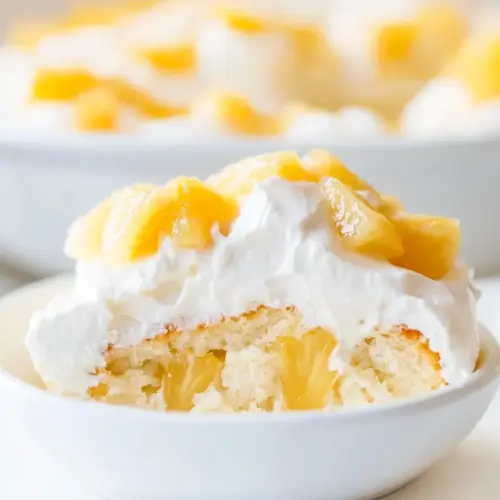
Pineapple Poke Cake
Pineapple Poke Cake has been my go to when I want something bright, nostalgic, and reliably crowd pleasing.
I first tried this at a summer potluck years ago, and the memory of that tender crumb soaked with pineapple juice stuck with me. Every time I make Pineapple Poke Cake now, I remember the warm kitchen, the laughter around the table, and how a simple combination of pantry staples turned into something unexpectedly joyful. I like that it is forgiving, so I can chat with guests while it bakes without worrying I ruined anything. It also travels well, so I often bring it wrapped to picnics, which always sparks requests for the recipe.
There is a comforting ritual to poking the holes, watching the filling sink in, and finishing with a cloud of whipped topping and a fresh pineapple piece. I enjoy the contrast of textures, the soft cake and pockets of bright, juicy pineapple. Over the years I adjusted small things to suit my family, but the essence remains the same. If you like desserts that are easy to assemble and gloriously tropical, this one will become one of your reliable favorites too.
Recipe Snapshot
1 hr 5 mins
35 mins
30 mins
Medium
290 kcal
American
Gluten-Free, Keto
Desserts
9 by 13 inch baking dish, Large bowl, Small wooden spoon or large straw for poking, Spatula, Refrigerator
Why This Pineapple Poke Cake Shines
It is wonderfully easy to make
I love recipes that do the heavy lifting for you, and Pineapple Poke Cake is exactly that. With a boxed yellow cake mix as the base, the method is streamlined, so I can focus on texture and flavor rather than complicated techniques. The straightforward steps make it perfect for busy weeknights or last minute gatherings, giving you a dessert that looks and tastes special without a huge time investment.
Textural contrast that keeps people coming back
The interplay between the soft cake crumb and the pockets of soaked pineapple is irresistible. When I bite into Pineapple Poke Cake, I get a tender, moist cake that yields bright bursts from the crushed pineapple. The finishing layer of Cool Whip adds a light, creamy top that balances the sweetness. That combination keeps guests reaching for another slice.
Flexible and forgiving
This recipe tolerates small adjustments, so I rarely worry about slight measurement slips. You can vary how many holes you poke to control the pudding infusion, and it still turns out lovely. I appreciate that flexibility when I am multitasking in the kitchen, and it makes Pineapple Poke Cake a go to when I need a reliable dessert option.
Great make ahead dessert
I often prepare this a day ahead. Chilling time helps the pudding set and the flavors meld, so when I serve Pineapple Poke Cake the next day it tastes even better. For gatherings, that ability to prepare in advance minimizes last minute stress and lets me enjoy the company rather than fussing over dessert.
Kid friendly and nostalgic
There is something comforting about this cake that sparks memories for many people, and kids especially love the sweet, juicy bites of pineapple. I find it is a hit at family events because it evokes classic home baking while still being simple enough for novice bakers to master.
Recipe Ingredients for Pineapple Poke Cake
These ingredients work together to create a moist, fruity cake with a creamy finish. The boxed yellow cake mix provides a stable, tender base that soaks up the pineapple flavor. The pineapple juice and crushed pineapple bring bright acidity and sweetness, while vanilla yogurt and milk add richness and help the pudding set. Butter gives a buttery note and helps with the cake crumb, and Cool Whip lightens the top for a soft finish.
- 15.25 oz box yellow cake mix: Provides the dry base and structure for the cake, supplying flour, sugar, leavening, and flavoring to create a tender yellow cake; follow package instructions for mixing and baking time to ensure proper rise. Enhances texture and stability so the cake can absorb pineapple juice when poked and hold up to fillings and toppings.
- 1 cup pineapple juice: Adds liquid and tropical sweetness that soaks into the baked cake when poured over poke holes, infusing pineapple flavor throughout; use the juice from canned pineapple for concentrated taste. Helps moisten the crumb so the final dessert remains juicy rather than dry.
- 1/3 cup unsalted butter melted: Contributes fat and richness when melted and mixed into the batter, improving tenderness and mouthfeel; melted unsalted butter can replace oil for a slightly richer flavor. Controls salt level since it contains no added salt, allowing the recipe’s balance to be managed by other ingredients.
- 5.3 oz cup vanilla yogurt: Introduces creamy tang and additional moisture while boosting vanilla flavor; vanilla yogurt also adds some density that complements the pudding filling. Helps maintain a soft, moist crumb and can enhance the cake’s overall richness without changing bake time significantly.
- 20 oz can crushed pineapple: Provides the primary pineapple flavor and texture, offering both juice and fruit bits that distribute sweetness and acidity across the cake; crushed pineapple is ideal for pouring and folding into the batter or as a poke filling. Contributes moisture and bite, and its syrup can be drained or used depending on desired intensity.
- 3.4 oz box instant vanilla pudding mix: Thickens the filling into a creamy layer and imparts concentrated vanilla flavor; instant vanilla pudding mix dissolves quickly in milk to form a stable custard that sets when chilled. Enhances sweetness and body, helping the topping adhere to the cake and hold Cool Whip without weeping.
- 1 cup whole milk: Activates the instant pudding mix and adjusts consistency of the filling to a smooth, pourable custard; whole milk provides richness that ensures a creamy, non-watery texture. Adds fat for silkiness, contributing to a luxurious mouthfeel in the finished dessert.
- 8 oz Cool Whip thawed: Creates a light, airy topping with stabilized sweetness and creaminess; thawed Cool Whip folds easily into the chilled pudding layer to produce a fluffy finish. Keeps the cake cool and adds visual appeal while balancing the denser cake and fruit components.
- 12 small pineapple chunks fresh or canned: Offers decorative garnish and bursts of fresh pineapple flavor and texture; small pineapple chunks can be arranged on top for contrast and to signal the cake’s flavor. Provides a firmer bite than crushed pineapple, enhancing presentation and adding a fresh accent.
Recipe Directions for Pineapple Poke Cake
This recipe moves from baking to assembly, with a moment of simple, satisfying hands on work when you poke and fill the cake. Follow each step and take time to notice the visual cues so your cake lands moist and evenly flavored.
- Preheat oven to 350° F and spray baking dish with non-stick cooking spray (or grease with some butter).: Close your oven and let it reach a steady 350° F , that steady warmth assures even rise and a consistent crumb. As the oven hums, prepare the pan so the cake releases cleanly after baking. The scent of butter warming in the pan is comforting and hints at the golden crust to come. Common mistake to avoid is not preheating early enough, which can make the cake dense instead of light. You want a reliable, consistent heat so the center cooks evenly while the edges set.
- In a large bowl add cake mix, pineapple juice, melted butter, and yogurt, stirring to combine.: As you stir the batter, notice how the dry yellow cake mix transforms into a glossy, pourable batter when it meets the pineapple juice , melted butter , and vanilla yogurt . The aroma of pineapple will lift the mixture, and a few vigorous folds will eliminate dry pockets of mix. A frequent error is over mixing, which can toughen the crumb, so stir until just combined and smooth. The batter should be uniform and slightly thick but not lumpy.
- Pour cake mixture into prepared baking dish and bake for 30 minutes.: When the batter slips into the pan, it should spread evenly and fill the dish without air pockets. Slide it into the 350° F oven and listen for a gentle settling sound as it begins to rise. After about 30 minutes, the top should be a light golden brown and a toothpick inserted near the center will come out with moist crumbs, not raw batter. A common pitfall is opening the oven door too often, which lowers temperature and can cause uneven baking. Trust the time and check near the end.
- Remove from oven and allow to cool for about 20 minutes at room temperature.: Pull the pan out and set it on a cooling rack so air can circulate underneath, which prevents soggy bottoms. As it cools, the cake will contract slightly, making it easier to poke clean, uniform holes. You want it warm but not hot because hot cake can collapse when filled, while cold cake resists absorbing the pudding. A mistake I see is rushing this step and poking a too hot or too cold cake, which affects how the filling soaks in.
- While the cake is cooling, make the filling by stirring together the crushed pineapple, pudding mix, and milk in a small bowl.: As you whisk the crushed pineapple with the instant vanilla pudding mix and milk , the mixture will thicken and give off a sweet, creamy scent. The texture should be silky and pourable, not runny, indicating the pudding mix has hydrated properly. This filling adds body and concentrated pineapple flavor into the cake. Avoid adding too much milk, which can make the filling too thin to settle into the holes properly.
- Using the handle of a small wooden spoon or large straw, poke holes in the cake about 3/4 the way through, taking care not to poke all the way to the bottom.: When poking, you will feel a slight give as the handle breaks the surface and meets a firmer layer beneath, which is your cue to stop so the cake still supports the filling. The tiny punctures should be evenly spaced so the pudding can disperse throughout the layer without leaking out the bottom. Common mistakes include poking too shallow, which prevents infusion, or too deep, which lets the filling pool under the cake. Aim for consistency in depth and spacing.
- Pour pudding mixture on top of cake and spread evenly.: As the pudding lands in the holes, watch it sink in with a gentle plopping sound and leave glossy pockets across the surface. Use a spatula to coax the filling into any stubborn spots, ensuring even distribution. The filling should sit slightly on top while seeping into the cake. If you spread too aggressively you can force the filling out of the holes, so work gently to maintain those concentrated bursts of pineapple.
- Cover and refrigerate cake for 2 hours.: When chilling, the pudding will set and meld into the crumb, cooling the dessert so it becomes sliceable without smearing. The refrigerator tames the sweetness and allows the textures to harmonize into a cohesive dessert. A common oversight is removing it too soon, leaving the filling loose and the cake difficult to slice. Two hours is a guideline to ensure proper setting; longer chilling deepens the flavors.
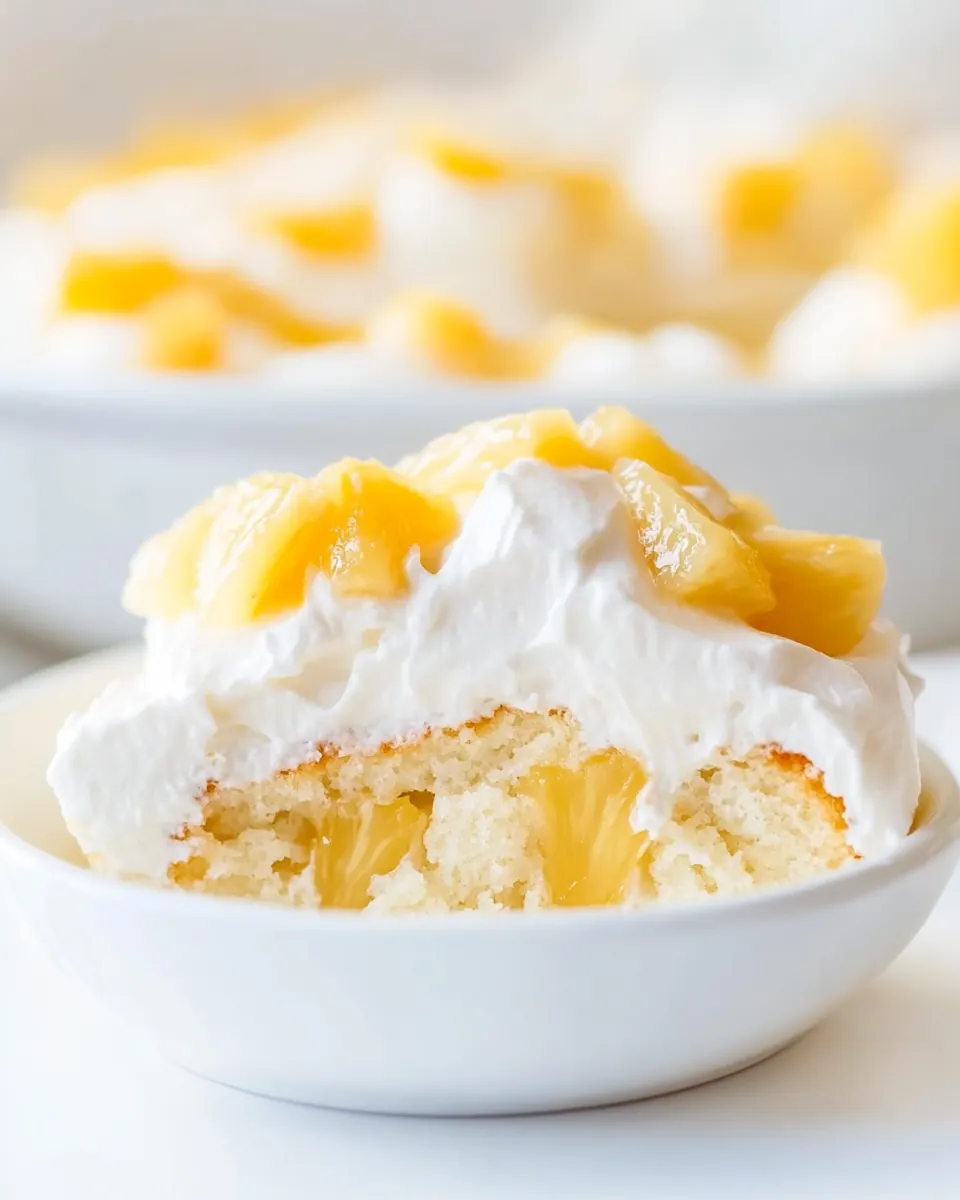
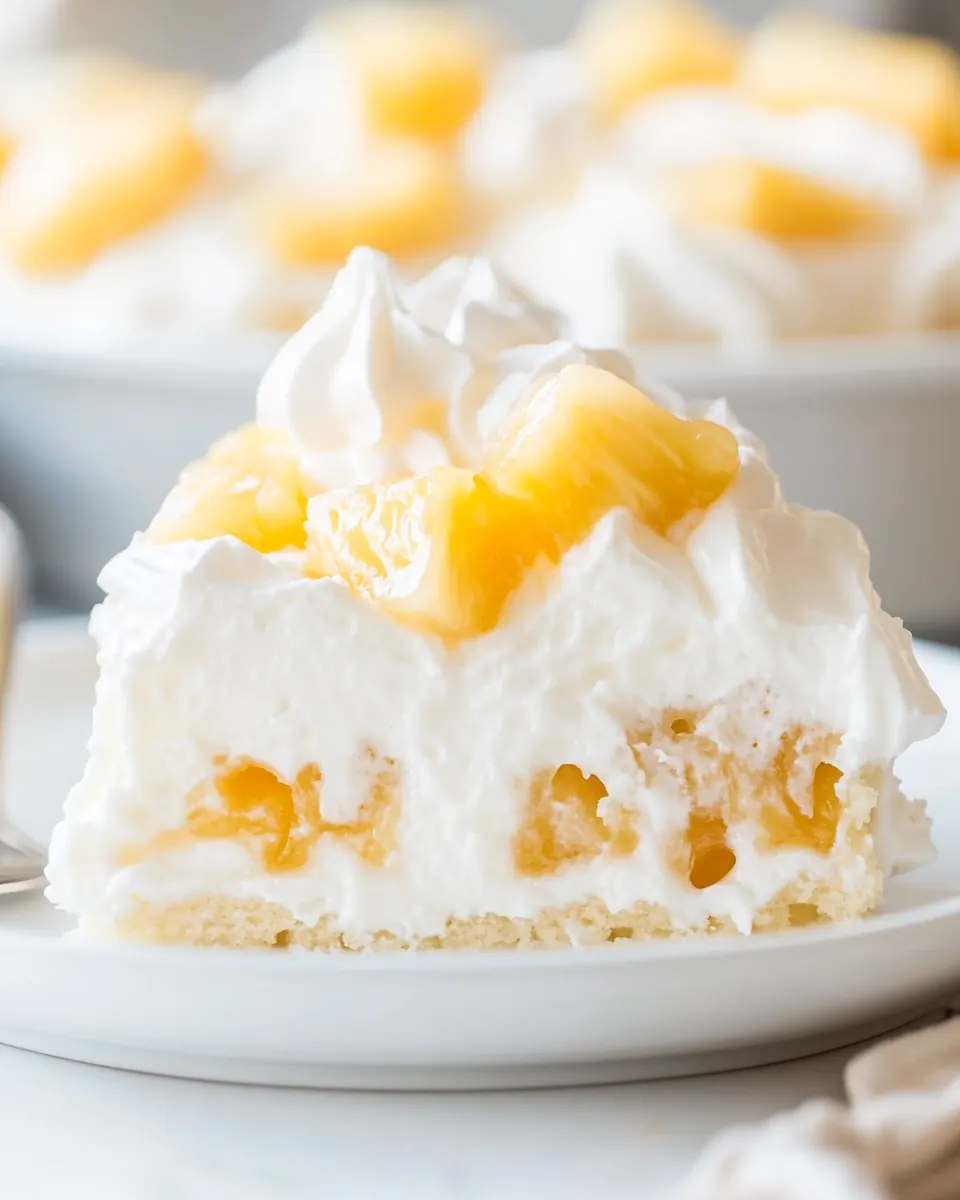
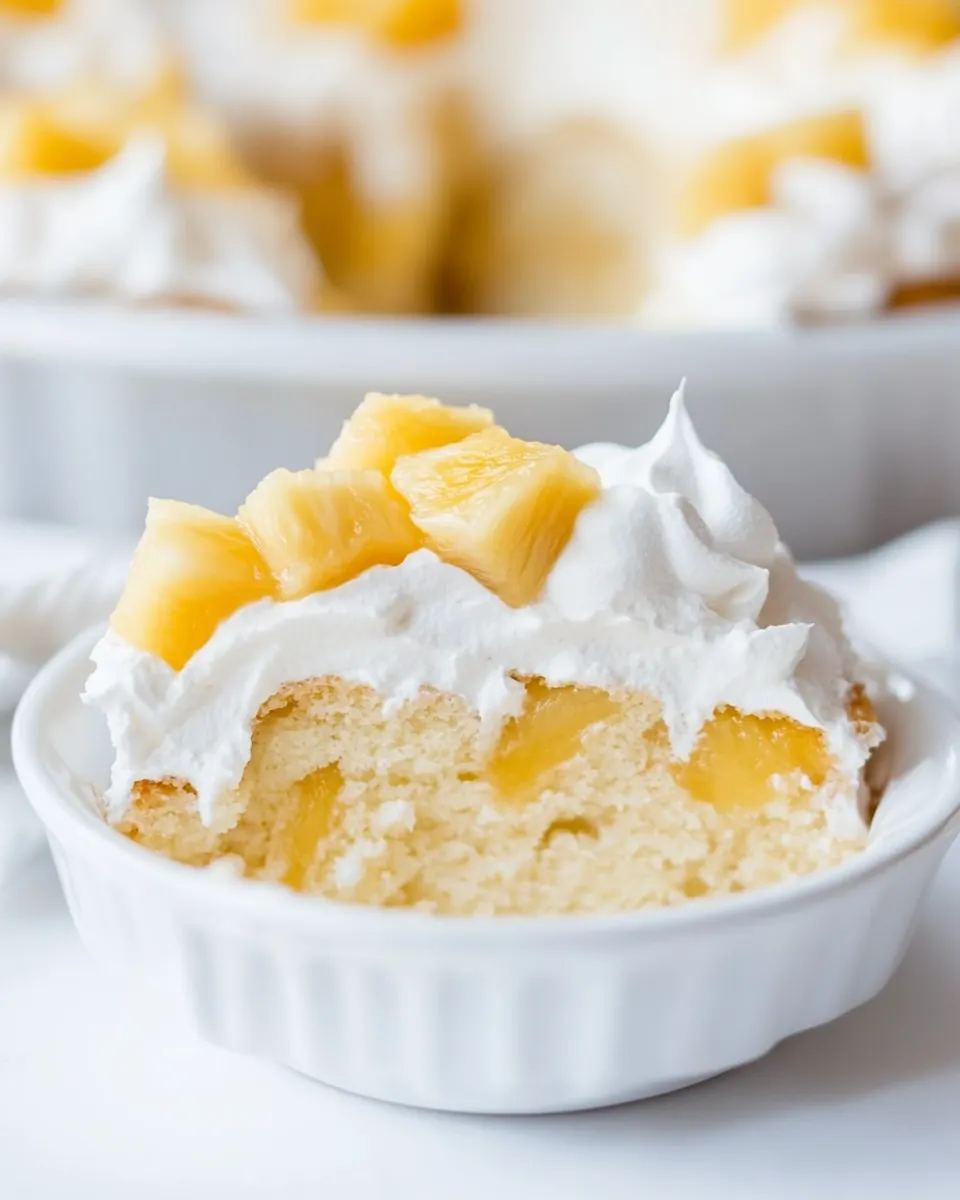
- Remove cake from refrigerator and spread Cool Whip on top. Add one small pineapple chunk per slice of cake.: The smooth, cloud like Cool Whip should be spread with gentle strokes so you preserve its airy texture. As you place a pineapple chunk on each slice you add a fresh burst of fruit and a pretty finishing touch. The contrast of the pale whipped surface with the bright pineapple is visually appealing. Avoid spreading when the cake is too cold and brittle, which can crack slices; allow it to warm slightly if needed for a smooth finish.
- Slice into 12 even squares and enjoy!: Use a clean, sharp knife to cut through the chilled cake so each portion holds together with neat edges. You should feel a slight resistance as the knife passes through the set pudding and soft cake, revealing pockets of juicy pineapple. If pieces stick, wipe the knife between cuts to keep slices tidy. Serving straight from the fridge keeps the texture crisp, and watching guests enjoy those juicy surprises is one of my favorite rewards.
Tips and Variations
This section gives practical tweaks and ideas to make Pineapple Poke Cake your own, whether you are prepping for a crowd or keeping it simple for family dessert.
- Scout your tools early Make sure you have a 9 by 13 inch baking dish ready and a small wooden spoon or large straw for poking holes so the assembly flows smoothly.
- Control the soak If you prefer a less saturated cake, reduce the amount of pineapple juice used in the batter slightly or poke fewer holes so the pudding infusion is lighter.
- Make ahead friendly This dessert improves overnight, refrigerating for several hours helps flavors meld and makes slicing cleaner, which is ideal for parties.
- Garnish with intent Place the small pineapple chunks on each piece just before serving to keep them looking fresh, avoiding a watery top if they sit too long.
- Watch the filling consistency Stir the pudding until it is creamy and smooth, not watery, so it settles into the cake without pooling excessively on the surface.
Serving This Pineapple Poke Cake
Pineapple Poke Cake is versatile and well suited to casual gatherings or relaxed holiday tables. I often serve it chilled after a light dinner, and it pairs nicely with simple iced coffee or tea. It is an excellent dessert for summer barbecues, potlucks, and family celebrations where make ahead ease is appreciated.
- Individual portions Slice into 12 even squares and garnish each with a small pineapple chunk to give a neat, presentable portion for guests.
- Occasions This cake shines at summer picnics, birthday parties, and potlucks because it transports well and can be served right from the fridge.
- Side pairings Offer light beverages such as iced tea or sparkling water to balance the sweet, creamy dessert without overpowering it.
- Storage Cover leftovers tightly and store in the refrigerator for up to four days; the flavors often deepen after a night in the fridge.
- Freezing Wrap individual slices if you want to freeze, and thaw in the refrigerator before serving for best texture retention.
FAQ
Conclusion
Pineapple Poke Cake stands out because it combines simple pantry ingredients into a moist, fruity, and comforting dessert that is both nostalgic and effortless. I urge you to give it a try, especially when you need a make ahead treat for gatherings or a fuss free summer dessert. The balance of tender cake, pineapple filled pockets, and a light whipped topping makes it an approachable recipe that still feels special, and I think you will find it quickly becomes a family favorite.
Pineapple Poke Cake
Equipment
- 9 by 13 inch baking dish
- Large Bowl
- Small wooden spoon or large straw for poking
- Spatula
- Refrigerator
Ingredients
- 15.25 oz box yellow cake mix Provides the dry base and structure for the cake, supplying flour, sugar, leavening, and flavoring to create a tender yellow cake; follow package instructions for mixing and baking time to ensure proper rise. Enhances texture and stability so the cake can absorb pineapple juice when poked and hold up to fillings and toppings.
- 1 cup pineapple juice Adds liquid and tropical sweetness that soaks into the baked cake when poured over poke holes, infusing pineapple flavor throughout; use the juice from canned pineapple for concentrated taste. Helps moisten the crumb so the final dessert remains juicy rather than dry.
- 1/3 cup unsalted butter melted Contributes fat and richness when melted and mixed into the batter, improving tenderness and mouthfeel; melted unsalted butter can replace oil for a slightly richer flavor. Controls salt level since it contains no added salt, allowing the recipe’s balance to be managed by other ingredients.
- 5.3 oz cup vanilla yogurt Introduces creamy tang and additional moisture while boosting vanilla flavor; vanilla yogurt also adds some density that complements the pudding filling. Helps maintain a soft, moist crumb and can enhance the cake’s overall richness without changing bake time significantly.
- 20 oz can crushed pineapple Provides the primary pineapple flavor and texture, offering both juice and fruit bits that distribute sweetness and acidity across the cake; crushed pineapple is ideal for pouring and folding into the batter or as a poke filling. Contributes moisture and bite, and its syrup can be drained or used depending on desired intensity.
- 3.4 oz box instant vanilla pudding mix Thickens the filling into a creamy layer and imparts concentrated vanilla flavor; instant vanilla pudding mix dissolves quickly in milk to form a stable custard that sets when chilled. Enhances sweetness and body, helping the topping adhere to the cake and hold Cool Whip without weeping.
- 1 cup whole milk Activates the instant pudding mix and adjusts consistency of the filling to a smooth, pourable custard; whole milk provides richness that ensures a creamy, non-watery texture. Adds fat for silkiness, contributing to a luxurious mouthfeel in the finished dessert.
- 8 oz Cool Whip thawed Creates a light, airy topping with stabilized sweetness and creaminess; thawed Cool Whip folds easily into the chilled pudding layer to produce a fluffy finish. Keeps the cake cool and adds visual appeal while balancing the denser cake and fruit components.
- 12 small pineapple chunks fresh or canned Offers decorative garnish and bursts of fresh pineapple flavor and texture; small pineapple chunks can be arranged on top for contrast and to signal the cake’s flavor. Provides a firmer bite than crushed pineapple, enhancing presentation and adding a fresh accent.
Instructions
- Preheat oven to 350° F and spray baking dish with non-stick cooking spray (or grease with some butter).: Close your oven and let it reach a steady 350° F , that steady warmth assures even rise and a consistent crumb. As the oven hums, prepare the pan so the cake releases cleanly after baking. The scent of butter warming in the pan is comforting and hints at the golden crust to come. Common mistake to avoid is not preheating early enough, which can make the cake dense instead of light. You want a reliable, consistent heat so the center cooks evenly while the edges set.
- In a large bowl add cake mix, pineapple juice, melted butter, and yogurt, stirring to combine.: As you stir the batter, notice how the dry yellow cake mix transforms into a glossy, pourable batter when it meets the pineapple juice , melted butter , and vanilla yogurt . The aroma of pineapple will lift the mixture, and a few vigorous folds will eliminate dry pockets of mix. A frequent error is over mixing, which can toughen the crumb, so stir until just combined and smooth. The batter should be uniform and slightly thick but not lumpy.
- Pour cake mixture into prepared baking dish and bake for 30 minutes.: When the batter slips into the pan, it should spread evenly and fill the dish without air pockets. Slide it into the 350° F oven and listen for a gentle settling sound as it begins to rise. After about 30 minutes, the top should be a light golden brown and a toothpick inserted near the center will come out with moist crumbs, not raw batter. A common pitfall is opening the oven door too often, which lowers temperature and can cause uneven baking. Trust the time and check near the end.
- Remove from oven and allow to cool for about 20 minutes at room temperature.: Pull the pan out and set it on a cooling rack so air can circulate underneath, which prevents soggy bottoms. As it cools, the cake will contract slightly, making it easier to poke clean, uniform holes. You want it warm but not hot because hot cake can collapse when filled, while cold cake resists absorbing the pudding. A mistake I see is rushing this step and poking a too hot or too cold cake, which affects how the filling soaks in.
- While the cake is cooling, make the filling by stirring together the crushed pineapple, pudding mix, and milk in a small bowl.: As you whisk the crushed pineapple with the instant vanilla pudding mix and milk , the mixture will thicken and give off a sweet, creamy scent. The texture should be silky and pourable, not runny, indicating the pudding mix has hydrated properly. This filling adds body and concentrated pineapple flavor into the cake. Avoid adding too much milk, which can make the filling too thin to settle into the holes properly.
- Using the handle of a small wooden spoon or large straw, poke holes in the cake about 3/4 the way through, taking care not to poke all the way to the bottom.: When poking, you will feel a slight give as the handle breaks the surface and meets a firmer layer beneath, which is your cue to stop so the cake still supports the filling. The tiny punctures should be evenly spaced so the pudding can disperse throughout the layer without leaking out the bottom. Common mistakes include poking too shallow, which prevents infusion, or too deep, which lets the filling pool under the cake. Aim for consistency in depth and spacing.
- Pour pudding mixture on top of cake and spread evenly.: As the pudding lands in the holes, watch it sink in with a gentle plopping sound and leave glossy pockets across the surface. Use a spatula to coax the filling into any stubborn spots, ensuring even distribution. The filling should sit slightly on top while seeping into the cake. If you spread too aggressively you can force the filling out of the holes, so work gently to maintain those concentrated bursts of pineapple.
- Cover and refrigerate cake for 2 hours.: When chilling, the pudding will set and meld into the crumb, cooling the dessert so it becomes sliceable without smearing. The refrigerator tames the sweetness and allows the textures to harmonize into a cohesive dessert. A common oversight is removing it too soon, leaving the filling loose and the cake difficult to slice. Two hours is a guideline to ensure proper setting; longer chilling deepens the flavors.
- Remove cake from refrigerator and spread Cool Whip on top. Add one small pineapple chunk per slice of cake.: The smooth, cloud like Cool Whip should be spread with gentle strokes so you preserve its airy texture. As you place a pineapple chunk on each slice you add a fresh burst of fruit and a pretty finishing touch. The contrast of the pale whipped surface with the bright pineapple is visually appealing. Avoid spreading when the cake is too cold and brittle, which can crack slices; allow it to warm slightly if needed for a smooth finish.
- Slice into 12 even squares and enjoy!: Use a clean, sharp knife to cut through the chilled cake so each portion holds together with neat edges. You should feel a slight resistance as the knife passes through the set pudding and soft cake, revealing pockets of juicy pineapple. If pieces stick, wipe the knife between cuts to keep slices tidy. Serving straight from the fridge keeps the texture crisp, and watching guests enjoy those juicy surprises is one of my favorite rewards.
Notes
- Scout your tools early Make sure you have a 9 by 13 inch baking dish ready and a small wooden spoon or large straw for poking holes so the assembly flows smoothly.
- Control the soak If you prefer a less saturated cake, reduce the amount of pineapple juice used in the batter slightly or poke fewer holes so the pudding infusion is lighter.
- Make ahead friendly This dessert improves overnight, refrigerating for several hours helps flavors meld and makes slicing cleaner, which is ideal for parties.
- Garnish with intent Place the small pineapple chunks on each piece just before serving to keep them looking fresh, avoiding a watery top if they sit too long.
- Watch the filling consistency Stir the pudding until it is creamy and smooth, not watery, so it settles into the cake without pooling excessively on the surface.