Mexican Rice
Mexican Rice is the sort of dish I return to when I want comforting, fragrant grains that carry bold, savory flavor without fuss. The first time I made this version I was trying to recreate a memory from a roadside taqueria, where the rice was slightly smoky, tomato infused, and tender but not mushy. I walked away from that first attempt with sticky hands, a slightly scorched pan, and a grin, because the flavors were so close, and I knew a few small adjustments would get me there.
Over the years I refined the technique, learning how long to toast the rice until it sings with a gentle nutty aroma, and when to fold in peas so they stay bright and pop with texture. This recipe, Mexican Rice, has become my go to side for weeknight tacos and slow roasted proteins, yet it is simple enough for a casual weeknight meal. I like to make a double batch and keep it in the fridge, because reheated rice always feels like a tiny luxury after a busy day.
Recipe Snapshot
50 mins
10 mins
40 mins
Medium
250 kcal
Mexican
Gluten-Free, Vegan
Side Dishes
1 large pot such as a Dutch oven
Why This Mexican Rice Shines
Toasted rice builds deep flavor
I love toasting the raw rice first because it develops a warm, nutty backbone that lifts the whole dish. When the grains take on that pale golden color and you smell a toasty, almost sweet aroma, you know you are on the right track. That little step transforms plain boiled rice into something far more interesting and satisfying.
Simple pantry ingredients, big payoff
There is something magical about using just a few staples: tomato paste, chicken broth, and aromatics like onion and garlic. They layer flavor without requiring dozens of bottles and spices. I appreciate how each element plays a role, with the tomato paste adding umami and color, while the broth gives savory depth that water cannot match.
Flexible and forgiving
This Mexican Rice is tolerant of small variations in heat and liquid, which makes it ideal for cooks who are still learning their stovetop. You can nudge the broth amount slightly to suit your stove, and the resting step does most of the work to finish the texture. I often tweak the liquid by a few tablespoons depending on whether I want fluffier or slightly more tender grains.
Great for meal prep and pairing
I often make a big pot because it stores beautifully in the fridge for up to several days, and it pairs effortlessly with beans, grilled vegetables, or braised proteins. The colors and aroma make it a reliable weeknight side, and it elevates casual gatherings without demanding a lot of hands on time.
Small techniques yield reliable results
Timing the sauté of the rice, not disturbing the pot while it simmers, and letting it rest before fluffing are small habits that reward you with fluffy, distinct grains and a glossy finish. Over the years I have found these micro rituals make the difference between bland and memorable, and I enjoy teaching them to friends in my kitchen.
Essential Ingredients for Mexican Rice
These ingredients are intentionally straightforward, chosen to build a balanced, savory rice with color and texture. The key players are the rice for structure, the broth and tomato paste for savory depth and color, and the aromatics like onion and garlic to give the dish lift. Each item works with the others to create layered flavor without masking the delicate toastiness of the grains.
- 4 tbsp avocado oil: Sauté to provide a neutral, high-heat cooking fat that helps toast the rice and carry flavors; choose avocado oil for its mild taste and high smoke point, ensuring even browning without burning. Measure carefully to prevent greasiness and allow the rice to develop a lightly nutty aroma during the toasting step.
- 1 small yellow onion finely chopped: Finely chopped to add sweet, mellow onion flavor that builds the aromatic base of the dish; cooking until translucent releases sugars that balance the tomato and broth. Adjust chop size for texture preference and sauté until softened but not browned for best rice integration.
- 5 large cloves garlic: Mince to contribute pungent, savory depth and aromatic sharpness that enhances the overall umami profile; sauté briefly with the onion to mellow raw harshness and infuse the oil. Use fresh cloves for brighter garlic flavor and avoid burning to prevent bitterness.
- 2 cups long grain white rice: Rinse or dry-toast to form the starchy, tender foundation of the dish; long grain white rice yields separate, fluffy grains when properly toasted and cooked with measured liquid. Ensure even toasting and proper liquid ratio to achieve classic Mexican rice texture without becoming mushy.
- 3 1/2 to 4 cups chicken broth: Simmer to provide the cooking liquid and primary savory backbone; chicken broth adds rich, meaty depth and seasoning that the rice absorbs during simmering. Adjust the amount within the given range based on rice dryness and desired tenderness, and keep at a gentle simmer for even cooking.
- 3 tbsp tomato paste: Whisk in to deliver concentrated tomato flavor, color, and slight acidity that rounds out the savory profile; tomato paste intensifies tomato notes without adding excess liquid. Bloom in the oil briefly with aromatics to deepen flavor and ensure even distribution throughout the rice.
- 1/2 tsp sea salt to taste: Season to control the overall saltiness and enhance other flavors; add to taste while considering the salt content of the broth and optional add-ins. Start conservative and adjust at the end of cooking to avoid over-salting the finished rice.
- 2/3 cup green peas frozen or canned (optional): Fold in optionally to introduce pops of color, subtle sweetness, and textural contrast; frozen or canned peas add quick-cooking green vegetables that complement the savory rice. Stir in near the end of cooking to heat through without overcooking and retain bright color.
How to Cook Mexican Rice

This method focuses on simple stovetop technique that rewards attention and patience. The process moves from toasting to gentle simmering and ends with a crucial resting phase that yields fluffy, separated grains. Keep your heat steady, use a heavy bottomed pot, and resist the urge to lift the lid while it cooks.
- Heat the oil in a large thick bottomed pot such as a Dutch oven over medium heat. Add the uncooked rice and sauté, stirring frequently, for 10 minutes, until the rice is golden brown. For the best results, be sure to sauté for the full 10 minutes and monitor the rice closely so that it doesn’t get too brown or burn.: The first sensory cue is the shimmer of avocado oil across the bottom of your pot, and a faint, warm scent as it comes up to temperature. You should hear a gentle ripple as you tilt the pot, not loud popping which means the oil is too hot. Using a heavy bottomed pot ensures even heat distribution and prevents hot spots that can burn the rice . A common error here is overheating the oil, which will scorch the rice as soon as it touches the pan. If the oil smokes, remove the pot from heat briefly to cool before continuing.
- Add in the chopped onion and garlic and sauté for another 3 to 5 minutes, or until the onion has softened.: As you stir the rice , it will gradually turn from translucent to a pale gold, then a warm, deeper golden hue. The sound is a steady, soft rattle as the grains move and toast; this signals moisture leaving and development of those nutty flavors. Toast for the full duration for best depth, monitoring closely so edges do not darken too quickly. If some grains brown faster, lower the heat, and stir more frequently. Avoid rushing this step because the toasting is vital to the final flavor.
- Add the broth and tomato paste to the pot and bring the mixture to a full boil. Reduce the heat to low and cook covered for 20 minutes undisturbed. The cooking time may vary slightly depending on the type of rice you use, the temperature your stove cooks at and the amount of liquid.: When you fold in the onion and minced garlic , the pan gives off a savory, sweet scent as the onion softens and the garlic turns fragrant. You should see the onion become translucent and slightly glossy. Keep the heat moderate so the garlic becomes aromatic without browning; burned garlic imparts bitterness. A typical mistake is adding these aromatics too early or at too high heat, which can lead to uneven cooking and off flavors.
- Remove the pot from the heat and add in the green peas but don’t stir them in just yet. Allow the rice to sit for another 10 minutes then use a fork to fluff rice and incorporate the peas.: When the chicken broth and dissolved tomato paste hit the pan, steam will rise and the aroma will shift to a rich, savory tomato broth scent. Watch for the liquid to reach a full rolling boil, which helps ensure even heat for the following simmer. Bringing it to a vigorous boil also helps the tomato paste integrate fully into the liquid. Avoid covering and reducing heat too soon, because the rice needs consistent temperature to hydrate evenly.
- Serve Mexican rice with your Mexican dishes along with any other sides like refried beans or black beans, and enjoy.: Once lowered to a gentle simmer and covered, you should hear a soft whisper of steam from the pot, no loud bubbling. This undisturbed phase allows the grains to absorb liquid evenly, resulting in distinct, tender kernels. Resist peeking during these 20 minutes, as lifting the lid lets out steam and disrupts the cooking environment. If you uncover repeatedly you may end up with undercooked or unevenly textured rice.
- Remove the pot from the heat and add in the green peas but don’t stir them in just yet: After removing from the heat the pot will still be warm and steam will continue to work on the grains. Adding the green peas at this stage allows them to gently warm without losing color or texture. Letting the rice sit undisturbed for an additional rest period ensures trapped steam finishes the cooking gently. A common mistake is stirring immediately, which can make the rice glue together; waiting preserves fluffiness.
- Allow the rice to sit for another 10 minutes then use a fork to fluff rice and incorporate the peas: The resting phase is where the final texture is decided. During this time the steam evens out moisture and firms up the grains. When you fluff with a fork you will notice delicate steam rises and the grains separate easily, leaving a glossy finish. Fluff gently so you do not crush the kernels. Overworking the rice here can turn it sticky, so stop once the peas are evenly distributed and the rice appears fluffy.
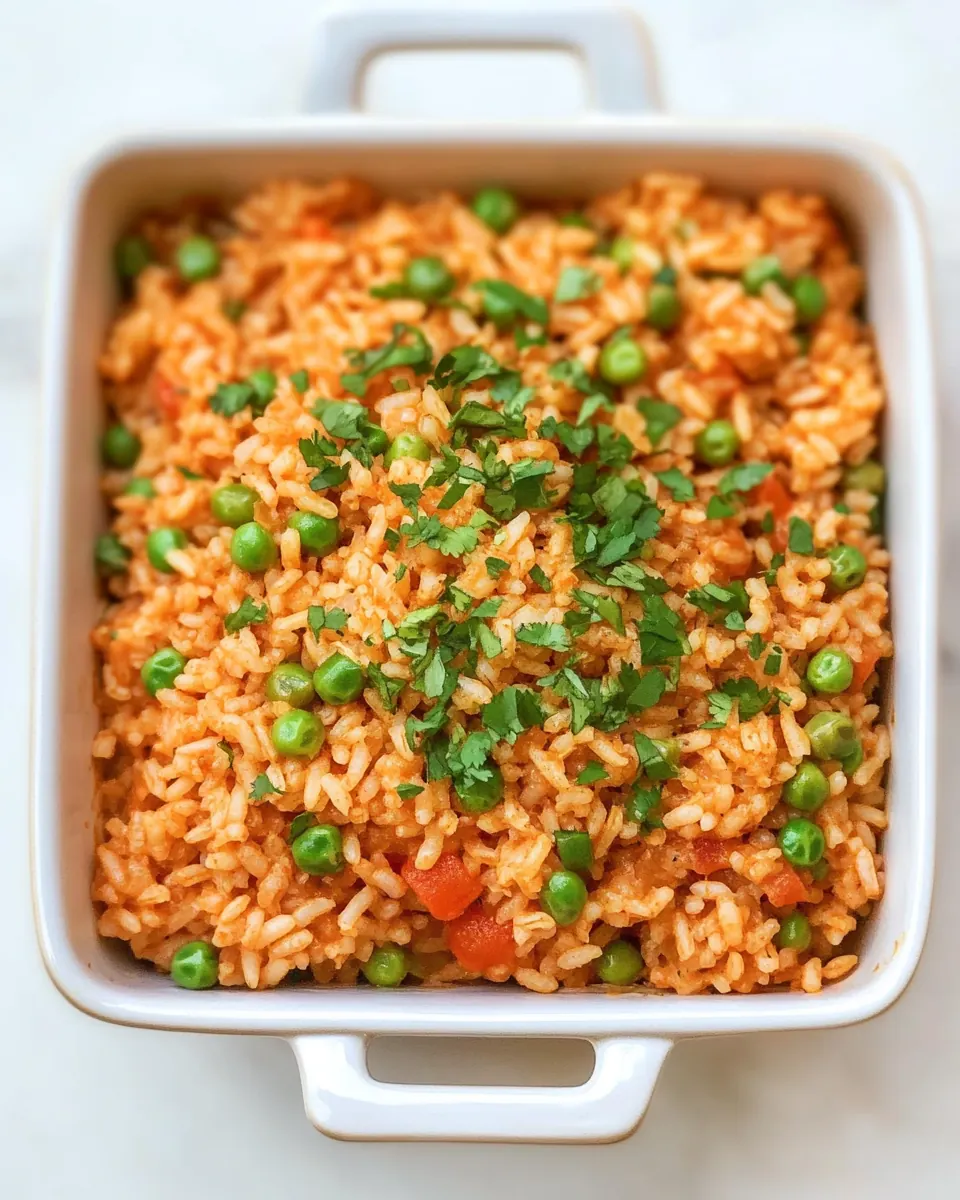
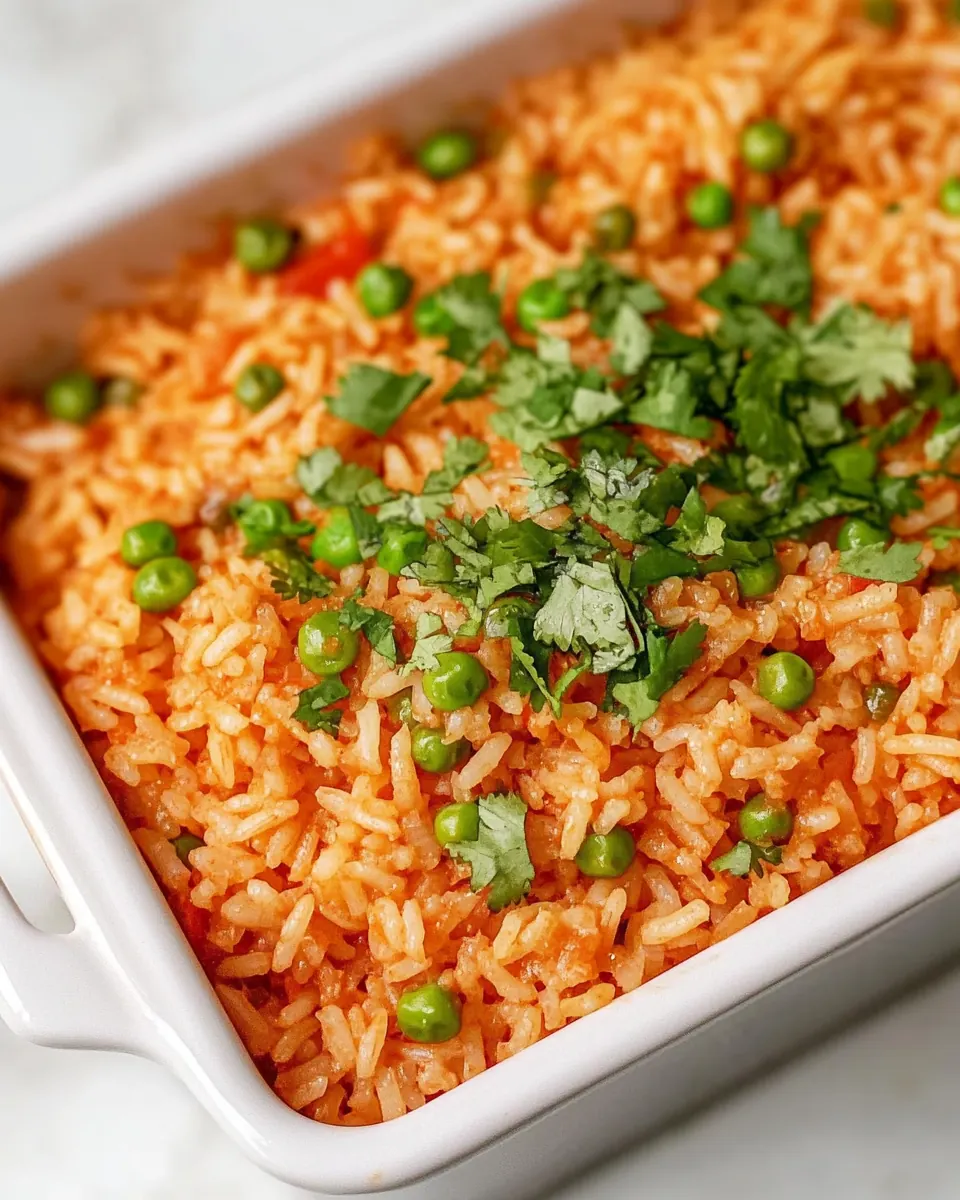
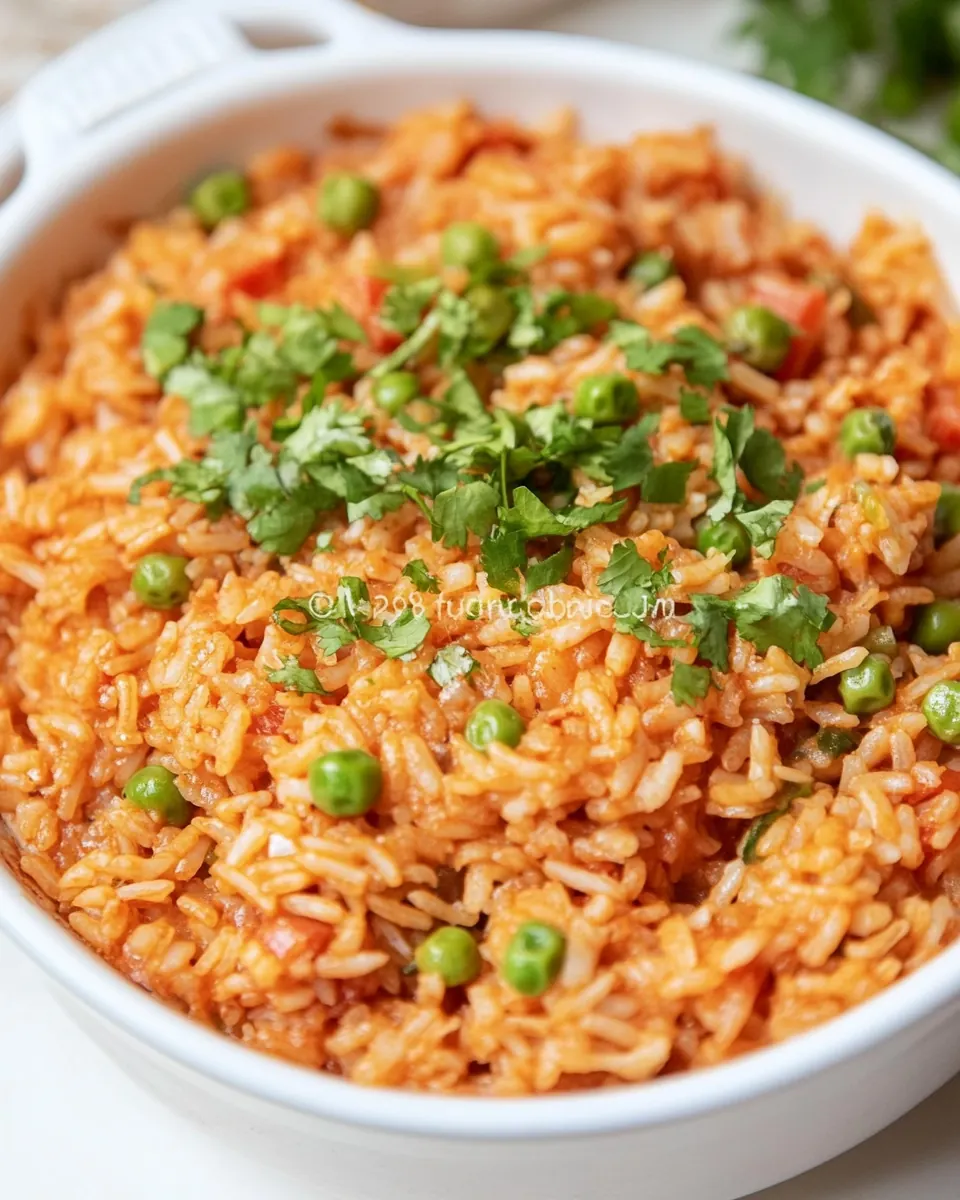
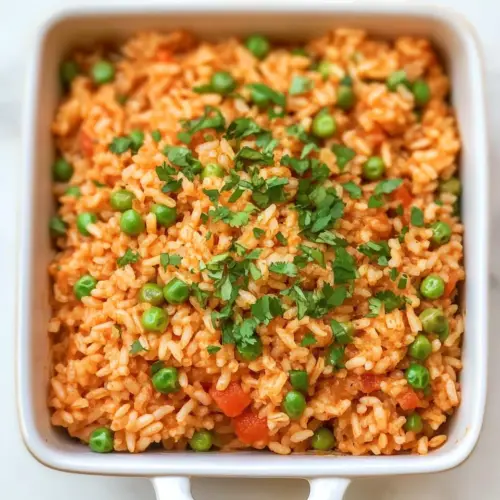
- Serve Mexican rice with your Mexican dishes along with any other sides like refried beans or black beans, and enjoy: The finished Mexican Rice should present with a warm, tomato colored hue, bright pops of green from the peas , and a toasty aroma from the initial sauté. Serve it warm as a complement to mains, noting how its savory, rounded profile lifts grilled or braised foods. A common serving misstep is letting the rice cool undisturbed for too long, which can harden the top layer, so plate promptly and cover any leftovers tightly.
Recipe Notes about Mexican Rice
I keep these practical notes nearby when I make Mexican Rice because small adjustments make the difference between okay and outstanding. Below are expanded tips that address technique, timing, and storage so your results are consistent.
- Adjust broth for your stove The precise amount of chicken broth depends on how vigorous your simmer is. If your stove runs hot you may need closer to 4 cups, while a stove that barely simmers might require 3 and a half cups. Test once and take notes so future batches match your equipment.
- Toast fully but monitor Toasting the rice for the full ten minutes deepens flavor, but watch for color change and reduce heat if the grains begin to darken unevenly. Stir frequently to promote even browning and avoid burnt kernels.
- Integrate tomato paste into the broth Dissolve tomato paste in the warm broth and whisk before adding to the rice so it spreads evenly, avoiding clumps that might stick to the pot and scorch.
- Let it rest before fluffing The ten minute rest after cooking allows steam to redistribute, producing separate, tender grains. Fluff gently with a fork once the steam subsides to keep the texture light.
- Store and reheat properly Cool leftover rice quickly and store in an airtight container in the refrigerator for up to five days, reheating with a splash of broth or water to restore moisture and prevent dryness.
How to Enjoy Mexican Rice
Mexican Rice is a versatile side that suits casual dinners and celebratory spreads alike. Its warm color and rounded flavor make it ideal alongside bold mains, and it stores well for meal prepping. Below are serving ideas, pairings, and practical storage notes to help you make the most of each batch.
- Classic pairing Serve the Mexican Rice alongside grilled meats, roasted vegetables, or a hearty bean dish for a balanced plate. The savory broth notes complement smoky proteins particularly well.
- Casual tacos and bowls Use the rice as a base for a bowl with beans, fresh salsa, and greens, or spoon it next to tacos to give an extra starch to the meal for a satisfying bite.
- Family dinners This rice is ideal for weeknight family meals because it is quick to prepare and feeds a crowd. Make a double batch and keep half refrigerated for quick reheating on busy nights.
- Holiday or gathering Bring the rice to a potluck as a colorful, comforting side; it pairs especially well with other Mexican style dishes like enchiladas or chiles rellenos for a themed spread.
- Storage tips Cool rice quickly, transfer to an airtight container, and refrigerate for up to five days. Reheat gently with a splash of chicken broth or water to revive moisture, stirring occasionally to heat evenly.
- Seasonal touches In warmer months serve with salsas and bright citrus notes, while in cooler weather it complements slow cooked items and roasted vegetables for a hearty plate.
FAQ
Conclusion
Mexican Rice stands out because it turns simple pantry staples into a vibrant, savory side with minimal fuss. The combination of toasted rice, concentrated tomato paste, and warm chicken broth creates a comforting dish that pairs well with a wide range of mains. Give this recipe a try the next time you want an easy, crowd pleasing accompaniment that rewards a little attention with excellent results. I hope it becomes a staple in your kitchen as it has in mine.
Mexican Rice
Equipment
- 1 large pot such as a Dutch oven
Ingredients
- 4 tbsp avocado oil Sauté to provide a neutral, high-heat cooking fat that helps toast the rice and carry flavors; choose avocado oil for its mild taste and high smoke point, ensuring even browning without burning. Measure carefully to prevent greasiness and allow the rice to develop a lightly nutty aroma during the toasting step.
- 1 small yellow onion finely chopped Finely chopped to add sweet, mellow onion flavor that builds the aromatic base of the dish; cooking until translucent releases sugars that balance the tomato and broth. Adjust chop size for texture preference and sauté until softened but not browned for best rice integration.
- 5 large cloves garlic Mince to contribute pungent, savory depth and aromatic sharpness that enhances the overall umami profile; sauté briefly with the onion to mellow raw harshness and infuse the oil. Use fresh cloves for brighter garlic flavor and avoid burning to prevent bitterness.
- 2 cups long grain white rice Rinse or dry-toast to form the starchy, tender foundation of the dish; long grain white rice yields separate, fluffy grains when properly toasted and cooked with measured liquid. Ensure even toasting and proper liquid ratio to achieve classic Mexican rice texture without becoming mushy.
- 3 1/2 to 4 cups chicken broth Simmer to provide the cooking liquid and primary savory backbone; chicken broth adds rich, meaty depth and seasoning that the rice absorbs during simmering. Adjust the amount within the given range based on rice dryness and desired tenderness, and keep at a gentle simmer for even cooking.
- 3 tbsp tomato paste Whisk in to deliver concentrated tomato flavor, color, and slight acidity that rounds out the savory profile; tomato paste intensifies tomato notes without adding excess liquid. Bloom in the oil briefly with aromatics to deepen flavor and ensure even distribution throughout the rice.
- 1/2 tsp sea salt to taste Season to control the overall saltiness and enhance other flavors; add to taste while considering the salt content of the broth and optional add-ins. Start conservative and adjust at the end of cooking to avoid over-salting the finished rice.
- 2/3 cup green peas frozen or canned, optional Fold in optionally to introduce pops of color, subtle sweetness, and textural contrast; frozen or canned peas add quick-cooking green vegetables that complement the savory rice. Stir in near the end of cooking to heat through without overcooking and retain bright color.
Instructions
- Heat the oil in a large thick bottomed pot such as a Dutch oven over medium heat. Add the uncooked rice and sauté, stirring frequently, for 10 minutes, until the rice is golden brown. For the best results, be sure to sauté for the full 10 minutes and monitor the rice closely so that it doesn’t get too brown or burn.: The first sensory cue is the shimmer of avocado oil across the bottom of your pot, and a faint, warm scent as it comes up to temperature. You should hear a gentle ripple as you tilt the pot, not loud popping which means the oil is too hot. Using a heavy bottomed pot ensures even heat distribution and prevents hot spots that can burn the rice . A common error here is overheating the oil, which will scorch the rice as soon as it touches the pan. If the oil smokes, remove the pot from heat briefly to cool before continuing.
- Add in the chopped onion and garlic and sauté for another 3 to 5 minutes, or until the onion has softened.: As you stir the rice , it will gradually turn from translucent to a pale gold, then a warm, deeper golden hue. The sound is a steady, soft rattle as the grains move and toast; this signals moisture leaving and development of those nutty flavors. Toast for the full duration for best depth, monitoring closely so edges do not darken too quickly. If some grains brown faster, lower the heat, and stir more frequently. Avoid rushing this step because the toasting is vital to the final flavor.
- Add the broth and tomato paste to the pot and bring the mixture to a full boil. Reduce the heat to low and cook covered for 20 minutes undisturbed. The cooking time may vary slightly depending on the type of rice you use, the temperature your stove cooks at and the amount of liquid.: When you fold in the onion and minced garlic , the pan gives off a savory, sweet scent as the onion softens and the garlic turns fragrant. You should see the onion become translucent and slightly glossy. Keep the heat moderate so the garlic becomes aromatic without browning; burned garlic imparts bitterness. A typical mistake is adding these aromatics too early or at too high heat, which can lead to uneven cooking and off flavors.
- Remove the pot from the heat and add in the green peas but don’t stir them in just yet. Allow the rice to sit for another 10 minutes then use a fork to fluff rice and incorporate the peas.: When the chicken broth and dissolved tomato paste hit the pan, steam will rise and the aroma will shift to a rich, savory tomato broth scent. Watch for the liquid to reach a full rolling boil, which helps ensure even heat for the following simmer. Bringing it to a vigorous boil also helps the tomato paste integrate fully into the liquid. Avoid covering and reducing heat too soon, because the rice needs consistent temperature to hydrate evenly.
- Serve Mexican rice with your Mexican dishes along with any other sides like refried beans or black beans, and enjoy.: Once lowered to a gentle simmer and covered, you should hear a soft whisper of steam from the pot, no loud bubbling. This undisturbed phase allows the grains to absorb liquid evenly, resulting in distinct, tender kernels. Resist peeking during these 20 minutes, as lifting the lid lets out steam and disrupts the cooking environment. If you uncover repeatedly you may end up with undercooked or unevenly textured rice.
- Remove the pot from the heat and add in the green peas but don’t stir them in just yet: After removing from the heat the pot will still be warm and steam will continue to work on the grains. Adding the green peas at this stage allows them to gently warm without losing color or texture. Letting the rice sit undisturbed for an additional rest period ensures trapped steam finishes the cooking gently. A common mistake is stirring immediately, which can make the rice glue together; waiting preserves fluffiness.
- Allow the rice to sit for another 10 minutes then use a fork to fluff rice and incorporate the peas: The resting phase is where the final texture is decided. During this time the steam evens out moisture and firms up the grains. When you fluff with a fork you will notice delicate steam rises and the grains separate easily, leaving a glossy finish. Fluff gently so you do not crush the kernels. Overworking the rice here can turn it sticky, so stop once the peas are evenly distributed and the rice appears fluffy.
- Serve Mexican rice with your Mexican dishes along with any other sides like refried beans or black beans, and enjoy: The finished Mexican Rice should present with a warm, tomato colored hue, bright pops of green from the peas , and a toasty aroma from the initial sauté. Serve it warm as a complement to mains, noting how its savory, rounded profile lifts grilled or braised foods. A common serving misstep is letting the rice cool undisturbed for too long, which can harden the top layer, so plate promptly and cover any leftovers tightly.
Notes
- Adjust broth for your stove The precise amount of chicken broth depends on how vigorous your simmer is. If your stove runs hot you may need closer to 4 cups, while a stove that barely simmers might require 3 and a half cups. Test once and take notes so future batches match your equipment.
- Toast fully but monitor Toasting the rice for the full ten minutes deepens flavor, but watch for color change and reduce heat if the grains begin to darken unevenly. Stir frequently to promote even browning and avoid burnt kernels.
- Integrate tomato paste into the broth Dissolve tomato paste in the warm broth and whisk before adding to the rice so it spreads evenly, avoiding clumps that might stick to the pot and scorch.
- Let it rest before fluffing The ten minute rest after cooking allows steam to redistribute, producing separate, tender grains. Fluff gently with a fork once the steam subsides to keep the texture light.
- Store and reheat properly Cool leftover rice quickly and store in an airtight container in the refrigerator for up to five days, reheating with a splash of broth or water to restore moisture and prevent dryness.