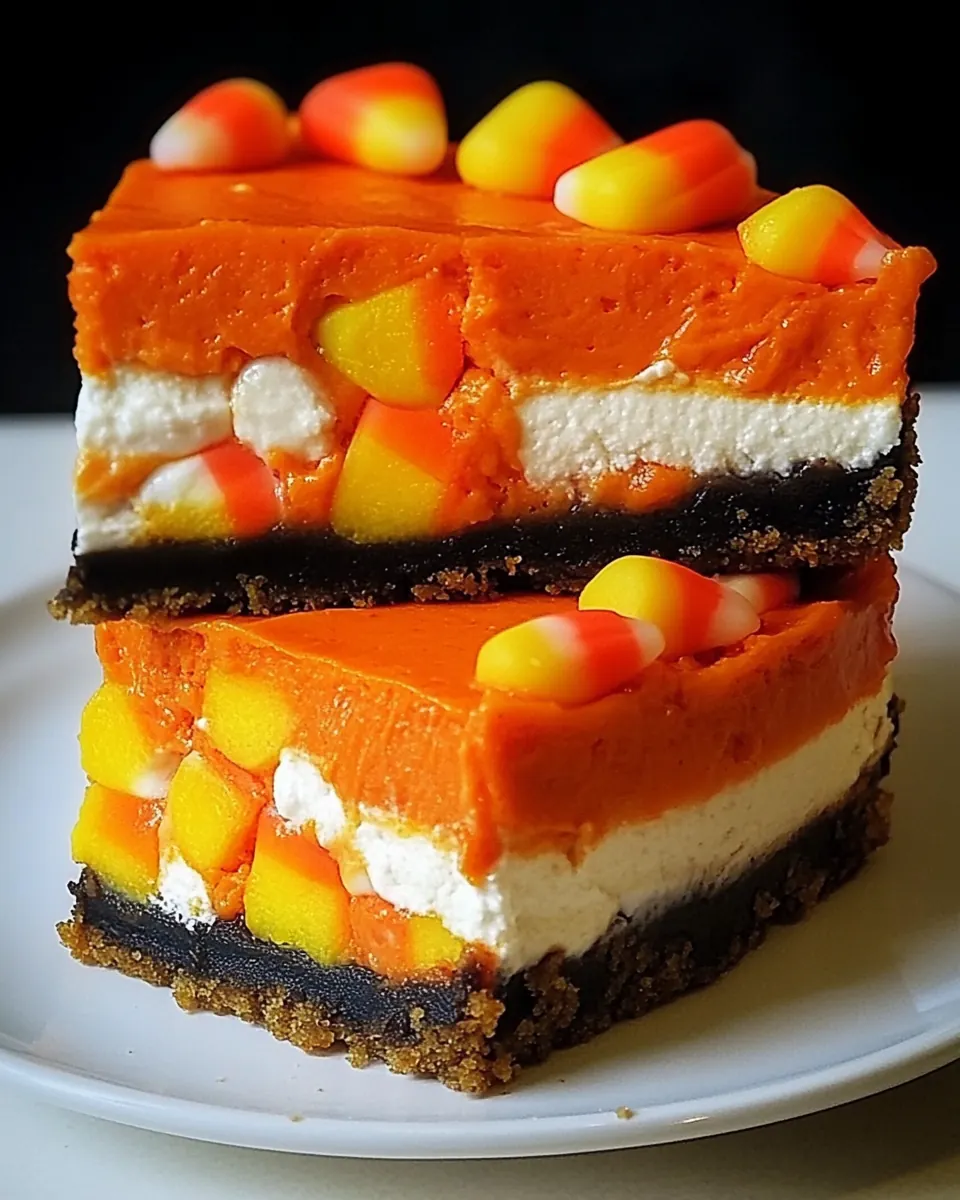
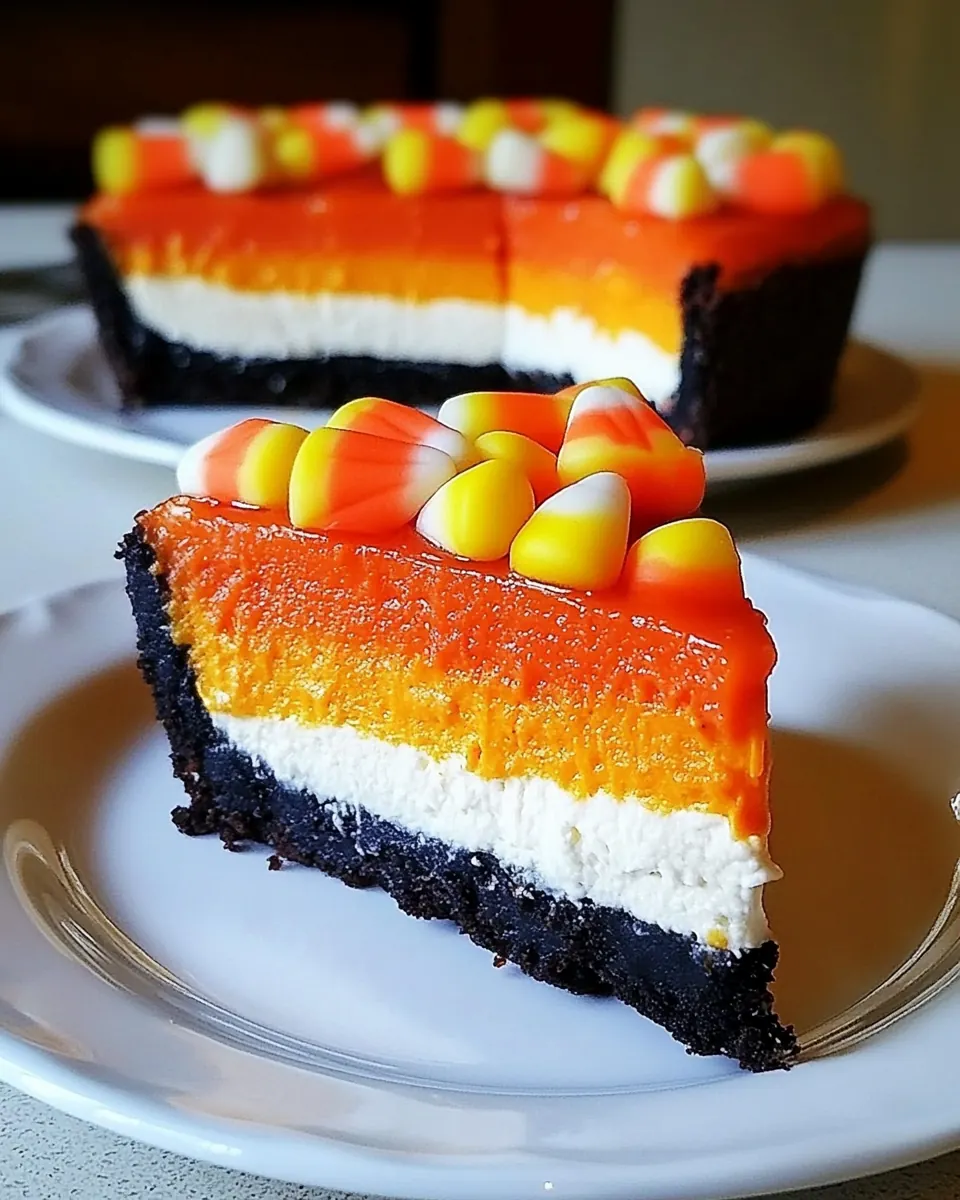
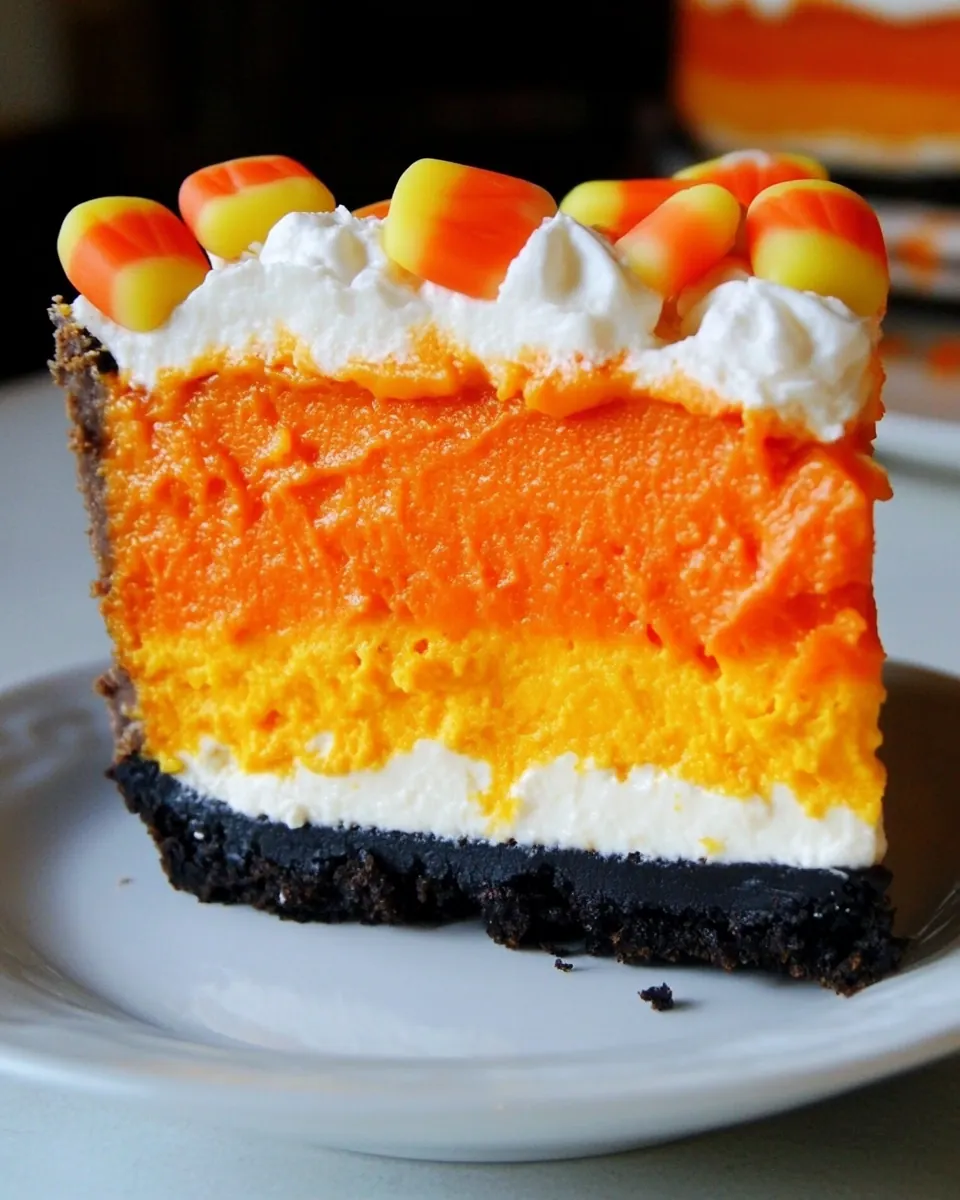
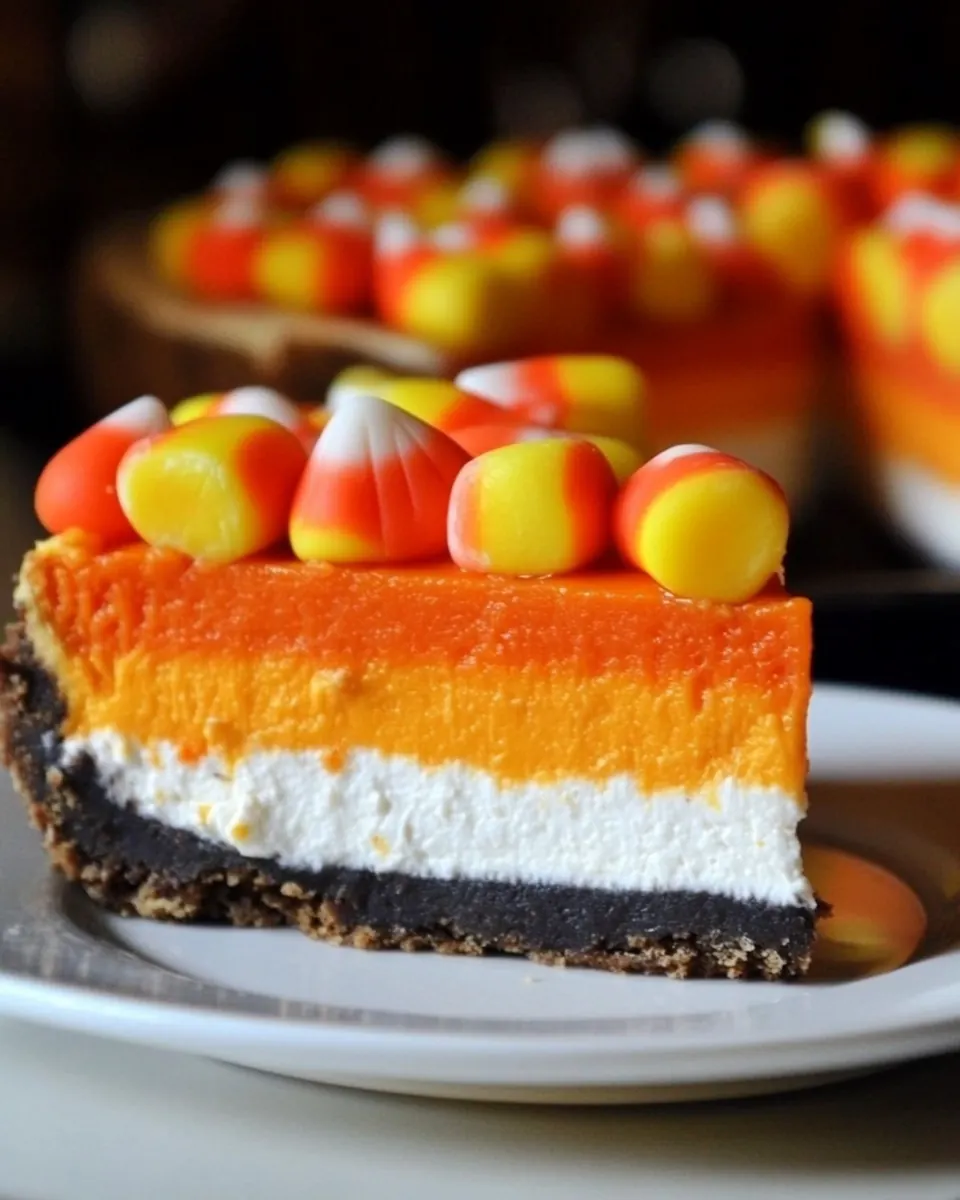
Candy Corn Cheesecake
Candy Corn Cheesecake has been my festive showstopper every October since I first tested the layers in a tiny kitchen with a too-small springform pan and a stubborn stand mixer.
I remember scooping out jarred color paste at a craft store, humming along to a Halloween playlist, and wondering if a cheesecake could really capture that candy corn look without tasting like a costume. The first slice cracked a little, the colors bled slightly, and I learned how gentle heat and patient cooling can turn fragile curd into a silky, sliceable treat. After some trial and error I found a rhythm for the layered bake that kept each band distinct, and I started bringing this to neighborhood potlucks where people expected candy and left with cheesecake on their plates.
What keeps me making Candy Corn Cheesecake is how theatrical it feels, yet how reliably comforting each forkful is. The crust gives a chocolaty whisper from crushed cookies, while the filling stays luxuriously dense and creamy because I treat the batter with respect, folding instead of overworking. I love the quiet pride of serving a cheesecake that looks like candy but tastes like something richer, and watching kids and grown ups alike hesitate before diving in, because they arent sure if its candy or cake. Over the years Ive learned small hacks that prevent cracks and help the layers set evenly, and those are the techniques Im excited to share with you.
Recipe Snapshot
2 hr 25 mins
40 mins
105 mins
Hard
350 kcal
American
Gluten-Free, Low FODMAP
Desserts
10 inch springform pan, Electric mixer, Mixing bowls, Rubber spatula, Oven
Why We Love This Candy Corn Cheesecake
Its playfully seasonal
I make this for October gatherings because the look alone brings cheer. People smile before they taste it, and that first impression makes dessert time feel festive.
Visual impact without fuss
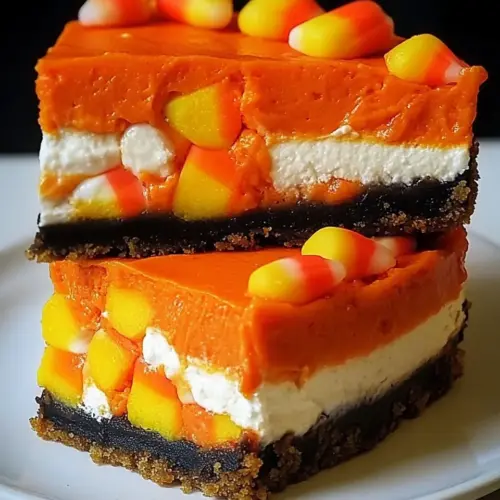
I love that Candy Corn Cheesecake delivers a dramatic three color effect with simple tools. A few bowls, some color paste, and patience while each layer bakes gives you a layered cake thats instantly shareable.
Texture that balances richness and lift
The combination of cream cheese, mascarpone, and sour cream creates a filling that is both dense and silk smooth. That trio keeps the cheesecake from feeling overly heavy, while the gentle folding and low speed mixing protects the texture.
Kid friendly and nostalgic
Theres a playful nostalgia here, and kids absolutely adore the colorful slices. I find its a fun way to get younger helpers involved with measuring, coloring, and decorating with candy corns.
Reliable sliceability
When you give the cheesecake the proper rest time in the fridge, the layers set firmly. I always warn readers that patience pays off, because a well rested cake slices cleanly, creating the picture perfect wedges photographers and hosts love.
Main Ingredients for Candy Corn Cheesecake
These components work together to create contrast and harmony. The crust anchors each slice with a toasty chocolate note while the filling layers provide richness, tang, and a smooth mouthfeel. Color paste is purely for visual effect, and the final whipped cream topping brightens the plate while the candy corns supply that playful Halloween touch.
- 24 Oreos, finely crushed: Finely crushed to form a compact, crunchy crust that provides structure and contrast to the creamy filling; press into the pan to create an even base and bake briefly if needed to set.
- 1/4 cup (1/2 stick) butter, melted: Melted to bind the crushed cookies together, adding richness and moisture to the crust; pour over crumbs and mix thoroughly to ensure an even, sliceable foundation.
- 38 ounce packages cream cheese, at room temperature: Soften and whip into a silky, tangy base that delivers body, stability, and traditional cheesecake flavor; combine at room temperature to avoid lumps and overmixing while incorporating air for smooth texture.
- 8 ounces mascarpone cheese, at room temperature: Added for extra creaminess and a slightly tangy, luxurious mouthfeel that enhances richness; fold gently into the cream cheese to maintain a dense, velvety batter.
- 8 ounces sour cream: Incorporated for subtle tang and moisture that balances sweetness and helps create a smooth, spreadable filling; mix in gently to preserve the creamy consistency.
- 1 1/2 cups honey: Sweeten and add floral depth while providing a natural, glossy sweetness that melds with dairy components; measure carefully to balance flavors without overpowering the cheesecake.
- 1 1/2 cups granulated white sugar: Granulated to supply bulk sweetness and structure while helping stabilize the batter during baking; dissolve well with other wet ingredients to avoid graininess in the finished cake.
- 6 large eggs: Beaten in to incorporate air, set the cheesecake, and provide structure through coagulation of proteins during baking; add eggs one at a time and mix gently to prevent over-aeration.
- 1/3 cup all purpose flour: Used sparingly to slightly thicken the batter and help stabilize the custard, contributing to a firmer slice; sift in and fold to prevent lumps and maintain a smooth texture.
- 1/2 cup heavy whipping cream: Added to enrich the batter, increasing creaminess and tenderness while helping achieve a silkier mouthfeel; incorporate slowly to maintain emulsion and avoid curdling.
- 1 teaspoon vanilla extract: Included to infuse warm, familiar flavor that complements the dairy and sweet notes; add at the end of mixing to retain aromatic intensity.
- yellow & orange color paste (or gel): Tinted paste or gel used to create vibrant yellow and orange layers for the candy corn effect without adding extra liquid; use small amounts to achieve saturated color without altering batter consistency.
- 1/2 cup heavy whipping cream: Whipped to soft peaks for topping or to lighten part of the filling, adding airy texture and a creamy finish; chill before whipping for best volume and stability.
- 1 cup candy corns: Stirred in or scattered on top as colorful, sweet candy pieces that lend texture and visual candy-corn motif; add after cooling to retain shape and prevent melting into the cheesecake.
Step by Step Guide for Candy Corn Cheesecake
Ill walk you through each stage of building the layers, from crust to chilled rest. Expect sensory checkpoints and practical cues so you can tell when each layer is ready, plus the classic troubleshooting notes that saved my early attempts.
- Preheat the oven to 350°F. Spray 10-inch springform pan with nonstick cooking spray (see recipe notes below if you only have a 9-inch pan).: Feel the warm pulse of the kitchen as the oven climbs to temperature, and notice the faint hum of preheating. This step ensures the pan enters a consistent environment, which helps the crust bake evenly, creating a toasty aroma within 10 minutes. If you skip preheating, your crust may bake unevenly, leaving a chewy center or overly dark edges. A common mistake is not securely fastening the springform latch, which can leak filling during baking and make cleanup tougher. Use a gentle, even spray of nonstick agent so the cake releases cleanly after chilling.
- In a medium bowl, combine the cookie crumbs and butter. Press into the bottom of the prepared pan. Bake for 10 minutes; remove from oven and let cool.: You should hear a soft thud as you press the crumb mixture, and the surface will compact into a glossy, even layer that holds when flipped upside down. As it bakes, the aroma of warm Oreos will deepen and the butter will toast the crumbs, creating a subtle crunch that contrasts with the smooth filling. Press firmly, using the back of a measuring cup for even pressure, because an airy crust collapses when sliced. A common misstep is not chilling the crust briefly before filling, which can make the bottom soggy; a short cool-down keeps structure intact.
- In a large bowl, combine the cream cheese, mascarpone, and sour cream. Beat at medium speed with an electric mixer until smooth, about 3 minutes. Add the honey and sugar; beat until combined. Add the eggs, one at a time, beating well after each addition. Using a rubber spatula, scrape down the sides of the bowl, and beat until smooth. Reduce the speed to low. Add the flour, cream, and vanilla, beating until combined. Divide the batter into thirds, reserving one-third of the batter white. In one bowl, add a small amount of yellow color paste; whisk until combined and add more color until the desired hue is reached. In a second bowl, repeat this process with the orange color paste.: Close your eyes and notice the change in texture as the mixture transforms from lumpy to velvet smooth; it will smell slightly tangy from the sour cream and rich from the cheeses. Adding the eggs one at a time helps create a uniform custard and prevents over aeration, which can cause cracking. Scraping the bowl prevents pockets of unblended cheese that would create lumps in the finished cake. When you reduce to low speed, you avoid whipping too much air into the batter, keeping the texture dense and creamy. A common error is adding all eggs at once, which can result in curdled spots; patience and gentle mixing are key here.
- Pour the yellow batter over the baked cookie crust. Bake 30 to 35 minutes, just until set and no longer jiggly. Remove from the oven and let cool for 20 minutes.: When pouring the yellow layer, you ll notice it spreads slowly and evens itself into a flat sheet. As it bakes, look for the edges to firm and the center to have a slight wobble like a soft pudding. The surface should develop a gentle sheen rather than cracking. Letting it rest for 20 minutes helps it finish setting and reduces steam that can warp the next layer. Overbaking shrinks and cracks the top, so aim for that delicate jiggle. One frequent mistake is opening the oven too often, which changes the temperature and can cause the layer to sink.
- Pour the orange batter on top of the baked yellow layer. Bake for another 30 to 35 minutes, just until set and no longer jiggly. Remove from the oven and let cool for 20 minutes.: The orange layer should settle smoothly atop the yellow, and you may hear a quiet settling sound as it finds its place. During baking, steam escapes and small bubbles may form along the edge; watch for the same pudding like wobble in the center as your doneness cue. When you cool it briefly, the interface between layers firms, preventing color blending. A common oversight is pouring too forcefully and creating ripples that leave uneven edges when sliced, so pour gently and let gravity do the work.
- Pour the remaining white batter onto the baked orange layer. Bake for another 30 to 35 minutes, just until set and no longer jiggly. Remove from the oven and let cool completely.: This final white band will steam and set into a creamy, glossy crown that completes the candy corn palette. Watch for a subtle golden ring around the edge as a sign it s done. Cooling completely before refrigerating prevents condensation from forming on the surface, which can make the top weep and affect texture. One common mistake is rushing the cooling and moving the cake while it s too hot, which can cause the layers to compress and weep.
- Refrigerate for 24 hours. Gently run a sharp knife around the edge of the pan; then release the sides. Slide a long, sharp knife under the bottom of the crust and carefully slide the whole cheesecake onto a platter, removing the bottom of the pan (if you feel brave enough!).: The refrigerator transforms the soft baked custard into a firm, sliceable cake, and you ll feel rewarded when the texture becomes dense and clean. Running a warm knife around the edge helps separate the filling from the pan without tugging, creating seamless slices. If you cut it too soon, the layers won t hold and the cake can crumble; that is the single most common regret. For cleaner release, chill the knife between slices to prevent dragging and tearing.
- In a medium bowl, whip 1/2 cup of heavy whipping cream at high speed until stiff peaks form; spread the whipped cream on top of the cheesecake; use candy corn to decorate. Refrigerate until ready to serve.: Whipping the final heavy whipping cream yields a bright, pillowy topping that contrasts with the dense filling. At high speed, the cream will thicken into peaks that hold their shape, offering a textured top for the candy corns to nestle into. If you overwhip, it turns grainy and butters, so watch closely and stop when peaks stand tall. A common slip is assembling too early; give the cheesecake time to firm and the whipped cream will stay pristine longer on a chilled surface.
Variations to Try
I like offering variations so you can adapt this cake to your pantry and crowd. Below are my favorite spins and practical notes to help you experiment confidently while keeping the core texture intact.
- Swap the crust base Use a different chocolate cookie if you prefer, but keep the crumb texture fine so the crust presses firmly and bakes evenly.
- Try liquid coloring with restraint If you must use liquid dye, add a concentrated gel alternative or reduce other liquids to prevent thinning the batter.
- Make mini cheesecakes Pour batter into smaller pans for party sized servings, but reduce baking time and start checking doneness earlier.
- Double up the whipped topping For extra cream on top, whip more heavy whipping cream and pipe decorative swirls before adding the candy corns.
- Prepare ahead Assemble and refrigerate up to two days before serving for easier hosting, keeping decorations until the last minute.
What to Pair With Candy Corn Cheesecake
This cheesecake shines at festive gatherings and creamy desserts deserve thoughtful pairings. Below are serving ideas, storage notes, and suggestions for occasions where this recipe feels most at home.
- Serve chilled slices Bring the cheesecake straight from the fridge, and plate with a small dollop of whipped cream to cut the sweetness.
- Accompany with coffee A bold cup of coffee balances the honeyed sweetness and enhances the creamy mouthfeel, making it a great after dinner option.
- Make it the centerpiece Use the cake as a Halloween party centerpiece; its bold colors make it a visual focal point for themed gatherings.
- Store properly Keep wrapped in plastic wrap or in an airtight container for up to five days in the refrigerator to preserve moisture and flavor.
- Transport tips Chill the cheesecake well before travel, and use a flat box with a non slip mat to prevent sliding during transit.
- Occasion ideas Ideal for Halloween parties, fall potlucks, and cozy dessert tables when you want something nostalgic yet special.
- Seasonal pairing Pair with warm spiced drinks in the fall, or serve alongside simple fruit to add freshness in late autumn gatherings.
FAQ
Conclusion
Candy Corn Cheesecake stands out because it combines theatrical visual appeal with a rich, silky texture that slices cleanly and serves beautifully. If you love a dessert that evokes nostalgia but feels elevated, this layered cheesecake is worth the extra time and attention. I encourage you to give it a try when you want a memorable fall or Halloween dessert; with patience during baking and chilling, youll end up with a showy centerpiece that tastes as good as it looks. Have fun with coloring, take your time between layers, and enjoy the smiles when guests see those bright, candy like bands on the plate.
Candy Corn Cheesecake
Equipment
- 10 inch springform pan
- Electric Mixer
- Mixing Bowls
- Rubber spatula
- Oven
Ingredients
- 24 Oreos, finely crushed Finely crushed to form a compact, crunchy crust that provides structure and contrast to the creamy filling; press into the pan to create an even base and bake briefly if needed to set.
- 1/4 cup (1/2 stick) butter, melted Melted to bind the crushed cookies together, adding richness and moisture to the crust; pour over crumbs and mix thoroughly to ensure an even, sliceable foundation.
- 38 -ounce packages cream cheese, at room temperature Soften and whip into a silky, tangy base that delivers body, stability, and traditional cheesecake flavor; combine at room temperature to avoid lumps and overmixing while incorporating air for smooth texture.
- 8 ounces mascarpone cheese, at room temperature Added for extra creaminess and a slightly tangy, luxurious mouthfeel that enhances richness; fold gently into the cream cheese to maintain a dense, velvety batter.
- 8 ounces sour cream Incorporated for subtle tang and moisture that balances sweetness and helps create a smooth, spreadable filling; mix in gently to preserve the creamy consistency.
- 1 1/2 cups honey Sweeten and add floral depth while providing a natural, glossy sweetness that melds with dairy components; measure carefully to balance flavors without overpowering the cheesecake.
- 1 1/2 cups granulated white sugar Granulated to supply bulk sweetness and structure while helping stabilize the batter during baking; dissolve well with other wet ingredients to avoid graininess in the finished cake.
- 6 large eggs Beaten in to incorporate air, set the cheesecake, and provide structure through coagulation of proteins during baking; add eggs one at a time and mix gently to prevent over-aeration.
- 1/3 cup all purpose flour Used sparingly to slightly thicken the batter and help stabilize the custard, contributing to a firmer slice; sift in and fold to prevent lumps and maintain a smooth texture.
- 1/2 cup heavy whipping cream Added to enrich the batter, increasing creaminess and tenderness while helping achieve a silkier mouthfeel; incorporate slowly to maintain emulsion and avoid curdling.
- 1 teaspoon vanilla extract Included to infuse warm, familiar flavor that complements the dairy and sweet notes; add at the end of mixing to retain aromatic intensity.
- yellow & orange color paste (or gel) Tinted paste or gel used to create vibrant yellow and orange layers for the candy corn effect without adding extra liquid; use small amounts to achieve saturated color without altering batter consistency.
- 1/2 cup heavy whipping cream Whipped to soft peaks for topping or to lighten part of the filling, adding airy texture and a creamy finish; chill before whipping for best volume and stability.
- 1 cup candy corns Stirred in or scattered on top as colorful, sweet candy pieces that lend texture and visual candy-corn motif; add after cooling to retain shape and prevent melting into the cheesecake.
Instructions
- Preheat the oven to 350°F. Spray 10-inch springform pan with nonstick cooking spray (see recipe notes below if you only have a 9-inch pan).: Feel the warm pulse of the kitchen as the oven climbs to temperature, and notice the faint hum of preheating. This step ensures the pan enters a consistent environment, which helps the crust bake evenly, creating a toasty aroma within 10 minutes. If you skip preheating, your crust may bake unevenly, leaving a chewy center or overly dark edges. A common mistake is not securely fastening the springform latch, which can leak filling during baking and make cleanup tougher. Use a gentle, even spray of nonstick agent so the cake releases cleanly after chilling.
- In a medium bowl, combine the cookie crumbs and butter. Press into the bottom of the prepared pan. Bake for 10 minutes; remove from oven and let cool.: You should hear a soft thud as you press the crumb mixture, and the surface will compact into a glossy, even layer that holds when flipped upside down. As it bakes, the aroma of warm Oreos will deepen and the butter will toast the crumbs, creating a subtle crunch that contrasts with the smooth filling. Press firmly, using the back of a measuring cup for even pressure, because an airy crust collapses when sliced. A common misstep is not chilling the crust briefly before filling, which can make the bottom soggy; a short cool-down keeps structure intact.
- In a large bowl, combine the cream cheese, mascarpone, and sour cream. Beat at medium speed with an electric mixer until smooth, about 3 minutes. Add the honey and sugar; beat until combined. Add the eggs, one at a time, beating well after each addition. Using a rubber spatula, scrape down the sides of the bowl, and beat until smooth. Reduce the speed to low. Add the flour, cream, and vanilla, beating until combined. Divide the batter into thirds, reserving one-third of the batter white. In one bowl, add a small amount of yellow color paste; whisk until combined and add more color until the desired hue is reached. In a second bowl, repeat this process with the orange color paste.: Close your eyes and notice the change in texture as the mixture transforms from lumpy to velvet smooth; it will smell slightly tangy from the sour cream and rich from the cheeses. Adding the eggs one at a time helps create a uniform custard and prevents over aeration, which can cause cracking. Scraping the bowl prevents pockets of unblended cheese that would create lumps in the finished cake. When you reduce to low speed, you avoid whipping too much air into the batter, keeping the texture dense and creamy. A common error is adding all eggs at once, which can result in curdled spots; patience and gentle mixing are key here.
- Pour the yellow batter over the baked cookie crust. Bake 30 to 35 minutes, just until set and no longer jiggly. Remove from the oven and let cool for 20 minutes.: When pouring the yellow layer, you ll notice it spreads slowly and evens itself into a flat sheet. As it bakes, look for the edges to firm and the center to have a slight wobble like a soft pudding. The surface should develop a gentle sheen rather than cracking. Letting it rest for 20 minutes helps it finish setting and reduces steam that can warp the next layer. Overbaking shrinks and cracks the top, so aim for that delicate jiggle. One frequent mistake is opening the oven too often, which changes the temperature and can cause the layer to sink.
- Pour the orange batter on top of the baked yellow layer. Bake for another 30 to 35 minutes, just until set and no longer jiggly. Remove from the oven and let cool for 20 minutes.: The orange layer should settle smoothly atop the yellow, and you may hear a quiet settling sound as it finds its place. During baking, steam escapes and small bubbles may form along the edge; watch for the same pudding like wobble in the center as your doneness cue. When you cool it briefly, the interface between layers firms, preventing color blending. A common oversight is pouring too forcefully and creating ripples that leave uneven edges when sliced, so pour gently and let gravity do the work.
- Pour the remaining white batter onto the baked orange layer. Bake for another 30 to 35 minutes, just until set and no longer jiggly. Remove from the oven and let cool completely.: This final white band will steam and set into a creamy, glossy crown that completes the candy corn palette. Watch for a subtle golden ring around the edge as a sign it s done. Cooling completely before refrigerating prevents condensation from forming on the surface, which can make the top weep and affect texture. One common mistake is rushing the cooling and moving the cake while it s too hot, which can cause the layers to compress and weep.
- Refrigerate for 24 hours. Gently run a sharp knife around the edge of the pan; then release the sides. Slide a long, sharp knife under the bottom of the crust and carefully slide the whole cheesecake onto a platter, removing the bottom of the pan (if you feel brave enough!).: The refrigerator transforms the soft baked custard into a firm, sliceable cake, and you ll feel rewarded when the texture becomes dense and clean. Running a warm knife around the edge helps separate the filling from the pan without tugging, creating seamless slices. If you cut it too soon, the layers won t hold and the cake can crumble; that is the single most common regret. For cleaner release, chill the knife between slices to prevent dragging and tearing.
- In a medium bowl, whip 1/2 cup of heavy whipping cream at high speed until stiff peaks form; spread the whipped cream on top of the cheesecake; use candy corn to decorate. Refrigerate until ready to serve.: Whipping the final heavy whipping cream yields a bright, pillowy topping that contrasts with the dense filling. At high speed, the cream will thicken into peaks that hold their shape, offering a textured top for the candy corns to nestle into. If you overwhip, it turns grainy and butters, so watch closely and stop when peaks stand tall. A common slip is assembling too early; give the cheesecake time to firm and the whipped cream will stay pristine longer on a chilled surface.
Notes
- Swap the crust base Use a different chocolate cookie if you prefer, but keep the crumb texture fine so the crust presses firmly and bakes evenly.
- Try liquid coloring with restraint If you must use liquid dye, add a concentrated gel alternative or reduce other liquids to prevent thinning the batter.
- Make mini cheesecakes Pour batter into smaller pans for party sized servings, but reduce baking time and start checking doneness earlier.
- Double up the whipped topping For extra cream on top, whip more heavy whipping cream and pipe decorative swirls before adding the candy corns.
- Prepare ahead Assemble and refrigerate up to two days before serving for easier hosting, keeping decorations until the last minute.