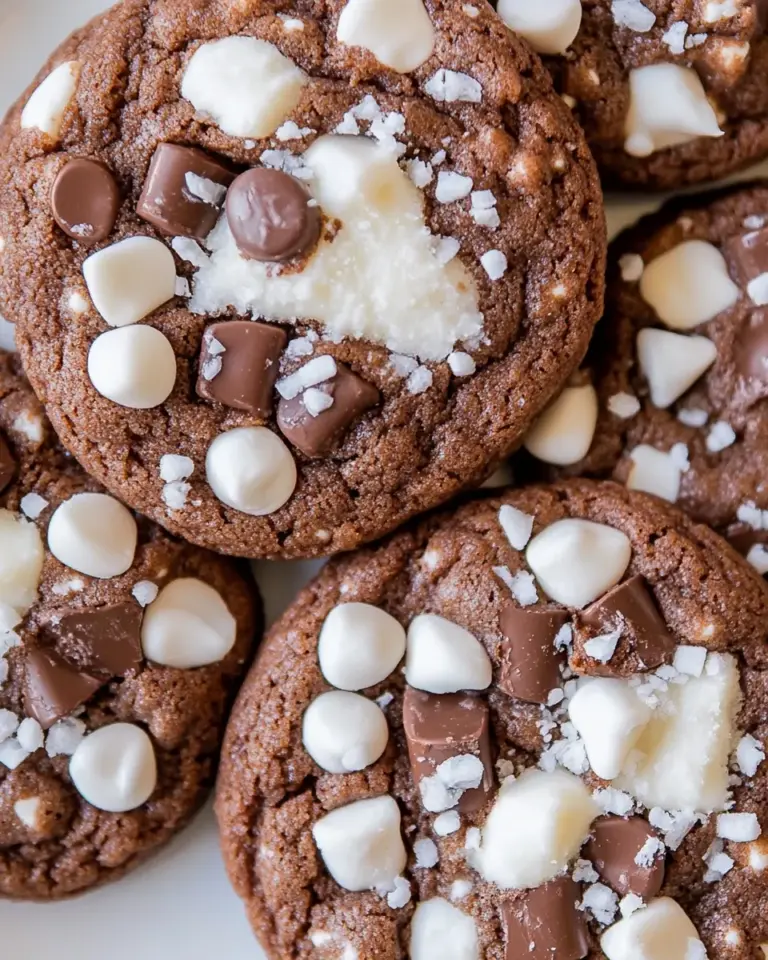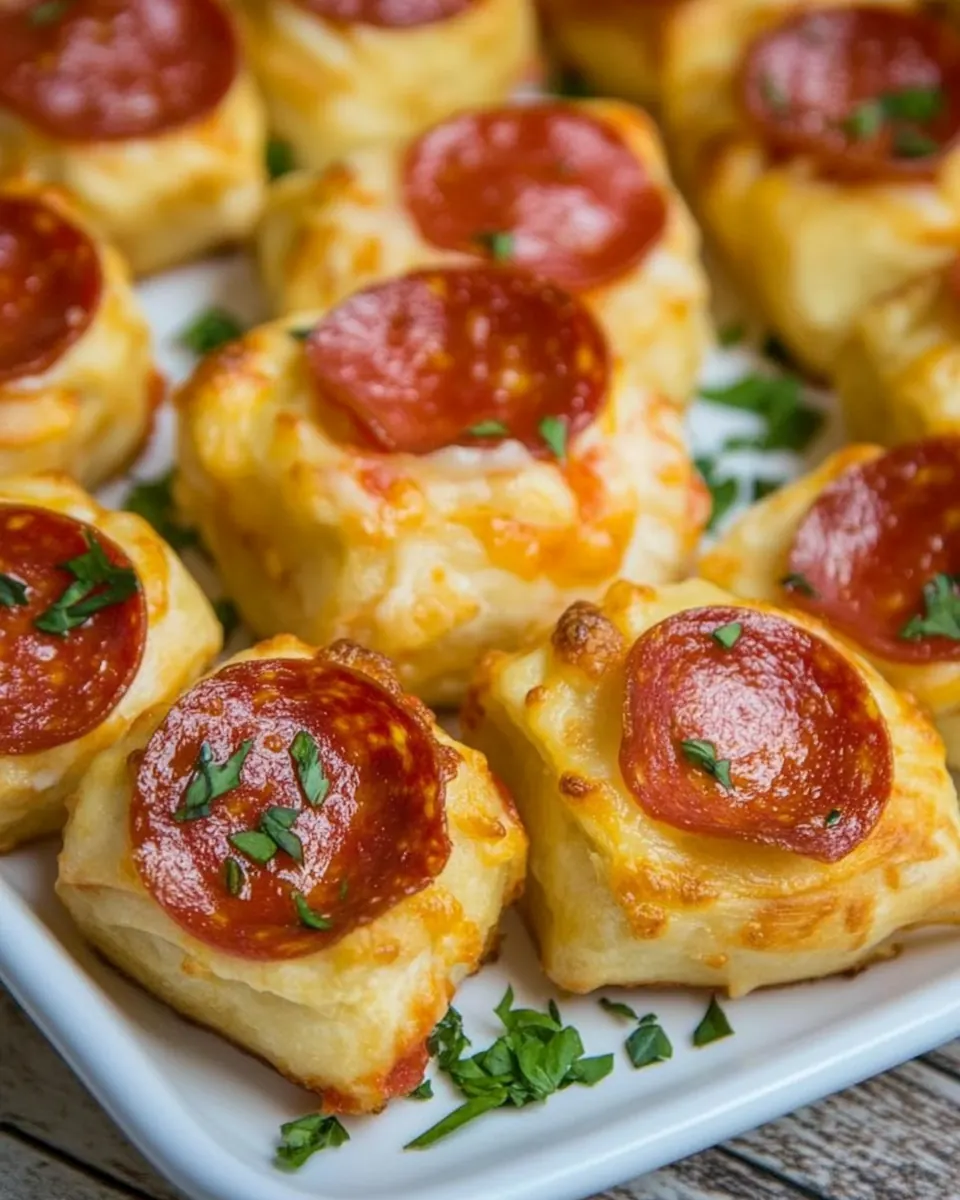
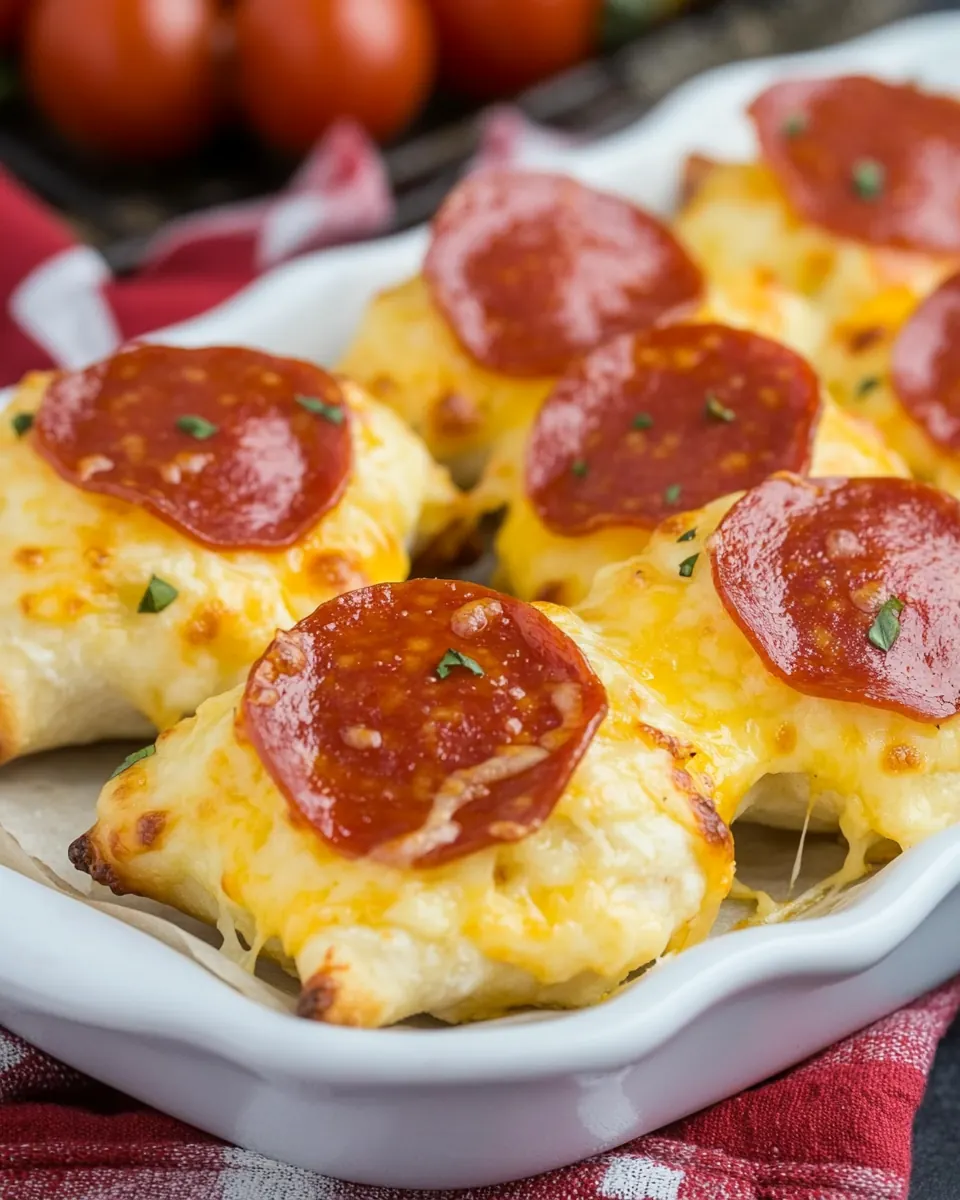
Pepperoni Pizza Poppers
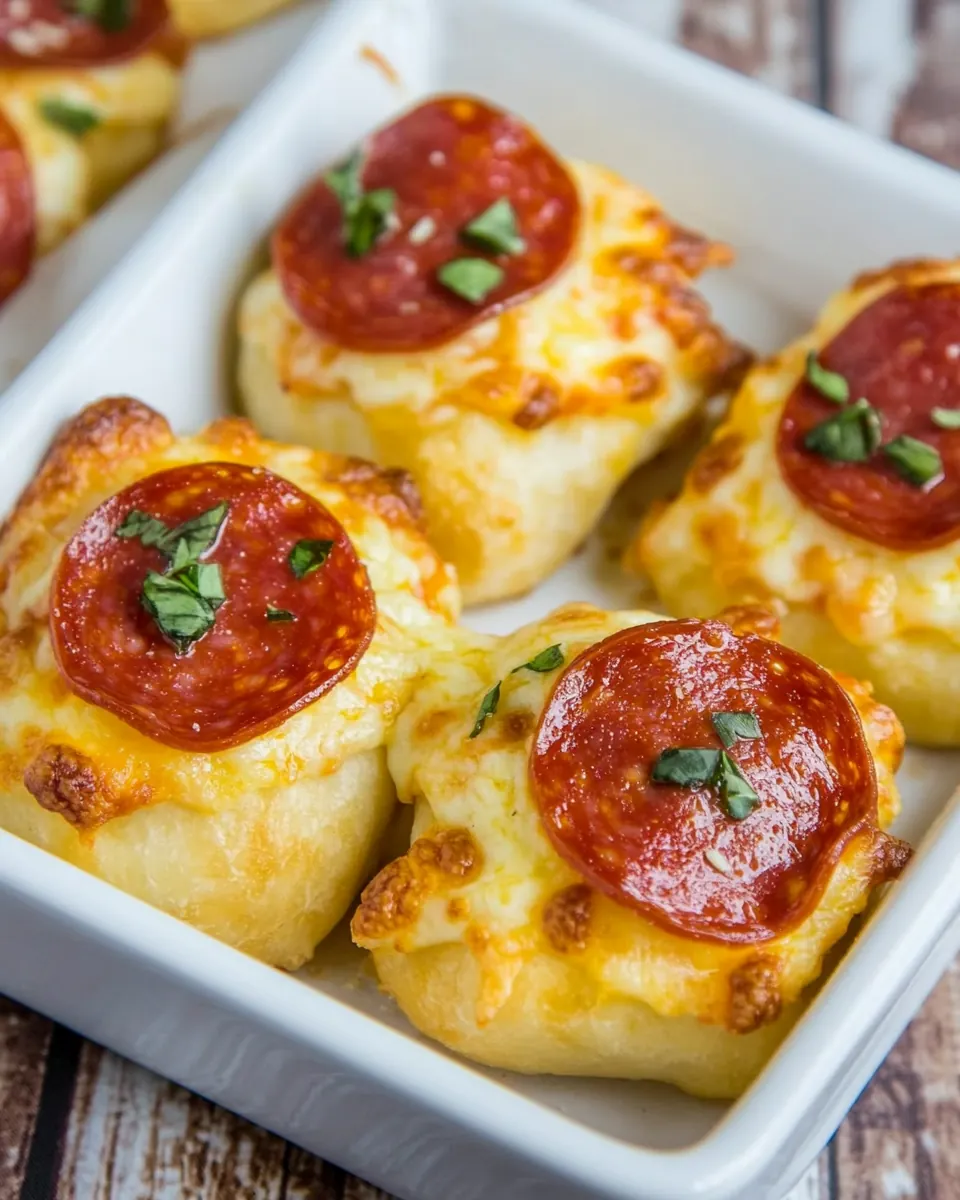
Pepperoni Pizza Poppers are one of those recipes I reach for when the house is buzzing and I want something playful, cheesy, and easy to share. I first made them on a rainy Sunday when friends dropped by unexpectedly, and the warm, cheesy bites disappeared before I could pour the first cup of coffee. From the crisp edges of the baked dough to the oily pop of mini pepperoni, every bite felt like a tiny celebration.
That afternoon taught me how small adjustments make a big difference. I swapped full sheets of dough for little squares, and the result was an ideal ratio of crust to filling. The creaminess of the softened cream cheese balances the tangy pizza sauce, while the mozzarella cheese melts into those beautiful strings that pull and promise comfort. Each time I bring out a tray, conversations slow as people savor that first hot popper, and I always smile because these are both nostalgic and new.
Recipe Snapshot
24 mins
12 mins
12 mins
Medium
250 kcal
American
Keto, Gluten-Free
Appetizers
Mini Muffin Tin
Why This Pepperoni Pizza Poppers Works
Quick crowd pleasing
I love that Pepperoni Pizza Poppers come together fast, so they are perfect for last minute snacks when guests arrive. The preparation is straightforward, and you can assemble a tray while chatting, making them my go to for casual get togethers.
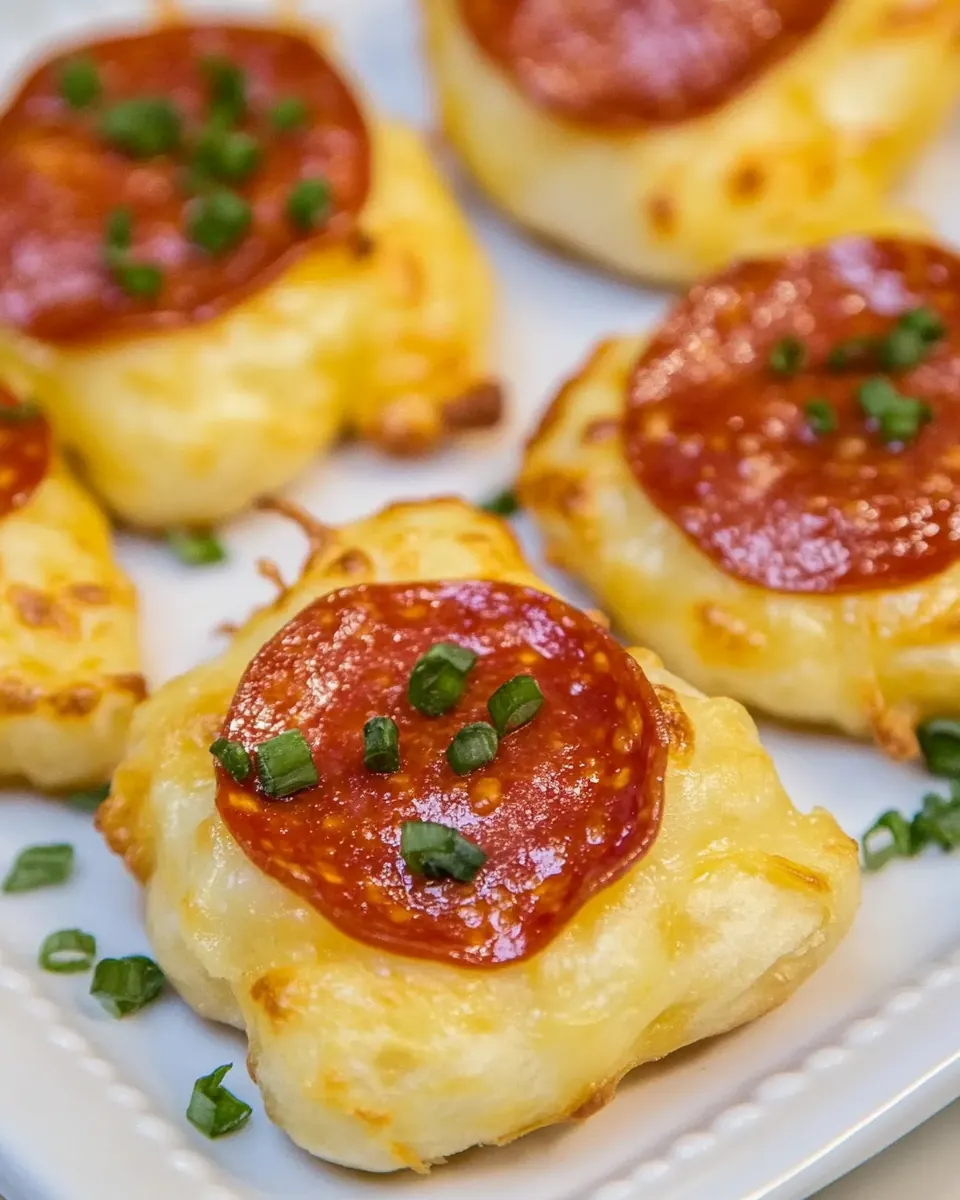
Perfect bite size
These little cups capture the best part of a pizza in one tidy mouthful. The small format means everyone gets a crisp edge and a gooey center, and that variety of textures keeps people coming back for more.
Kid friendly and fun
Kids adore the interactive element of hand held food, and Pepperoni Pizza Poppers are safe to eat without utensils. I often bring them to family gatherings because they are forgiving, and picky eaters usually find a version they like on the plate.
Flexible and forgiving
Because the components are simple, you can adjust amounts without breaking the recipe. I sometimes add a touch more cream cheese for a silky interior, or a little extra pizza sauce for tang. The method tolerates variance which makes it ideal when you are improvising.
Great for make ahead
You can assemble these earlier in the day and bake them shortly before serving, so they feel freshly made without last minute stress. I appreciate how they free me to focus on drinks and conversation while the oven does the finishing work.
What Goes Into Pepperoni Pizza Poppers
These ingredients are uncomplicated, each playing a clear role. The dough becomes the crisp vessel, the cream cheese adds richness, the pizza sauce brings acidity, and the mozzarella cheese creates that irresistible pull. Small seasonings like dried oregano lift the profile so every bite tastes complete.
- 2 containers refrigerated Crescent rolls, (8 rolls per container): Unroll and separate dough pieces to form individual pockets or cups that will hold fillings; provides a tender, flaky outer shell that bakes golden brown and seals in moisture. Work quickly with chilled dough to maintain layers and achieve a light, crescent-like texture while wrapping the filling securely.
- 1 (8-ounce) package cream cheese, softened: Soften with ambient heat and beat until smooth to create a rich, creamy binder that adds tang and moisture to the filling; contributes a silky mouthfeel and helps other ingredients adhere. Chill briefly if overheated to prevent separation and ensure easy spreading or scooping into dough.
- 1 jar pizza sauce: Spread or spoon as a flavorful, seasoned tomato base that supplies familiar pizza taste and moisture; brings herbs and acidity to balance the richness of cheese and cream cheese. Use a moderate amount to avoid soggy dough while maintaining a saucy bite inside each popper.
- 1 bag shredded mozzarella cheese: Shred and mix into the filling to deliver stretchy, melty cheese that provides gooey pull and savory richness; enhances both texture and pizza-like flavor. Choose a fine to medium shred for even melting and distribute evenly to ensure every popper contains cheesy strands.
- 1 package mini pepperonis: Scatter small slices within the filling to add concentrated cured-meat flavor, saltiness, and a slightly chewy texture; delivers classic pepperoni spice that defines the popper’s profile. Use a handful per popper for balanced meatiness without overpowering the cheese and sauce.
- dried oregano, about 1 teaspoon: Sprinkle as a dried herb accent to contribute warm, aromatic notes and authentic Italian seasoning; enhances overall pizza flavor with subtle earthiness. Use sparingly to avoid bitterness and to complement the tomato sauce and cheeses without dominating them.
How to Cook Pepperoni Pizza Poppers
These directions are approachable, and I like to walk through the sensory cues so you feel confident at every step. Expect aromas of butter and baked dough, and watch for golden coloring to know when they are done. Take your time shaping each cup and keep a close eye in the last minutes of baking.
- Spray a mini muffin pan with cooking spray and preheat oven to 375 degrees.: You will smell a slight scent from the oil as you spray the pan, and the pan will feel cool to the touch compared to the warm air of the oven. Getting the pan well greased prevents the bottoms from sticking, which keeps the crust intact when you remove the poppers. A common mistake is skimping on spray, leading to tearing when unmolding, so be thorough but not excessive.
- Unroll crescent dough and separate into squares of 2 triangles stuck together. Take each square and press on the seam to seal it. Cut into 4 smaller squares. Between the 2 containers of crescent dough, you should get 32 pieces of dough (if I’ve done the math right). It’s ok if they’re a little misshapen.: The dough will be soft and slightly tacky when you unroll it, with a mild buttery smell. Pressing the seam to seal creates a sturdier surface that will hold the fillings, and cutting into four smaller squares gives you consistent sizes. If the dough feels too cold and resists, let it sit for a few minutes to relax so it cuts cleanly.
- Press dough squares down into mini muffin cups, shaping them to fit the bottom and up the sides.: As you press the dough, you will notice it stretches and takes on the muffin cup shape, forming little cups that cradle the fillings. The edges will start to look more sealed and slightly pinched; that is normal and helps create a crisp rim. Avoid over stretching which can thin the base and lead to leaks when baking.
- Using 2 spoons, place a small amount of cream cheese (maybe 1/2 teaspoon, but totally up to personal preference) into bottom of each dough-filled muffin cup.: The creamy texture will be cool and smooth as you spoon it in, and a scant half teaspoon prevents the filling from overpowering the shell. That creamy layer keeps the center rich and slows sauce from soaking the dough. Spoon too much and the center will be heavy and underbaked compared to the edges.
- On top of cream cheese, spoon a little pizza sauce (maybe 1 teaspoon) into each cup.: The pizza sauce will be tangy and slightly fragrant, and a tiny spoonful adds bright tomato notes without making the dough soggy. You will see glossy red pools that sit atop the cream cheese, and the scent will become more savory. Using too much sauce leads to excess moisture and longer baking time, so stick to a small spoonful.
- Top pizza sauce with a little sprinkling of oregano and mozzarella cheese. Place 3 to 4 mini pepperonis on top of each popper.: The sprinkle of dried oregano will scent the poppers subtly, and the shredded mozzarella cheese melts into a pale, creamy layer that browns lightly. The mini pepperonis will release a touch of oil and crisp at the edges, giving a textural contrast. If you crowd too many toppings the cheese may not brown evenly, so keep it modest.
- Place in oven for 10 to 12 minutes, but check after 8 minutes because you definitely do not want to burn these guys.: As they bake you will see the edges of the dough turn golden, and the cheese begins to melt and bubble with tempting aroma. The sound is quiet, but you can notice a subtle hot oven hum and the smell of toasted dough. A common error is leaving them too long which dries out the base, so check early and watch for a gentle golden hue.
- Let cool in pan for a minute or two, just until cool enough to handle. If reusing the pan for another batch it is best to let the pan cool before placing dough into it.: Cooling allows the fillings to settle and the crust to firm up slightly so they hold their shape when removed. You will feel steam rising and a comforting warmth when you lift the pan, and the texture will shift from molten to pleasantly warm. Attempting to remove them immediately can cause filling to spill or burn fingers, so be patient for a short minute or two.
Make It Your Own
These small changes help you personalize Pepperoni Pizza Poppers without changing the soul of the recipe. A few thoughtful tweaks can tailor them to your crowd and make assembly easier when you are entertaining.
- Swap cheese amounts Adjust the quantity of mozzarella cheese to control gooeyness, using slightly less for crisper tops or a touch more for extra pull.
- Temperature check Keep your oven at a steady 375 degrees and rotate the pan if your oven has hot spots so each popper browns evenly.
- Make ahead assembly Assemble the poppers and keep them covered in the fridge for a few hours, then bake just before serving to save time.
- Even filling Use two spoons for neat portions, it helps you control the amount of cream cheese and pizza sauce per cup for consistent results.
- Grease well Ensure your mini muffin tin is well sprayed so bottoms release cleanly, preventing tearing and maintaining appearance.
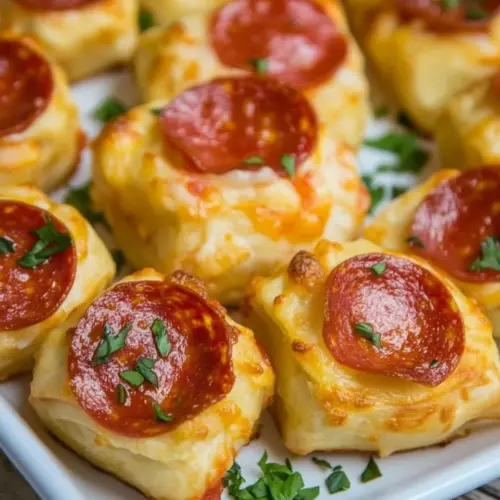
How to Enjoy Pepperoni Pizza Poppers
These poppers are versatile for many settings, and I often plan pairings to complement their playful nature. They work as a snack, appetizer, or part of a casual meal spread, and you can serve them warm for best texture and flavor.
- Serve warm Present the poppers hot from the oven with a small bowl of heated pizza sauce for dipping, which intensifies the tomato aroma and adds a warm, saucy contrast.
- Occasions These are ideal for game day, casual parties, or family movie nights because they are handheld and kid friendly, making them an easy crowd pleaser.
- Pairings Offer simple sides like crisp vegetable sticks or a green salad to balance the richness of the cheese, providing refreshing textures alongside the buttery dough.
- Storage Refrigerate leftovers in an airtight container for up to two days, then rewarm in a baking tray at low heat so the crust crisps back up without over melting the filling.
- Make ahead tips Assemble but do not bake, then cover and refrigerate; when ready, bake from chilled and add a minute or two to the time for a perfect finish.
- Serving style Arrange on a large platter with small tongs, and include toothpicks for easy pick up if serving at a busy gathering.
FAQ
Conclusion
Pepperoni Pizza Poppers capture the joy of pizza in a compact, shareable bite that is both nostalgic and fun. They are quick to assemble, forgiving in technique, and deliver a satisfying mix of crisp dough, creamy filling, and melty cheese. Try making a batch for your next gathering or a cozy night in, and watch how quickly they disappear. These poppers are a reliable crowd pleaser that brings warmth and smiles to the table.
Pepperoni Pizza Poppers
Equipment
- Mini Muffin Tin
Ingredients
- 2 containers refrigerated Crescent rolls, (8 rolls per container) Unroll and separate dough pieces to form individual pockets or cups that will hold fillings; provides a tender, flaky outer shell that bakes golden brown and seals in moisture. Work quickly with chilled dough to maintain layers and achieve a light, crescent-like texture while wrapping the filling securely.
- 1 (8-ounce) package cream cheese, softened Soften with ambient heat and beat until smooth to create a rich, creamy binder that adds tang and moisture to the filling; contributes a silky mouthfeel and helps other ingredients adhere. Chill briefly if overheated to prevent separation and ensure easy spreading or scooping into dough.
- 1 jar pizza sauce Spread or spoon as a flavorful, seasoned tomato base that supplies familiar pizza taste and moisture; brings herbs and acidity to balance the richness of cheese and cream cheese. Use a moderate amount to avoid soggy dough while maintaining a saucy bite inside each popper.
- 1 bag shredded mozzarella cheese Shred and mix into the filling to deliver stretchy, melty cheese that provides gooey pull and savory richness; enhances both texture and pizza-like flavor. Choose a fine to medium shred for even melting and distribute evenly to ensure every popper contains cheesy strands.
- 1 package mini pepperonis Scatter small slices within the filling to add concentrated cured-meat flavor, saltiness, and a slightly chewy texture; delivers classic pepperoni spice that defines the popper’s profile. Use a handful per popper for balanced meatiness without overpowering the cheese and sauce.
- dried oregano, about 1 teaspoon Sprinkle as a dried herb accent to contribute warm, aromatic notes and authentic Italian seasoning; enhances overall pizza flavor with subtle earthiness. Use sparingly to avoid bitterness and to complement the tomato sauce and cheeses without dominating them.
Instructions
- Spray a mini muffin pan with cooking spray and preheat oven to 375 degrees.: You will smell a slight scent from the oil as you spray the pan, and the pan will feel cool to the touch compared to the warm air of the oven. Getting the pan well greased prevents the bottoms from sticking, which keeps the crust intact when you remove the poppers. A common mistake is skimping on spray, leading to tearing when unmolding, so be thorough but not excessive.
- Unroll crescent dough and separate into squares of 2 triangles stuck together. Take each square and press on the seam to seal it. Cut into 4 smaller squares. Between the 2 containers of crescent dough, you should get 32 pieces of dough (if I’ve done the math right). It’s ok if they’re a little misshapen.: The dough will be soft and slightly tacky when you unroll it, with a mild buttery smell. Pressing the seam to seal creates a sturdier surface that will hold the fillings, and cutting into four smaller squares gives you consistent sizes. If the dough feels too cold and resists, let it sit for a few minutes to relax so it cuts cleanly.
- Press dough squares down into mini muffin cups, shaping them to fit the bottom and up the sides.: As you press the dough, you will notice it stretches and takes on the muffin cup shape, forming little cups that cradle the fillings. The edges will start to look more sealed and slightly pinched; that is normal and helps create a crisp rim. Avoid over stretching which can thin the base and lead to leaks when baking.
- Using 2 spoons, place a small amount of cream cheese (maybe 1/2 teaspoon, but totally up to personal preference) into bottom of each dough-filled muffin cup.: The creamy texture will be cool and smooth as you spoon it in, and a scant half teaspoon prevents the filling from overpowering the shell. That creamy layer keeps the center rich and slows sauce from soaking the dough. Spoon too much and the center will be heavy and underbaked compared to the edges.
- On top of cream cheese, spoon a little pizza sauce (maybe 1 teaspoon) into each cup.: The pizza sauce will be tangy and slightly fragrant, and a tiny spoonful adds bright tomato notes without making the dough soggy. You will see glossy red pools that sit atop the cream cheese, and the scent will become more savory. Using too much sauce leads to excess moisture and longer baking time, so stick to a small spoonful.
- Top pizza sauce with a little sprinkling of oregano and mozzarella cheese. Place 3 to 4 mini pepperonis on top of each popper.: The sprinkle of dried oregano will scent the poppers subtly, and the shredded mozzarella cheese melts into a pale, creamy layer that browns lightly. The mini pepperonis will release a touch of oil and crisp at the edges, giving a textural contrast. If you crowd too many toppings the cheese may not brown evenly, so keep it modest.
- Place in oven for 10 to 12 minutes, but check after 8 minutes because you definitely do not want to burn these guys.: As they bake you will see the edges of the dough turn golden, and the cheese begins to melt and bubble with tempting aroma. The sound is quiet, but you can notice a subtle hot oven hum and the smell of toasted dough. A common error is leaving them too long which dries out the base, so check early and watch for a gentle golden hue.
- Let cool in pan for a minute or two, just until cool enough to handle. If reusing the pan for another batch it is best to let the pan cool before placing dough into it.: Cooling allows the fillings to settle and the crust to firm up slightly so they hold their shape when removed. You will feel steam rising and a comforting warmth when you lift the pan, and the texture will shift from molten to pleasantly warm. Attempting to remove them immediately can cause filling to spill or burn fingers, so be patient for a short minute or two.
Notes
- Swap cheese amounts Adjust the quantity of mozzarella cheese to control gooeyness, using slightly less for crisper tops or a touch more for extra pull.
- Temperature check Keep your oven at a steady 375 degrees and rotate the pan if your oven has hot spots so each popper browns evenly.
- Make ahead assembly Assemble the poppers and keep them covered in the fridge for a few hours, then bake just before serving to save time.
- Even filling Use two spoons for neat portions, it helps you control the amount of cream cheese and pizza sauce per cup for consistent results.
- Grease well Ensure your mini muffin tin is well sprayed so bottoms release cleanly, preventing tearing and maintaining appearance.