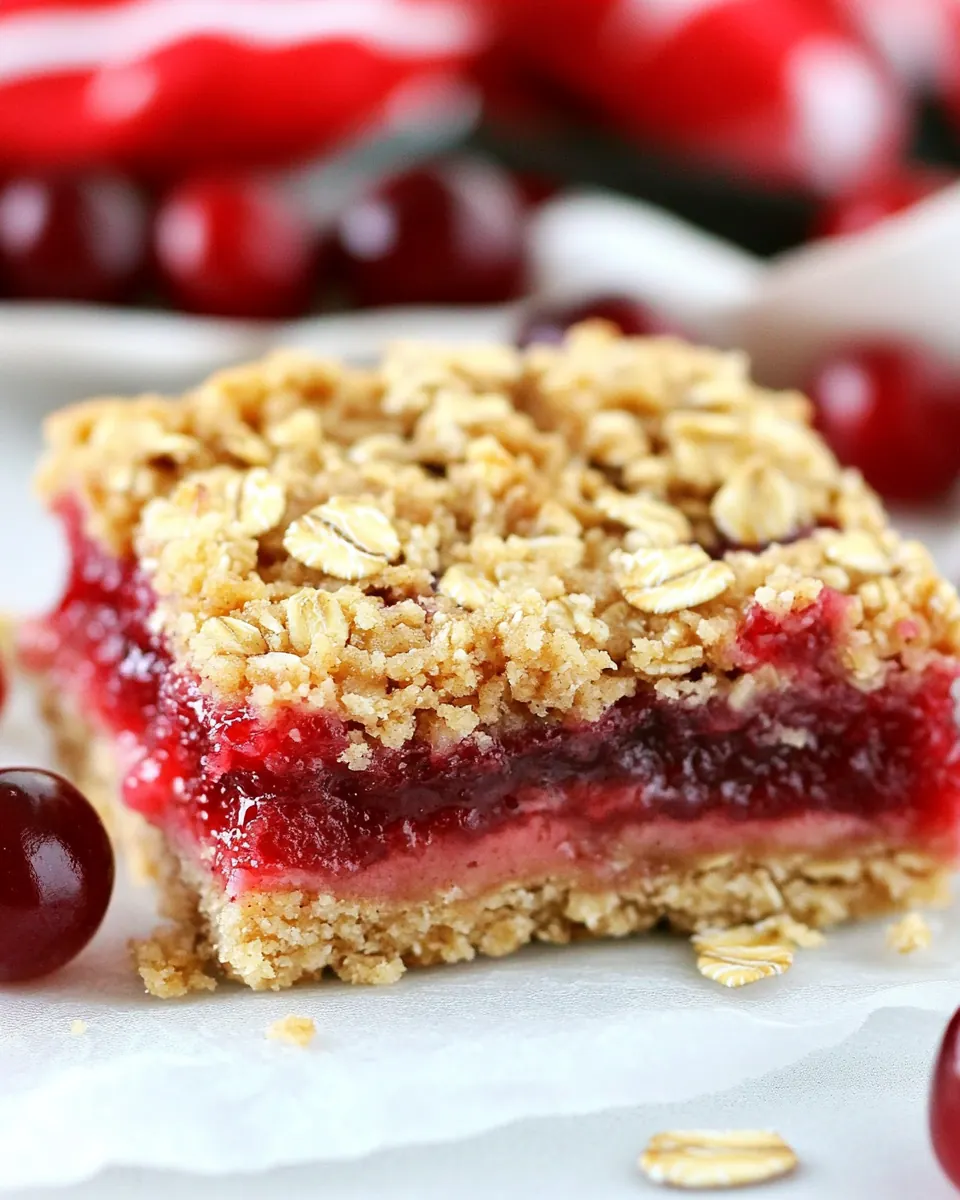
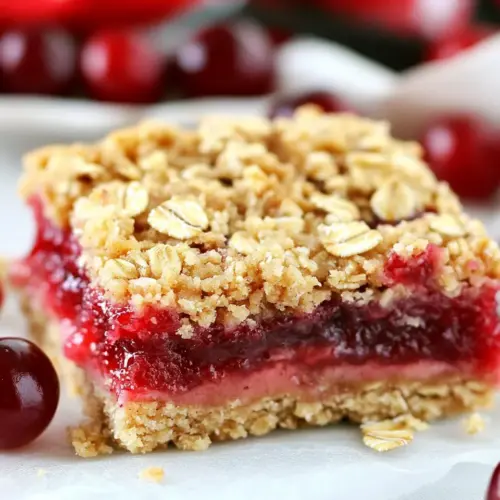
Cherry Oatmeal Crumble Bars
Cherry Oatmeal Crumble Bars quickly became my go to when I needed a crowd pleasing dessert that feels homemade without fuss. The first time I made these, I was juggling a busy weekend and a last minute potluck invite, and the way the sweet cherry filling paired with the toasty oats felt like a warm, familiar hug. From that batch on, they turned up at birthday gatherings, picnic baskets, and casual coffee dates, each time vanishing before I could snag a second piece.
I remember pressing the crumbly mixture into the pan while humming along to a playlist, the buttery aroma rising and promising something irresistible. These bars are one of those recipes that make you look like you put in more effort than you did, which is a personal favorite trick. They travel well, they slice clean when chilled, and they invite improvisation if you want to swap fillings someday, though I always come back to the balance of sweet cherry and hearty oats.
Recipe Snapshot
38 mins
15 mins
23 mins
Medium
200 kcal
American
Gluten-Free, Vegan
Desserts
9 x 13 baking dish, Parchment paper, Large bowl, Measuring cup
The Beauty of This Cherry Oatmeal Crumble Bars
Comfortingly Simple
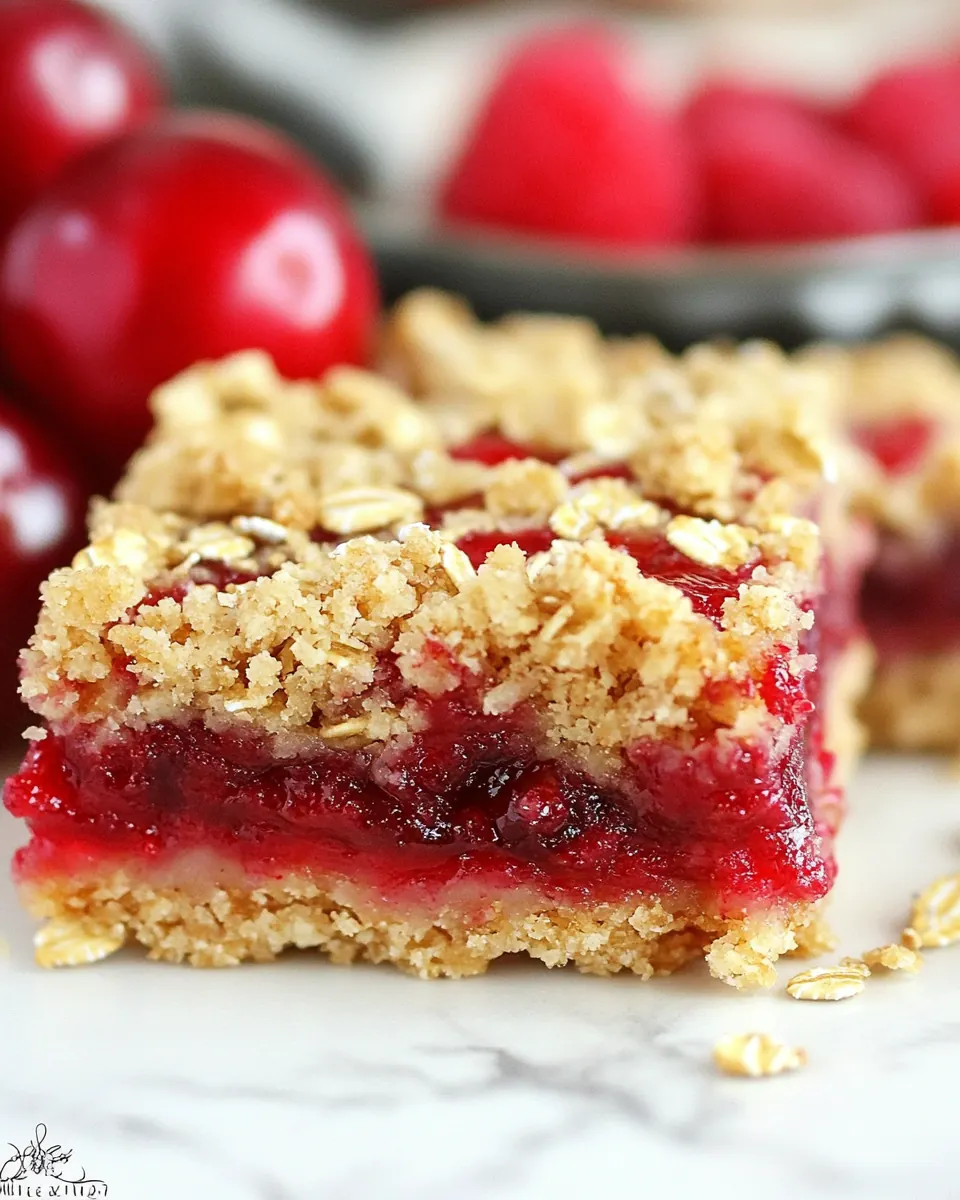
I love how Cherry Oatmeal Crumble Bars feel both nostalgic and modern, because they use pantry friendly staples yet deliver a comforting, homey bite. The texture contrast between the tender fruit center and the crisp, buttery crumble is what keeps me coming back.
Perfect for Feeding a Crowd
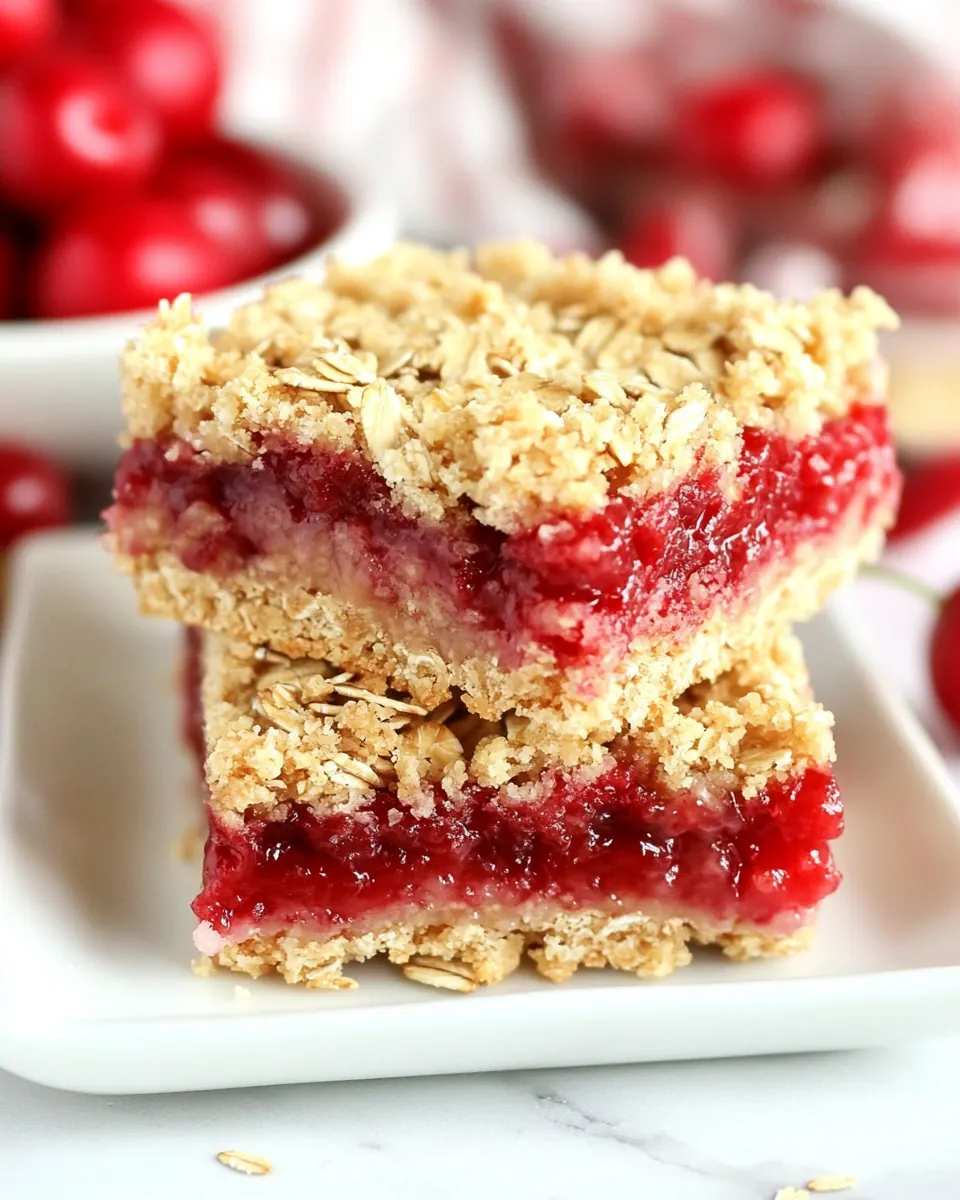
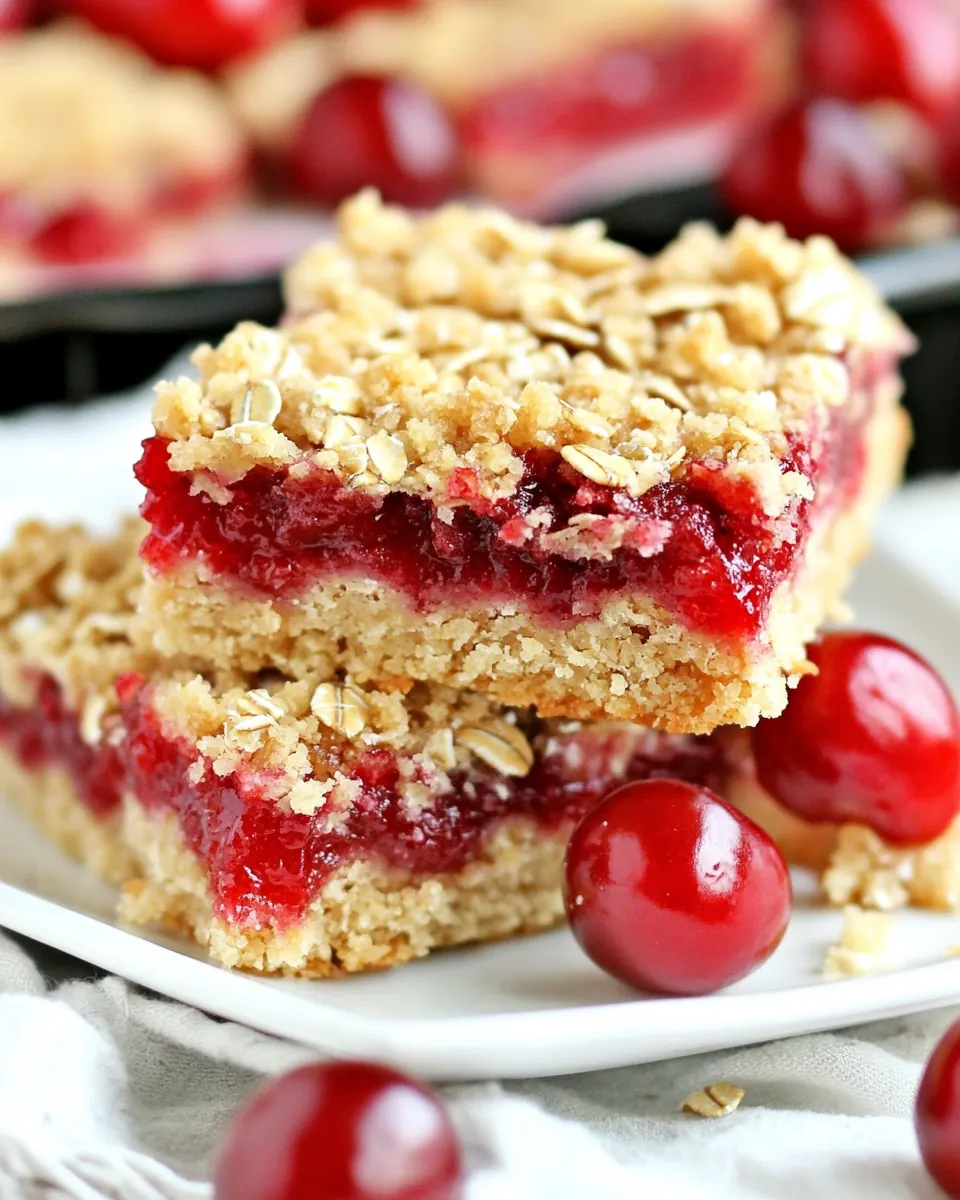
When I need something that scales easily, these bars are a top choice. You can slice them into many pieces, and they hold up well during transport, making them ideal for potlucks or bake sales.
No Fancy Equipment Required
I appreciate recipes that do not demand special tools. You can assemble these with basic bowls and a spatula, and that low barrier to entry means I make them on busy evenings when I still want to share something homemade.
Reliable and Forgiving
These bars are quite forgiving. If your crumb is a bit more sandy or a touch wetter, the final bake still turns out satisfying. That resilience makes them great for cooks who are still learning how butter and flour behave in crumbles.
Versatile Serving Options
I often serve them warm with a scoop of ice cream, or pack them into lunch boxes for a sweet afternoon treat. Their portability and texture make them suitable for picnics, casual brunches, or a simple dessert after dinner.
Everything You Need for Cherry Oatmeal Crumble Bars
These ingredients come together with a clear purpose: the crumbly base and topping create structure and buttery flavor, while the cherry filling provides a juicy, bright center. The key players are the dry mix that forms the crumble, the butter that binds and crisps, and the preserved fruit that brings sweetness and moisture. Together they make a bar that is both sturdy and tender, with satisfying chew from the oats.
- 15.25 oz yellow cake mix 1 package: Provides a sweet, tender base and crumb binding for the bars; imparts vanilla and buttery cake notes while supplying structure when mixed with oats and butter. Works as a convenient dry blend to create a sandy dough that bakes into a golden, slightly cakey crust and topping.
- 2 1/2 cups quick-cooking oats: Adds hearty texture, chewiness, and whole-grain character to the crumble; absorbs some butter to help form cohesive crumbs and a rustic mouthfeel. Contributes fiber and a toasty finish that contrasts the sweet, soft filling for balanced bars.
- 3/4 cups butter melted: Adds richness and moisture, melting to bind the dry ingredients into a cohesive crust and crumble topping; contributes a smooth mouthfeel and helps achieve a tender bite. Also promotes browning and enhances flavor release from the cake mix and oats during baking.
- 21 oz cherry pie filling 1 can: Supplies a sweet, jammy fruit layer with bright cherry flavor and syrupy consistency that provides moisture and contrast to the crunchy topping. Offers ready-made sweetness and fruit chunks that create a classic cherry bar center without additional prep.
Cooking Instructions for Cherry Oatmeal Crumble Bars
These steps are straightforward, but I like to walk you through sensory cues that make the difference. Pay attention to texture when mixing, the scent as the butter browns, and how the top takes on a golden tone in the oven. Little signals will tell you these bars are done and ready to enjoy.
- Preheat oven to 375 degrees.: You will notice the kitchen warming as the oven comes up to temperature, which helps the crust set quickly and the top crisp. An oven that is not fully preheated can cause the crumble to absorb more filling moisture, leading to a denser result. A common mistake is putting the pan in too early, so always wait until the display reads 375 and the oven light cycles if yours has one.
- Line a 9 x 13 baking dish with parchment paper or grease with cooking spray.: The smooth sound of parchment being smoothed into the pan is oddly satisfying, and it makes lifting the finished slab effortless. Greased pans can still work, but parchment ensures cleaner edges and easy removal. Avoid skipping this step, because those bars can stick and tear when you try to cut them while warm.
- Mix cake mix and oats in a large bowl.: As you stir the dry yellow cake mix and the oats , you'll see the texture change from powdery to a coarse, sandy mixture, which is the right look. This blend balances sweetness and chew, so mix gently to keep the oats intact. Overmixing can break down the oats and make the crumb too fine, reducing the pleasant toothsome texture.
- Add melted butter, stir until crumbly.: The butter will coat the dry mixture, and you should end up with pea sized clumps and a sandy crumb, not a paste. The aroma of warm butter will become evident as it mixes in. If your mixture looks too wet, add a tablespoon more oats; if it is too dry and powdery, a splash more melted butter will help. A typical error is adding all the butter too hot, which can make the mix overly liquified.
- Press down half the crumbs onto the bottom of the pan.: When you press the mixture into the pan, you should feel it compact and form a firm foundation that will hold the filling. Use the back of a measuring cup to get an even, smooth base. Pressing firmly ensures the crust will stay intact when sliced; if you press too lightly the base can crumble when serving.
- Carefully spread cherry pie filling over the crumb crust.: Spoon the cherry filling gently so you do not disturb the crust; the filling should glisten and hold its shape. I often use the back of a spoon to nudge it into a thin, even layer so each bite has the right fruit ratio. Avoid piling it too thick, or the bars may become unstable and ooze at the edges during baking.
- Spread remaining crumbs over preserves and press down gently.: Scatter the rest of the crumble into an even layer and press lightly so it adheres to the cherry filling. You want a rustic, patchy top rather than a perfectly smooth blanket, because those gaps let steam escape and create a crisp finish. A common slip is overpacking, which can prevent the top from crisping properly.
- Bake for 18 to 23 minutes or until very lightly golden brown.: As they bake, the scent of warm butter and toasted oats will fill your kitchen and small pockets of bubbling near the edges may appear. Look for a pale golden edge and a slightly firm top; the center will set as it cools. Leaving them in too long risks drying the bars, while taking them out too soon can leave the middle gooey and unstable.
- Eat warm or cool, cut into bars, and serve.: Warm bars are tender and spoon friendly, releasing a soft steam and an inviting aroma, while cooled bars slice more cleanly and firm up. If you cut while warm, use a sharp knife and wipe it between slices to keep edges neat. Cooling completely yields cleaner squares, but if you wait too long and they chill fully, they may need a few moments at room temperature to soften for the best bite.
Recipe Notes about Cherry Oatmeal Crumble Bars
These notes collect practical ideas I use every time I bake these bars. They cover small technique choices that affect texture and presentation, and they reflect what I learned from repeatedly making and sharing them.
- Room temperature butter: Measuring the butter at room temperature before melting helps ensure accurate quantities, and gently melting prevents hot pockets that could make the crumbs too wet.
- Even layer pressure: Use a flat-bottomed measuring cup to press the base firmly and evenly, which helps the bars hold shape when cutting and serving.
- Contain the filling: Leave a small border at the edges when spreading the cherry filling to prevent overflow as the fruit softens and bubbles in the oven.
- Watch the color: Remove the bars when the top is very lightly golden brown, as carryover heat will continue to set the texture after they come out.
- Storage method: Keep leftover bars in a single layer or separated with parchment to maintain the crispness of the topping for up to four days at room temperature.
Serving Ideas for Cherry Oatmeal Crumble Bars
These bars are versatile, and they can be dressed up or kept casual depending on the occasion. I like to tailor serving style to the event, whether a laid back picnic or a cozy dessert after dinner. They pair well with simple beverages, and you can store or gift them easily.
- Casual snacks: Pack individual squares for lunch boxes or coffee breaks to provide a sweet, satisfying treat with a chewy texture.
- Brunch addition: Serve warm bars alongside coffee and fruit for an informal brunch spread that feels indulgent without being fussy.
- Picnic friendly: Cut into sturdy bars and wrap in parchment, they travel well and are easy to serve outdoors without plates.
- Holiday dessert table: Offer them in a tray for a colorful addition to dessert spreads, their bright cherry center adding visual contrast.
- Storage tips: Keep bars in an airtight container at room temperature for up to four days, or refrigerate to extend freshness; bring chilled bars to room temperature briefly before serving for a softer bite.
- Serving temperature: Warm for a softer, almost gooey center, or cooled for clean slices and firmer texture, depending on your preference.
FAQ
Conclusion
These Cherry Oatmeal Crumble Bars stand out because they combine a buttery, oat forward crumble with a bright, fruity center for a dessert that is both comforting and uncomplicated. I encourage you to give them a try the next time you need a reliable sweet to share, whether for a casual get together or a special potluck. They require minimal equipment, few steps, and reward you with familiar flavors that always make people smile, which is exactly why I keep this recipe in rotation.
Cherry Oatmeal Crumble Bars
Equipment
- 9 X 13 baking dish
- Parchment Paper
- Large Bowl
- Measuring Cup
Ingredients
- 15.25 oz yellow cake mix 1 package Provides a sweet, tender base and crumb binding for the bars; imparts vanilla and buttery cake notes while supplying structure when mixed with oats and butter. Works as a convenient dry blend to create a sandy dough that bakes into a golden, slightly cakey crust and topping.
- 2 1/2 cups quick-cooking oats Adds hearty texture, chewiness, and whole-grain character to the crumble; absorbs some butter to help form cohesive crumbs and a rustic mouthfeel. Contributes fiber and a toasty finish that contrasts the sweet, soft filling for balanced bars.
- 3/4 cups butter melted Adds richness and moisture, melting to bind the dry ingredients into a cohesive crust and crumble topping; contributes a smooth mouthfeel and helps achieve a tender bite. Also promotes browning and enhances flavor release from the cake mix and oats during baking.
- 21 oz cherry pie filling 1 can Supplies a sweet, jammy fruit layer with bright cherry flavor and syrupy consistency that provides moisture and contrast to the crunchy topping. Offers ready-made sweetness and fruit chunks that create a classic cherry bar center without additional prep.
Instructions
- Preheat oven to 375 degrees.: You will notice the kitchen warming as the oven comes up to temperature, which helps the crust set quickly and the top crisp. An oven that is not fully preheated can cause the crumble to absorb more filling moisture, leading to a denser result. A common mistake is putting the pan in too early, so always wait until the display reads 375 and the oven light cycles if yours has one.
- Line a 9 x 13 baking dish with parchment paper or grease with cooking spray.: The smooth sound of parchment being smoothed into the pan is oddly satisfying, and it makes lifting the finished slab effortless. Greased pans can still work, but parchment ensures cleaner edges and easy removal. Avoid skipping this step, because those bars can stick and tear when you try to cut them while warm.
- Mix cake mix and oats in a large bowl.: As you stir the dry yellow cake mix and the oats , you'll see the texture change from powdery to a coarse, sandy mixture, which is the right look. This blend balances sweetness and chew, so mix gently to keep the oats intact. Overmixing can break down the oats and make the crumb too fine, reducing the pleasant toothsome texture.
- Add melted butter, stir until crumbly.: The butter will coat the dry mixture, and you should end up with pea sized clumps and a sandy crumb, not a paste. The aroma of warm butter will become evident as it mixes in. If your mixture looks too wet, add a tablespoon more oats; if it is too dry and powdery, a splash more melted butter will help. A typical error is adding all the butter too hot, which can make the mix overly liquified.
- Press down half the crumbs onto the bottom of the pan.: When you press the mixture into the pan, you should feel it compact and form a firm foundation that will hold the filling. Use the back of a measuring cup to get an even, smooth base. Pressing firmly ensures the crust will stay intact when sliced; if you press too lightly the base can crumble when serving.
- Carefully spread cherry pie filling over the crumb crust.: Spoon the cherry filling gently so you do not disturb the crust; the filling should glisten and hold its shape. I often use the back of a spoon to nudge it into a thin, even layer so each bite has the right fruit ratio. Avoid piling it too thick, or the bars may become unstable and ooze at the edges during baking.
- Spread remaining crumbs over preserves and press down gently.: Scatter the rest of the crumble into an even layer and press lightly so it adheres to the cherry filling. You want a rustic, patchy top rather than a perfectly smooth blanket, because those gaps let steam escape and create a crisp finish. A common slip is overpacking, which can prevent the top from crisping properly.
- Bake for 18 to 23 minutes or until very lightly golden brown.: As they bake, the scent of warm butter and toasted oats will fill your kitchen and small pockets of bubbling near the edges may appear. Look for a pale golden edge and a slightly firm top; the center will set as it cools. Leaving them in too long risks drying the bars, while taking them out too soon can leave the middle gooey and unstable.
- Eat warm or cool, cut into bars, and serve.: Warm bars are tender and spoon friendly, releasing a soft steam and an inviting aroma, while cooled bars slice more cleanly and firm up. If you cut while warm, use a sharp knife and wipe it between slices to keep edges neat. Cooling completely yields cleaner squares, but if you wait too long and they chill fully, they may need a few moments at room temperature to soften for the best bite.
Notes
- Room temperature butter: Measuring the butter at room temperature before melting helps ensure accurate quantities, and gently melting prevents hot pockets that could make the crumbs too wet.
- Even layer pressure: Use a flat-bottomed measuring cup to press the base firmly and evenly, which helps the bars hold shape when cutting and serving.
- Contain the filling: Leave a small border at the edges when spreading the cherry filling to prevent overflow as the fruit softens and bubbles in the oven.
- Watch the color: Remove the bars when the top is very lightly golden brown, as carryover heat will continue to set the texture after they come out.
- Storage method: Keep leftover bars in a single layer or separated with parchment to maintain the crispness of the topping for up to four days at room temperature.