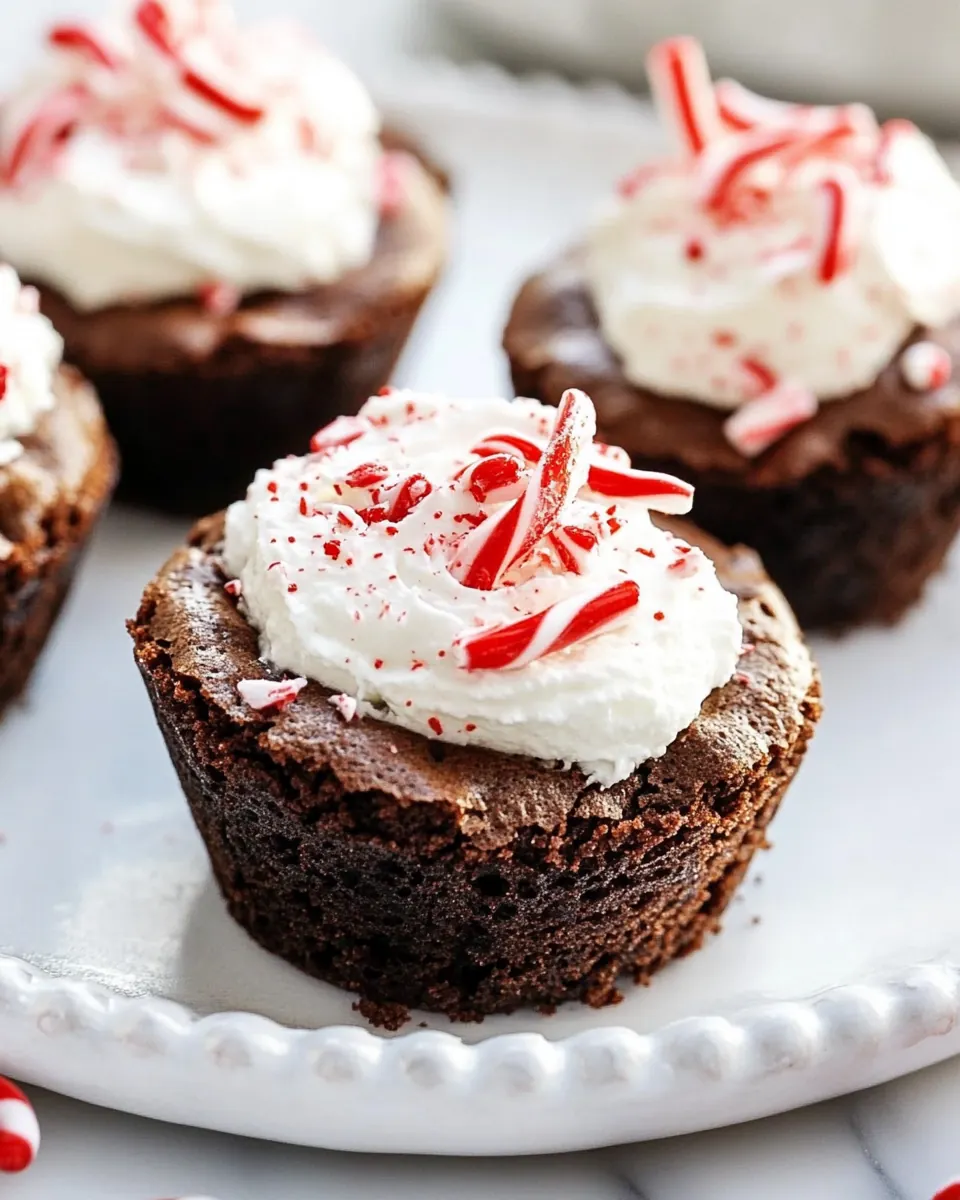
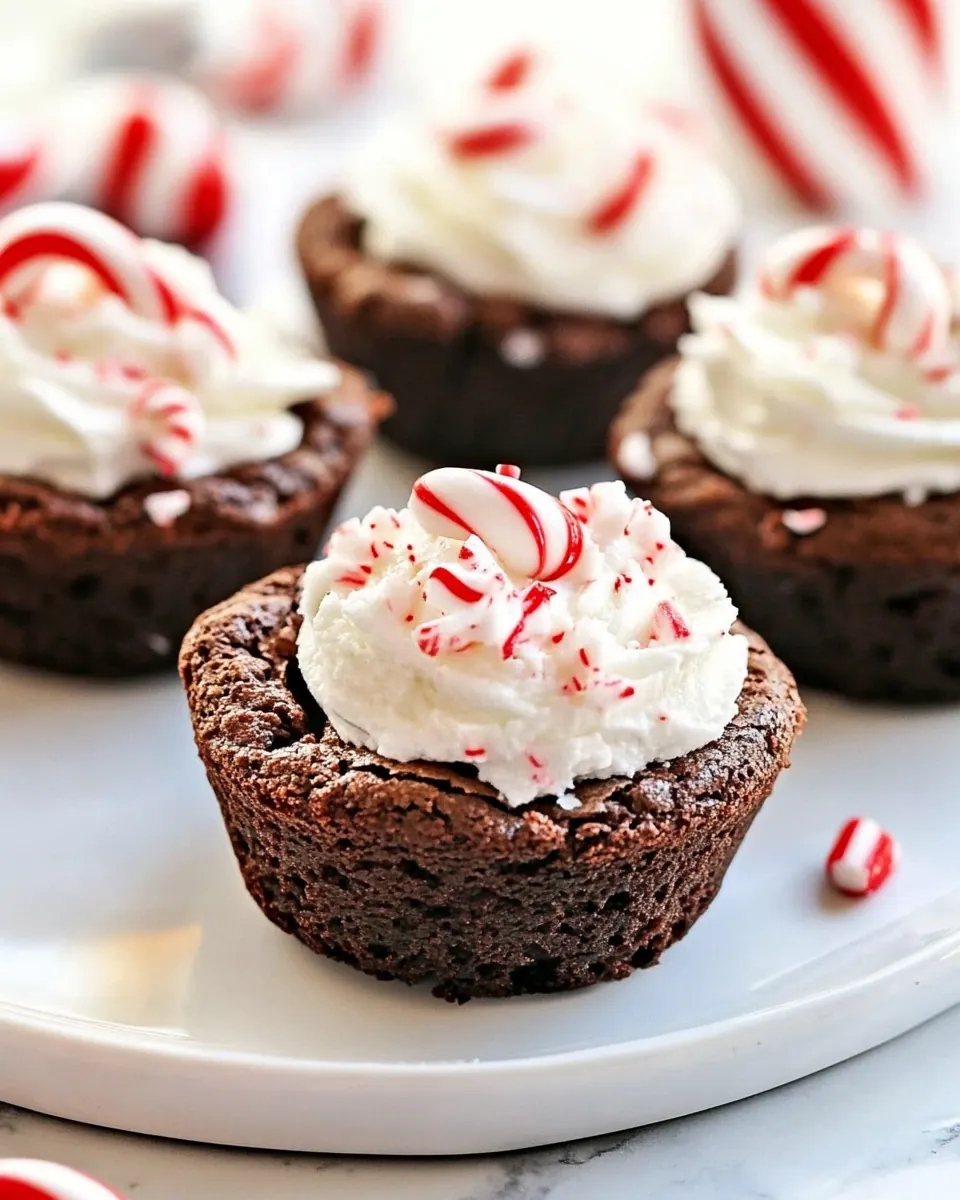
Peppermint Cocoa Brownie Cups
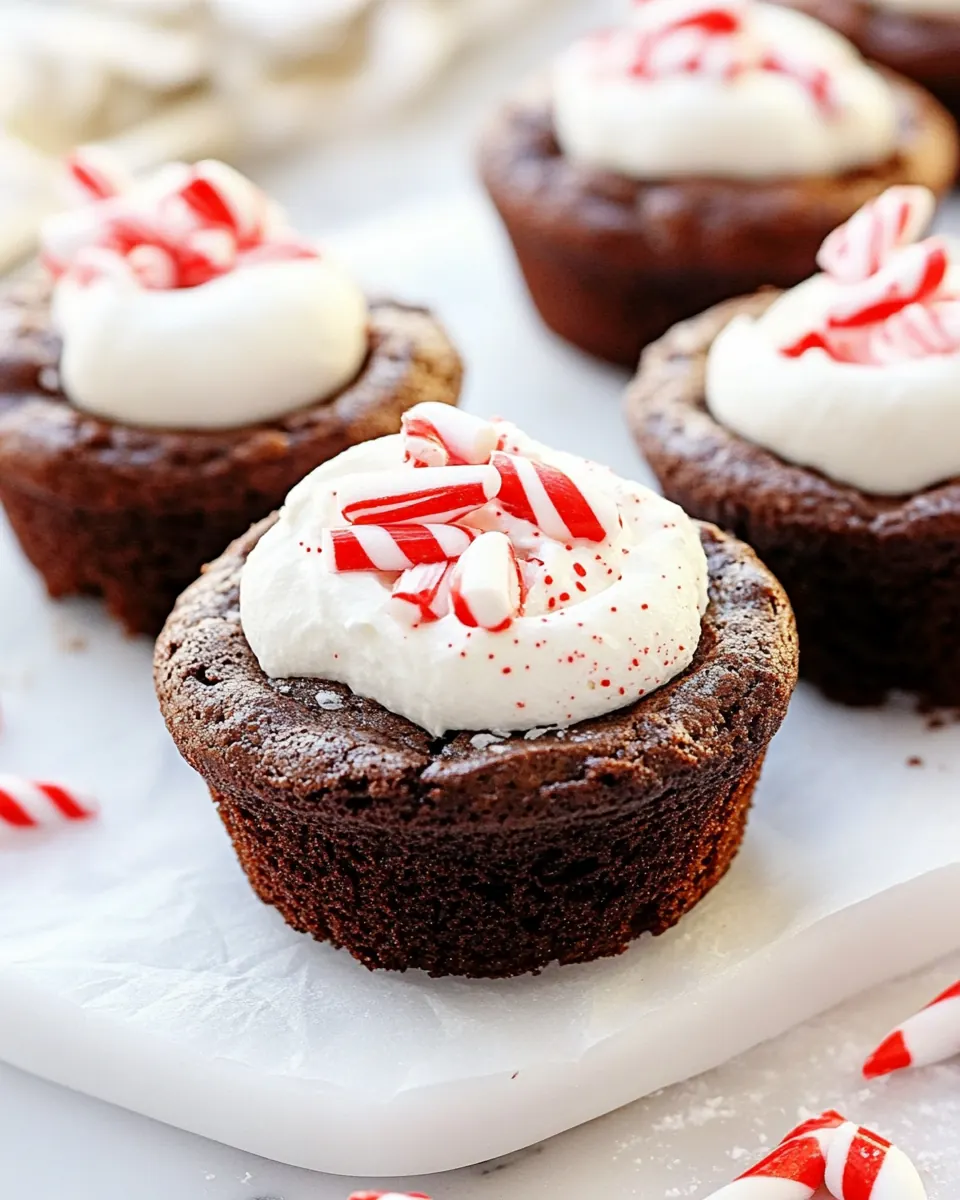
Peppermint Cocoa Brownie Cups have been my go to for holiday gatherings ever since I first folded peppermint chips into warm brownie batter at a small kitchen counter that smelled like cocoa and sugar. The first bite transported me back to a chilly evening when I handed a tray of these to neighbors, and we all paused, mid conversation, to savor the cool mint crunch against the rich, fudgy brownie base. I still remember the satisfied hush, followed by requests for the recipe, and that memory nudged me to perfect the balance between minty brightness and chocolate depth.
Over the years I learned little tricks that made these cups consistent and crowd friendly. I now rely on a quality boxed brownie mix for reliable texture, then enrich the batter with Andes Peppermint Crunch Baking Chips so each bite has a speckled bite of mint. When I top them with pillowy whipped cream, a dust of cocoa powder, soft mini marshmallows and crushed candy canes, they look like tiny, festive desserts that still feel homey. I often bring them to cookie swaps and holiday brunches because they travel well, and they always disappear quickly.
Recipe Snapshot
35 mins
10 mins
25 mins
Easy
200 kcal
American
Keto, Gluten-Free
Desserts
12-cup muffin tin, Oven, Cooling rack, Cookie scoop, Offset spatula
The Beauty of This Peppermint Cocoa Brownie Cups
1. Festive contrast of flavors
I adore how Peppermint Cocoa Brownie Cups pair bright, cool mint with warm, deep chocolate. That contrast keeps the palate interested, and I’ve noticed guests describe each bite as both refreshing and comforting. Because I use both mint chips and crushed candy canes, the mint shows up in texture as well as flavor.
2. Perfect for gatherings
These little cups are portable and portioned, which makes serving effortless. I love not having to slice a cake at a party, you can just set a platter down and watch them vanish. They are ideal when you want an eye catching dessert that is easy to pass around.
3. Quick, reliable technique
I appreciate that starting with a boxed brownie mix gives consistent results without hours of fuss. The method is forgiving, and folding in Andes Peppermint Crunch Baking Chips adds texture without compromising the fudgy crumb. For a busy host like me, that reliability is everything.
4. Textures that sing
Between the dense brownie, the airy whipped cream, the powdery cocoa powder, soft mini marshmallows and crunchy crushed candy canes, there is a delightful interplay. I enjoy how each bite moves from velvety to fluffy to crunchy, inviting another piece immediately.
5. Holiday friendly and flexible
These cups read as special but not fussy, so they work beautifully for holiday dessert tables or casual cookie exchanges. I like that you can scale them up easily without losing the charm, so whether I am making a dozen or three dozen, the recipe holds up.
Peppermint Cocoa Brownie Cups Shopping List
My ingredient philosophy here is simple: trust the small number of ingredients to do their jobs well. The key players are the gooey brownie base and the minty chips, while the toppings bring contrast and cheer. Each component supports texture or flavor, so you get richness, lift, coolness and crunch in every bite.
- 18 ounce Ghiradelli brownie mix plus the ingredients listed on the box: Provide rich chocolate structure and sweetness when prepared according to the package, supplying the base batter and instructions for baking the brownie cups to proper texture and rise.
- 1/2 cup Andes Peppermint Crunch Baking Chips: Add bright peppermint chocolate chips that melt into pockets of minty sweetness, contributing both flavor contrast and a speckled, festive appearance throughout the brownies.
- freshly whipped cream or an 8-ounce container of thawed whipped topping: Offer light, airy creaminess as a topping when freshly whipped or thawed from a container, lending a cool, smooth contrast to the warm, dense brownie cups and carrying cocoa or peppermint flavors on the palate.
- 2 tablespoons sweetened cocoa powder: Contribute concentrated cocoa aroma and a slightly dry, intense chocolate flavor to dust or fold into toppings, enhancing chocolate depth and balancing sweetness with mild bitterness.
- 1/2 cup Campfire® Mini Marshmallows: Provide small, chewy mounds of sweet marshmallow that toast slightly when warmed, adding playful texture and nostalgic flavor to the brownie cup ensemble.
- 5 crushed mini candy canes: Impart strong, crunchy peppermint notes and decorative sparkle when crushed, supplying a crisp contrast and festive finishing touch to complement the mint chips and whipped topping.
How to Prepare Peppermint Cocoa Brownie Cups
These instructions will walk you through turning batter into perfectly portioned, festive brownie cups. I’ll share sensory cues and troubleshooting tips so you can nail the texture and presentation. Keep your tools handy and savor the process as you go.
- Preheat oven to 325 degrees F. Spray a 12-cup standard muffin tin with nonstick cooking spray.: You will feel the kitchen warm as the oven reaches temperature and smell the faint, dry heat; setting the oven correctly is important because it controls how the brownie crumb sets and how the edges bake. If the oven is cooler than intended, the centers may stay underdone and collapse; if it runs hot, the edges can overbrown before the middle bakes. A reliable oven thermometer helps prevent these errors and gives you predictable results.
- Prepare brownies according to the directions on the box. Fold in the peppermint baking chips.: Oil slicks will glisten on the tin surface, ensuring the cups release cleanly once they cool; this step preserves the round, domed shape of each cup. If you skip this, the brownie edges may cling and tear when you remove them. For extra insurance, I sometimes press a paper liner lightly into each cup, but the spray alone usually does the trick.
- Use a large cookie scoop (3 tablespoons) to portion the brownie batter into the prepared muffin cups.: The batter should be glossy and slightly thick, with no streaks of flour; achieving the right viscosity matters because it affects how the batter bakes into a fudgy center. Stir until the mix is incorporated, avoiding vigorous beating which can introduce air and produce a cakier texture. A common mistake is over mixing, which makes the crumb drier and less tender.
- Bake in preheated oven for 22-25 minutes. Remove pan from oven and place it on a cooling rack and allow the brownies to cool for about 15 minutes before removing them from the pan and to a wire rack to cool completely. I use a thin offset spatula to make this process a little easier.: You will see flecks of white and green throughout the shiny batter, and the chips will soften slightly from the batter warmth; folding preserves the chips’ shape and distributes mint evenly. Use a gentle folding motion to avoid toughening the batter. If you stir too aggressively, you risk breaking the chips into dust and overworking the batter.
- When you're ready to serve up these Peppermint Cocoa Brownie Cups, top them with whipped cream, dust them with cocoa powder and sprinkle on the mini marshmallows and crushed candy canes.: The scooped batter will mound gently in each cup, offering consistent portions that bake at the same rate; visual uniformity helps all cups finish together. When the tin is full, the centers should rise slightly; uneven scoops cause some to bake faster and others slower. If your scoop sticks, lightly oil it between portions to keep the dollops neat.
- Bake in preheated oven for 22 to 25 minutes: As they bake, you’ll notice the tops shift from glossy to matte and the aroma of warm chocolate will fill the room; look for the edges to set and a slight jiggle in the center when gently nudged. This timing creates a fudgy interior, while longer baking yields cakier cups. Opening the oven early can cause collapse, so resist peeking until near the end of the window.
- Remove pan from oven and place it on a cooling rack and allow the brownies to cool for about 15 minutes before removing them from the pan and to a wire rack to cool completely: The warm brownie crumb will relax and firm up as it cools, making removal easier; the first cooling step prevents tearing and maintains shape. Transferring to a wire rack completes the cooling by allowing air to circulate. If you try to remove them when too hot, they may break apart, so patience here protects presentation.
- I use a thin offset spatula to make this process a little easier: The spatula slides beneath the cups and gives you leverage without tearing, and you’ll feel the slight resistance ease as the cup lifts away cleanly. The thin blade prevents splintering and keeps edges intact. Avoid prodding with a fork, which can shred the surface and ruin the tidy cup look.
- When you're ready to serve up these Peppermint Cocoa Brownie Cups, top them with whipped cream, dust them with cocoa powder and sprinkle on the mini marshmallows and crushed candy canes: The cool whipped cream contrasts with the still warm crumb if you decide to top sooner, and the cocoa powder adds depth while the mini marshmallows and crushed candy canes add playful texture; together they transform a simple brownie into a holiday worthy cup. Apply the toppings gently so the cup shape remains pristine. A common misstep is piling on toppings too early, which can cause marshmallows to melt or candy to clump; add delicate garnishes just before serving for best texture.
Making Adjustments
These tips help you adapt Peppermint Cocoa Brownie Cups for different situations and preferences. I include practical tweaks so you can scale, streamline, or dress them up depending on your event.
- Boost mint intensity: If you prefer a stronger mint flavor, fold in an extra quarter cup of peppermint baking chips, but be cautious because too many chips can make the centers softer and affect baking time.
- Make ahead strategy: You can bake the cups a day ahead and store them in an airtight container at room temperature; add the whipped cream, cocoa powder, mini marshmallows, and crushed candy canes just before serving to preserve texture and appearance.
- Whipped cream swap: If you want a stabilized topping that holds up longer, use a thawed container of whipped topping; it is less likely to weep under room temperature conditions than freshly whipped cream.
- Perfect portioning: Use a 3 tablespoon scoop for uniformity; if you need larger or smaller portions, test bake a tray to adjust the baking time in small increments to avoid over or under baking.
- Transport tips: Place the cups in a single layer on a flat tray and cover loosely with plastic wrap; if stacking is required, insert cardboard sheets between layers to protect the toppings from crushing.
How to Serve Peppermint Cocoa Brownie Cups
I like to present these as a centerpiece on dessert tables where friends can help themselves, or on a platter for more formal gatherings. The serving approach can be playful or polished, and the toppings make them visually festive.
- Holiday dessert table: Arrange the cups on a tiered stand surrounded by cookies for an eye catching display that invites guests to sample multiple treats.
- Casual gatherings: Place the cups on a simple platter with a small sign describing them as Peppermint Cocoa Brownie Cups, so people know there is mint inside.
- Brunch or afternoon tea: Pair with simple hot beverages like cocoa or coffee; their minty finish complements warm drinks and provides a sweet contrast between sips.
- Storage advice: Store leftover cups in an airtight container for up to two days at room temperature; if topped with whipped cream, refrigerate and consume within 24 hours to keep the topping fresh.
- Seasonal pairing: They shine in winter and at Christmas celebrations because the candy canes and peppermint chips give a festive color and flavor profile that matches seasonal decor.
FAQ
Conclusion
What makes these Peppermint Cocoa Brownie Cups special is the way they balance rich, fudgy chocolate with cool, crunchy mint in a perfectly portioned, festive package. If you love desserts that combine contrasting textures and require minimal hands on time, you should give these a try, especially during the holiday season when that little extra sparkle matters. I hope you enjoy making and sharing them as much as I do, and that they become a repeat favorite at your gatherings.
Peppermint Cocoa Brownie Cups
Equipment
- 12-cup muffin tin
- Oven
- Cooling rack
- Cookie Scoop
- Offset Spatula
Ingredients
- 18 -ounce Ghiradelli brownie mix plus the ingredients listed on the box Provide rich chocolate structure and sweetness when prepared according to the package, supplying the base batter and instructions for baking the brownie cups to proper texture and rise.
- 1/2 cup Andes Peppermint Crunch Baking Chips Add bright peppermint chocolate chips that melt into pockets of minty sweetness, contributing both flavor contrast and a speckled, festive appearance throughout the brownies.
- freshly whipped cream or an 8-ounce container of thawed whipped topping Offer light, airy creaminess as a topping when freshly whipped or thawed from a container, lending a cool, smooth contrast to the warm, dense brownie cups and carrying cocoa or peppermint flavors on the palate.
- 2 tablespoons sweetened cocoa powder Contribute concentrated cocoa aroma and a slightly dry, intense chocolate flavor to dust or fold into toppings, enhancing chocolate depth and balancing sweetness with mild bitterness.
- 1/2 cup Campfire® Mini Marshmallows Provide small, chewy mounds of sweet marshmallow that toast slightly when warmed, adding playful texture and nostalgic flavor to the brownie cup ensemble.
- 5 crushed mini candy canes Impart strong, crunchy peppermint notes and decorative sparkle when crushed, supplying a crisp contrast and festive finishing touch to complement the mint chips and whipped topping.
Instructions
- Preheat oven to 325 degrees F. Spray a 12-cup standard muffin tin with nonstick cooking spray.: You will feel the kitchen warm as the oven reaches temperature and smell the faint, dry heat; setting the oven correctly is important because it controls how the brownie crumb sets and how the edges bake. If the oven is cooler than intended, the centers may stay underdone and collapse; if it runs hot, the edges can overbrown before the middle bakes. A reliable oven thermometer helps prevent these errors and gives you predictable results.
- Prepare brownies according to the directions on the box. Fold in the peppermint baking chips.: Oil slicks will glisten on the tin surface, ensuring the cups release cleanly once they cool; this step preserves the round, domed shape of each cup. If you skip this, the brownie edges may cling and tear when you remove them. For extra insurance, I sometimes press a paper liner lightly into each cup, but the spray alone usually does the trick.
- Use a large cookie scoop (3 tablespoons) to portion the brownie batter into the prepared muffin cups.: The batter should be glossy and slightly thick, with no streaks of flour; achieving the right viscosity matters because it affects how the batter bakes into a fudgy center. Stir until the mix is incorporated, avoiding vigorous beating which can introduce air and produce a cakier texture. A common mistake is over mixing, which makes the crumb drier and less tender.
- Bake in preheated oven for 22-25 minutes. Remove pan from oven and place it on a cooling rack and allow the brownies to cool for about 15 minutes before removing them from the pan and to a wire rack to cool completely. I use a thin offset spatula to make this process a little easier.: You will see flecks of white and green throughout the shiny batter, and the chips will soften slightly from the batter warmth; folding preserves the chips’ shape and distributes mint evenly. Use a gentle folding motion to avoid toughening the batter. If you stir too aggressively, you risk breaking the chips into dust and overworking the batter.
- When you're ready to serve up these Peppermint Cocoa Brownie Cups, top them with whipped cream, dust them with cocoa powder and sprinkle on the mini marshmallows and crushed candy canes.: The scooped batter will mound gently in each cup, offering consistent portions that bake at the same rate; visual uniformity helps all cups finish together. When the tin is full, the centers should rise slightly; uneven scoops cause some to bake faster and others slower. If your scoop sticks, lightly oil it between portions to keep the dollops neat.
- Bake in preheated oven for 22 to 25 minutes: As they bake, you’ll notice the tops shift from glossy to matte and the aroma of warm chocolate will fill the room; look for the edges to set and a slight jiggle in the center when gently nudged. This timing creates a fudgy interior, while longer baking yields cakier cups. Opening the oven early can cause collapse, so resist peeking until near the end of the window.
- Remove pan from oven and place it on a cooling rack and allow the brownies to cool for about 15 minutes before removing them from the pan and to a wire rack to cool completely: The warm brownie crumb will relax and firm up as it cools, making removal easier; the first cooling step prevents tearing and maintains shape. Transferring to a wire rack completes the cooling by allowing air to circulate. If you try to remove them when too hot, they may break apart, so patience here protects presentation.
- I use a thin offset spatula to make this process a little easier: The spatula slides beneath the cups and gives you leverage without tearing, and you’ll feel the slight resistance ease as the cup lifts away cleanly. The thin blade prevents splintering and keeps edges intact. Avoid prodding with a fork, which can shred the surface and ruin the tidy cup look.
- When you're ready to serve up these Peppermint Cocoa Brownie Cups, top them with whipped cream, dust them with cocoa powder and sprinkle on the mini marshmallows and crushed candy canes: The cool whipped cream contrasts with the still warm crumb if you decide to top sooner, and the cocoa powder adds depth while the mini marshmallows and crushed candy canes add playful texture; together they transform a simple brownie into a holiday worthy cup. Apply the toppings gently so the cup shape remains pristine. A common misstep is piling on toppings too early, which can cause marshmallows to melt or candy to clump; add delicate garnishes just before serving for best texture.
Notes
- Boost mint intensity: If you prefer a stronger mint flavor, fold in an extra quarter cup of peppermint baking chips, but be cautious because too many chips can make the centers softer and affect baking time.
- Make ahead strategy: You can bake the cups a day ahead and store them in an airtight container at room temperature; add the whipped cream, cocoa powder, mini marshmallows, and crushed candy canes just before serving to preserve texture and appearance.
- Whipped cream swap: If you want a stabilized topping that holds up longer, use a thawed container of whipped topping; it is less likely to weep under room temperature conditions than freshly whipped cream.
- Perfect portioning: Use a 3 tablespoon scoop for uniformity; if you need larger or smaller portions, test bake a tray to adjust the baking time in small increments to avoid over or under baking.
- Transport tips: Place the cups in a single layer on a flat tray and cover loosely with plastic wrap; if stacking is required, insert cardboard sheets between layers to protect the toppings from crushing.