Peppermint Chocolate Chip Cookies
Peppermint Chocolate Chip Cookies began as my favorite holiday baking experiment and quickly became the cookie I turn to when I need something festive yet familiar. The first time I made them I remember the tiny crackle of crushed candy canes as I stirred them in, and how that bright peppermint note cut through the rich chocolate chips. I still laugh about how I stood at the counter sampling warm cookies straight from the tray, hands dusted in sugar and crumbs, convinced I had just perfected a seasonal classic.
Over the years I have tweaked little things, from how long I cream the butter and sugar to the size of the crushed candy cane pieces, and each change nudged the cookies closer to my ideal balance of tender center and slightly crisp edge. There are evenings when I bake a single batch just to cheer up a friend, and mornings when the whole house smells like vanilla, chocolate, and mint, which somehow makes even the weekday feel special. Baking these cookies has taught me patience, because chilling the dough rewards you with even texture and prettier rounds.
What I love most about these cookies is how approachable they are, even though they look bakery perfect. You do not need fancy tools, and small adjustments go a long way. When I host, these cookies vanish first, which tells me they say something friendly and comforting to folks who try them. If you want a recipe that feels seasonal, yet could be pulled out whenever you crave a mint chocolate moment, these are for you.
Recipe Snapshot
25 mins
15 mins
10 mins
Easy
150 kcal
American
Gluten-Free, Low FODMAP
Desserts
Mixer, Mixing bowl, Baking sheet, Parchment paper, Cookie scoop, Cooling rack
The Magic of This Peppermint Chocolate Chip Cookies
Flavor Contrast That Works
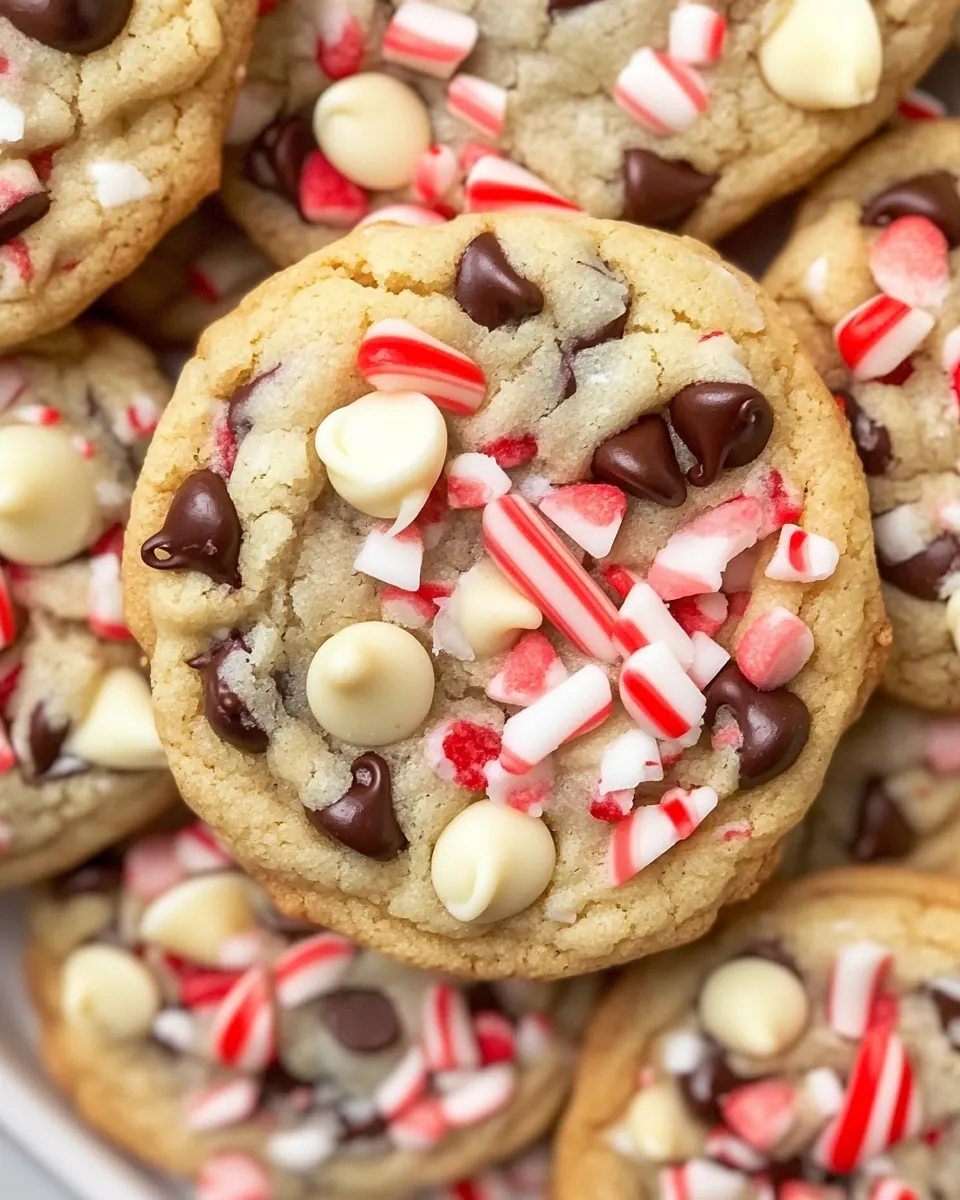
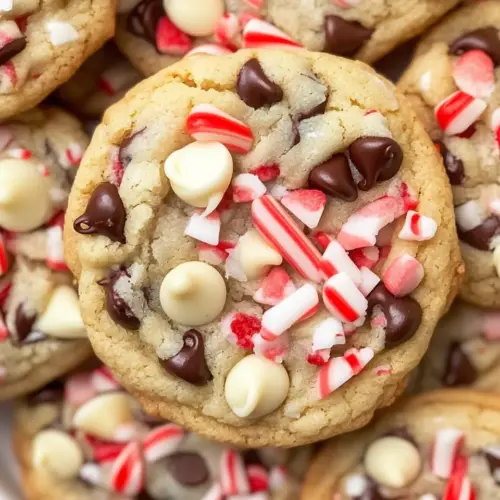
I adore how Peppermint Chocolate Chip Cookies balance bright mint with deep chocolate. The crushed candy canes bring a cool sting that plays against the sweet, creamy notes of the chocolate chips, creating a bite that keeps you coming back. I especially like the way white chocolate chips add a mellow sweetness while darker chips give structure and depth.
Texture You Can Rely On
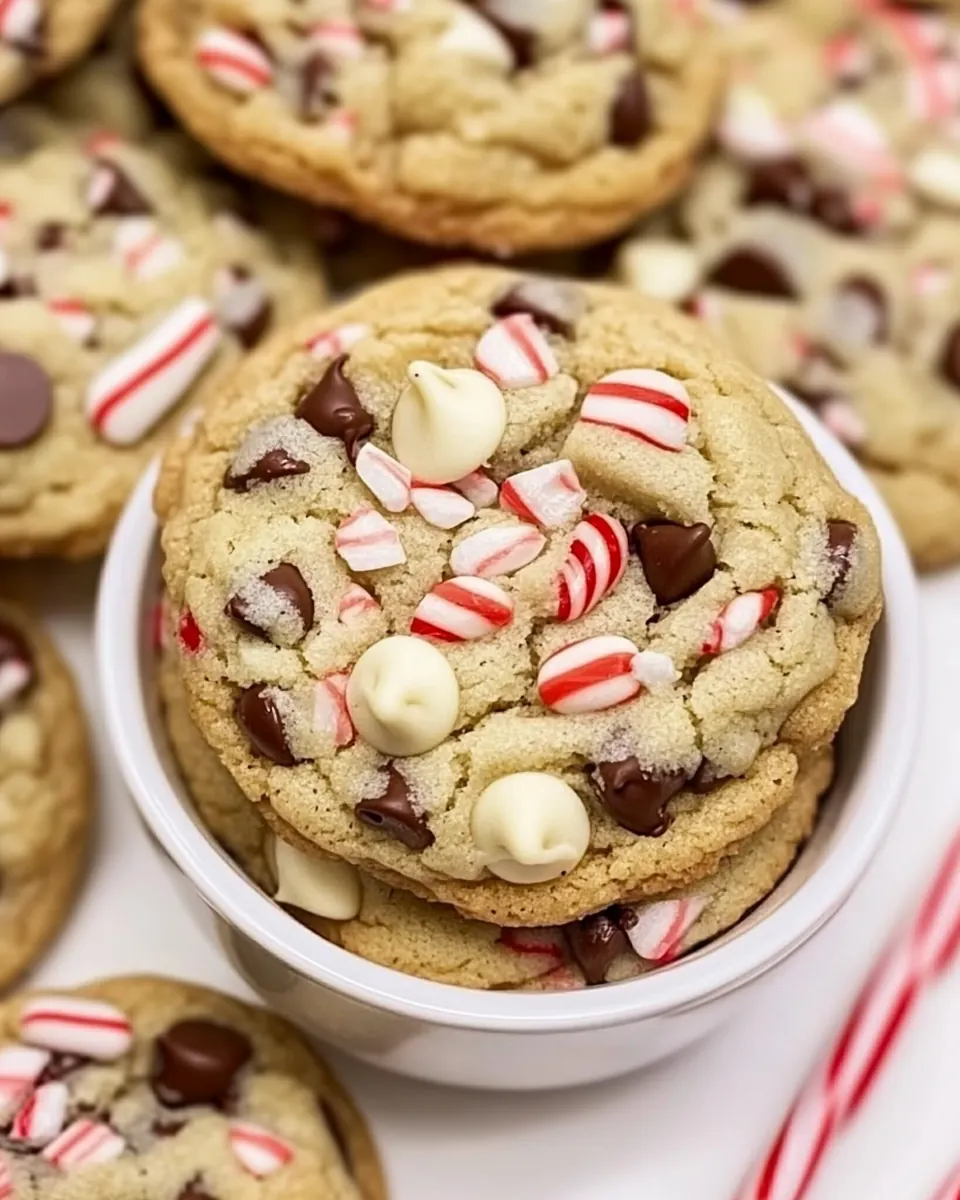
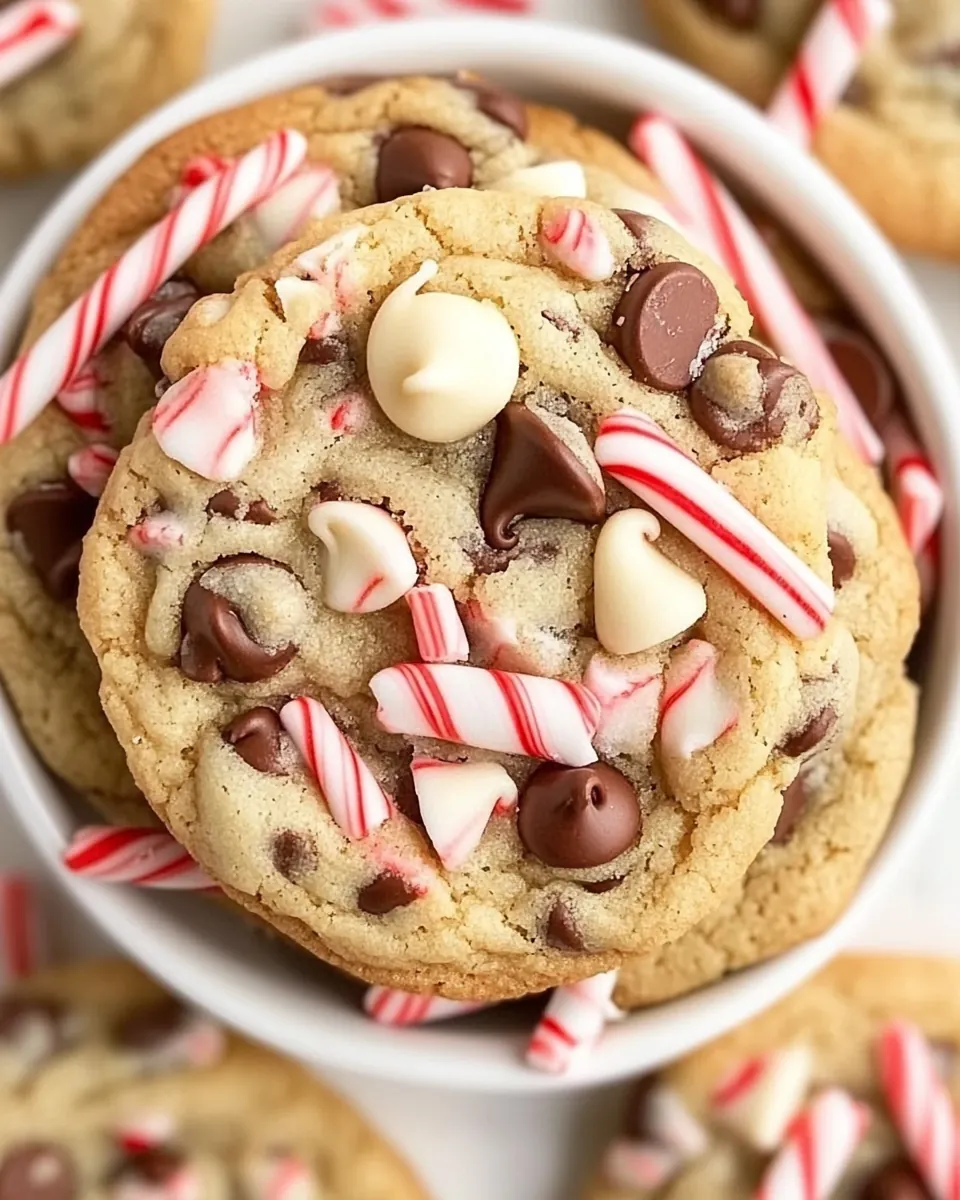
One reason I reach for this recipe is the reliable texture. The dough chills so the cookies bake with a tender, slightly chewy center and edges that firm up to a satisfying bite. When I press the dough into rounds, I can already hear the promise of crisp edges as they cool on the tray. That contrast is why I think people love these cookies so much.
Holiday Friendly Without Being Fussy
I often need a festive treat that does not require hours of decorating. These cookies feel special because of the peppermint, yet they are straightforward to make. I can whip up a batch for a cookie swap or a last minute gathering and feel assured they will look and taste like I meant to make them this beautiful.
Flexible and Forgiving
I appreciate that this recipe tolerates slight variations, as long as you pay attention to a few smart details. If your dough needs a little extra firmness, a spoonful more flour will save the day. Likewise, crushing candy canes smaller prevents bleeding during bake time, which is a simple fix I often share with friends.
Perfect for Sharing
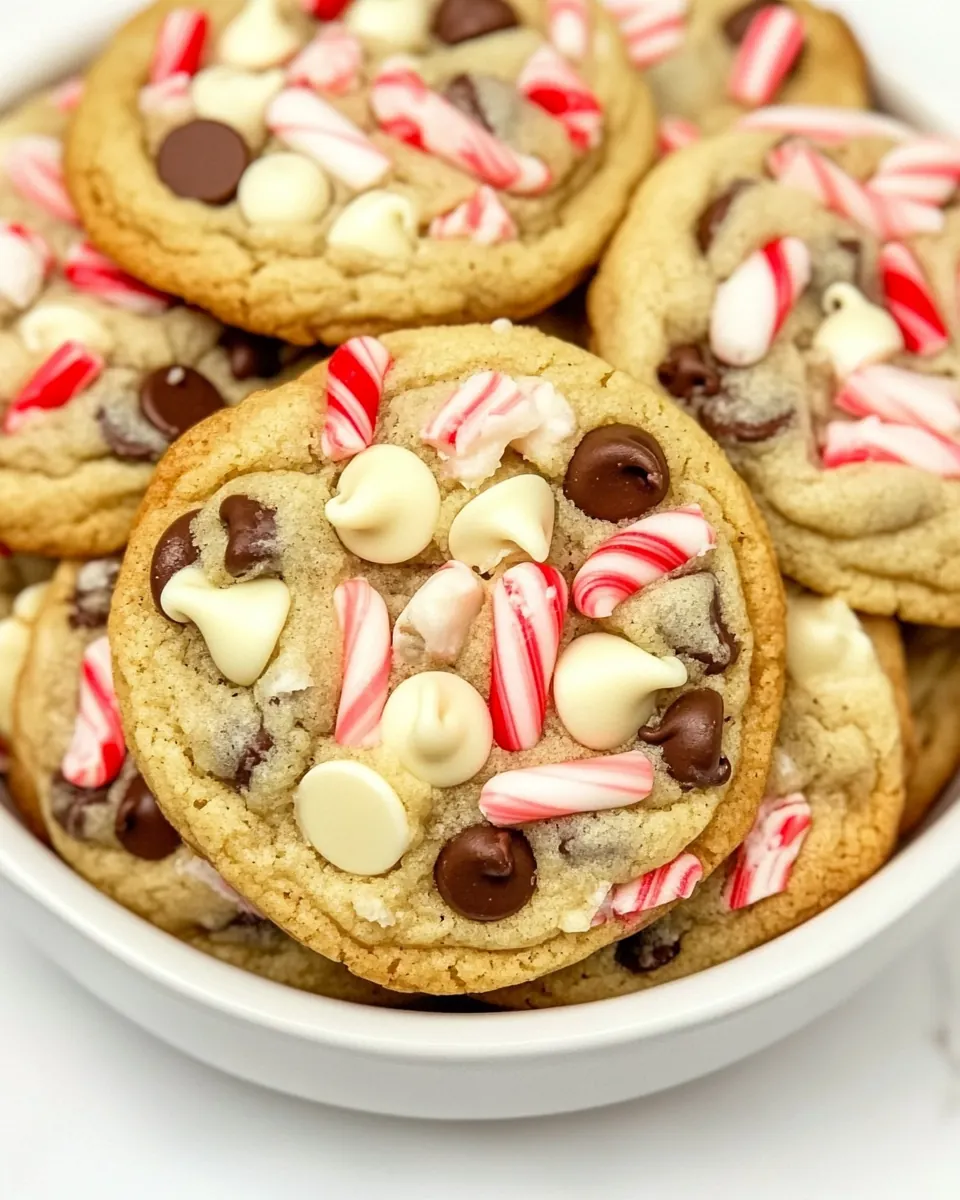
Finally, these cookies are just plain shareable. They travel well, look festive on a platter, and pair nicely with simple hot drinks. Whenever I hand someone a warm cookie from the tray, their reaction tells me this recipe hits the sweet spot between classic comfort and playful holiday flair.
Ingredients Overview for Peppermint Chocolate Chip Cookies
These ingredients combine to create a familiar cookie base brightened by cool peppermint and layered chocolate. The foundation is a classic mix of butter, sugar, and flour, which provide structure and tenderness. Key players like white chocolate chips and dark or regular chocolate chips build the chocolate profile, while crushed candy canes add that unmistakable peppermint finish. Each item plays a role in texture, flavor, and the final visual appeal.
- 1/2 cup unsalted butter, softened, 1 stick: Creamed until light and fluffy to provide rich moisture and structure while helping cookies spread evenly during baking.
- 1/2 cups sugar: Granulated sugar beaten with butter to add sweetness and contribute to crisp edges and tender crumb through caramelization.
- 1/3 cup light brown sugar, packed firmly: Packed light brown sugar incorporated for a deeper, molasses-like flavor and extra chewiness due to its moisture content.
- 1 1/2 tsp vanilla: Added for aromatic warmth and subtle sweetness enhancement, helping to round out the flavor profile of the cookie dough.
- 1 large egg: Whisked in to bind ingredients, add moisture, and provide lift and tenderness through its emulsifying properties.
- 1 1/2 cups flour (204 g) see note!!, If doubling the recipe, please see notes for grams!!: Measured precisely to form the cookie’s structure and texture; provides gluten-forming proteins that determine chewiness and density.
- 1/2 tsp sea salt: Sprinkled in to enhance overall flavor by balancing sweetness and subtly lifting other flavors while also controlling fermentation.
- 1/2 tsp baking soda: Mixed in as a leavening agent to produce carbon dioxide during baking, creating a lighter, tender cookie texture.
- 3/4 cup white chocolate chips: Folded into the dough to introduce creamy sweetness and pockets of rich dairy flavor that contrast with darker chips.
- 3/4 cup dark or regular chocolate chips: Added for bursts of chocolate flavor and texture variation, contributing bittersweet or sweet chocolate notes depending on choice.
- 5 candy canes, crushed into fine pieces, about 1/4 cup plus a tablespoon: Crushed finely and folded or sprinkled to impart bright peppermint flavor, crunchy texture, and festive visual contrast.
Directions for Peppermint Chocolate Chip Cookies
These directions walk you through each stage with sensory cues and troubleshooting hints so you feel confident from mixing to cooling. Follow the sequence and pay attention to texture and timing clues for the best results.
- Using a hand or standing mixer, cream butter, sugar and brown sugar until nice and creamy. Add in vanilla and egg and beat until incorporated. You don't want to over do this part or cookies will be stiff. Just enough until the egg is mixed in (about 20 seconds.): You will notice a change in texture as the butter and sugar transform into a paler, airy mass that smells sweet and slightly caramelized; that airy feel creates lift and tenderness in the baked cookie. As you add the vanilla and egg , stop when the mixture becomes homogeneous and glossy, because overbeating incorporates too much air and can make the dough tough and the cookies cakier. A common mistake is to beat for too long after adding the egg , which warms the dough and causes spreading in the oven. If the mixture feels greasy or separates, chill it briefly to bring it back together, and always scrape the bowl so everything mixes evenly.
- In a separate bowl, whisk together flour, sea salt and baking soda. Mix dry ingredients into wet ingredients until combined.: The dry ingredients should look uniform and pale, with the baking soda fully distributed so that each bite rises evenly. When you fold these into the creamed mixture, the texture will change from glossy to a thicker, slightly tacky dough that holds shape. If you still see streaks of flour, mix gently until they disappear, because under-mixed dough yields pockets of dry flour. Avoid overmixing, which develops gluten and makes cookies chewy rather than tender; use a rubber spatula and stop as soon as the dough is uniform.
- Stir in chocolate chips and candy canes.: At this stage, the dough becomes visually exciting, studded with shiny white chocolate chips , darker chocolate chips , and flecks of crushed candy canes . The peppermint aroma will start to lift from the bowl. Fold slowly to distribute the mix-ins evenly without smashing them into fragments, because too much crushing releases oils and sugars that can alter texture. If you notice large candy cane chunks, crush them finer or remove the biggest bits to prevent melting and streaking during bake time.
- Chill the dough for about 30-60 minutes, seal tightly and chill up to 3 days before baking. Allow to sit out 10-15 minutes before you bake them if you chill longer than about 2 hours.: Chilling firms the dough so cookies hold their shape and develop a better crumb; the kitchen will smell faintly of mint and butter as it rests. If chilled very cold, let the dough relax at room temperature so it scoops easily, because baking frozen dough can lead to uneven spread. A common pitfall is skipping chill time, which often causes excessive spreading; if time is tight, a short chill still helps, but be aware texture will differ from a fully rested dough.
- When ready to bake, preheat oven to 350°F. Roll dough into balls or use a cookie scoop and line on a parchment lined baking sheet. Bake for 9-12 minutes or until cookies look slightly golden. When cookies come out of the oven, you can "pull them together" by putting a circle cookie cutter or biscuit cutter around each cookie and gently scoot them to form nice round cookies. Do not overbake your cookies–pull them out just before you think they are done.: As the oven warms, you will smell the chocolate blooming and the peppermint brightening. Watch the edges, which should set and turn a hint of gold while centers remain soft; this visual cue ensures tender centers. After removing them, the gentle nudge with a cookie cutter rounds the edges for a bakery look while the cookies are still warm and malleable. Avoid leaving them in until fully firm, because overbaking dries out the cookie and kills that soft chew everyone loves.
- Allow to cool for several minutes before transferring to your mouth–er, a cooling rack.: Cooling is when texture finalizes, the edges crisp slightly and the center firms just enough to handle. The aroma will still rise in the cooling minutes, inviting a quick taste. Let them rest a few minutes on the pan, then move to a rack to avoid condensation that can make bottoms soggy. A typical error is transferring straight into an airtight container while too warm, which traps steam and softens the cookies, so always cool completely before storing.
Helpful Notes about Peppermint Chocolate Chip Cookies
These notes expand on the recipe‘s most useful adjustments and common pitfalls, based on experience and testing. Read through them to avoid small errors that change cookie texture or appearance.
- Flour weight guidance: I tested different cup weights and found that 204 grams for 1 1/2 cups works best here; if you double, use 408 grams to keep the dough consistent.
- Creme duration matters: Make sure to cream butter and sugar for about three minutes so the dough traps enough air for a tender crumb, but stop mixing soon after adding the egg to avoid toughness.
- Handling candy cane placement: Watch for large peppermint shards near the dough edges before baking; remove or press them in to avoid excessive running and uneven melting.
- Adjust if dough spreads too much: If chilled dough still flattens, stir in one or two tablespoons of flour to help maintain shape without affecting flavor noticeably.
- Storage tip: Cool completely before storing in an airtight container to prevent steam softening; for best texture, layer with parchment and eat within four to five days.
Accompaniments for Peppermint Chocolate Chip Cookies
These cookies pair well with simple warm beverages and make excellent seasonal gifts. Below are serving ideas, occasions, and storage tips to help you showcase them best.
- Serve with hot beverages: Pair the cookies with a warm cup of coffee or a non dairy hot cocoa for a cozy contrast between mint and rich drink.
- Holiday platter: Arrange the cookies on a decorative platter with other simple treats for a festive dessert table at gatherings or cookie swaps.
- Gift packaging: Line a tin or box with parchment and stack cookies with layers separated by paper for gifting during Christmas or winter visits.
- Occasion suggestions: These cookies work for afternoon tea, holiday parties, or casual get togethers whenever you want a seasonal treat that is easy to transport.
- Seasonal pairing: Serve during winter months when peppermint notes feel most at home, or anytime you want a playful mint chocolate twist.
- Storage and freezing: Store cooled cookies in an airtight container up to five days, or freeze baked cookies for up to two months; thaw at room temperature for best texture.
FAQ
Conclusion
These Peppermint Chocolate Chip Cookies shine because they pair classic chocolate comfort with a bright peppermint note and a trustworthy tender texture. Give them a try when you want something festive yet uncomplicated, and you might find they become a go to for holiday platters or midwinter baking. They are forgiving, travel well, and bring a cheerful crunch to the familiar chocolate chip cookie profile. I hope you enjoy making them as much as I do, and that they become part of your seasonal routine.
Peppermint Chocolate Chip Cookies
Equipment
- Mixer
- Mixing Bowl
- Baking Sheet
- Parchment Paper
- Cookie Scoop
- Cooling rack
Ingredients
- 1/2 cup unsalted butter, softened, 1 stick Creamed until light and fluffy to provide rich moisture and structure while helping cookies spread evenly during baking.
- 1/2 cups sugar Granulated sugar beaten with butter to add sweetness and contribute to crisp edges and tender crumb through caramelization.
- 1/3 cup light brown sugar, packed firmly Packed light brown sugar incorporated for a deeper, molasses-like flavor and extra chewiness due to its moisture content.
- 1 1/2 tsp vanilla Added for aromatic warmth and subtle sweetness enhancement, helping to round out the flavor profile of the cookie dough.
- 1 large egg Whisked in to bind ingredients, add moisture, and provide lift and tenderness through its emulsifying properties.
- 1 1/2 cups flour (204 g) see note!!, If doubling the recipe, please see notes for grams!! Measured precisely to form the cookie’s structure and texture; provides gluten-forming proteins that determine chewiness and density.
- 1/2 tsp sea salt Sprinkled in to enhance overall flavor by balancing sweetness and subtly lifting other flavors while also controlling fermentation.
- 1/2 tsp baking soda Mixed in as a leavening agent to produce carbon dioxide during baking, creating a lighter, tender cookie texture.
- 3/4 cup white chocolate chips Folded into the dough to introduce creamy sweetness and pockets of rich dairy flavor that contrast with darker chips.
- 3/4 cup dark or regular chocolate chips Added for bursts of chocolate flavor and texture variation, contributing bittersweet or sweet chocolate notes depending on choice.
- 5 candy canes, crushed into fine pieces, about 1/4 cup plus a tablespoon Crushed finely and folded or sprinkled to impart bright peppermint flavor, crunchy texture, and festive visual contrast.
Instructions
- Using a hand or standing mixer, cream butter, sugar and brown sugar until nice and creamy. Add in vanilla and egg and beat until incorporated. You don't want to over do this part or cookies will be stiff. Just enough until the egg is mixed in (about 20 seconds.): You will notice a change in texture as the butter and sugar transform into a paler, airy mass that smells sweet and slightly caramelized; that airy feel creates lift and tenderness in the baked cookie. As you add the vanilla and egg , stop when the mixture becomes homogeneous and glossy, because overbeating incorporates too much air and can make the dough tough and the cookies cakier. A common mistake is to beat for too long after adding the egg , which warms the dough and causes spreading in the oven. If the mixture feels greasy or separates, chill it briefly to bring it back together, and always scrape the bowl so everything mixes evenly.
- In a separate bowl, whisk together flour, sea salt and baking soda. Mix dry ingredients into wet ingredients until combined.: The dry ingredients should look uniform and pale, with the baking soda fully distributed so that each bite rises evenly. When you fold these into the creamed mixture, the texture will change from glossy to a thicker, slightly tacky dough that holds shape. If you still see streaks of flour, mix gently until they disappear, because under-mixed dough yields pockets of dry flour. Avoid overmixing, which develops gluten and makes cookies chewy rather than tender; use a rubber spatula and stop as soon as the dough is uniform.
- Stir in chocolate chips and candy canes.: At this stage, the dough becomes visually exciting, studded with shiny white chocolate chips , darker chocolate chips , and flecks of crushed candy canes . The peppermint aroma will start to lift from the bowl. Fold slowly to distribute the mix-ins evenly without smashing them into fragments, because too much crushing releases oils and sugars that can alter texture. If you notice large candy cane chunks, crush them finer or remove the biggest bits to prevent melting and streaking during bake time.
- Chill the dough for about 30-60 minutes, seal tightly and chill up to 3 days before baking. Allow to sit out 10-15 minutes before you bake them if you chill longer than about 2 hours.: Chilling firms the dough so cookies hold their shape and develop a better crumb; the kitchen will smell faintly of mint and butter as it rests. If chilled very cold, let the dough relax at room temperature so it scoops easily, because baking frozen dough can lead to uneven spread. A common pitfall is skipping chill time, which often causes excessive spreading; if time is tight, a short chill still helps, but be aware texture will differ from a fully rested dough.
- When ready to bake, preheat oven to 350°F. Roll dough into balls or use a cookie scoop and line on a parchment lined baking sheet. Bake for 9-12 minutes or until cookies look slightly golden. When cookies come out of the oven, you can "pull them together" by putting a circle cookie cutter or biscuit cutter around each cookie and gently scoot them to form nice round cookies. Do not overbake your cookies–pull them out just before you think they are done.: As the oven warms, you will smell the chocolate blooming and the peppermint brightening. Watch the edges, which should set and turn a hint of gold while centers remain soft; this visual cue ensures tender centers. After removing them, the gentle nudge with a cookie cutter rounds the edges for a bakery look while the cookies are still warm and malleable. Avoid leaving them in until fully firm, because overbaking dries out the cookie and kills that soft chew everyone loves.
- Allow to cool for several minutes before transferring to your mouth–er, a cooling rack.: Cooling is when texture finalizes, the edges crisp slightly and the center firms just enough to handle. The aroma will still rise in the cooling minutes, inviting a quick taste. Let them rest a few minutes on the pan, then move to a rack to avoid condensation that can make bottoms soggy. A typical error is transferring straight into an airtight container while too warm, which traps steam and softens the cookies, so always cool completely before storing.
Notes
- Flour weight guidance: I tested different cup weights and found that 204 grams for 1 1/2 cups works best here; if you double, use 408 grams to keep the dough consistent.
- Creme duration matters: Make sure to cream butter and sugar for about three minutes so the dough traps enough air for a tender crumb, but stop mixing soon after adding the egg to avoid toughness.
- Handling candy cane placement: Watch for large peppermint shards near the dough edges before baking; remove or press them in to avoid excessive running and uneven melting.
- Adjust if dough spreads too much: If chilled dough still flattens, stir in one or two tablespoons of flour to help maintain shape without affecting flavor noticeably.
- Storage tip: Cool completely before storing in an airtight container to prevent steam softening; for best texture, layer with parchment and eat within four to five days.