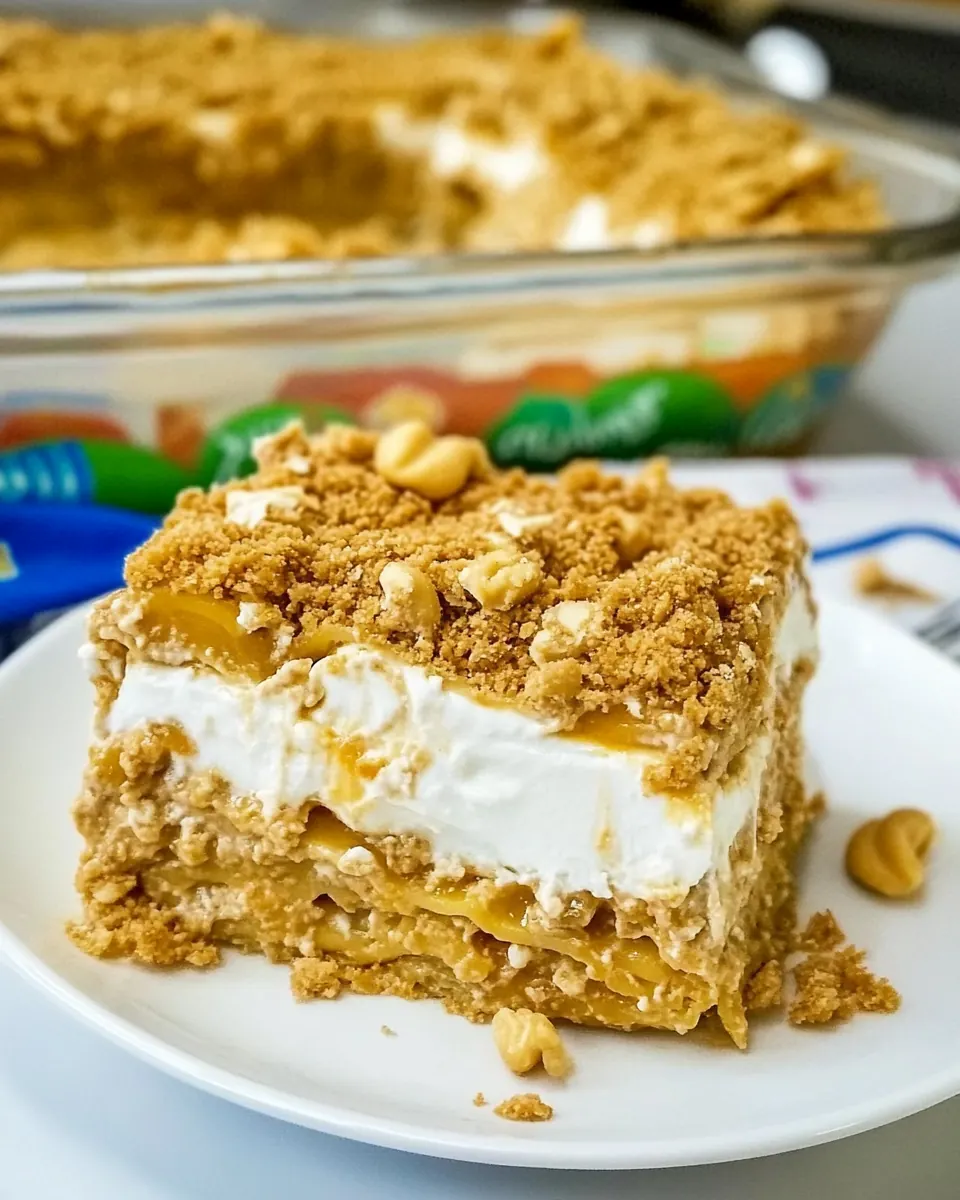
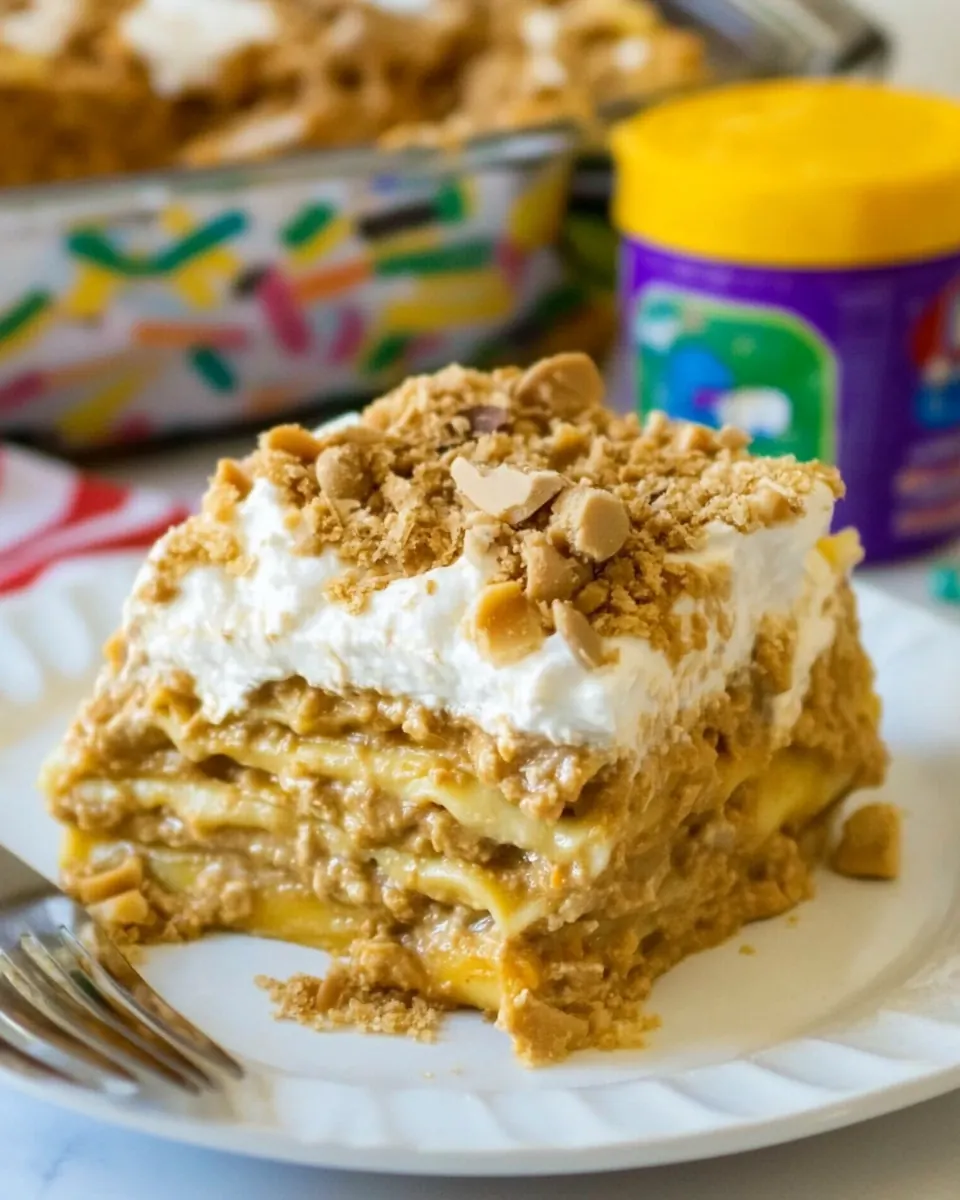
Peanut Butter Lasagna
Peanut Butter Lasagna is the kind of dessert that sneaks into family gatherings and instantly becomes the most requested dish on the table. I remember the first time I brought one to a potluck, balancing a heavy 9 by 13 pan through a crowded kitchen, and watching the forks vanish from paper plates as if by magic. The texture play between layers kept people guessing, and I loved how the flavors felt familiar but a little wickedly fun at the same time.
Over the years I have adjusted the assembly order and portioning until the layers hold together just right, yet remain easy to scoop. When I make Peanut Butter Lasagna for friends, someone always asks for the recipe and then improvises by adding chopped candy or extra drizzle. Those small personal choices make this dessert feel alive, and I enjoy seeing how each person tweaks it. For me, the best part is serving it straight from the fridge so the layers are firm but still melt on the tongue.
Recipe Snapshot
16 mins
15 mins
1 mins
Medium
300 kcal
American
Gluten-Free, Low FODMAP
Desserts
9×13-inch pan
The Charm of This Peanut Butter Lasagna
I love the contrast of textures
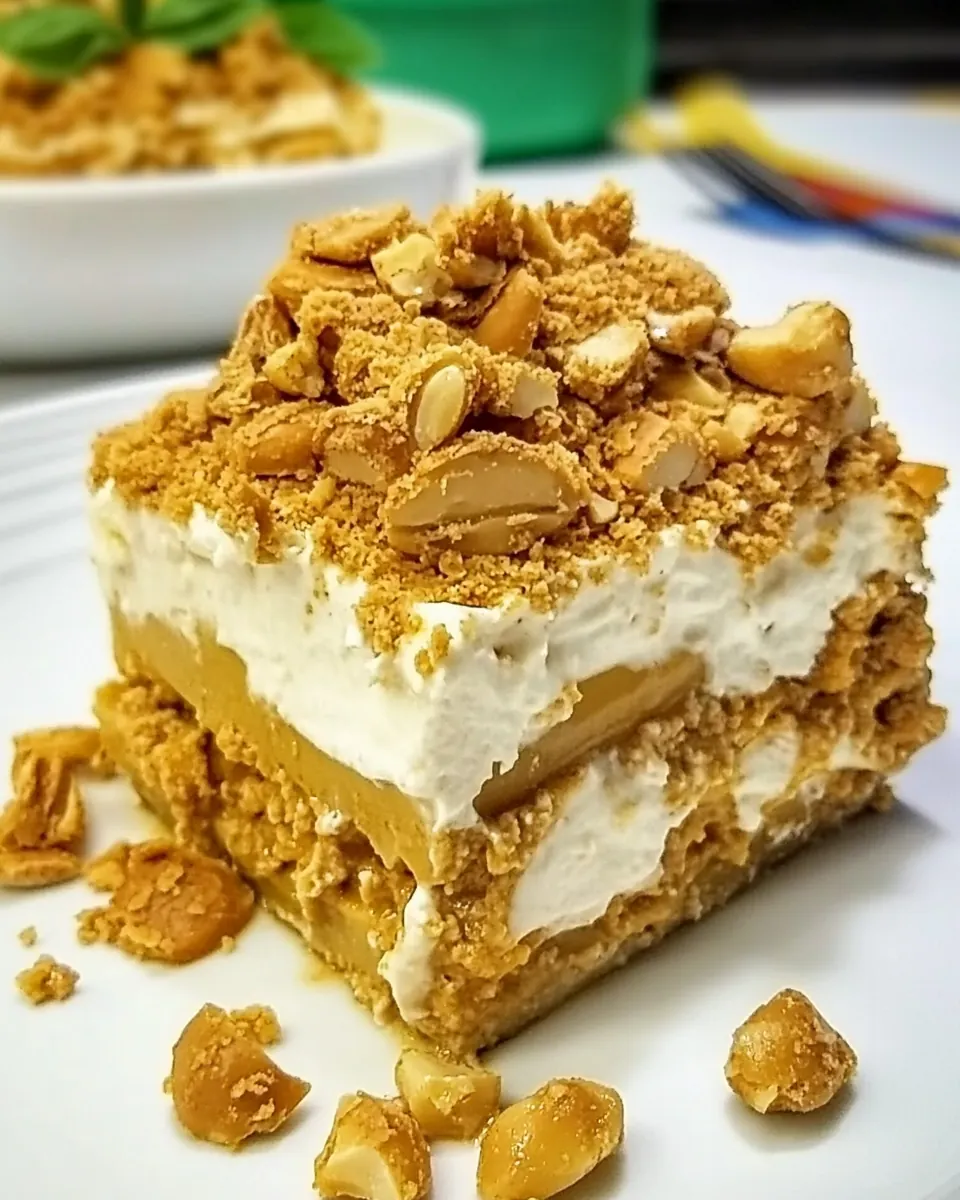
The combination of crunchy Nutter Butter Cookies with creamy layers creates a joyful mouthfeel. One bite delivers a crisp cookie base, a fluffy whipped layer, and a dense, peanut buttery pudding section that makes every forkful interesting. I find this balance keeps people coming back for another taste, and it makes the dish feel thoughtfully composed rather than one note.
It is effortless to assemble
I often make this when I need a dessert that does not demand hours of baking. With simple mixing and chilling, Peanut Butter Lasagna comes together quickly, which is why I reach for it on busy weekends or when I am hosting a crowd. Minimal hands on time means I can focus on conversation and plating, not worrying about burned edges or complicated techniques.
It is flexible and forgiving
Because the structure relies on chilling rather than precise baking, you can adjust consistency by chilling longer or using slightly more pudding mix. I once had a last minute need to transport this dessert and the chilled, firm layers traveled beautifully. That forgiving nature makes it an excellent candidate for potlucks and picnics where predictability matters.
It tastes nostalgic but elevated
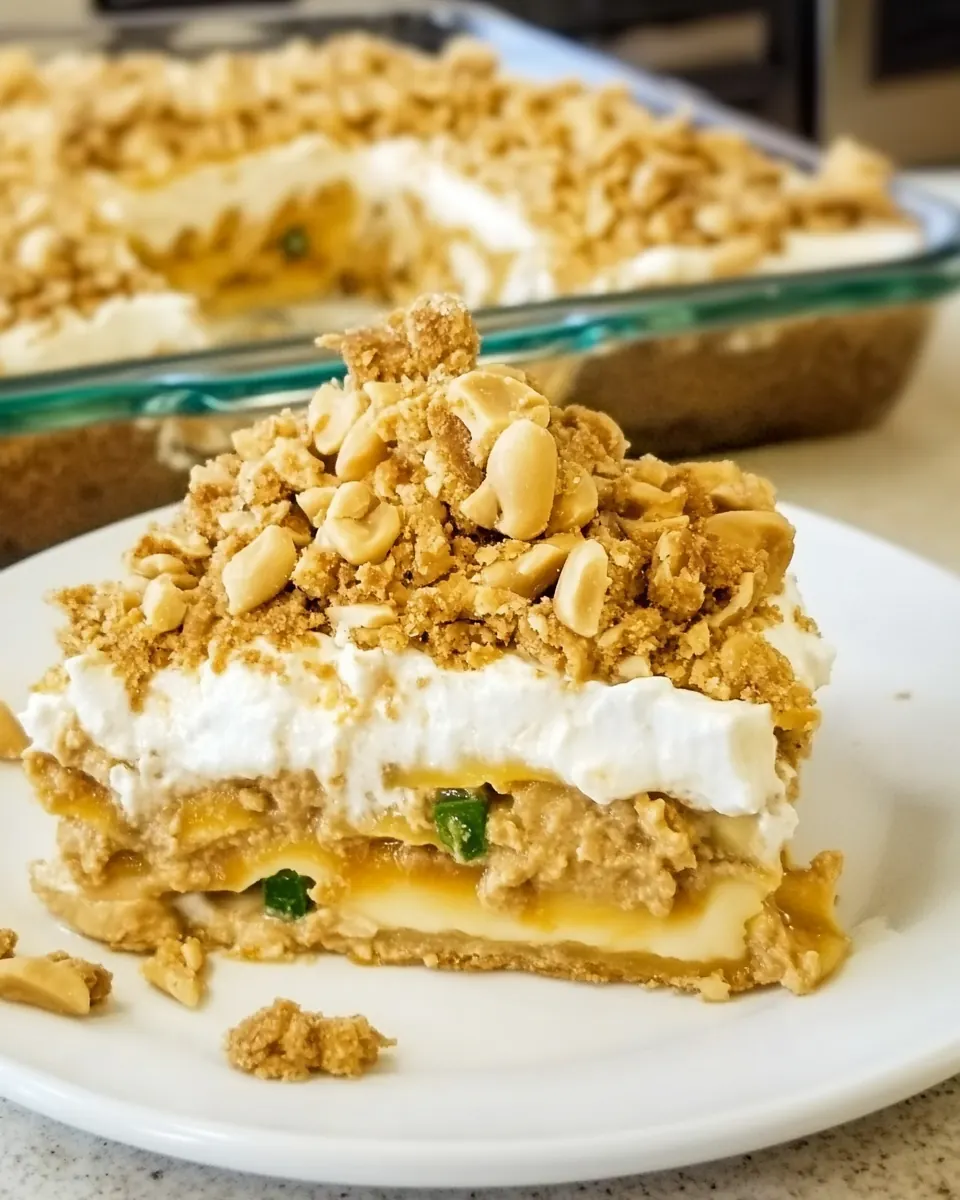
Between the cookie base, creamy cheese layer, and peanut butter pudding, there are echoes of childhood candy while still feeling like a treat for grown up gatherings. I enjoy how the chopped Butterfinger topping adds a playful crunch and a hint of caramelized sugar, bringing another level of flavor that makes people smile when they take the first bite.
It is a showstopper without the fuss
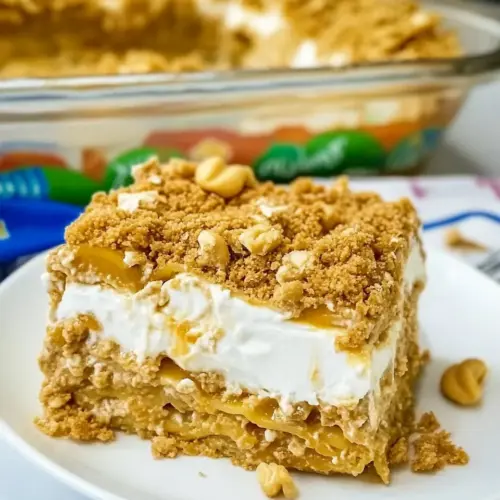
For special occasions I arrange extra cookie crumbs and candy on top to create a dramatic finish, but honestly the simple version is already impressive. The layered presentation in a clear pan reveals the strata and invites compliments, which is always a rewarding moment when you take the pan out of the fridge to serve.
Everything You Need for Peanut Butter Lasagna
These ingredients work together like a small ensemble where each player has a distinct job. The crunchy cookies form a sturdy foundation, the cream cheese and Cool Whip bring airy richness, while the pudding and peanut butter contribute dense, peanut forward flavor. The finishing candies and cookie crumbs add sparkle and texture so every bite feels complete.
- 1 package Nutter Butter Cookies: Crush into fine crumbs to form the crunchy base layer for the dessert; provides a sweet, nutty cookie flavor and sturdy texture that supports the creamy layers. Press evenly into the pan to create a compact crust that contrasts with the soft filling. Optionally reserve some for sprinkling on top for added crunch and visual appeal.
- 8 ounces cream cheese, softened: Soften to room temperature and beat until smooth to create a rich, tangy cream layer that adds body and stability to the filling. Combine thoroughly with powdered sugar to sweeten and stabilize the mixture, preventing it from becoming too loose. Chill briefly if needed to keep the layers distinct during assembly.
- 1 1/4 cups powdered sugar: Sift or whisk into the softened cheese to sweeten and thicken the filling; provides powdered sweetness that blends smoothly without grittiness. Adjust slightly to taste for desired sweetness and structure in the creamy layers. Helps the filling set while keeping a silky consistency.
- 4 cups Cool Whip, divided: Fold gently into mixtures to lighten and add a fluffy, airy texture; divide as directed so some creates a lighter mousse and some finishes the top layer. Keep chilled until assembly to maintain stability and volume. Use leftover to achieve smooth, cloud-like layers that balance denser elements.
- 1 (3.4-ounce) package instant vanilla pudding: Whisk with milk to create a quick vanilla pudding layer that adds creamy flavor and helps the dessert set; instant powder thickens rapidly for convenience. Ensure even distribution to avoid lumps and to create a stable middle layer between creams. Contributes vanilla notes that complement the peanut butter and cookies.
- 1 1/2 cups whole milk: Combine with instant pudding mix and stir to hydrate the powder, creating a smooth, custard-like component that firms as it chills. Use whole milk for richness and proper thickening; lower-fat milks may yield a looser set. Chill the prepared pudding before layering to prevent melting surrounding components.
- 1 cup creamy peanut butter: Mix into the pudding or cream layers to impart a pronounced peanut flavor and rich, creamy mouthfeel; primary peanut component for the recipe. Warm slightly for easier blending and to achieve a uniform texture throughout the filling. Balances sweetness and provides depth to the overall profile.
- 1/4 cup creamy peanut butter: Swirl or layer in smaller quantity to enhance peanut flavor intensity and create distinct pockets of peanut butter; acts as a concentrated accent rather than the main binder. Use to adjust saltiness and creaminess in targeted areas of the lasagna. Incorporate gently to maintain marbled or layered appearance.
- 2 snack-size Butterfinger candies, chopped: Chop finely and sprinkle on top to add crunchy, chocolate-caramel candy bits that contrast with creamy layers; offers bursts of texture and additional peanut–butter-candy flavor. Use sparingly for garnish and visual interest while complementing the cookie base. Ensures each bite has a mix of smooth, crunchy, and sweet elements.
Step by Step Instructions for Peanut Butter Lasagna
These directions walk you through building the layers with care. I like to keep everything nearby and chilled equipment on hand, since this recipe rewards steady assembly and a little patience while layers set. Read each step, then work calm and steady to get those clean slices.
- Arrange a single layer of Nutter Butter cookies in the bottom of a 9×13-inch baking dish. (Save the remaining Nutter Butters for the topping.): The moment you place those cookies the base takes shape visually and structurally. You should hear a faint snap as each cookie meets the pan and feel their firmness under your fingers, which ensures a crunchy foundation that will hold up to the wet layers. Make sure cookies sit edge to edge with minimal gaps so the cream cheese layer can rest evenly. A common mistake is leaving large gaps between cookies, which leads to weak spots in the finished bars, so press them gently into a single even layer.
- In a large bowl, use a hand-held electric mixer to mix together cream cheese and powdered sugar. Then beat in 1 cup of Cool Whip.: As you whip, watch the texture transform from lumpy to silky, and notice the sweet, tangy aroma lift from the bowl. The goal is a satiny, lump free mixture so the sugar fully dissolves into the softened cream cheese . Beat at medium speed until smooth, then incorporate 1 cup of Cool Whip until light and airy. If you under whip, the layer will feel dense and heavy; over whip and it can lose body or become too loose, so stop once it looks smooth and holds gentle peaks.
- Spread cream cheese mixture over Nutter Butters and then refrigerate for at least 20 minutes.: When spreading, run a rubber spatula across the surface to create an even cushion, and you will feel slight resistance as the mix meets the textured cookie tops. Chilling firms this layer, preventing the next wet layer from seeping into the cookies. If you skip chilling, the cookie base can become soggy and the layers may blend together, so give it those twenty minutes to set properly.
- Either rinse out the bowl or use a new bowl to beat together vanilla pudding mix and whole milk. Continue to beat until it starts to thicken. Then beat in peanut butter and 1 cup of Cool Whip.: As you whisk, the pudding will thicken and release a sweet, creamy perfume. Beat until it starts to set, then add 1 cup of creamy peanut butter and 1 cup of Cool Whip , beating until smooth. The peanut butter should meld fully into the pudding, creating a glossy, peanut scented mass. A sign it's ready is when the mixture holds some body and does not run off the spoon. Avoid under mixing, which leaves pockets of dry powder, and over mixing, which can make the texture pasty.
- Spread pudding mixture over cream cheese layer. Refrigerate at least 20 minutes.: Smooth the peanut butter pudding with a spatula, watching the color shift to a uniform, light brown sheen. The sound here is silence as the paddle glides, and the surface should look satiny and slightly thick. Refrigerate again for at least 20 minutes so this dense layer firms, locking in the layers. If you skip chilling the pudding, assembly will be messier and slicing will be difficult, so patience pays off.
- Spread remaining Cool Whip on top.: Apply the remaining whipped topping in gentle sweeping motions to create a cloud like cap. The visual cue is a soft white finish that hides the layer below while still showing a hint of strata at the edge. Keep the strokes light to avoid compressing the pudding layer underneath. The common error is over smoothing, which can break the pudding finish and create an uneven top.
- For the topping, place the peanut butter in a microwave-safe bowl and microwave for 10 seconds. Transfer to a ziplock bag. Snip the corner and drizzle on top of the lush.: After heating, the peanut butter will smell warm and nutty and become runny enough to pipe. Transfer it to a ziplock bag, snip a small corner, and drizzle across the surface to create thin glossy ribbons. The quick warm up makes it fluid while preserving flavor. Be careful not to overheat, which can make it scorch and taste bitter.
- Sprinkle the chopped Butterfinger on top. Chop the remaining Nutter Butter cookies and arrange them on top.: The act of sprinkling adds a crisp, brittle sound and a sparkly visual contrast. Distribute the chopped candy and cookie bits evenly so every slice gets some crunch. This step transforms texture and appearance, offering caramelized sugar notes and cookie fragments that play against the creamy layers. Avoid piling too much in one area which leads to uneven bites and a top that slides when cut.
- Refrigerate for at least 2 hours before serving.: This final chill is when flavors harmonize and layers firm to a sliceable consistency. You will notice the pan becoming cool to the touch and the top setting into a slightly more matte finish. Two hours ensures the pudding and cream cheese layers stabilize for clean serving. Serving too soon is the usual pitfall here, resulting in a runny cut and messy presentation, so give it the rest time it needs.
How to Switch It Up
I like to tinker with little additions that boost texture and presentation without overcomplicating the recipe. Below are detailed, practical tips to customize and adapt Peanut Butter Lasagna for different occasions and preferences.
- Swap candy toppings for variety Try different snack sized chocolates or chopped bars to alter the crunch profile and flavor. Each candy will bring its own sweetness and texture so pick one that complements the peanut notes rather than overpowering them.
- Adjust the peanut butter intensity Increase or decrease the amount of pudding stage peanut butter to tailor richness. More will yield a denser, more pronounced peanut presence while less keeps the dessert milder and sweeter.
- Use flavored instant pudding Substitute chocolate or butterscotch instant pudding for a new twist. The pudding brand can change thickness and sweetness, so taste as you go and consider chilling slightly longer if the pudding is looser.
- Make individual servings Assemble the lasagna in small ramekins for an elegant presentation at parties. Individual portions chill faster and travel better, and they let guests choose toppings to their liking.
- Enhance the base texture Pulse some of the Nutter Butters into fine crumbs and mix with melted butter to create a cohesive crust. This will make the base more sliceable and introduce a richer mouthfeel that resembles a baked crust.
- Layer ordering for stability If you anticipate travel, put the pudding layer first then the cream cheese layer on top to reduce shifting. Chilling between layers is essential to keep the strata distinct during transport.
What Complements This Peanut Butter Lasagna
This dessert pairs well with simple accompaniments that either contrast or echo its peanutty sweetness. I often serve it with elements that offer brightness or textural lift so the richness does not feel overwhelming. The suggestions below include serving styles, occasions, and storage ideas to help you plan when and how to present the dish.
- Serve with fresh berries A small spoonful of raspberries or sliced strawberries on the side cuts the richness with bright acidity, creating balance on the palate.
- Pair with coffee or tea A bold cup of coffee or a brisk black tea complements the sweet profile and helps cleanse the palate between bites, especially at brunch or after a heavy meal.
- Bring to potlucks This Peanut Butter Lasagna travels well when kept chilled, making it ideal for gatherings. Pack it in a cooler and slice at the venue for best results.
- Occasions It shines at birthday parties, family reunions, and casual holiday gatherings where you want a crowd pleasing dessert that is simple to prepare ahead of time.
- Storage tips Keep covered in the refrigerator for up to five days. For longer storage, freeze individual portions wrapped tightly and thaw overnight in the fridge before serving.
- Seasonal pairing In warmer months keep it chilled and serve alongside light, fruity sides. In cooler months, offer warm coffee and let the contrast between chilled dessert and warm beverage be part of the experience.
FAQ
Conclusion
Peanut Butter Lasagna stands out because it layers crisp cookies, tangy cream cheese, and rich peanut butter pudding into a no bake dessert that delights both kids and adults. Give it a try when you need something impressive but low fuss, and plan for the chilling time so you get clean slices and a perfect texture. I hope you enjoy making it as much as I do, and that it becomes your go to crowd pleasing treat for gatherings and casual nights alike.
Peanut Butter Lasagna
Equipment
- 9×13-inch pan
Ingredients
- 1 package Nutter Butter Cookies Crush into fine crumbs to form the crunchy base layer for the dessert; provides a sweet, nutty cookie flavor and sturdy texture that supports the creamy layers. Press evenly into the pan to create a compact crust that contrasts with the soft filling. Optionally reserve some for sprinkling on top for added crunch and visual appeal.
- 8 ounces cream cheese, softened Soften to room temperature and beat until smooth to create a rich, tangy cream layer that adds body and stability to the filling. Combine thoroughly with powdered sugar to sweeten and stabilize the mixture, preventing it from becoming too loose. Chill briefly if needed to keep the layers distinct during assembly.
- 1 1/4 cups powdered sugar Sift or whisk into the softened cheese to sweeten and thicken the filling; provides powdered sweetness that blends smoothly without grittiness. Adjust slightly to taste for desired sweetness and structure in the creamy layers. Helps the filling set while keeping a silky consistency.
- 4 cups Cool Whip, divided Fold gently into mixtures to lighten and add a fluffy, airy texture; divide as directed so some creates a lighter mousse and some finishes the top layer. Keep chilled until assembly to maintain stability and volume. Use leftover to achieve smooth, cloud-like layers that balance denser elements.
- 1 (3.4-ounce) package instant vanilla pudding Whisk with milk to create a quick vanilla pudding layer that adds creamy flavor and helps the dessert set; instant powder thickens rapidly for convenience. Ensure even distribution to avoid lumps and to create a stable middle layer between creams. Contributes vanilla notes that complement the peanut butter and cookies.
- 1 1/2 cups whole milk Combine with instant pudding mix and stir to hydrate the powder, creating a smooth, custard-like component that firms as it chills. Use whole milk for richness and proper thickening; lower-fat milks may yield a looser set. Chill the prepared pudding before layering to prevent melting surrounding components.
- 1 cup creamy peanut butter Mix into the pudding or cream layers to impart a pronounced peanut flavor and rich, creamy mouthfeel; primary peanut component for the recipe. Warm slightly for easier blending and to achieve a uniform texture throughout the filling. Balances sweetness and provides depth to the overall profile.
- 1/4 cup creamy peanut butter Swirl or layer in smaller quantity to enhance peanut flavor intensity and create distinct pockets of peanut butter; acts as a concentrated accent rather than the main binder. Use to adjust saltiness and creaminess in targeted areas of the lasagna. Incorporate gently to maintain marbled or layered appearance.
- 2 snack-size Butterfinger candies, chopped Chop finely and sprinkle on top to add crunchy, chocolate-caramel candy bits that contrast with creamy layers; offers bursts of texture and additional peanut-butter-candy flavor. Use sparingly for garnish and visual interest while complementing the cookie base. Ensures each bite has a mix of smooth, crunchy, and sweet elements.
Instructions
- Arrange a single layer of Nutter Butter cookies in the bottom of a 9×13-inch baking dish. (Save the remaining Nutter Butters for the topping.): The moment you place those cookies the base takes shape visually and structurally. You should hear a faint snap as each cookie meets the pan and feel their firmness under your fingers, which ensures a crunchy foundation that will hold up to the wet layers. Make sure cookies sit edge to edge with minimal gaps so the cream cheese layer can rest evenly. A common mistake is leaving large gaps between cookies, which leads to weak spots in the finished bars, so press them gently into a single even layer.
- In a large bowl, use a hand-held electric mixer to mix together cream cheese and powdered sugar. Then beat in 1 cup of Cool Whip.: As you whip, watch the texture transform from lumpy to silky, and notice the sweet, tangy aroma lift from the bowl. The goal is a satiny, lump free mixture so the sugar fully dissolves into the softened cream cheese . Beat at medium speed until smooth, then incorporate 1 cup of Cool Whip until light and airy. If you under whip, the layer will feel dense and heavy; over whip and it can lose body or become too loose, so stop once it looks smooth and holds gentle peaks.
- Spread cream cheese mixture over Nutter Butters and then refrigerate for at least 20 minutes.: When spreading, run a rubber spatula across the surface to create an even cushion, and you will feel slight resistance as the mix meets the textured cookie tops. Chilling firms this layer, preventing the next wet layer from seeping into the cookies. If you skip chilling, the cookie base can become soggy and the layers may blend together, so give it those twenty minutes to set properly.
- Either rinse out the bowl or use a new bowl to beat together vanilla pudding mix and whole milk. Continue to beat until it starts to thicken. Then beat in peanut butter and 1 cup of Cool Whip.: As you whisk, the pudding will thicken and release a sweet, creamy perfume. Beat until it starts to set, then add 1 cup of creamy peanut butter and 1 cup of Cool Whip , beating until smooth. The peanut butter should meld fully into the pudding, creating a glossy, peanut scented mass. A sign it's ready is when the mixture holds some body and does not run off the spoon. Avoid under mixing, which leaves pockets of dry powder, and over mixing, which can make the texture pasty.
- Spread pudding mixture over cream cheese layer. Refrigerate at least 20 minutes.: Smooth the peanut butter pudding with a spatula, watching the color shift to a uniform, light brown sheen. The sound here is silence as the paddle glides, and the surface should look satiny and slightly thick. Refrigerate again for at least 20 minutes so this dense layer firms, locking in the layers. If you skip chilling the pudding, assembly will be messier and slicing will be difficult, so patience pays off.
- Spread remaining Cool Whip on top.: Apply the remaining whipped topping in gentle sweeping motions to create a cloud like cap. The visual cue is a soft white finish that hides the layer below while still showing a hint of strata at the edge. Keep the strokes light to avoid compressing the pudding layer underneath. The common error is over smoothing, which can break the pudding finish and create an uneven top.
- For the topping, place the peanut butter in a microwave-safe bowl and microwave for 10 seconds. Transfer to a ziplock bag. Snip the corner and drizzle on top of the lush.: After heating, the peanut butter will smell warm and nutty and become runny enough to pipe. Transfer it to a ziplock bag, snip a small corner, and drizzle across the surface to create thin glossy ribbons. The quick warm up makes it fluid while preserving flavor. Be careful not to overheat, which can make it scorch and taste bitter.
- Sprinkle the chopped Butterfinger on top. Chop the remaining Nutter Butter cookies and arrange them on top.: The act of sprinkling adds a crisp, brittle sound and a sparkly visual contrast. Distribute the chopped candy and cookie bits evenly so every slice gets some crunch. This step transforms texture and appearance, offering caramelized sugar notes and cookie fragments that play against the creamy layers. Avoid piling too much in one area which leads to uneven bites and a top that slides when cut.
- Refrigerate for at least 2 hours before serving.: This final chill is when flavors harmonize and layers firm to a sliceable consistency. You will notice the pan becoming cool to the touch and the top setting into a slightly more matte finish. Two hours ensures the pudding and cream cheese layers stabilize for clean serving. Serving too soon is the usual pitfall here, resulting in a runny cut and messy presentation, so give it the rest time it needs.
Notes
- Swap candy toppings for variety Try different snack sized chocolates or chopped bars to alter the crunch profile and flavor. Each candy will bring its own sweetness and texture so pick one that complements the peanut notes rather than overpowering them.
- Adjust the peanut butter intensity Increase or decrease the amount of pudding stage peanut butter to tailor richness. More will yield a denser, more pronounced peanut presence while less keeps the dessert milder and sweeter.
- Use flavored instant pudding Substitute chocolate or butterscotch instant pudding for a new twist. The pudding brand can change thickness and sweetness, so taste as you go and consider chilling slightly longer if the pudding is looser.
- Make individual servings Assemble the lasagna in small ramekins for an elegant presentation at parties. Individual portions chill faster and travel better, and they let guests choose toppings to their liking.
- Enhance the base texture Pulse some of the Nutter Butters into fine crumbs and mix with melted butter to create a cohesive crust. This will make the base more sliceable and introduce a richer mouthfeel that resembles a baked crust.
- Layer ordering for stability If you anticipate travel, put the pudding layer first then the cream cheese layer on top to reduce shifting. Chilling between layers is essential to keep the strata distinct during transport.