Peanut Butter Cup Cookies
Peanut Butter Cup Cookies are the kind of cookie that shows up at every celebration I host, and guests always ask for the recipe. I remember the first time I made them, juggling a wobbly tray of warm cookies while trying not to burn my fingertips as I pressed a tiny chocolate cup into each mound of dough. That sticky, joyful moment is the reason these cookies feel like comfort and celebration rolled into one.
Over the years I’ve tweaked the balance between sweet and salty, learning that the right amount of peanut butter and the soft chew of the cookie are what make people come back for seconds. I like to tell friends that these treats are deceptively simple, yet they look like something from a bakery. When I bake a batch, the house fills with a warm, nutty scent and the kids line up near the oven, drawn by the promise of chocolate and crunch.
Recipe Snapshot
20 mins
10 mins
10 mins
Easy
150 kcal
American
Gluten-Free, Low FODMAP
Desserts
Mini muffin tin, Mixing bowls, Whisk, Spatula
Why This Peanut Butter Cup Cookies Works
Classic Crowd Pleaser
I love how Peanut Butter Cup Cookies take a humble cookie and turn it into a party centerpiece. They are easy to make in large batches, and the mini Reese’s butter cups pressed into each cookie add a playful, professional touch without extra fuss.
Perfect Balance of Texture
The contrast between the tender cookie and the creamy, slightly melty peanut butter cup creates a satisfying bite. I always aim for cookies that are soft in the middle and slightly crisp at the edges, and this recipe nails that balance for me every time.
Kid Approved, Adult Loved
When I bring these to school events or weekend gatherings, the kids are first in line, and the grownups keep sneaking back. The combination of white sugar and brown sugar gives a depth of flavor that makes the cookies interesting for adults while still being a hit with kids.
Flexible and Forgiving
I’ve baked these in different pans and swapped mini muffin tins for paper liners when I’m in a hurry. The recipe is forgiving if your dough is a touch dry or your oven runs a bit hot, making it a reliable option for busy days when you want something delicious fast.
Visually Charming
There is something so satisfying about pressing a glossy, chocolatey cup into warm dough. It elevates the presentation immediately, which is why I often make these when I need a dessert that looks special without extra effort.
Ingredients Required for Peanut Butter Cup Cookies
I treat the ingredient list like a small team where every player has a job. The dry ingredients provide structure, the sugars bring sweetness and chew, and the peanut butter and butter supply the flavor and tender crumb. The miniature cups are the finishing flourish that turns a simple cookie into a memorable treat.
- 1 3/4 cups all-purpose flour: Provides structure and bulk to the cookie dough by forming the gluten network when mixed; balances moisture and helps create a tender crumb when combined with fats and liquids. Commonly used in cookies to give them body and support spreading during baking.
- 1/2 teaspoons salt: Enhances overall flavor by balancing sweetness and helps strengthen gluten slightly; also controls yeast or chemical leavening reactions in some recipes. Small amounts improve taste and highlight other flavors in the dough.
- 1 teaspoon baking soda: Acts as the primary leavening agent to create lift and spread by producing carbon dioxide when reacted; ensures cookies rise properly and develop a light texture. Works best when evenly distributed through the flour for consistent results.
- 1/2 cup butter, softened: Contributes fat that tenderizes the dough, promotes spread, and yields a rich mouthfeel; creaming with sugars incorporates air to aid leavening. Softened butter also carries flavor and helps brown the cookie surface during baking.
- 1/2 cup white sugar: Adds sweetness and helps with creaming to incorporate air for a lighter texture; also influences spread and browning through caramelization. Granulated sugar contributes a crisp edge and subtle caramel flavor when baked.
- 1/2 cup peanut butter: Provides nutty flavor, richness, and additional fat that enhances tenderness and chewiness; binds ingredients together and intensifies peanut flavor throughout the cookie. Peanut butter also contributes to the cookie’s moist texture and helps hold the miniature cups in place.
- 1/2 cup packed brown sugar: Adds deep, caramel-like sweetness and moisture, which contributes to chewiness and a softer texture; helps with browning and flavor complexity. Packed brown sugar also keeps cookies tender and slightly sticky.
- 1 egg, beaten: Binds the dough, adds moisture, and contributes to structure and richness; beaten egg helps emulsify fats and liquids for uniform texture. Egg proteins also help set the cookie during baking for proper shape retention.
- 1 teaspoon vanilla extract: Provides aromatic sweetness and enhances other flavors; a small amount brightens the overall profile of the cookies. Vanilla extract rounds out the peanut and chocolate notes for a more complex taste.
- 2 tablespoons milk: Adjusts dough consistency by adding a small amount of liquid to achieve the desired texture; helps hydrate dry ingredients and can influence spread. Milk also adds a touch of tenderness and richness to the finished cookie.
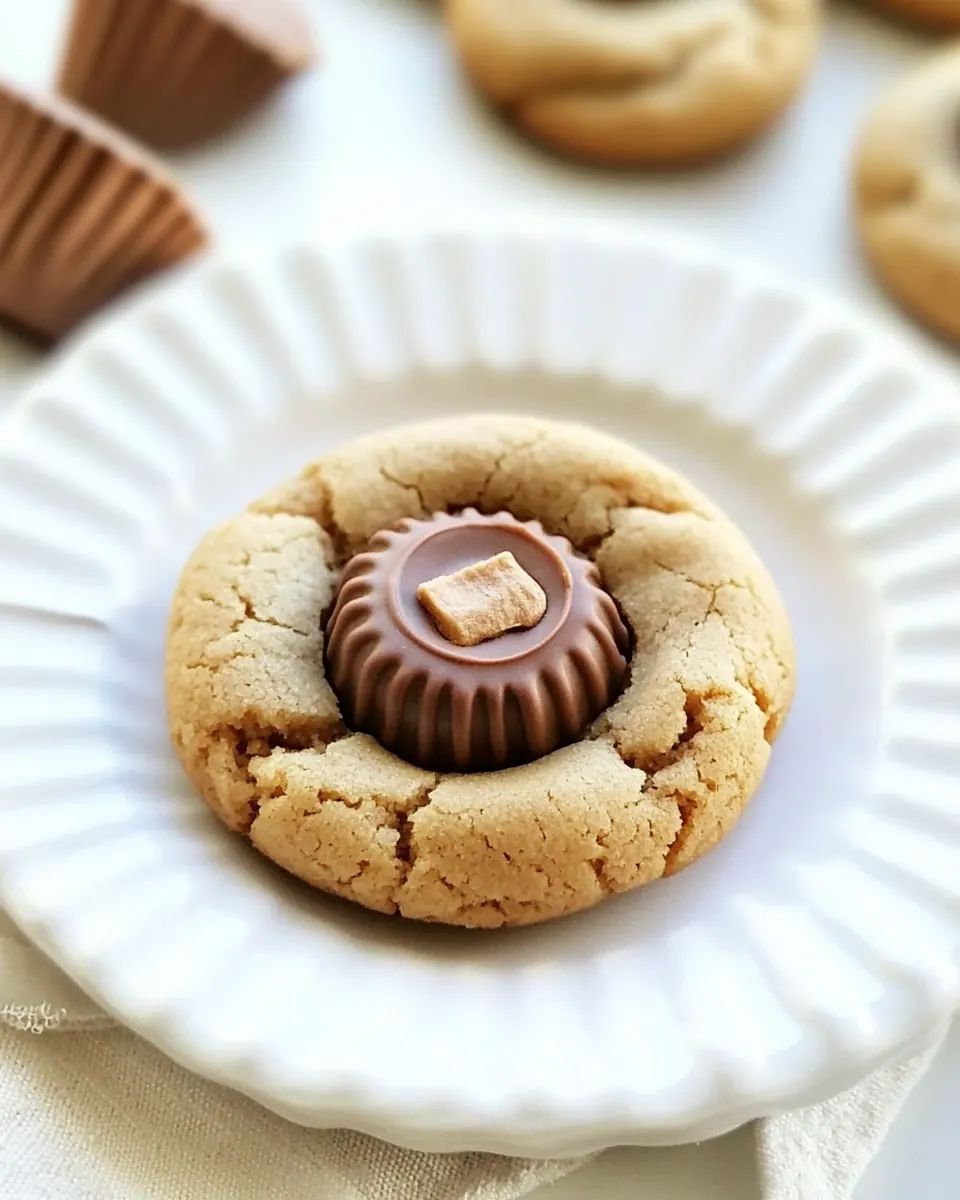
- about 30-40 miniature Reese's butter cups, unwrapped: Adds concentrated pockets of chocolate and peanut butter flavor, serving as the signature mix-in and topping; unwrapped miniature cups melt slightly or remain intact for texture contrast. Distributing these evenly creates bursts of gooey or chewy candy in each cookie.
The Process for Making Peanut Butter Cup Cookies
This recipe is straightforward, and following a few sensory cues will help you hit the perfect texture. Read through the steps so you know when to watch for color changes and subtle scent cues from the oven.
- Preheat oven to 375 degrees F (190 degrees C). Whisk together the flour, salt and baking soda in a medium bowl; set aside.: When the oven warms, you will notice a subtle humid warmth and the faint metallic scent of an active element, which tells me the oven is reaching the right temperature. Preheating ensures the cookies begin to set immediately, which helps retain a soft center and creates slightly crisp edges. A common mistake is placing cookies in a cold oven, which leads to flat, dense cookies because the butter melts too slowly. If your oven runs hot, use an oven thermometer and lower the temperature slightly to avoid overbrowning.
- Cream together the butter, sugar, peanut butter and brown sugar until fluffy. Beat in the egg, vanilla and milk. Add the flour mixture; mix well. Shape into 1 inch balls and place each into a greased mini muffin tin (or use paper liners).: After combining these dry ingredients, you should see a uniform pale mixture with no streaks, and when you whisk, a light dust cloud will rise briefly. This step ensures even distribution of leavening and salt, preventing pockets that could change the texture. If you skip this, some cookies might rise differently, creating inconsistent results. Avoid overworking the flour once the wet ingredients are added, as that can develop gluten and make cookies tough.
- Bake at 375 degrees for about 8 minutes. Do not overbake! Remove from oven and immediately press a mini peanut butter cup into each ball. Cool and carefully remove from pan.: As you beat these together, the mixture will turn paler and gain volume, producing a soft, ribbon like texture. This aeration traps tiny air bubbles that expand during baking, contributing to the cookie's lightness. If the mixture looks curdled, it usually means the butter was too cold, so let it soften a bit more next time or beat longer at medium speed. Overcreaming can incorporate too much air, leading to cookies that spread excessively, so stop when the texture is smooth and homogeneous.
- Beat in the egg, vanilla and milk: Adding these liquids will transform the fat and sugar into a glossy, cohesive batter that will hold together when scooped. The egg brings richness and structure, while the milk loosens the dough to an easily shaped consistency. Watch for a smooth, slightly sticky texture. If the mixture separates or becomes watery, you may have added the egg too fast; mix briefly until combined, then proceed to the next step.
- Add the flour mixture mix well: When the dry mix disappears into the wet ingredients, the dough should be soft and slightly tacky, not dry or crumbly. Using a spatula, fold until just combined to avoid overdeveloping gluten which can make cookies chewy. If the dough seems excessively sticky, chill it briefly for 10 to 15 minutes to firm up before shaping. A common pitfall is overmixing, which yields a denser cookie rather than the tender texture we want.
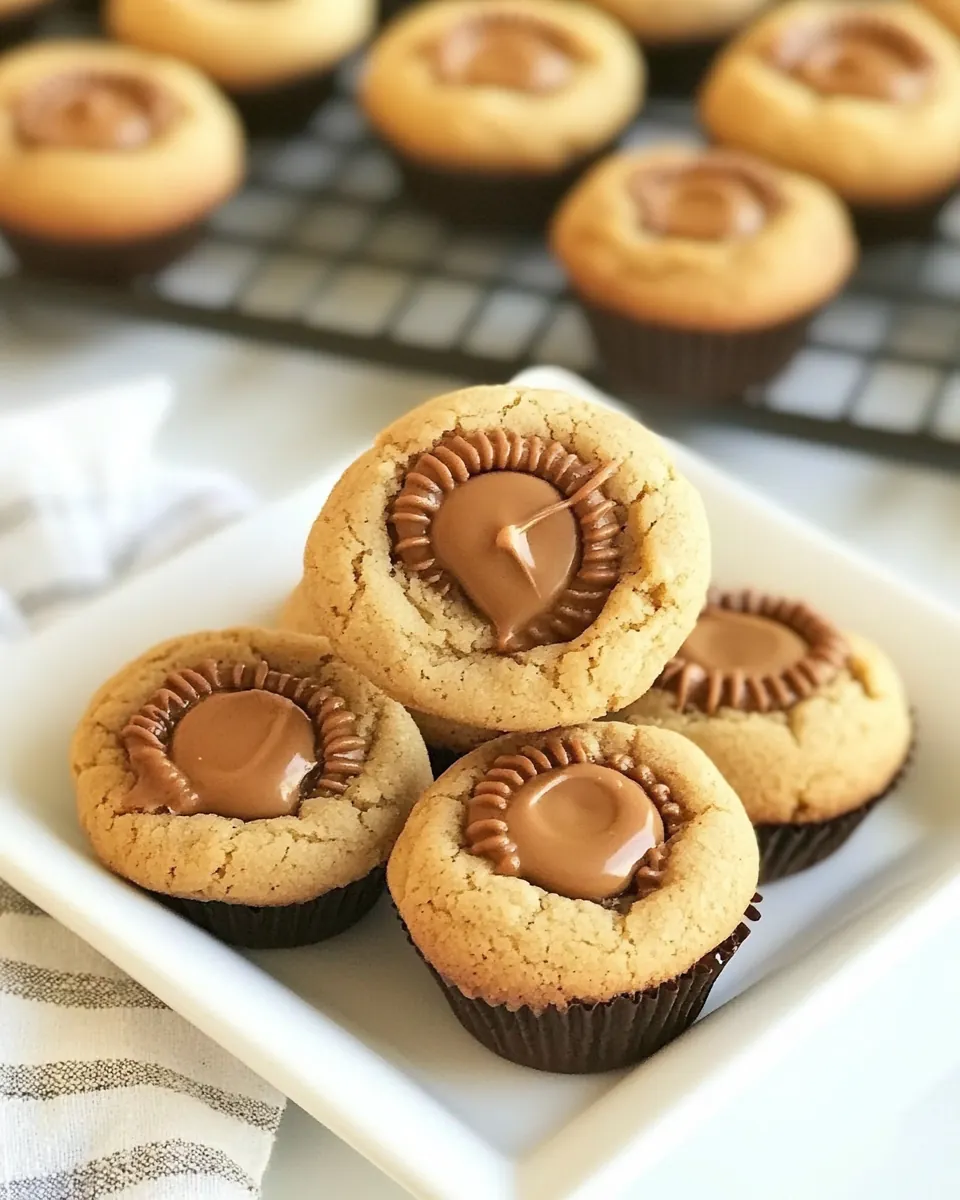
- Shape into 1 inch balls and place each into a greased mini muffin tin or use paper liners: The dough should feel yielding but not gooey when rolled. Rolling into uniform balls ensures even baking, and the mini muffin tin supports the cookie as it spreads, creating a crisp rim and soft center. If you skip the tin and place on a flat sheet, the cookies will spread flatter and may lose the indentation that holds the mini cup. Beware of making balls too large, which will need longer baking and may not cook evenly through the center.
- Bake at 375 degrees for about 8 minutes: As the cookies bake, you will notice a toasty, nutty aroma and the edges gaining a faint golden tint while the centers remain pale. This brief bake time is crucial to keep the centers soft, so watch the first batch closely, as ovens vary. A common mistake is leaving them in until they look fully brown, which dries them out. Pull them when the edges are set and the centers still look slightly underdone; they will finish setting as they cool.
- Do not overbake: Overbaking removes moisture and turns a tender cookie into a dry one, and you'll lose that chewy, soft center. Immediately after removing the tray, the surface should yield slightly to a gentle touch, indicating a perfect texture. If you feel resistance that is stiff and firm, you likely baked too long. To avoid this, set a timer and check the cookies a minute or two early the first time you bake a batch.
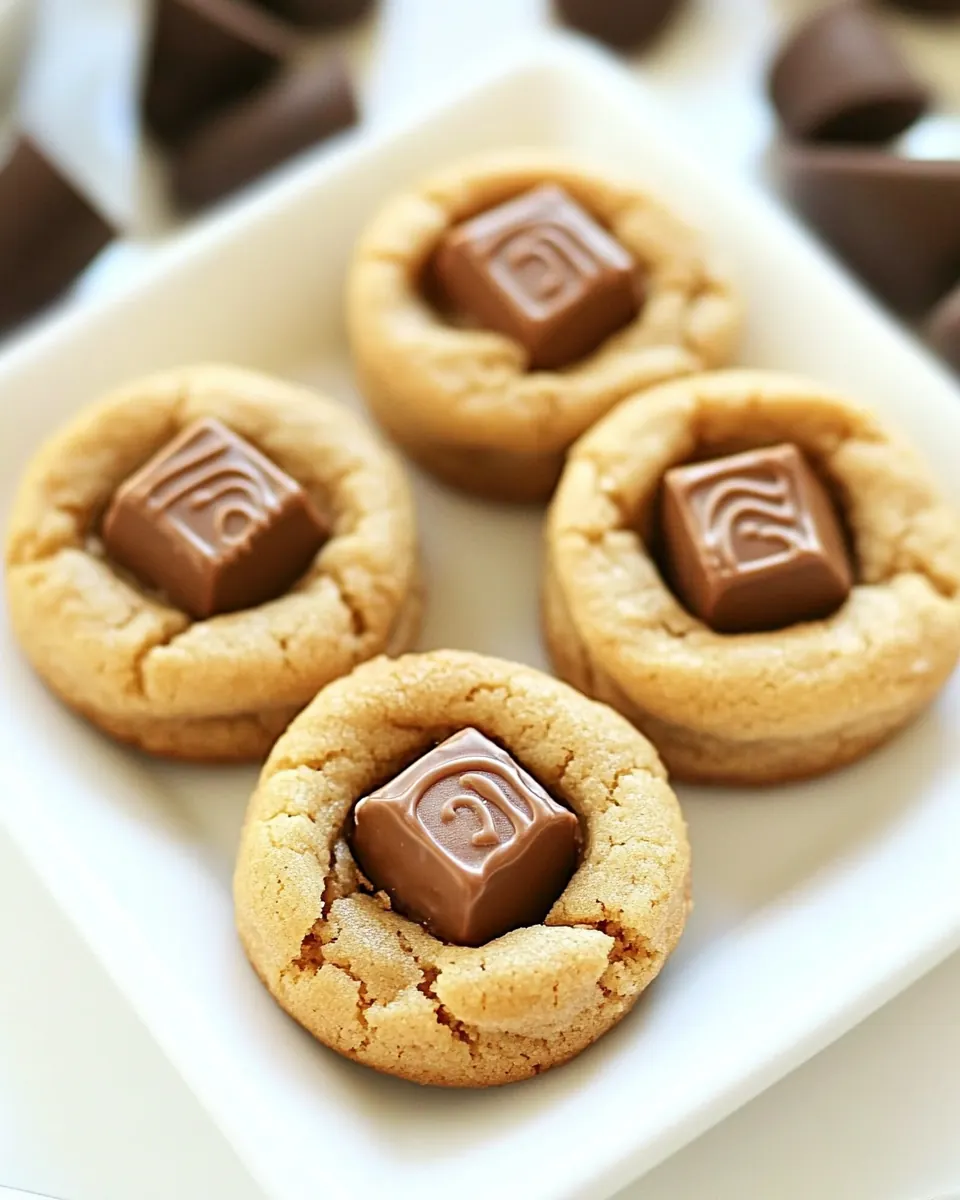
- Remove from oven and immediately press a mini peanut butter cup into each ball: When you press the chocolate cup into the warm cookie, you will feel a pleasant give as the cup nestles into the dough, and the chocolate will soften slightly, creating a glossy dome. This immediate pressing helps the two components meld, producing a gooey center and a neat presentation. If you wait until the cookies have cooled completely, the cup will not embed as smoothly and may sit on top awkwardly. Be careful not to press so hard that you flatten the cookie completely; a gentle, firm press is enough.
- Cool and carefully remove from pan: As the cookies cool, their centers set and the edges crisp a touch more, and you should hear a faint settling sound as the steam escapes. Allowing them to cool slightly makes removal easier, and using a small spatula helps prevent breaking. If you try to remove them too early, they can fall apart, and if left too long in the pan they may stick. To prevent sticking, use paper liners or a light coating of grease and let cookies rest for a few minutes before attempting to lift them out.
Recipe Tips about Peanut Butter Cup Cookies
I like to think of tips as small, practical tricks that save time and improve results. These are the tactics I use when I need a reliable batch every time, whether for a bake sale or a last minute gathering.
- Measure the flour correctly by spooning it into the cup and leveling with a knife, this prevents dry, cakey cookies from too much flour.
- Use room temperature butter so it creams easily with sugars, creating a light texture without overworking the dough.
- Don’t overbake watch for set edges and slightly soft centers, they will finish cooking as they cool for a tender bite.
- Press candies while warm to get that perfect glossy, softened peanut butter cup center that looks and tastes indulgent.
- Uniform sizing matters use a small scoop or spoon to make consistent balls so they bake evenly across the tray.
Serve This Peanut Butter Cup Cookies With
These cookies are versatile and suit many occasions, from casual snack time to holiday platters. I like to pair them thoughtfully depending on the event, and the suggestions below help highlight their best qualities.
- For a family party arrange the cookies on a large platter with small paper doilies, so guests can grab and go while mingling.
- For dessert tables place them near lighter items like fruit tarts so guests can alternate richer bites with something bright.
- During Ramadan or festive seasons offer them after iftar with tea, their sweetness provides a comforting finish to the meal.
- Storage tips keep in an airtight container at room temperature for up to three days, or freeze in a single layer and transfer to a bag for longer storage.
- Occasions these are great for bake sales, school events, or as a homemade gift when wrapped in clear cellophane and tied with a ribbon.
FAQ
Conclusion
These Peanut Butter Cup Cookies stand out for their perfect marriage of tender cookie and a gooey, chocolate centered finish that feels celebratory and familiar at once. Try them the next time you need a dessert that looks impressive but stays wonderfully simple to make. They are forgiving, crowd pleasing, and a lovely way to share a small joy with friends and family.

Peanut Butter Cup Cookies
Equipment
- Mini Muffin Tin
- Mixing Bowls
- Whisk
- Spatula
Ingredients
- 1 3/4 cups all-purpose flour Provides structure and bulk to the cookie dough by forming the gluten network when mixed; balances moisture and helps create a tender crumb when combined with fats and liquids. Commonly used in cookies to give them body and support spreading during baking.
- 1/2 teaspoons salt Enhances overall flavor by balancing sweetness and helps strengthen gluten slightly; also controls yeast or chemical leavening reactions in some recipes. Small amounts improve taste and highlight other flavors in the dough.
- 1 teaspoon baking soda Acts as the primary leavening agent to create lift and spread by producing carbon dioxide when reacted; ensures cookies rise properly and develop a light texture. Works best when evenly distributed through the flour for consistent results.
- 1/2 cup butter, softened Contributes fat that tenderizes the dough, promotes spread, and yields a rich mouthfeel; creaming with sugars incorporates air to aid leavening. Softened butter also carries flavor and helps brown the cookie surface during baking.
- 1/2 cup white sugar Adds sweetness and helps with creaming to incorporate air for a lighter texture; also influences spread and browning through caramelization. Granulated sugar contributes a crisp edge and subtle caramel flavor when baked.
- 1/2 cup peanut butter Provides nutty flavor, richness, and additional fat that enhances tenderness and chewiness; binds ingredients together and intensifies peanut flavor throughout the cookie. Peanut butter also contributes to the cookie’s moist texture and helps hold the miniature cups in place.
- 1/2 cup packed brown sugar Adds deep, caramel-like sweetness and moisture, which contributes to chewiness and a softer texture; helps with browning and flavor complexity. Packed brown sugar also keeps cookies tender and slightly sticky.
- 1 egg, beaten Binds the dough, adds moisture, and contributes to structure and richness; beaten egg helps emulsify fats and liquids for uniform texture. Egg proteins also help set the cookie during baking for proper shape retention.
- 1 teaspoon vanilla extract Provides aromatic sweetness and enhances other flavors; a small amount brightens the overall profile of the cookies. Vanilla extract rounds out the peanut and chocolate notes for a more complex taste.
- 2 tablespoons milk Adjusts dough consistency by adding a small amount of liquid to achieve the desired texture; helps hydrate dry ingredients and can influence spread. Milk also adds a touch of tenderness and richness to the finished cookie.
- about 30-40 miniature Reese's butter cups, unwrapped Adds concentrated pockets of chocolate and peanut butter flavor, serving as the signature mix-in and topping; unwrapped miniature cups melt slightly or remain intact for texture contrast. Distributing these evenly creates bursts of gooey or chewy candy in each cookie.
Instructions
- Preheat oven to 375 degrees F (190 degrees C). Whisk together the flour, salt and baking soda in a medium bowl; set aside.: When the oven warms, you will notice a subtle humid warmth and the faint metallic scent of an active element, which tells me the oven is reaching the right temperature. Preheating ensures the cookies begin to set immediately, which helps retain a soft center and creates slightly crisp edges. A common mistake is placing cookies in a cold oven, which leads to flat, dense cookies because the butter melts too slowly. If your oven runs hot, use an oven thermometer and lower the temperature slightly to avoid overbrowning.
- Cream together the butter, sugar, peanut butter and brown sugar until fluffy. Beat in the egg, vanilla and milk. Add the flour mixture; mix well. Shape into 1 inch balls and place each into a greased mini muffin tin (or use paper liners).: After combining these dry ingredients, you should see a uniform pale mixture with no streaks, and when you whisk, a light dust cloud will rise briefly. This step ensures even distribution of leavening and salt, preventing pockets that could change the texture. If you skip this, some cookies might rise differently, creating inconsistent results. Avoid overworking the flour once the wet ingredients are added, as that can develop gluten and make cookies tough.
- Bake at 375 degrees for about 8 minutes. Do not overbake! Remove from oven and immediately press a mini peanut butter cup into each ball. Cool and carefully remove from pan.: As you beat these together, the mixture will turn paler and gain volume, producing a soft, ribbon like texture. This aeration traps tiny air bubbles that expand during baking, contributing to the cookie's lightness. If the mixture looks curdled, it usually means the butter was too cold, so let it soften a bit more next time or beat longer at medium speed. Overcreaming can incorporate too much air, leading to cookies that spread excessively, so stop when the texture is smooth and homogeneous.
- Beat in the egg, vanilla and milk: Adding these liquids will transform the fat and sugar into a glossy, cohesive batter that will hold together when scooped. The egg brings richness and structure, while the milk loosens the dough to an easily shaped consistency. Watch for a smooth, slightly sticky texture. If the mixture separates or becomes watery, you may have added the egg too fast; mix briefly until combined, then proceed to the next step.
- Add the flour mixture mix well: When the dry mix disappears into the wet ingredients, the dough should be soft and slightly tacky, not dry or crumbly. Using a spatula, fold until just combined to avoid overdeveloping gluten which can make cookies chewy. If the dough seems excessively sticky, chill it briefly for 10 to 15 minutes to firm up before shaping. A common pitfall is overmixing, which yields a denser cookie rather than the tender texture we want.
- Shape into 1 inch balls and place each into a greased mini muffin tin or use paper liners: The dough should feel yielding but not gooey when rolled. Rolling into uniform balls ensures even baking, and the mini muffin tin supports the cookie as it spreads, creating a crisp rim and soft center. If you skip the tin and place on a flat sheet, the cookies will spread flatter and may lose the indentation that holds the mini cup. Beware of making balls too large, which will need longer baking and may not cook evenly through the center.
- Bake at 375 degrees for about 8 minutes: As the cookies bake, you will notice a toasty, nutty aroma and the edges gaining a faint golden tint while the centers remain pale. This brief bake time is crucial to keep the centers soft, so watch the first batch closely, as ovens vary. A common mistake is leaving them in until they look fully brown, which dries them out. Pull them when the edges are set and the centers still look slightly underdone; they will finish setting as they cool.
- Do not overbake: Overbaking removes moisture and turns a tender cookie into a dry one, and you'll lose that chewy, soft center. Immediately after removing the tray, the surface should yield slightly to a gentle touch, indicating a perfect texture. If you feel resistance that is stiff and firm, you likely baked too long. To avoid this, set a timer and check the cookies a minute or two early the first time you bake a batch.
- Remove from oven and immediately press a mini peanut butter cup into each ball: When you press the chocolate cup into the warm cookie, you will feel a pleasant give as the cup nestles into the dough, and the chocolate will soften slightly, creating a glossy dome. This immediate pressing helps the two components meld, producing a gooey center and a neat presentation. If you wait until the cookies have cooled completely, the cup will not embed as smoothly and may sit on top awkwardly. Be careful not to press so hard that you flatten the cookie completely; a gentle, firm press is enough.
- Cool and carefully remove from pan: As the cookies cool, their centers set and the edges crisp a touch more, and you should hear a faint settling sound as the steam escapes. Allowing them to cool slightly makes removal easier, and using a small spatula helps prevent breaking. If you try to remove them too early, they can fall apart, and if left too long in the pan they may stick. To prevent sticking, use paper liners or a light coating of grease and let cookies rest for a few minutes before attempting to lift them out.
Notes
- Measure the flour correctly by spooning it into the cup and leveling with a knife, this prevents dry, cakey cookies from too much flour.
- Use room temperature butter so it creams easily with sugars, creating a light texture without overworking the dough.
- Don't overbake watch for set edges and slightly soft centers, they will finish cooking as they cool for a tender bite.
- Press candies while warm to get that perfect glossy, softened peanut butter cup center that looks and tastes indulgent.
- Uniform sizing matters use a small scoop or spoon to make consistent balls so they bake evenly across the tray.