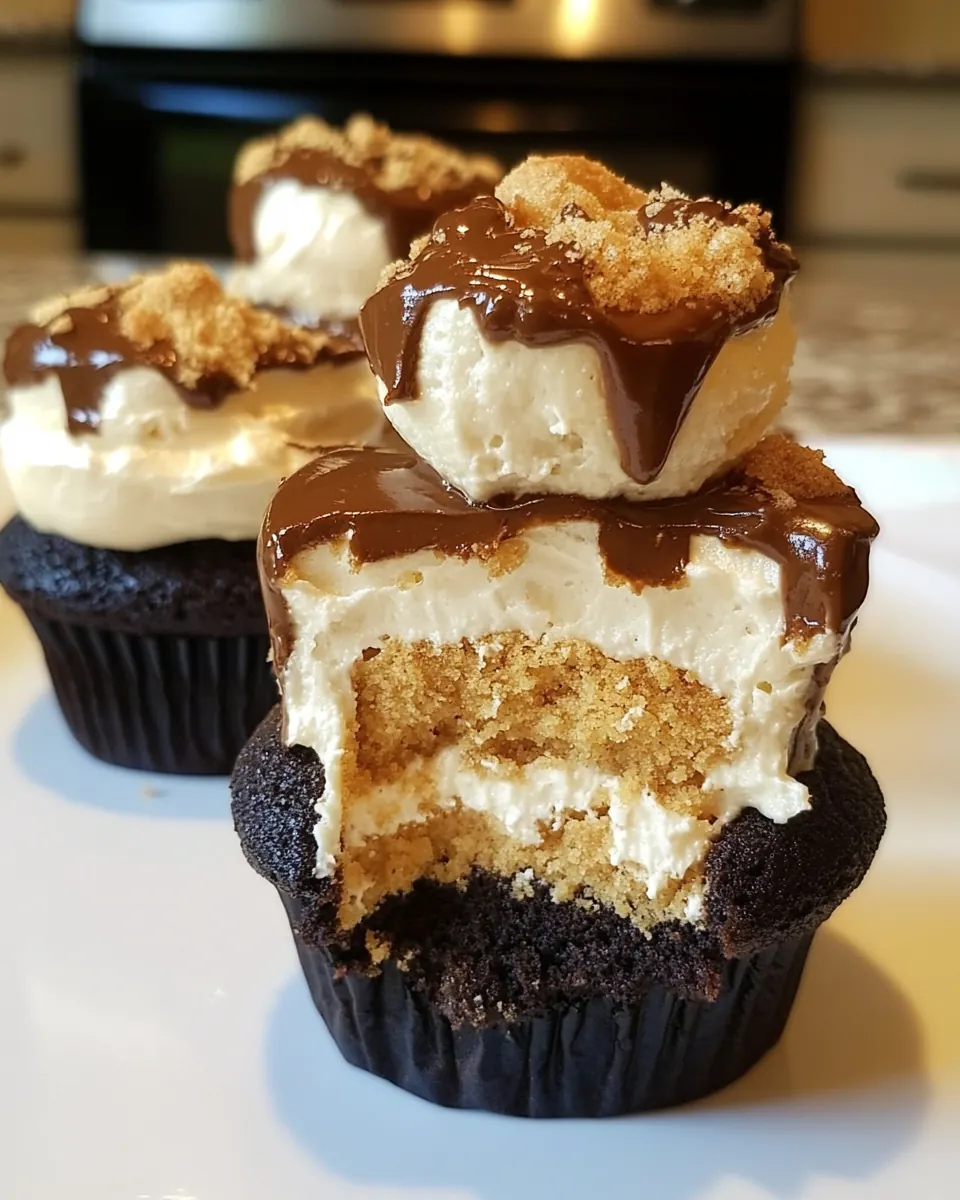
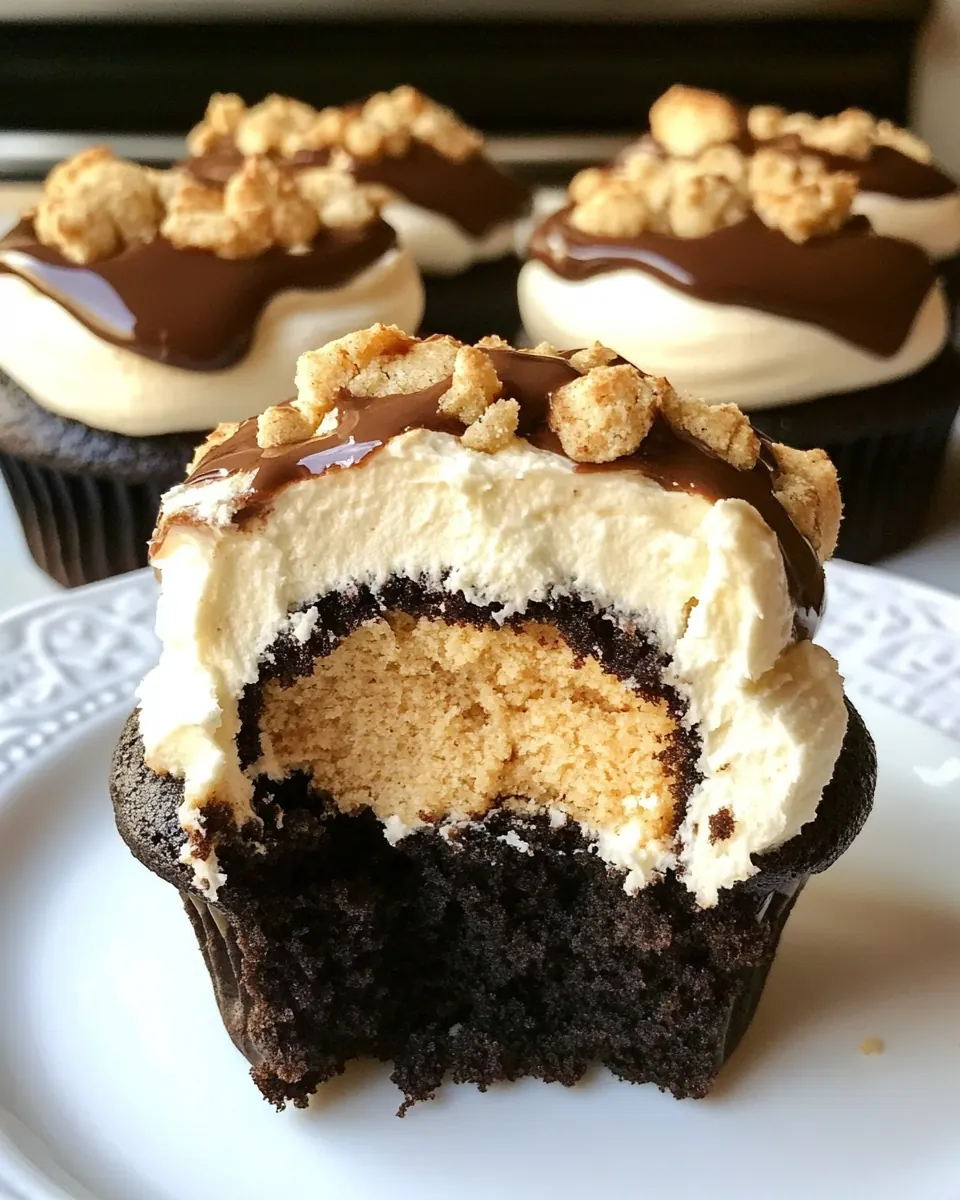
Peanut Butter Cookie Dough Filled S’mores Cupcakes
Peanut Butter Cookie Dough Filled S’mores Cupcakes started as a late night kitchen experiment when I had a craving for something nostalgic yet a little grown up. I remember pulling together scraps from the pantry, humming along to a playlist, and turning ordinary cupcake batter into a handheld campfire memory. That first batch had a crackly top and a soft, fudgy interior, and when I pressed in that peanut butter cookie dough center with my thumb, the kitchen filled with the warm aroma of cocoa and toasted sugar. It felt like making a tiny celebration, one I wanted to share right away.
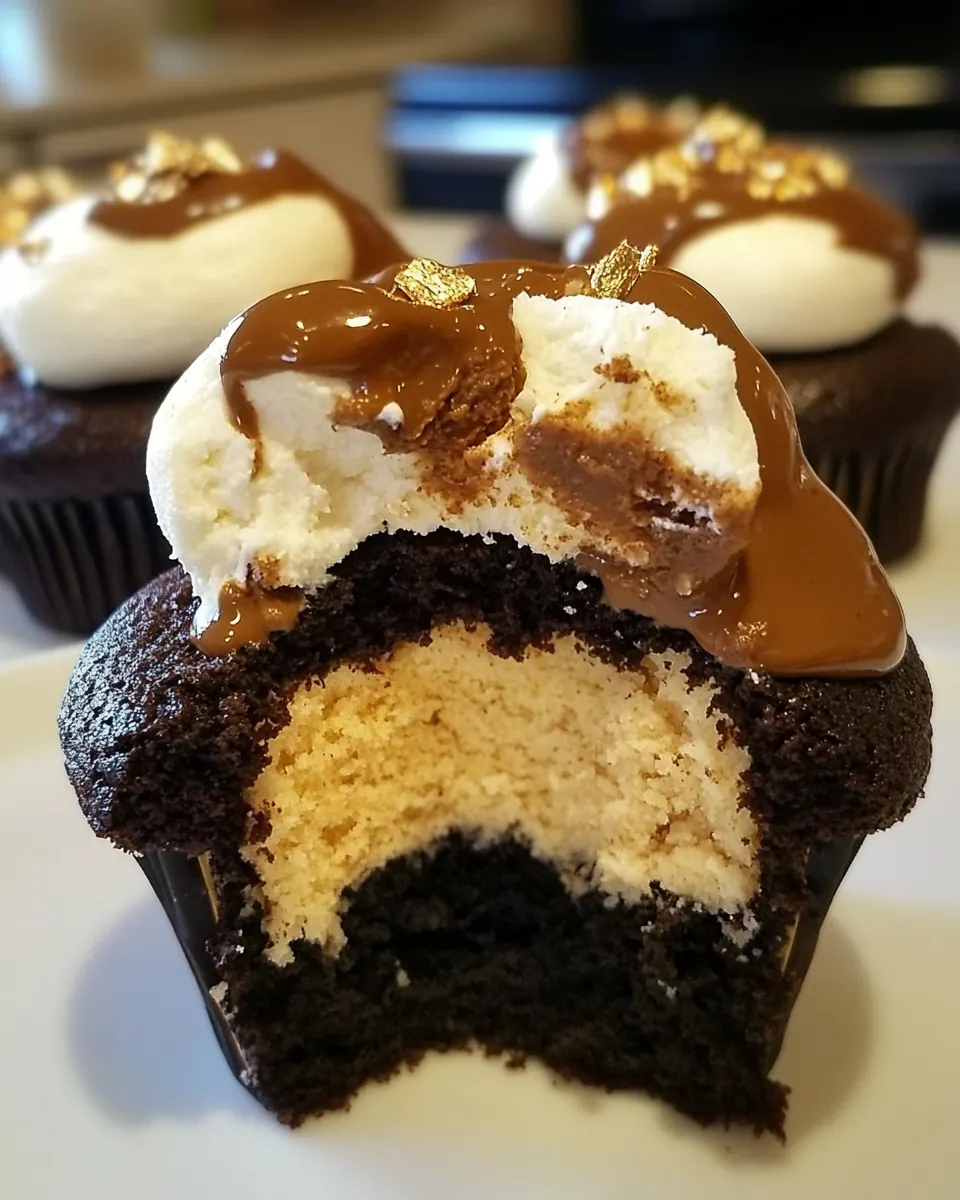
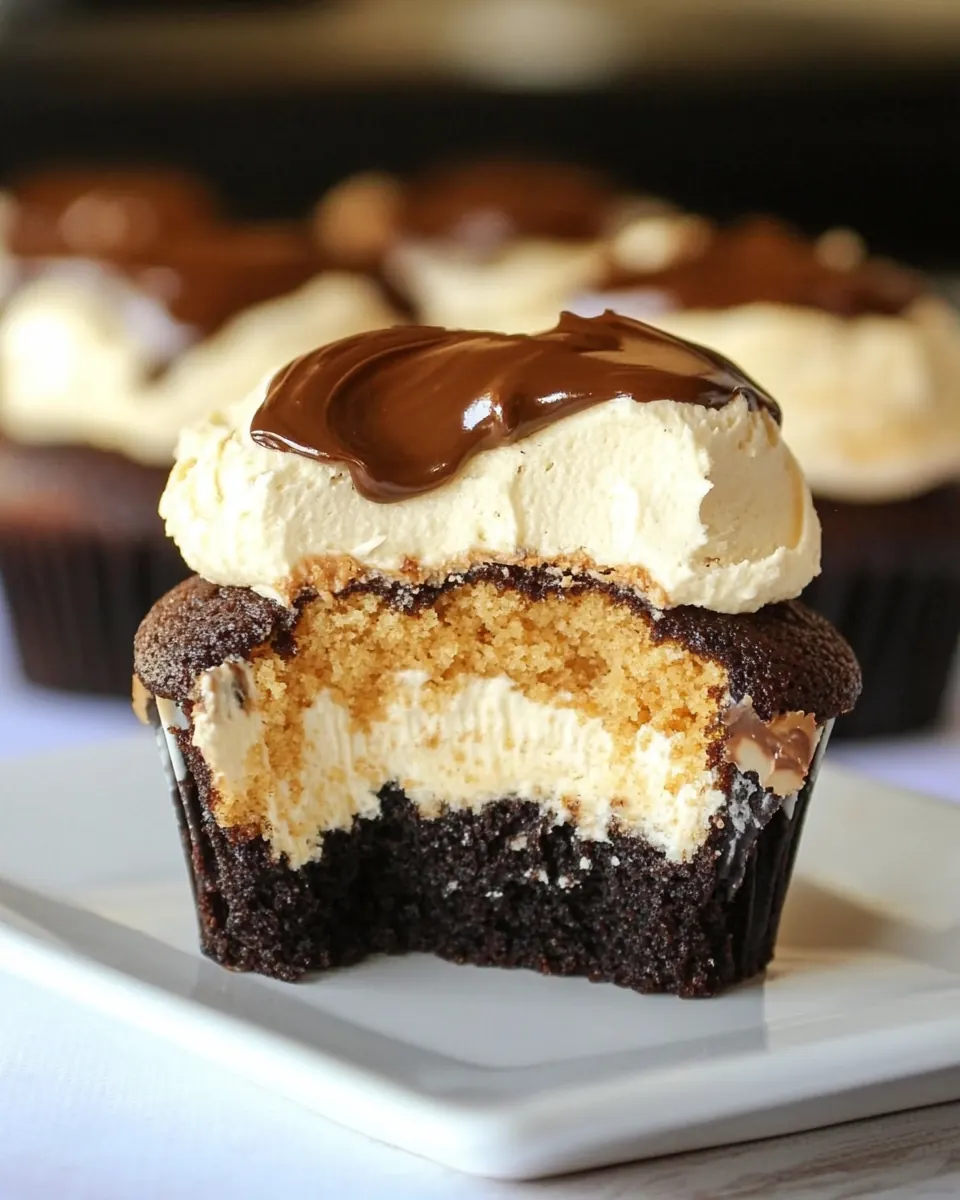
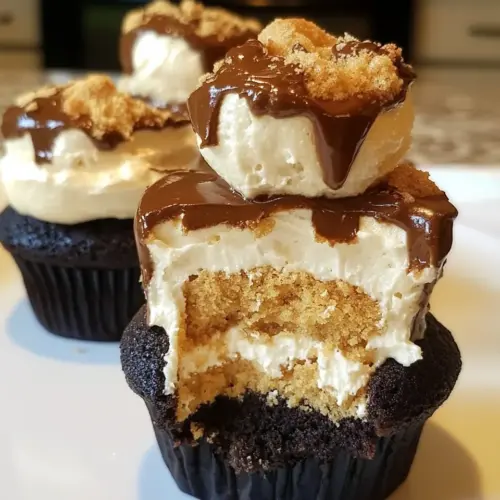
I make these cupcakes whenever I want to impress friends with minimal fuss, and they always spark conversation. The contrast between the soft chocolate cupcake, the slightly chewy peanut butter cookie dough center, and the pillowy toasted marshmallow top is such a satisfying combination. I love that you can hand one to someone and watch their face change as they bite into the hidden center. Over time I refined the technique so the cookie dough stays soft and the marshmallow gets that perfect golden kiss without making a sticky mess.
Recipe Snapshot
57 mins
35 mins
22 mins
Medium
250 kcal
American
Gluten-Free, Low FODMAP
Desserts
Muffin tin, Paper liners, Microwave or double boiler, Mixing bowls, Whisk, Kitchen torch or broiler
What Makes This Peanut Butter Cookie Dough Filled S’mores Cupcakes Special
Unexpected Textures
I adore how Peanut Butter Cookie Dough Filled S’mores Cupcakes brings together multiple textures in a single bite. The dense, fudgy crumb of the all purpose flour and unsweetened cocoa powder base contrasts beautifully with the creamy smooth peanut butter cookie dough tucked inside, and the toasted large marshmallows on top add a glossy, slightly crisp finish. When I eat one, I notice the way the top yields with a gentle pop, the center gives way like a little surprise, and the chew of the marshmallow finishes the story.
Flavor Harmony
There is a real balance here, I promise. The fudgy cupcake is lightly sweetened with granulated sugar and deepened by semi sweet chocolate chips, while the peanut butter center adds a savory, nutty backbone. A touch of salt and a whisper of vanilla extract sharpen the flavors and keep the sweetness from feeling flat. I like to think of each component as a player that knows when to step back and when to shine.
Comfort With a Twist
These cupcakes are comfort food, but with playfulness. I make them for cozy gatherings and for nights when I want something indulgent without fuss. They capture that campfire nostalgia yet are portable and elegant enough for a dinner party. I’ve brought them to book club and potlucks, and people always ask for the recipe because they taste familiar but surprising at once.
Simple Techniques, Big Impact
You do not need fancy tools to get phenomenal results, which I love. Melting butter and semi sweet chocolate chips and folding in a few dry ingredients gives you bakery style texture at home. Pressing in the cookie dough takes only a minute, and a quick torch or broiler finish on the marshmallow creates that show stopping caramelized top. I appreciate recipes that deliver high reward for thoughtful but straightforward effort.
Makeahead Friendly
One more reason I reach for this recipe is flexibility. You can bake the cupcakes and prepare the cookie dough ahead, then fill and toast when guests arrive. That way you keep the marshmallow fresh and toasty, and the centers stay soft. I often prep everything earlier in the day and assemble at the last minute so the presentation is peak and the textures are ideal.
What Goes Into Peanut Butter Cookie Dough Filled S’mores Cupcakes
I approach ingredients like a small orchestra, where each player supports the others. The cupcake batter gives structure and chocolate depth, the peanut butter cookie dough provides creamy, nutty contrast, and the marshmallow crown brings the warm, toasty finishing note. The key players to pay attention to are the semi sweet chocolate chips and smooth peanut butter, which set the flavor personality, while the buttermilk and precise leaveners make sure the crumb is tender and moist.
- 1/2 cup butter: Soften and cream to provide a rich, tender crumb and contribute moisture and flavor to the batter; also aids in melting and incorporating chocolate for a smooth texture when baked.
- 1/2 cups semi sweet chocolate chips: Melt or fold into batter to impart deep chocolate flavor and contribute to the cake's moistness and richness; can be melted for ganache or folded for pockets of chocolate throughout.
- 2 large eggs: Beat well to incorporate air and structure, helping to leaven and bind the batter while contributing moisture and richness to the cupcakes.
- 1 1/4 cups granulated sugar: Dissolve into wet ingredients to sweeten, tenderize the crumb, and assist in browning for an appealing crust on the baked cupcakes.
- 1/2 teaspoon vanilla extract: Add for subtle floral and sweet aroma to enhance overall flavor profile and tie together chocolate and peanut butter notes.
- 1/2 teaspoons salt: Season and balance flavor, strengthening gluten control and improving taste; also enhances the perception of sweetness and reduces bitterness.
- 1/2 teaspoon baking soda: React with acids in the batter to produce carbon dioxide, contributing lift and lightness to the cupcake crumb when combined with moisture.
- 1/2 teaspoon baking powder: Provide additional leavening and finer lift in the batter, helping to maintain oven spring and a uniform crumb structure when used alongside baking soda.
- 1/3 cup unsweetened cocoa powder: Introduce concentrated chocolate flavor without added sugar, intensifying cocoa notes and contributing to color and a slightly drier crumb that balances richness.
- 1 cup all purpose flour: Build structure by providing gluten and absorbency, creating the framework that holds the cupcake together and ensuring proper texture.
- 1 cup buttermilk: Add acidity and moisture to tenderize the crumb and react with baking soda for leavening, producing a tangy backdrop that enhances chocolate and peanut flavors.
- 1/4 cup butter softened: Soften and cream with peanut butter mixture to create a smooth, spreadable filling that adds richness and moisture to the cookie dough center.
- 1/4 cups smooth peanut butter: Blend with butter and sugar to form a creamy, nutty filling, contributing salt balance and a dense, satisfying peanut butter flavor inside the cupcakes.
- 5 tablespoons powdered sugar: Sweeten and stabilize the peanut butter filling while helping to achieve a smooth, cookie-dough-like consistency that holds shape when scooped into centers.
- 2 tablespoons packed brown sugar: Provide caramel-like sweetness and moisture to the peanut butter filling, adding depth of flavor and slight chewiness to the cookie dough center.
- 5 tablespoons all purpose flour: Absorb excess moisture and help bind the peanut butter filling, creating structure so the dough holds together when portioned into cupcake centers.
- 1/4 teaspoon vanilla extract: Add a concentrated vanilla aroma to the filling to enhance sweetness perception and round out the peanut butter and chocolate flavors in the center.
- 36 large marshmallows: Toast or place whole to create the classic s'mores gooey marshmallow layer; provide airy sweetness and a soft, melty contrast to chocolate and cookie dough.
- butter or non-stick cooking spray for your hands: Coat hands to prevent sticking while shaping or filling the peanut butter cookie dough, ensuring clean handling and easy portioning during assembly.
Putting Together Peanut Butter Cookie Dough Filled S’mores Cupcakes
I like to move through assembly in focused stages so nothing feels rushed. Start by preparing your muffin tin and preheating the oven, then melt the chocolate and butter, mix batter, bake, and cool completely. After that, make the cookie dough, hollow the centers, press in the filling, top with marshmallow, and finish by toasting.
- Preheat oven to 350 degrees. Line 18 muffin tin cups with paper liners and set aside.: You should notice the oven steadily warming and a slight hum as it reaches 350 degrees , which creates the even environment needed for consistent rise and texture. Always line the cups to prevent sticking and to make removal effortless, and arrange the tin in the center of the oven so heat circulates uniformly. A common mistake is not preheating long enough, which can lead to uneven baking and dense centers. If your oven runs hot or cold, use an oven thermometer to confirm the temperature, because accurate heat is why your cupcakes will bake through without overbrowning.
- In a small bowl, melt butter and chocolate chips together until smooth. Set aside to cool.: As the butter and semi sweet chocolate chips melt, they will combine into a glossy, silky mixture; watch for steam and large unmelted chips which indicate it needs another brief stir. Cooling slightly prevents the eggs from cooking when combined, and it helps the batter emulsify more smoothly. One pitfall is overheating the chocolate making it grainy or burnt; use short bursts in the microwave or a gentle double boiler. The aroma of warm chocolate will deepen as it cools, signaling readiness for the next step.
- In a large bowl, whip eggs, sugar and vanilla extract together until ribbons form and color has changed to a light yellow. Stir in melted chocolate and butter. Sift salt, baking soda, baking powder, cocoa and flour together. Slowly alternate the flour mixture and buttermilk into the butter and chocolate mixture, finishing with buttermilk. Scrape the sides to ensure everything is evenly incorporated. Drop by the heaping tablespoon into the lined cupcake pans. Bake 20-25 minutes or until just cooked through. Set aside to cool completely.: The whipped eggs and granulated sugar should look glossy and slightly thickened when you lift the whisk, forming ribbons that fade slowly into the bowl. When you fold in the cooled chocolate, the batter will darken and smell richly of cocoa, creating a cohesive, thick base. Sifting the dry ingredients ensures no lumps of unsweetened cocoa powder or leaveners remain, and alternating with buttermilk keeps the batter smooth and prevents overmixing which would develop gluten and make the cupcakes tough. Drop batter by heaping tablespoons so each cupcake fills evenly; you should hear a faint silence as the batter settles, and the top should spring back slightly when done. Avoid opening the oven during the first part of baking, or they may collapse. Overbaking will dry them out, so check the center for slight bounce rather than a toothpick that comes out completely clean.
- For the peanut butter cookie dough, whip butter and peanut butter together until evenly incorporated. Stir in remaining ingredients until combined.: The creamed butter and smooth peanut butter should be pale and fluffy, with a faint nutty perfume. Adding the powdered sugar , brown sugar , all purpose flour , and the splash of vanilla extract transforms this into a cohesive, scoopable dough. The texture should be dense but pliable, not greasy or crumbly; if it feels too loose, a touch more powdered sugar will help. One common error is overbeating which can make the dough too aerated and unstable when pressed into the cupcake cavity. The dough should hold its shape with gentle pressure, making it easy to form into small discs for filling.
- Once cupcakes have cooled completely, scoop out a small hole into the center of the cupcakes {about 3/4 inch in diameter and 1/2 inch deep}. Press cookie dough into hole of cupcakes.: Cooling is essential here so the crumb sets and you do not create a funnel to the bottom of the cupcake. When scooping, aim for a shallow, neat cavity that will cradle the peanut butter cookie dough without breaking the walls of the cupcake. The aroma will be faintly chocolatey and the crumb should be tender; press the dough gently so it nests snugly. Avoid scooping too aggressively which can fracture the sides and lead to leaks. If the cavity is slightly larger than intended, press a bit more dough in to form a flush surface for the marshmallow topping.
- For the marshmallow tops, place large marshmallows into a large bowl. Microwave until marshmallows start to melt. Stir together and using well greased fingers, remove about 2 marshmallows worth of fluff and place onto cupcake. Squish marshmallow gently down to cover the top of the cupcake. Re-grease hands and continue to cover the remaining tops of cupcakes.: The marshmallows will soften and swell, releasing a sweet, toasted scent as they warm. Work quickly because the mixture will cool and become less pliable; greasing your hands with butter or non-stick cooking spray for your hands prevents sticking and keeps the surface smooth. The marshmallow should form a soft dome that clings to the cupcake edge, and you will feel a slight tack when pressing it down gently to seal. A common mistake is overheating the marshmallows to the point they become too liquid, which makes them hard to shape; warm only until they are soft and pliable for handling.
- Once all cupcakes are covered, use a kitchen torch or broiler to toast the tops. Cool slightly and serve.: Toasting will caramelize the marshmallow surface, producing a crackly, maple colored skin and a toasty aroma reminiscent of a campfire. If using a torch, move in steady, even strokes to avoid burning any one spot; under the broiler, watch constantly because the transformation happens in seconds and can quickly go from golden to charred. After toasting, allow them to cool briefly so the marshmallow surface firms and does not stick to teeth. A common pitfall is overtoasting which masks the peanut butter center; aim for golden speckles and a slightly crackled surface to preserve contrast in flavors and textures.
Helpful Hints
I like to tuck these tips into the margins while I bake, because small adjustments make the final cupcake sing. Below you will find practical guidance to keep assembly clean, textures balanced, and flavors bright, all written so you can reference them mid bake.
- Preheat accuracy: Confirm your oven reaches 350 degrees with an oven thermometer to avoid underbaked or overbaked cupcakes.
- Chocolate melting: Melt butter and semi sweet chocolate chips gently, stopping while still slightly glossy to avoid a grainy finish.
- Room temperature eggs: Use room temperature eggs so they incorporate smoothly and help create ribbon stage when whipped with sugar.
- Measure flour correctly: Spoon and level all purpose flour into the cup to avoid dense batter from packed flour.
- Work quickly with marshmallow: Warmed marshmallow sets as it cools, so grease your hands and shape fast for smooth domes.
- Watch the torch: Keep the flame moving when toasting the marshmallow to prevent bitter burnt spots and to achieve even caramelization.
Perfect Pairings for Peanut Butter Cookie Dough Filled S’mores Cupcakes
These cupcakes are a showstopper on any dessert table, and pairing them thoughtfully enhances the experience. Below I outline serving ideas, occasions, and storage notes so you can plan how to present them and keep leftovers at their best.
- Casual gatherings: Serve these cupcakes at backyard get togethers or potlucks where guests can grab a portion, the nostalgic s’mores vibe is always a hit.
- Holiday dessert spreads: Their playful presentation makes them perfect for celebratory tables, especially during fall events when flavors like peanut butter and chocolate are beloved.
- Serving temperature: Offer at room temperature so the peanut butter center is soft and the toasted marshmallow slightly set, which highlights the contrast in textures.
- Storage: Keep in an airtight container at room temperature for up to two days to preserve marshmallow texture, or refrigerate for up to four days but bring to room temperature before serving to soften the center.
- Transport notes: Place them in a shallow container with high sides and separate layers with parchment to prevent toasted tops from sticking or smudging.
- Seasonal appeal: These are especially lovely in the fall when cozy flavors shine, but they are flexible enough for year round celebrations.
FAQ
Conclusion
What makes these cupcakes special is the playful layering of textures and flavors, from the fudgy chocolate base to the creamy peanut butter cookie dough center and the toasted marshmallow top. They bring campfire nostalgia into a sophisticated handheld dessert that is surprisingly easy to assemble. I encourage you to give them a try and share them with friends or family, because the reactions are always worth the small amount of extra effort. Enjoy the process, savor the aroma while baking, and have fun toasting those marshmallow tops for a show stopping finish.
Peanut Butter Cookie Dough Filled S'mores Cupcakes
Equipment
- Muffin Tin
- Paper liners
- Microwave or double boiler
- Mixing Bowls
- Whisk
- Kitchen Torch or Broiler
Ingredients
- 1/2 cup butter Soften and cream to provide a rich, tender crumb and contribute moisture and flavor to the batter; also aids in melting and incorporating chocolate for a smooth texture when baked.
- 1/2 cups semi sweet chocolate chips Melt or fold into batter to impart deep chocolate flavor and contribute to the cake's moistness and richness; can be melted for ganache or folded for pockets of chocolate throughout.
- 2 large eggs Beat well to incorporate air and structure, helping to leaven and bind the batter while contributing moisture and richness to the cupcakes.
- 1 1/4 cups granulated sugar Dissolve into wet ingredients to sweeten, tenderize the crumb, and assist in browning for an appealing crust on the baked cupcakes.
- 1/2 teaspoon vanilla extract Add for subtle floral and sweet aroma to enhance overall flavor profile and tie together chocolate and peanut butter notes.
- 1/2 teaspoons salt Season and balance flavor, strengthening gluten control and improving taste; also enhances the perception of sweetness and reduces bitterness.
- 1/2 teaspoon baking soda React with acids in the batter to produce carbon dioxide, contributing lift and lightness to the cupcake crumb when combined with moisture.
- 1/2 teaspoon baking powder Provide additional leavening and finer lift in the batter, helping to maintain oven spring and a uniform crumb structure when used alongside baking soda.
- 1/3 cup unsweetened cocoa powder Introduce concentrated chocolate flavor without added sugar, intensifying cocoa notes and contributing to color and a slightly drier crumb that balances richness.
- 1 cup all purpose flour Build structure by providing gluten and absorbency, creating the framework that holds the cupcake together and ensuring proper texture.
- 1 cup buttermilk Add acidity and moisture to tenderize the crumb and react with baking soda for leavening, producing a tangy backdrop that enhances chocolate and peanut flavors.
- 1/4 cup butter softened Soften and cream with peanut butter mixture to create a smooth, spreadable filling that adds richness and moisture to the cookie dough center.
- 1/4 cups smooth peanut butter Blend with butter and sugar to form a creamy, nutty filling, contributing salt balance and a dense, satisfying peanut butter flavor inside the cupcakes.
- 5 tablespoons powdered sugar Sweeten and stabilize the peanut butter filling while helping to achieve a smooth, cookie-dough-like consistency that holds shape when scooped into centers.
- 2 tablespoons packed brown sugar Provide caramel-like sweetness and moisture to the peanut butter filling, adding depth of flavor and slight chewiness to the cookie dough center.
- 5 tablespoons all purpose flour Absorb excess moisture and help bind the peanut butter filling, creating structure so the dough holds together when portioned into cupcake centers.
- 1/4 teaspoon vanilla extract Add a concentrated vanilla aroma to the filling to enhance sweetness perception and round out the peanut butter and chocolate flavors in the center.
- 36 large marshmallows Toast or place whole to create the classic s'mores gooey marshmallow layer; provide airy sweetness and a soft, melty contrast to chocolate and cookie dough.
- butter or non-stick cooking spray for your hands Coat hands to prevent sticking while shaping or filling the peanut butter cookie dough, ensuring clean handling and easy portioning during assembly.
Instructions
- Preheat oven to 350 degrees. Line 18 muffin tin cups with paper liners and set aside.: You should notice the oven steadily warming and a slight hum as it reaches 350 degrees , which creates the even environment needed for consistent rise and texture. Always line the cups to prevent sticking and to make removal effortless, and arrange the tin in the center of the oven so heat circulates uniformly. A common mistake is not preheating long enough, which can lead to uneven baking and dense centers. If your oven runs hot or cold, use an oven thermometer to confirm the temperature, because accurate heat is why your cupcakes will bake through without overbrowning.
- In a small bowl, melt butter and chocolate chips together until smooth. Set aside to cool.: As the butter and semi sweet chocolate chips melt, they will combine into a glossy, silky mixture; watch for steam and large unmelted chips which indicate it needs another brief stir. Cooling slightly prevents the eggs from cooking when combined, and it helps the batter emulsify more smoothly. One pitfall is overheating the chocolate making it grainy or burnt; use short bursts in the microwave or a gentle double boiler. The aroma of warm chocolate will deepen as it cools, signaling readiness for the next step.
- In a large bowl, whip eggs, sugar and vanilla extract together until ribbons form and color has changed to a light yellow. Stir in melted chocolate and butter. Sift salt, baking soda, baking powder, cocoa and flour together. Slowly alternate the flour mixture and buttermilk into the butter and chocolate mixture, finishing with buttermilk. Scrape the sides to ensure everything is evenly incorporated. Drop by the heaping tablespoon into the lined cupcake pans. Bake 20-25 minutes or until just cooked through. Set aside to cool completely.: The whipped eggs and granulated sugar should look glossy and slightly thickened when you lift the whisk, forming ribbons that fade slowly into the bowl. When you fold in the cooled chocolate, the batter will darken and smell richly of cocoa, creating a cohesive, thick base. Sifting the dry ingredients ensures no lumps of unsweetened cocoa powder or leaveners remain, and alternating with buttermilk keeps the batter smooth and prevents overmixing which would develop gluten and make the cupcakes tough. Drop batter by heaping tablespoons so each cupcake fills evenly; you should hear a faint silence as the batter settles, and the top should spring back slightly when done. Avoid opening the oven during the first part of baking, or they may collapse. Overbaking will dry them out, so check the center for slight bounce rather than a toothpick that comes out completely clean.
- For the peanut butter cookie dough, whip butter and peanut butter together until evenly incorporated. Stir in remaining ingredients until combined.: The creamed butter and smooth peanut butter should be pale and fluffy, with a faint nutty perfume. Adding the powdered sugar , brown sugar , all purpose flour , and the splash of vanilla extract transforms this into a cohesive, scoopable dough. The texture should be dense but pliable, not greasy or crumbly; if it feels too loose, a touch more powdered sugar will help. One common error is overbeating which can make the dough too aerated and unstable when pressed into the cupcake cavity. The dough should hold its shape with gentle pressure, making it easy to form into small discs for filling.
- Once cupcakes have cooled completely, scoop out a small hole into the center of the cupcakes {about 3/4 inch in diameter and 1/2 inch deep}. Press cookie dough into hole of cupcakes.: Cooling is essential here so the crumb sets and you do not create a funnel to the bottom of the cupcake. When scooping, aim for a shallow, neat cavity that will cradle the peanut butter cookie dough without breaking the walls of the cupcake. The aroma will be faintly chocolatey and the crumb should be tender; press the dough gently so it nests snugly. Avoid scooping too aggressively which can fracture the sides and lead to leaks. If the cavity is slightly larger than intended, press a bit more dough in to form a flush surface for the marshmallow topping.
- For the marshmallow tops, place large marshmallows into a large bowl. Microwave until marshmallows start to melt. Stir together and using well greased fingers, remove about 2 marshmallows worth of fluff and place onto cupcake. Squish marshmallow gently down to cover the top of the cupcake. Re-grease hands and continue to cover the remaining tops of cupcakes.: The marshmallows will soften and swell, releasing a sweet, toasted scent as they warm. Work quickly because the mixture will cool and become less pliable; greasing your hands with butter or non-stick cooking spray for your hands prevents sticking and keeps the surface smooth. The marshmallow should form a soft dome that clings to the cupcake edge, and you will feel a slight tack when pressing it down gently to seal. A common mistake is overheating the marshmallows to the point they become too liquid, which makes them hard to shape; warm only until they are soft and pliable for handling.
- Once all cupcakes are covered, use a kitchen torch or broiler to toast the tops. Cool slightly and serve.: Toasting will caramelize the marshmallow surface, producing a crackly, maple colored skin and a toasty aroma reminiscent of a campfire. If using a torch, move in steady, even strokes to avoid burning any one spot; under the broiler, watch constantly because the transformation happens in seconds and can quickly go from golden to charred. After toasting, allow them to cool briefly so the marshmallow surface firms and does not stick to teeth. A common pitfall is overtoasting which masks the peanut butter center; aim for golden speckles and a slightly crackled surface to preserve contrast in flavors and textures.
Notes
- Preheat accuracy: Confirm your oven reaches 350 degrees with an oven thermometer to avoid underbaked or overbaked cupcakes.
- Chocolate melting: Melt butter and semi sweet chocolate chips gently, stopping while still slightly glossy to avoid a grainy finish.
- Room temperature eggs: Use room temperature eggs so they incorporate smoothly and help create ribbon stage when whipped with sugar.
- Measure flour correctly: Spoon and level all purpose flour into the cup to avoid dense batter from packed flour.
- Work quickly with marshmallow: Warmed marshmallow sets as it cools, so grease your hands and shape fast for smooth domes.
- Watch the torch: Keep the flame moving when toasting the marshmallow to prevent bitter burnt spots and to achieve even caramelization.